 Vous avez accidentellement supprimé quelque chose de votre carte SD ? Vous serez heureux d’apprendre que dans la plupart des cas, les fichiers ne sont pas définitivement perdus. Plus vous agissez rapidement, meilleures sont vos chances de tout récupérer. Aujourd’hui, nous allons vous montrer comment récupérer des données supprimées d’une carte SD sur un Mac, étape par étape, et ce qui fonctionne réellement dans des situations réelles.
Vue d’ensemble rapide
- Dans la plupart des cas réels de récupération de carte SD sur Mac, Logiciel de récupération de données SD fait le gros du travail. Vous connectez la carte SD à votre Mac, lancez l’outil, effectuez une analyse, prévisualisez ce qu’il trouve et récupérez les fichiers vers un autre emplacement sur votre Mac. C’est tout.
- Si les fichiers ont simplement été supprimés (même permanently), la récupération est souvent simple.
- Si la carte a été formatée rapidement en utilisant l’option par défaut, il y a encore de fortes chances de récupérer les fichiers supprimés, car le formatage rapide supprime généralement les références aux fichiers, mais pas les données elles-mêmes.
- Si la carte a été entièrement formatée, la récupération devient peu probable. Une fois que les secteurs sont réécrits, les anciennes données disparaissent.
- Une carte corrompuecarte SD, étonnamment, est souvent récupérable aussi. Lorsque le système de fichiers est endommagé mais que les données brutes sont toujours intactes, le logiciel peut analyser au-delà de la structure cassée et reconstruire les fichiers directement à partir de la carte.
- Et n’oubliez pas les choses simples. Si vous avez supprimé des fichiers alors que la carte était connectée à votre Mac, vérifiez d’abord la Corbeille. Nous avons vu cela sauver des séances photo entières.
Voilà l’essentiel. Voyons maintenant, étape par étape, comment restaurer les données supprimées de la carte SD.
Comment récupérer des fichiers supprimés d’une carte SD sur Mac
Nous commencerons par un logiciel de récupération SD puisque, dans la plupart des cas, c’est ce qui permet réellement de récupérer les fichiers.
Nous allons vous présenter quelques outils qui peuvent vous aider, chacun ayant ses avantages, alors commençons par le plus simple.
Méthode 1 : Récupérer des fichiers supprimés d’une carte SD sur Mac avec Disk Drill
Disk Drill est l’un des outils de récupération SD les plus faciles à utiliser sur Mac, et il gère correctement les cartes SD. Il prend en charge les systèmes de fichiers que vous trouverez habituellement sur les cartes mémoire (exFAT, FAT32, même des variantes plus anciennes), donc que la carte provienne d’un DSLR, Appareils Android, ou GoPro, il la lit sans problème.
Il intègre également des fonctionnalités qui améliorent les chances de récupération sans compliquer les choses. Il prend en charge près de 400 types de fichiers, dispose d’un module de récupération avancée pour les fichiers vidéo fragmentés, propose une imagerie disque byte à byte pour les cartes instables, et inclut une fonction d’aperçu puissante afin que vous puissiez vérifier les fichiers avant de les restaurer.
Pour récupérer vos données à partir d’une carte SD avec Disk Drill, suivez les étapes ci-dessous :
- Tout d’abord, télécharger Disk Drill pour Mac depuis le site officiel.
- Ensuite, ouvrez diskdrill.dmg depuis votre dossier Téléchargements.
- Puis, faites glisser l’icône Disk Drill vers le dossier Applications.

- Ouvrez Disk Drill depuis le dossier Applications. Si c’est la première fois que vous ouvrez l’application, un message s’affichera pour vous demander si vous êtes sûr de vouloir ouvrir Disk Drill. Cliquez sur Ouvrir.
- Disk Drill va maintenant se lancer.
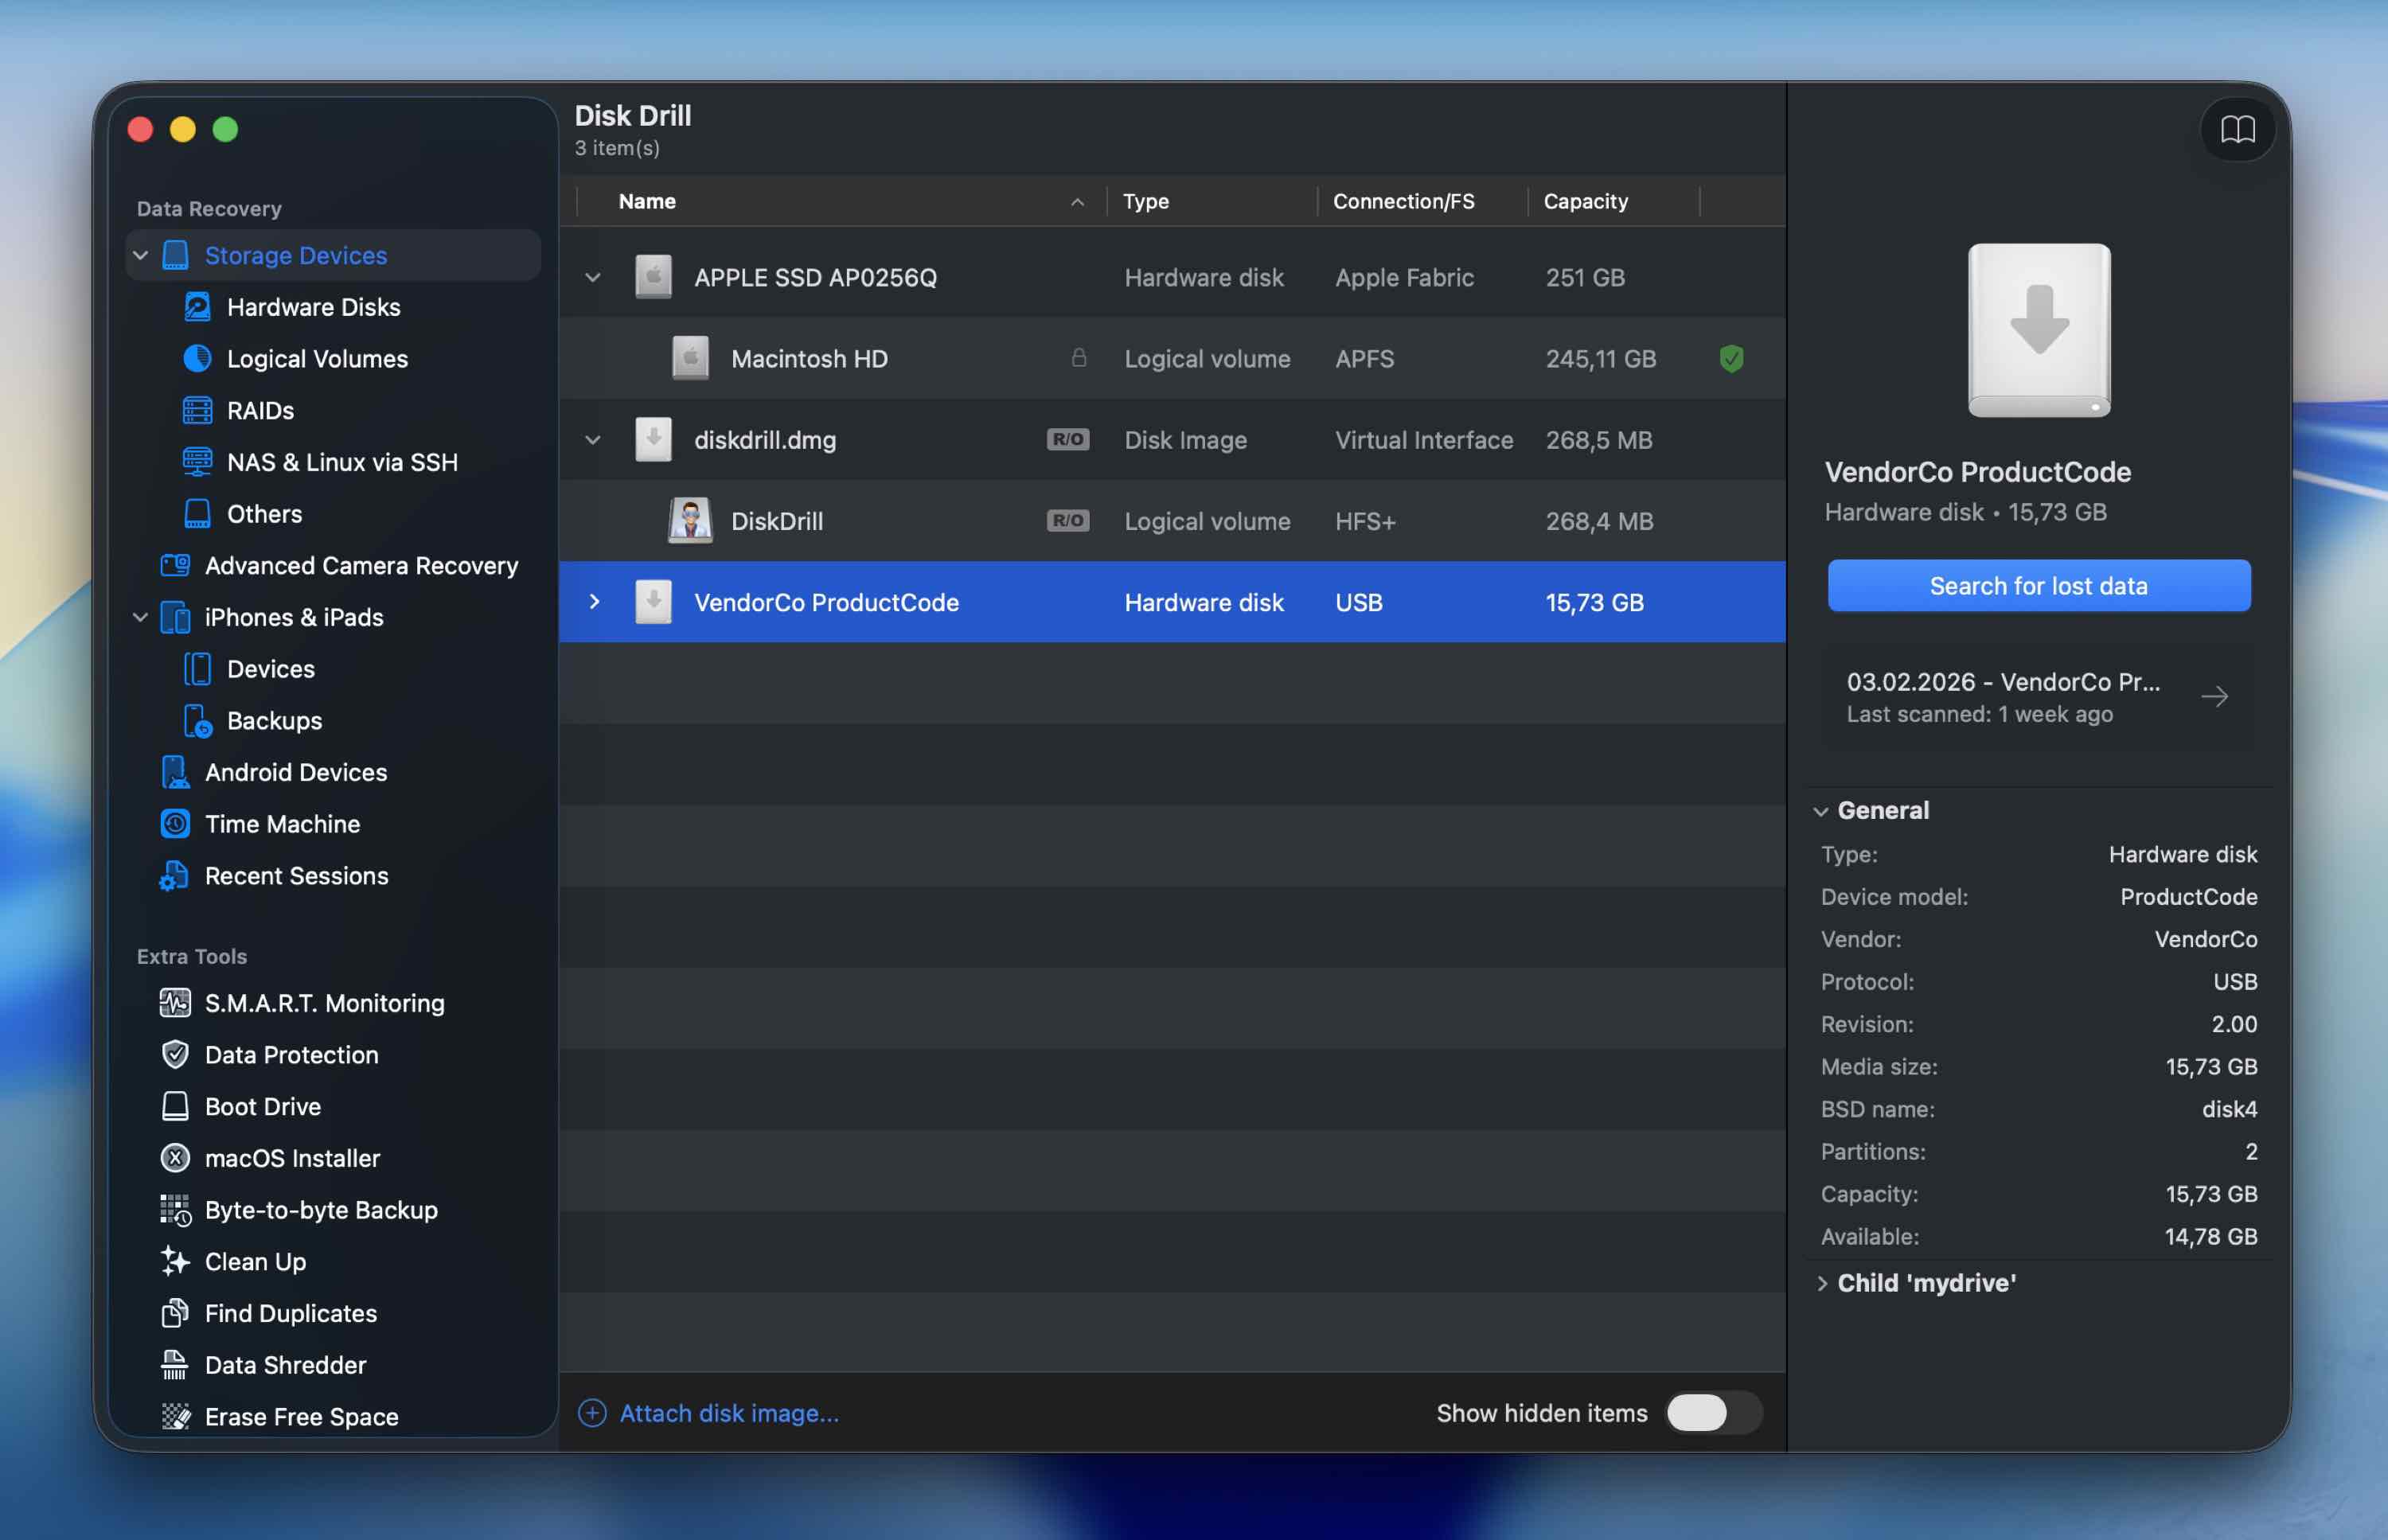 Tous les disques disponibles pour l’analyse apparaîtront sur la page d’accueil de Disk Drill, donc assurez-vous que votre carte SD est branchée à votre Mac pour qu’elle soit détectée.
 - Cliquez sur la carte SD que vous souhaitez analyser pour les données perdues, puis cliquez sur Rechercher les données perdues.
- Ensuite, choisissez un mode d’analyse.
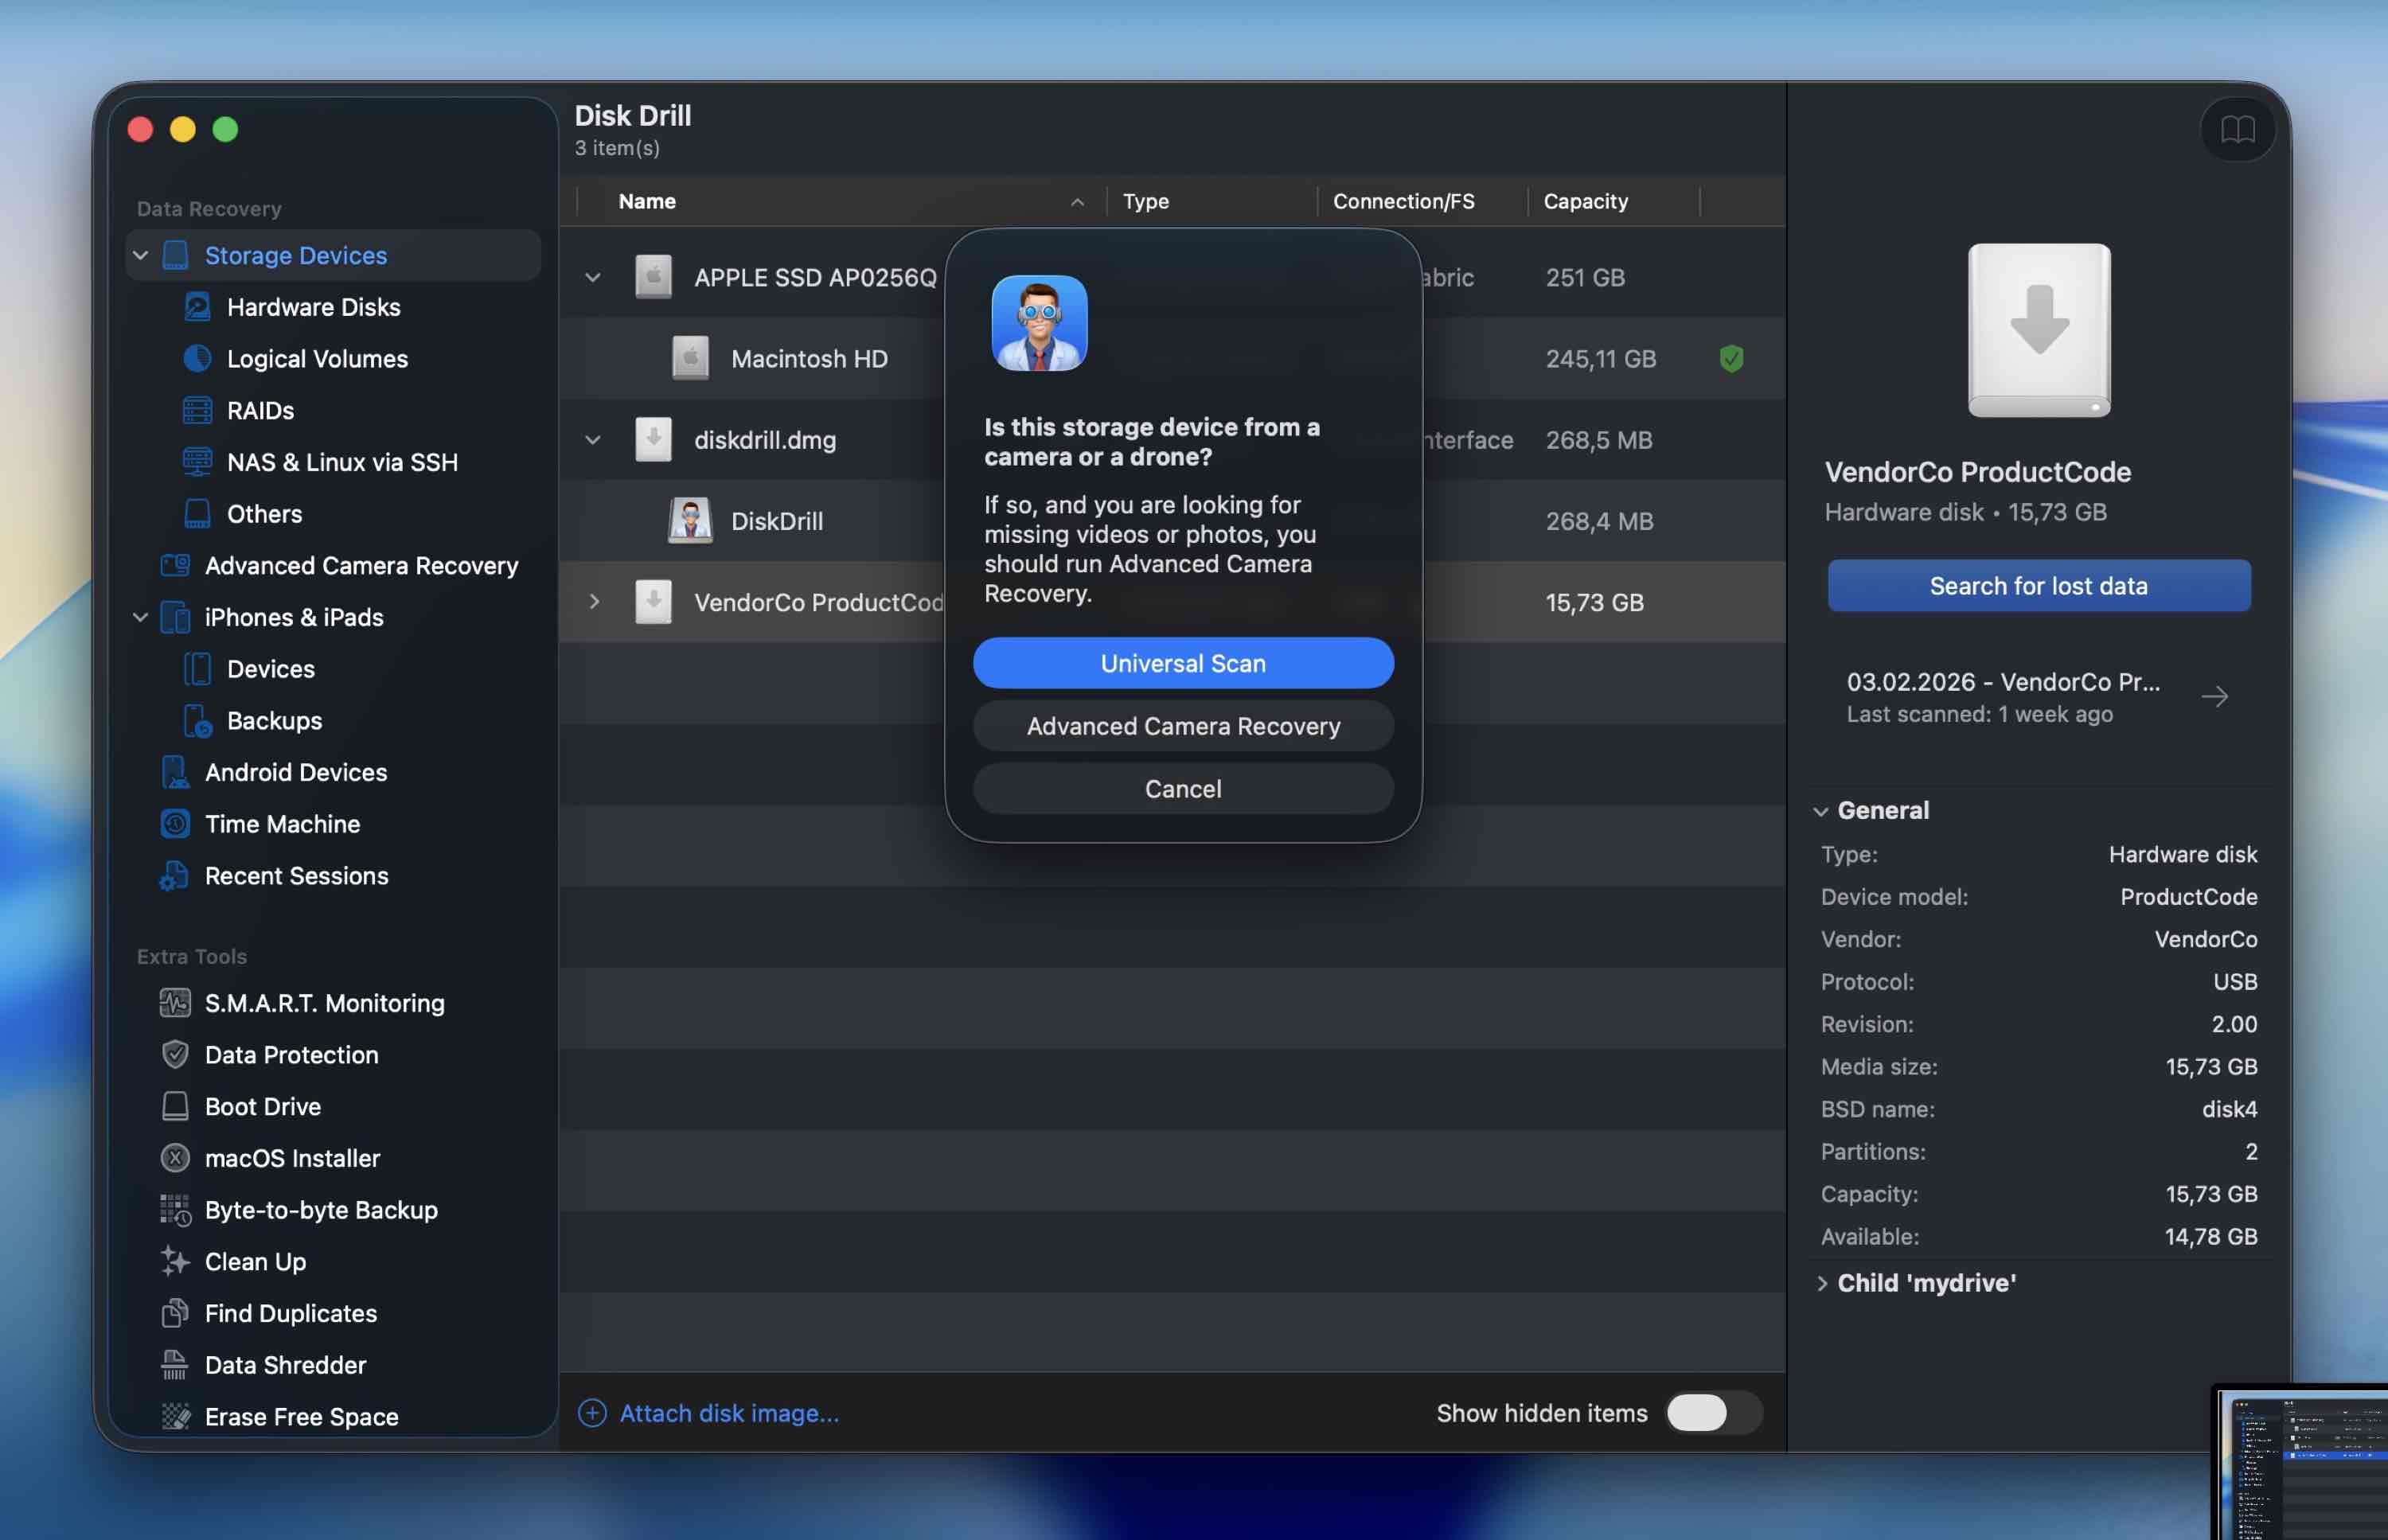 Dans la plupart des cas, Universal Scan fonctionne parfaitement. Si vous traitez des séquences vidéo d’une caméra ou d’un drone, nous recommandons de commencer avec Advanced Camera Recovery. (Vous pouvez toujours lancer une autre analyse ultérieurement en choisissant un autre mode si besoin.)
 - Attendez que l’analyse soit terminée. (Vous pouvez commencer à parcourir les résultats dès que les fichiers apparaissent, mais il est généralement conseillé de laisser l’analyse se terminer pour obtenir le résultat le plus précis possible.) Cela peut durer un certain temps en fonction de la taille du disque à analyser.
- Quand l’analyse est terminée, Disk Drill affichera les éléments que vous pouvez récupérer. Ils seront séparés selon le type de fichier.
- Supposons que vous cherchez à récupérer des photos depuis votre carte SD.
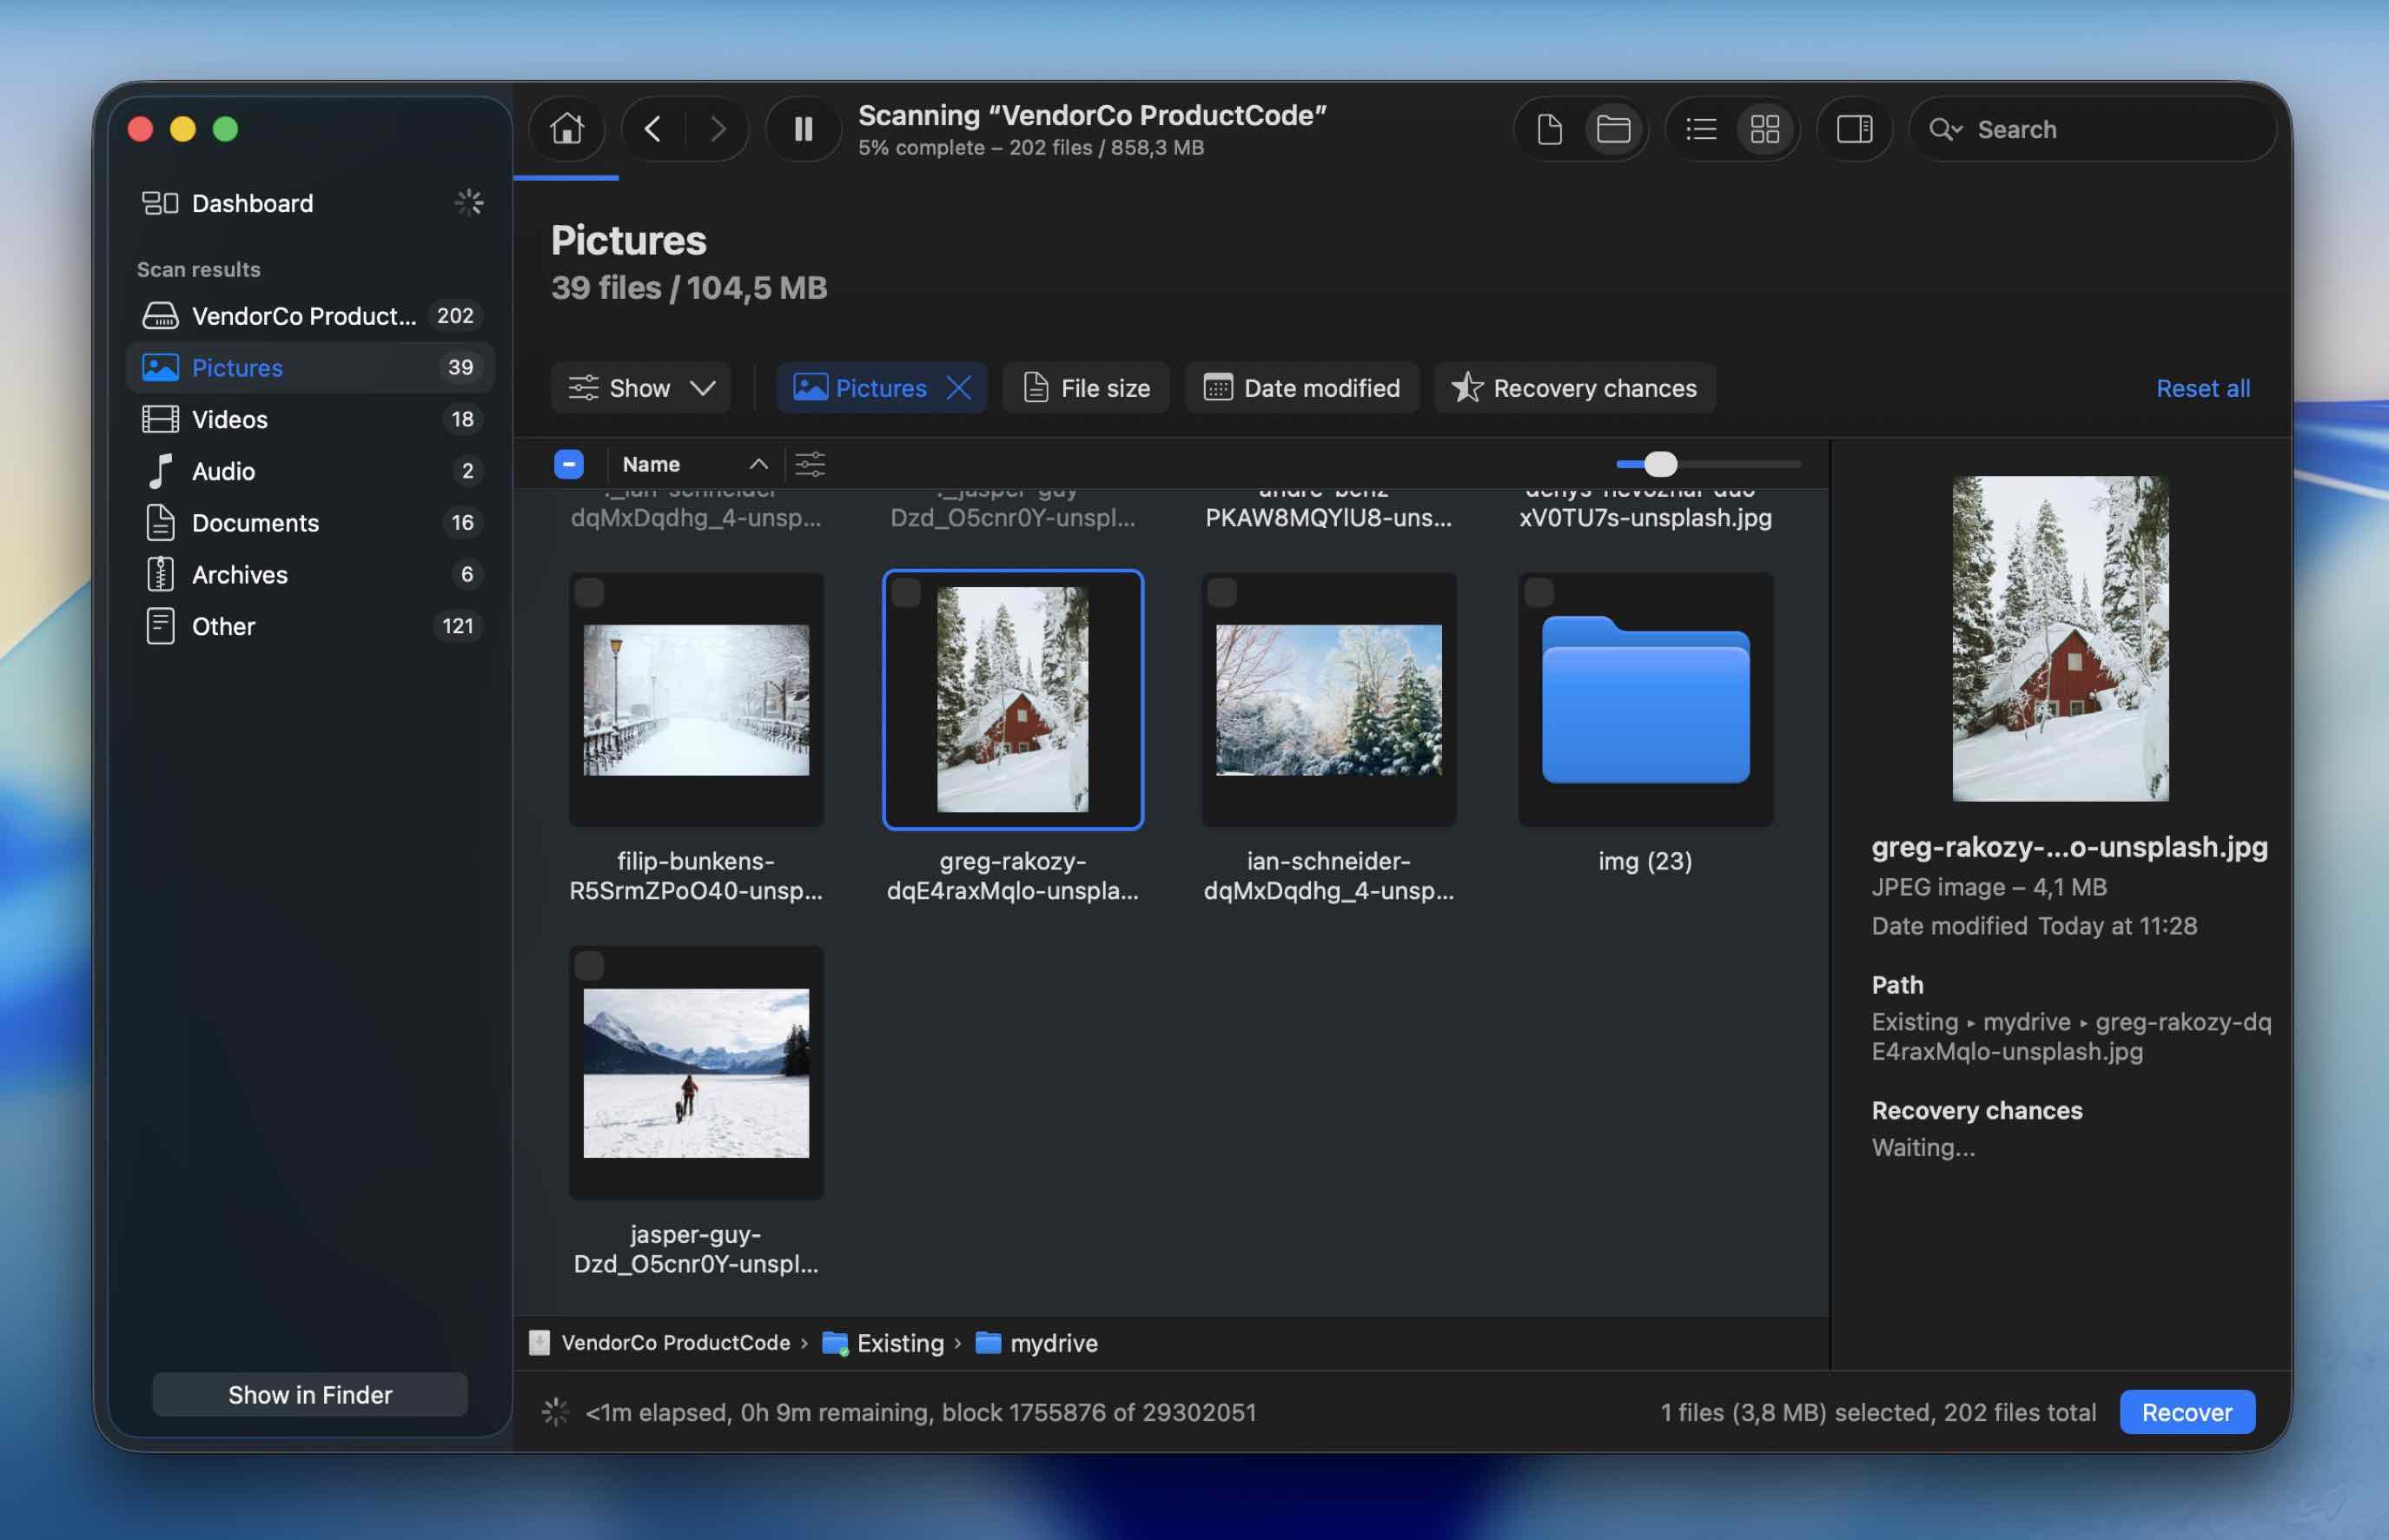 Cliquez sur la catégorie Images. Il y aura des sous-dossiers. Filtrez-les par taille de fichier, date de modification ou recherchez directement le nom du fichier.
 - Une fois que vous avez trouvé le fichier, cliquez dessus pour voir un aperçu de l’image. Si l’aperçu se charge correctement, c’est un des meilleurs indicateurs que le fichier est intact et devrait être récupérable sans problème. (Vous verrez également un indicateur de probabilité de récupération à côté de chaque fichier.)
- Enfin, cliquez sur le bouton Récupérer situé dans la partie inférieure droite de l’écran. Si vous utilisez la version gratuite, il vous faudra une licence pour enregistrer les fichiers récupérés. L’analyse/aperçu est cependant illimitée, vous pouvez donc vérifier si vos fichiers sont toujours présents avant de décider de passer à la version supérieure.
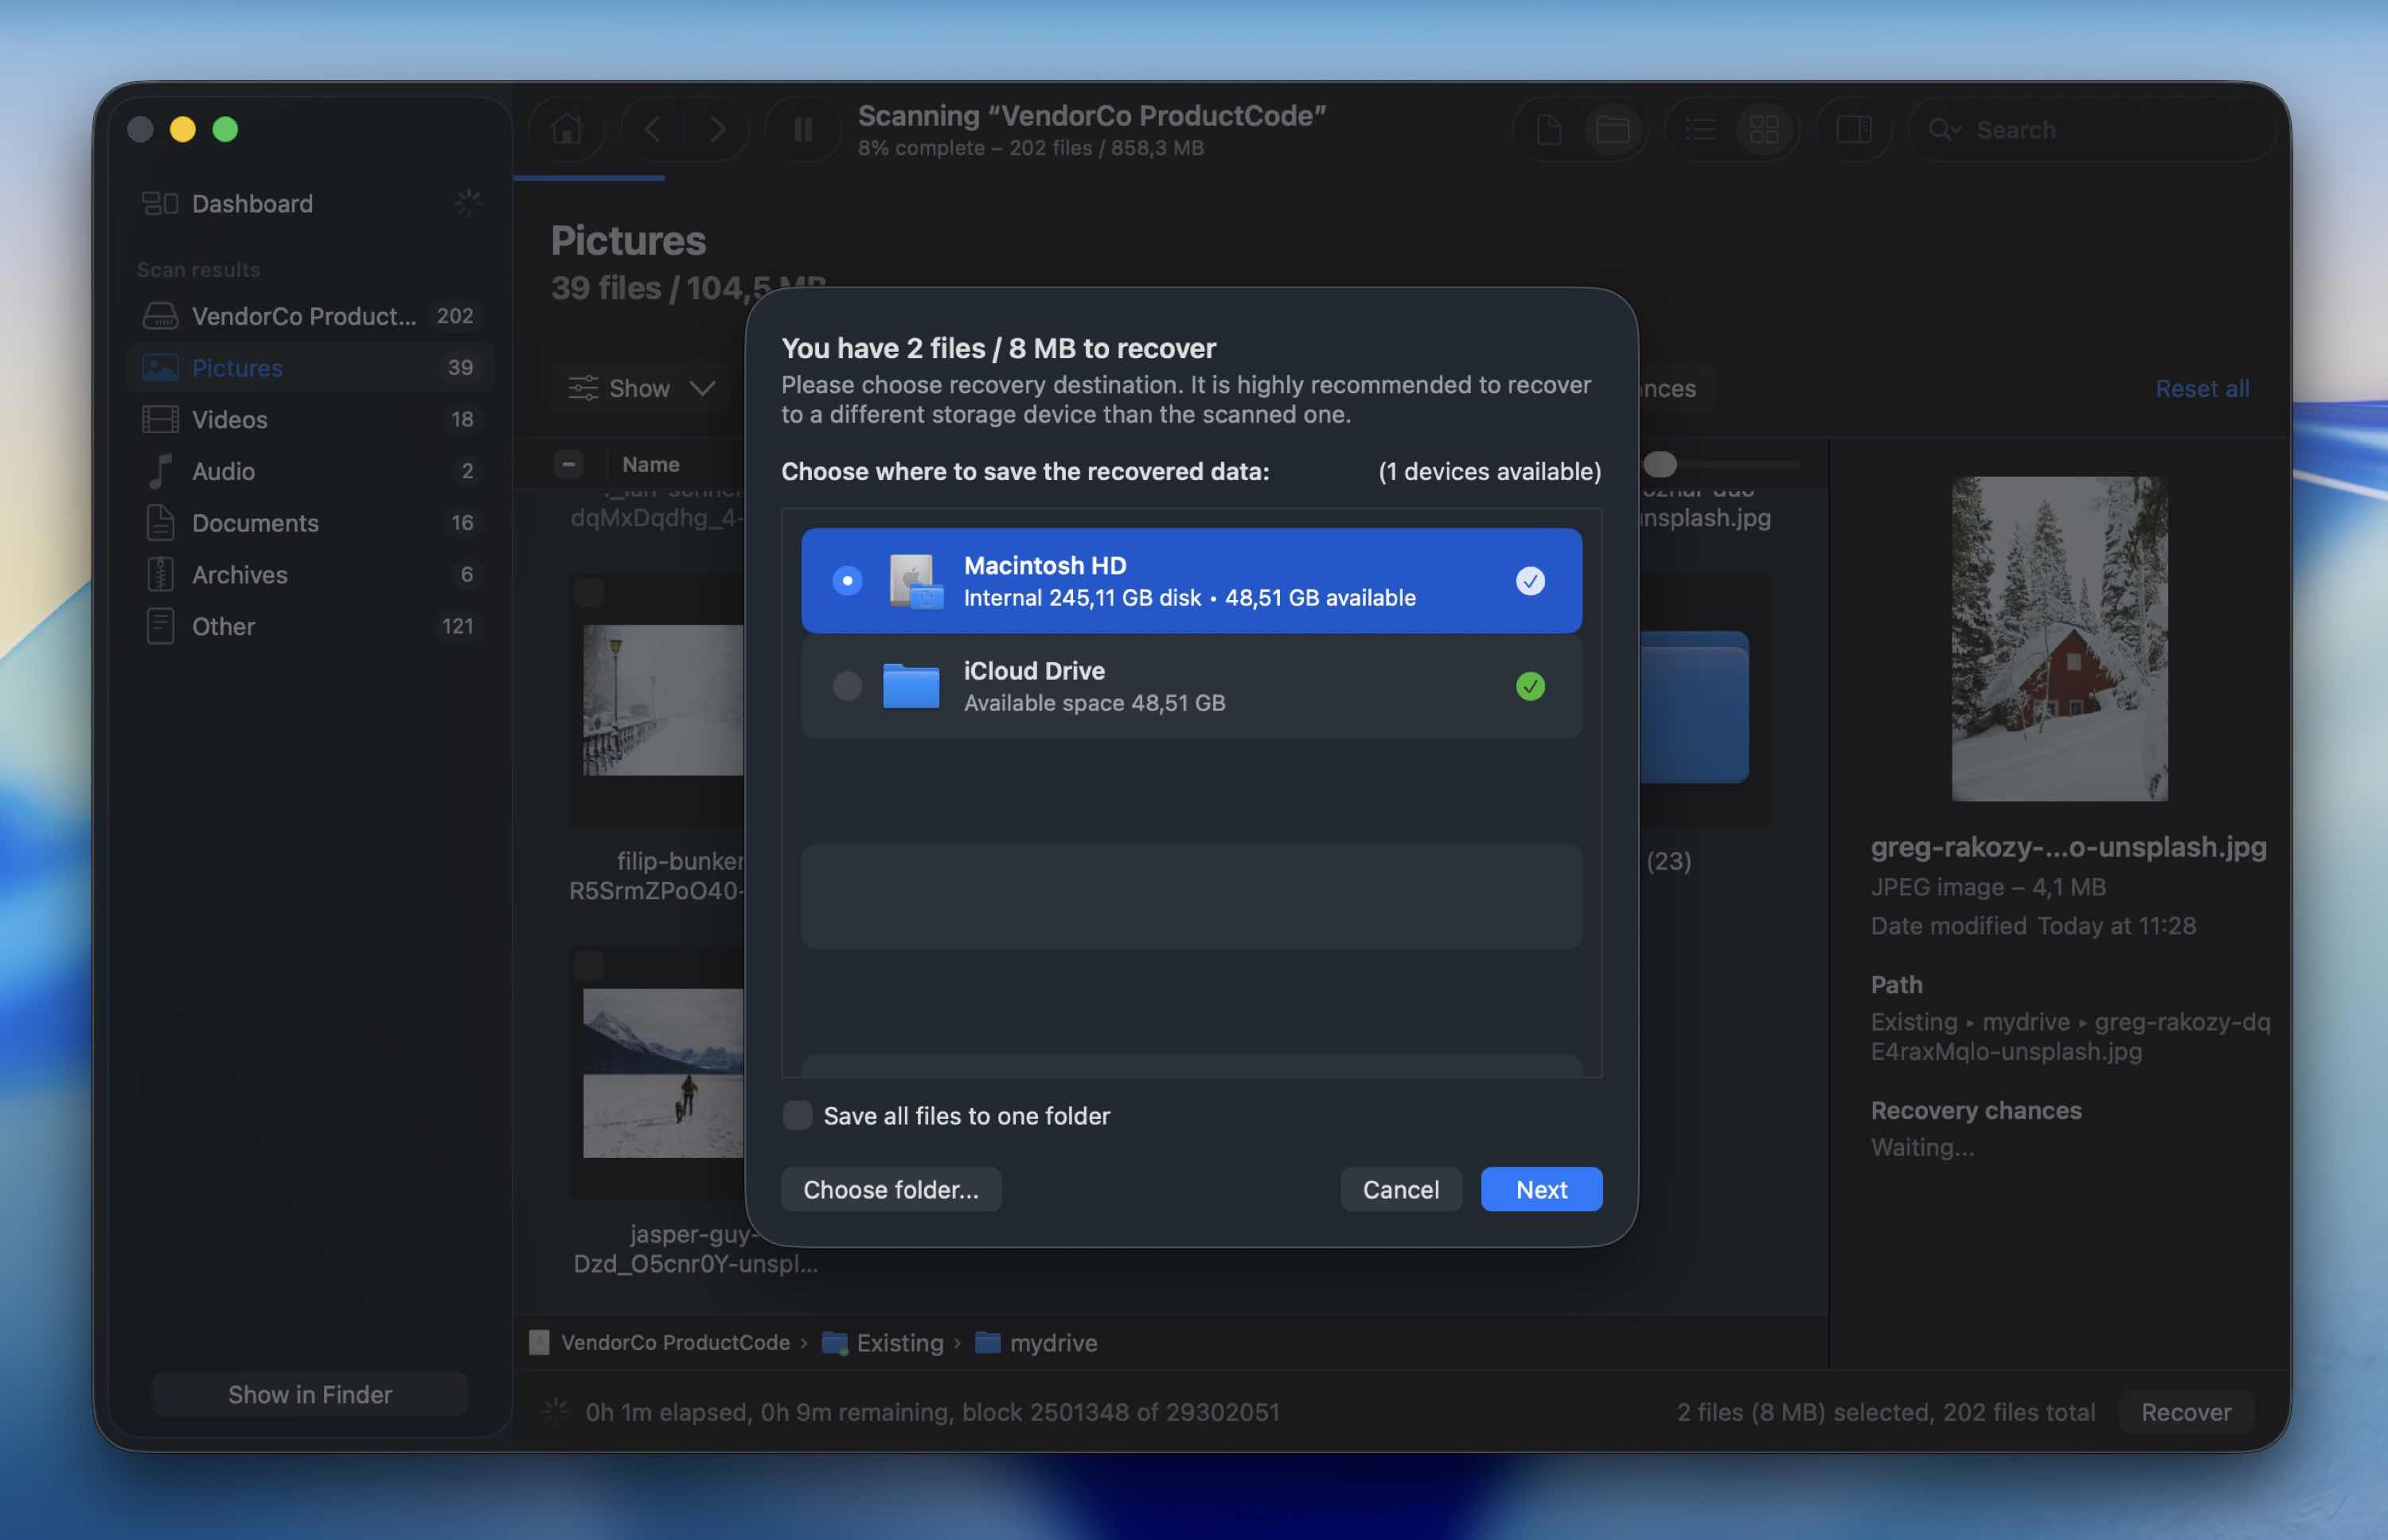
- Choisissez un nouvel emplacement pour le fichier que vous souhaitez récupérer. Sélectionnez n’importe quel emplacement – sauf la même carte SD. (Il n’est jamais conseillé de restaurer sur la carte SD car cela peut écraser d’autres données encore récupérables.)
- Un message apparaîtra à l’écran pour confirmer que le fichier a été récupéré.
Méthode 2 : Récupérez les données de votre carte SD avec PhotoRec
Un autre outil qui peut vous aider à récupérer des fichiers supprimés d’une carte SD est PhotoRec. Il s’agit d’un logiciel de récupération de données entièrement gratuit et open source, qui fait un excellent travail pour restaurer des images, des vidéos et d’autres fichiers supprimés.
Cela dit, ce n’est pas l’outil le plus convivial pour les débutants. L’interface est basée sur du texte, et vous y naviguez à l’aide de votre clavier. Il repose également sur une analyse basée sur les signatures (extraction de fichiers). Pour cette raison, il ne peut généralement pas restaurer les noms de fichiers ou la hiérarchie des dossiers d’origine. Les fichiers récupérés reviennent souvent avec des noms génériques, et vous devrez les trier manuellement par la suite.
Suivez ces étapes pour récupérer les fichiers supprimés de votre carte SD à l’aide de PhotoRec :
- Télécharger PhotoRec sur votre Mac (vous devrez télécharger à la fois TestDisk & PhotoRec car ces utilitaires sont fournis ensemble).
- Pour installer l’utilitaire, lancez le Terminal (allez dans Launchpad > Terminal) et copiez-collez la commande suivante : sudo photorec.
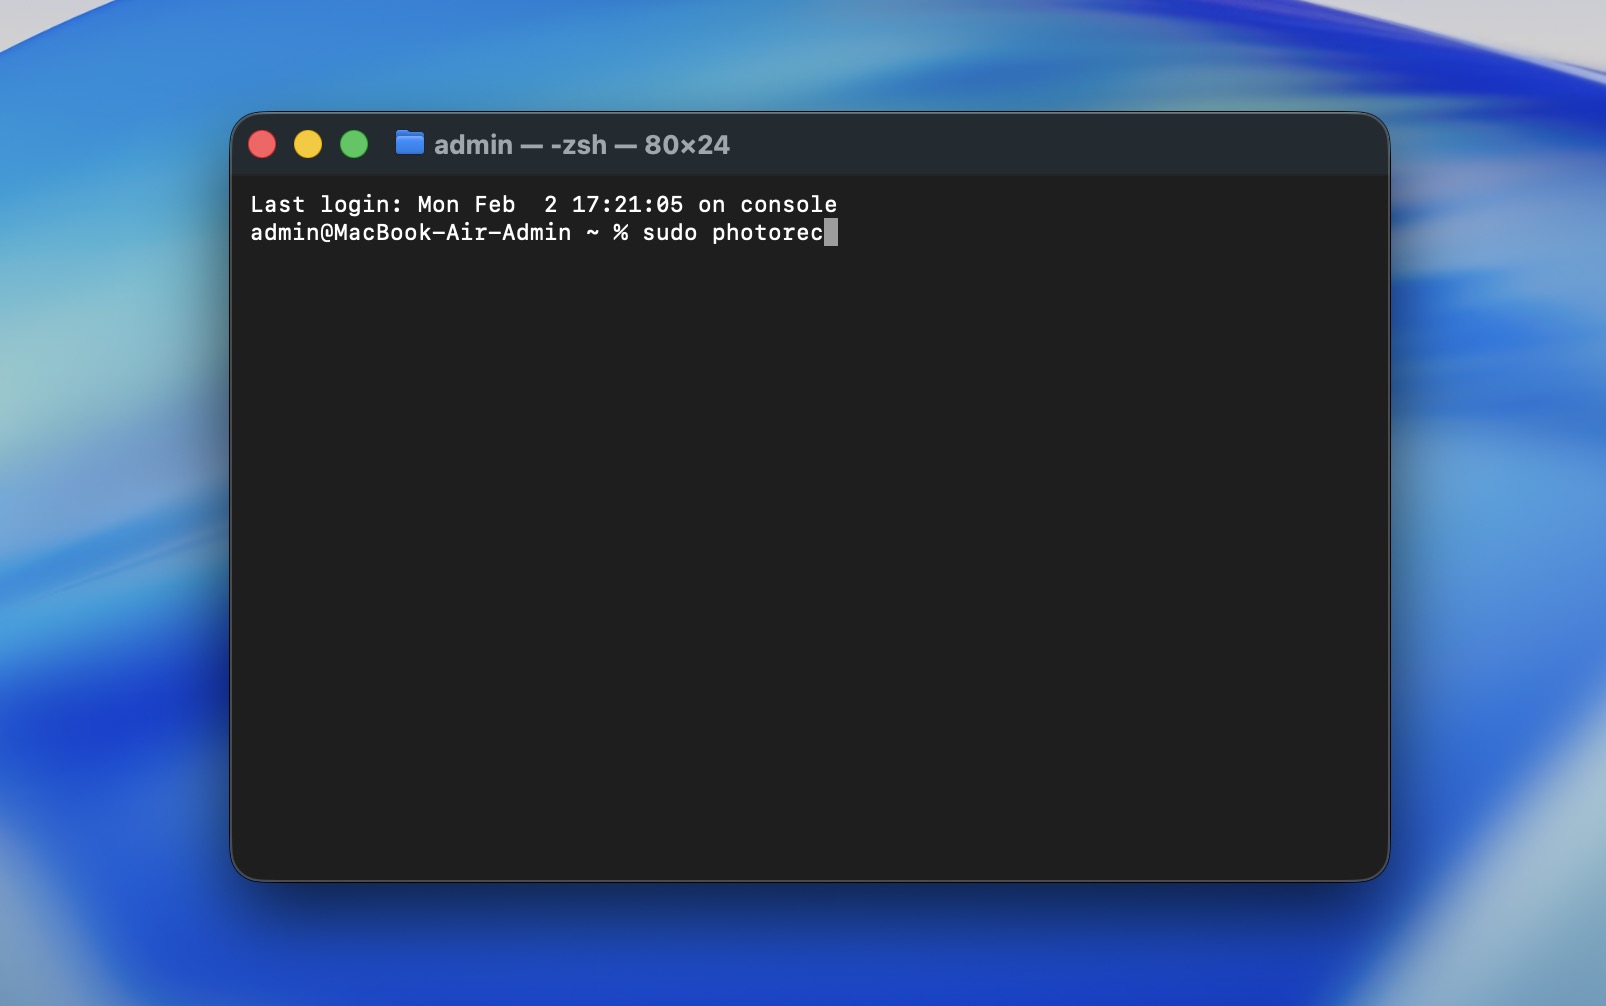
- Appuyez sur Retour et saisissez votre mot de passe administrateur si nécessaire.
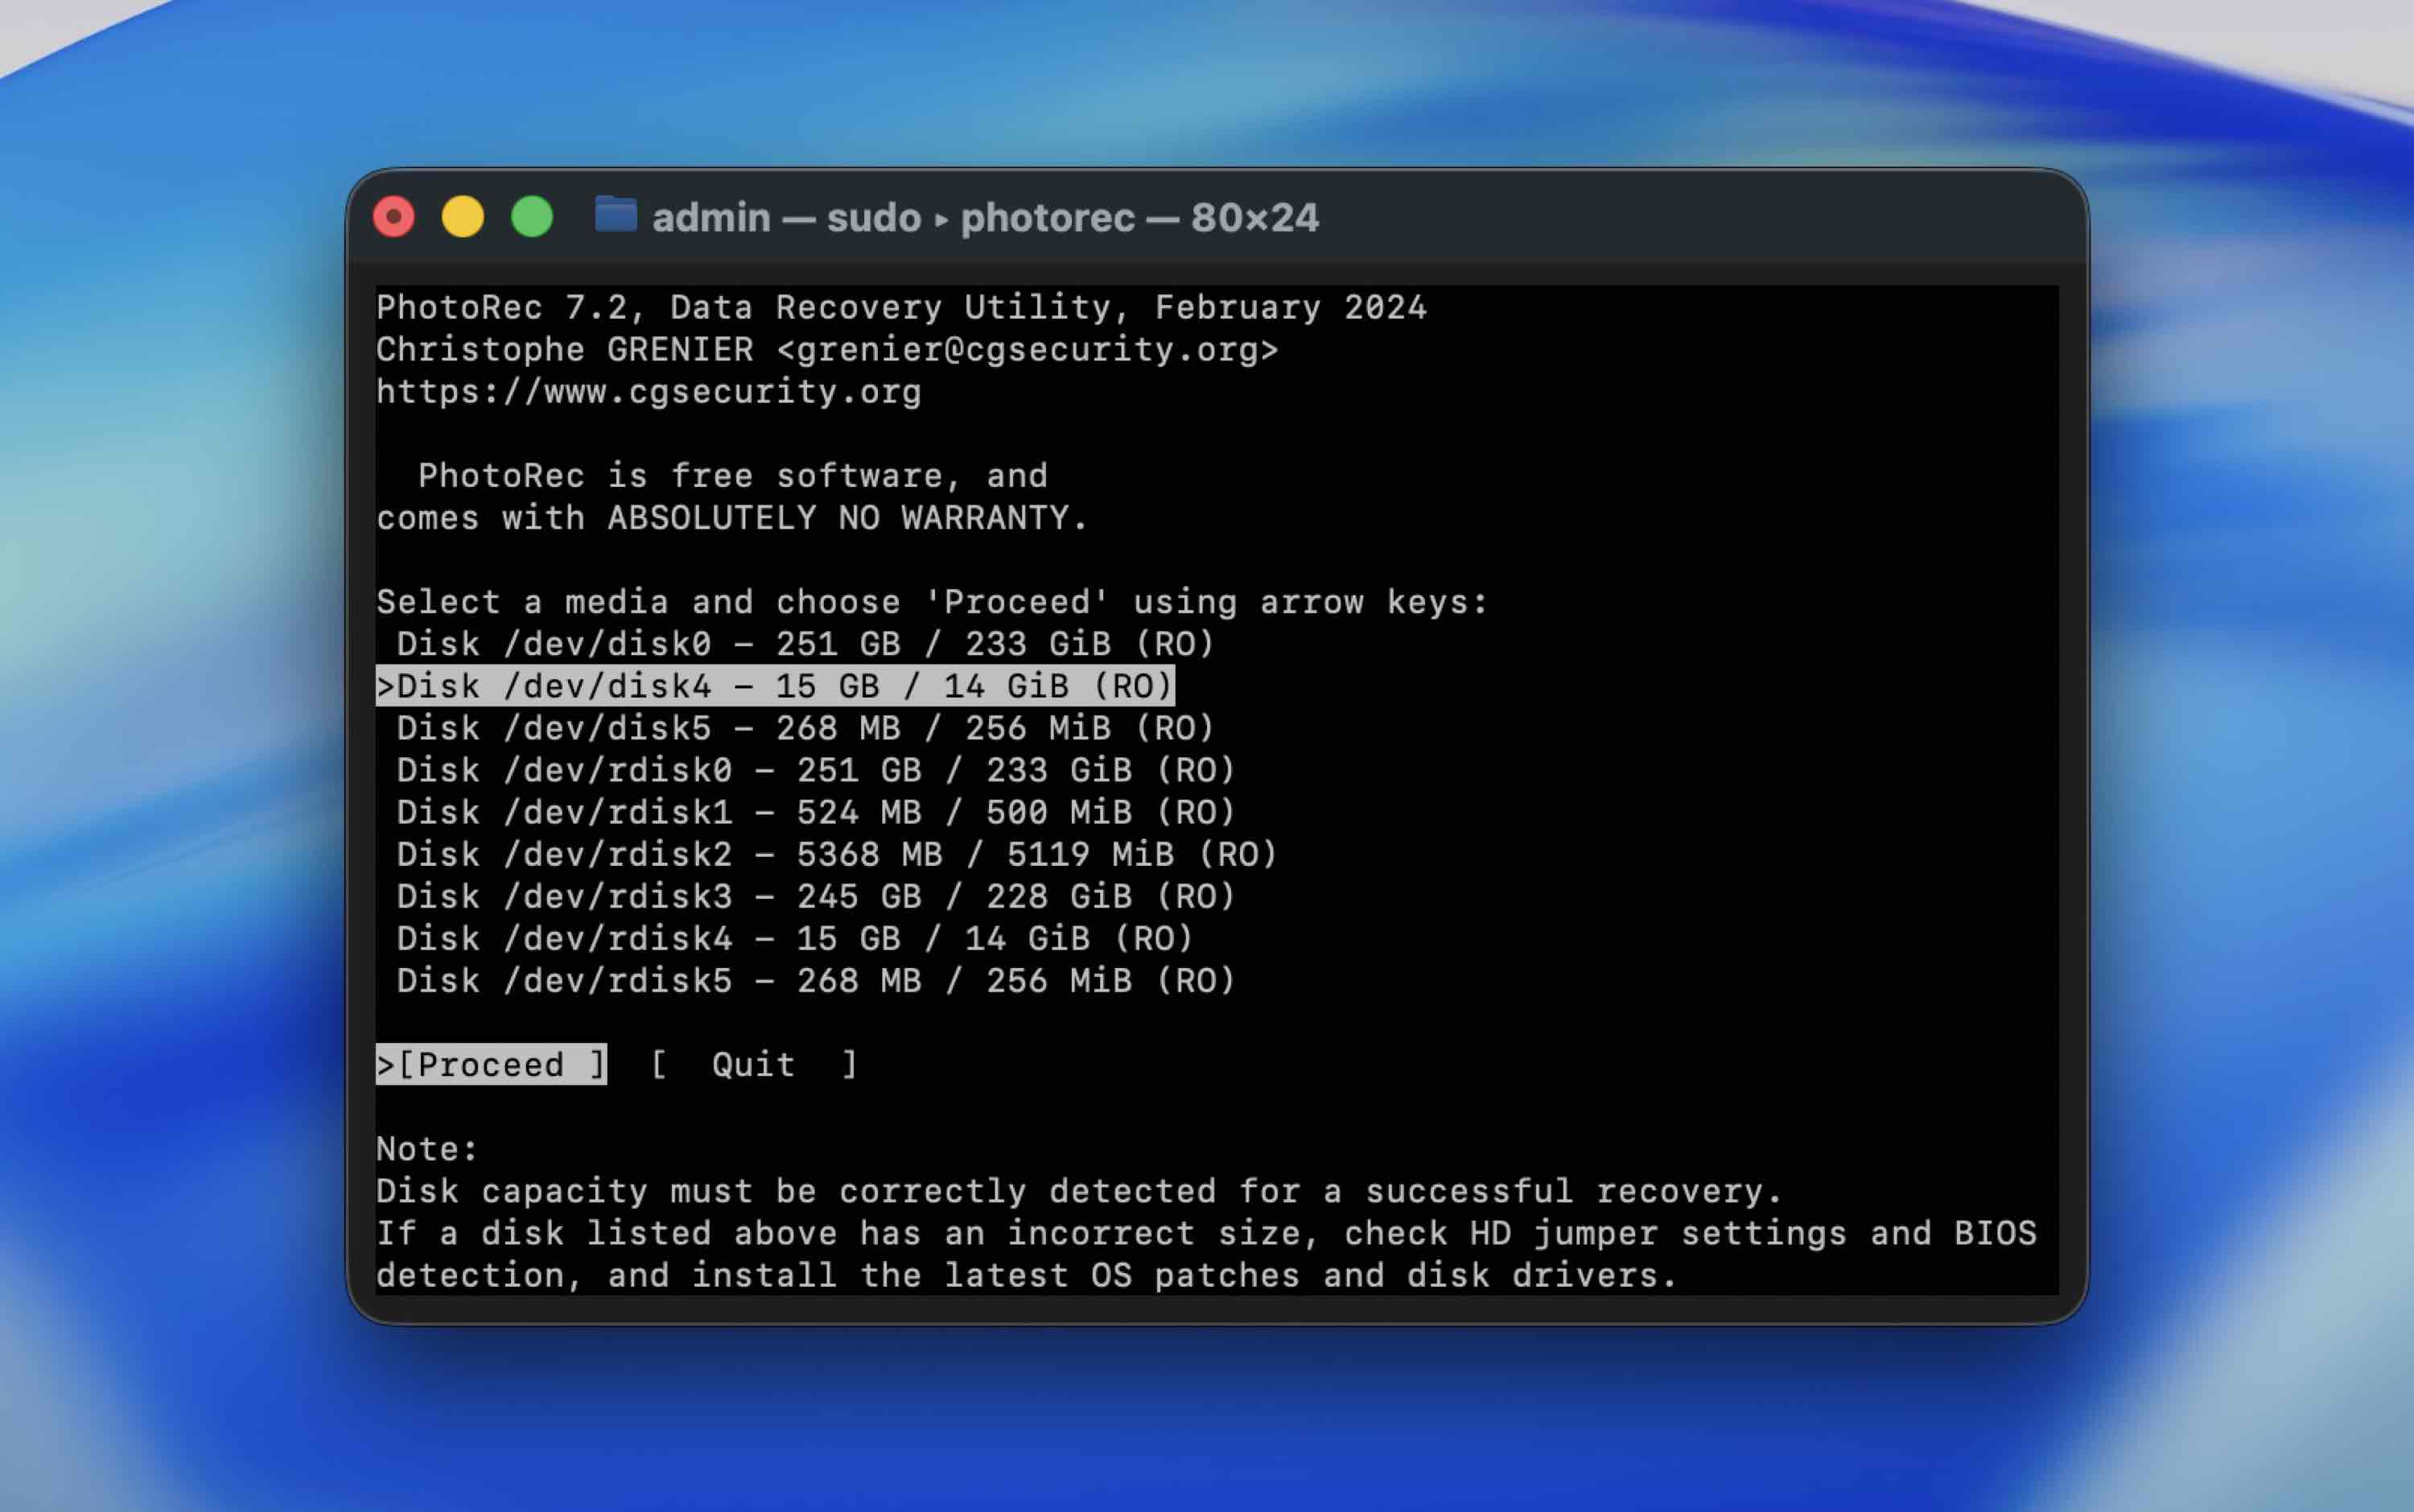
- Choisissez votre carte SD dans la liste des appareils à l’aide des touches fléchées et appuyez sur Retour pour confirmer votre choix.
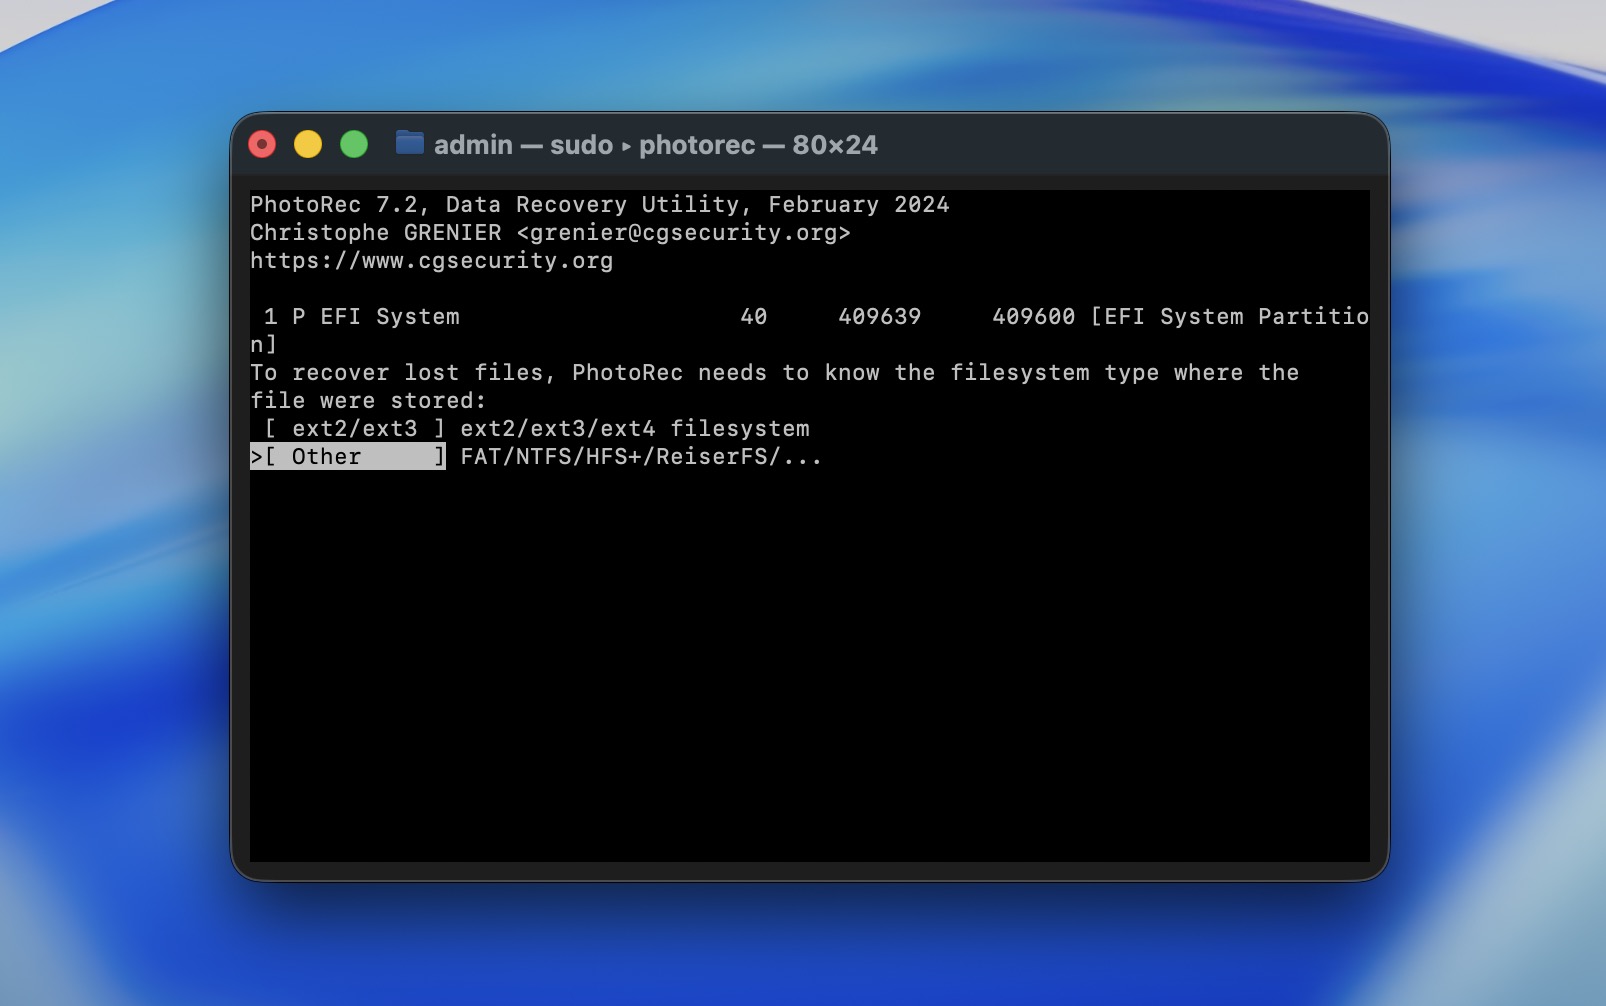
- Sélectionnez la partition de la carte SD contenant vos données et appuyez sur Retour pour lancer la recherche. Assurez-vous d’avoir sélectionné Other et appuyez sur la touche Retour.
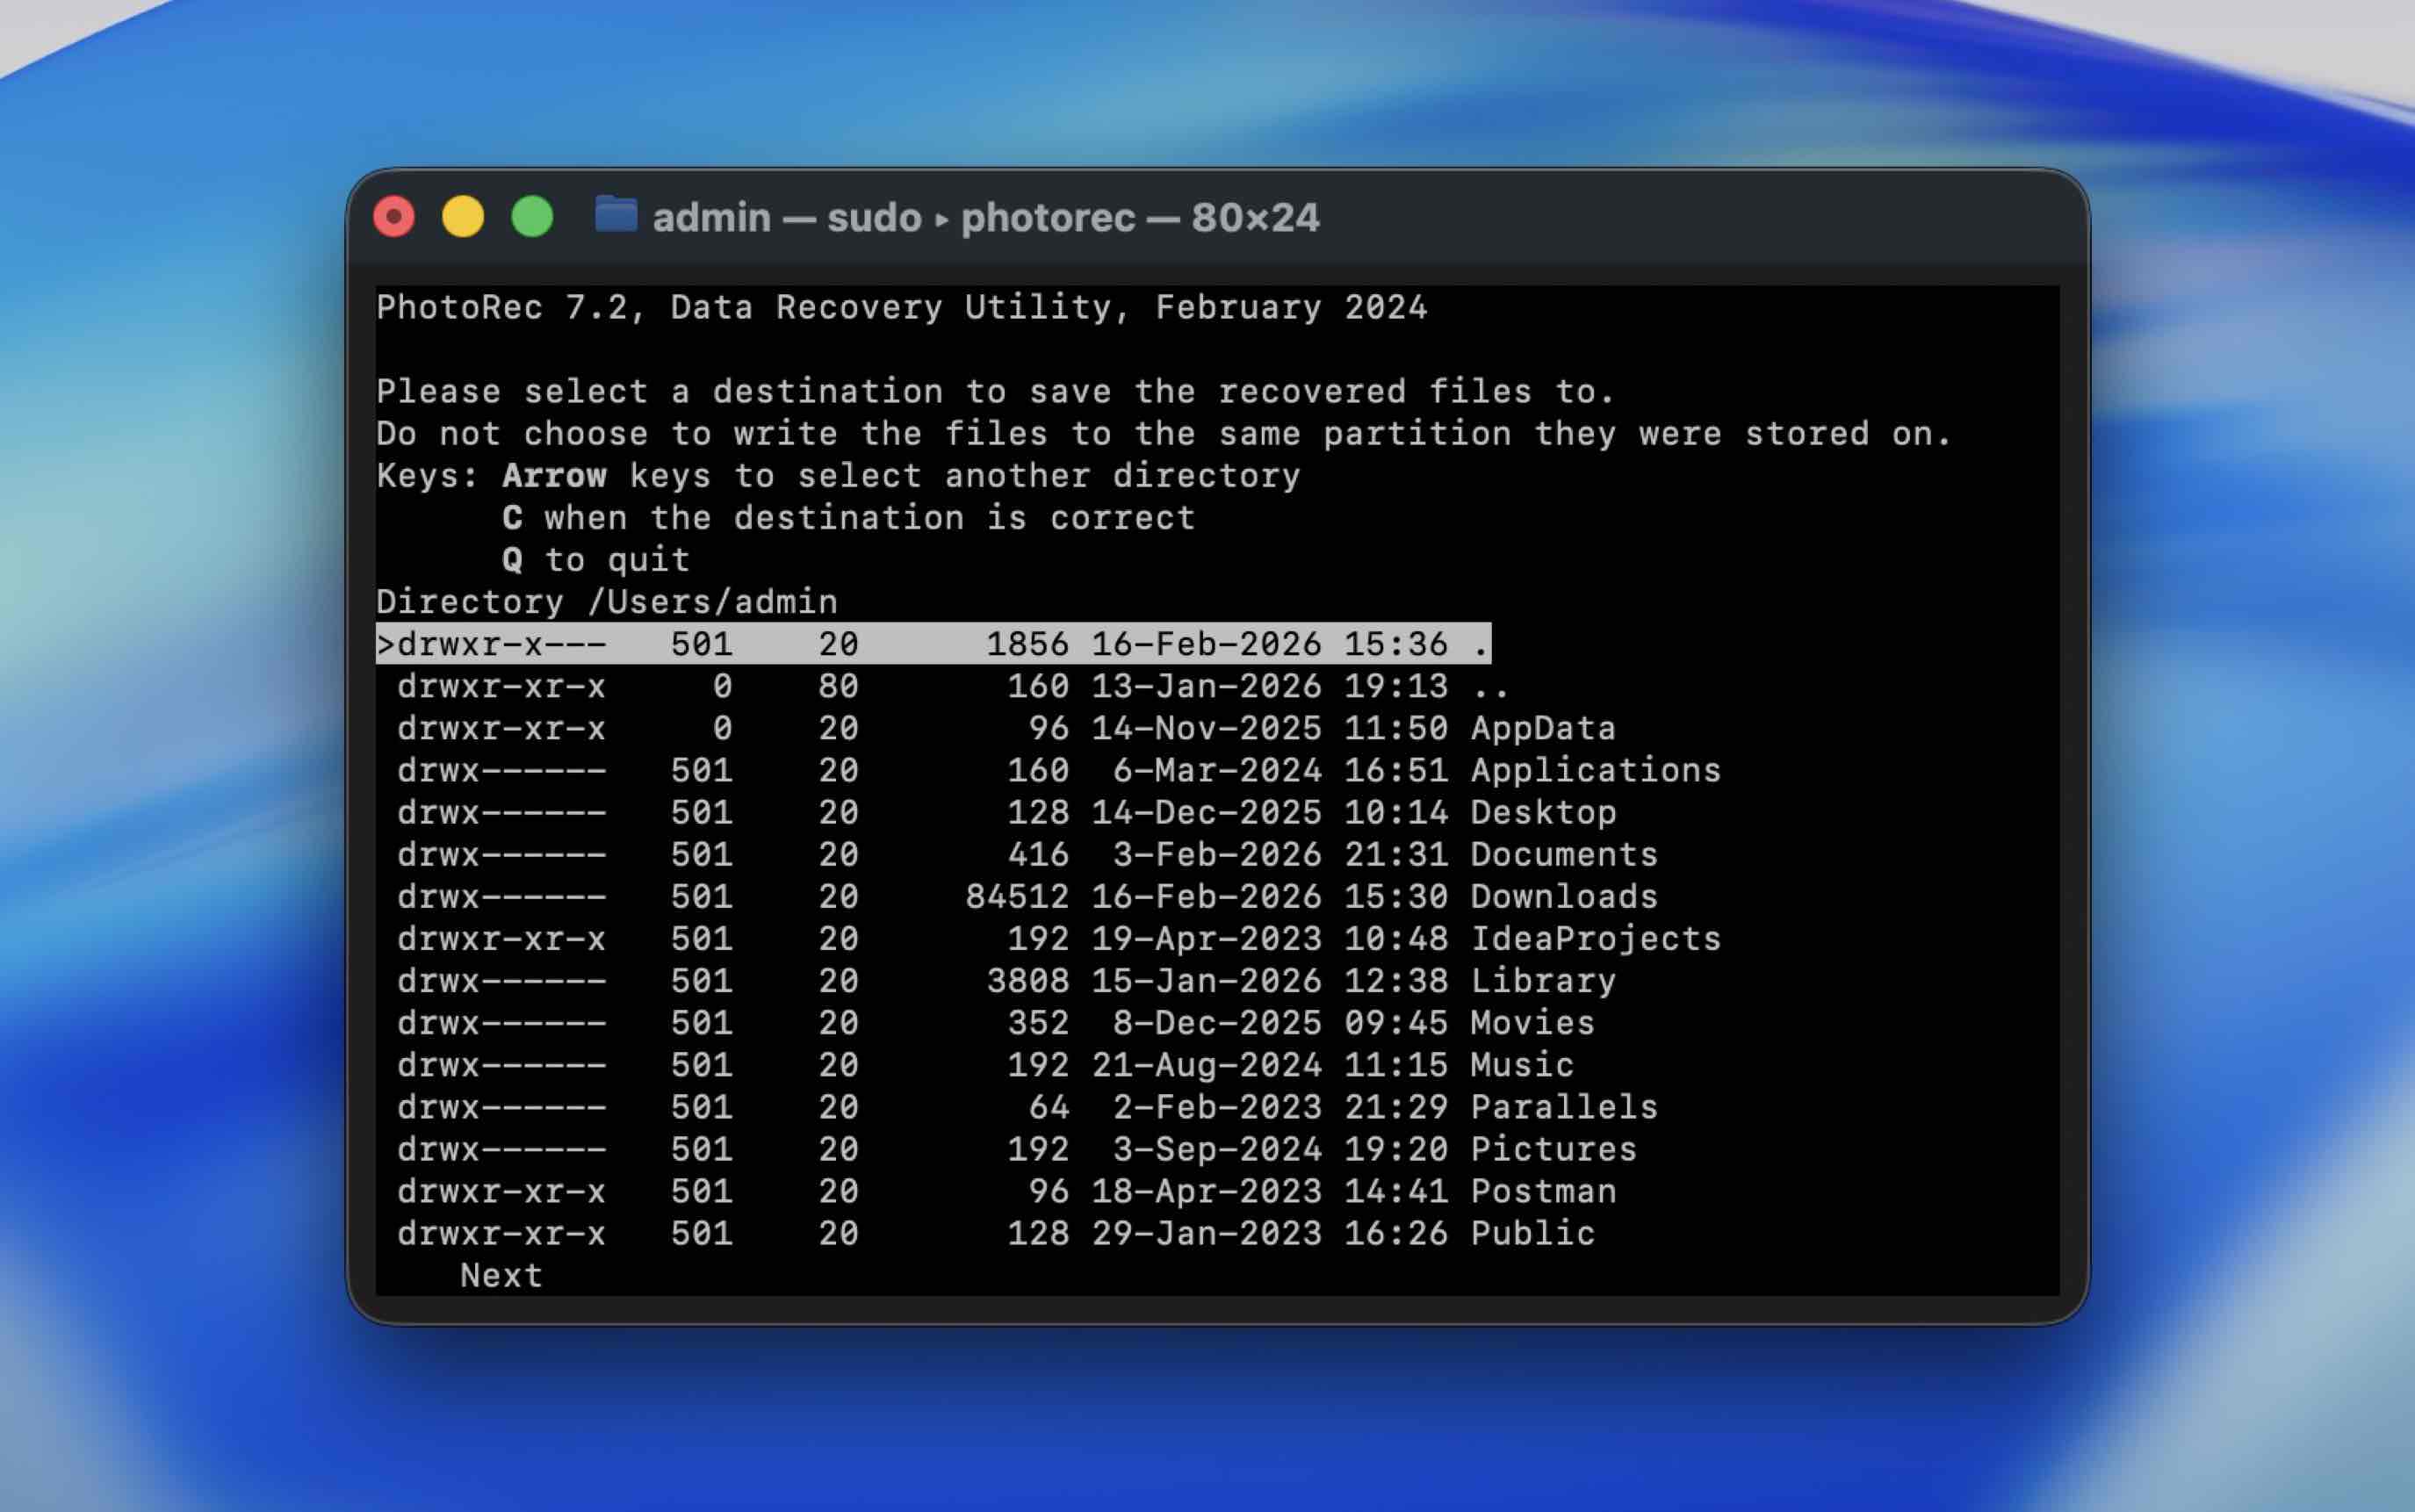
- Sélectionnez la destination pour les données récupérées (assurez-vous que ce n’est pas la même carte SD) et appuyez sur C sur votre clavier pour confirmer.
Une fois que l’utilitaire a terminé le processus de récupération, quittez Terminal et rendez-vous à l’emplacement précédemment choisi pour trouver le dossier contenant les données récupérées.
Puis-je restaurer des données supprimées d’une carte SD en utilisant la corbeille de mon Mac ?
Oui, c’est une autre façon de récupérer des fichiers, mais cela ne fonctionne que dans des situations spécifiques.
C’est utile si vous avez supprimé les fichiers alors que la carte SD était connectée à votre Mac et que vous n’avez pas encore vidé la Corbeille. Dans ce cas, macOS les déplace vers le dossier Corbeille associé à ce volume externe.
Suivez ces étapes pour récupérer les fichiers supprimés de votre carte SD dans la Corbeille sur votre Mac :
- Connectez la carte SD à votre Mac.
- Lancez Corbeille (cliquez sur la dernière icône de votre Dock).

- Faites défiler les fichiers qui s’y trouvent pour trouver celui dont vous avez besoin.
- Faites glisser le fichier vers un autre dossier ou faites un clic droit dessus et choisissez Remettre dans le menu déroulant pour le remettre à son emplacement d’origine.
FAQ
- Le premier problème, et le plus courant, est la suppression accidentelle. Celui-ci arrive en tête de liste à chaque fois.
- Ensuite, il y a le formatage (intentionnel ou accidentel). Un formatage rapide supprime généralement les références aux fichiers, mais pas les données elles-mêmes, c’est pourquoi la récupération est souvent possible.
- Un autre problème courant est l’éjection inappropriée. Comme vous l'avez sans doute deviné, retirer la carte SD lors d'un transfert de fichier ou sans l’éjecter correctement peut corrompre le système de fichiers.
- Il y a ensuite la corruption du système de fichiers. Une coupure de courant, un plantage de l’appareil ou un dysfonctionnement du firmware peuvent endommager la structure de la carte.
- Les dommages physiques ou l’usure avec le temps sont un autre facteur. Les cartes SD ont un nombre limité de cycles d’écriture. Avec le temps, les cellules mémoire se dégradent. L’exposition à la chaleur, à l’humidité ou à une manipulation brutale peut accélérer ce processus.
- L’infection par un virus ou un malware. Si la carte est connectée à un ordinateur infecté, le malware peut cacher, chiffrer ou endommager les fichiers. Parfois, les fichiers ne sont pas supprimés du tout – ils sont simplement masqués.
- Enfin, utiliser la même carte sur plusieurs appareils peut contribuer aux problèmes. Passer d’un appareil photo à un drone, un téléphone ou un ordinateur peut augmenter le risque d’incohérences structurelles, surtout si les appareils gèrent le formatage différemment. Ce n’est pas toujours problématique, mais on le constate fréquemment dans les situations de récupération réelles.
- Tout d’abord, vérifiez la Corbeille de votre Mac si les fichiers ont été supprimés alors que la carte était connectée. Cela ne coûte rien et prend une minute.
- Pour une récupération plus approfondie, des outils gratuits comme PhotoRec peuvent analyser la carte et restaurer les fichiers sans vous facturer.
- Certains outils payants (Disk Drill ou UFS Explorer) permettent également une analyse et un aperçu illimités, ce qui vous permet de vérifier si vos fichiers sont toujours présents avant de décider d’acheter une licence.
- Connectez la carte SD à votre Mac.
- Installez et lancez une application de récupération de données qui prend en charge la récupération de carte SD pour Mac.
- Sélectionnez la carte SD dans la liste des lecteurs disponibles.
- Lancez une analyse complète.
- Une fois l’analyse terminée, prévisualisez les photos pour confirmer qu’elles s’ouvrent correctement (si possible).
- Enfin, récupérez les fichiers sélectionnés sur le disque interne de votre Mac ou sur un autre disque externe. Ne les restaurez jamais sur la même carte SD.
- Éjectez toujours la carte correctement (aussi basique que cela puisse paraître, cela prévient de nombreux cas de corruption).
- N’interrompez pas l’activité de lecture/écriture. Si votre appareil photo écrit encore des photos ou si votre Mac copie des fichiers, patientez.
- Sauvegardez régulièrement vos fichiers. Comme vous l’avez sans doute constaté, la récupération n’est jamais garantie. Copiez les fichiers importants sur votre Mac, un disque externe ou un stockage cloud dès que possible.
- Évitez d’utiliser la même carte partout (passer constamment d’un appareil photo, drone ou ordinateur à l’autre augmente le risque d’incohérences structurelles). Si possible, dédiez des cartes à des appareils spécifiques.
- Formatez la carte dans l’appareil avec lequel vous l’utilisez. S’il s’agit d’une carte pour appareil photo, formatez-la dans l’appareil photo. Cela permet d’« aligner » le système de fichiers avec les attentes de l’appareil.
- Protégez-la contre les dommages physiques : gardez les cartes SD à l’écart de la chaleur, de l’humidité et de la flexion. Rangez-les dans un étui de protection.


