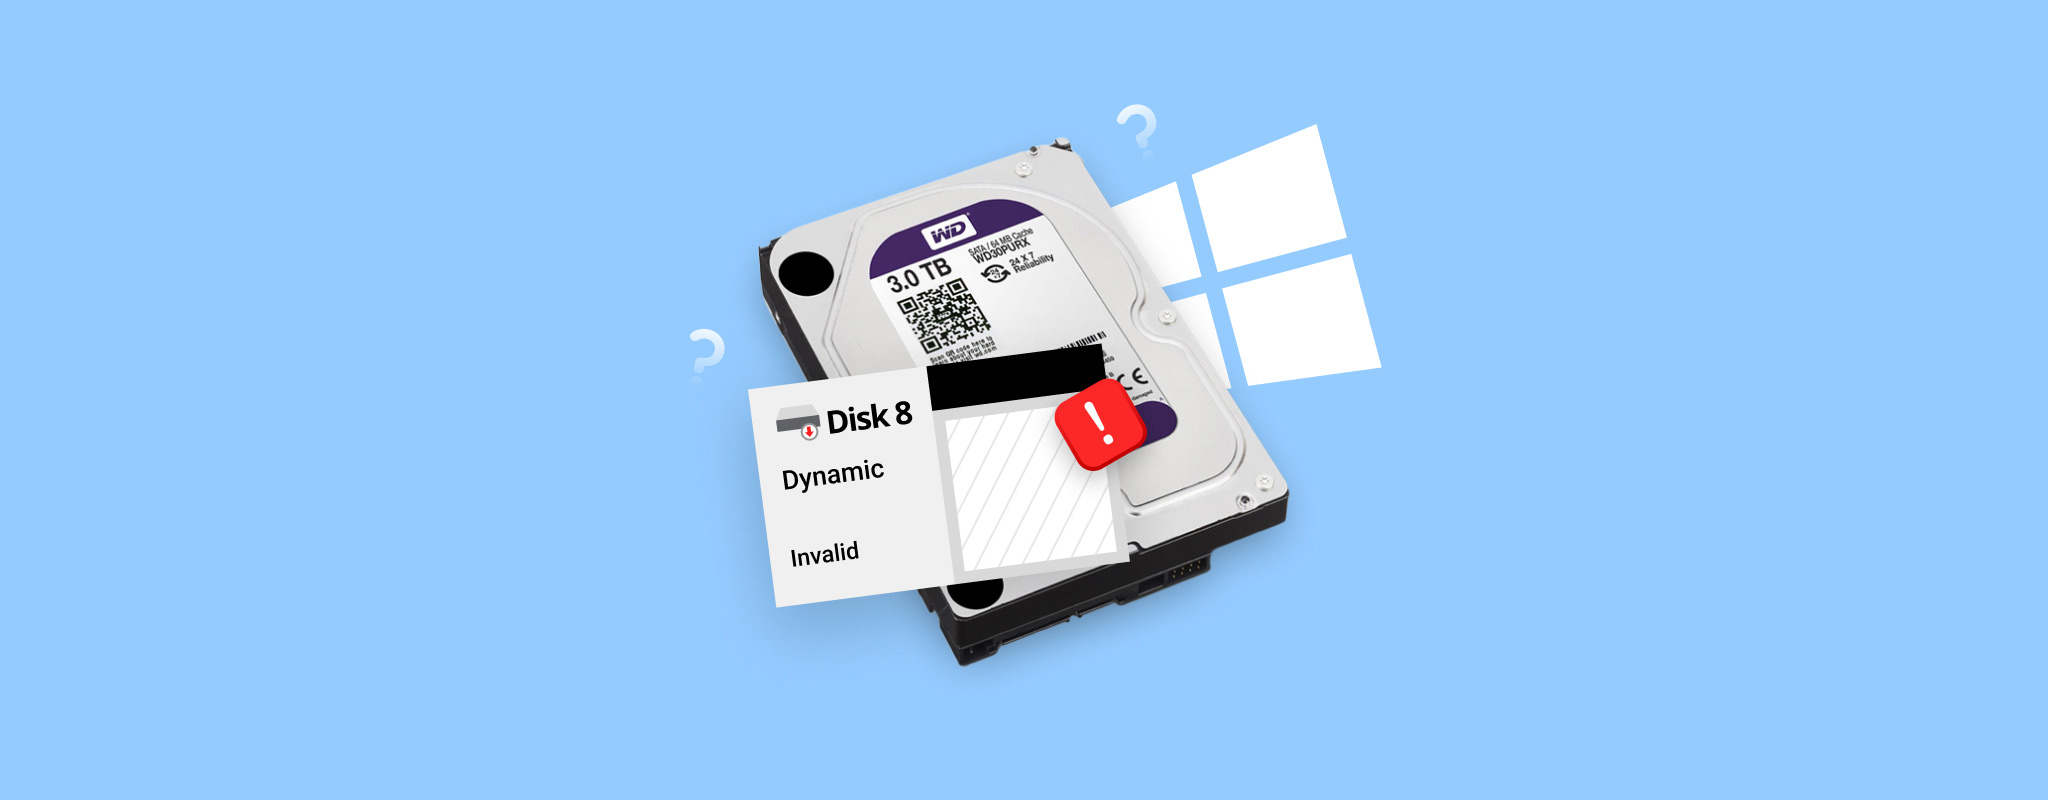
Have you encountered the dynamic disk invalid error and don’t know how to deal with it? That reaction is completely normal. Unlike many other disk-related issues in Windows, this error does not appear very often, so many users see it for the first time without a clear idea of what it means or how to fix it.
Fortunately, its rarity does not leave you without options. Our team tested several possible fixes for the invalid dynamic disk problem and selected the methods that actually work. In this guide, we share those solutions so you can try them yourself. Since you already opened this article, the issue is likely relevant to you so just continue reading!
What Does the Dynamic Disk Invalid Error Mean?
Before moving on to the fixes, it helps to understand the basics behind this error.
In Windows, a dynamic disk is a special type of disk configuration that allows more flexible volume management compared to a standard basic disk. Dynamic disks were introduced in Windows 2000 and support advanced features such as spanning volumes across multiple drives, creating mirrored volumes for redundancy, and resizing volumes without restarting the system.
This technology is now considered outdated. Microsoft gradually replaced it with Storage Spaces, a newer storage virtualization system introduced in Windows 8. Even so, dynamic disks still exist on many computers, especially on systems that were configured years ago or set up by administrators.
The dynamic disk invalid error appears when Windows can no longer properly recognize the disk’s dynamic configuration. In other words, the operating system detects the disk itself but fails to interpret the structure that defines its volumes. When a disk appears as invalid, Windows typically blocks access to the volumes stored on it. This error can appear for several reasons, for example, it may occur after switching Windows editions, after connecting the disk to another computer where its configuration has not yet been imported, etc. However, the exact cause doesn’t change the repair way, so we won’t focus on it too much here and will instead move on to the methods that can fix the problem.
Part 1: How to Recover Data from an Invalid Dynamic Disk
Before we move on to the dynamic disk Invalid fixes, we must warn you that some repair methods may lead to data loss. For that reason, it’s a good idea to recover important files from the disk first. Doing this in advance helps avoid a situation where you have to interrupt the repair process later just to figure out how to save your data.
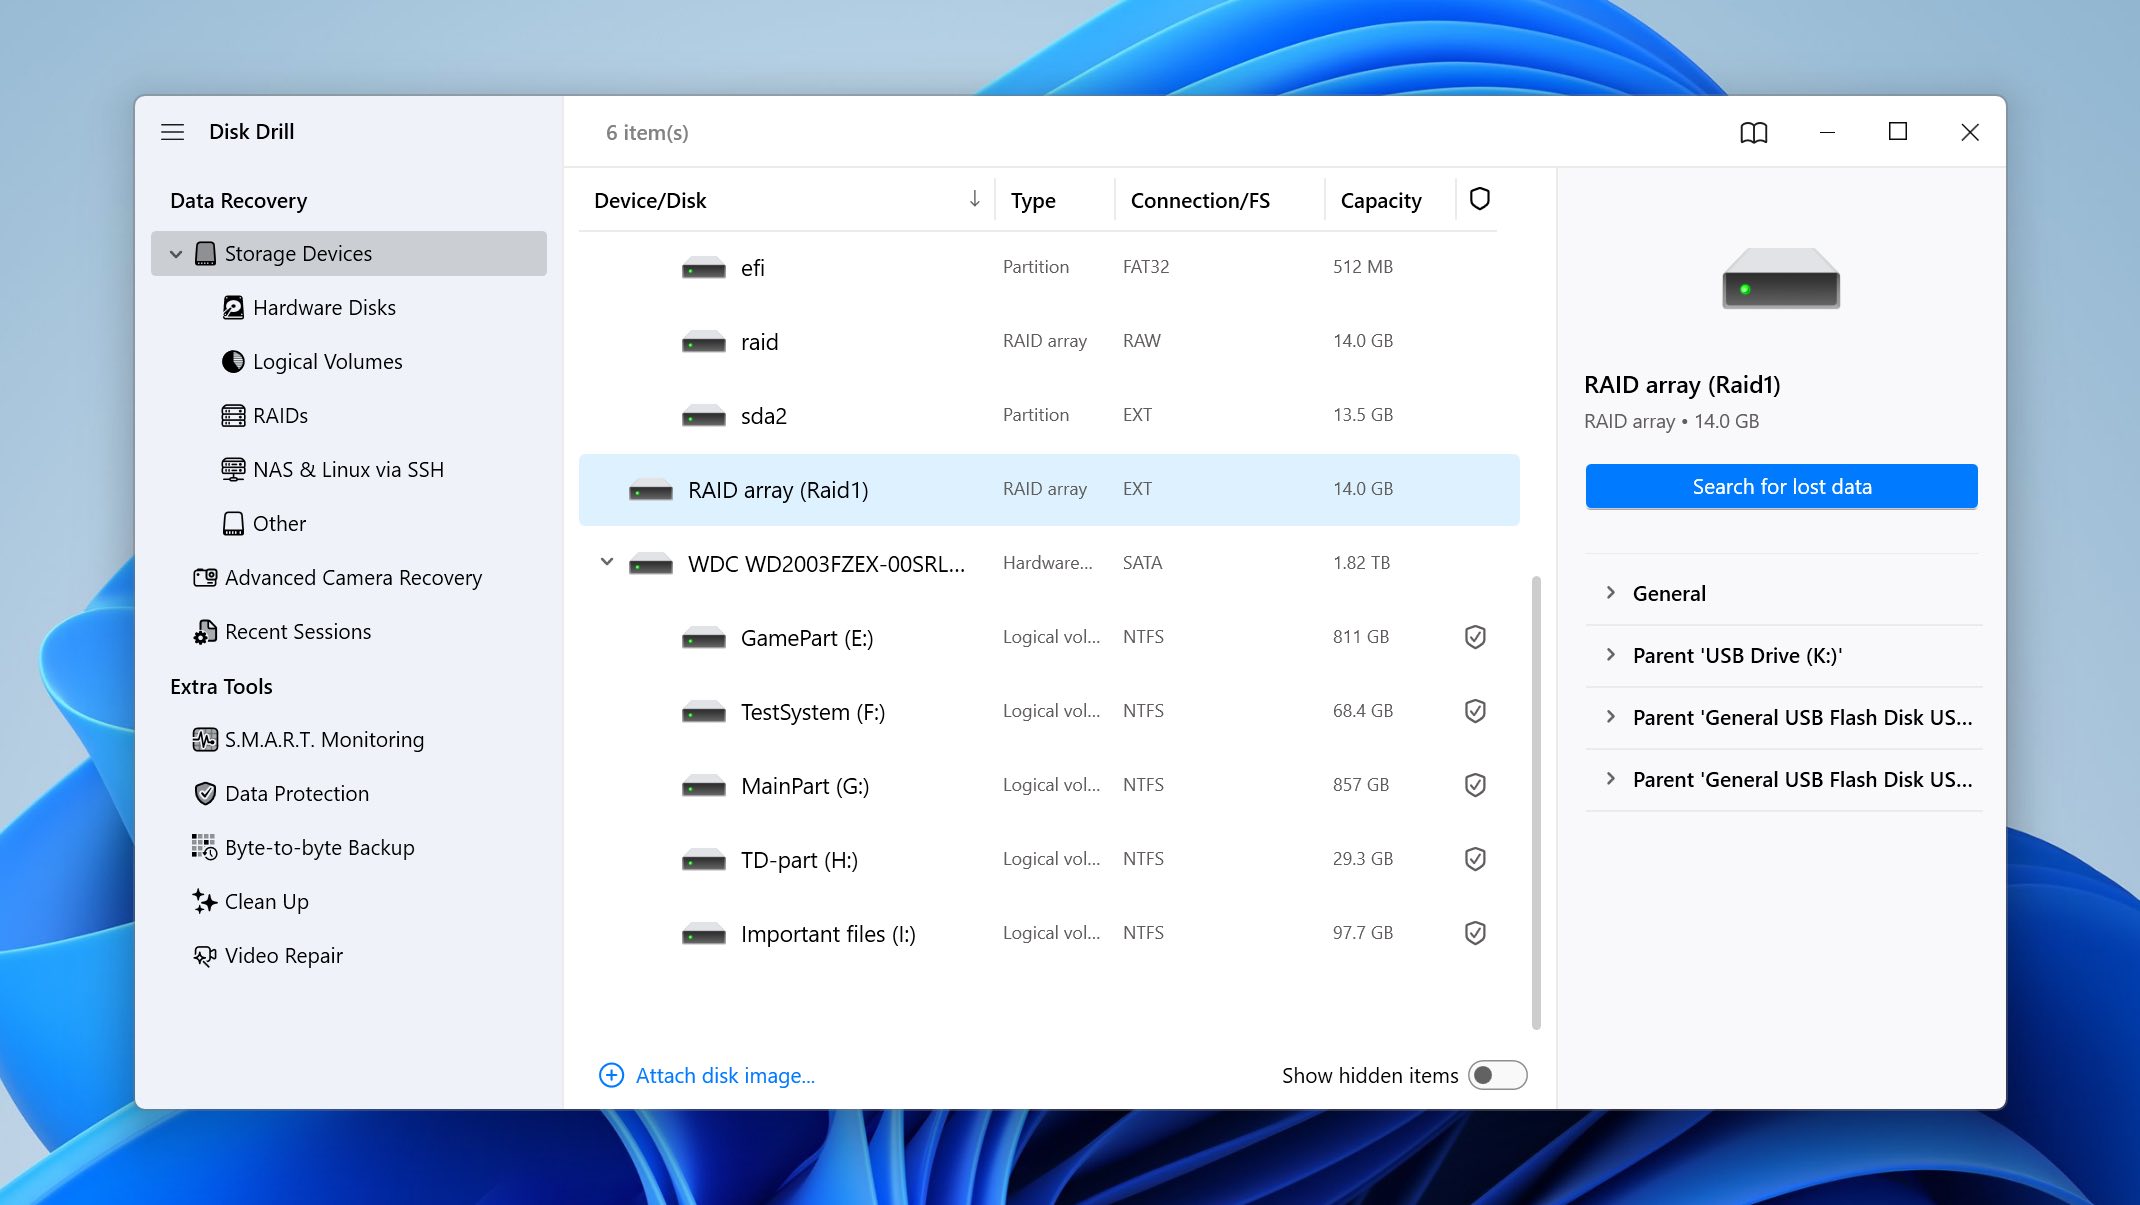
To demonstrate the recovery process, we’ll use Disk Drill. We chose this tool because it performed well during comparisons with other data recovery software and proved reliable in real recovery scenarios. It can work with all Windows-supported file systems, and it recovers files using both file system information (when available) and file signatures, supporting more than 400 file formats. This means that even if the dynamic disk’s file system is severely corrupted, the software can still locate and restore your files. As an added benefit, Disk Drill is very easy to use, so even users without prior data recovery experience can scan a disk and recover files without dealing with complex technical settings.
Here’s how to recover invalid dynamic disk data using Disk Drill:
- Download Disk Drill from the Cleverfiles website and install it on your computer to get started.
- Launch the program, then select the storage device affected by the dynamic disk issue and click Search for lost data.
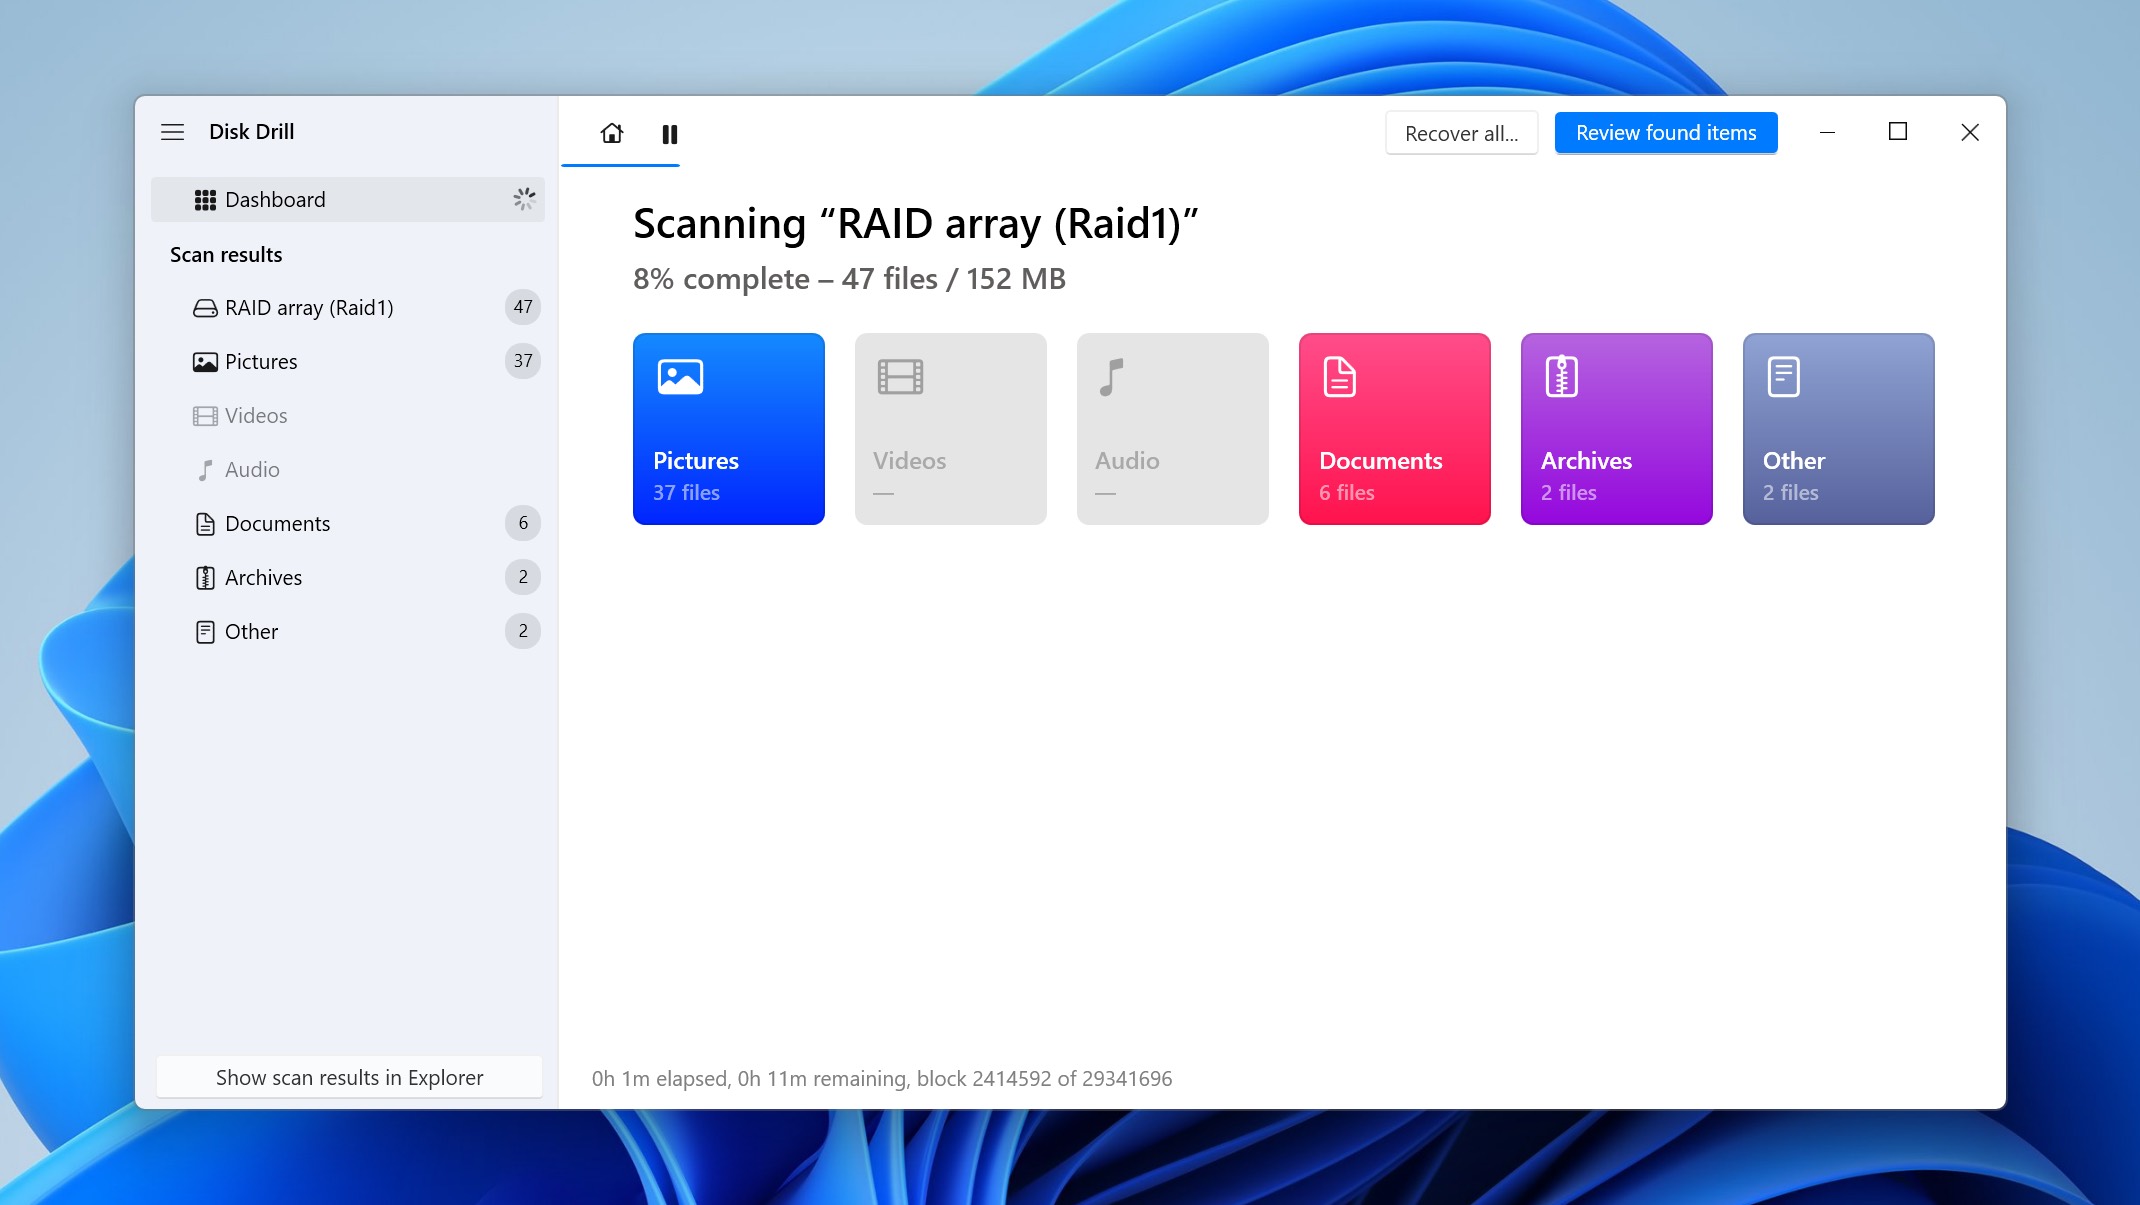
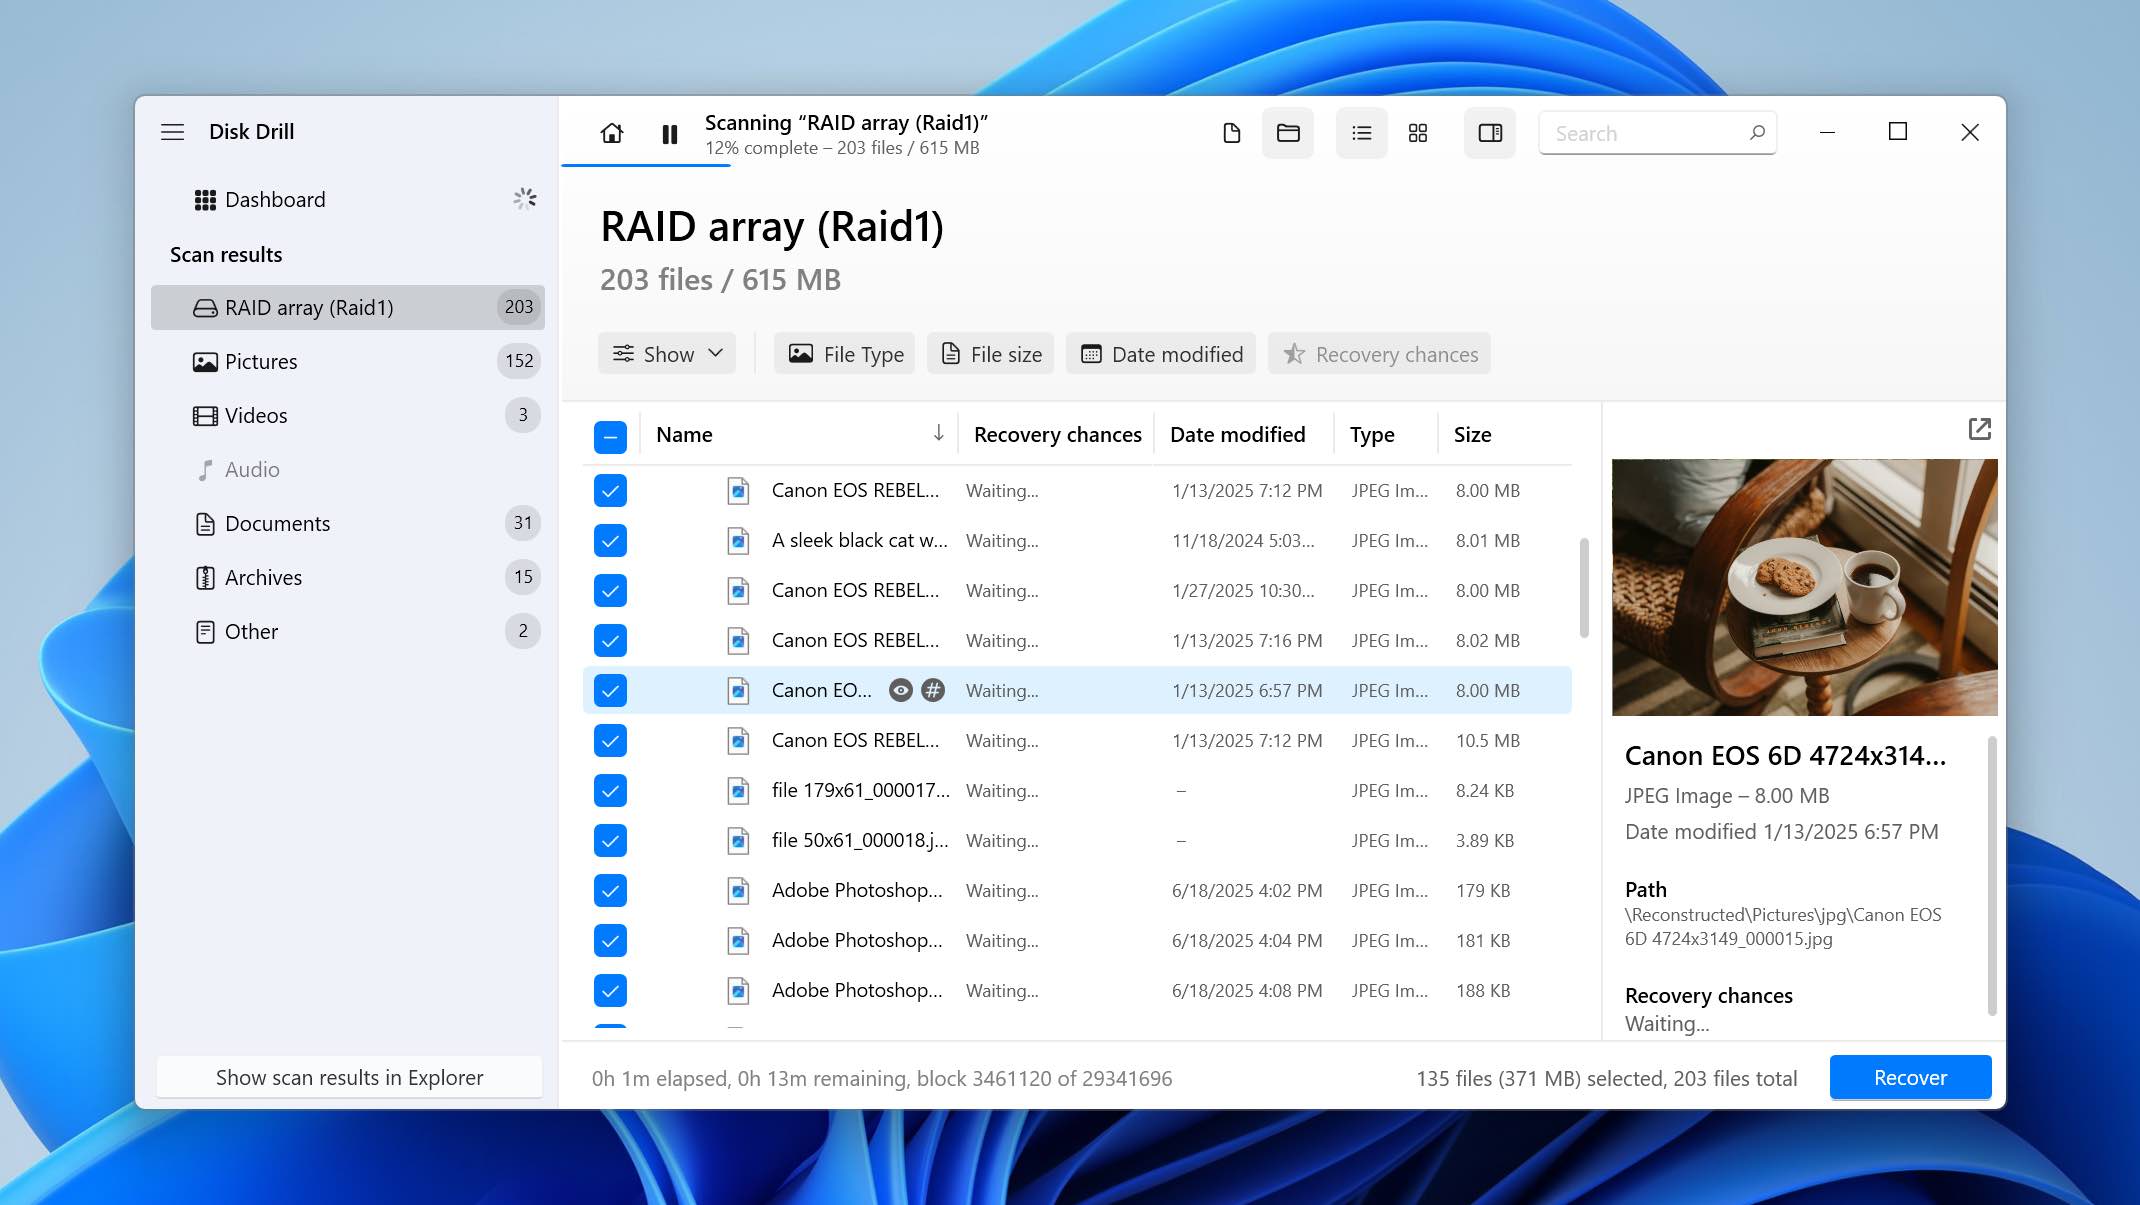
- Disk Drill will immediately begin scanning the drive for recoverable files. You can click Review found items in the top-right corner to view results while the scan continues. However, it’s usually better to wait until the scan finishes. Once completed, Disk Drill will display the recovery chances for each file (High, Average, or Low), which makes it easier to decide which files are worth restoring.
- On the results screen, locate the files you want to recover. You can narrow the list by using filters by file type, modification date, or by entering part of the file name in the search bar.
- When you find a file, you can preview it by clicking the eye icon next to its name (or simply double-clicking it). Once you confirm the file is the one you need, select it by ticking the checkbox next to its name. After selecting all required files, click Recover.
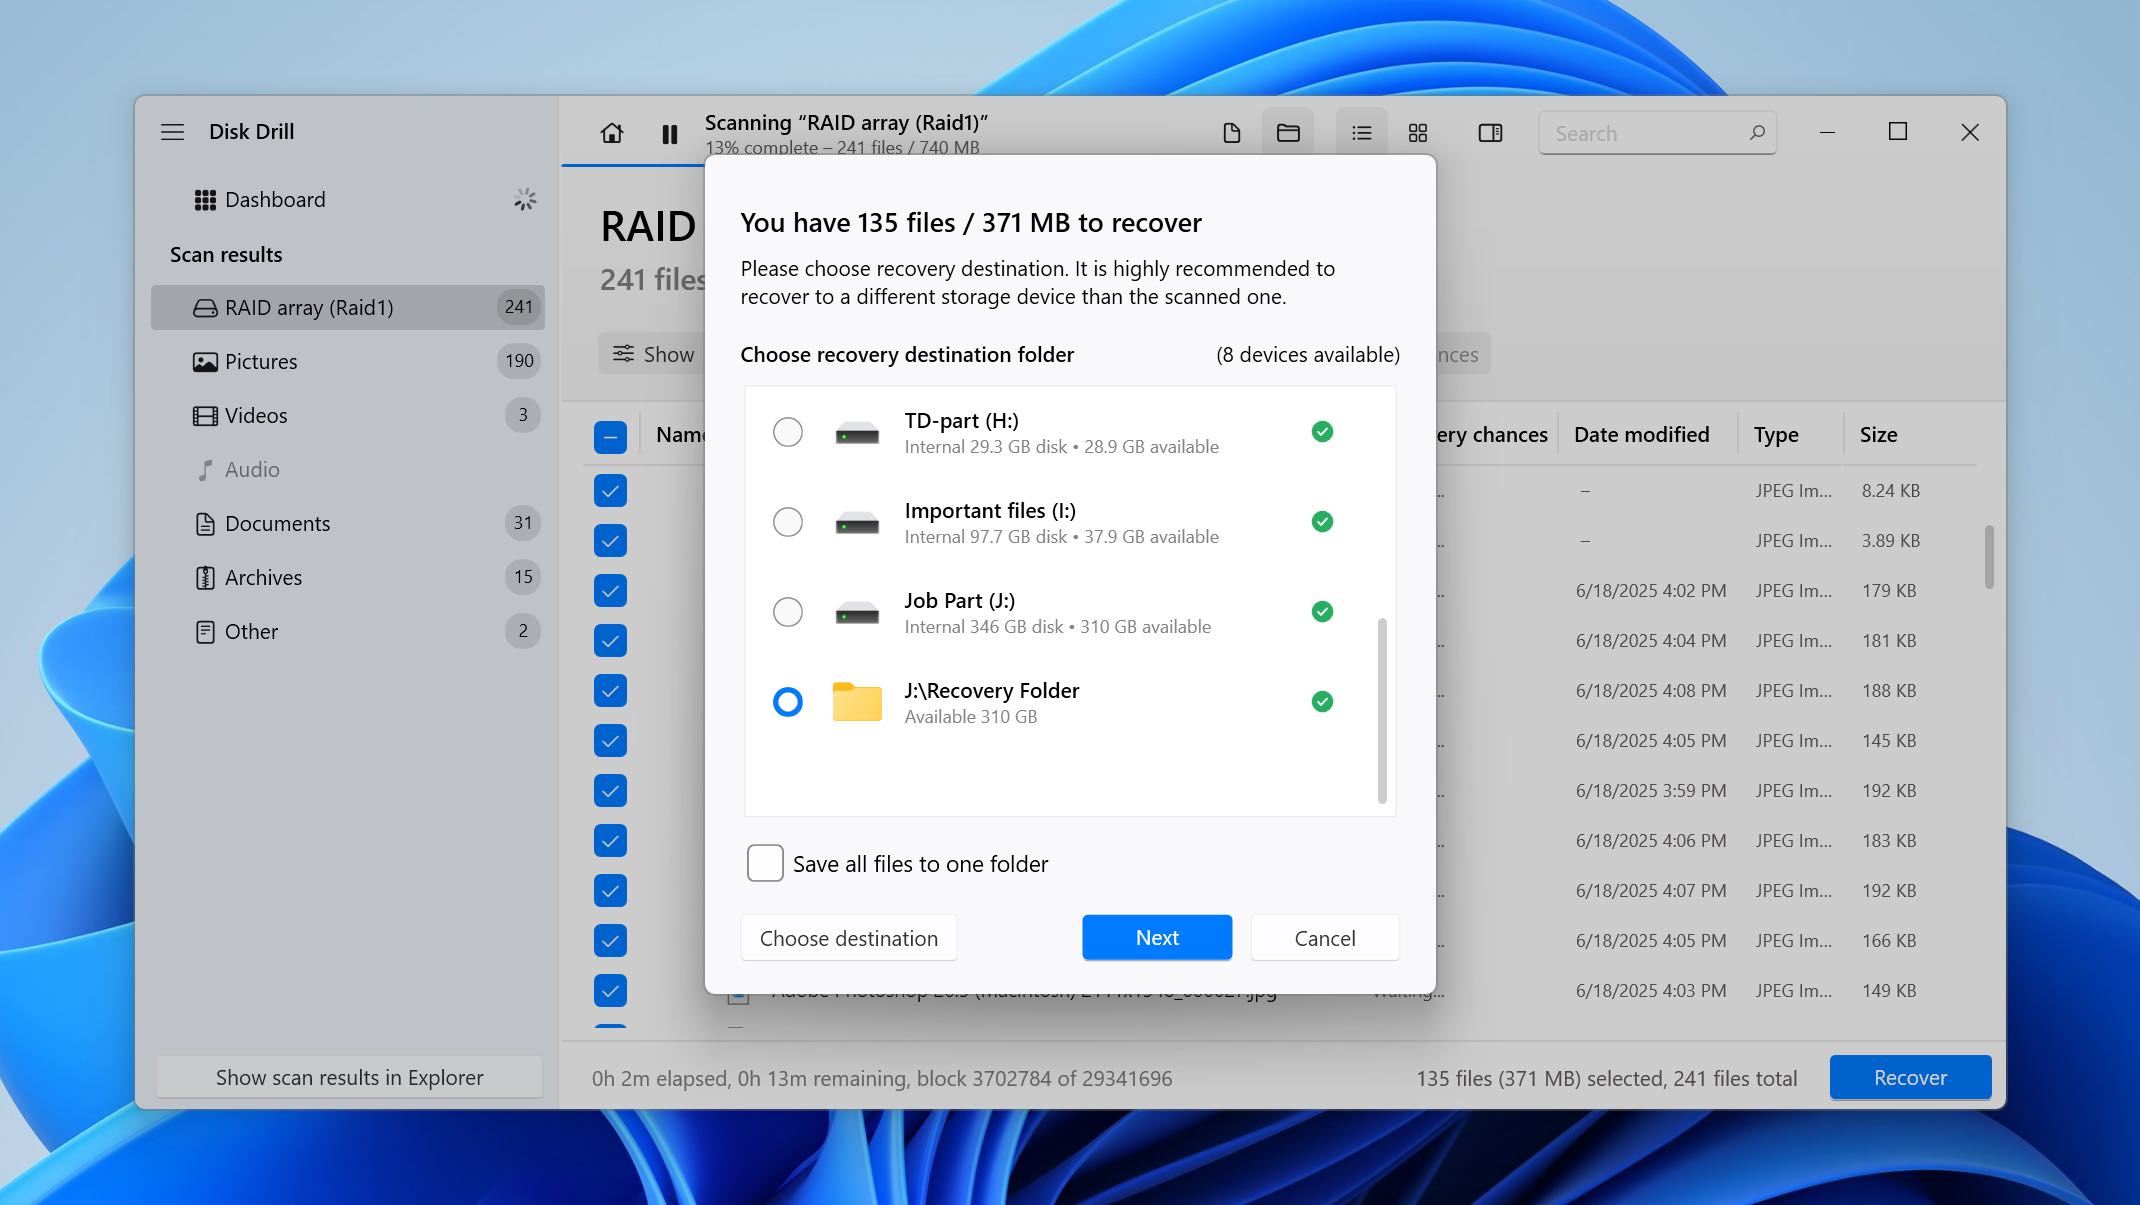
- A small window will appear where you need to choose a location to save the recovered files. This location must be on a different drive from the one you are recovering from. Disk Drill marks suitable destinations with a green indicator, making it easier to select a safe location. Click Next when you’re ready.
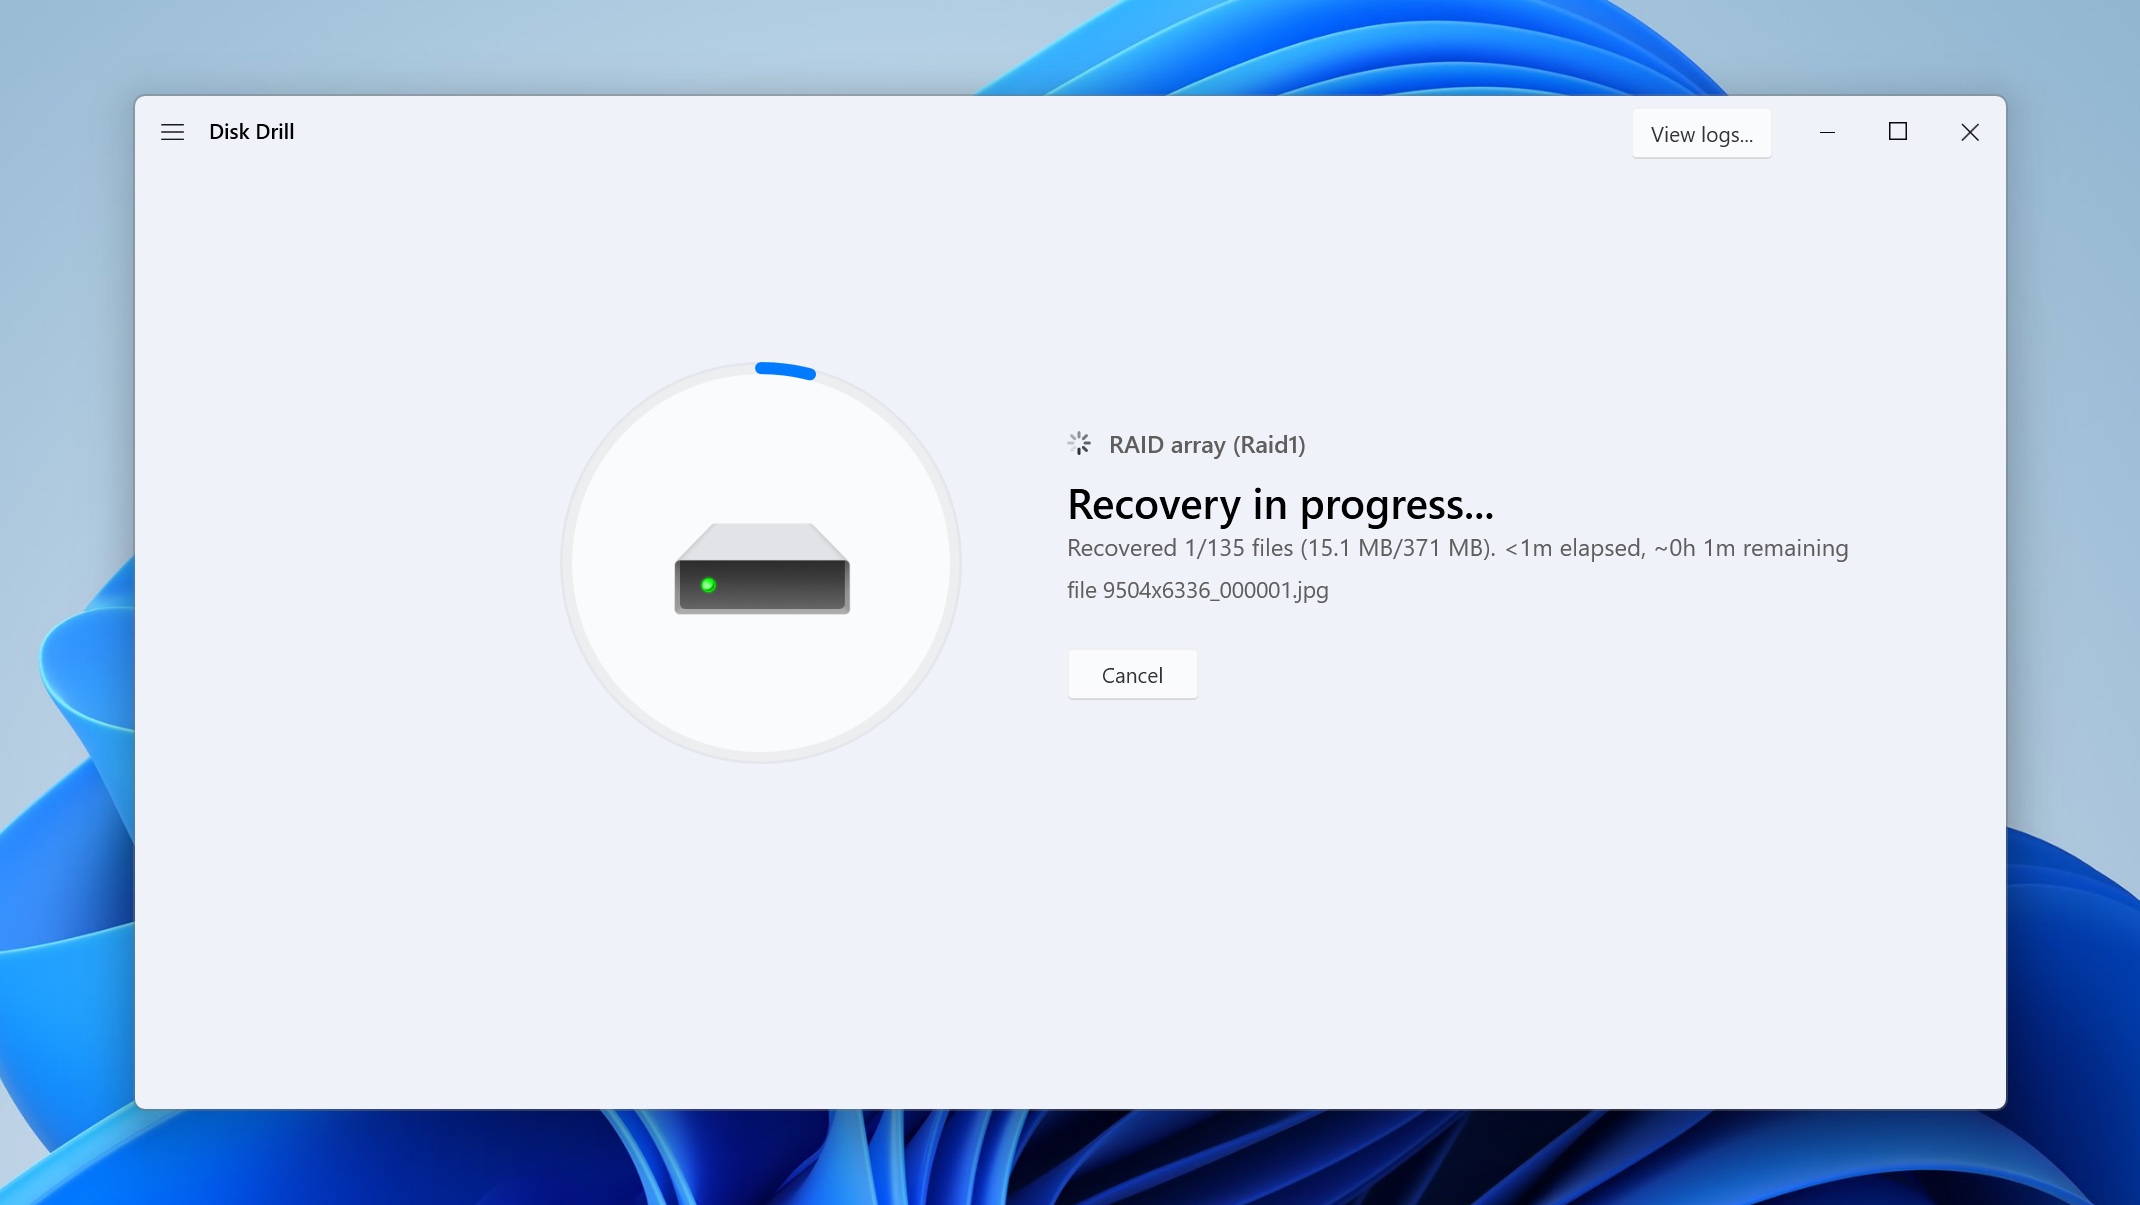
- Disk Drill will begin restoring your selected files. When the process finishes, you will see a completion message and a button labeled Show recovered data in Explorer, which opens the folder containing your recovered files. At this point, you can either review the restored data or close the program and proceed to fix the disk issue itself.
The free version of Disk Drill allows you to recover up to 100 MB of data, so you can test the software’s capabilities with your specific dynamic disk issue before committing to a purchase. You can even preview all recoverable files directly in Disk Drill to be completely sure that your files are intact and recoverable before deciding to upgrade.
Part 2: How to Fix an Invalid Dynamic Disk
Now that we’ve explained how to protect your data, we can move on to the actual fixes for the dynamic disk invalid error. The methods below are presented in order of complexity, starting with the simplest solutions. For that reason, it’s best to follow them in the same sequence.
Fix 1: Check your Windows Edition
As mentioned earlier, dynamic disks are only supported on specific Windows editions. The feature requires Professional, Enterprise, or Server editions of Windows. Home editions don’t support dynamic disks at all. Currently, dynamic disks are supported on:
- Windows 11 Pro/Enterprise
- Windows 10 Pro/Enterprise
- Windows 8.1 Pro/Enterprise
- Windows 7 Professional/Enterprise/Ultimate
- Windows Server 2016, 2019, and 2022
That’s why you should start by checking which version of Windows you’re currently running. Here’s how:
- To get started, click the start button and head to Settings > System > About.
- After that, turn your attention to the Windows specifications section, and you’ll see your Windows version next to the Edition label. If it’s not a part of the list of supported editions listed earlier in this article, then that’s what’s causing your dynamic hard disk problem.

If you have a Windows version that doesn’t support dynamic disks, the only remedy is to install a different version that does. For more recent Windows variants, you’ll need the “Professional” edition or higher.
Fix 2: Reactivate Disk
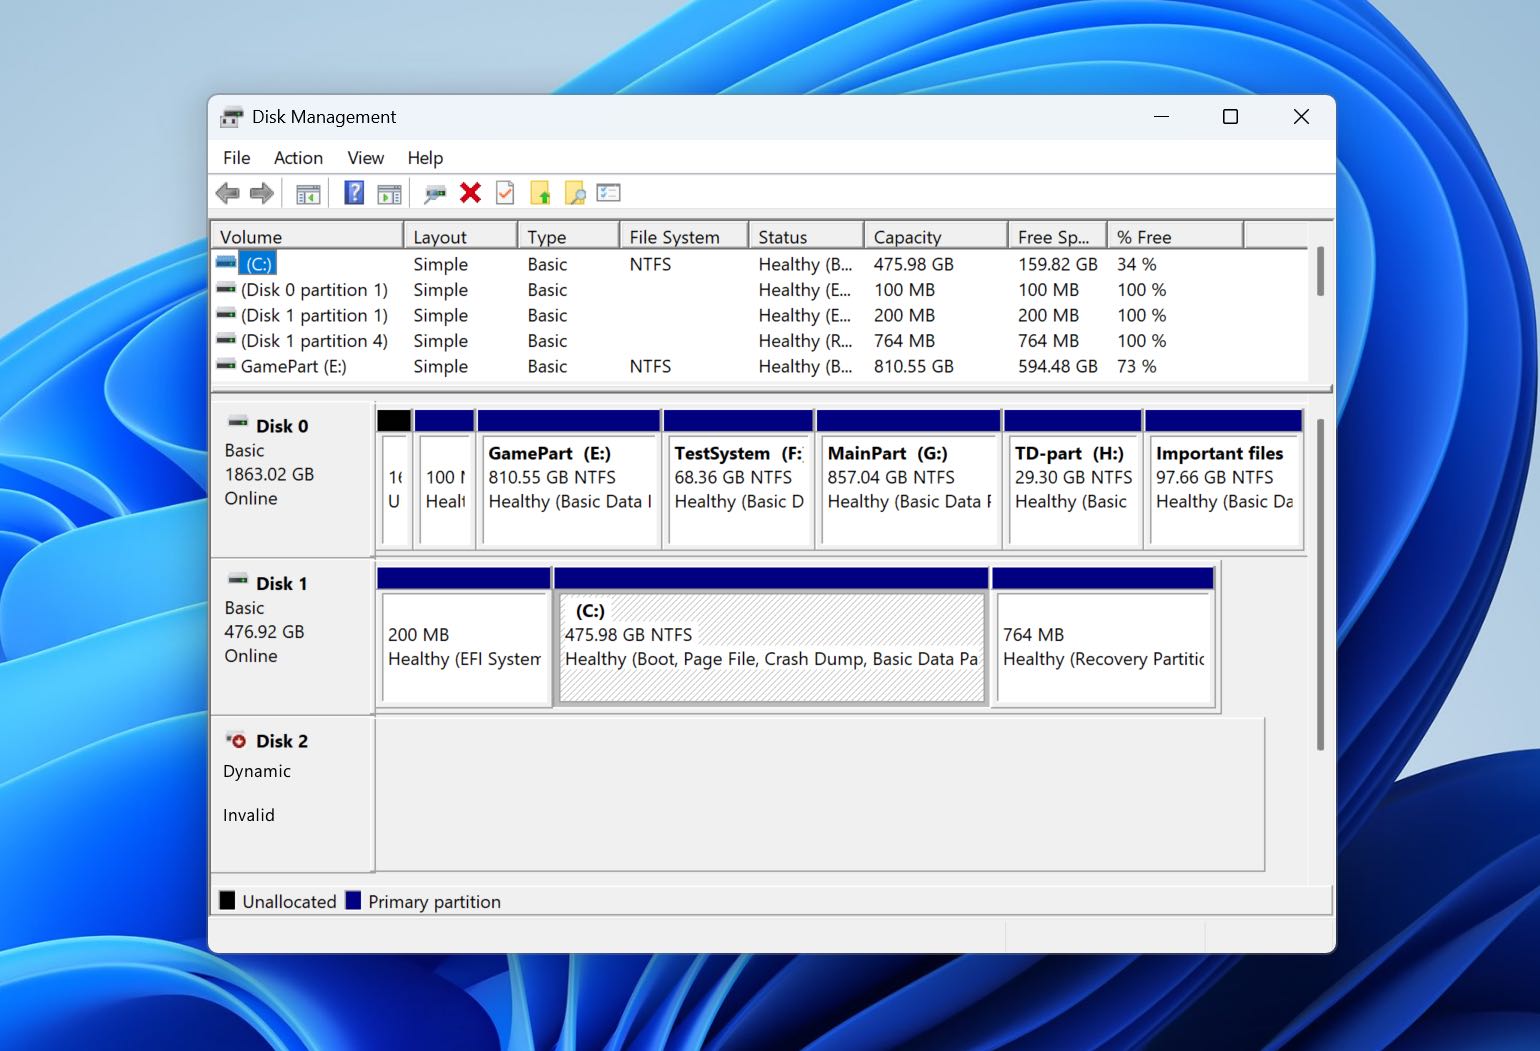
If the problem wasn’t caused by an unsupported Windows edition, the next thing to try is reactivating the disk. In many cases, Windows marks a dynamic disk as Invalid simply because it has been temporarily deactivated due to system changes or minor configuration issues. The easiest way to reactivate the disk is through Disk Management, a built-in Windows utility.
Here’s how to do it:
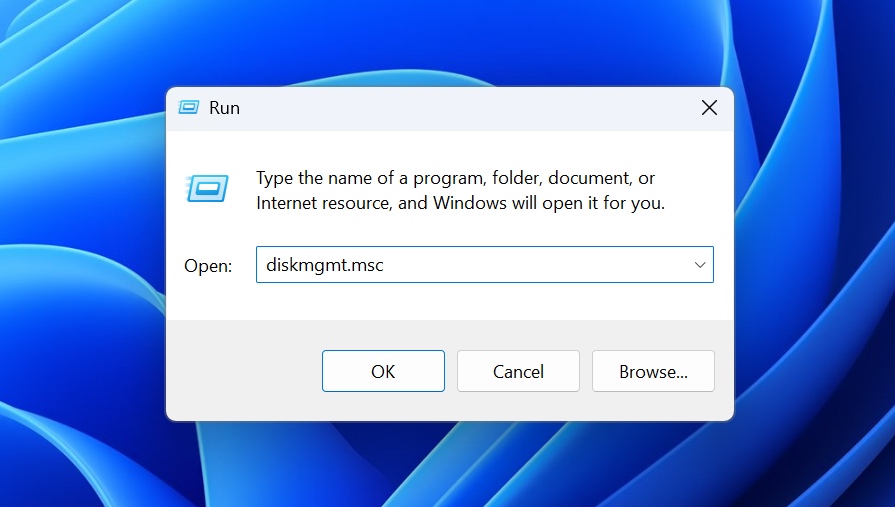
- Press Windows + R to open the Run dialog box.
- Type diskmgmt.msc and press Enter to open Disk Management.
- In the lower part of the window, locate the disk showing the Dynamic Disk Invalid status.
- Right-click the disk and select Reactivate Disk.
If the option is grayed out, it usually means the disk is already active and the problem is caused by something else.
As an alternative, you can perform the same action using DiskPart, a command-line utility built into Windows. In some cases, this method works even when the graphical interface fails because DiskPart provides lower-level access to disk structures and can bypass certain system-level restrictions. However, keep in mind that DiskPart is a powerful tool, and incorrect commands may lead to data loss.
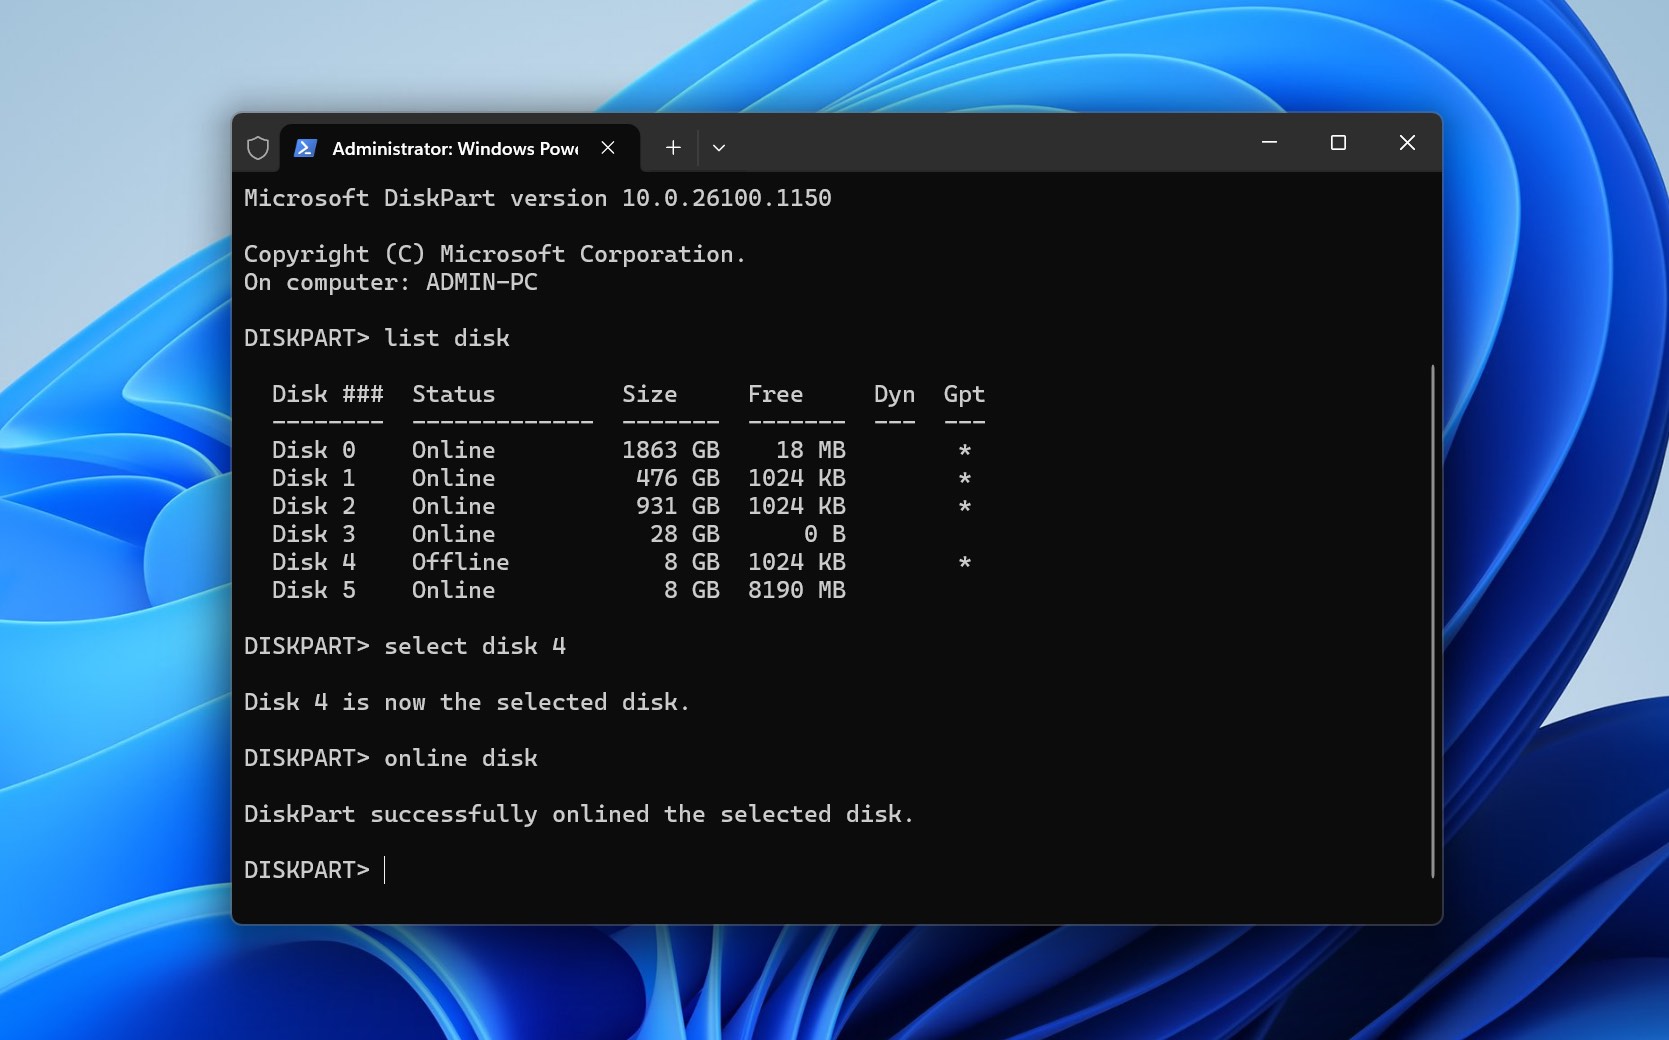
To reactivate the disk using DiskPart:
- Press Windows + R, type diskpart, and press Enter to launch the DiskPart utility.
- Type the list disk command and press Enter. This will display all disks connected to your computer. Identify the disk with the invalid status and note its number.
- Select the affected disk by entering select disk X, where X is the number of the disk you want to reactivate (for example, select disk 0).
- Finally, type the online disk command and press Enter. After completing these steps, Windows should attempt to bring the disk back online.
Fix 3: Manually Mark Disk as Basic via Hex Editor
If the dynamic disk fails to reactivate and shows the this operation is not allowed on the invalid disk pack error, then you can use a hex editor to manually mark the disk as basic and solve the problem without data loss.
Specifically, a hex editor allows us to change a single byte in the disk’s metadata that identifies it as a dynamic disk (value “42”) to the identifier for a basic disk (value “07”). Just like the previous fix, this one requires careful attention to detail because modifying the wrong values in a hex editor can cause serious problems.
If you’re ready, then you can follow these steps:
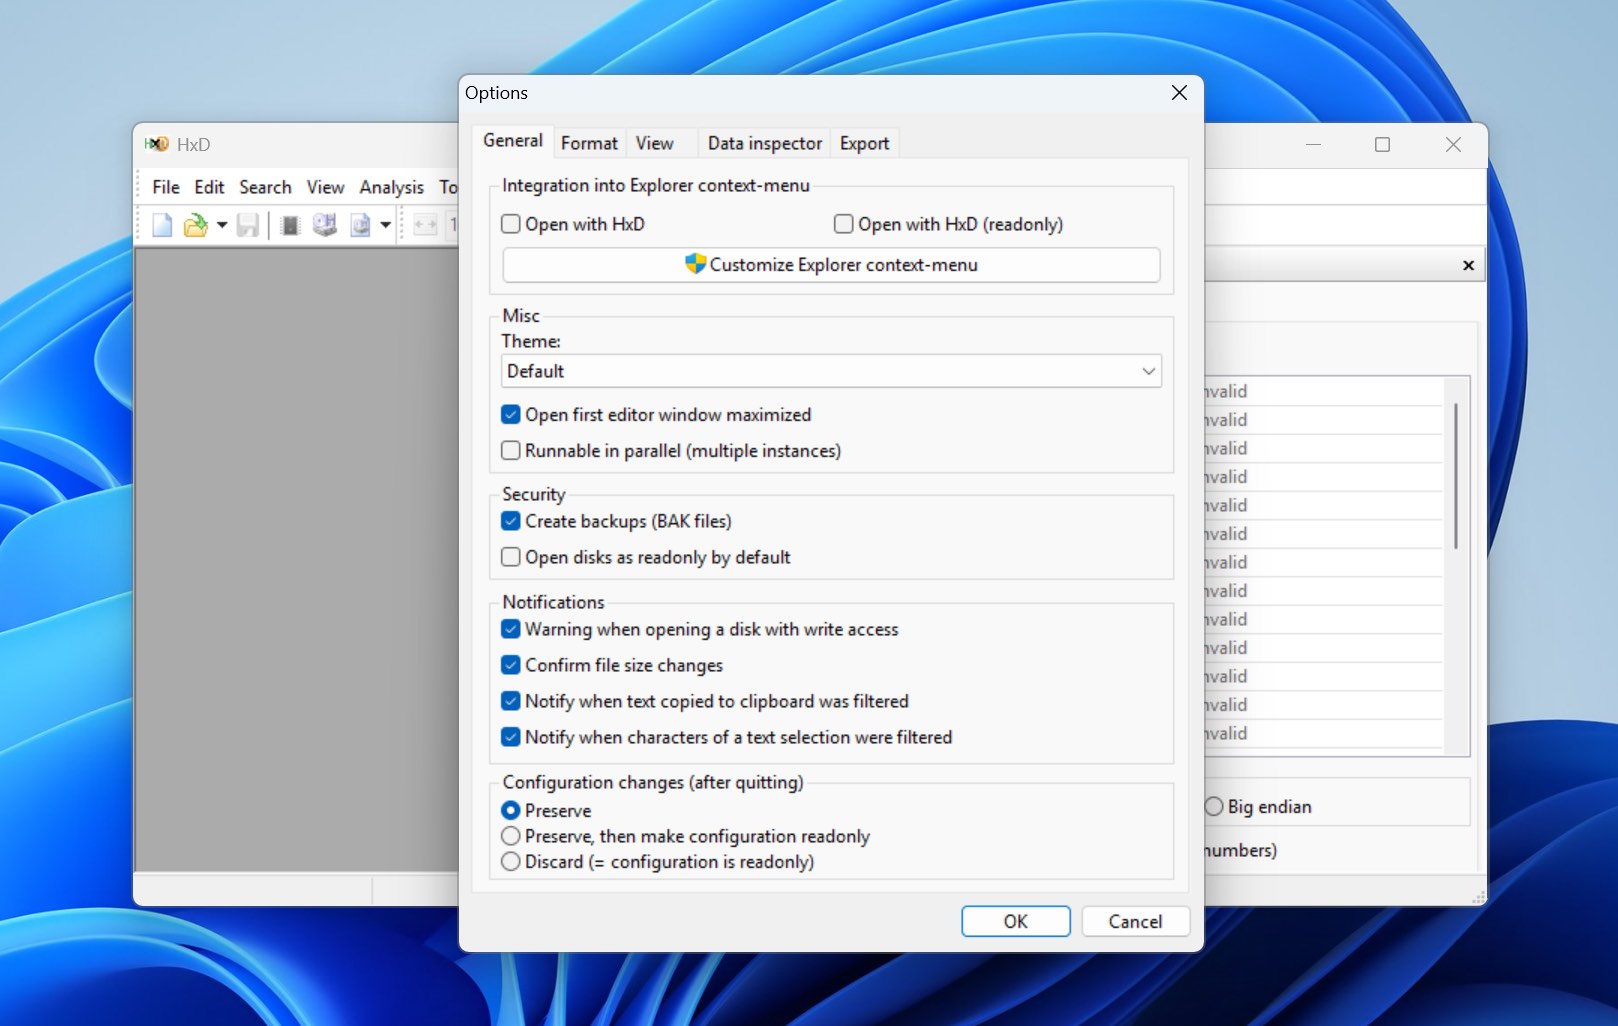
- To get started, download and install a good free hex editor, like HxD.
- Launch HxD as Administrator, then go to Tools > Options and disable Open disks as read-only by default. Click OK to apply the change.
- Press Ctrl + Shift + D to open the Open disk window, then select the physical disk that shows the Dynamic Disk Invalid status.

- Once the disk opens, navigate to offset 000001C2 in the hex view. If the disk was previously converted to a dynamic disk, this byte will typically show the value 42, which indicates a dynamic disk type.
- Change the value 42 to 07, which corresponds to a standard NTFS/basic disk partition type.
- Press Ctrl + S to save the changes, close HxD, and restart your computer.
Note: It may take a few reboots for conversion to be successful. If you still don’t have access to your hard drive after the third reboot, just undo the changes to your disk by editing the “07” back to “42”.
This method only works for MBR disks. It does not apply to GPT disks, which use a completely different partition structure.
Fix 4: Convert to Basic Disk Using Disk Manager
If the previous methods didn’t help and your disk still appears as Invalid in Disk Management, you can try converting it from dynamic to basic directly from the same interface. In many cases, this resolves the problem.
However, there is an important drawback. Converting a disk from dynamic to basic removes all volumes on the disk, which means all data stored on it will be deleted. Because of this, make sure you recover your files first. If you haven’t done that yet, go back to Part 1 of this guide and restore your data before continuing with the steps below.
Here’s how to convert the disk using Disk Management:
- Press Windows + R to open the Run dialog.
- Type diskmgmt.msc and press Enter to open Disk Management.
- In the lower section of the window, locate the disk that shows the Invalid Dynamic Disk status.
- If the disk contains volumes, right-click each volume and select Delete Volume until the disk shows Unallocated space.
- Once all volumes are removed, right-click the disk label on the left side (for example Disk 1) and select Convert to Basic Disk. After the conversion finishes, the disk should return to a basic disk configuration, and you can create new partitions and restore your recovered data back to it.
Conclusion
Now you know what to do if you encounter the dynamic disk invalid error. However, you probably don’t want to face this problem again. To reduce the chances of it happening in the future, try to avoid unnecessary disk configuration changes, make sure you use compatible Windows editions when working with dynamic disks, and always keep regular backups of important data. It’s also a good idea to safely disconnect external drives and periodically check your disks for errors, since file system corruption can sometimes trigger issues like this.
At the beginning of this guide, we mentioned that this isn’t the most common disk-related problem in Windows. Still, it’s not the only one you might run into. Just in case, here are a few other guides that explain how to deal with different disk and storage issues on Windows. You may want to save them for future reference:
- How to Fix Volume Does Not Contain a Recognized File System Error
- You Need to Format the Disk Before You Can Use It: How to Fix
- How to Fix a Disk that is Unknown and Not Initialized
- What Is Raw Read Error Rate of a Hard Drive and How to Interpret It


