


Accidentally emptied the Trash on your Mac and now can’t find an important file? Take a deep breath – emptying the Trash doesn’t always mean your files are gone without a trace, and in many cases, you can still recover them using a backup or specialized recovery software, depending on your situation.
So, if you’ve accidentally emptied the Trash on your Mac, here’s what to do next: read through this guide, pay close attention to the recovery chances table below, and follow the steps for the chosen method
Can You Recover Deleted Files From Trash on Mac?
Yes, in many cases you can recover files from an emptied Trash on Mac. Your chances of success depend on how the files were deleted, what type of drive your Mac uses, and whether you have a backup. To help you choose the right recovery method, start with the table below.
| Your situation | Best method | Chance of success |
| The files are still in the Trash | Simply open the Trash, select the missing files, and click Put Back to restore them to their original folder. | Very high |
| You have a Time Machine backup from before the deletion | Restore the files using Time Machine | High |
| You don’t have a backup and emptied the Trash recently | Check for Time Machine local snapshots first. If none are available, try data recovery software before the deleted files become overwritten. | Medium to high |
| You don’t have a backup, your Mac uses an SSD, and some time has passed | Try data recovery software immediately. SSDs use TRIM, a feature that can permanently erase deleted data and significantly reduce your recovery chance (we’ll explain this in more detail in Method 1). | Low to medium |
| The drive doesn’t mount, makes unusual noises, or isn’t detected at all | Contact a professional data recovery service. | Varies |
Before starting recovery, make sure the Trash was actually emptied. If you can’t locate the Trash icon on your Dock, check out the section titled What to Do If the Trash Icon Disappeared? for quick fixes. Once you’ve confirmed the files are gone, proceed with the recovery methods below.
Method 1: Recover Emptied Trash on Mac with Software
If you don’t have a backup, data recovery software is your only chance of recovering files from an emptied Trash. That’s because emptying the Trash doesn’t immediately remove the files themselves, and macOS simply marks their storage space as available for new data. Until that space gets reused, the deleted files can often still be recovered.
The biggest exception is SSD storage and a feature called TRIM. It helps SSDs maintain their performance by proactively erasing deleted data blocks. Once this happens, the deleted files are usually gone for good. Since virtually all modern Macs use SSDs, it’s important to start the recovery process as soon as possible.
Besides acting quickly, there are several other factors that can affect whether data recovery software will be able to restore your files:
| Factor | Impact on recovery |
| Data overwriting | Every new file you save, app you install, or background task that writes data to the drive can overwrite deleted files and reduce your chances of recovery. |
| Drive type (HDD vs SSD) | Older Macs with hard drives typically provide a larger recovery window. Modern Macs use SSDs with TRIM, which can permanently erase deleted data within minutes or hours. |
| Mac chip (M1-M5, T2) | Newer Macs require recovery software with Apple Silicon and T2 support. Not all recovery tools can access these drives due to additional security restrictions. |
Taking all of these factors into account and after testing numerous Mac data recovery software ourselves, we found Disk Drill to be the most reliable option for recovering files from an emptied Trash.
Disk Drill is among the Mac data recovery software that works on Macs with M1, M2, M3, M4, M5 or T2 chips since it has its own kernel extension. Moreover, it supports almost any file type and format (video, audio, archive, images, documents, etc.) and can be used by anyone regardless of their technical knowledge thanks to its user-friendly design. Disk Drill also includes several useful tools for everyday Mac maintenance, such as drive health monitoring and disk image creation. We cover all of these extra features in our Disk Drill review, so give it a look if you’re curious about what else the software can do.
📝 Note: If you’re using a Mac with Apple Silicon or T2 chip, you may need to install Disk Drill’s system extension. See the installation guide for detailed instructions.
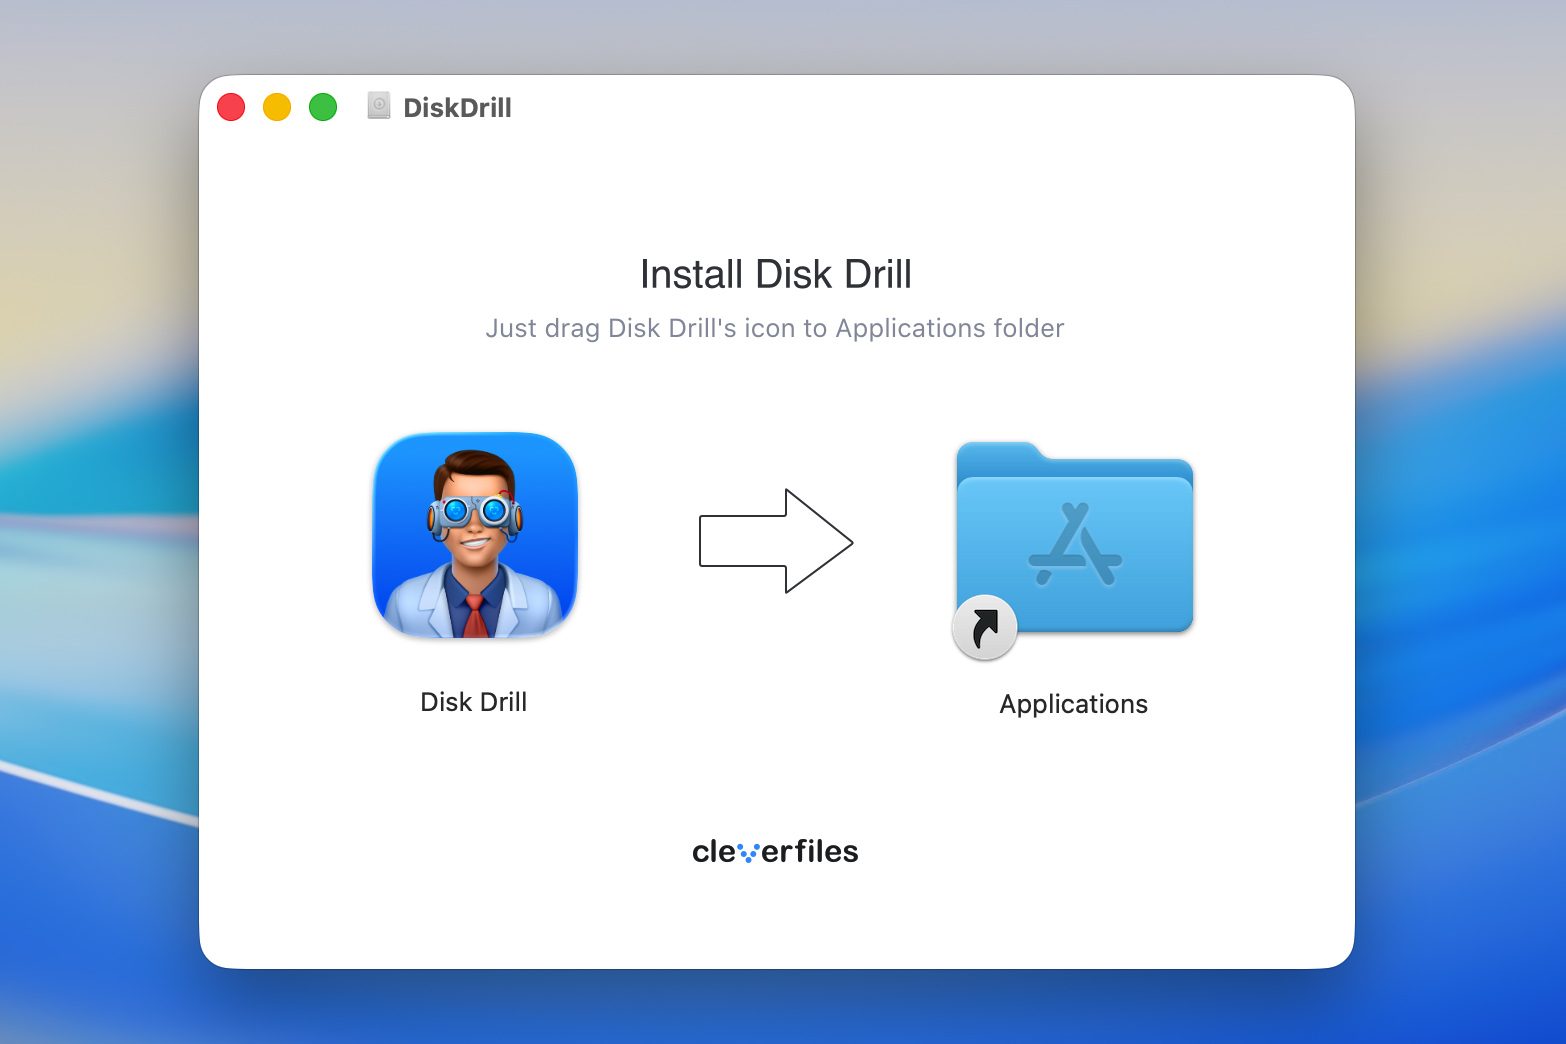
- Download Disk Drill for Mac and follow the onscreen instructions to install it on a drive different from where your data was lost. You can then launch the application.
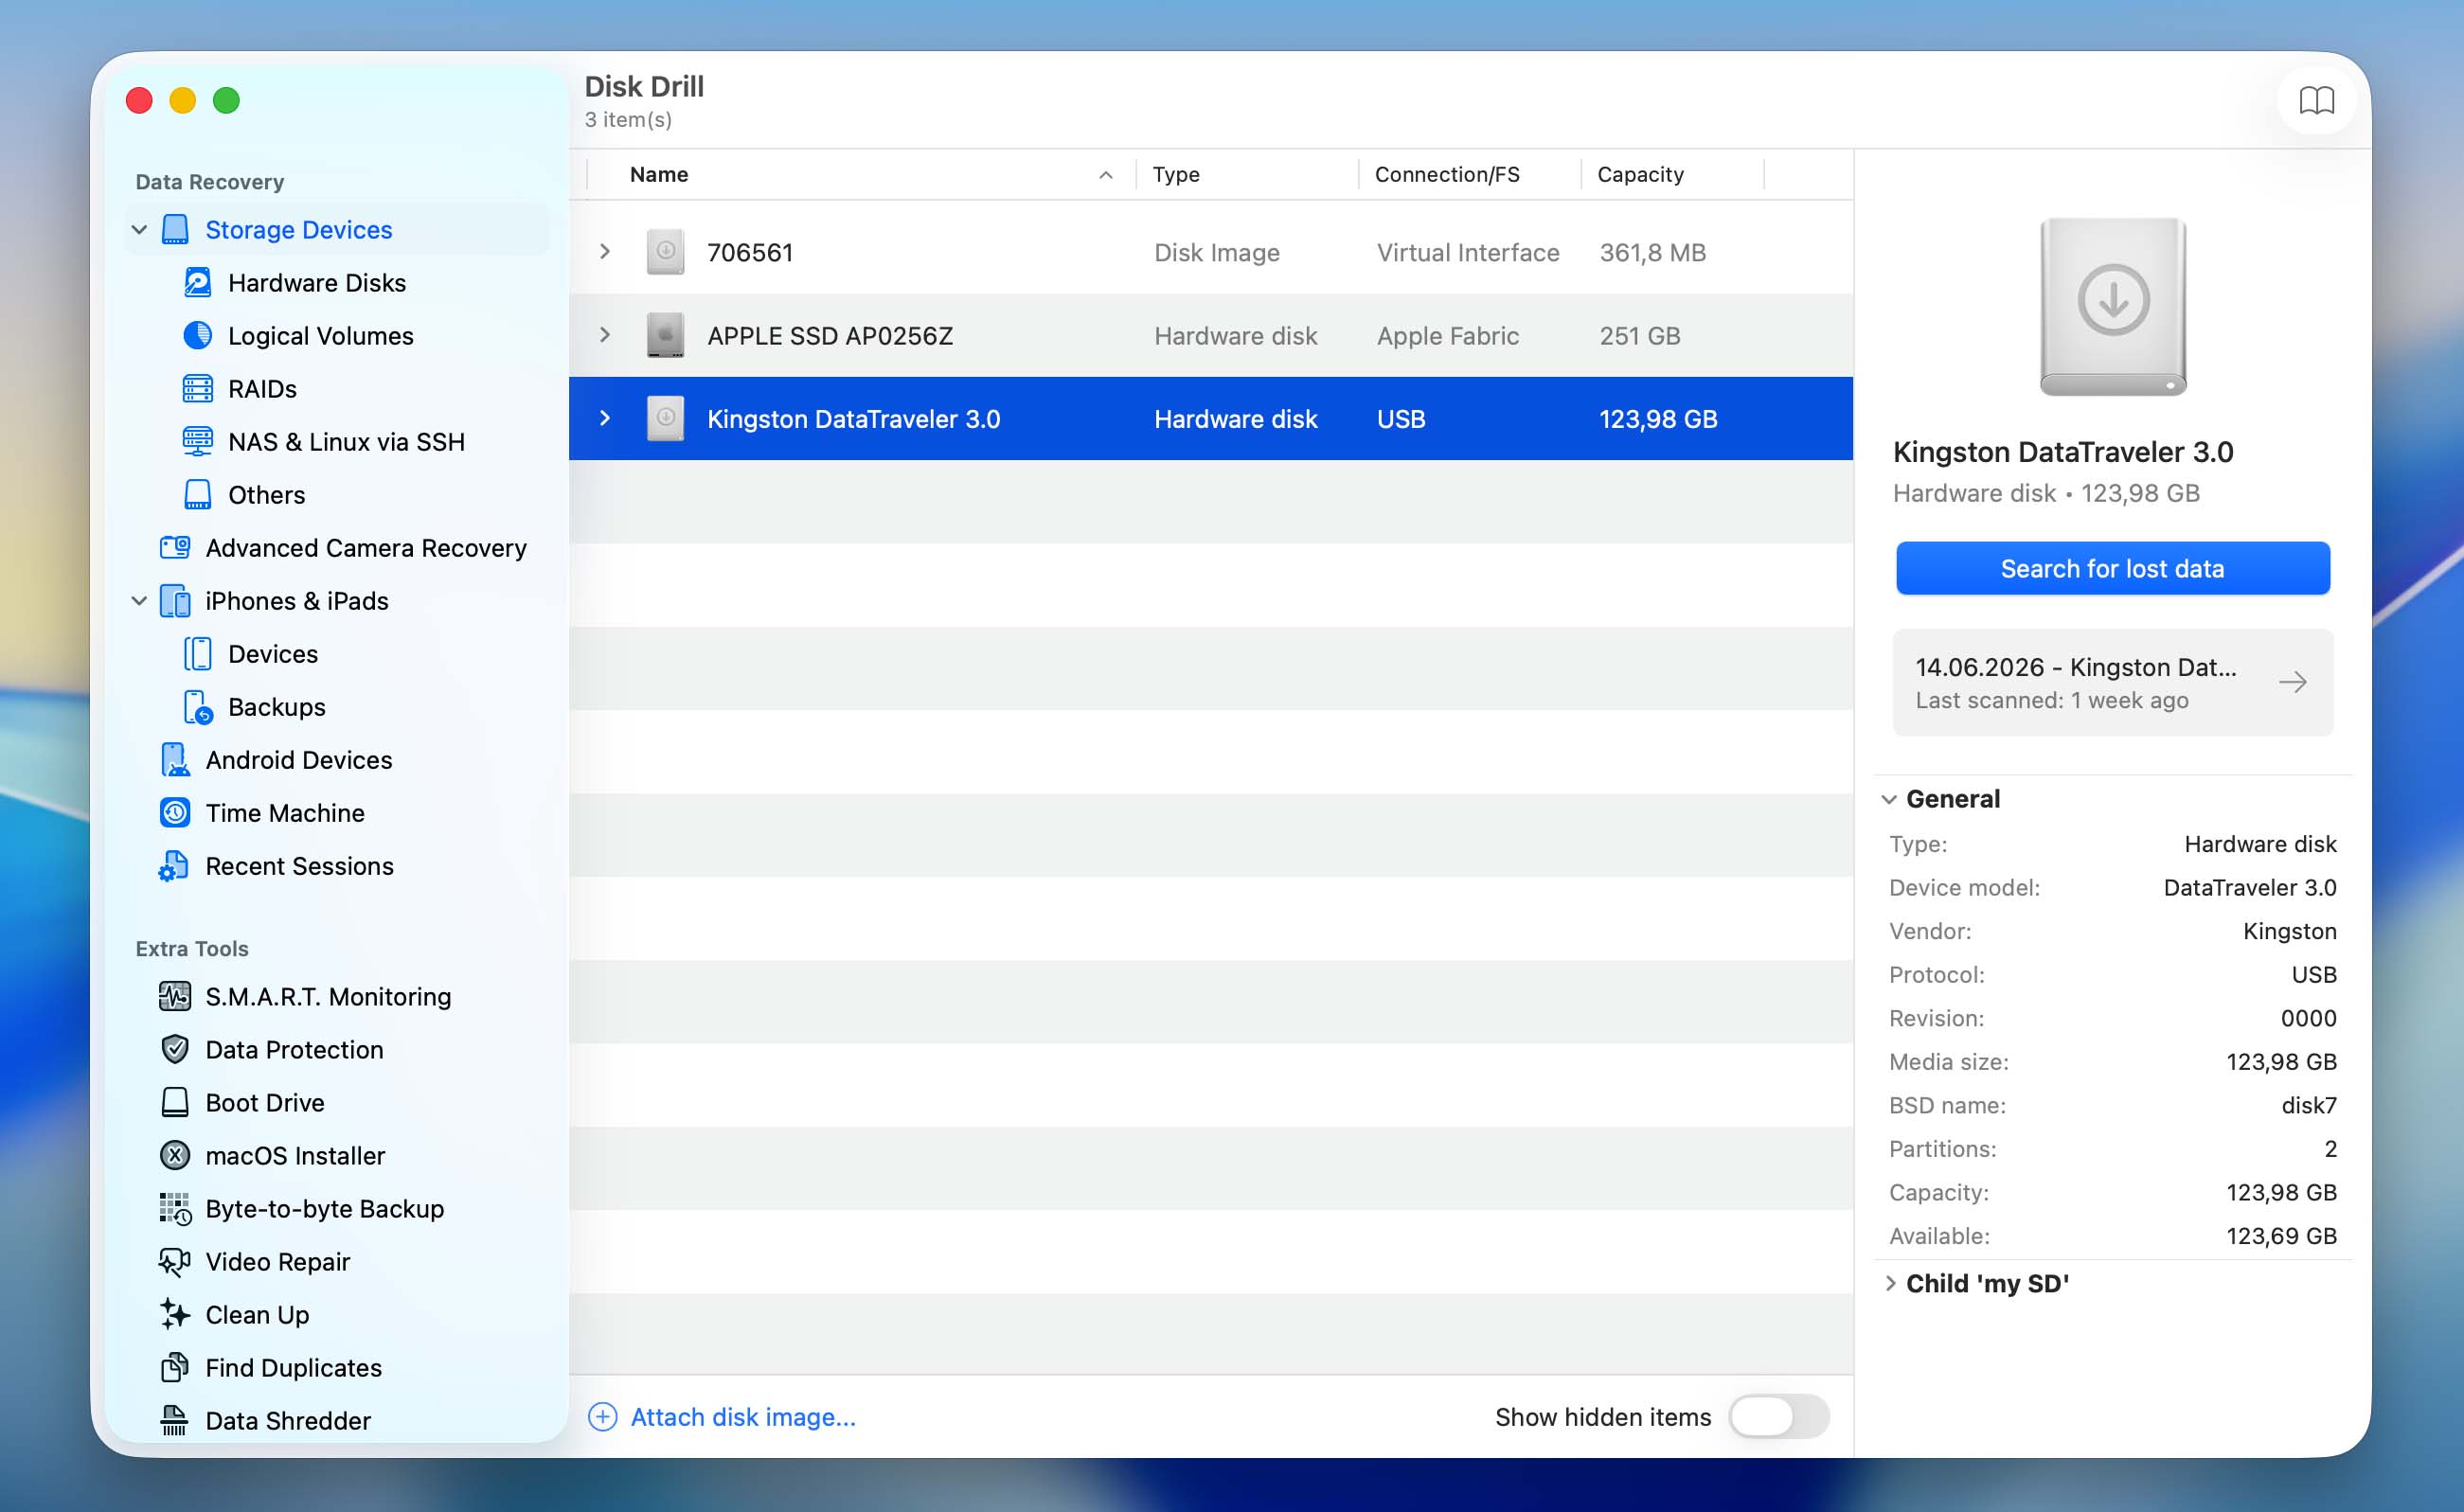
- Choose the hard drive which contained the deleted files from the list of available devices. Click Search for lost data to initiate the scan.
- Then select your scan type:
- Universal Scan (recommended): Best for most file types and general recovery from emptied Trash.
- Advanced Camera Recovery (ACR): Use this as a second option if your Trash contained videos originally stored on SD cards from cameras or drones, and Universal Scan didn’t fully recover them.
- Wait for the scan to finish and click Review found items.
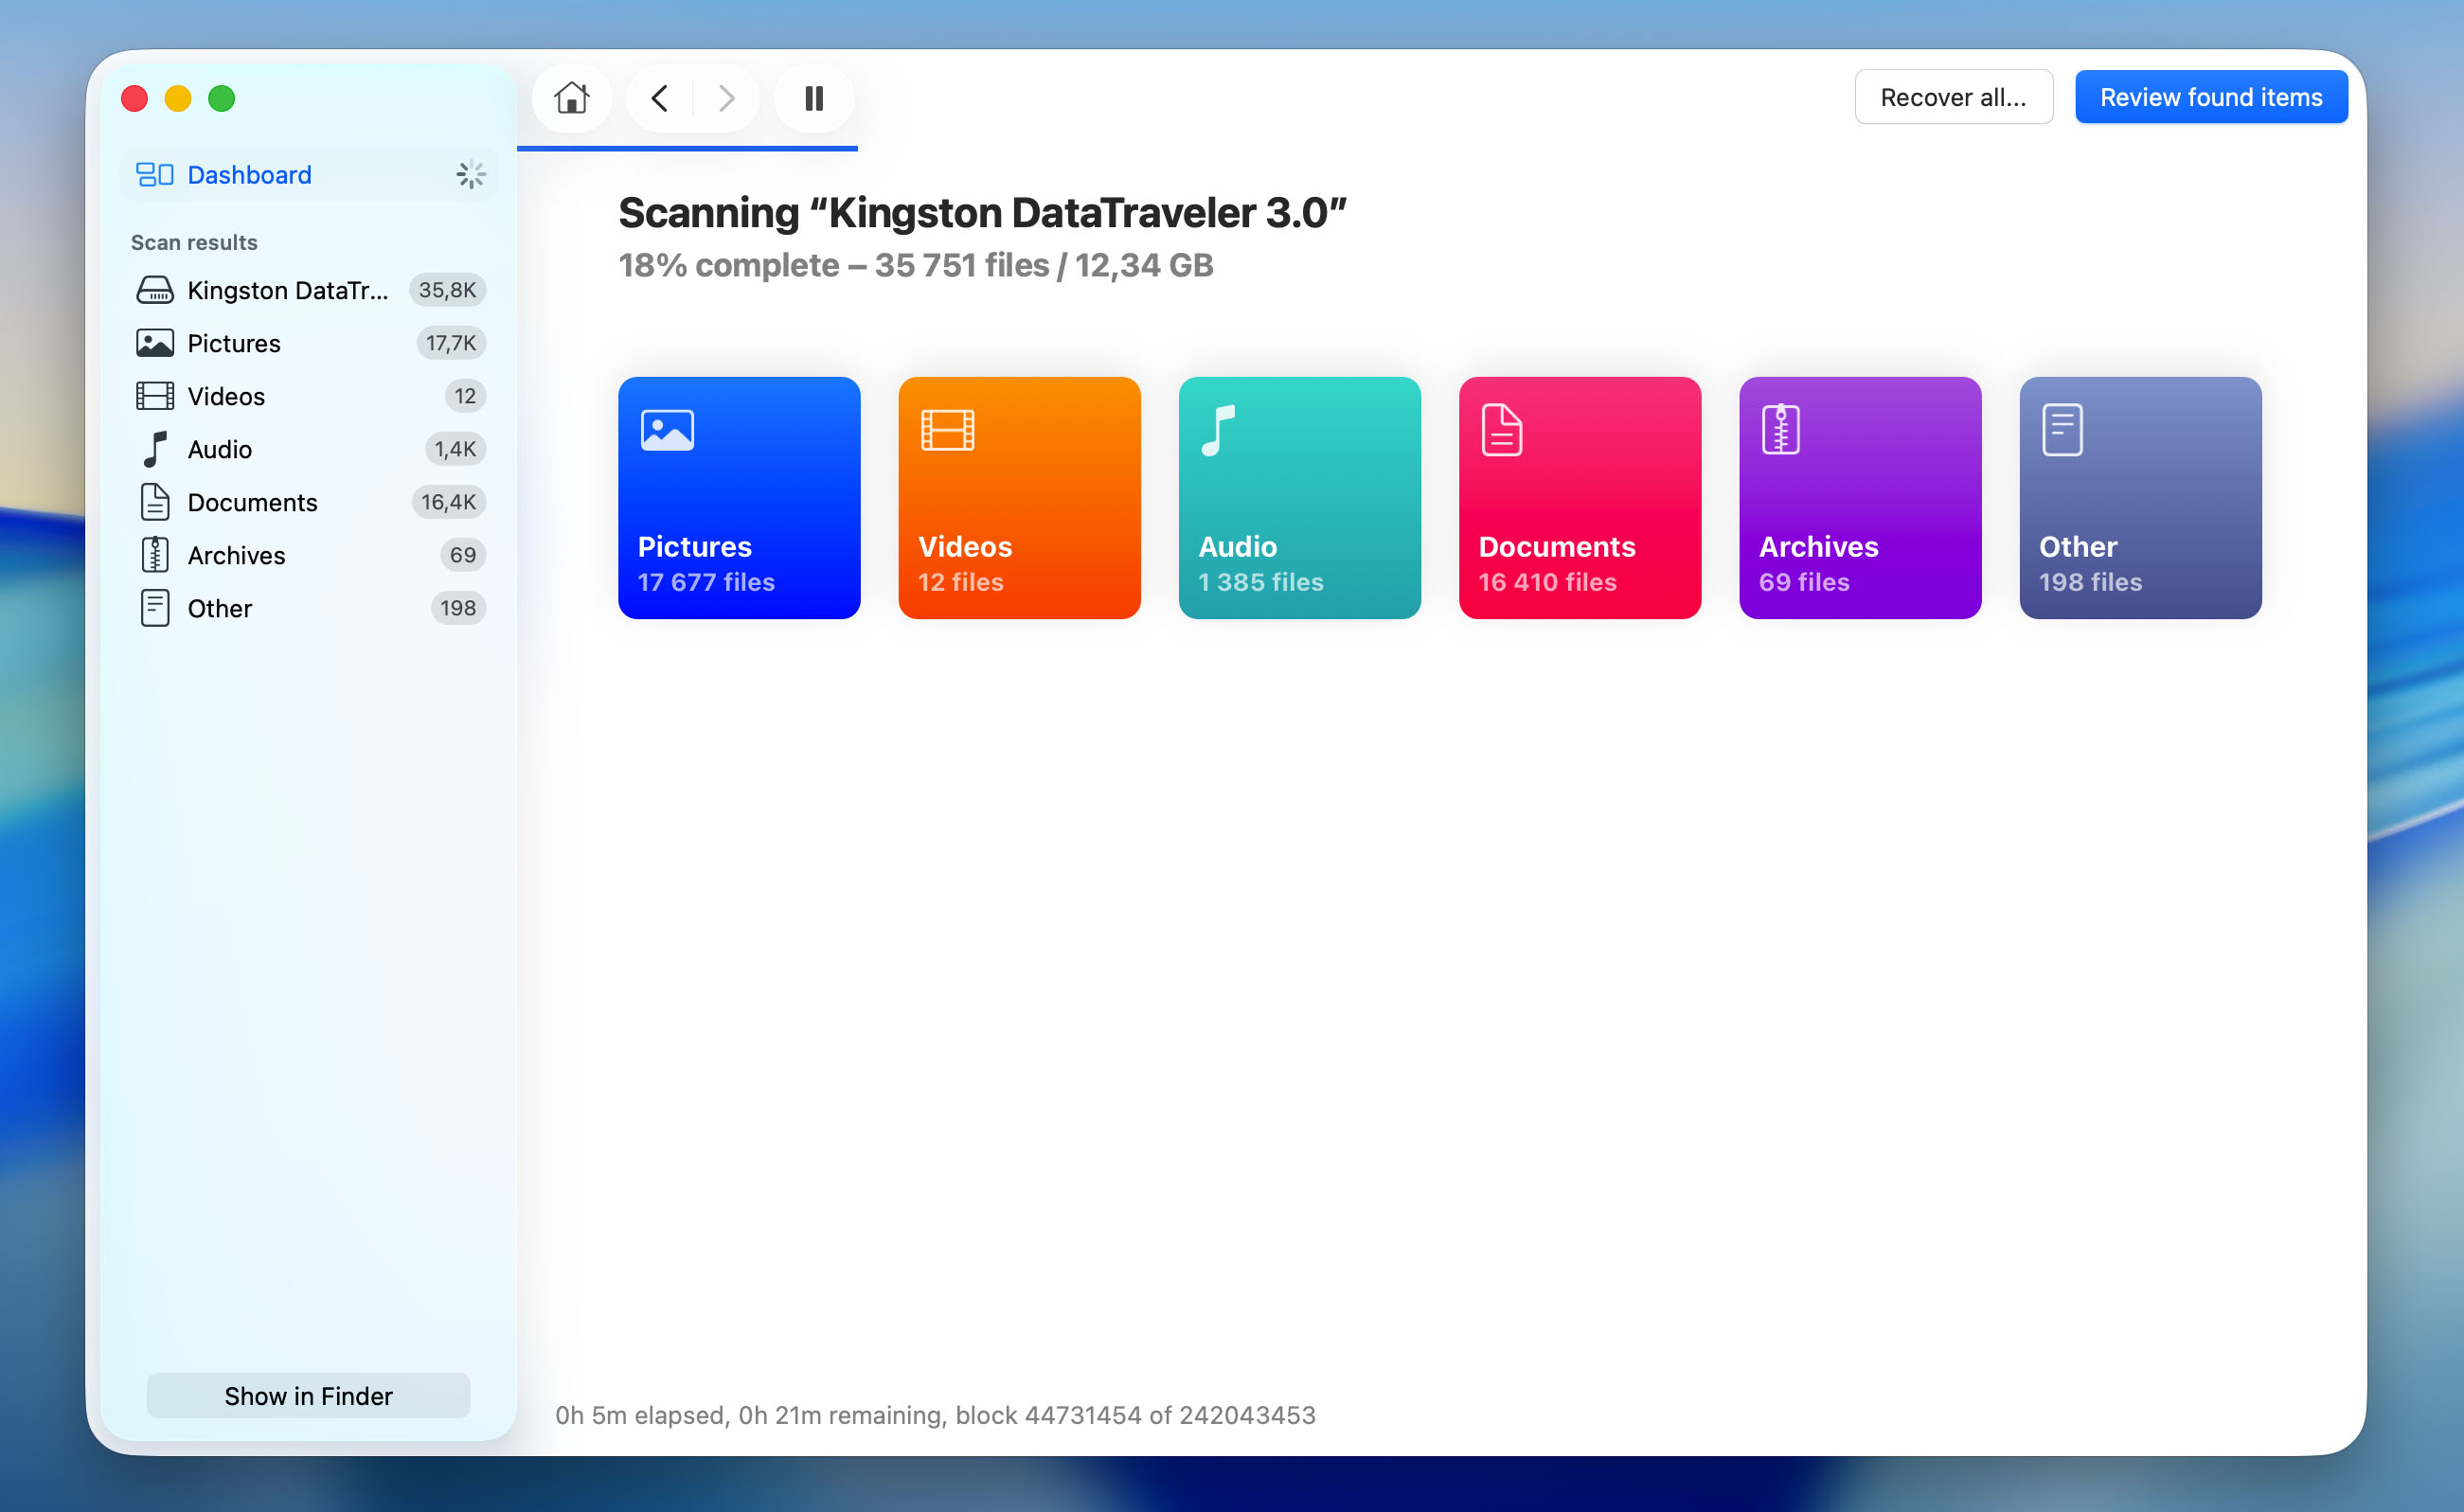
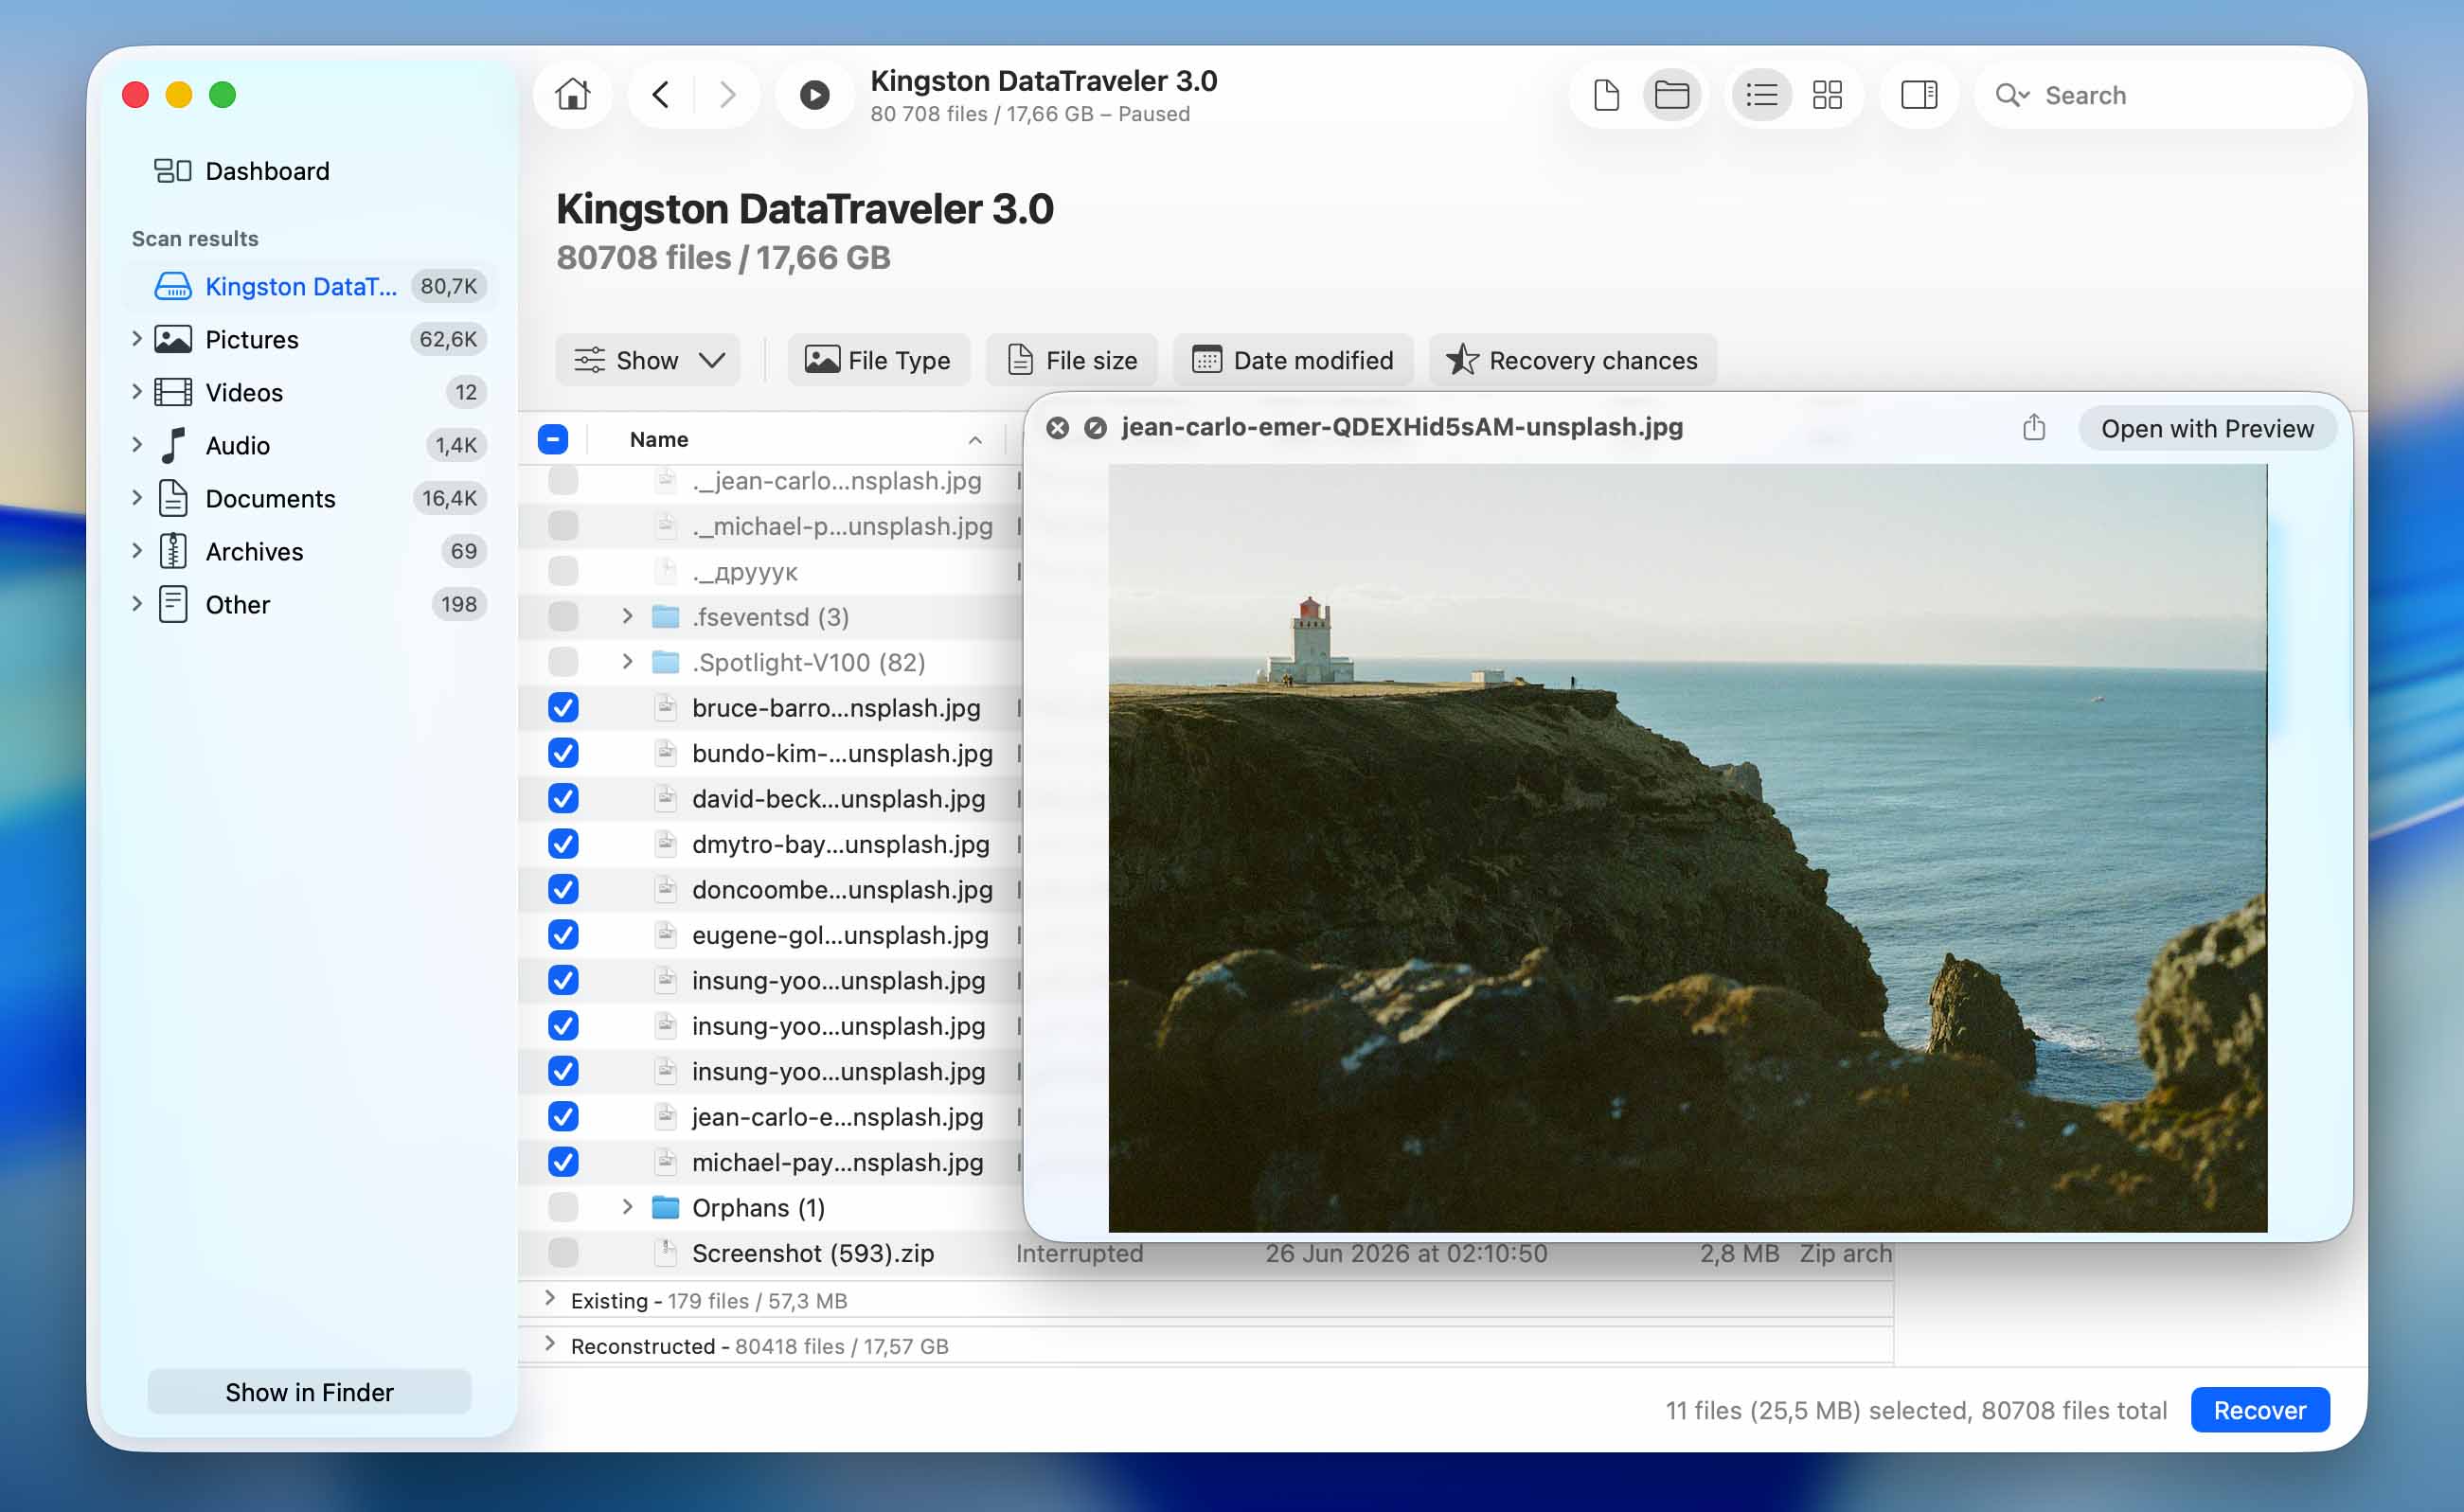
- Use the filters at the top of the scan results to narrow down your search by file type, size, or date. If you remember the name of the deleted file or its format, use the search field at the top-right.
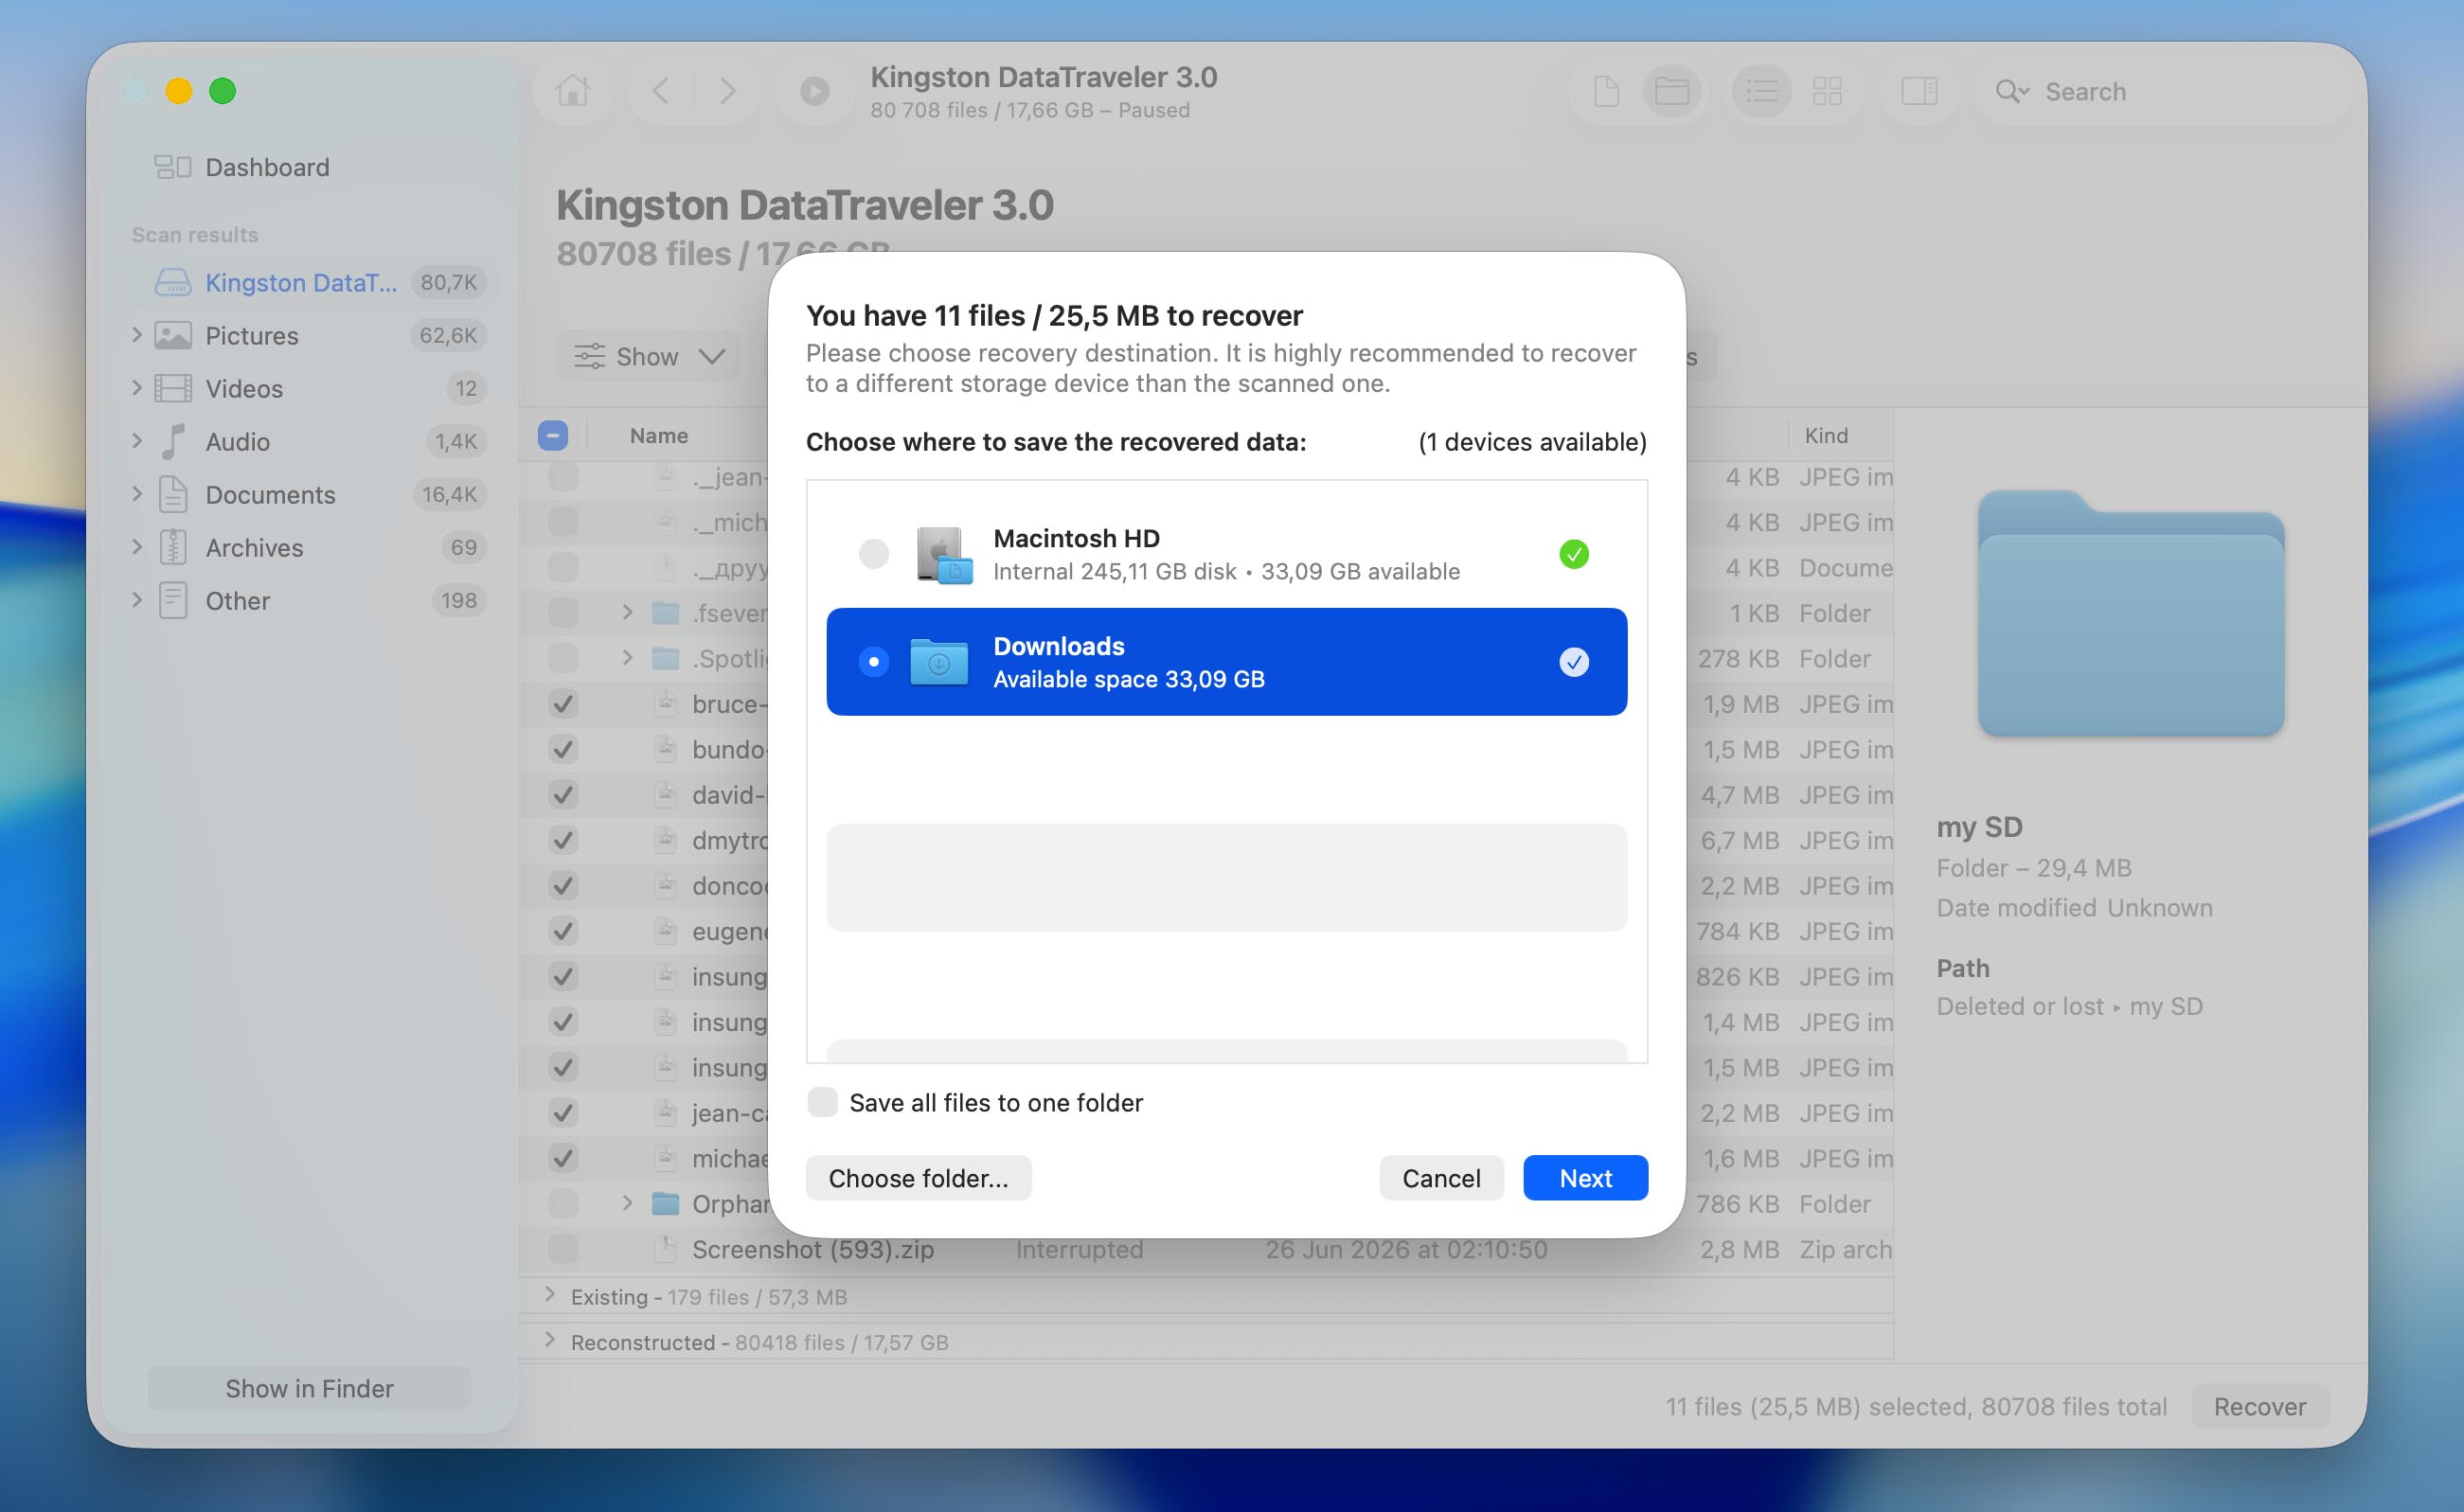
- Click any file to preview it and verify it’s the one you need. Then, select all files you wish to restore and click the Recover button.
- Choose a recovery destination (to avoid data overwriting, select a folder on a different drive from where the files were originally stored) and click Next to confirm.
Disk Drill can be downloaded and used to scan your drive for free. However, to actually recover files from the emptied Trash on Mac, you’ll need to upgrade to the Pro version.
Method 2: Restore Lost Files From an Emptied Trash Using Backups
If you regularly back up your Mac, recovering files from an emptied Trash can be much easier than using data recovery software. In many cases, you can simply restore an older copy of the missing files without worrying about data overwriting, TRIM, or compatibility issues.
The exact recovery steps depend on the backup solution you’re using. Below, we’ll cover the most common options, starting with Time Machine.
Option 1: Recover Emptied Trash With Time Machine
If you have Time Machine enabled on your Mac, you should be able to retrieve the deleted files from one of the backups or system snapshots that were made by the tool. This process is fairly easy and quite safe. All you need is the external hard drive with the Time Machine backups (if you were using one to backup your Mac) and your computer.
- Connect the drive containing your Time Machine backups to your Mac (if you used an internal drive for the backups, skip this step).
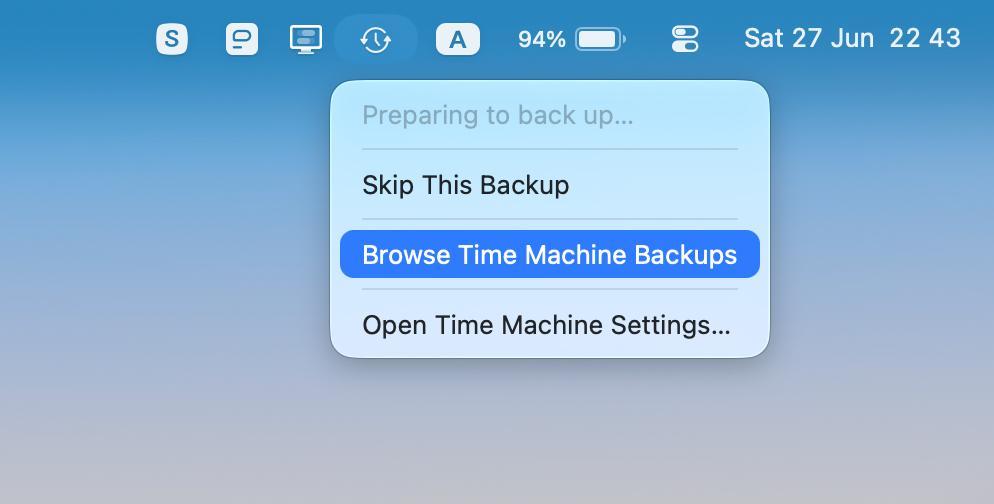
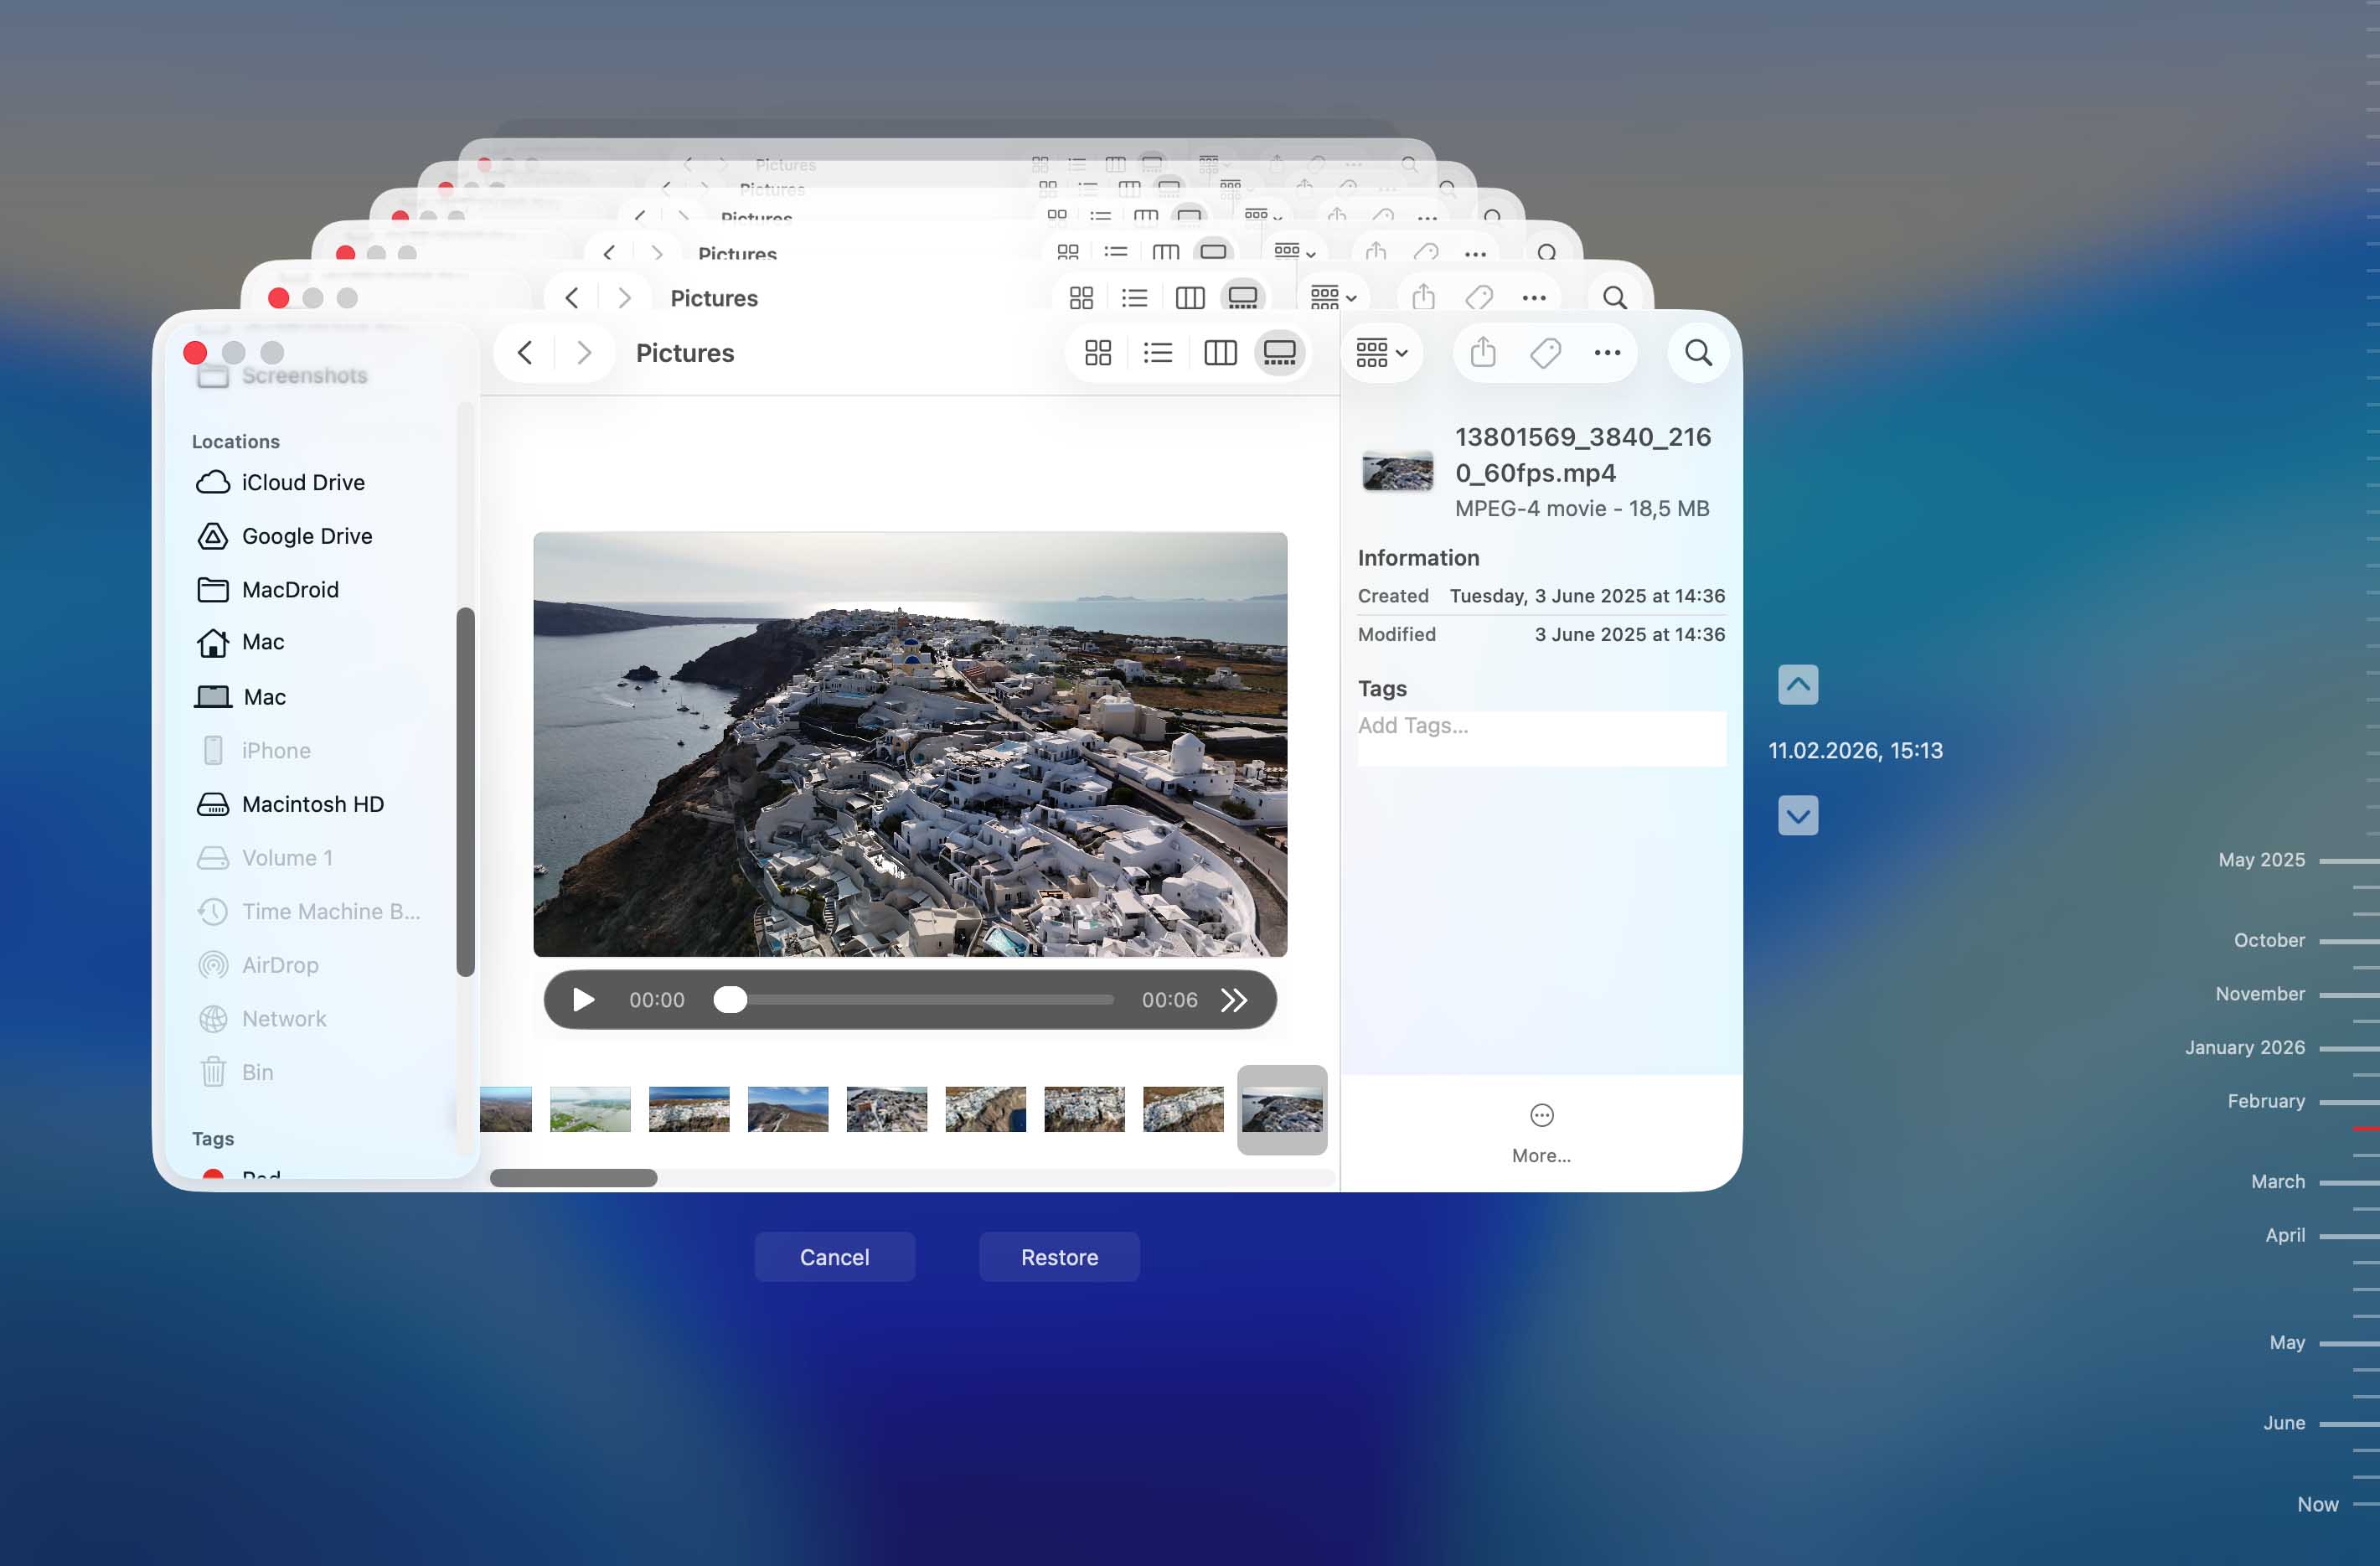
- Using the menu bar at the top, click the Time Machine icon and choose Browse Time Machine Backups from the drop-down menu.
- Go to the folder where the needed files were located before deletion.
- Use the arrows or the timeline on the right to go to the backup version containing the files that you’re searching for.
- To preview a specific file, click it and press the Spacebar on your keyboard.
- Choose the files that you wish to recover and click the Restore button.
Option 2: Recover Files Using Time Machine Local Snapshots
Even if you don’t have your Time Machine backup drive connected, you may still be able to recover your files using Time Machine local snapshots.
When Time Machine is enabled, macOS automatically creates temporary snapshots of your files and stores them on your internal drive whenever the backup disk isn’t available. These snapshots are typically kept for up to 24 hours, although macOS may delete them sooner if your Mac starts running low on free space. Because of this, local snapshots are best suited for recently deleted files. If you emptied the Trash a few hours ago or earlier today, it’s definitely worth checking whether a snapshot is still available.
Here’s how to restore files from a local snapshot:
- Open Finder and navigate to the folder where the deleted files were located before you emptied the Trash.
- Click the Time Machine icon in the menu bar and select Browse Time Machine Backups. If you don’t see the icon, open System Settings > Control Center and temporarily enable it.
- Use the timeline on the right side of the screen to look for an older version of the folder. Local snapshots are usually labeled with the date and time they were created.
- Locate the files you want to recover and preview them by pressing the Spacebar if necessary.
- Select the files and click Restore to return them to their original location.
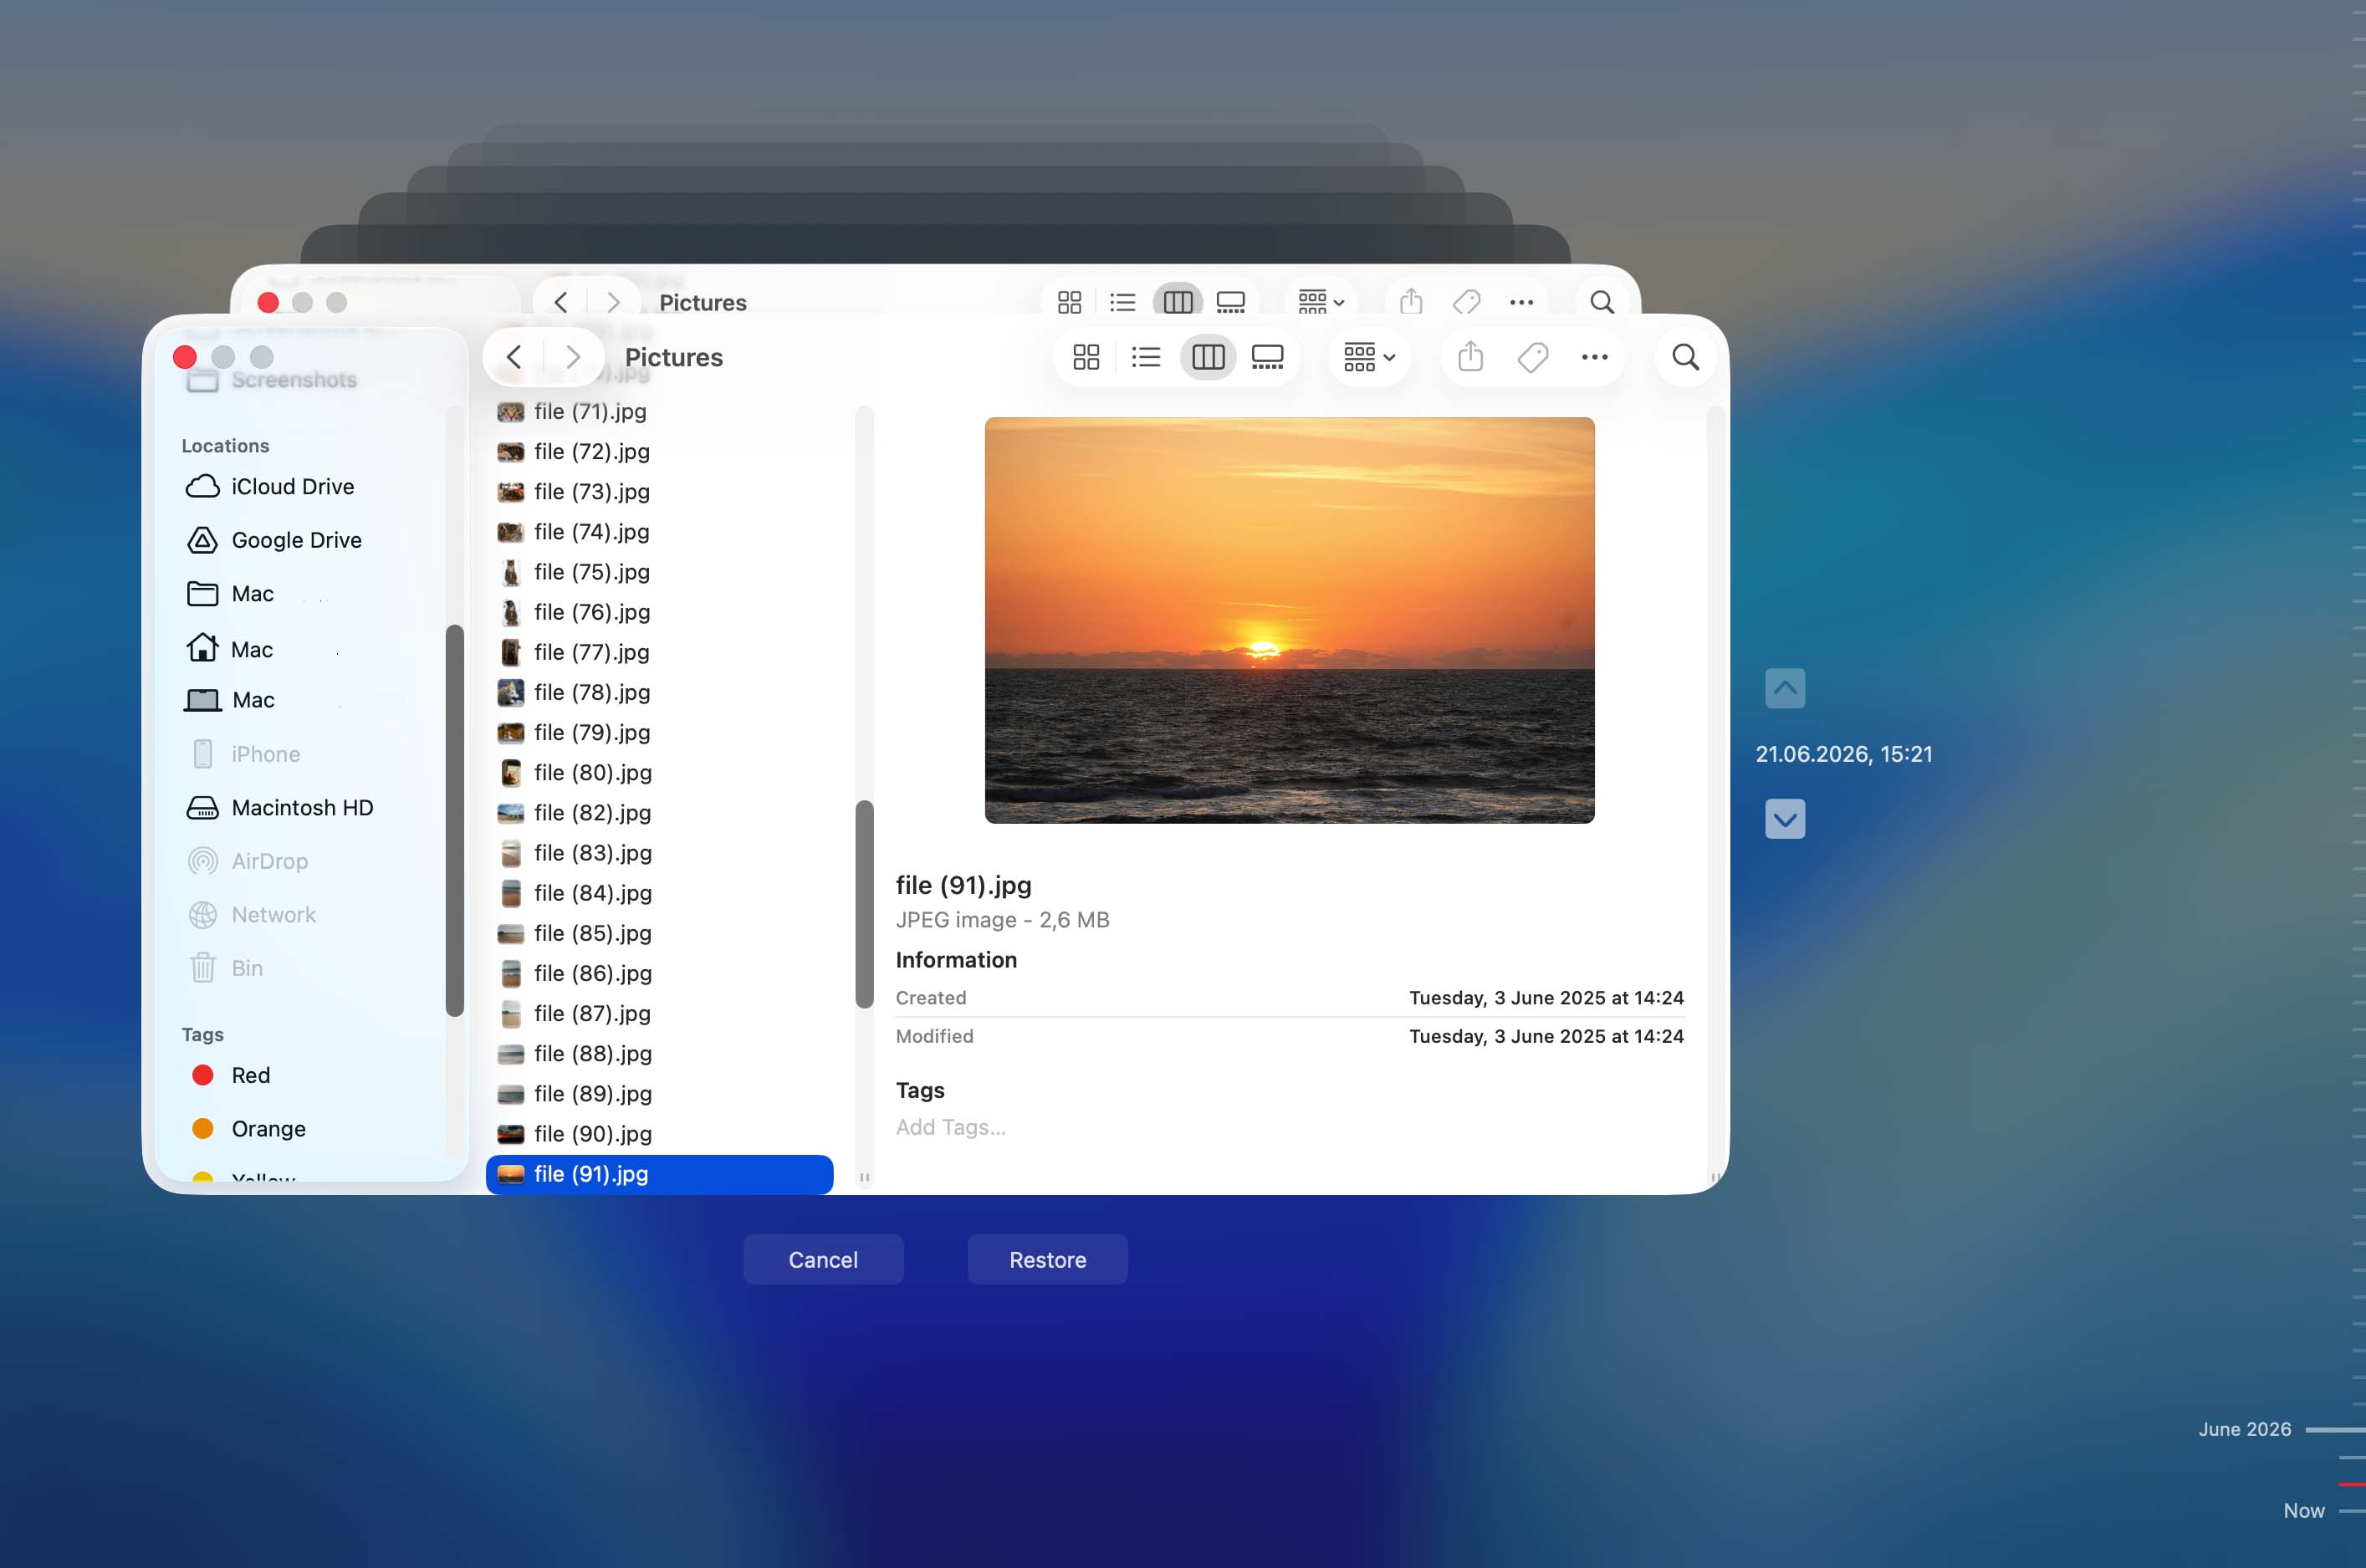
📝 If Time Machine opens but you don’t see any snapshots, they may have already been deleted automatically by macOS. In that case, move on to the other data recovery methods.
Option 3: Check iCloud Drive and Recently Deleted
iCloud isn’t a true backup solution like Time Machine because deletions normally sync across all of your Apple devices. In other words, if you empty the Trash on your Mac, the same file will usually disappear from iCloud Drive as well.
That said, it’s still worth checking iCloud. Synchronization delays, connection issues, or files stored in iCloud’s Recently Deleted section can sometimes leave a small window of opportunity to recover your data.
- Open a web browser and sign in to iCloud.com using your Apple Account.
- Open iCloud Drive and see whether the missing files are still present.
- If they aren’t there, click your profile picture in the top-right corner and select Data Recovery.
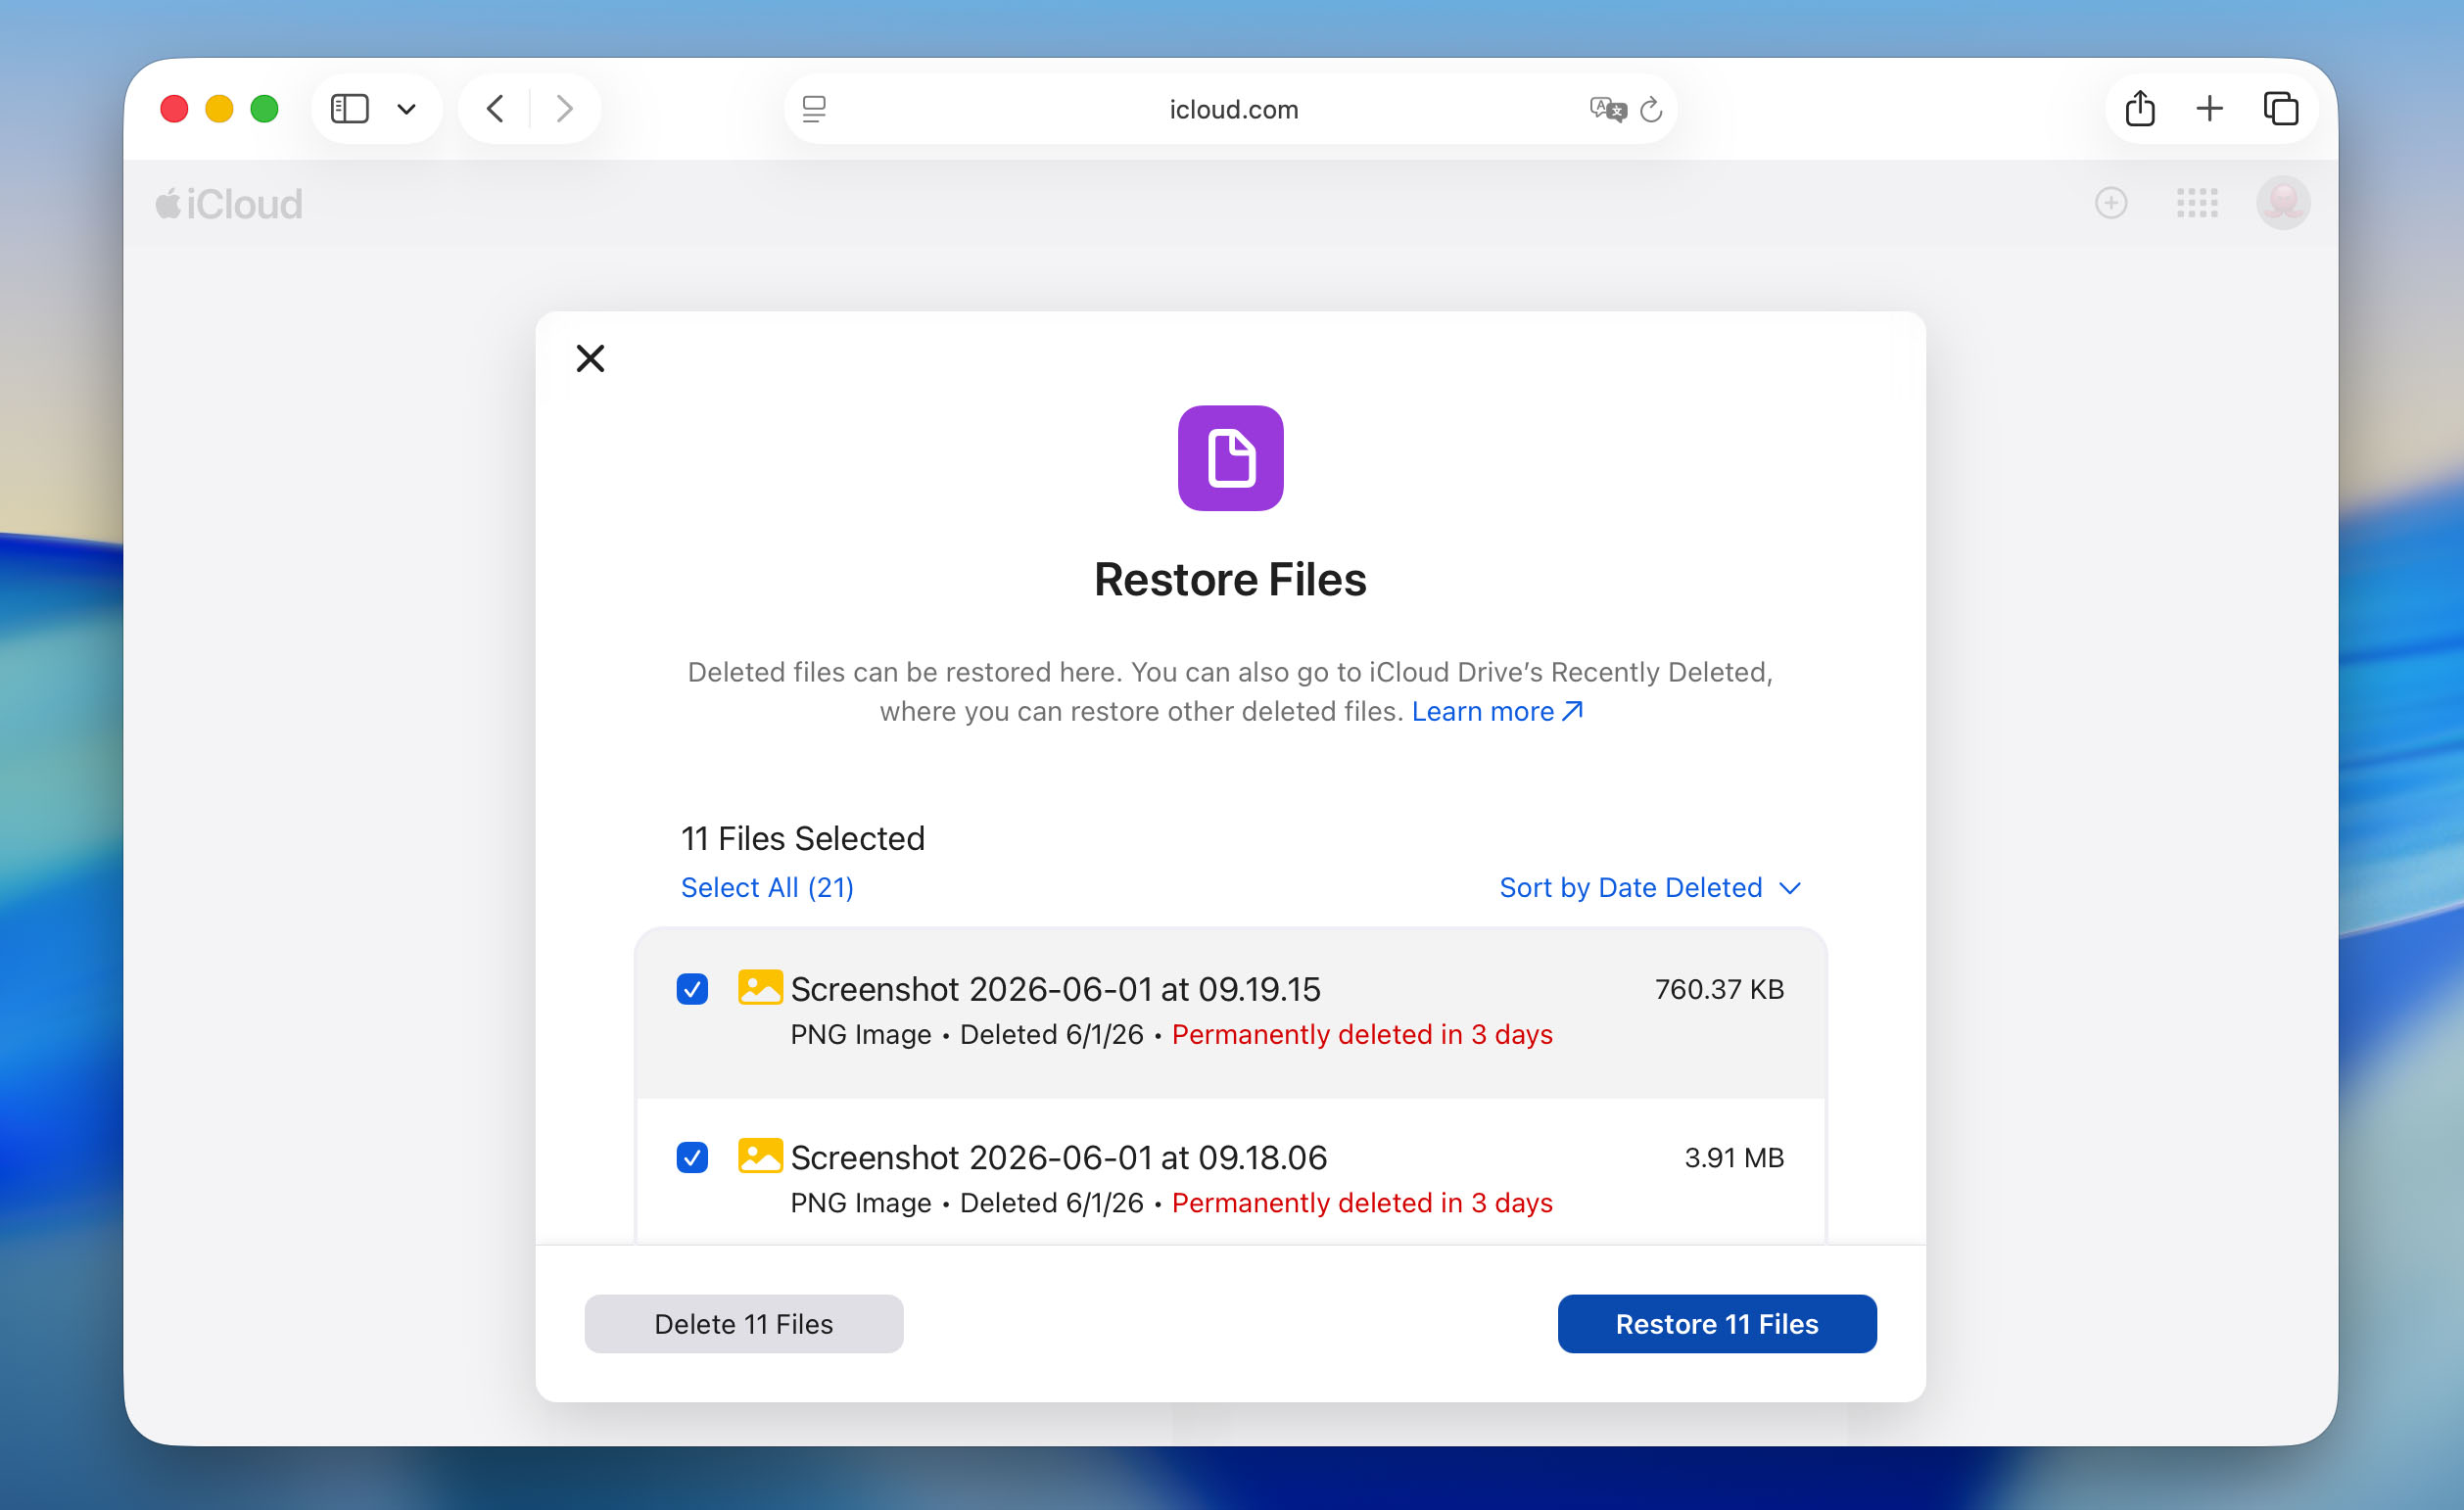
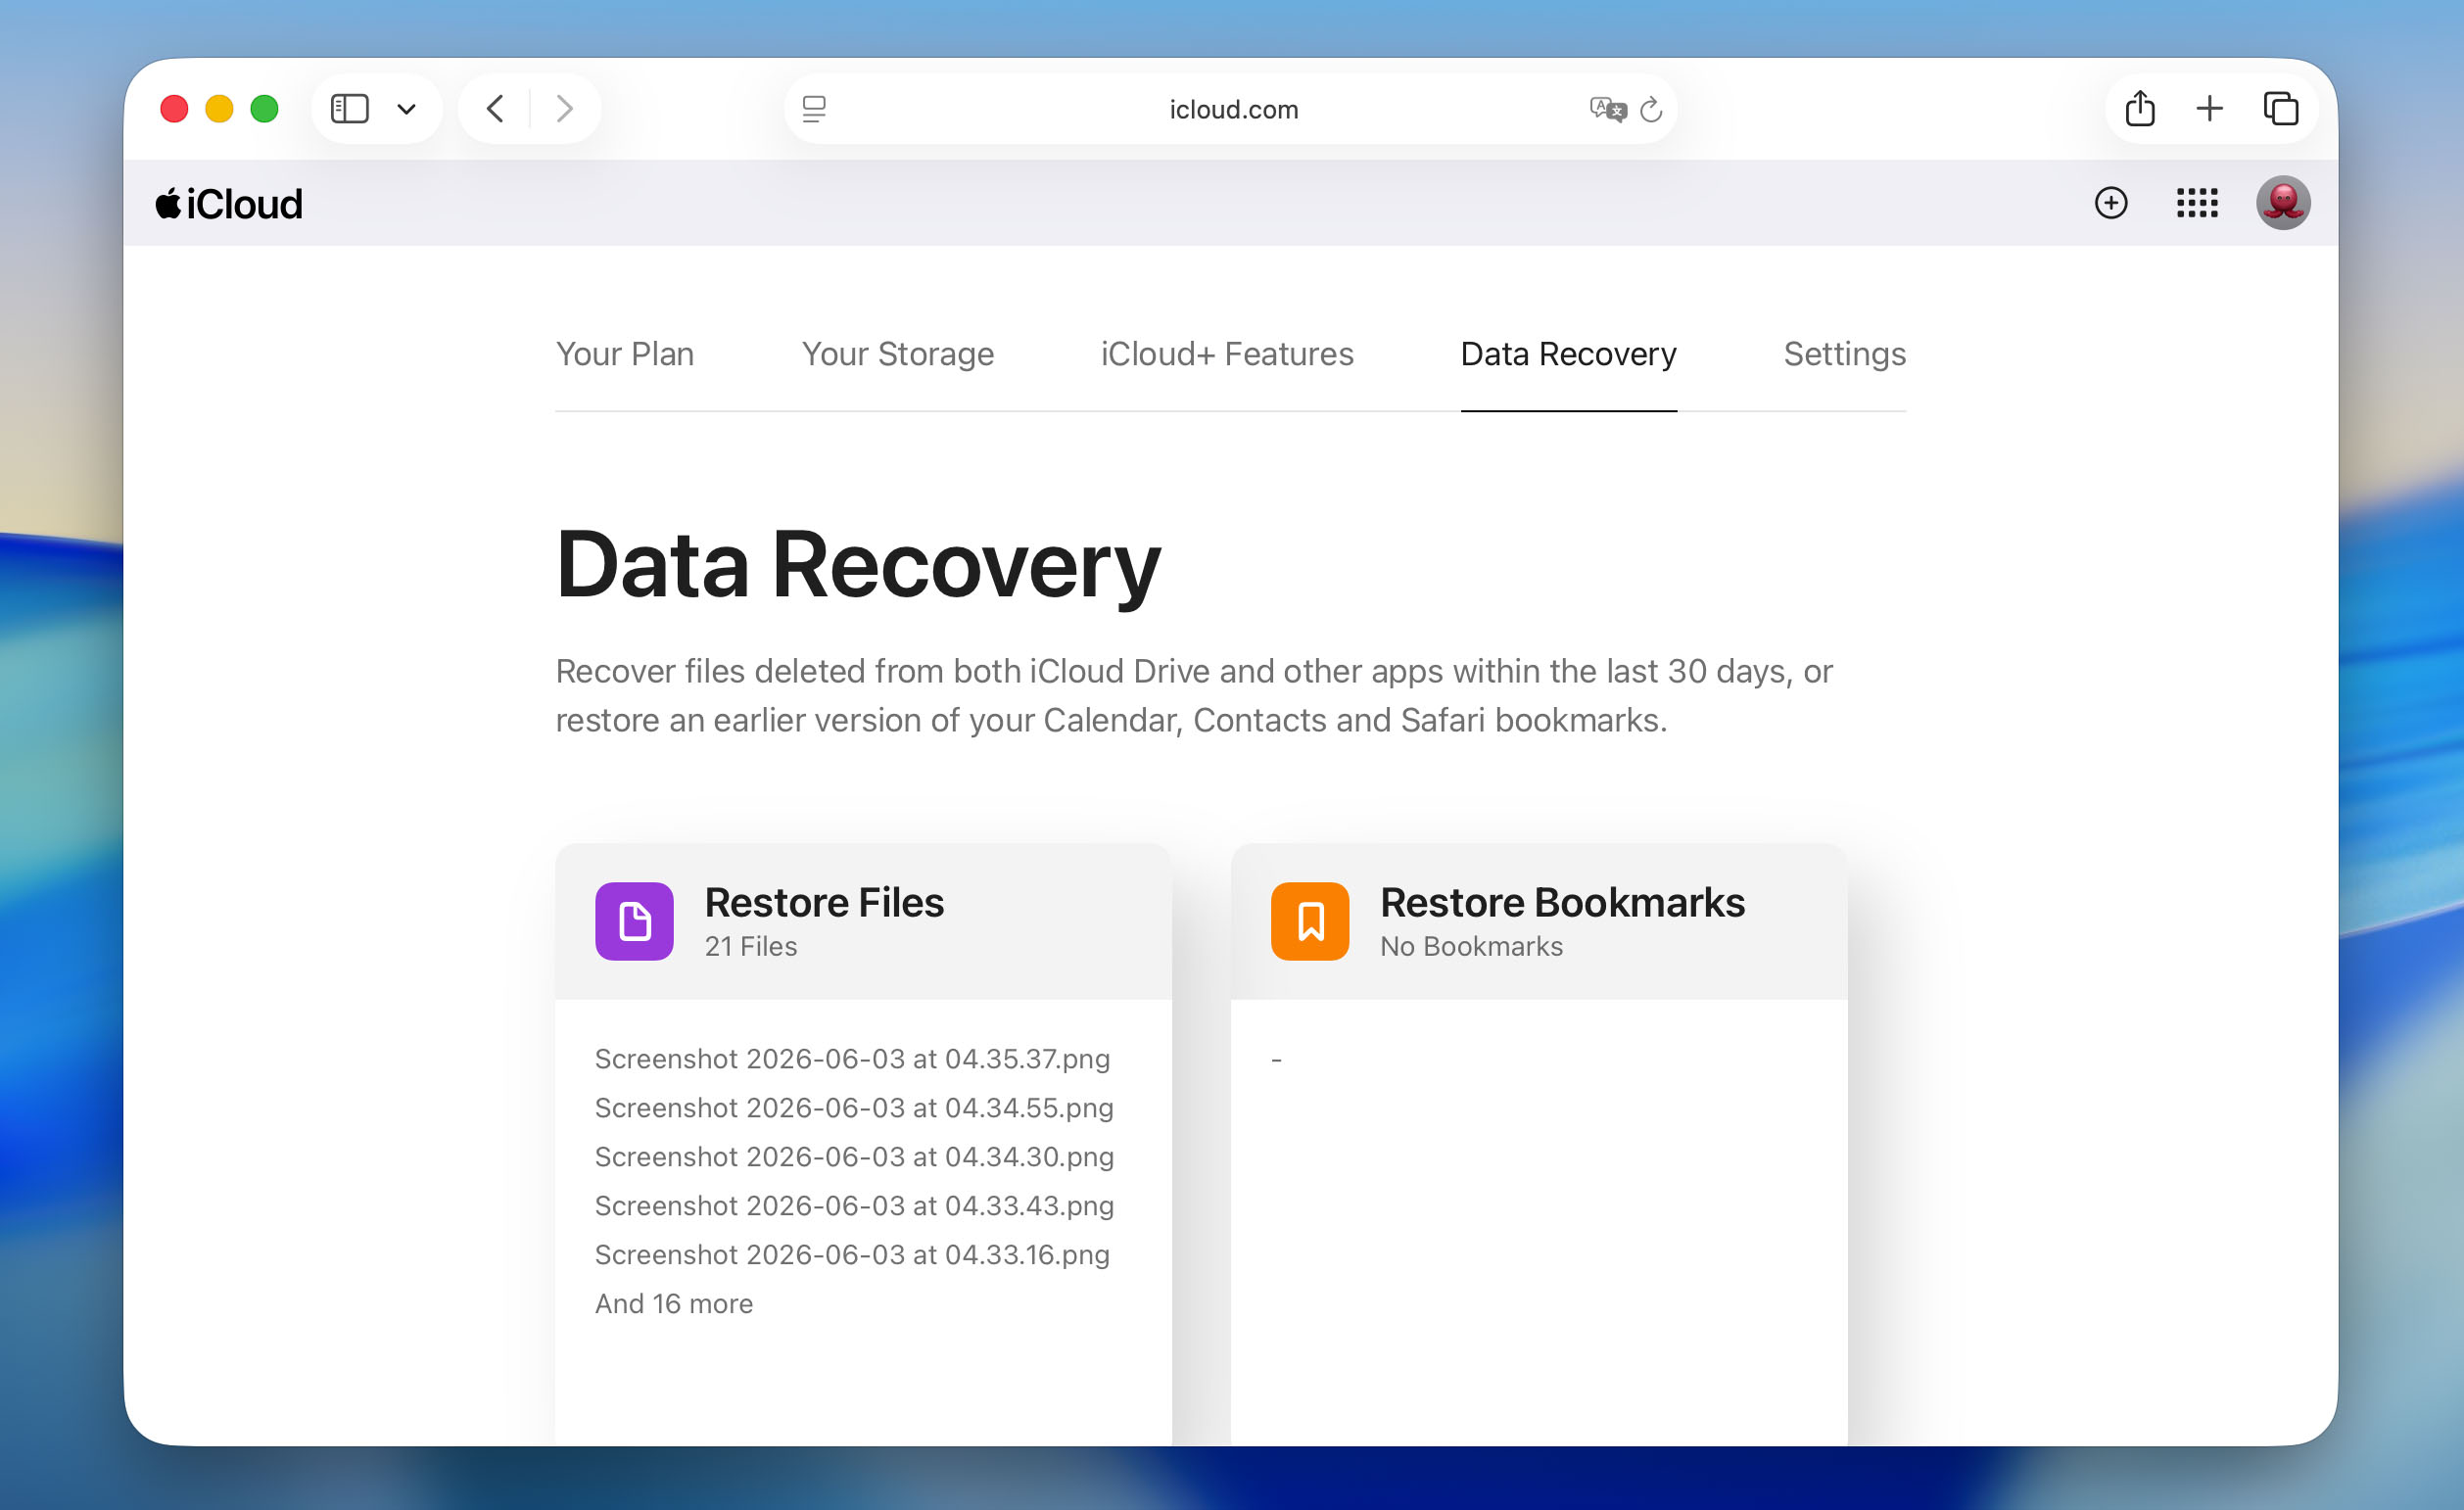 Open the Restore Files section and look for the deleted files.
- Select any files you want to recover and click Restore.
Method 3: Contact Professional Services for Trash Recovery on Mac
When software solutions and Time Machine backups aren’t enough to recover files from emptied Trash on Mac, professional data recovery services can sometimes (not always) still save the day.
Professional recovery services work by physically examining your drive in cleanroom environments to prevent dust contamination. Technicians use specialized hardware and proprietary software to read data at the sector level to bypass the operating system entirely. As such, they can sometimes recover data from drives that won’t even mount on your Mac.
The downside? Professional recovery isn’t cheap. Prices typically range from $300 to $3000 depending on the drive type, damage severity, and urgency. Some services charge evaluation fees just to diagnose the problem, while others offer “no data, no fee” policies.
Given these factors, here’s when it makes sense to consider professional data recovery services:
- Your Mac’s drive makes unusual clicking or grinding noises.
- The drive doesn’t appear in Disk Utility at all.
- Business data is at stake and you can’t afford to lose it.
- Software recovery tools fail to find your files.
📝 Note: Professional services aren’t miracle workers. They cannot recover data that’s been overwritten by new files or erased by TRIM on SSDs. Once TRIM permanently removes data blocks on modern SSDs, or new data physically overwrites the storage locations on any drive, those files are gone forever. The same goes for encrypted drives you don’t know the correct password to.
What to Do If the Trash Icon Disappeared?
By default, Trash is located at the end of the Dock on all Macs. The folder’s icon looks like a garbage can and might be a bit different depending on what macOS version your computer is using. If you can’t find it in its usual spot, there are two alternative ways that can help you access it.
Option 1: Use Terminal to Access Trash
Terminal provides direct access to your Mac’s Trash folder through text-based commands. While it might look technical, the process is actually simple.
Here’s how to access and recover files from Trash using Terminal:
- Open Terminal (go to Launchpad and type Terminal in the search field).
- Copy-paste the following command into the Terminal window and hit the Return key: cd ~/.Trash
- Then copy-paste this command and hit Return: ls -al ~/.Trash
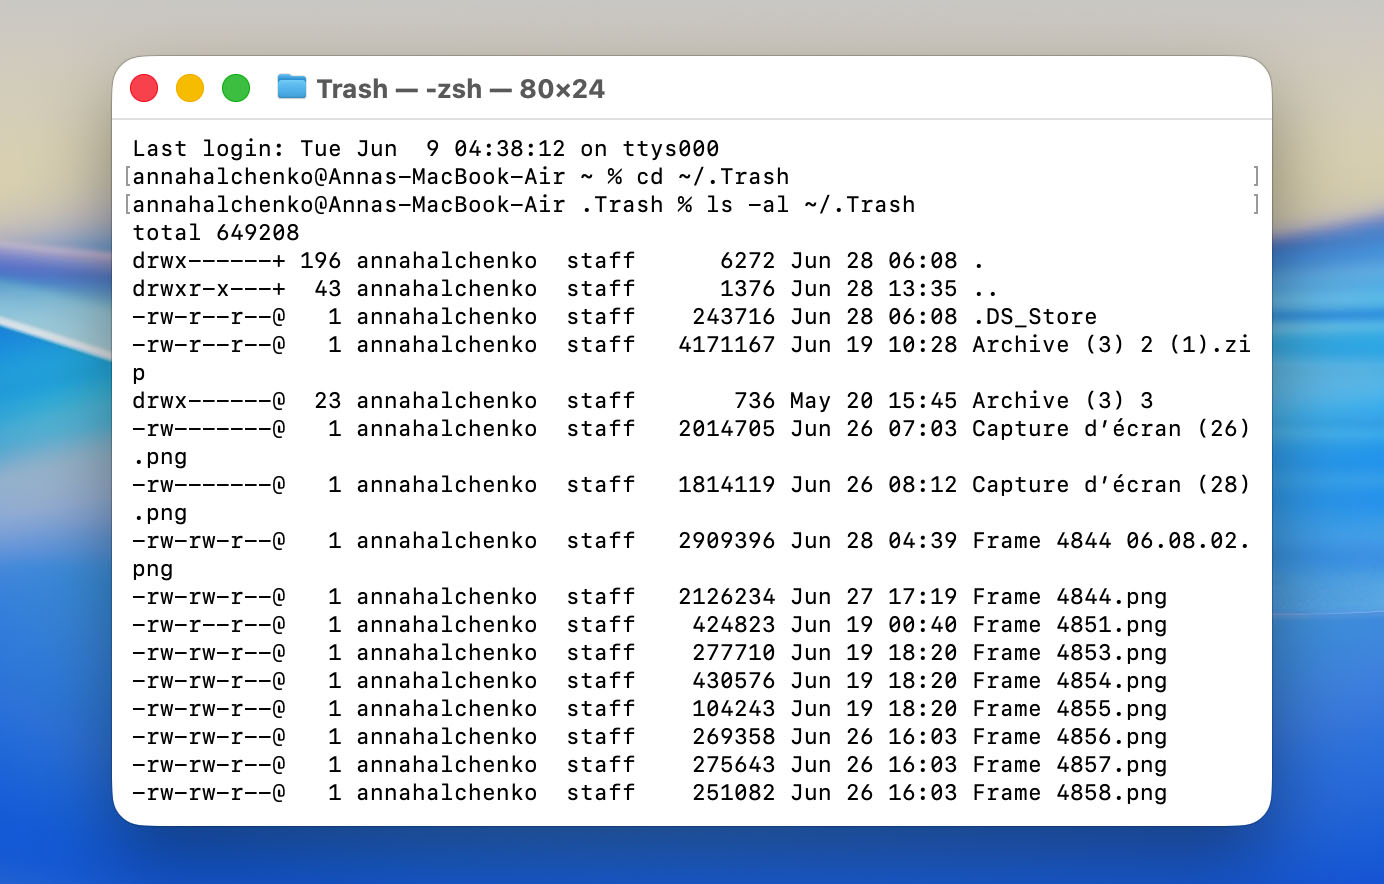
You’ll see a list of files currently in your Trash. Now, check if the files you need are there. If you find the files you want to recover, you also need to complete the following steps:
- To move a file back to your Desktop, use this command: mv filename ~/Desktop/
- To move it to Documents or another location, replace ~/Desktop/ with your preferred path
- For files with spaces in their names, wrap the filename in quotes: mv “my important file.pdf” ~/Desktop/
For example, to recover a file called “report.docx” and move it to your Documents folder: mv report.docx ~/Documents/
If you don’t see your files, this means they’ve already been permanently deleted from the Trash. At this point, you’ll need to return to the recovery methods section above and try one of the data recovery tools or backup methods. Remember, if you accidentally emptied trash on Mac, the sooner you use recovery software, the better your chances of getting those files back.
Option 2: Make Trash a Folder on the Desktop
If you want quick access to your Mac’s Trash without relying on the Dock, you can create a shortcut folder right on your desktop. Here’s how to set it up:
- Open Terminal (go to Launchpad and type Terminal in the search field).
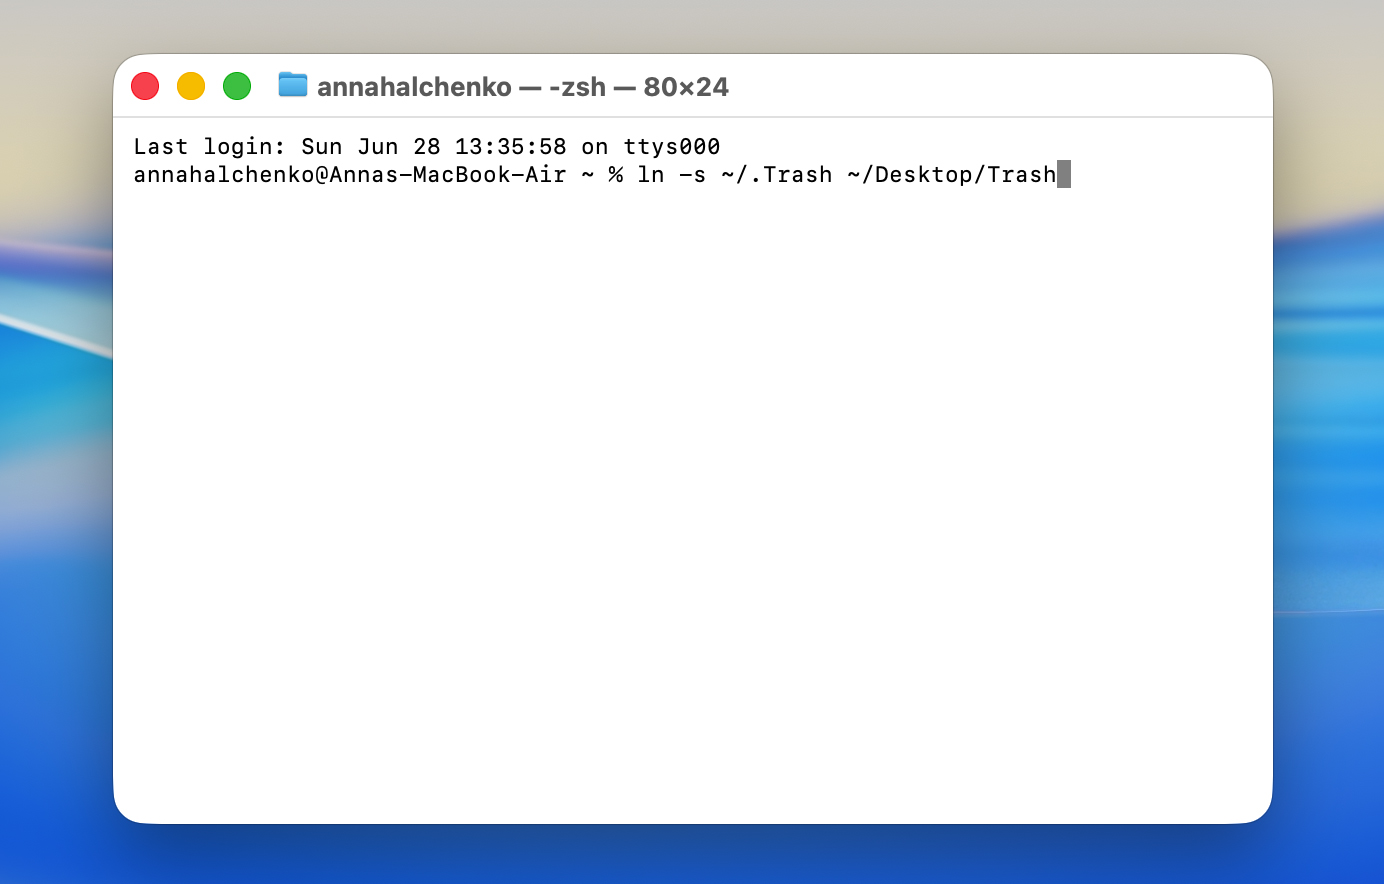
- Copy-paste the following command into the Terminal window and hit the Return key: ln -s ~/.Trash ~/Desktop/Trash
- Go to your Mac’s desktop and look for a folder called Trash (it’ll look like a regular folder).
When you double-click this Trash folder on your desktop, it opens the standard Trash window where you can:
- View all deleted files waiting to be permanently removed.
- Restore files by dragging them back to any location on your Mac.
- Empty the Trash by right-clicking and selecting Empty Trash.
- Sort deleted items by name, date deleted, or size.
The folder works exactly like the normal Trash icon in your Dock, just in a different location. You can even drag files directly to this desktop folder to delete them.
Final Thoughts
An emptied Trash isn’t always the end of the road. As long as you act before new data overwrites the deleted files, recovery is often still possible, whether through a backup or data recovery software like Disk Drill.
Going forward, a few simple habits can significantly reduce the chances of permanent data loss:
- Turn on Time Machine or another backup solution so you always have a fallback.
- Treat the Trash as the final step before deletion, not as temporary storage for files you might need later.
- If your Mac uses an SSD, act quickly after accidental deletion because TRIM can permanently erase deleted data much sooner than most people expect.
If you run into a similar situation on a Windows PC, the recovery process is a bit different. We have a separate guide that explains how to recover deleted files from the Windows Recycle Bin.
Still have questions or want to share your experience recovering files from an emptied Trash? Feel free to join the discussion on our forum and ask the community for help.
FAQ:
- Open Finder.
- Press Command + Shift + G to launch the Go To Folder menu.
- Type ~/.Trash in the text box and press Enter.