
Did a partition suddenly disappear on your Mac or start showing errors that block access to your files? Partition loss or corruption can make entire volumes look empty or unreadable, even though the data may still exist on the drive. In many cases, the issue comes down to damaged partition tables or file system errors rather than permanent data loss. We will show you how to recover your data and repair corrupted partition.
Can You Recover a Corrupted or Deleted Partition on a Mac?
Yes, a corrupted or lost partition can often be recovered on a Mac, as long as the data has not been overwritten. In macOS, standard tools like Disk Utility do not offer a direct option to simply delete a partition in the same way as on Windows. Usually, partitions are lost during actions such as reformatting, resizing, or merging volumes, when one partition is expanded into another.
When this happens, macOS removes or rewrites entries in the partition map, but the actual data may still remain on the disk until new data replaces it. Recovery chances depend on what operation was performed and what happened afterward. In many cases, the partition structure can be rebuilt or files can be recovered directly from the disk.
| Scenario | Data Recovery Chances | Recommended Course of Action |
| Partition lost after disk repartitioning | Medium to High | Avoid creating new partitions or writing data. Use recovery software to scan the entire disk and reconstruct files or partitions. |
| Drive shows as Uninitialised or without partition | High | Do not format the drive. Use tools like TestDisk or recovery software to restore the partition entry. |
| File system corruption mistaken for deletion | High | Try Disk Utility First Aid or fsck. If the partition does not mount, proceed with data recovery tools. |
| External drive issues after improper ejection or power loss | Medium to High | Reconnect the drive and avoid repeated mounting attempts. Scan the drive or create a disk image before recovery. |
| Physical damage or unstable drive | Very Low (DIY) | Consult a professional data recovery service. |
Several factors influence the extent of data recovery. To maximize your data recovery chances, keep these tips in mind:
- Stop using the drive until you perform data recovery. Continued drive usage increases chances of the missing files being overwritten by system-created, and user-created files.
- Use disk cloning tools to create a byte-level disk image of the drive. This shields you against further data loss.
- Scan the drive using a trustworthy data recovery tool. The first data recovery scan is typically the most successful.
- Contact a professional data recovery service if the data loss by caused due to physical damage. Attempting DIY data recovery will do more harm than good when dealing with physical damage.
Be careful with partition actions in tools like Disk Utility. Most operations there involve formatting, which can trigger TRIM on SSDs and make recovery impossible.
How to Recover Data From a Deleted Partition on Mac
To recover data from a partition on Mac, you need to use specialized third-party software. There are many excellent applications to choose from, but after testing some of those apps, we recommend you to try out Disk Drill.
Disk Drill has a user-friendly interface, which makes it very easy to use compared to other partition recovery Mac software. It works well when you need to recover files from a deleted or corrupted partition, since it supports a wide range of file systems and file formats.
Now you can move on to the main part. Follow these steps to recover deleted partition data on your Mac using Disk Drill:
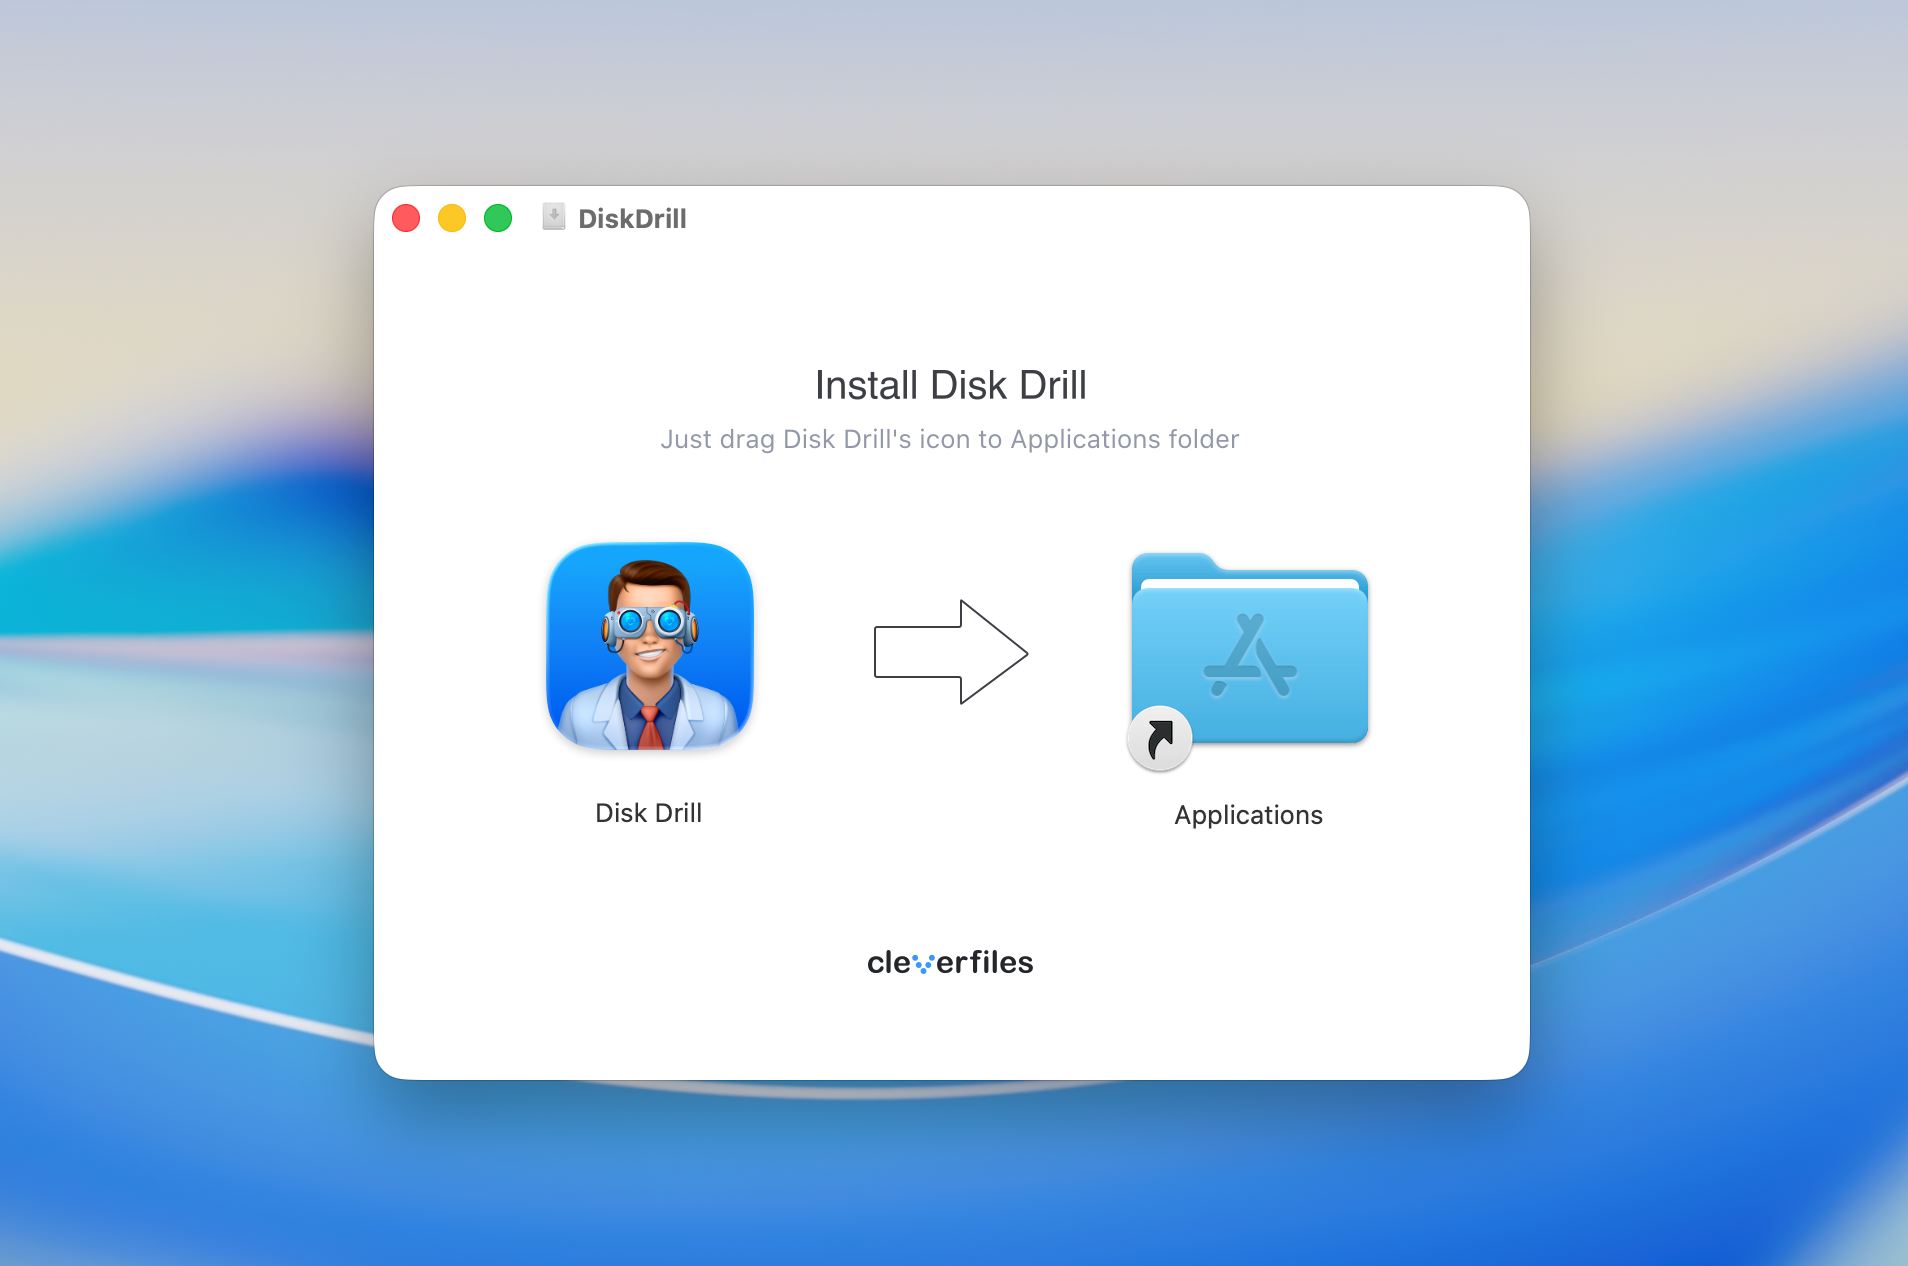
- Go to the official website and download Disk Drill.
- Install it like any other app, drag the Disk Drill icon into the Applications folder.
- If you want to recover data from a deleted partition from an external hard drive on your Mac, then connect the drive to your computer. Skip this step if you’re trying to recover data from an internal drive.
- Open Disk Drill and go to the Byte-to-byte backup if you want to create a disk image first.
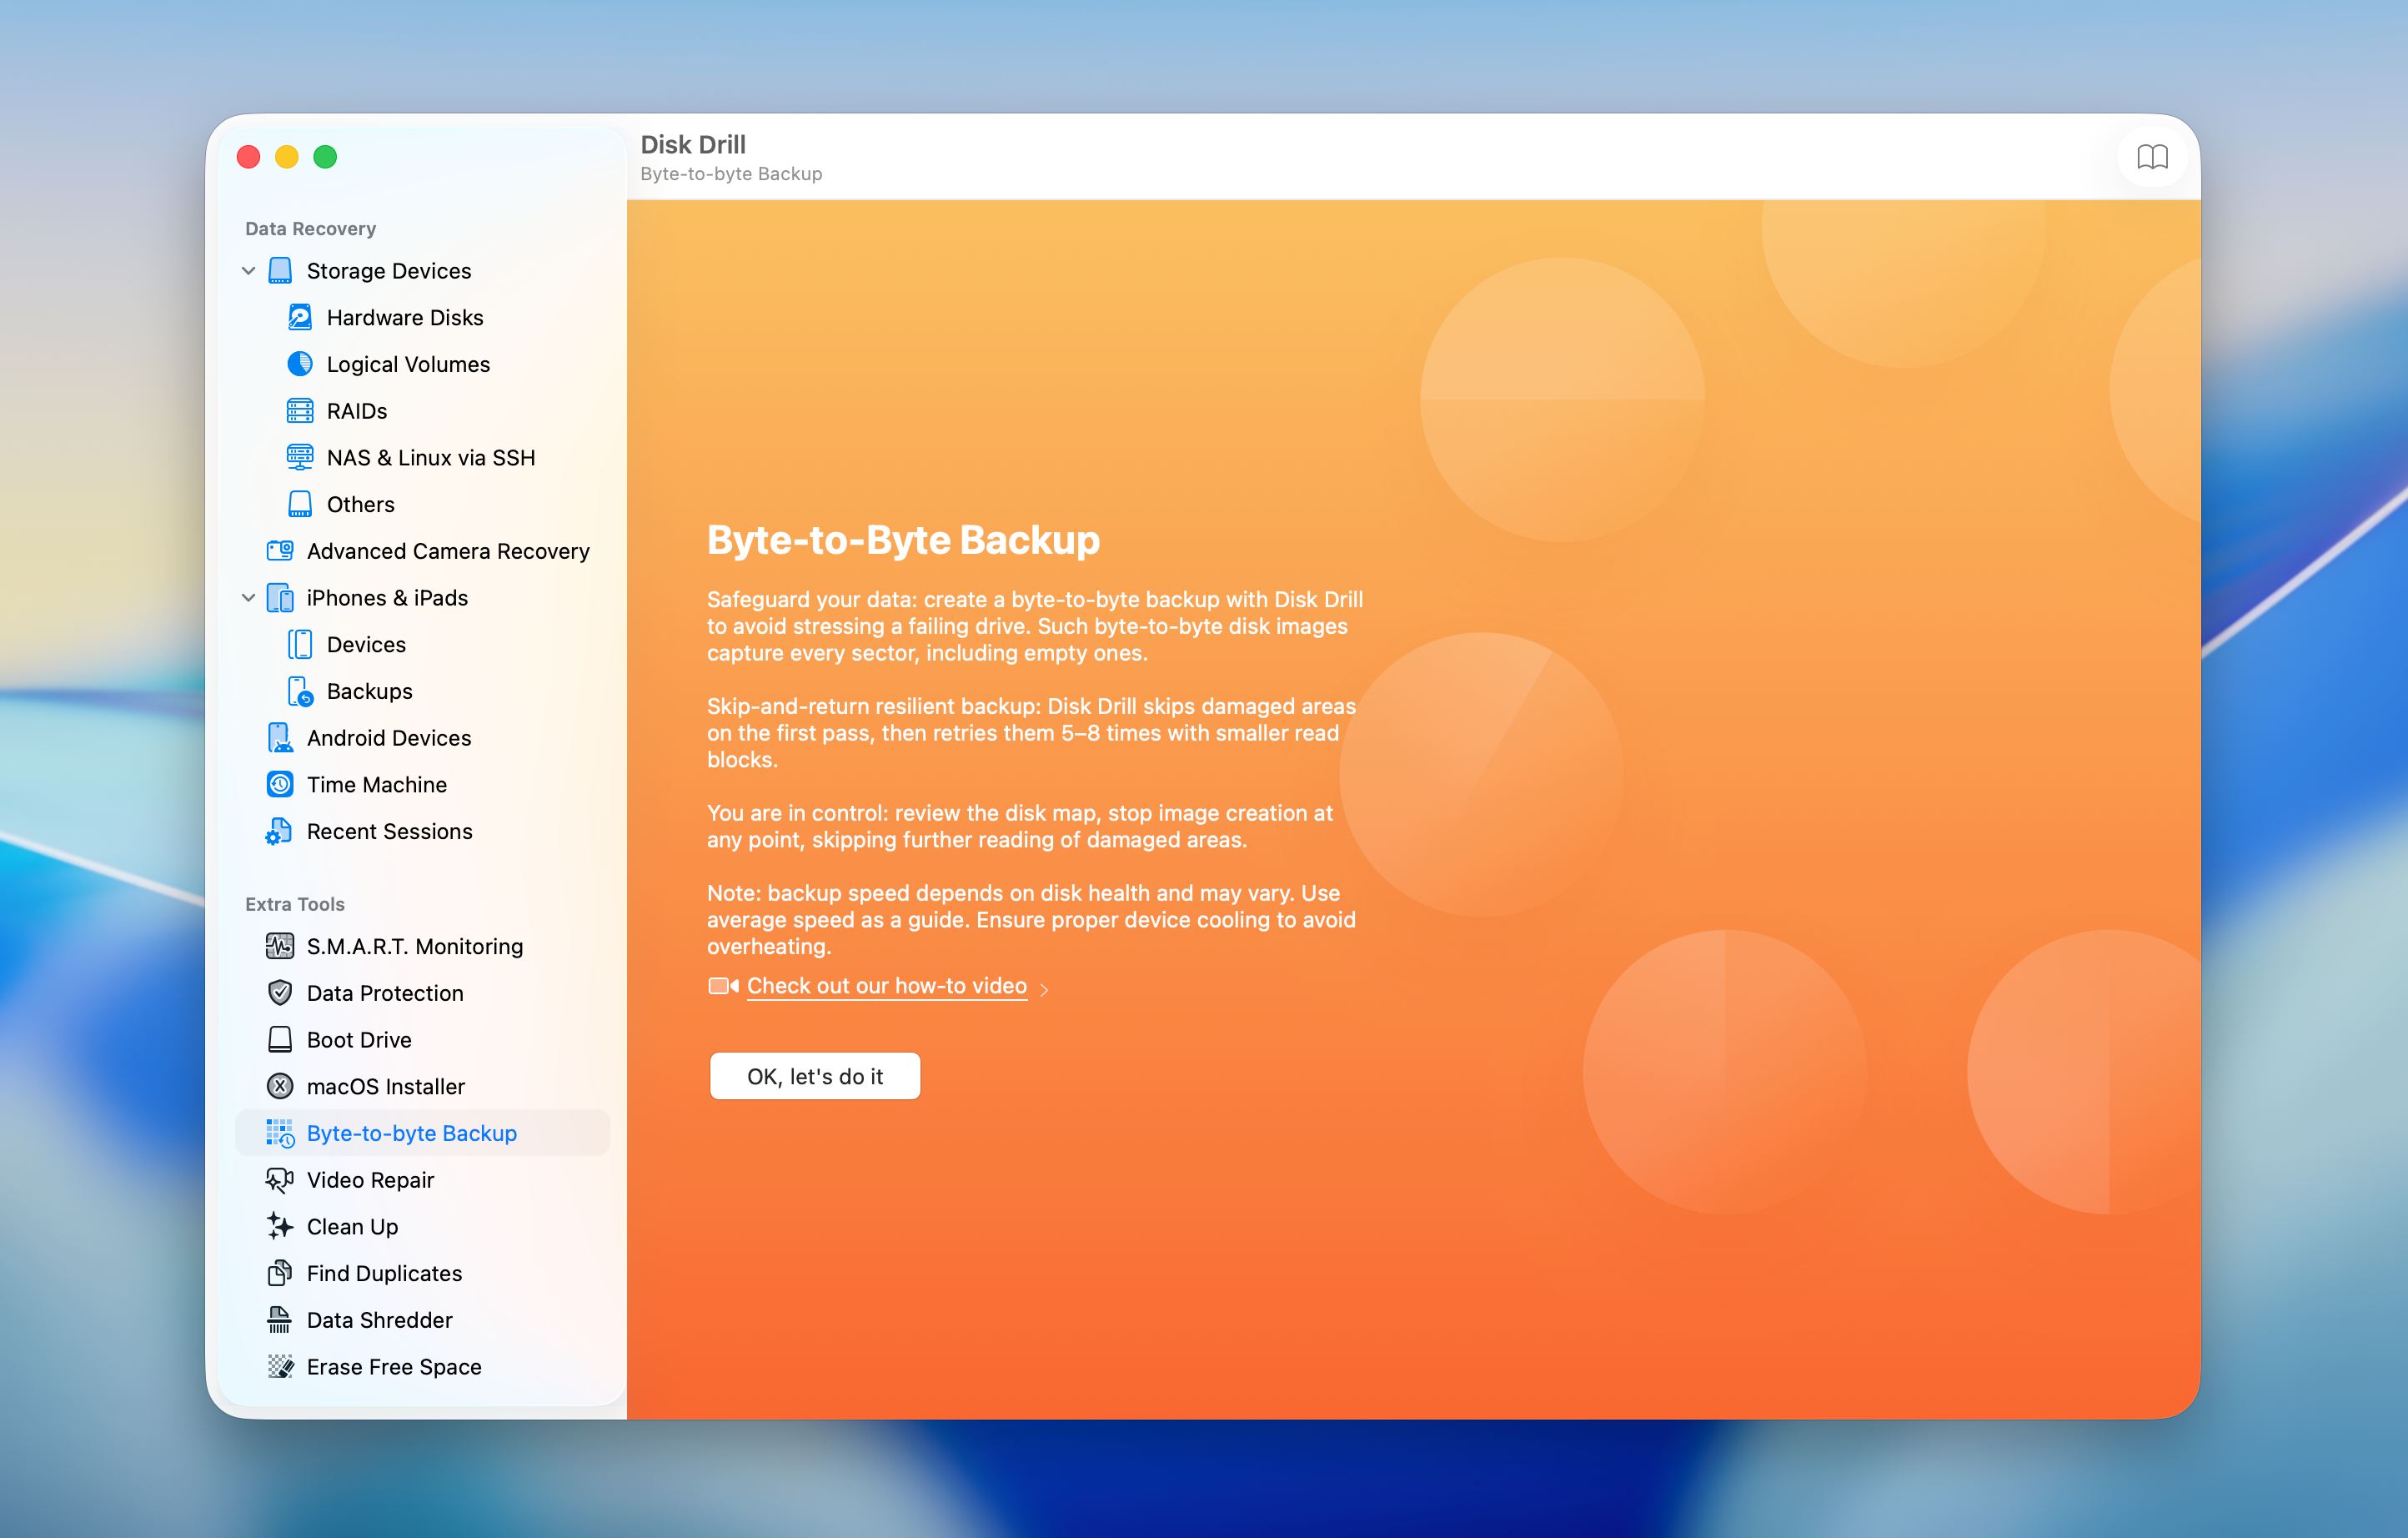
- Choose the drive and click Create backup.
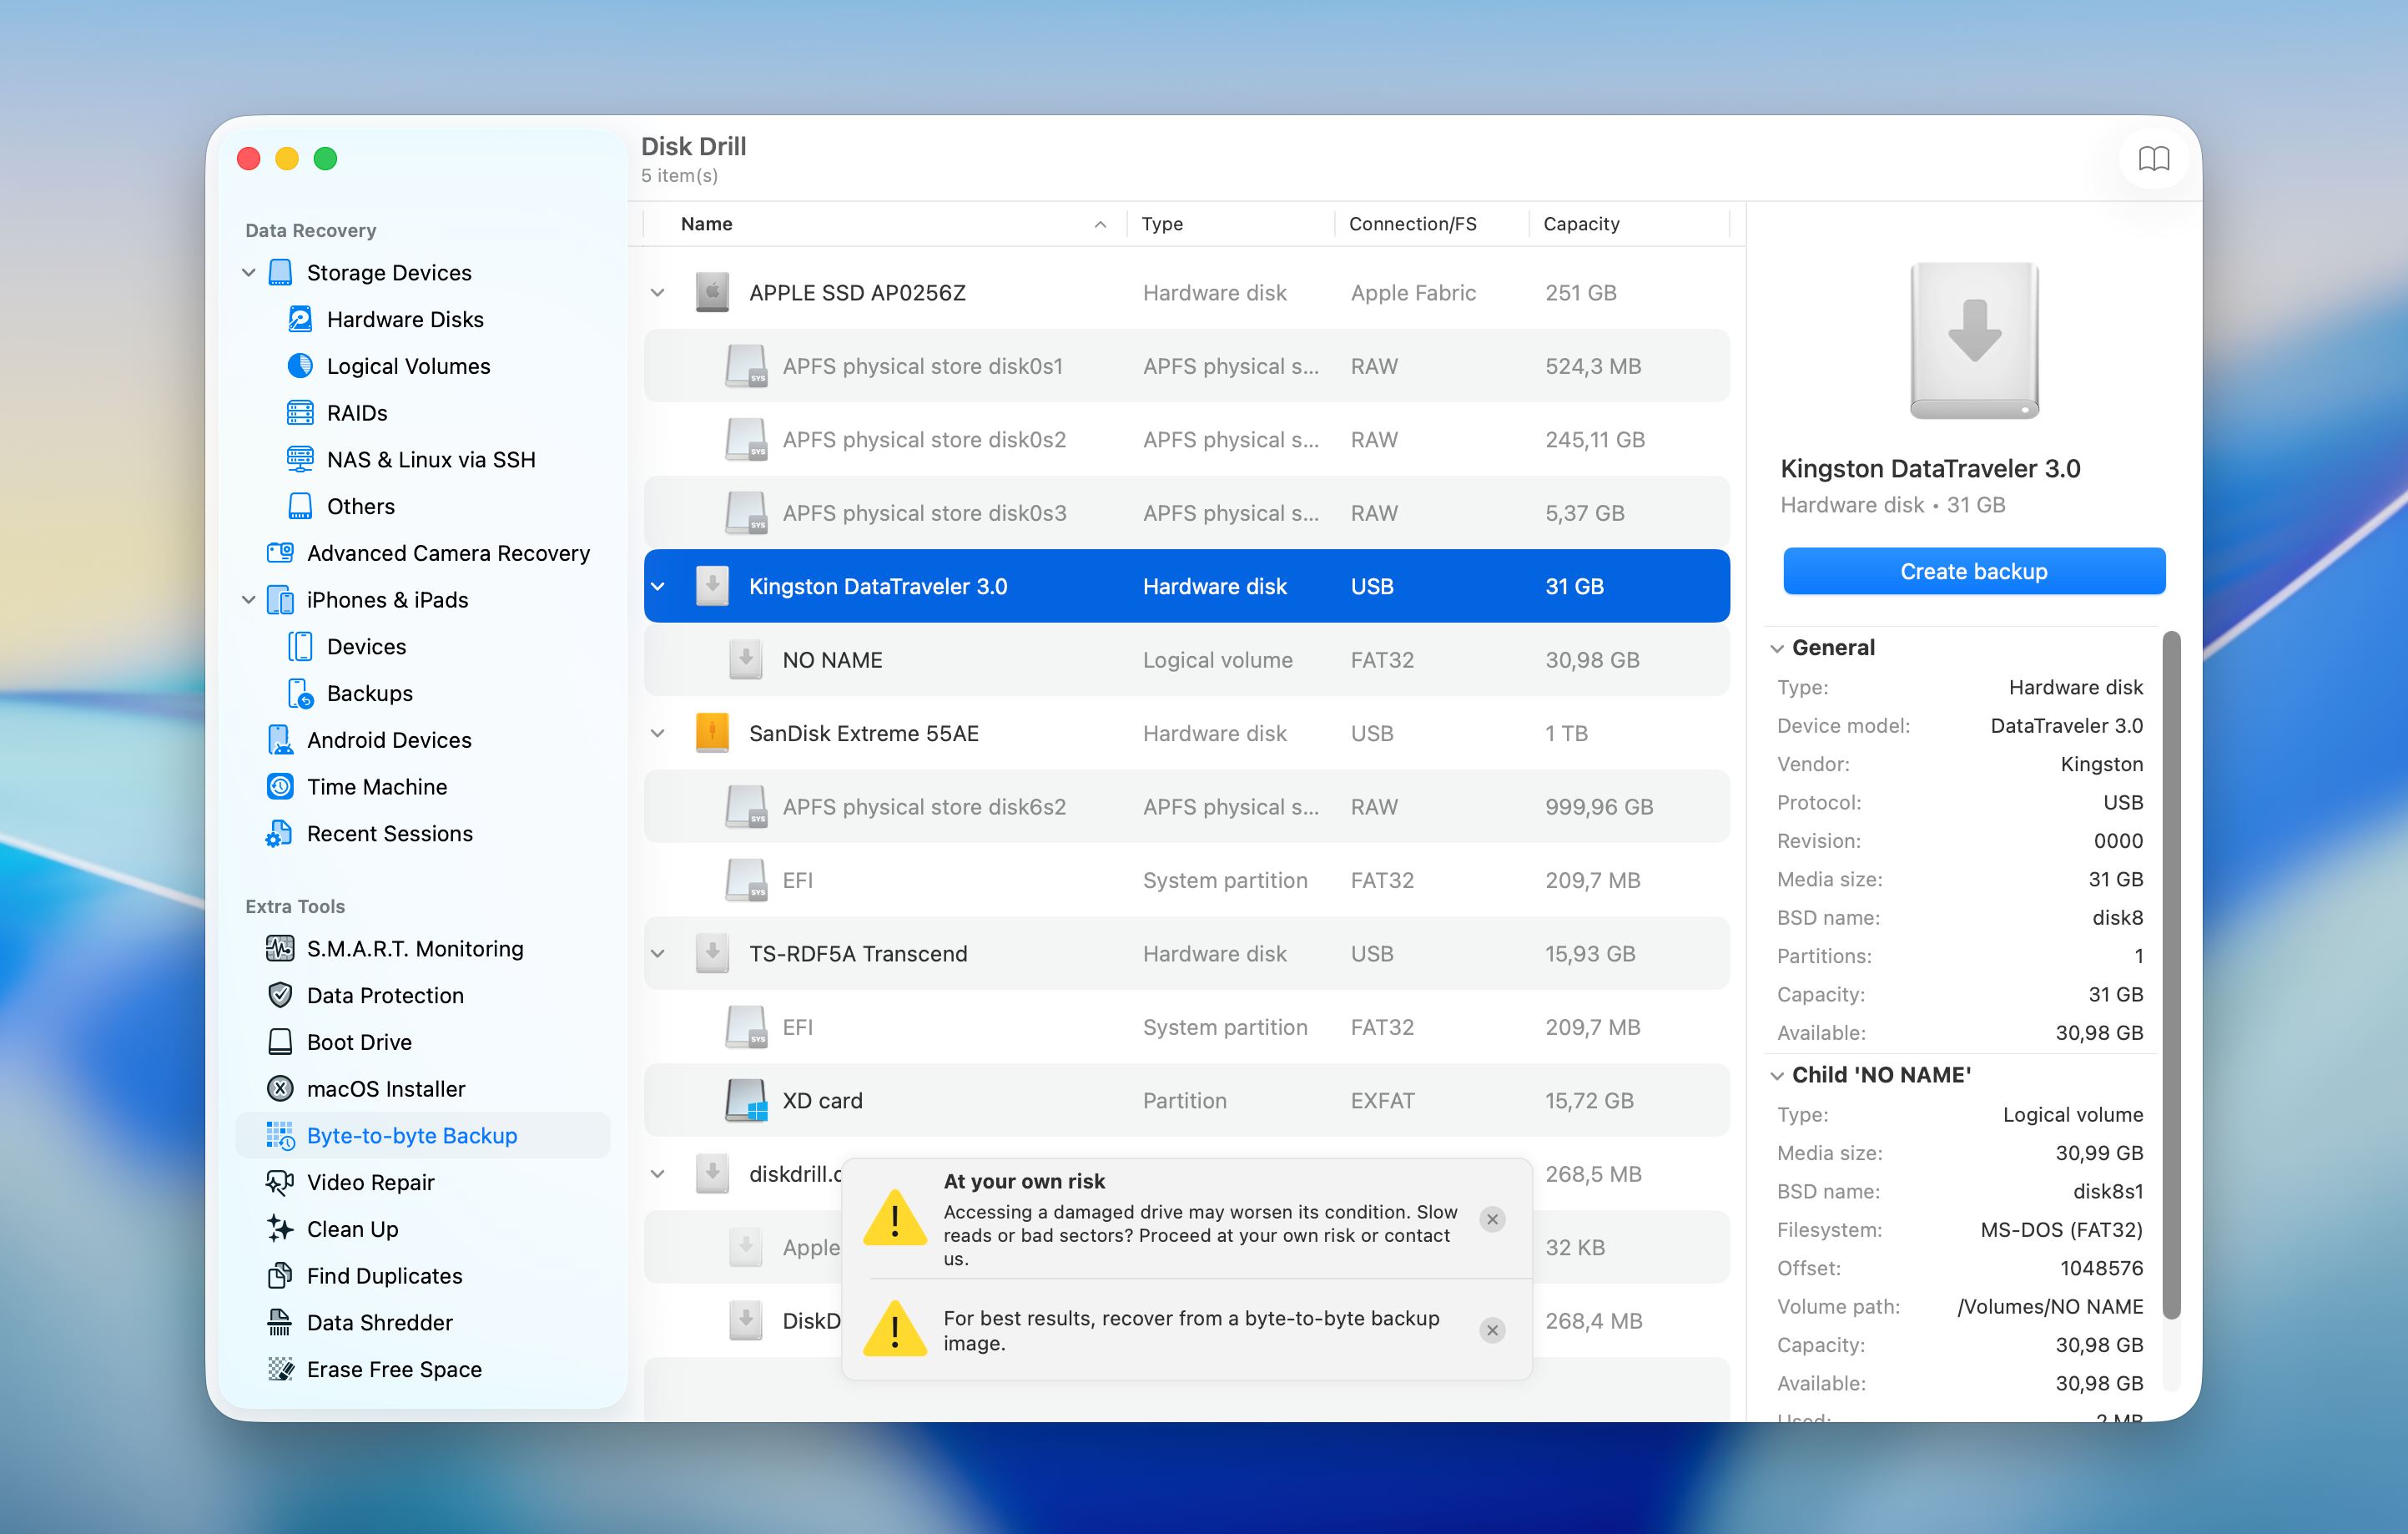
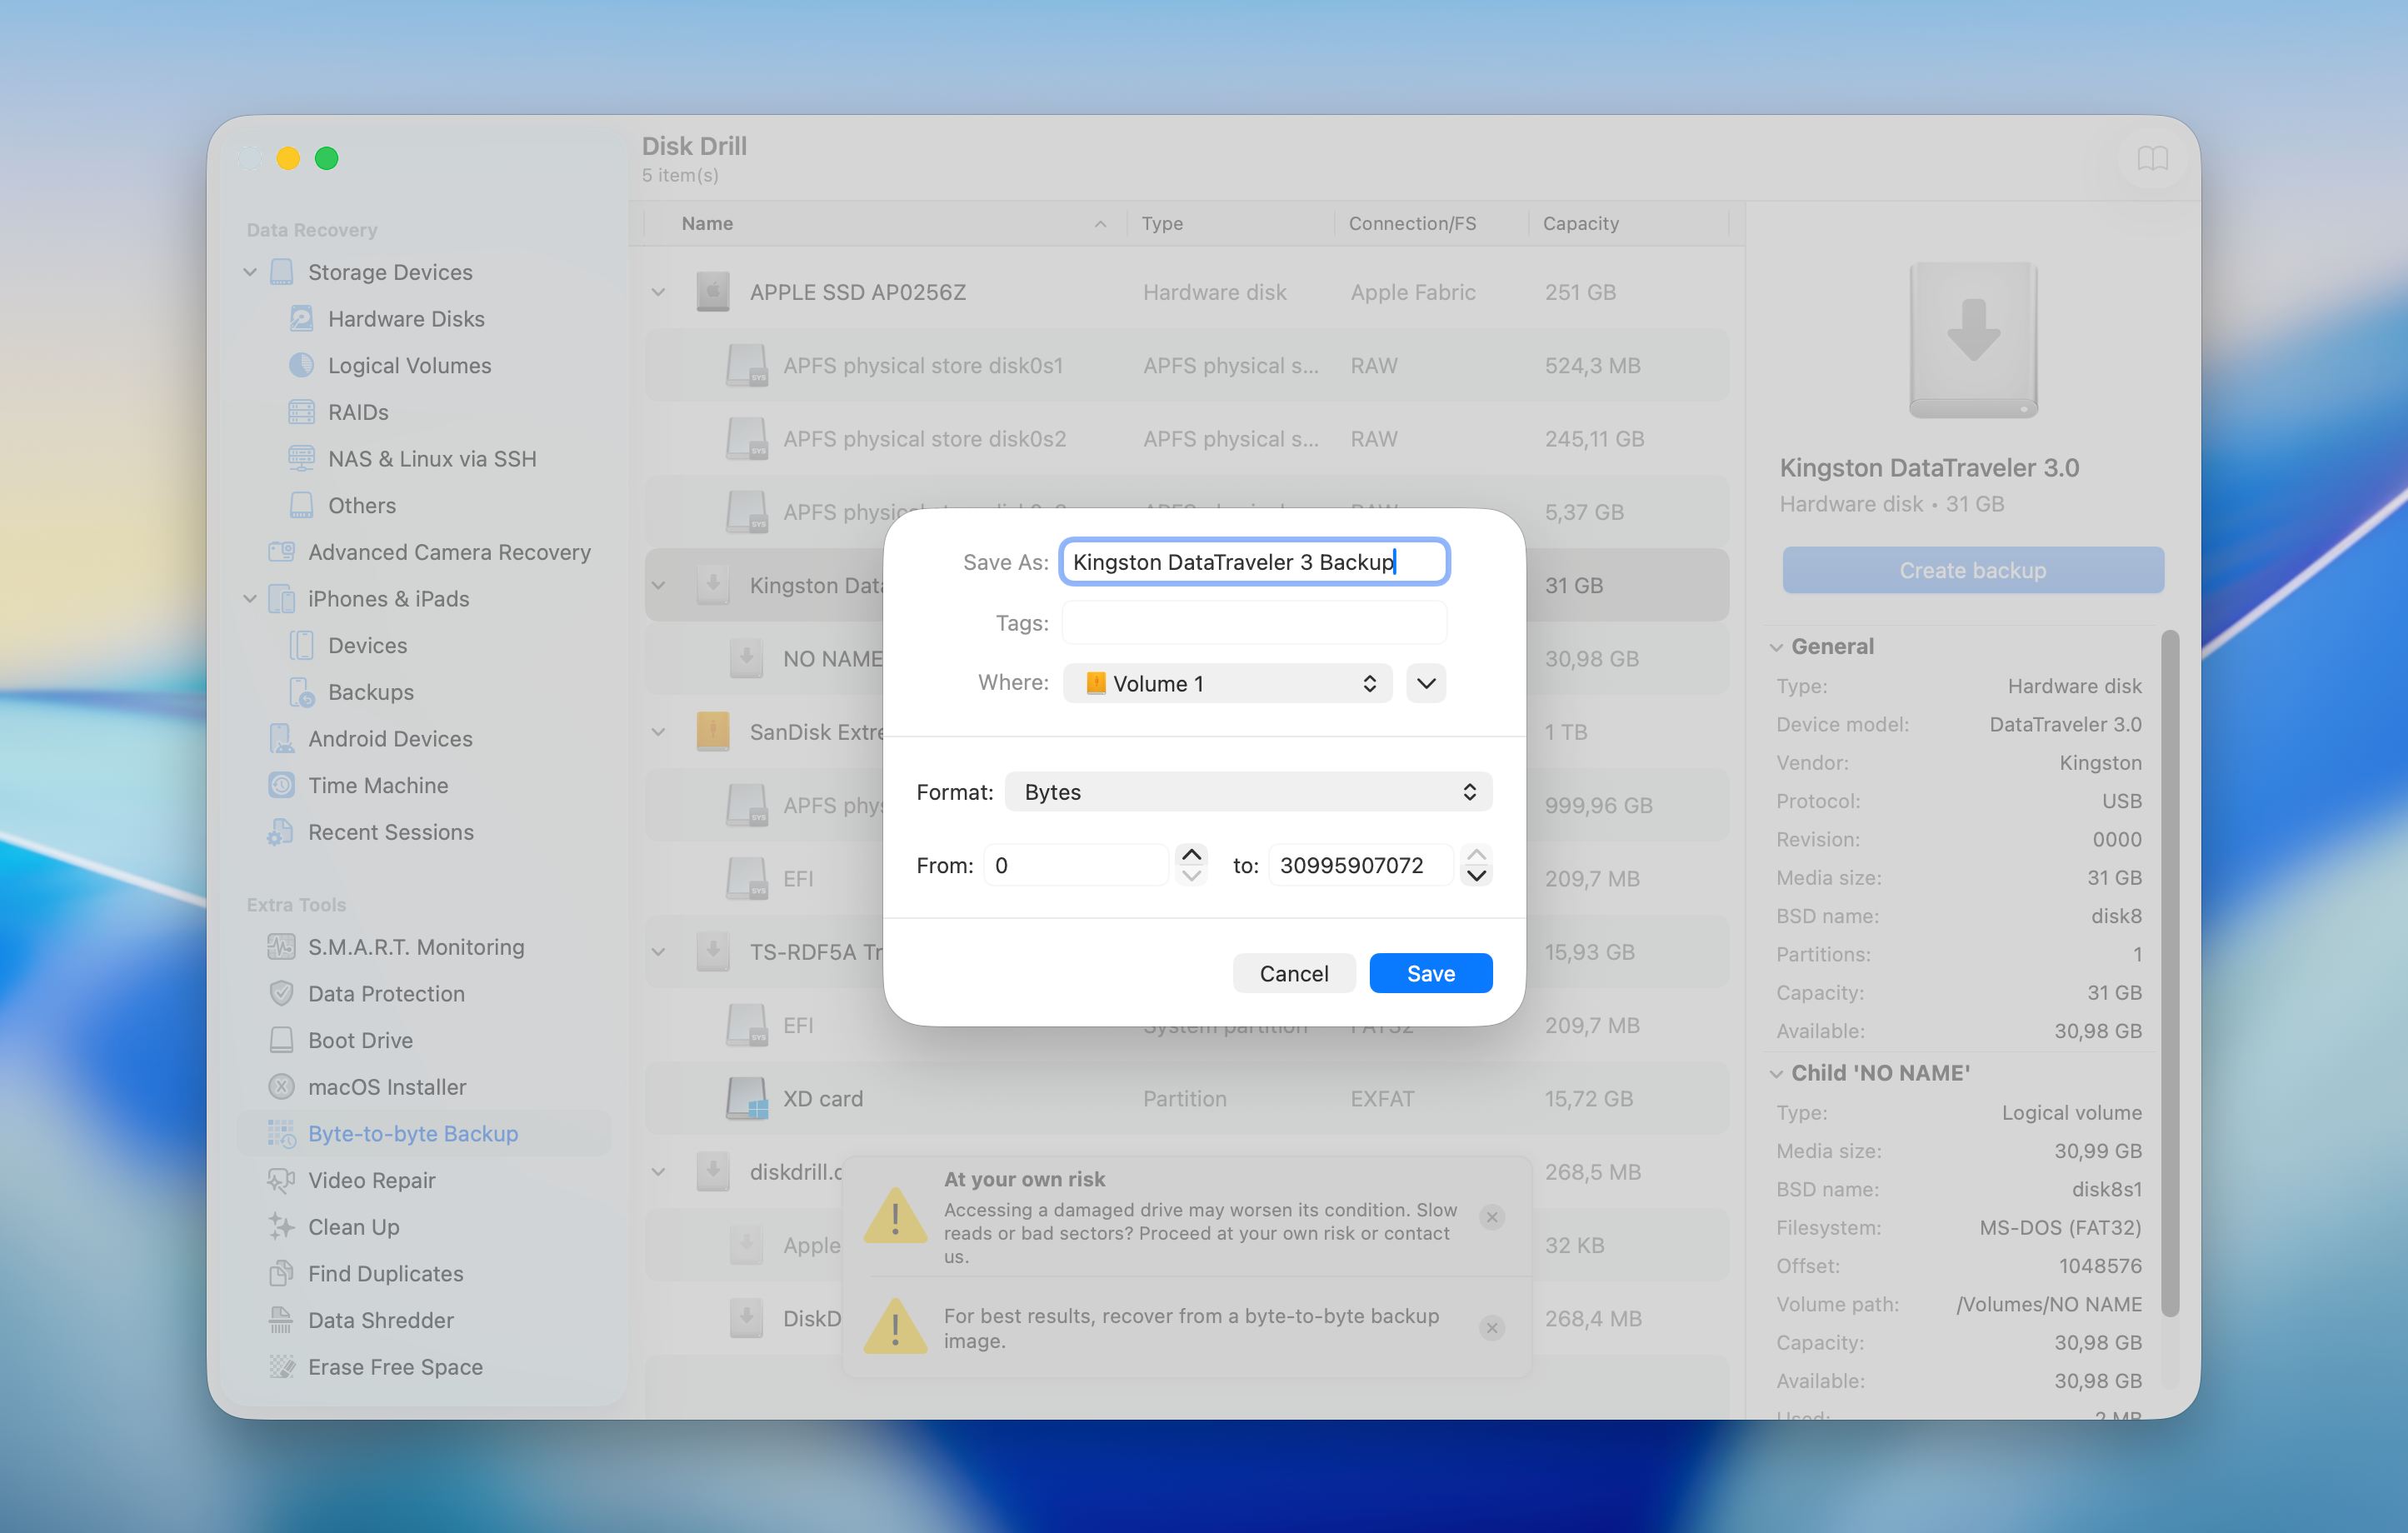
- Select the drive to save a backup, change a name if necessary and click OK.
- Go back to the main menu and click Attach disk image.
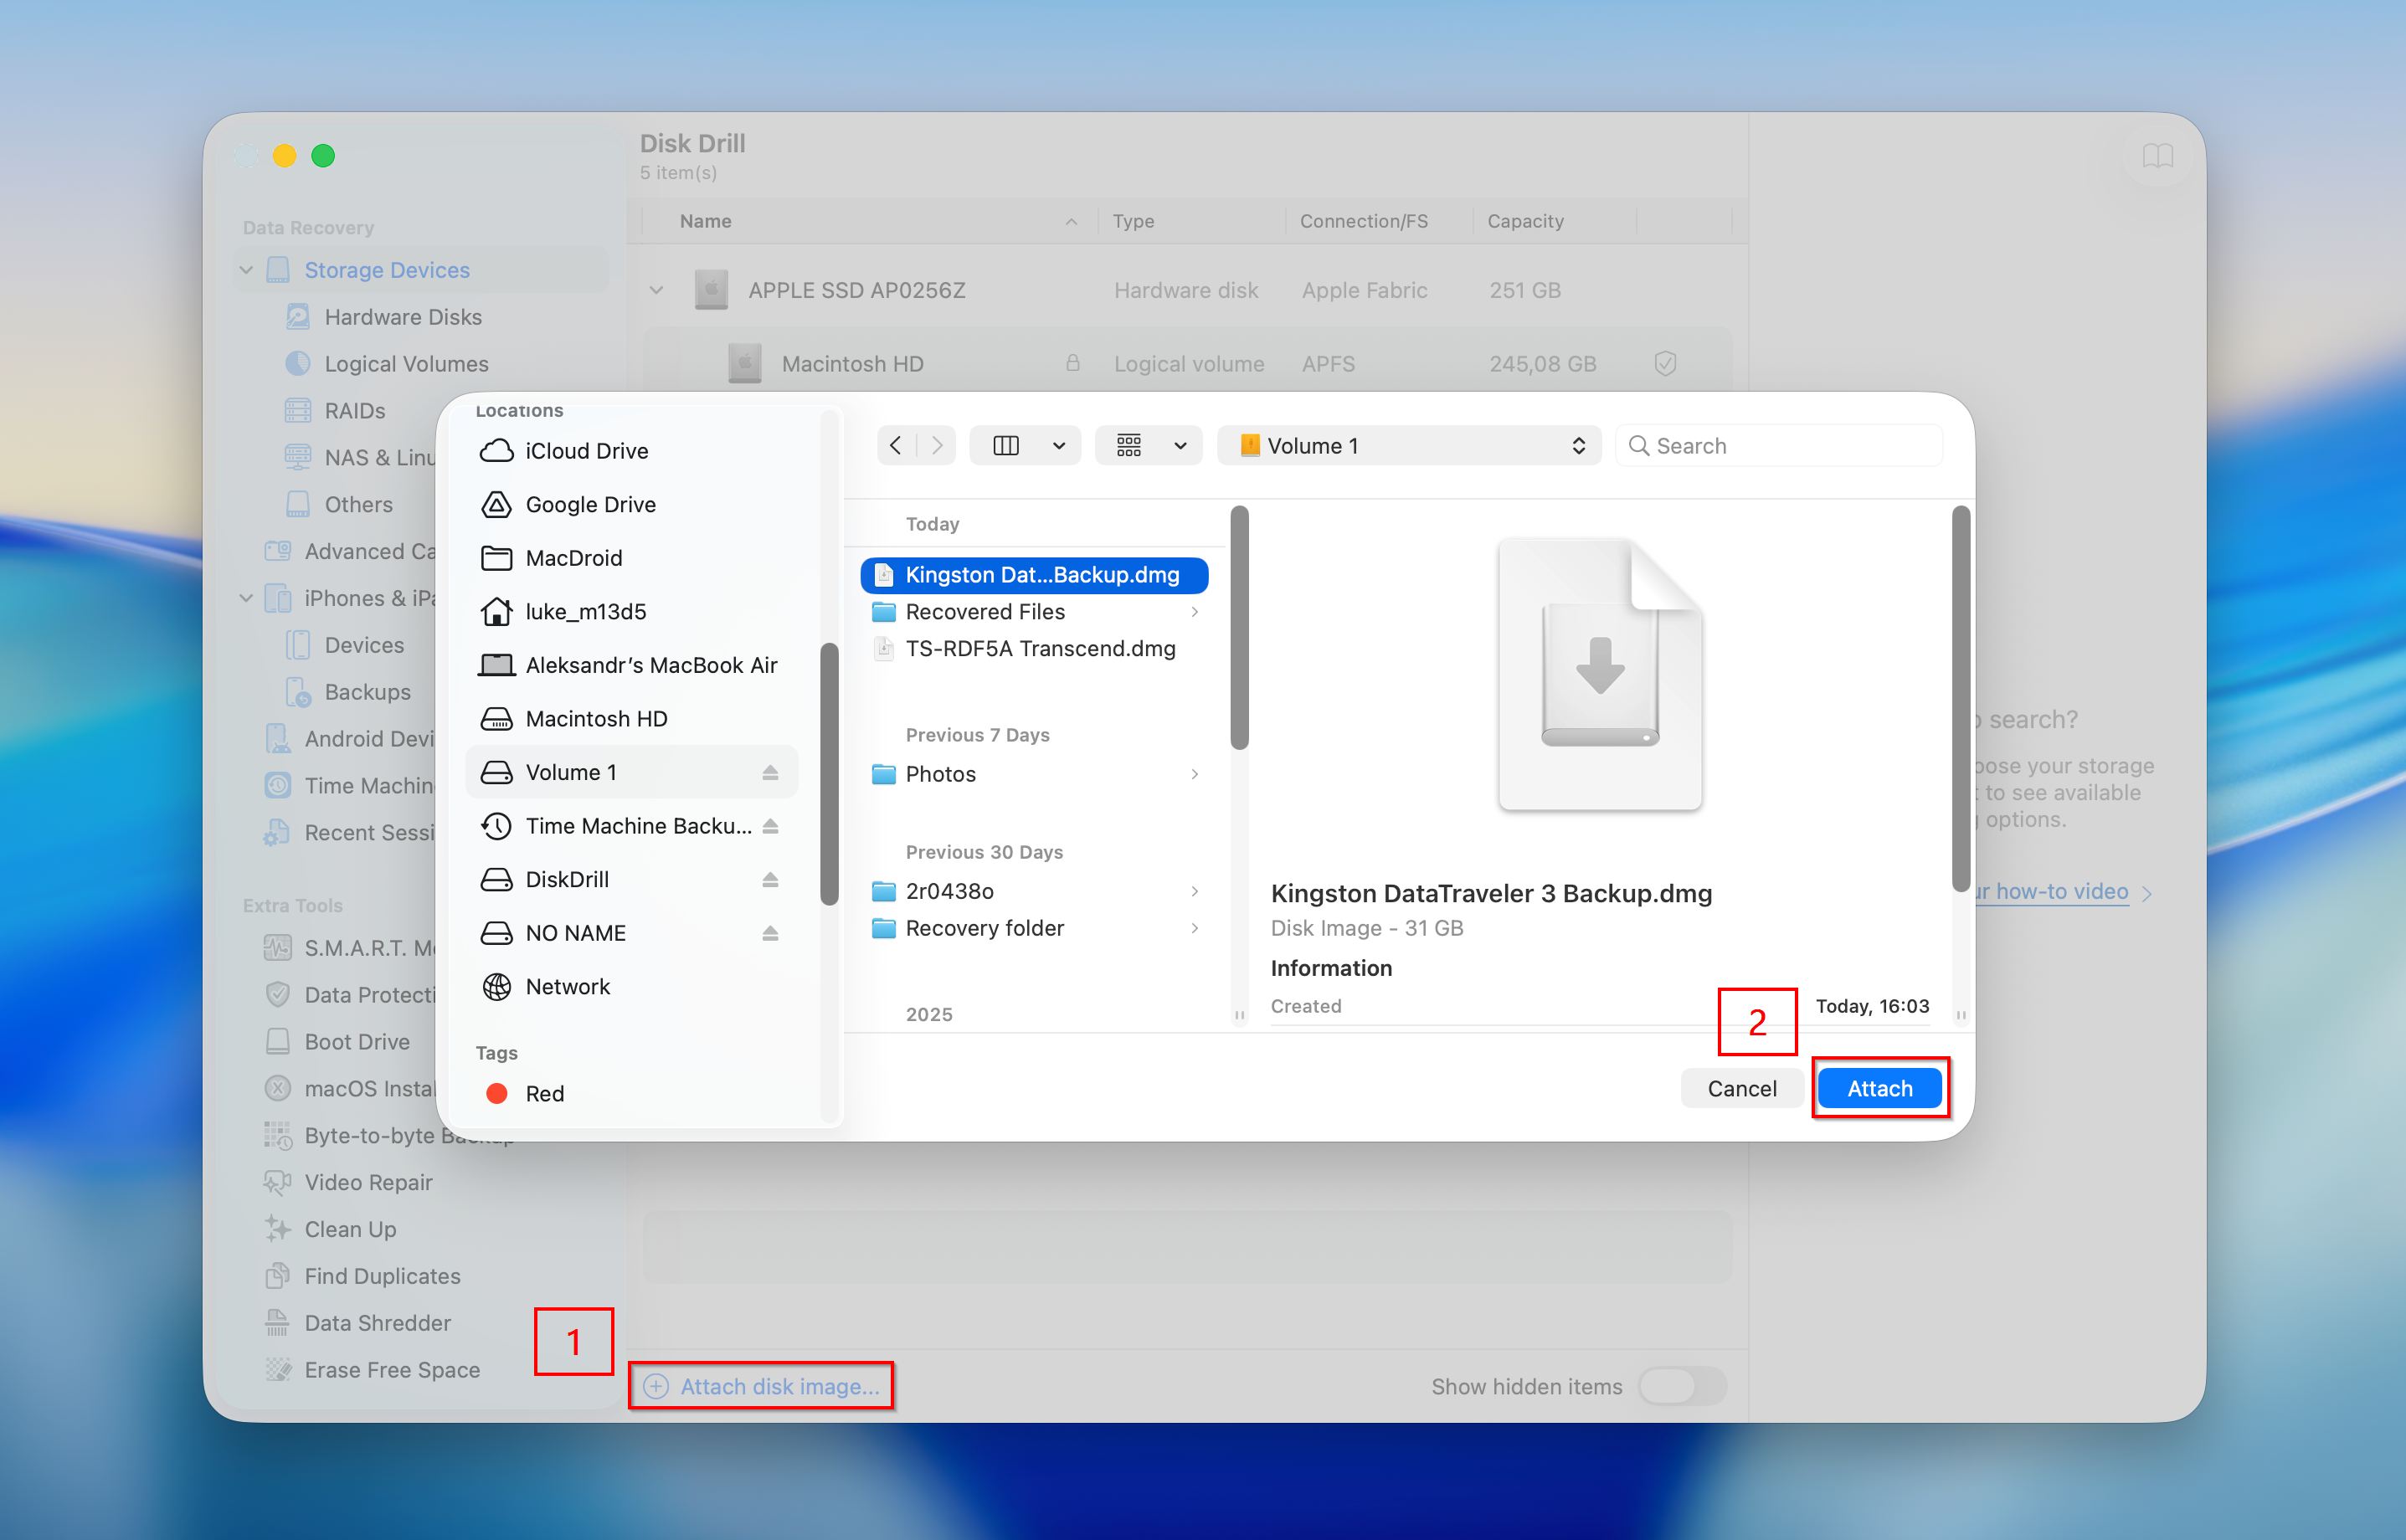
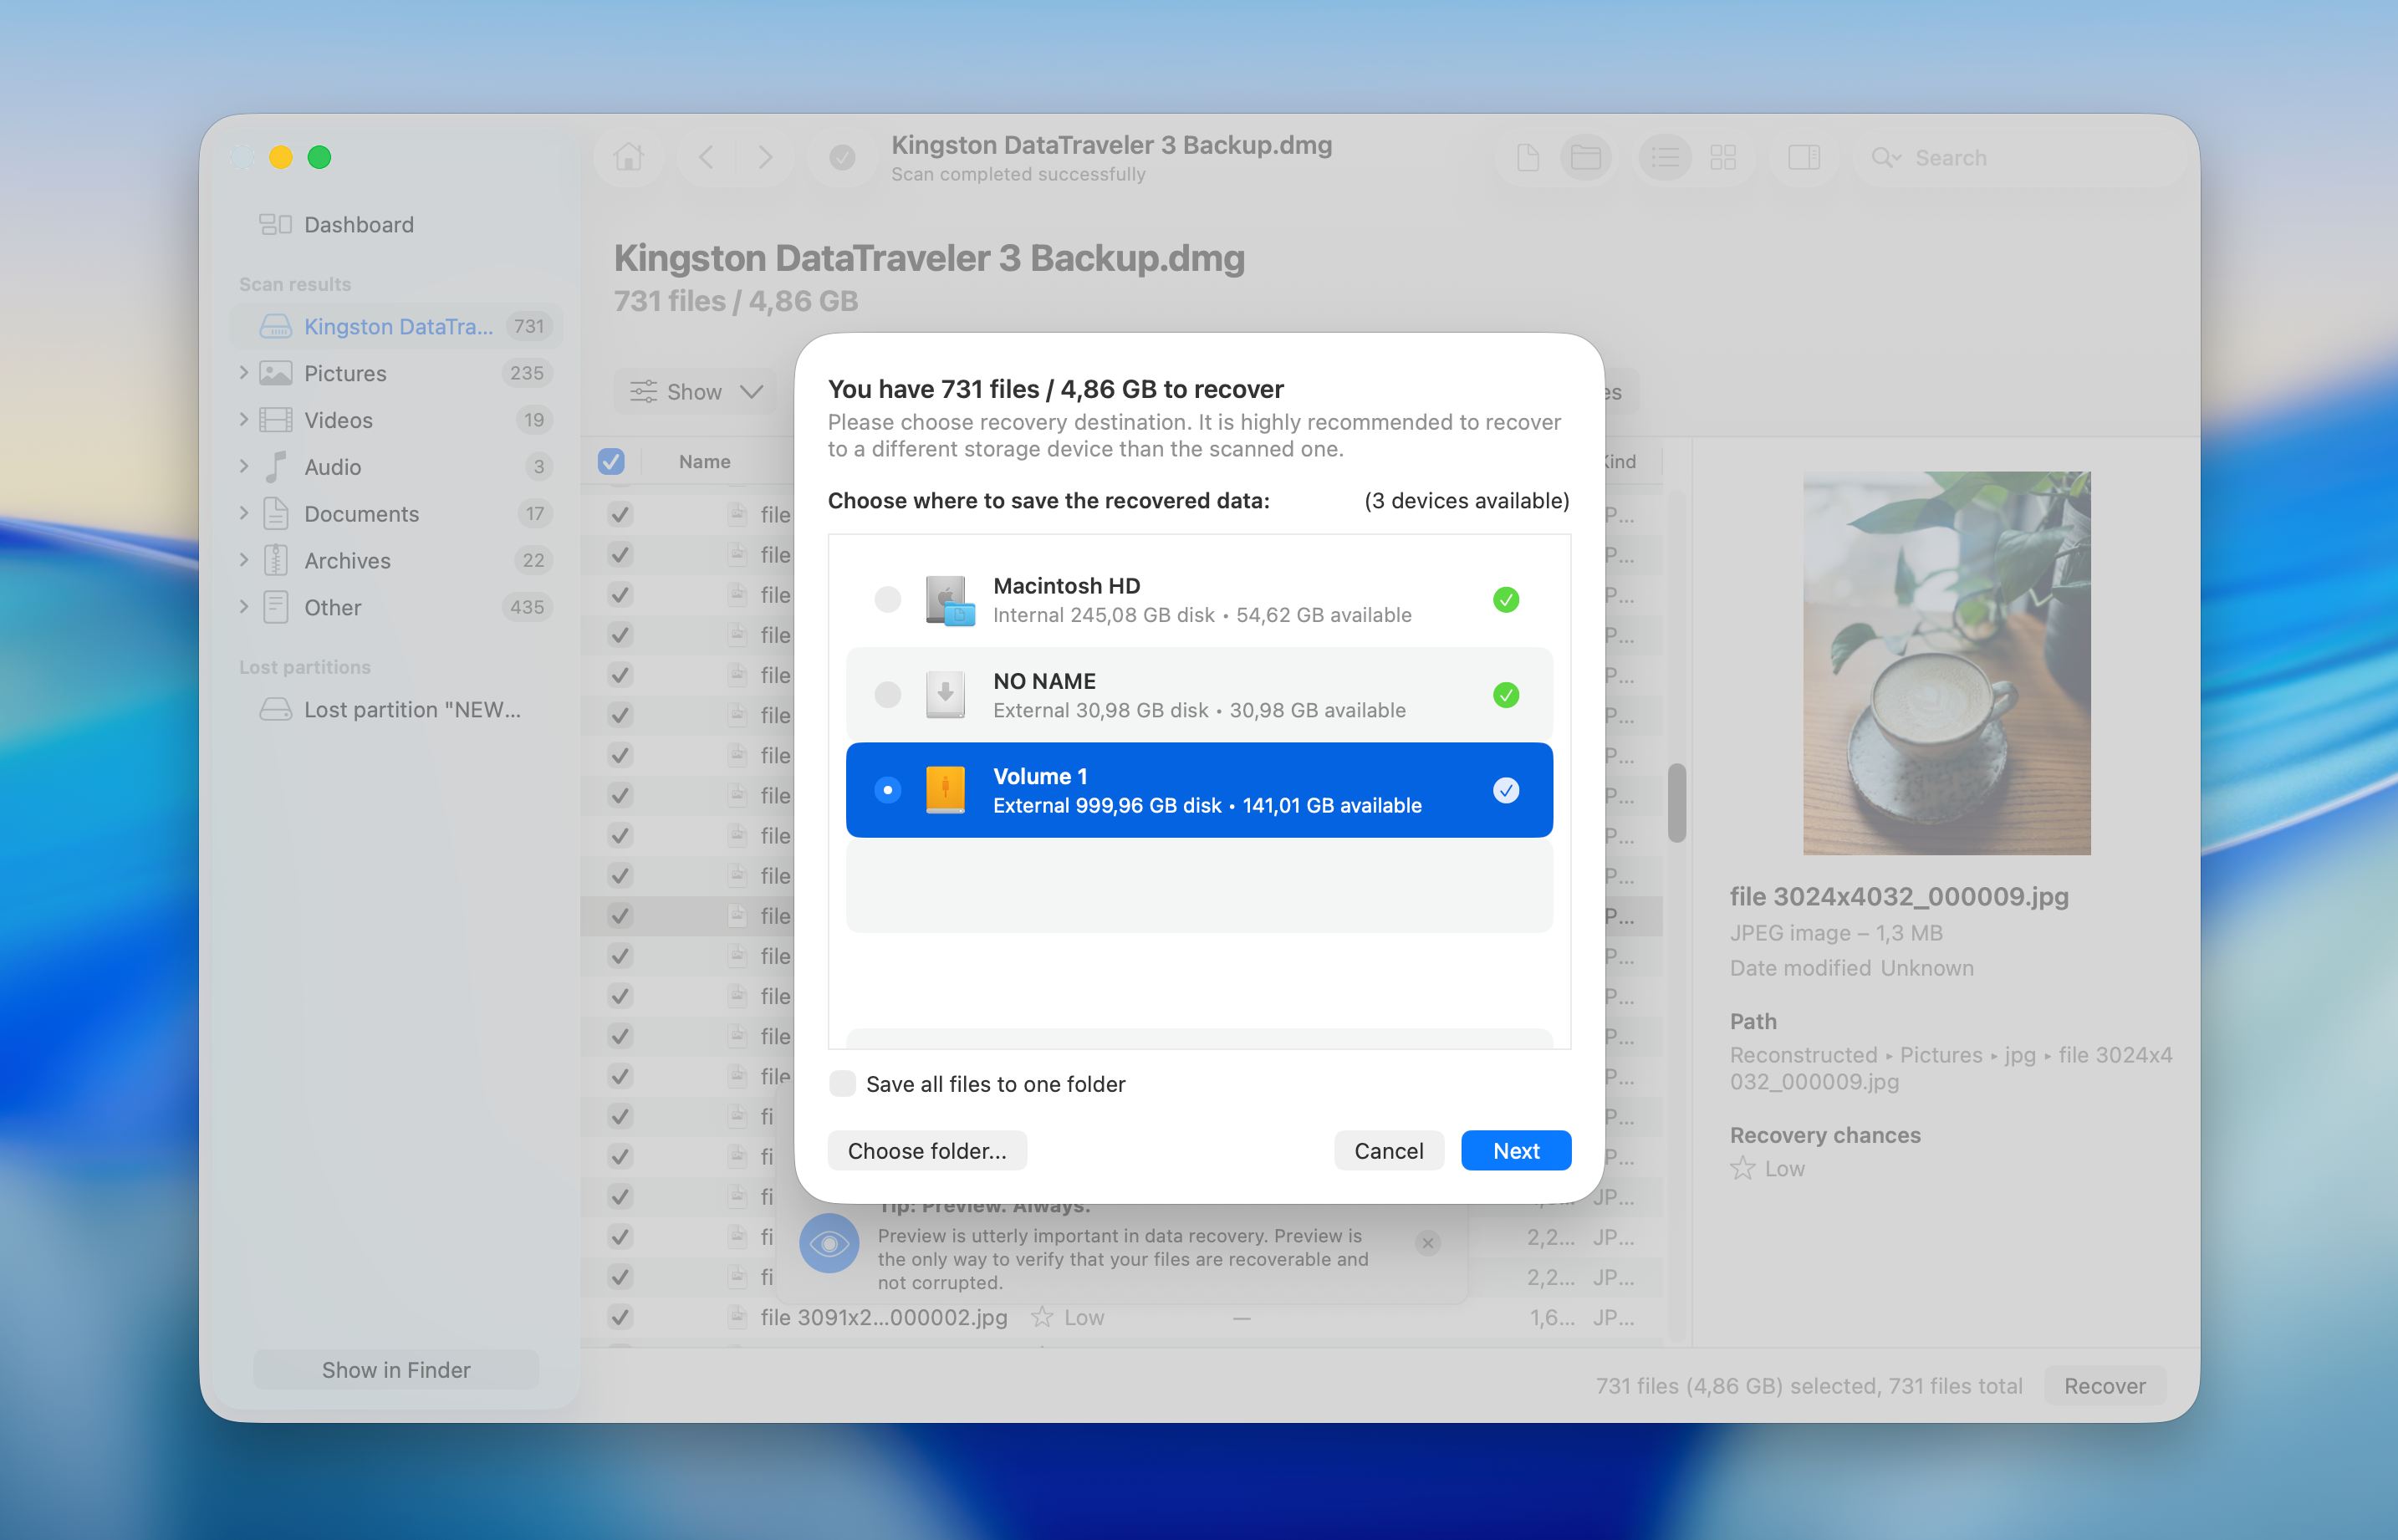
- Select the partition or image you want to recover and click on Search for lost data.

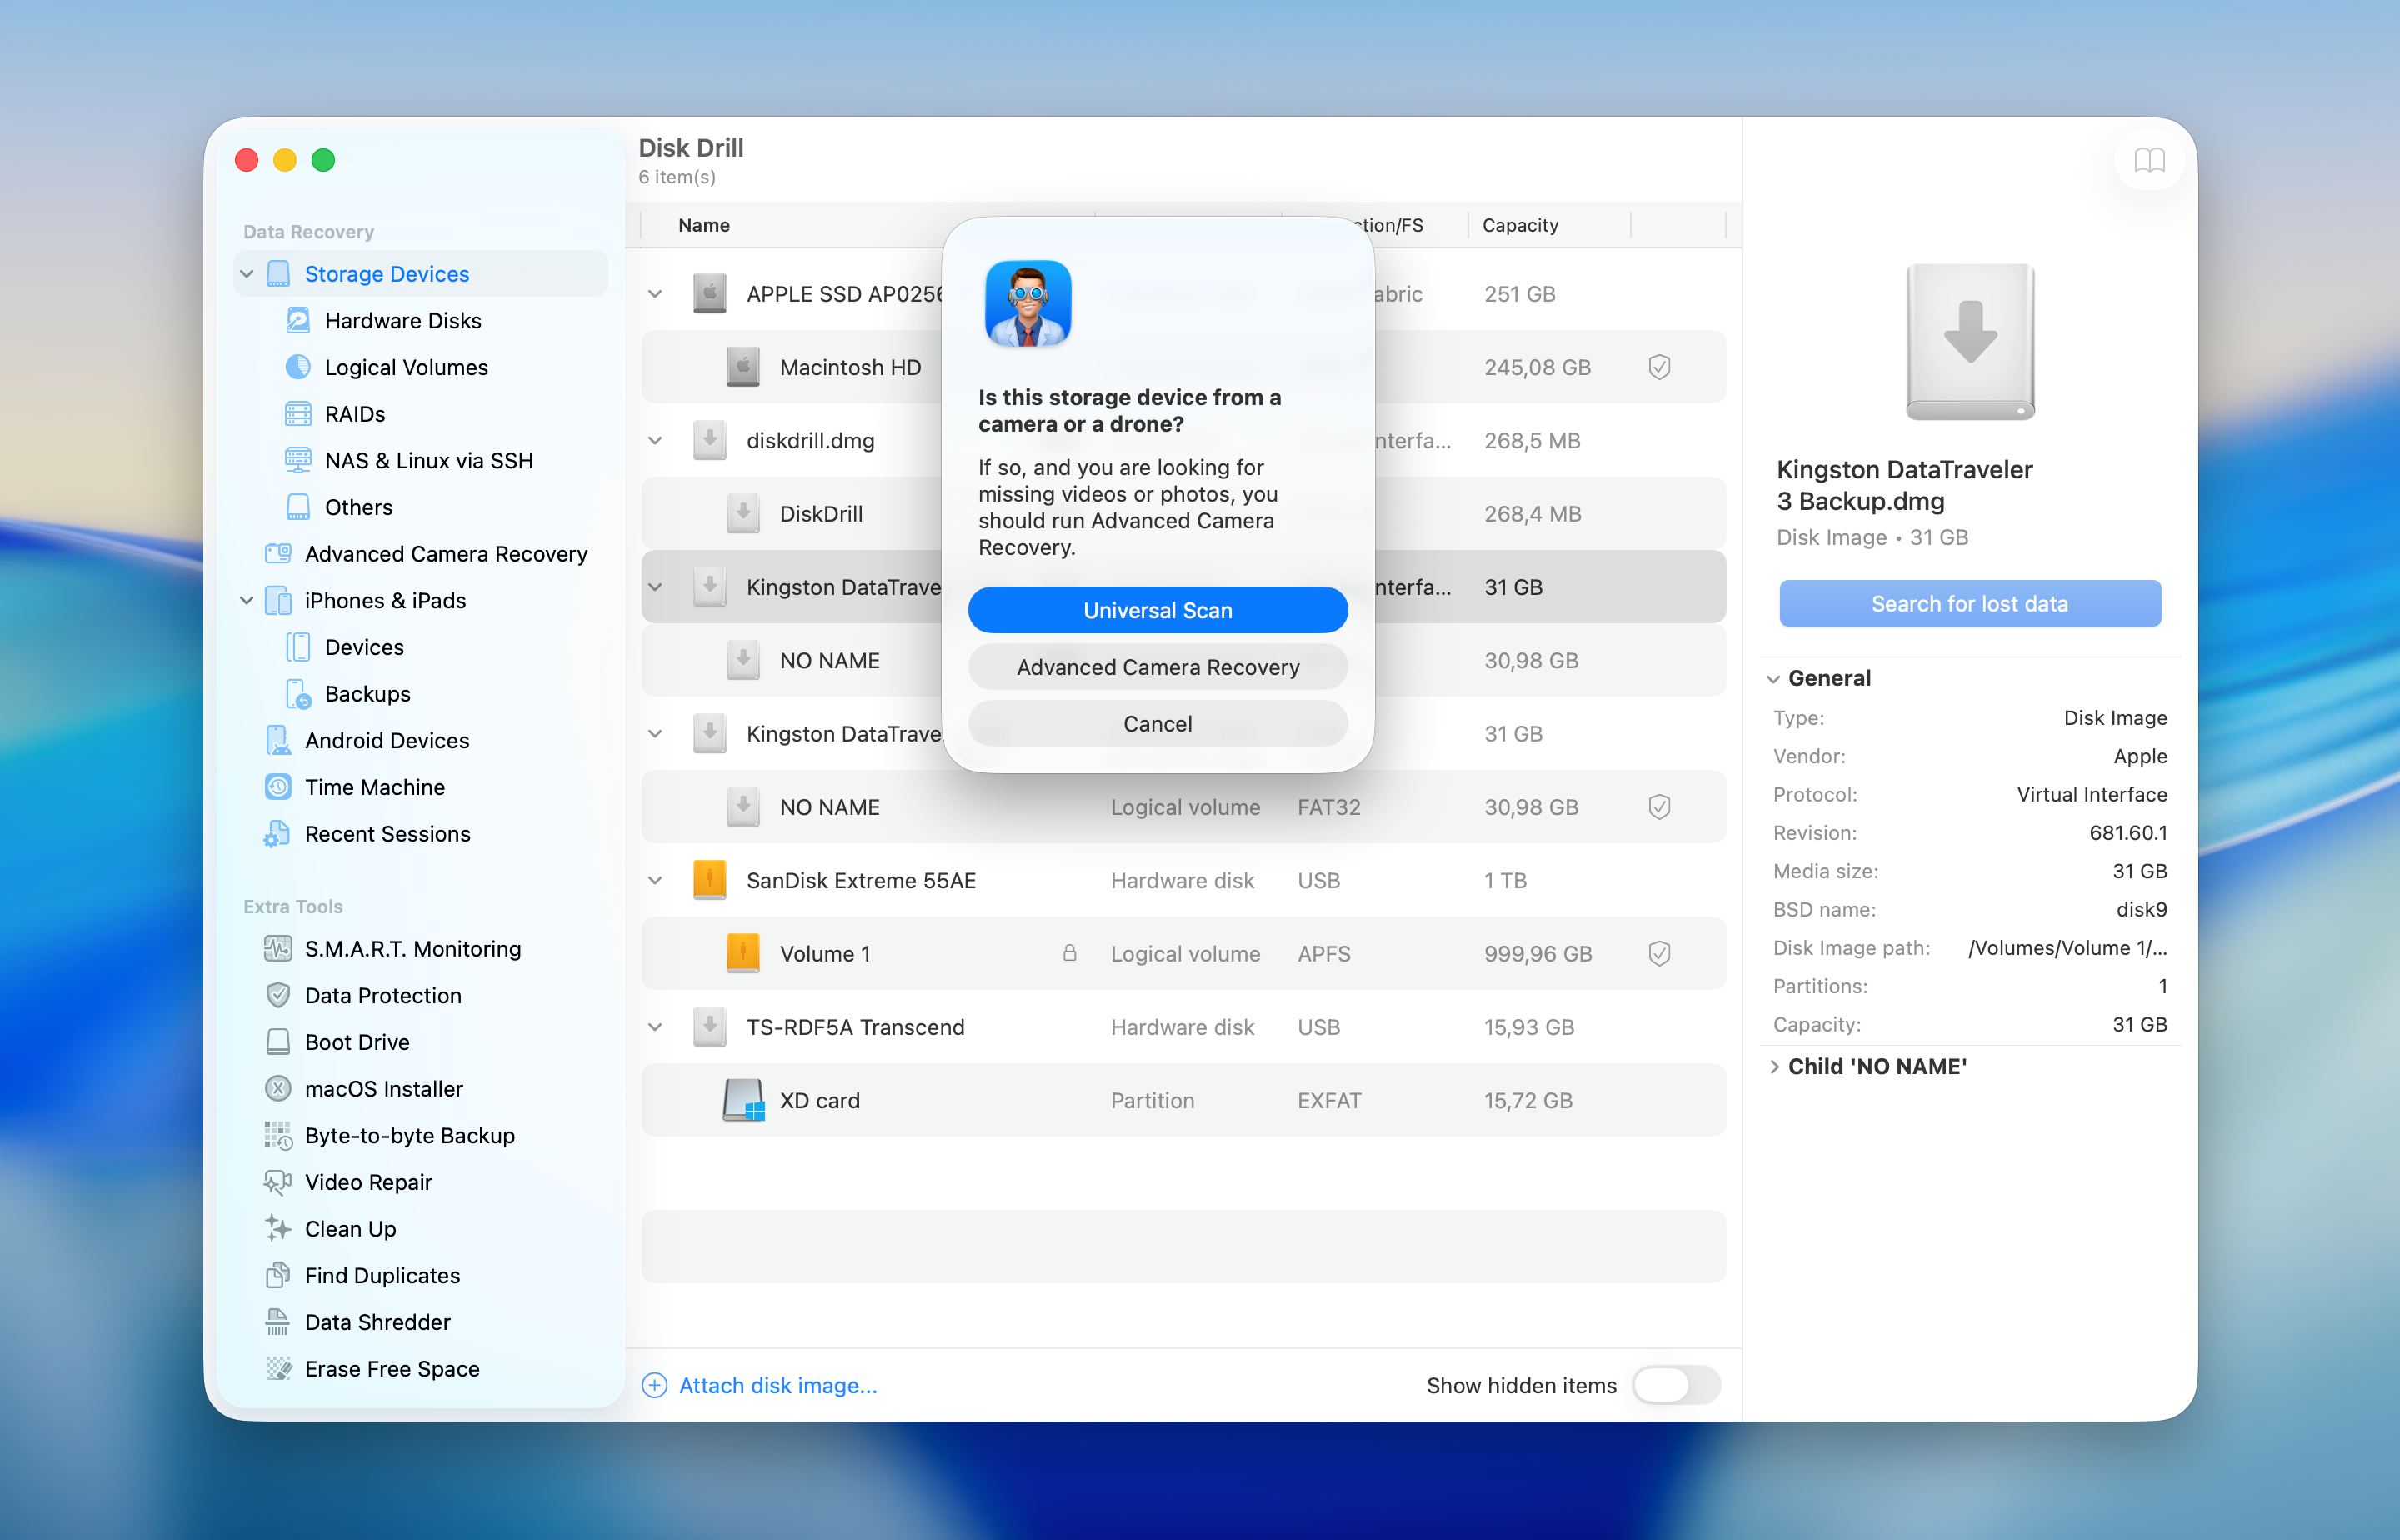
- If you scan an external drive, Disk Drill will ask you to select recovery mode. In most cases, Universal Scan is the way to go, unless you need to recover videos from a camera or drone memory card.
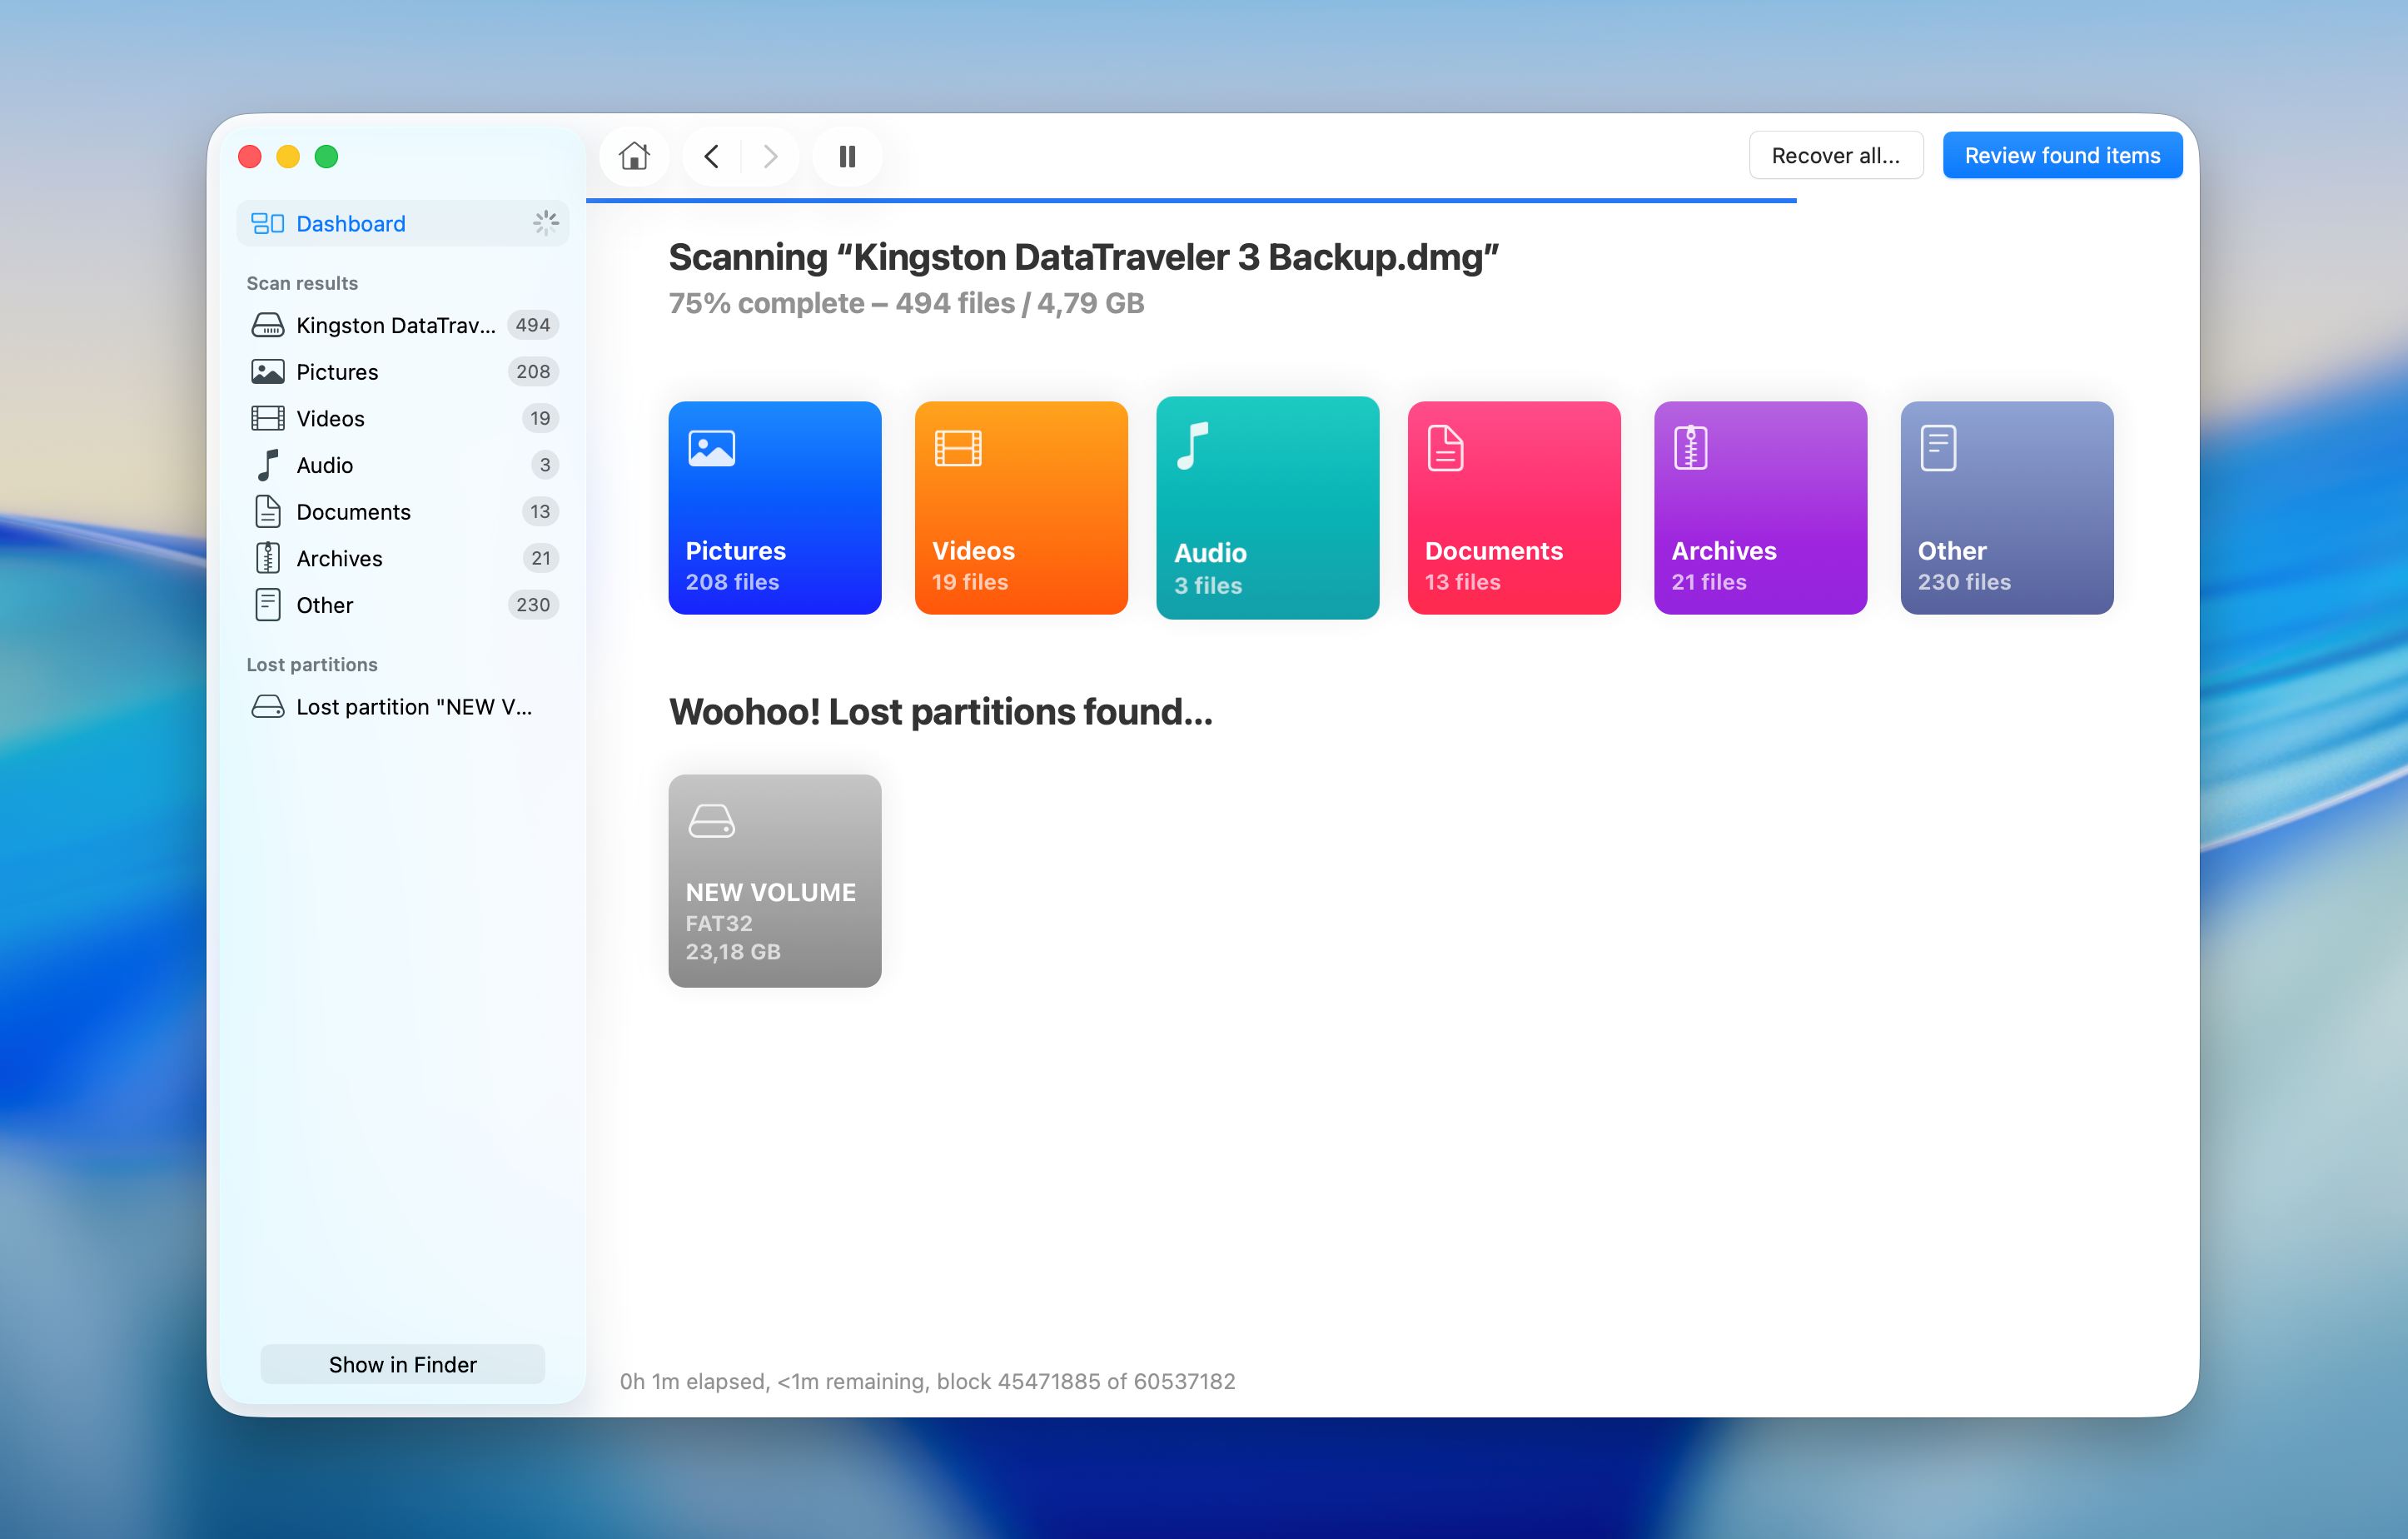
- Wait for the scan to finish, then click on Review found items. If the software detects a complete partition, you can open it right away and access its files directly without going through the full results list.
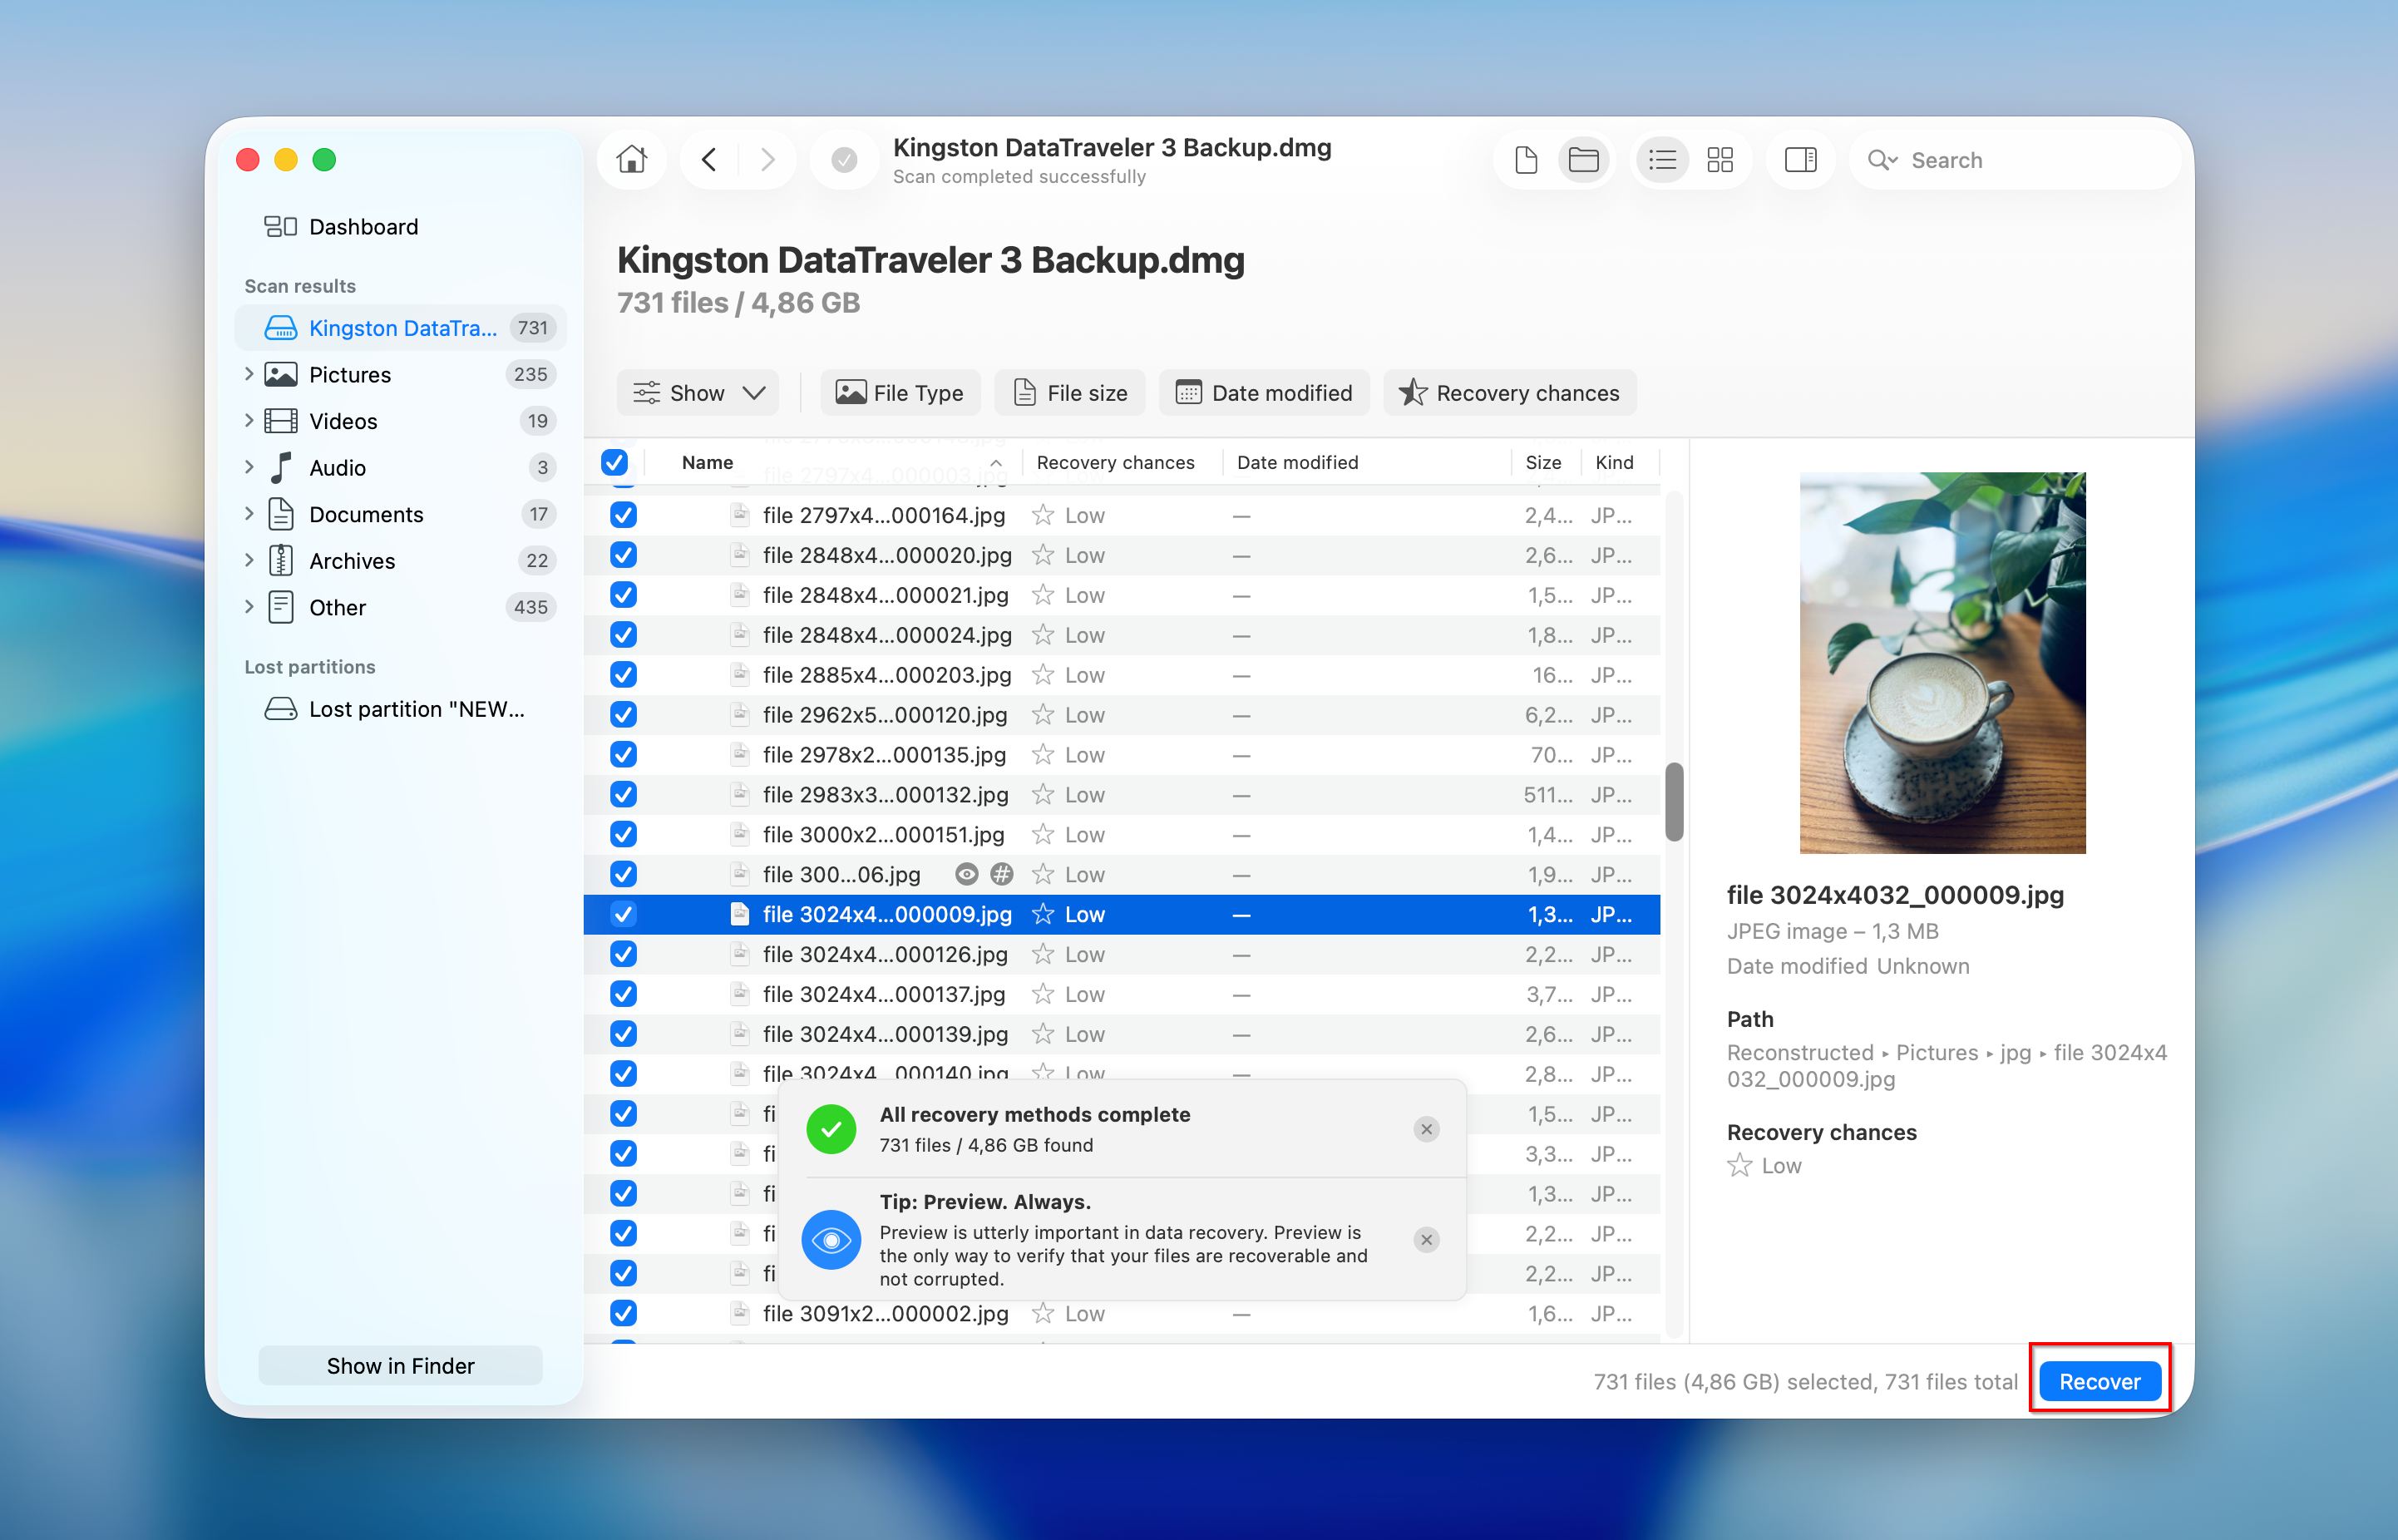
- Use the preview feature to check file integrity before recovery, and apply filters in the left pane or above the results list to quickly narrow down the scan results. Select the files you want to recover, or choose an entire detected partition to restore all files from it. Click the Recover button.
- Choose a destination to save the recovered files and confirm the action. Once the process finishes, a notification will appear.
Disk Drill handles various recovery scenarios well and offers features such as S.M.A.R.T. monitoring to check the drive’s condition before and during recovery.
How to Repair Corrupted Partition
File recovery itself is a safe process, while repair attempts can modify the drive and reduce the chances of further recovery if something goes wrong. For this reason, recover your files first, or at least create a full backup or disk image as a safety measure.
These methods aim to restore the partition structure and make the drive usable again. We start with built-in macOS tools, then move to more advanced options such as Terminal and third-party utilities.
Method 1: Repair the Partition with Disk Utility (First Aid)
Disk Utility is the primary tool on macOS for fixing partition-level issues. In many cases, the partition itself is still intact, but macOS cannot read its structure correctly. First Aid checks the file system and attempts to repair these inconsistencies automatically.
Here is how to do it:
- Open Disk Utility from Launchpad or from the Applications folder and then Utilities. Restart into Recovery Mode first if the affected partition belongs to the startup disk.
- Click View and select Show All Devices to display the full disk structure.
- Select the affected partition in the sidebar, then click First Aid in the top toolbar.
- Confirm the action and wait for the scan and repair process to complete.
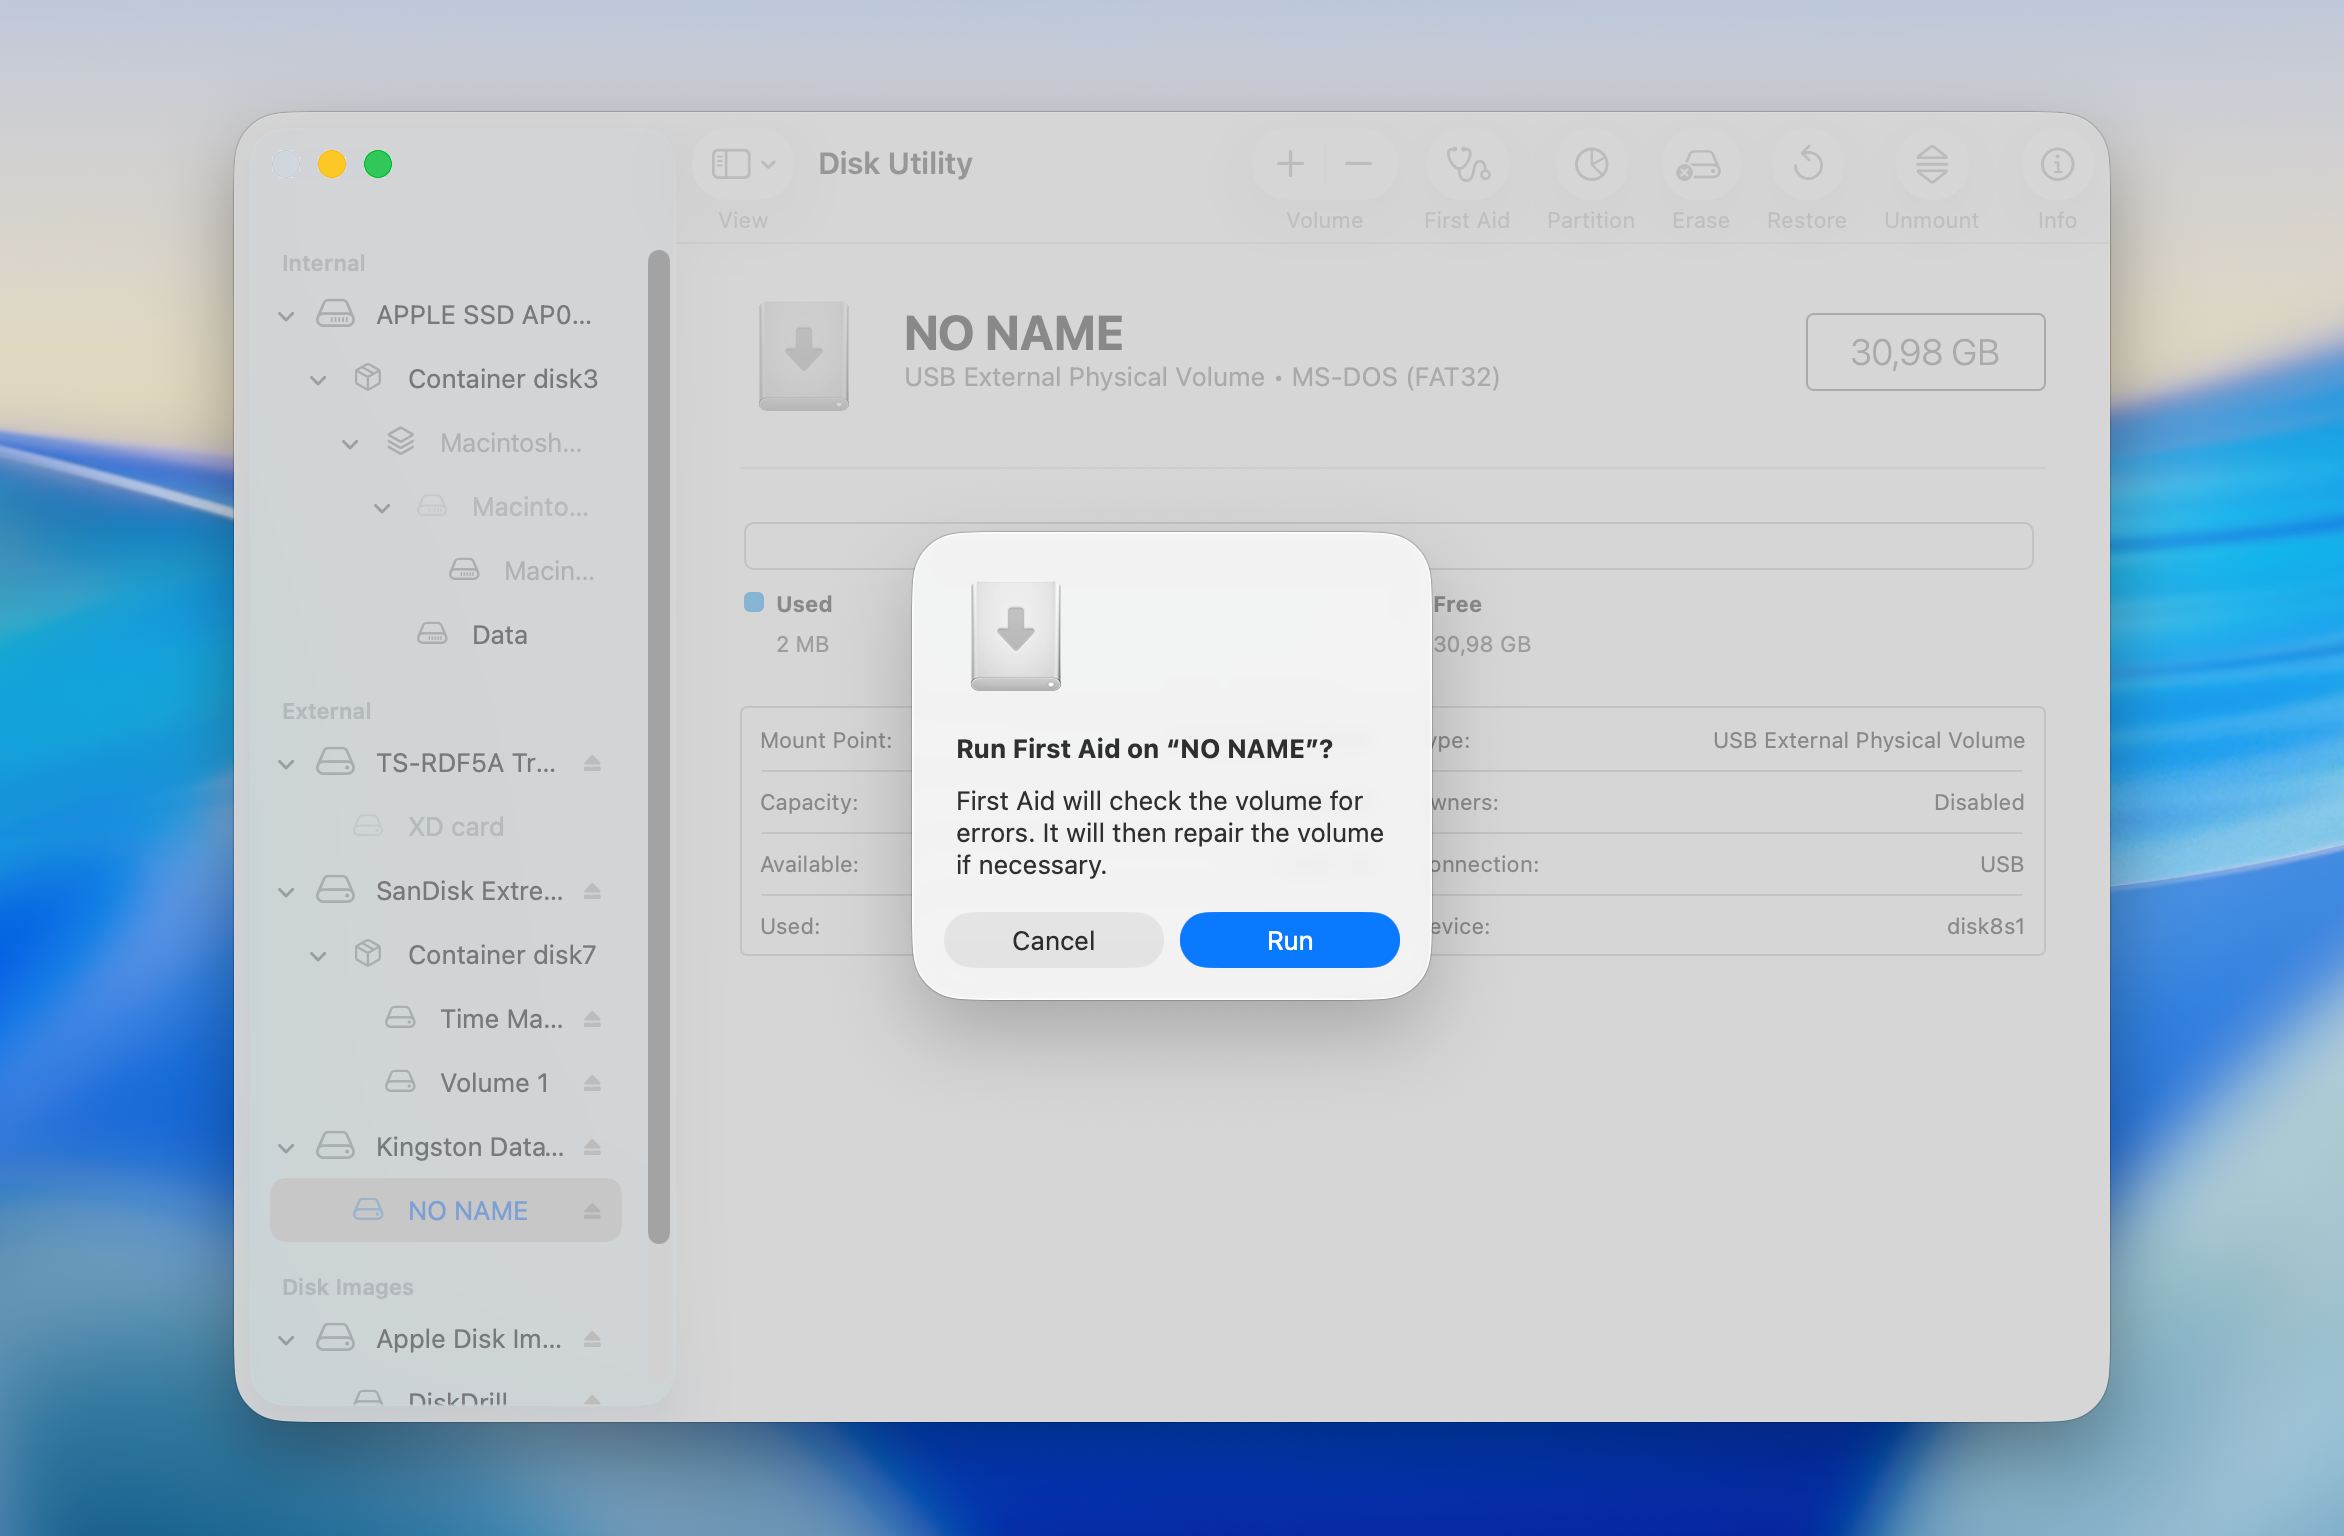
- Review the result message and close the window once the process finishes.
After the repair completes, check if the partition mounts and becomes accessible. Run First Aid again on the parent container or physical disk if the issue persists, since partition map problems often affect multiple levels. A restart can also help macOS load the repaired structure correctly.
Stop repeated repair attempts if Disk Utility reports that it cannot fix the errors or if the partition remains inaccessible. At that point, the safer approach is to recover data first before attempting any further fixes.
Method 2: Repair Using Terminal (fsck)/h3>
If Disk Utility fails to repair the partition or does not detect the issue at all, the fsck command can perform a deeper file system check and attempt to fix structural inconsistencies directly. This method is more technical and works best when the partition is still detected but cannot mount or behaves incorrectly.
Here is how to use the fsck command to repair a corrupted partition:
- Restart the Mac and enter macOS Recovery so the system disk is not in active use.
- Open Terminal from the Utilities menu in the Recovery environment.
- Enter the command diskutil list to list all connected drives and locate the affected partition. Note its identifier, for example disk2s1.
- Determine the file system type of the partition. Use the APFS version of the command for newer macOS volumes and the HFS version for older formatted drives.
- Run the appropriate fsck command with the correct disk identifier and confirm the operation when prompted.
 Example for APFS:
fsck_apfs -y /dev/disk2s1.
Example for HFS+:
fsck_hfs -fy /dev/disk2s1
- Wait for the check to complete and review the output to see if errors were repaired.
- Restart the Mac and check if the partition mounts and becomes accessible.
This method usually helps when the partition structure exists but contains errors that prevent normal access. It can succeed in cases where Disk Utility reports issues but cannot complete the repair.
Method 3: Repair the Corrupted Partition Using TestDisk
TestDisk is a powerful open-source tool for partition repair and recovery. It can handle a wide range of scenarios, from accidentally deleted partitions to severely corrupted partition tables. It is one of the more reliable options available for free. The main caveat is that TestDisk operates entirely through a command-line interface, with no graphical interface to guide you through the process.
That may seem complex at first, but as long as you follow the steps below carefully, you’ll have no trouble working through the tool:
- Install TestDisk on your Mac. You’ll be able to do it only after you install Homebrew (a software package management system). To do it, launch Terminal and copy-paste this command:
/bin/bash -c "$(curl -fsSL https://raw.githubusercontent.com/Homebrew/install/HEAD/install.sh)"
- Hit Return and type in your user password when prompted. Then hit Return once again to finish the installation process. Once Terminal says that the tool is installed, copy-paste this command to install TestDisk on your Mac and hit Return:
brew install testdisk
- Run TestDisk via Terminal. To do it, simply enter this command:
sudo testdisk - You’ll be asked to choose whether to create a new log file or not. The first option s is recommended since it’ll let you view all the tasks that are being completed by the tool, but it’s up to you to choose.
- Choose the drive you wish to scan and select the partition table type. Then choose the Analyse function (analyze current partition structure and search for lost partitions).
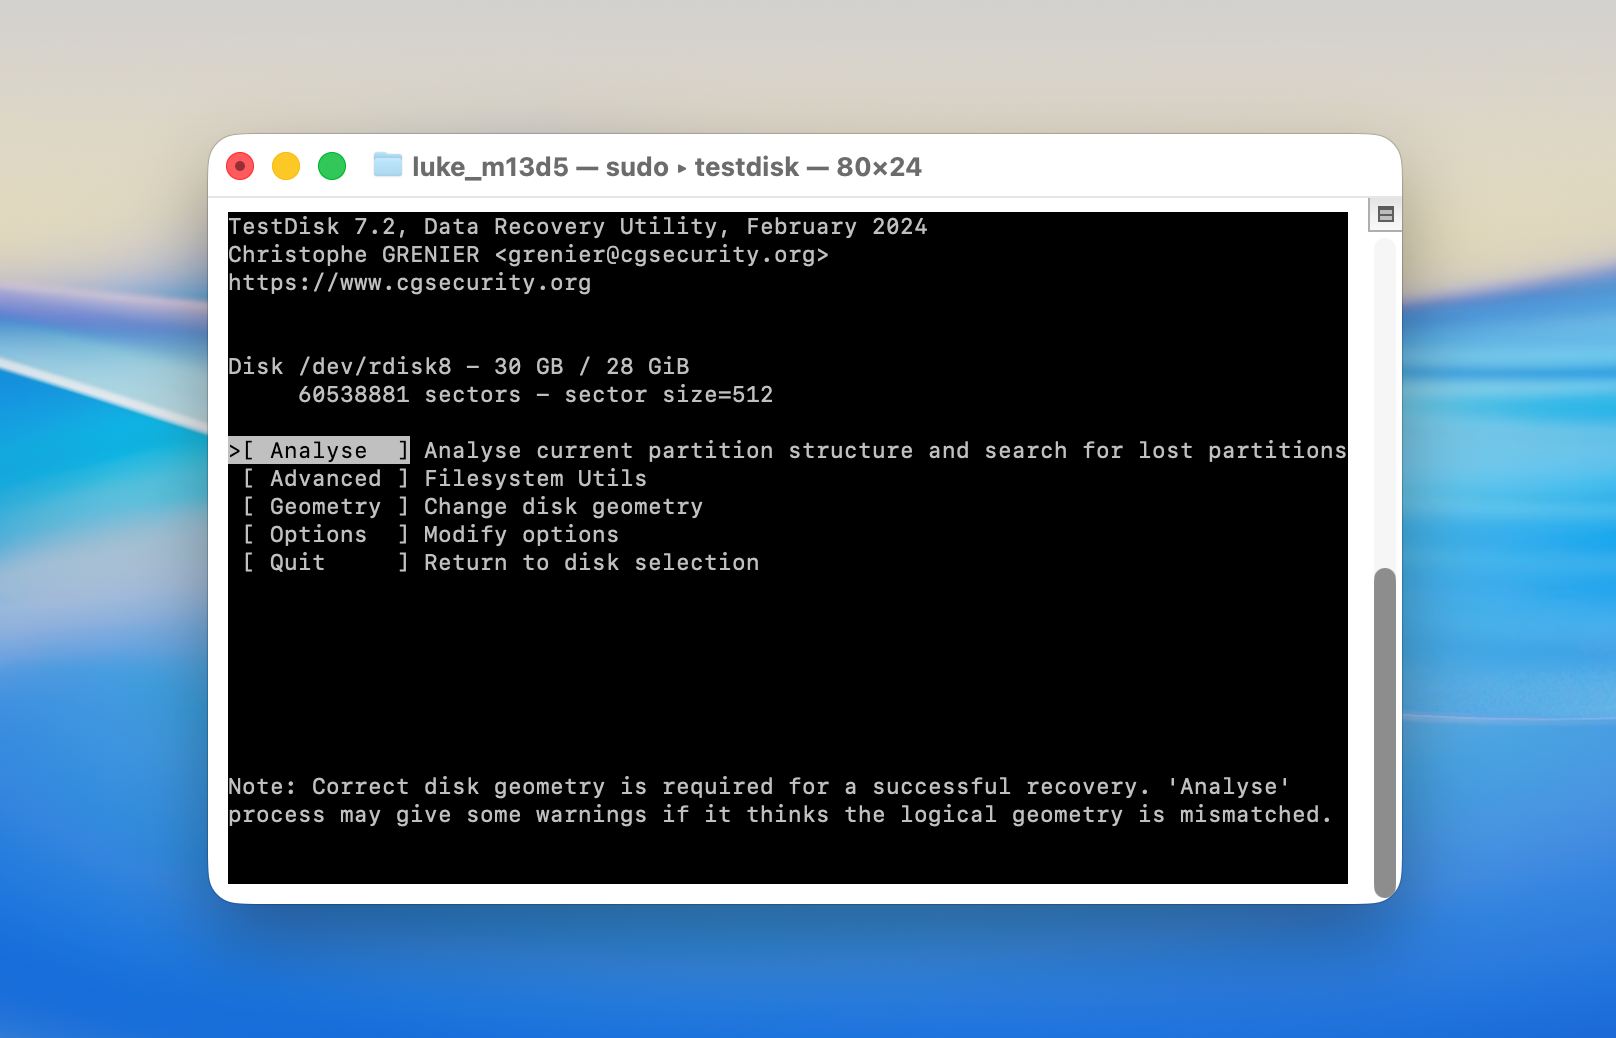
- Begin the Quick Search.
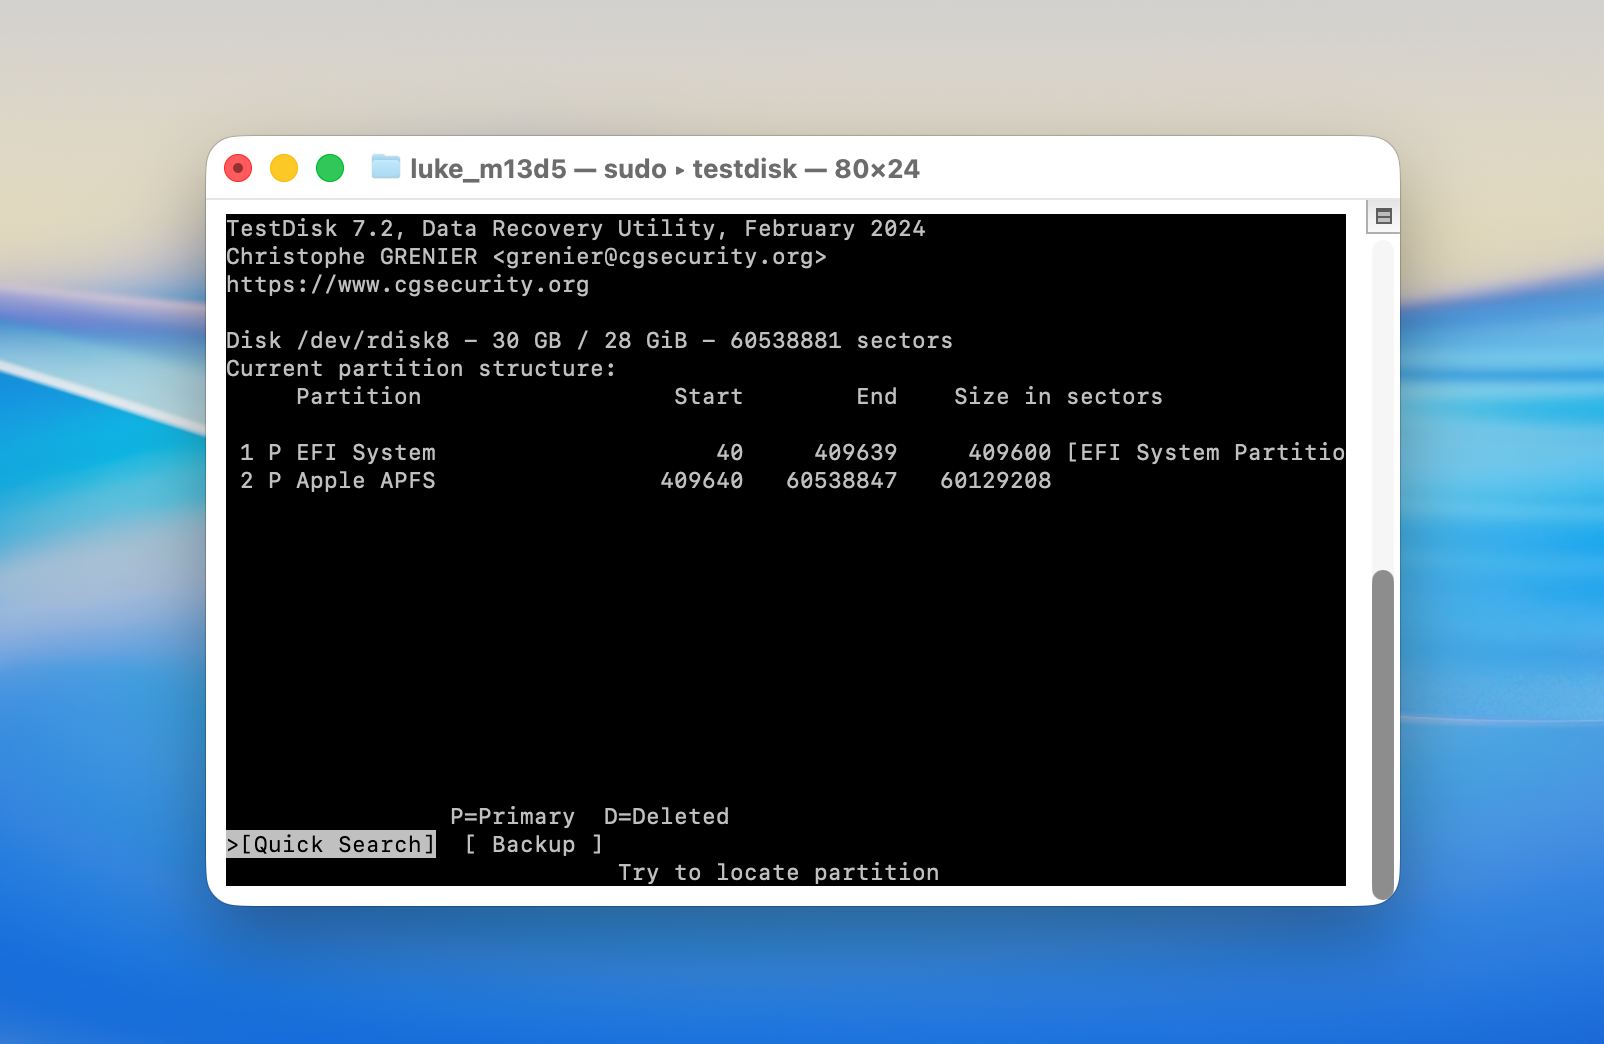
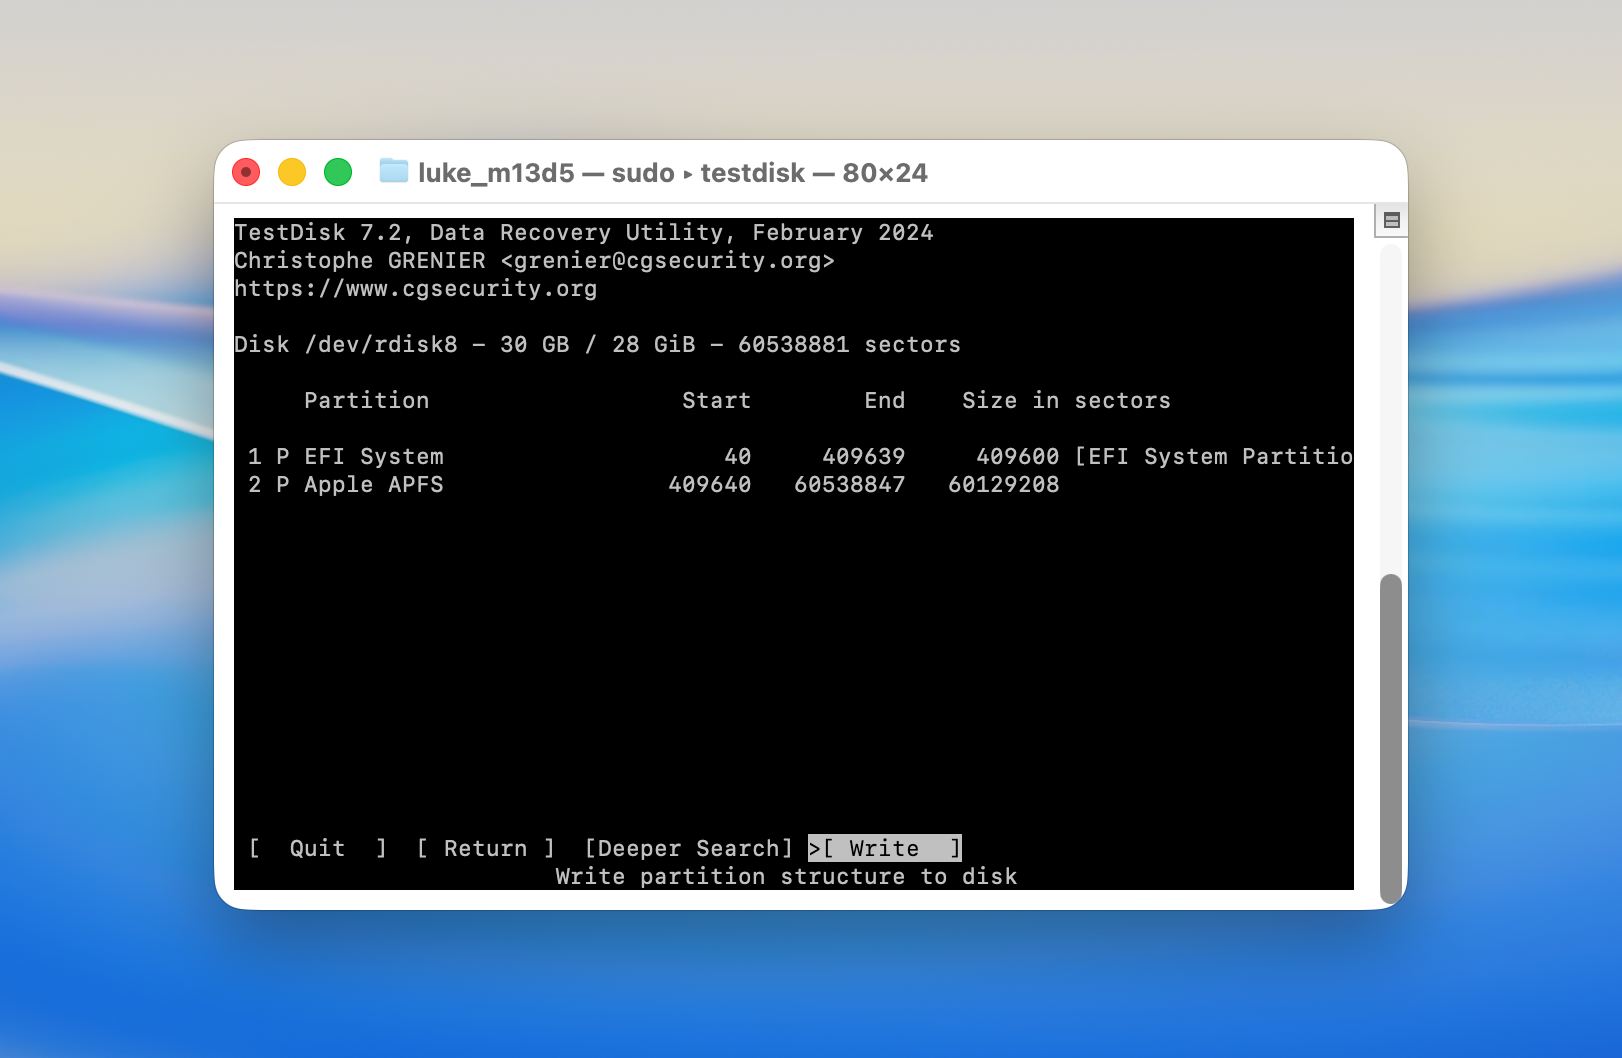
- Once the scan is finished, you’ll see a list of all recoverable partitions. If you’ve found the needed one, select it, and hit Return to start the Mac partition recovery process. Then choose Write to save the partition structure.
- If the tool hasn’t spotted your lost partition, try doing a Deeper Search. There is a chance that a deeper scan is needed to reveal the partition.
Method 4: Format the Drive Partition
If the partition cannot be repaired and data recovery is no longer required, formatting the partition restores usability as it creates a new file system structure.
Follow these steps to format a corrupted partition:
- Open Disk Utility from Launchpad or from the Applications folder and then Utilities.
- Click View and select Show All Devices.
- Select the corrupted partition or the entire disk from the sidebar.
- Click Erase in the top toolbar.
- Enter a name for the partition and choose the file system format. Select APFS for macOS use or exFAT for cross-platform compatibility.
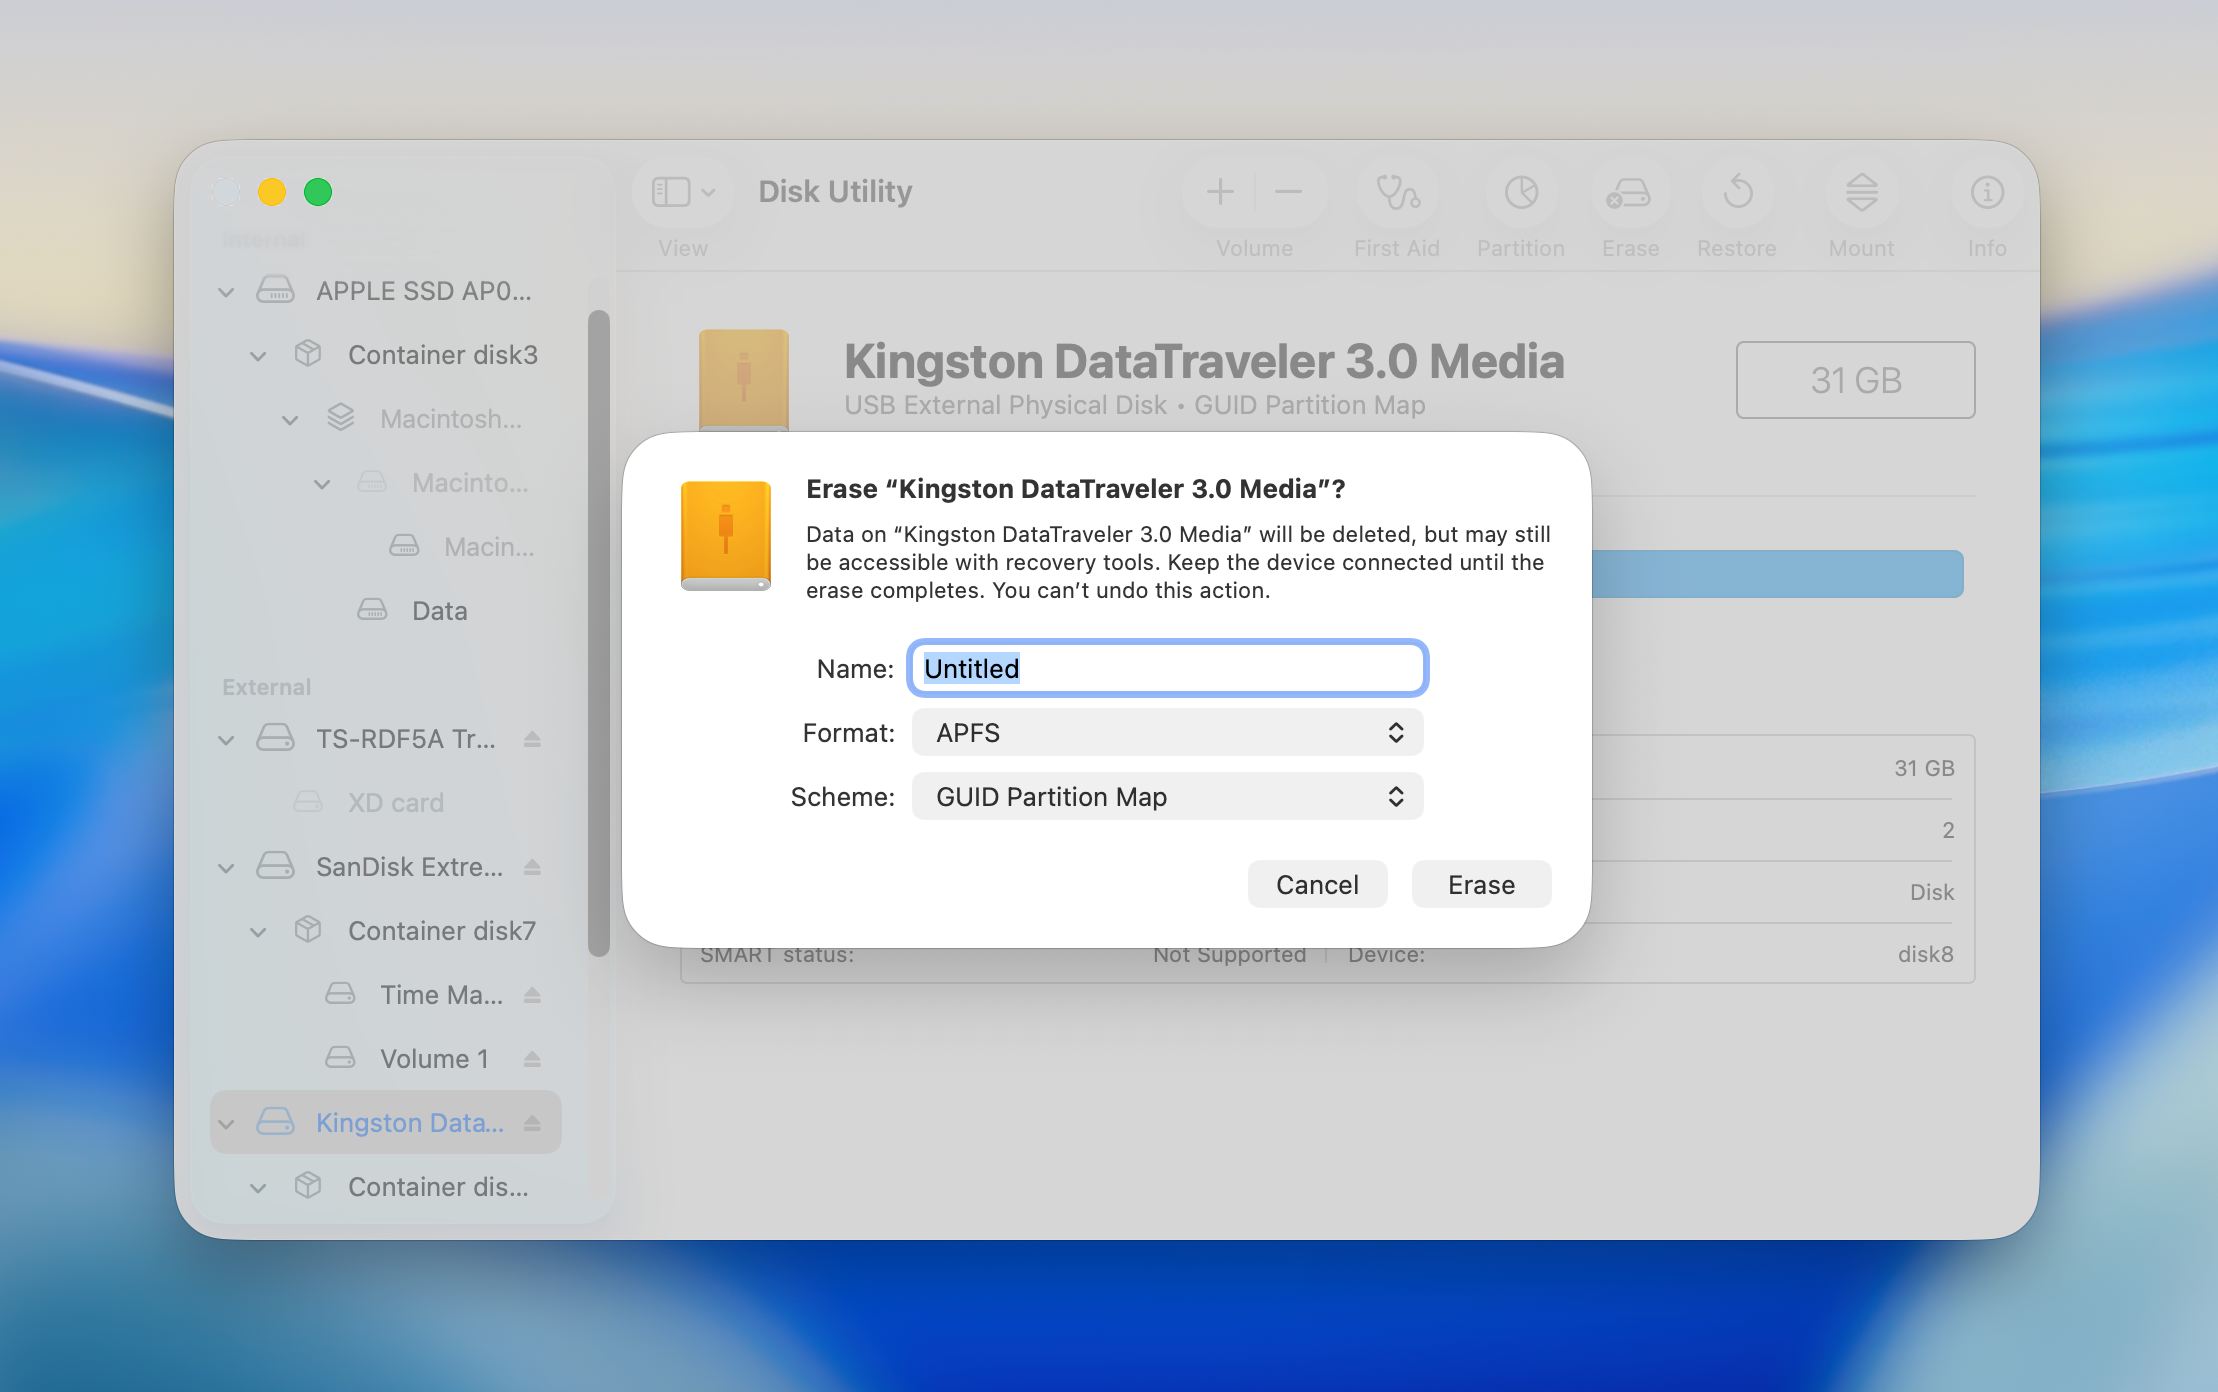
- Confirm the action and wait for the formatting process to complete.
- Once finished, close Disk Utility and verify that the partition mounts and works as expected.
Formatting removes all existing data and replaces the file system structure, so it should only be used after you recover important files or decide that the data is no longer needed.
How to Prevent Partition Loss on a Mac Hard Drive?
Partition loss often results from routine actions such as incorrect disk operations, unsafe drive removal, or overlooked signs of drive issues. A few simple habits can help maintain a stable partition structure and reduce the risk of data becoming inaccessible over time:
- Back up regularly. Time Machine is the easiest place to start. Connect an external drive, enable Time Machine in System Settings, and let it run automatically. For extra redundancy, keep a second backup in a separate location or use a cloud storage service alongside it.
- Be careful in Disk Utility and third-party partitioning tools. It is easy to select the wrong volume or confirm an irreversible action without fully reading the prompt. Always double-check which disk and partition you have selected before you make any changes.
- Always eject external drives before you unplug them. A drive that is pulled mid-write can suffer partition table corruption, which may cause one or more partitions to become unreadable. On desktop Macs, we also recommend a UPS (uninterruptible power supply) to protect against unexpected shutdowns during disk operations.
- Keep macOS up to date. System updates often include fixes for disk management bugs and improvements to file system stability. An outdated OS on a modern drive can introduce compatibility issues that put your partitions at risk.
- Monitor your drive health. Both Disk Utility and Disk Drill can display data that may indicate early signs of drive issues. Disk Utility provides a basic status check built into macOS, while Disk Drill offers S.M.A.R.T. attributes. If a drive starts to report errors, back it up immediately and consider replacing it rather than waiting for a complete failure.
Preventive steps like these do not eliminate every risk, but they reduce the chances of sudden partition loss.
Closing Thoughts
We hope this guide helped you recover your data and understand what to do when a partition disappears on macOS. In many cases, files remain recoverable if you act quickly and avoid writing new data . Start with recovery, not repair. Use a reliable tool like Disk Drill to scan the drive, recover important files, or create a disk image. This step is safe and gives you the best chance to get your data back.
Only move to repair methods after that. Tools like Disk Utility or Terminal can modify the disk and reduce recovery chances if something goes wrong. Recover first, fix later, and keep a backup once everything is restored.
FAQ
- Avoid writing new files to the drive. It’s best to stop using it.
- Use a data recovery tool like Disk Drill to create a disk image of the drive and recover data from it.
- Attempt to recover the deleted partition using TestDisk.
- If partition recovery is unsuccessful, you’ll likely need to create a new partition.

")


