


Normally, an external hard drive should mount automatically as soon as you connect it to your Mac. Once macOS recognizes the drive and mounts its volume, it appears in Finder and is ready to use. If that doesn’t happen, the next step depends on whether the drive still appears in Disk Utility.
If your external hard drive appears in Disk Utility but not in Finder, check Finder settings or try mounting it manually. If the drive doesn’t appear in Disk Utility at all, start with the USB port and cable, then check the power supply and test the drive on another computer. If macOS detects the drive but none of the fixes make your files accessible, you can use Disk Drill to scan the drive and recover the data before you move on to repairs or formatting.
Note on Search Trends: According to Google Trends data, searches for “hard drive not mounting mac” continue to show noticeable fluctuations worldwide. One recent spike coincided with the release of macOS Tahoe 26 in September 2025, when search interest in the United States increased by about 38% the following month. Today, the problem remains highly relevant worldwide – search interest increased by about 66% between April and June 2026 and remained at the same elevated level in July.
Why Is Hard Drive Not Mounting on Mac?
Let’s diagnose why your external hard drive is not mounting on Mac. Understanding what’s causing your drive to fail helps you pick the right fix and get back to your files faster.
Here are the most common culprits and their solutions:
| Reason | Description | Recommended Recovery Methods |
| 🔌 Loose or faulty USB cable | Your USB cable might be loose in the port or damaged internally. A worn cable can cause intermittent connections that prevent proper mounting. | Check and replace the cable. Test with a different USB cable to rule out cable failure. |
| ❌ Damaged USB port | Mac USB ports can fail from wear, liquid damage, or power surges. One bad port doesn’t mean they’re all broken. | Try different USB ports on your Mac. If one port fails but others work, you’ve identified the problem and found your workaround. |
| 🦠 Drive corruption | File system errors from improper ejection, sudden power loss, or interrupted transfers can prevent mounting. Malware is less common on Mac but still possible. | Run First Aid in Disk Utility to repair file system errors. For severe corruption, you may need to format the drive after recovering your data. |
| 💻 Older macOS version | macOS compatibility varies by file system. For example, High Sierra can’t read APFS drives, and older versions struggle with exFAT or NTFS formats. | Use a third-party external drive mounter for NTFS drives. Update macOS if possible for better native file system support. |
| ⚙️ Wrong settings | Your drive might be mounting correctly but hidden from view. Finder and Desktop display settings control drive visibility. | Change macOS display settings to enable External disks in Finder Preferences. |
| 🔋 Insufficient power | USB-powered drives need adequate power to spin up and mount. Some drives require more power than a single USB port provides. | Reset NVRAM/PRAM and SMC to restore proper power management. These resets often fix power delivery issues to USB ports. |
| 🚫 Drive won’t mount but is visible | Drive appears in Disk Utility but won’t mount automatically (often due to minor file system issues or mounting conflicts). | Force mount the drive in Disk Utility. This manual mounting bypasses automatic mounting problems and usually provides immediate access. |
Real-Users Insights
At 7 Data Recovery Experts, our experts analyzed over 100 community discussions from Apple Forums, Reddit, WD Community, and StackExchange to identify patterns in external drive mounting failures. We’ve compiled this data to help you recognize your specific issue and apply the solution that’s worked for others when your Mac external hard drive won’t mount:
| Reason | Short Text with User Insight |
| All external drives stopped mounting after Tahoe 26.0.1 | A Mac Studio user reported that none of their external drives – including APFS-formatted drives – would mount after upgrading to Tahoe 26.0.1. Attempts to erase and remount them returned an “unable to mount” error. The same drives continued to work normally on a MacBook Pro that had not been upgraded. |
| Drive appears only after reboot | A Mac mini user on Tahoe 26.0.1 said the SSD made Disk Utility hang and showed nowhere, but it mounted normally when connected during a reboot. |
| Storage devices fail on one USB path | One M2 Mac mini owner reported that after Tahoe 26.2, storage devices stopped appearing through USB-A while the same drives worked through USB-C/Thunderbolt and on other computers. |
| External SSD disconnects or ejects itself | Tahoe 26.2 users described repeated SSD ejections; replies focused on power management, a powered hub, alternate ports, and cable testing. |
| Finder eject is slow or unstable | A Tahoe 26.0.1 report described ejects taking up to about 20 seconds and Finder crashing immediately afterward. Discussion also pointed to Spotlight activity as a possible source of disk access. |
| ExFAT transfers stall or become extremely slow | A user with two Samsung T7 ExFAT SSDs reported long stalls after updating to Tahoe 26.0.1. They later said 26.1 improved most of the problem; reformatting one drive also helped, although other commenters had mixed results. |
The biggest takeaway from all this is that most “broken” external drives aren’t broken at all, as many users have demonstrated across different forums. Instead, they’re software casualties that can be fixed in minutes if you know how.
Recover Your Files First: Using Disk Drill on an Unmounted Drive
If your external hard drive is not mounting on Mac, but you can see it in Disk Utility with the correct storage capacity, it means your Mac’s hardware can still detect the drive, so you don’t have to lose the data stored on it. Disk Drill can help with that. It’s one of the best data recovery software for Mac and has already been rated by more than a million users.
Disk Drill bypasses macOS’s mounting requirements and reads data directly at the sector level. This means it can access files even when the file system is corrupted, the partition table is damaged, or the drive refuses to mount due to logical errors. We tested Disk Drill on external drives from different manufacturers, including Seagate, WD, SanDisk, LaCie, Toshiba, and Samsung, and with different file systems, such as APFS, HFS+, exFAT, NTFS, and FAT32, and in each case, Disk Drill was able to detect and scan the drive even when its volume wouldn’t mount normally in macOS.
You can do this before or instead of trying the fixes below, especially if the drive shows signs of corruption or you’re not sure it’s safe to keep troubleshooting. In the latter case, it’s better to create an image of the drive first and scan the backup image instead of the original drive.
Follow these steps to retrieve the data from your external hard drive on your Mac using Disk Drill:
- Download Disk Drill for Mac and follow the installation prompts. The free version lets you scan and preview recoverable files before committing to recovery.
- Plug the unmountable external hard drive into your Mac. Use a direct connection when possible as USB hubs can interfere with data recovery.
- Open Disk Drill and, under the Storage Devices section, look through the list of available devices. Your unmountable drive should appear here even if it’s not showing up in Finder.
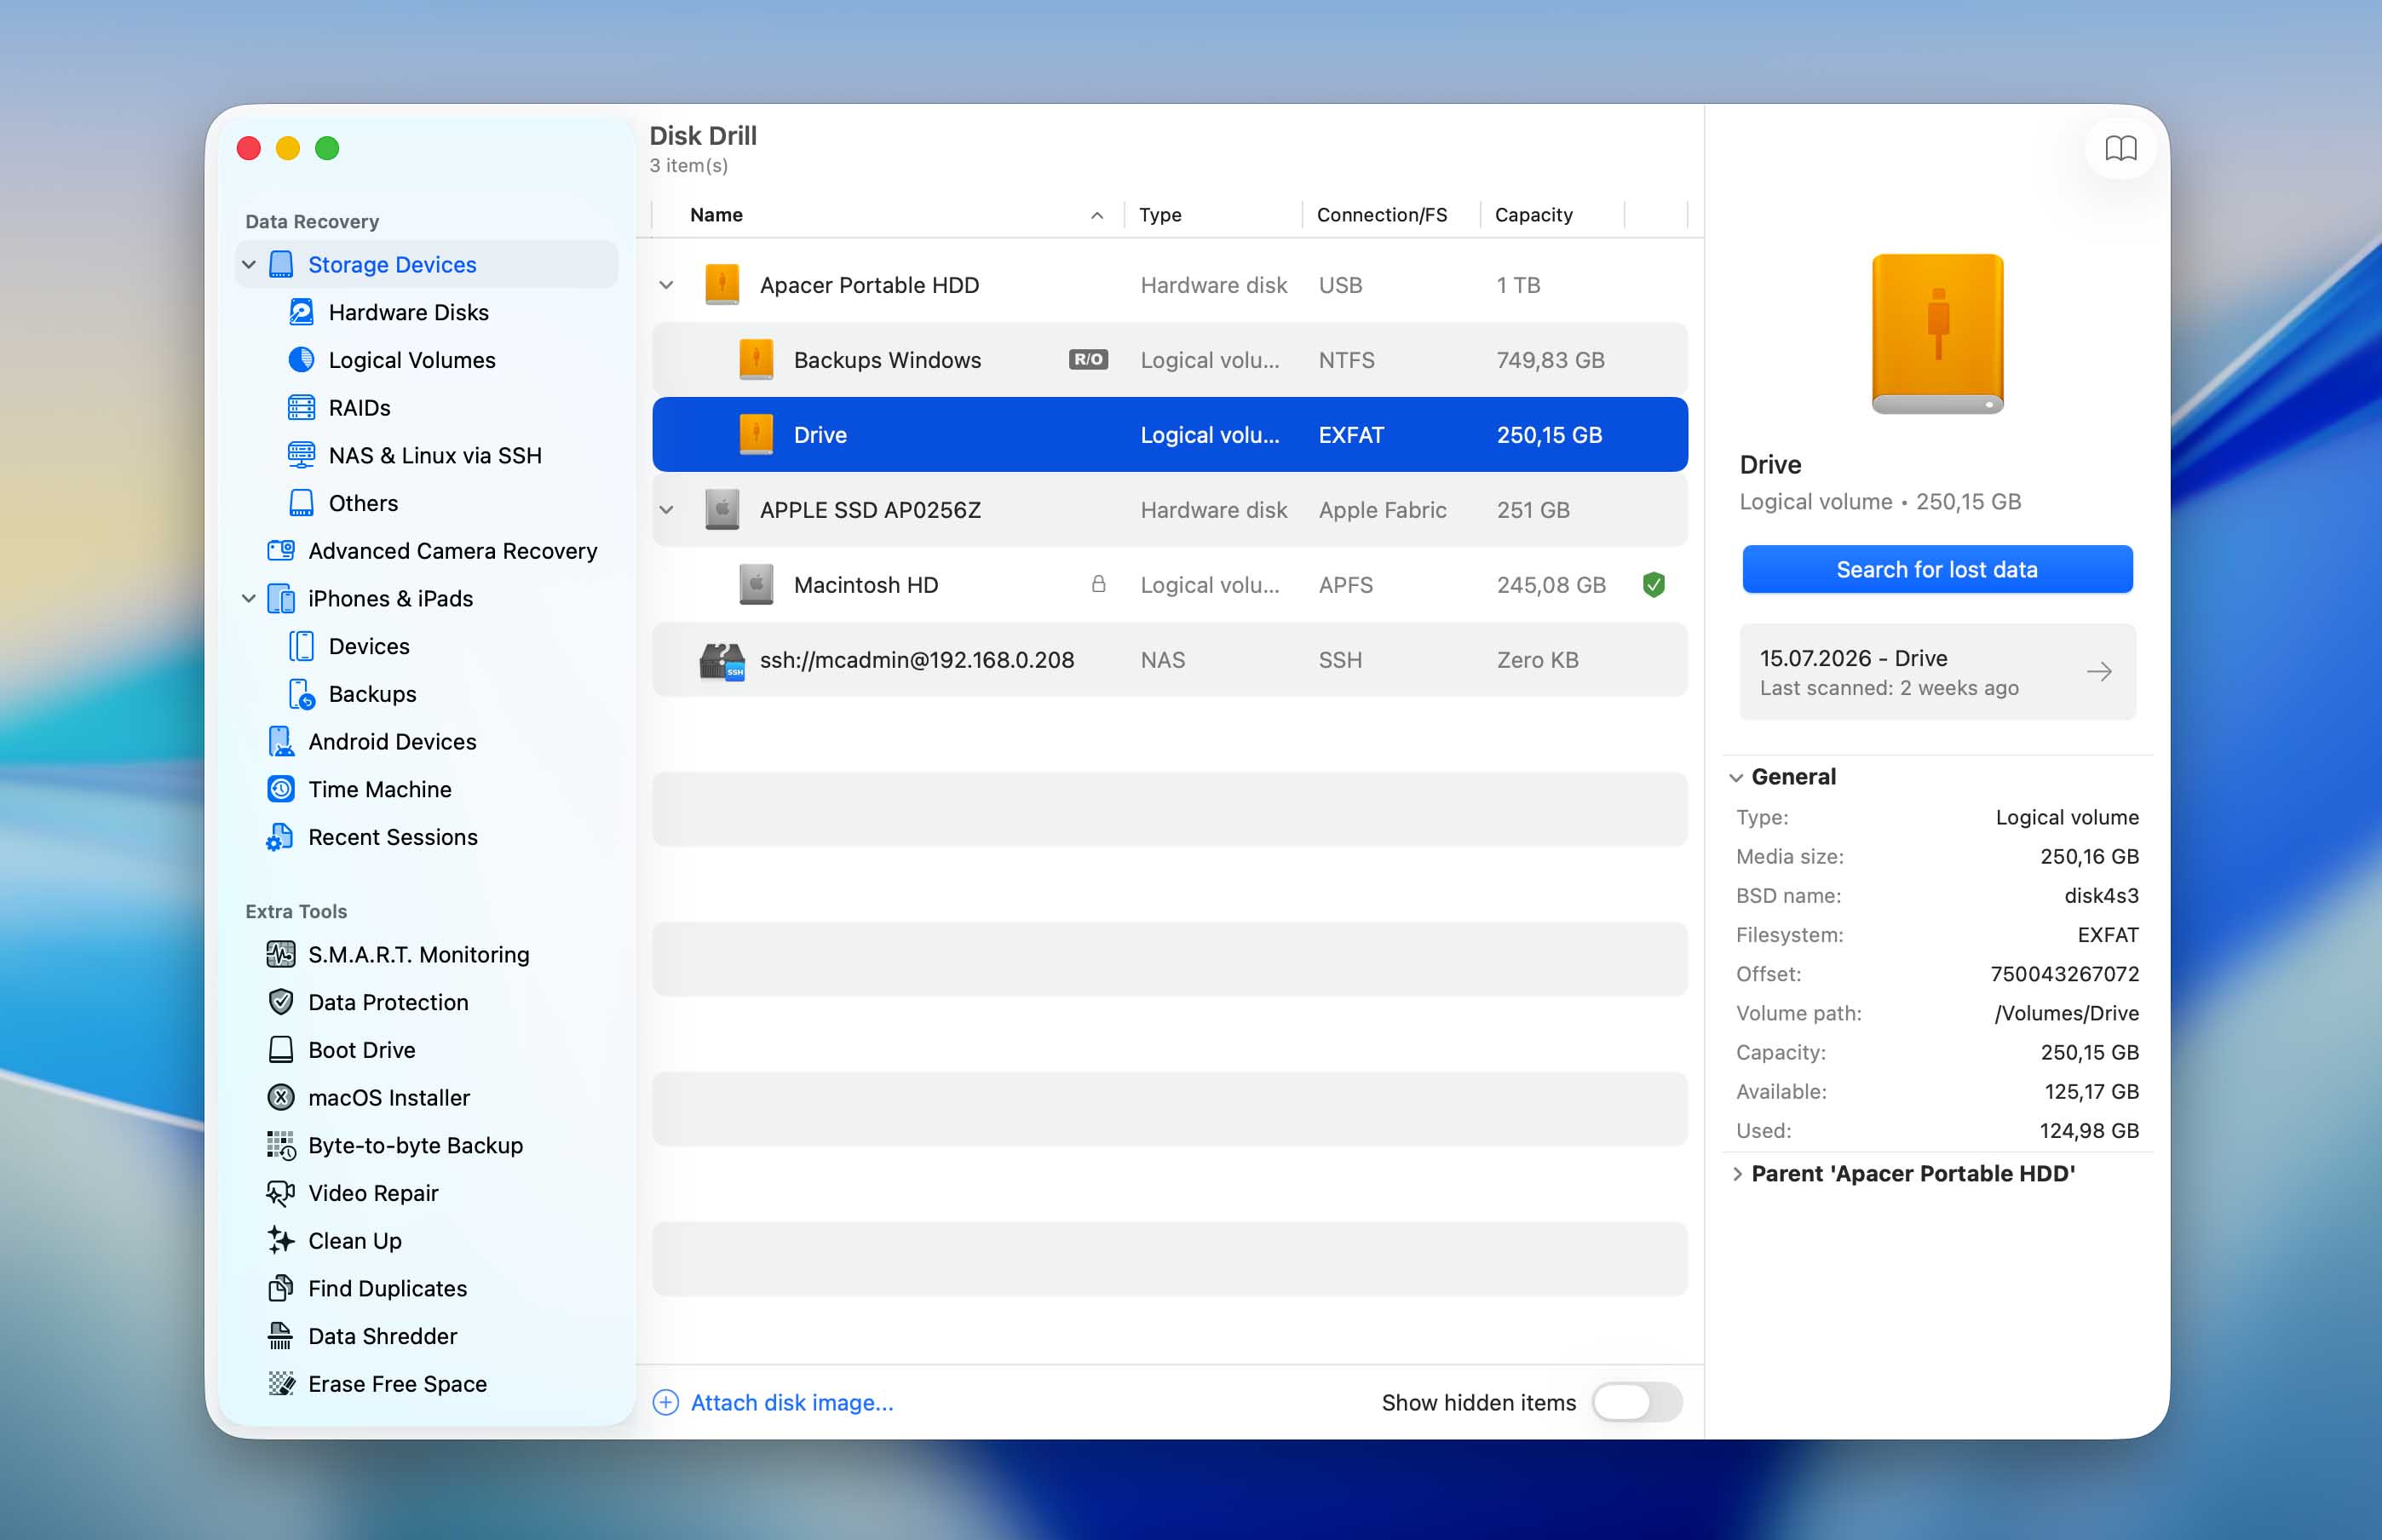
- Click on your external drive to select it. You can then click the Search for lost data button to start a scan. Drill offers two main scanning approaches:
- Universal Scan: Combines Quick and Deep Scan methods, ideal for most recovery scenarios.
- Advanced Camera Recovery (ACR): Specialized for recovering fragmented video files from cameras, GoPros, and drones.
If you created a disk image of the external drive earlier, you’ll need to add it to this list first. Click Attach Disk Image at the bottom of the Disk Drill window and select the image file. It will then appear under Storage Devices alongside the other drives available for scanning. Select it, click Search for lost data, and choose the scan type you want to run.
- The scan duration depends on drive size and condition, and you can pause and resume anytime. Once scanning completes, click Review found items. Disk Drill categorizes recovered files into three types:
- Deleted or Lost: Recently deleted files with intact metadata.
- Reconstructed: Files rebuilt from fragments (may have generic names like “file001.jpg”).
- Existing Files: Current files still on the drive but inaccessible due to mounting issues.
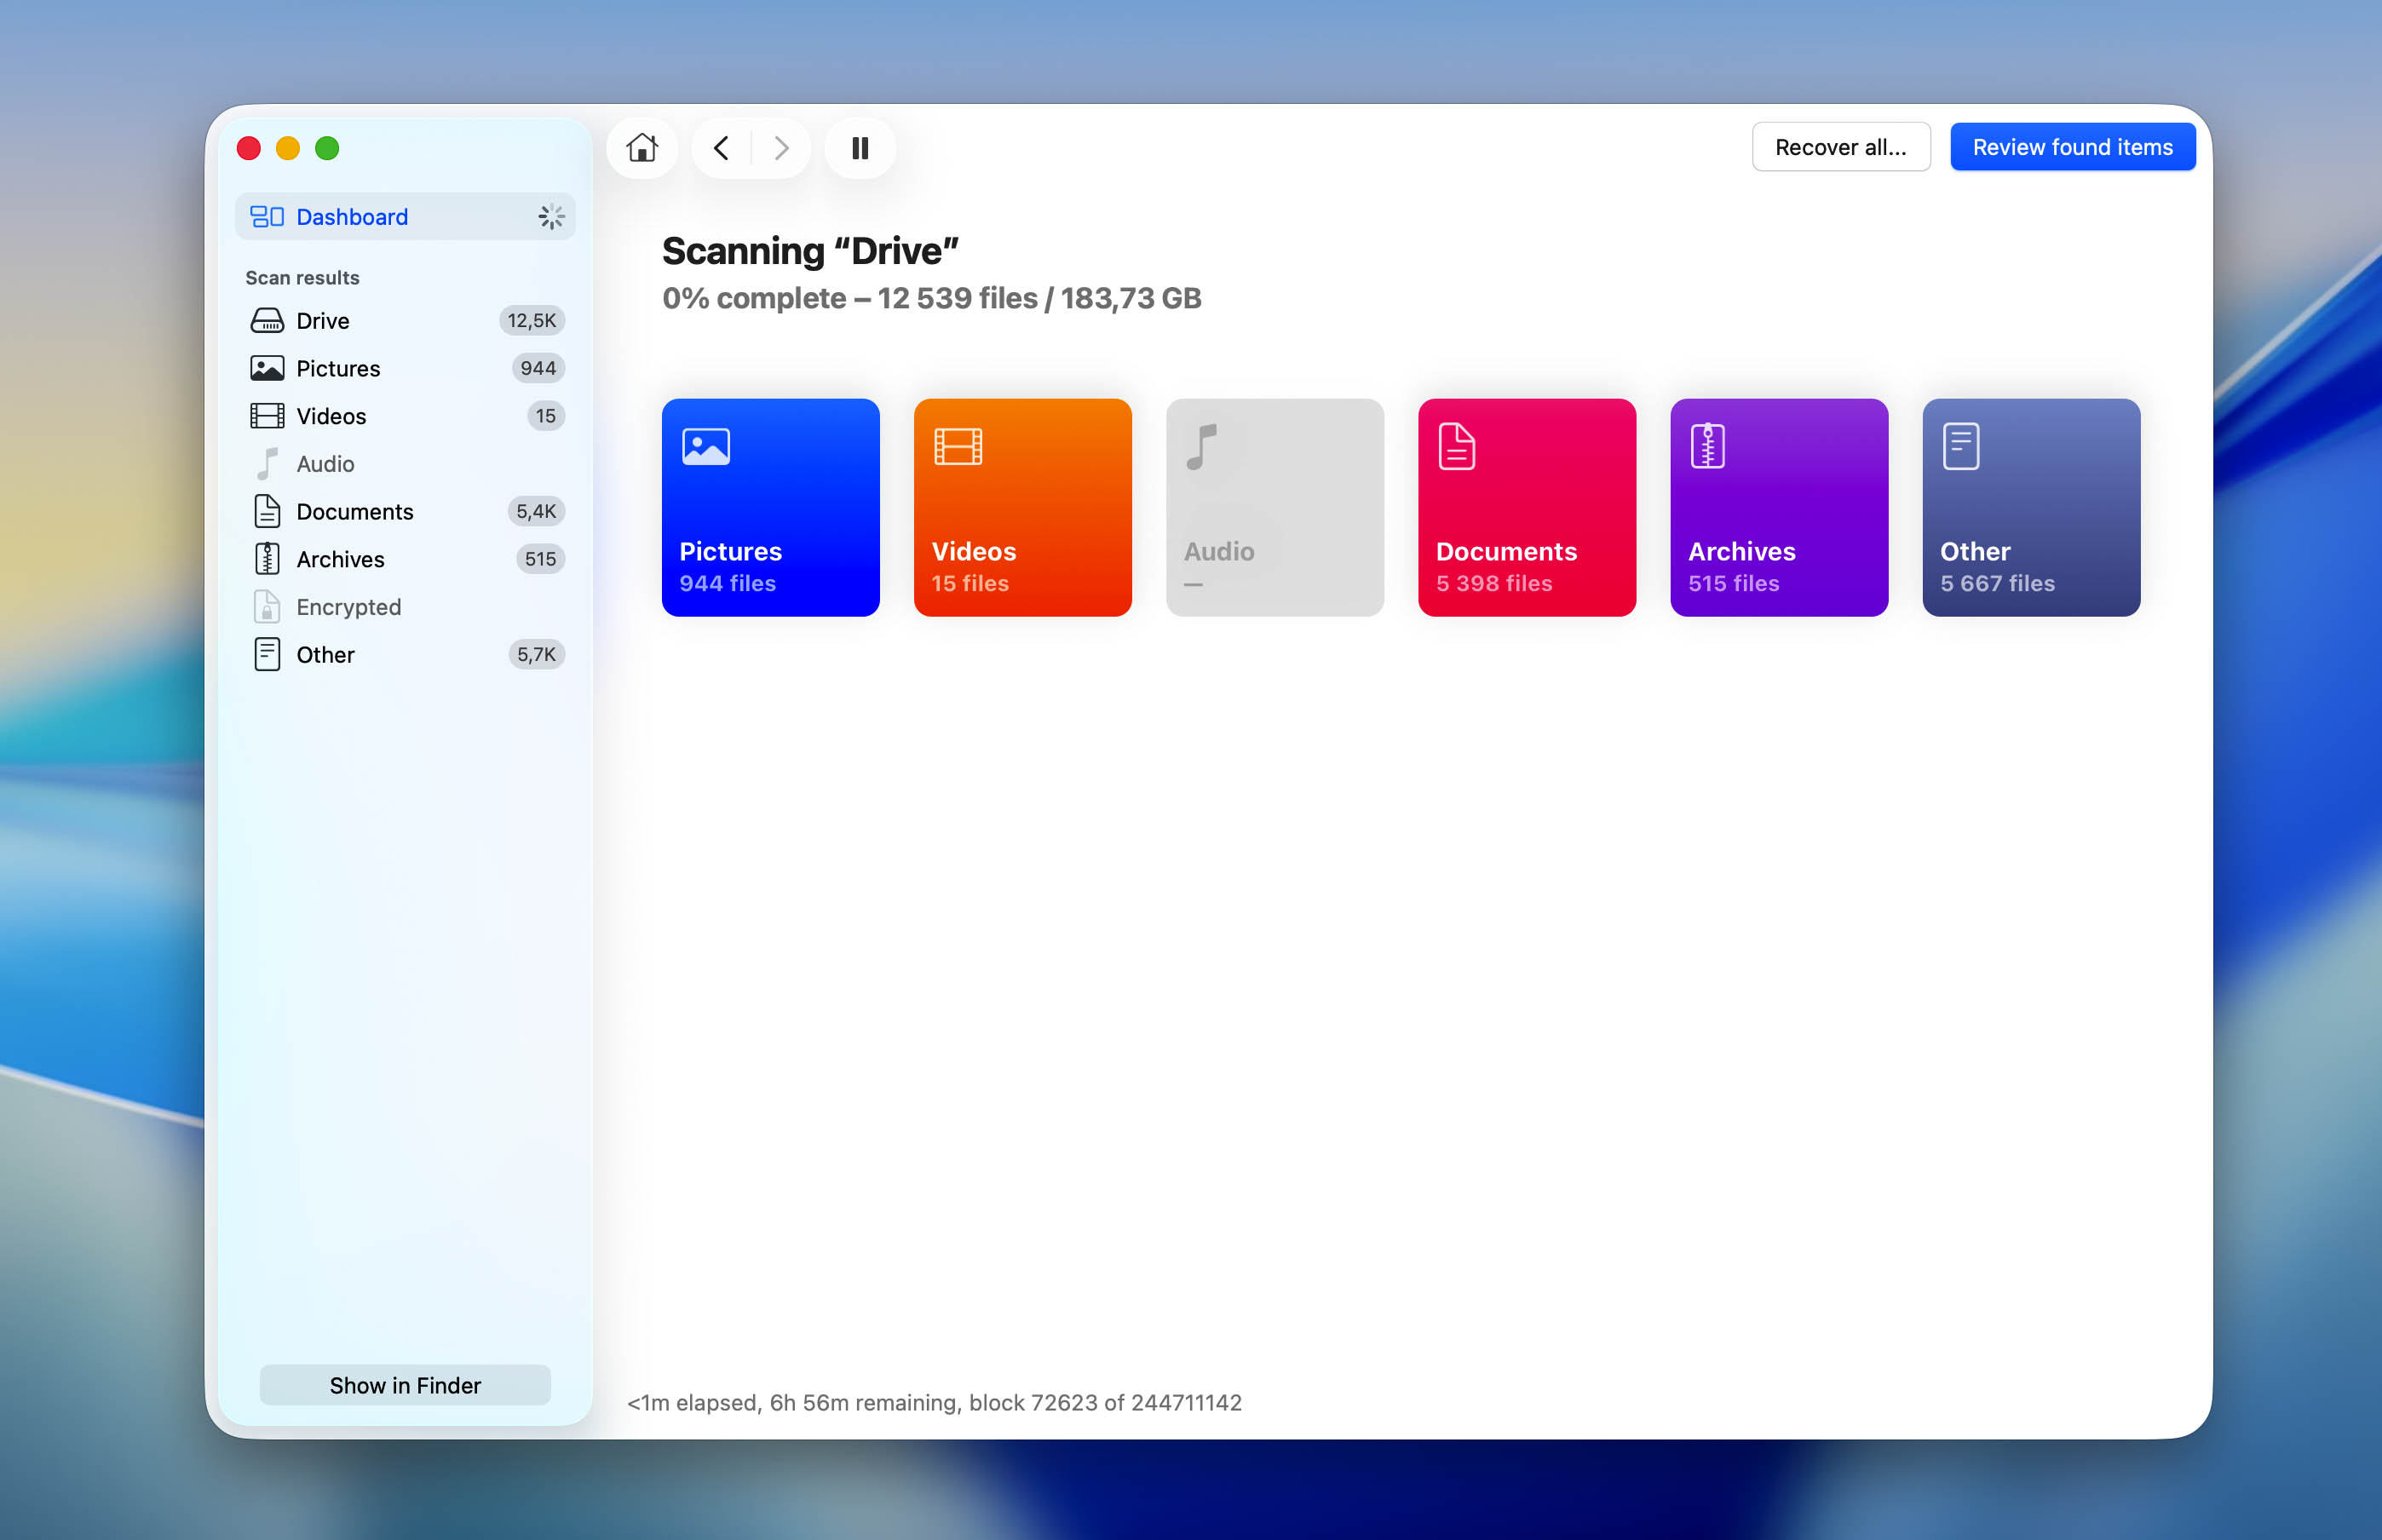
- Use the powerful filtering options to find what you need. For example, you can enter file names, extensions (.docx, .jpg), or partial names in the search bar or choose to display only certain file types.
- Preview images before you check the boxes next to them so that you can verify their content and integrity. Files that can be previewed can also be recovered.
- Click the Recover button at the bottom right whenever ready.
- Choose a folder on a different drive than the one you’re recovering from and confirm.
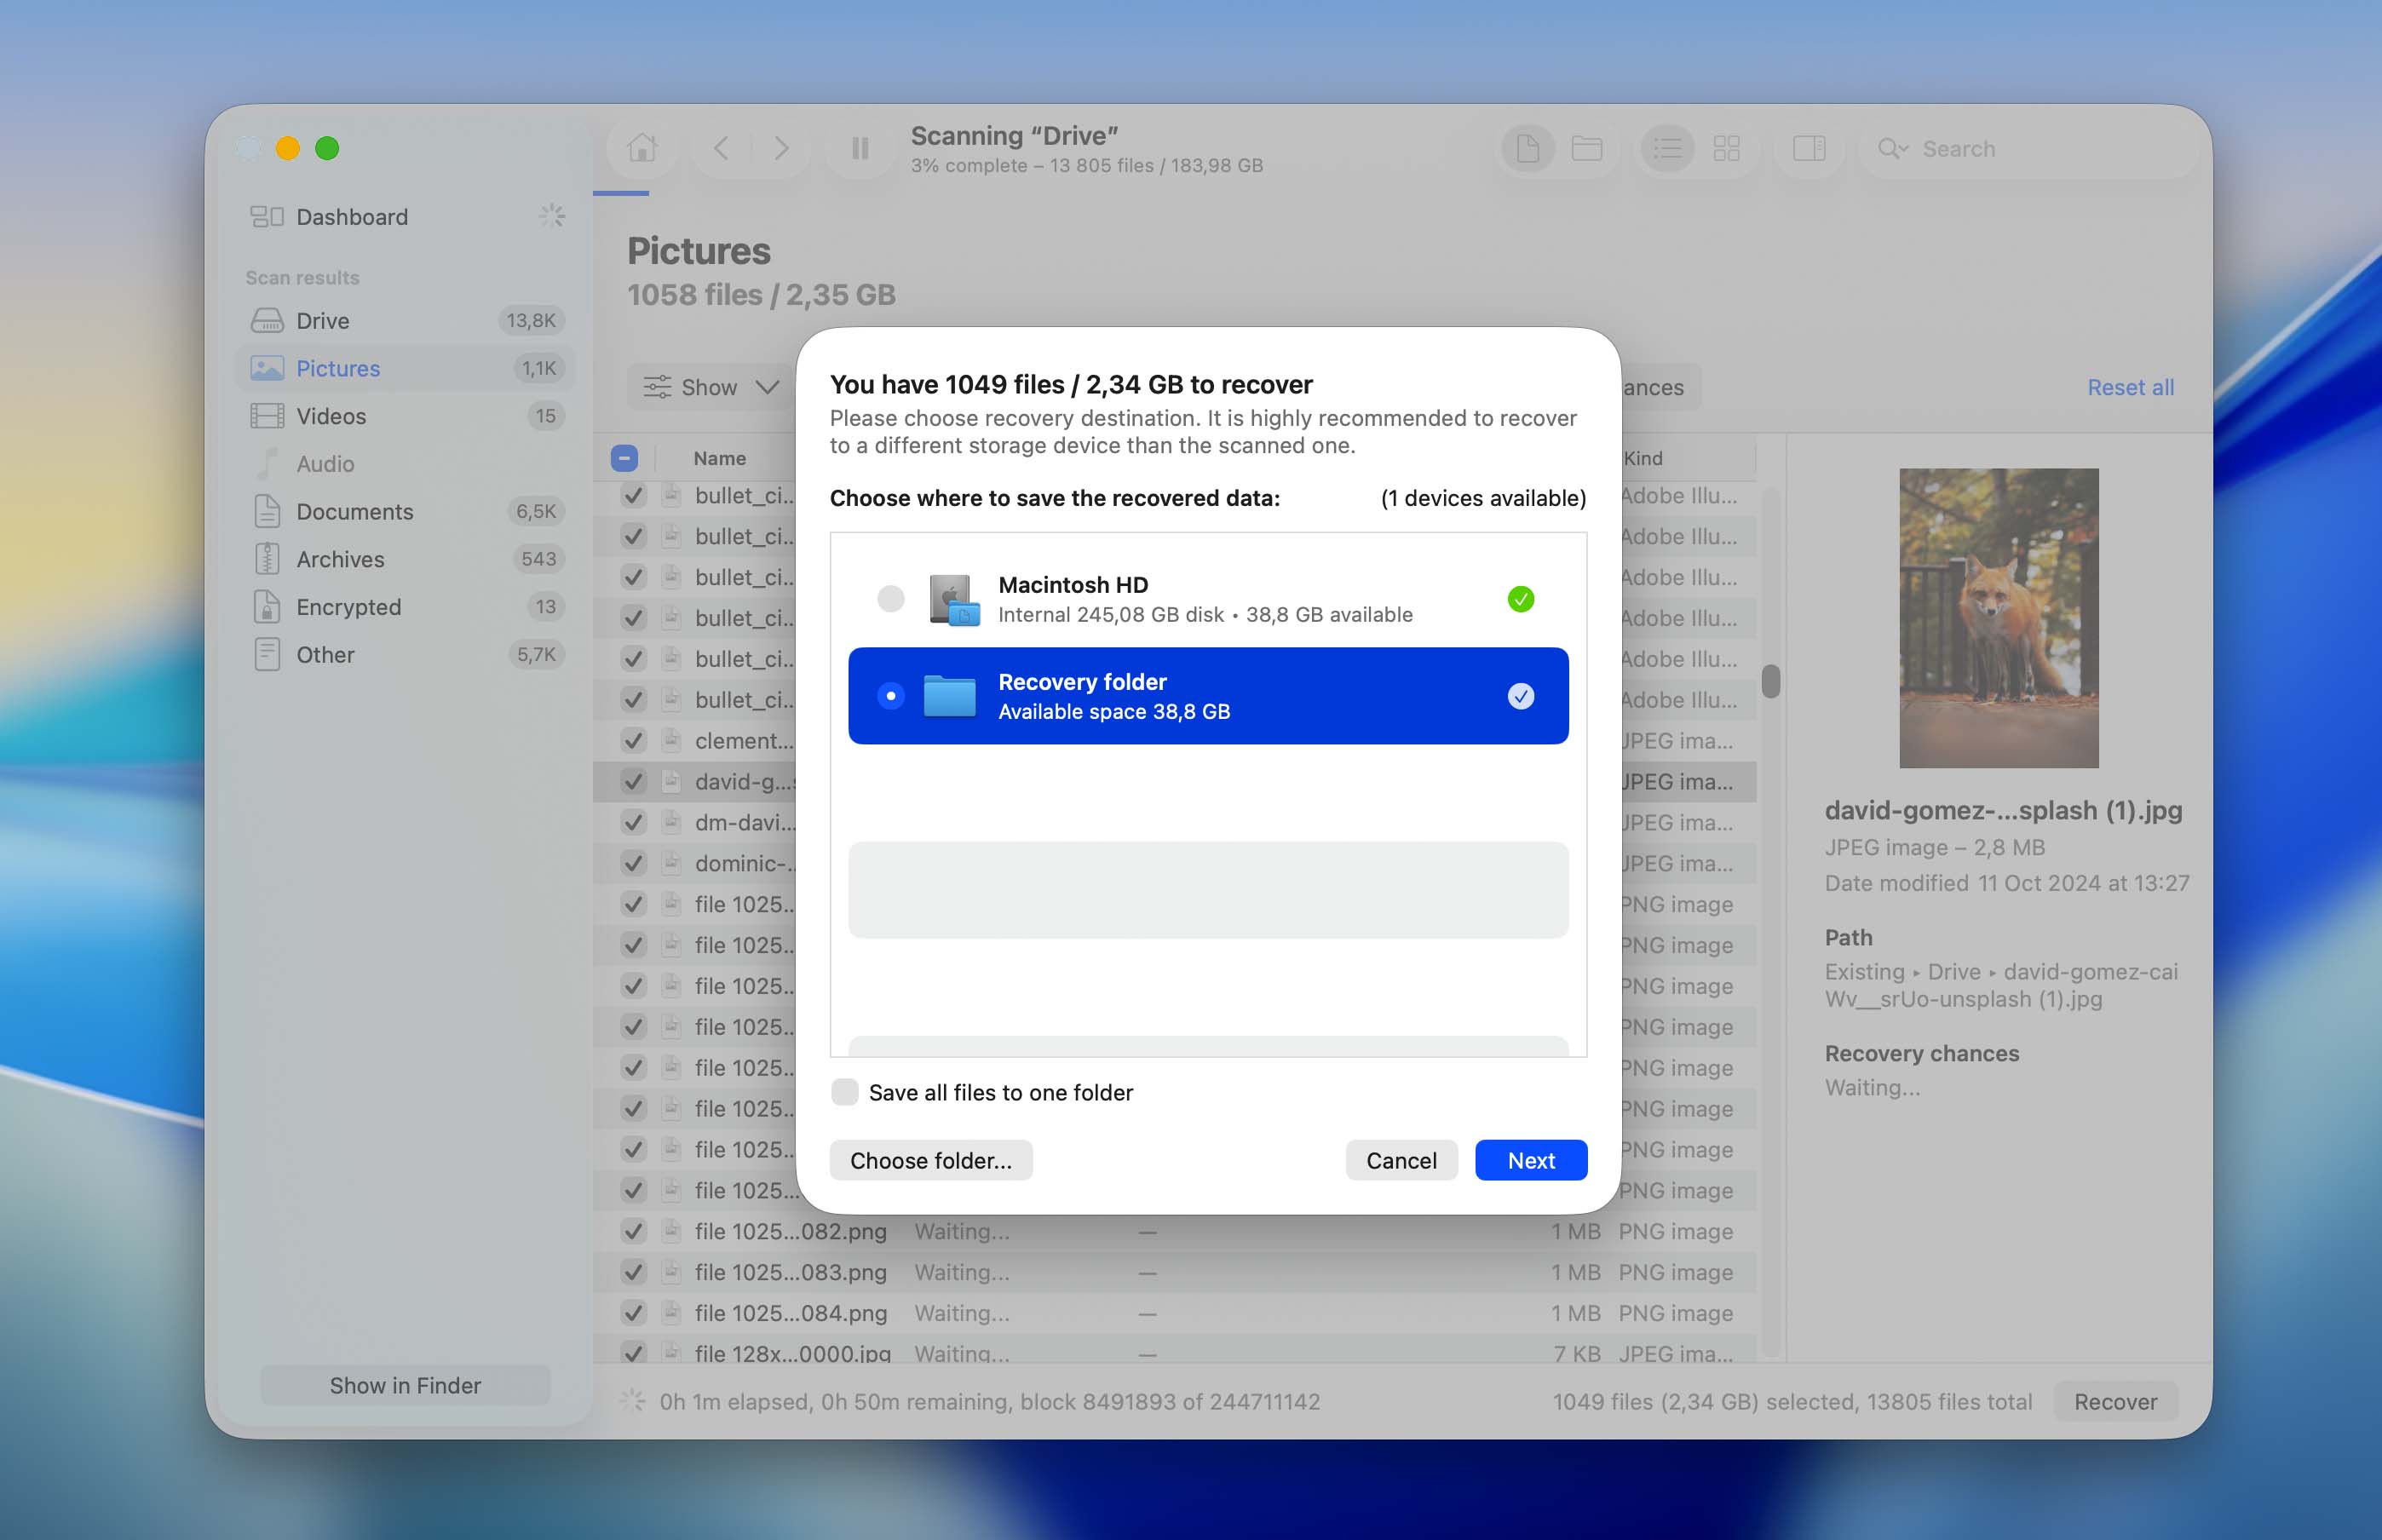
As you can see, Disk Drill makes it very easy to perform file recovery even for non-technical users, but knowing how it works under the hood can improve your recovery success rate.
Basically, the software preserves crucial file metadata whenever possible, including original file names, folder structures, timestamps, and even file permissions. When metadata is destroyed (common in severe corruption), Disk Drill switches to signature-based carving. These reconstructed files get generic names like “file001.jpg,” but the content remains intact. The software recognizes over 400 file signatures and uses header-footer analysis to rebuild files byte by byte.
If you’d like to learn more about how Disk Drill works, check out our full review. We cover these technical details in more depth there, along with other features that may come in handy in different data recovery scenarios.
How to Fix External Drive That Is Not Mounting on Mac
Ready to fix your external hard drive not mounting on Mac? These proven methods work on all Mac models (MacBook Pro, MacBook Air, iMac, Mac mini, or Mac Studio). We’ve organized them from quickest to most complex, so you can get your drive working with minimal effort.
💡 Pro Tip: Start with the simple fixes first. Many mounting issues are solved by the first three options alone, which take less than 5 minutes total.
| Fix Option | Time Required | Difficulty | Success Rate | Best For |
| 1. Change USB Ports | 30 seconds | Easy | 85% | Connection issues, port failures |
| 2. Check the Cable | 1-2 minutes | Easy | 90% | Faulty cables, loose connections |
| 3. Reset NVRAM or PRAM | 2 minutes | Easy | 70% | System glitches, power issues |
| 4. SMC Reset | 2 minutes | Easy | 65% | Power management problems |
| 5. Change macOS Display Settings | 1 minute | Easy | 95% | Hidden but mounted drives |
| 6. Use Third-Party Drive Mounter | 5-10 minutes | Medium | 80% | NTFS drives, cross-platform drives |
| 7. Run First Aid in Disk Utility | 5-15 minutes | Medium | 75% | File system errors, minor corruption |
| 8. Force Mount in Disk Utility | 2 minutes | Medium | 60% | Drives are visible but not mounting |
| 9. Format the Drive | 10-20 minutes | Medium | 100%* | Last resort (*erases all data) |
⚠️ Important: Before attempting Options 7-9, make sure you have backups of important data. These methods may modify your drive’s structure.
🗨️ Not sure where to start? First, check where your external drive appears on your Mac. If it doesn’t show up in Disk Utility at all, start with Options 1-4. If it appears in Disk Utility but is grayed out or won’t mount, go to Options 7-8. If it shows up in Disk Utility but not in Finder or on the desktop, start with Option 5. For NTFS or other cross-platform drives, check Option 6. Leave Option 9 for last, and recover any important data before formatting.
Option 1: Change USB Ports
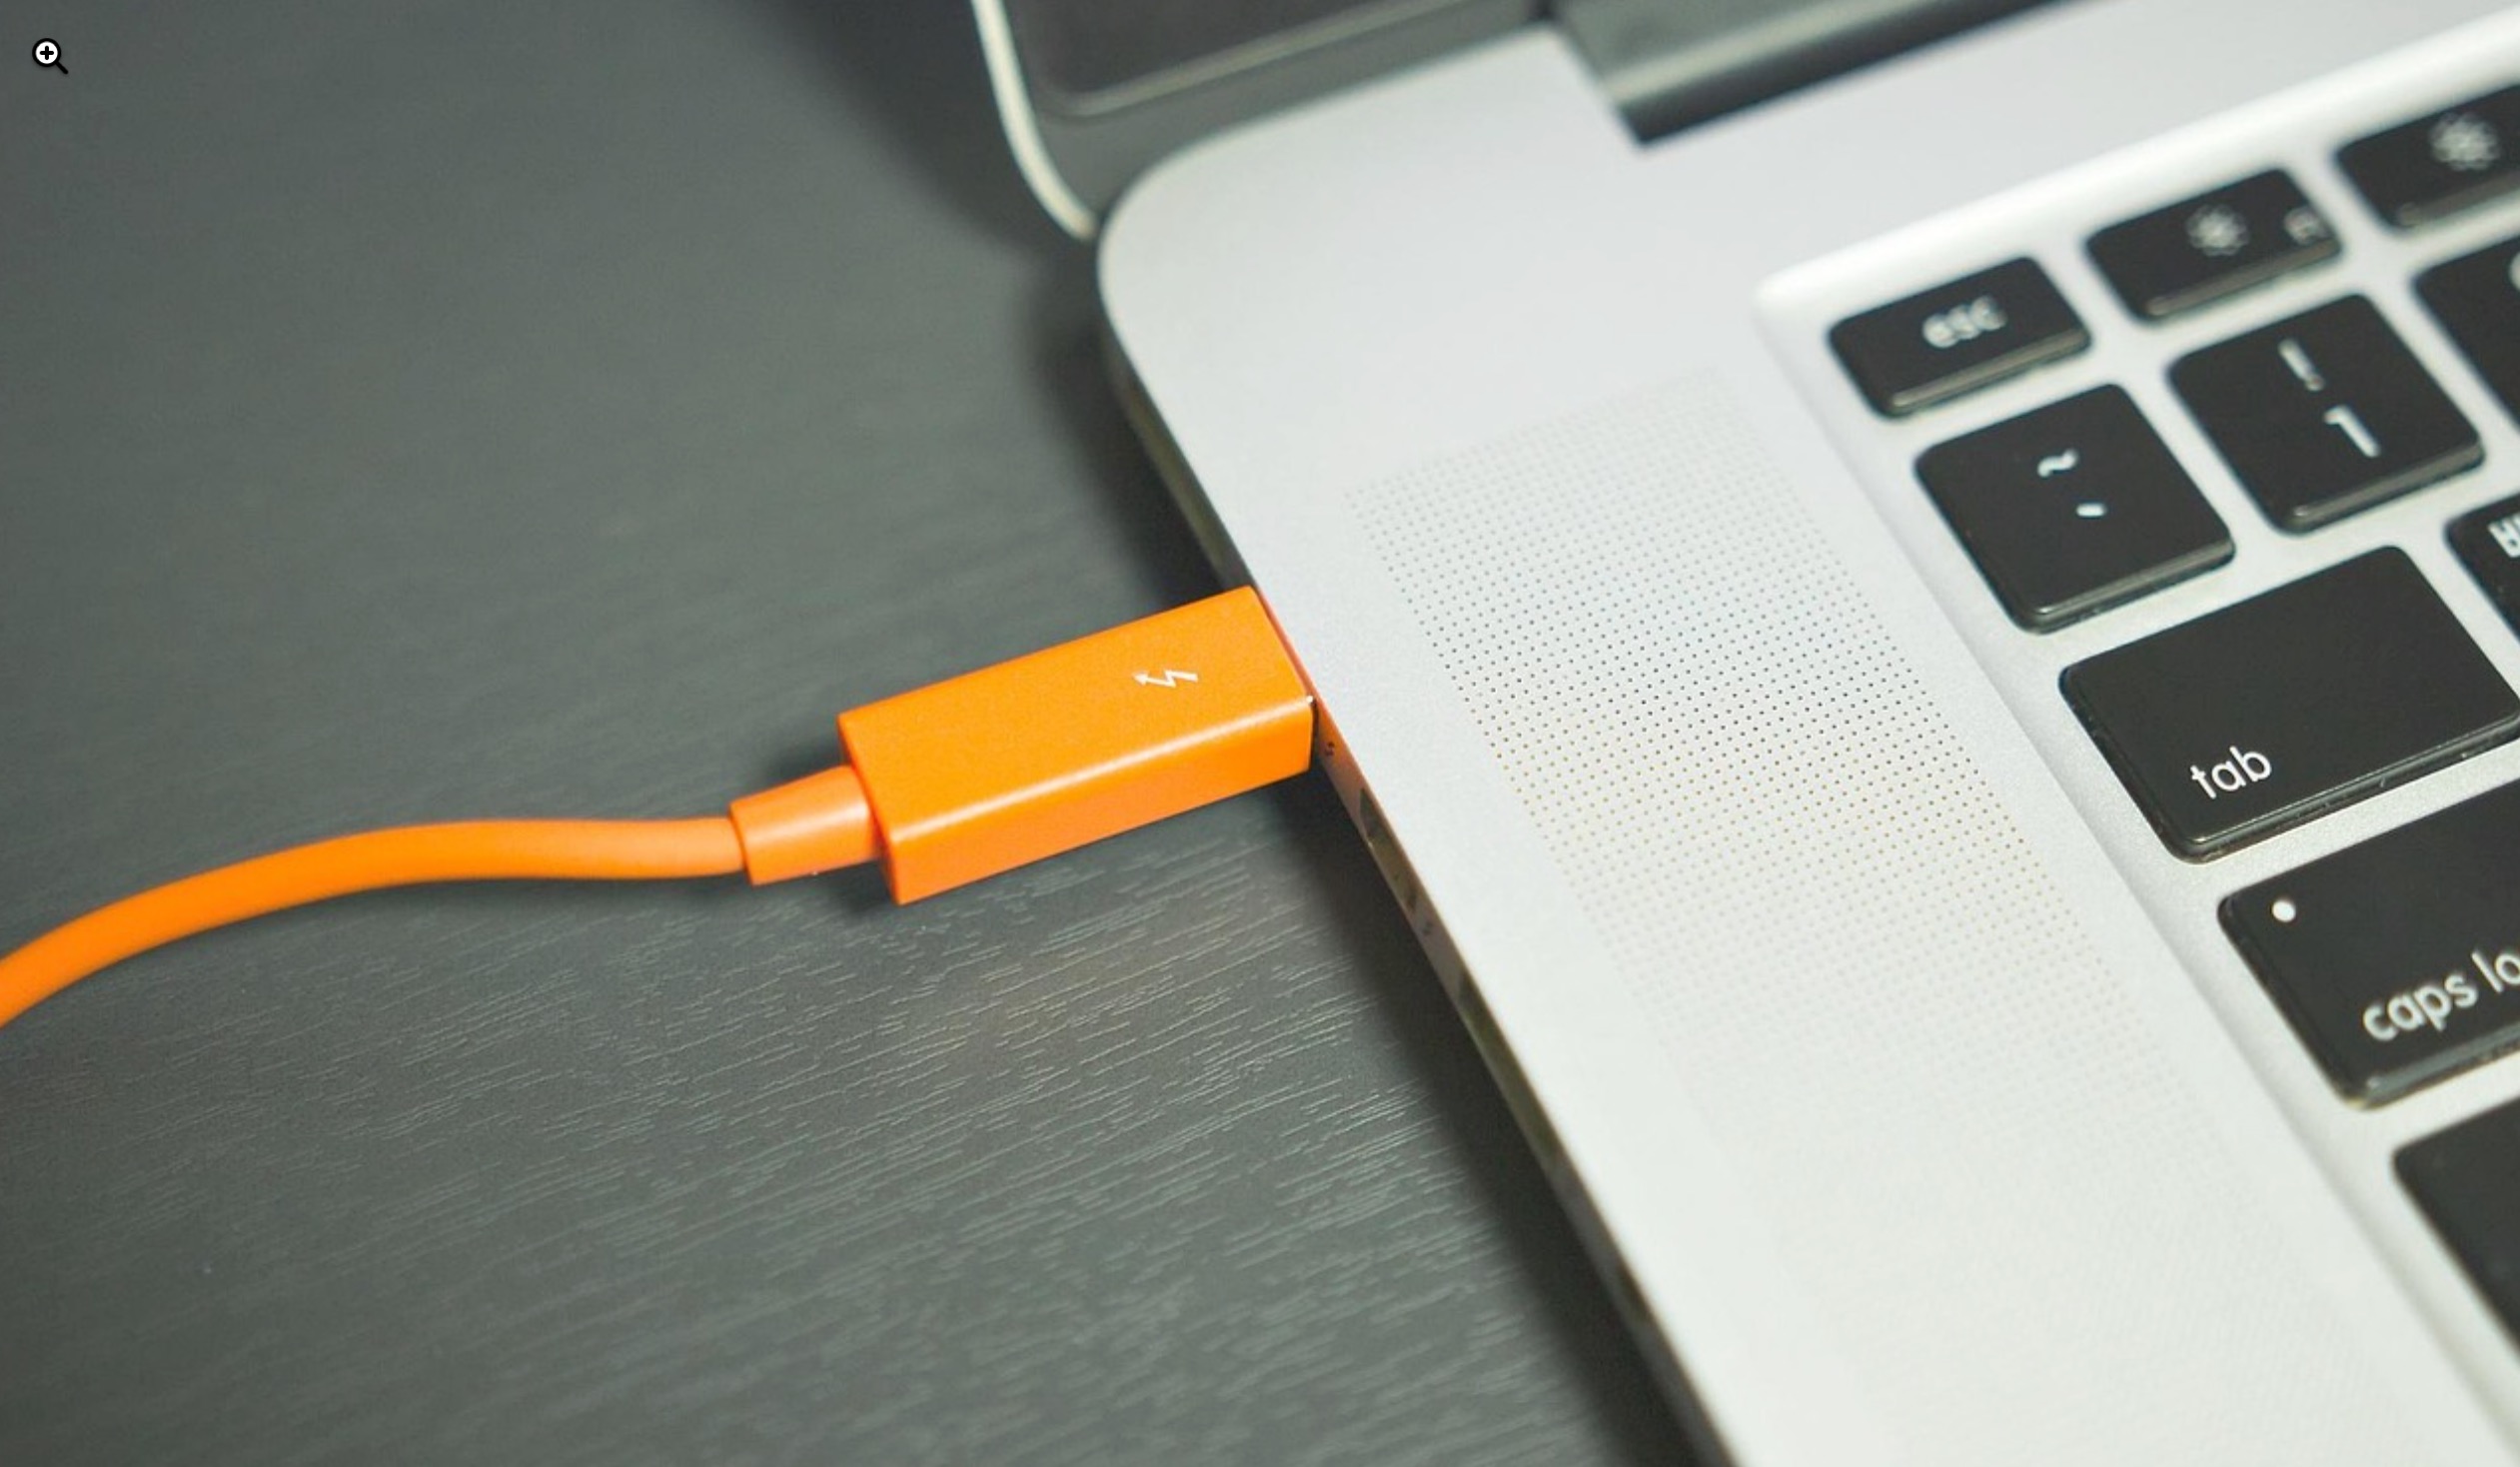
It might sound pretty obvious, but a lot of times, the reason why you can’t mount an external hard drive to your Mac lies behind a broken or faulty USB port (especially if you’re having trouble with mounting all of the external devices to your Mac).
In such a case, you can either try a different USB port, or if it also doesn’t work, you might need to resort to a professional to fix the issue on your Mac.
Option 2: Check the Cable
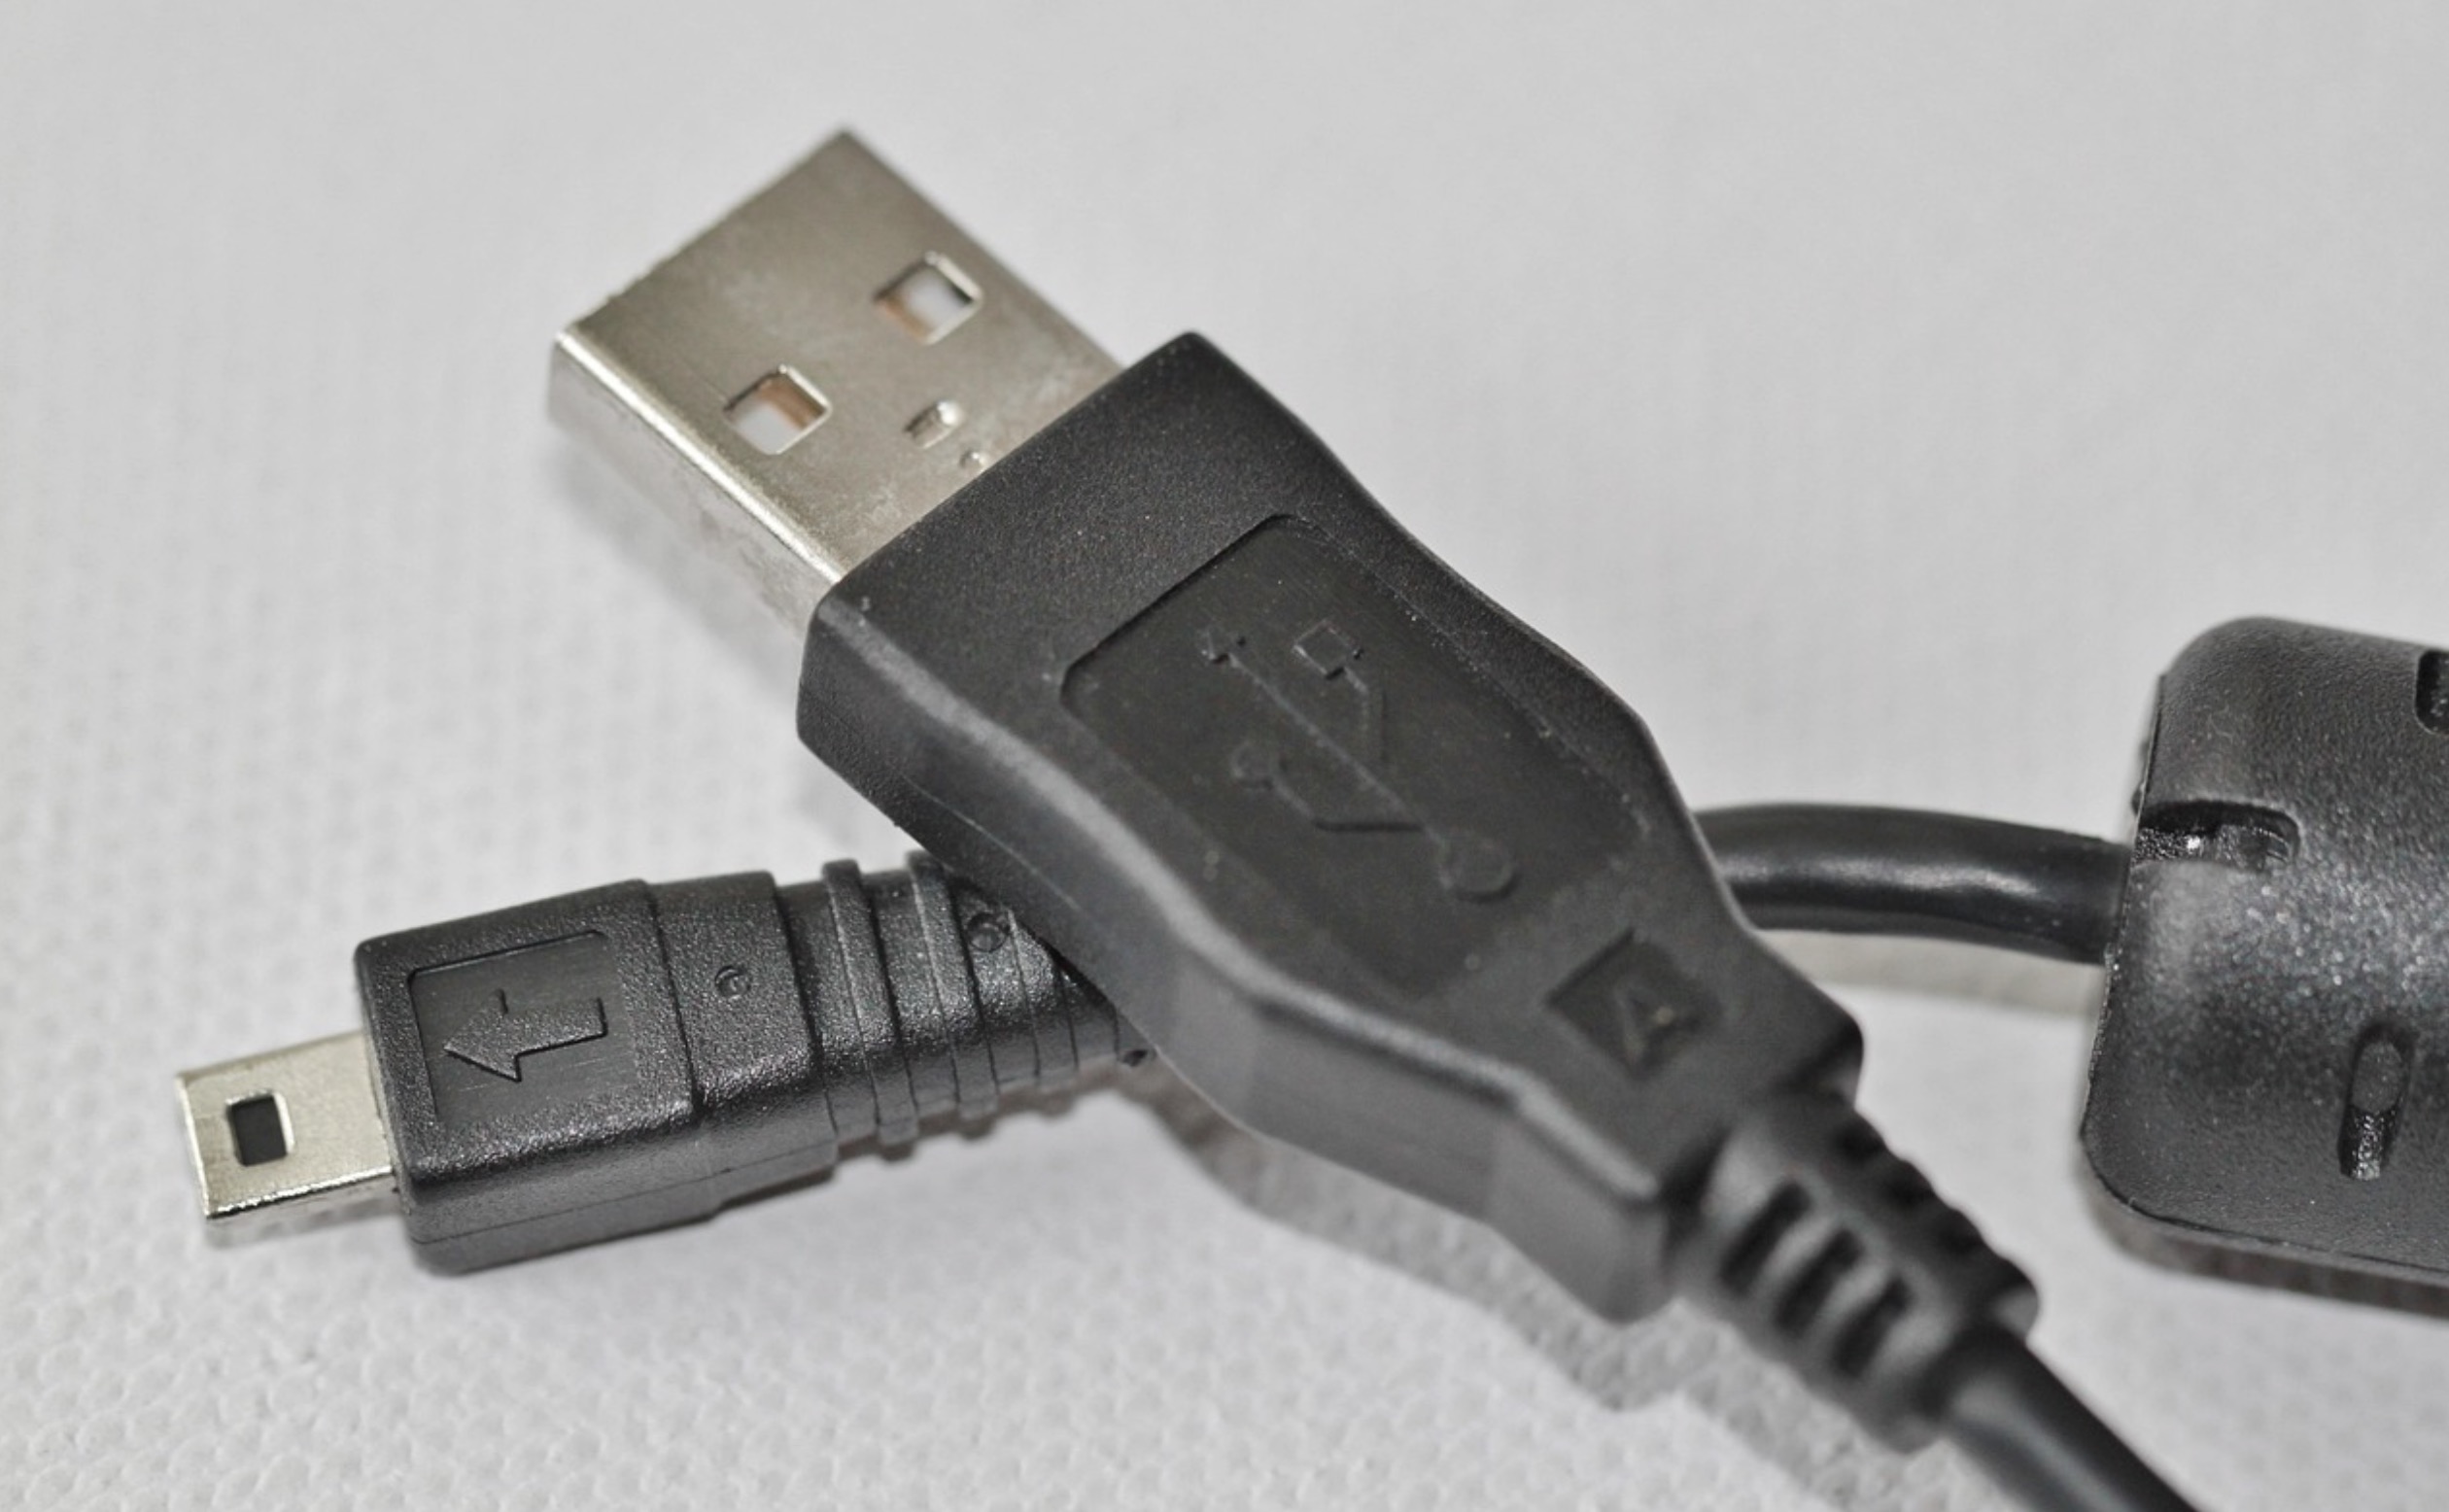
Another reason why you can’t connect the external drive to your Mac might be a faulty USB cable. So it’s a good idea to try mounting the external hard drive with a different USB connector to see if it might be causing all the trouble.
Option 3: Reset NVRAM or PRAM
It’s quite possible that the issue isn’t with your external hard drive but with your Mac. Sometimes a corrupt NVRAM or PRAM might be causing various problems on your computer and even prevent external drives from successfully mounting to it. And even though NVRAM corruption doesn’t happen very often, it’s best to reset it to rule out this problem.
📝 Note: If you’re using an M1 Mac, then all you need to do to reset NVRAM or PRAM on it is to restart your computer.
Here’s what you should do to reset NVRAM or PRAM on your Intel-based Mac to eliminate the issue:
- Turn off your computer.
- Press the power button to turn your Mac back on, and then immediately press and hold the following key combination: Command + Option + P + R.
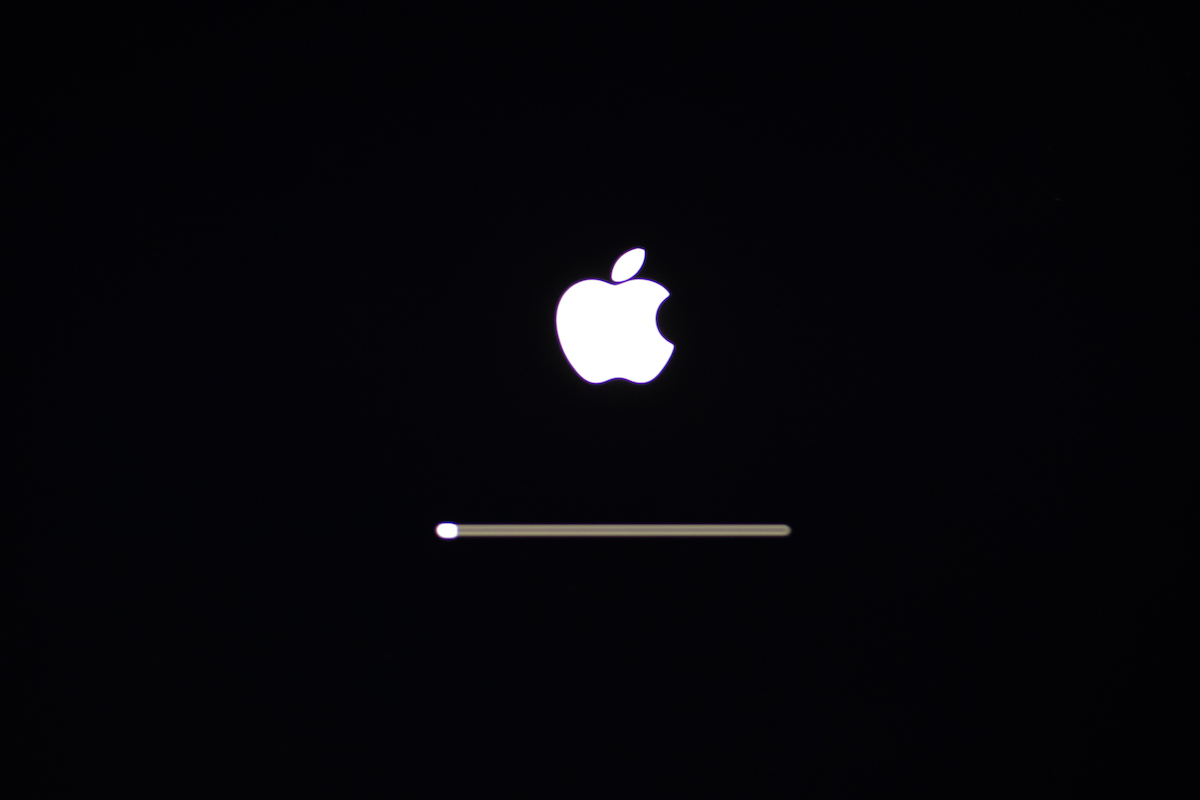
- Hold the key combination until you see the Apple logo appear on your screen for the second time (it takes around 20 seconds).
Option 4: SMC Reset
SMC (System Management Controller) is a sub-system on Macs that helps with power management, fan control, etc. Moreover, it can sometimes even be the cause of external drive connectivity issues.
📝 Note: On M1 Macs, all you need to do to reset SMC is to shut down the computer for around 30 seconds and then power it back on.
Here’s how to reset SMC on an Intel-based Mac:
- Turn off your Mac.
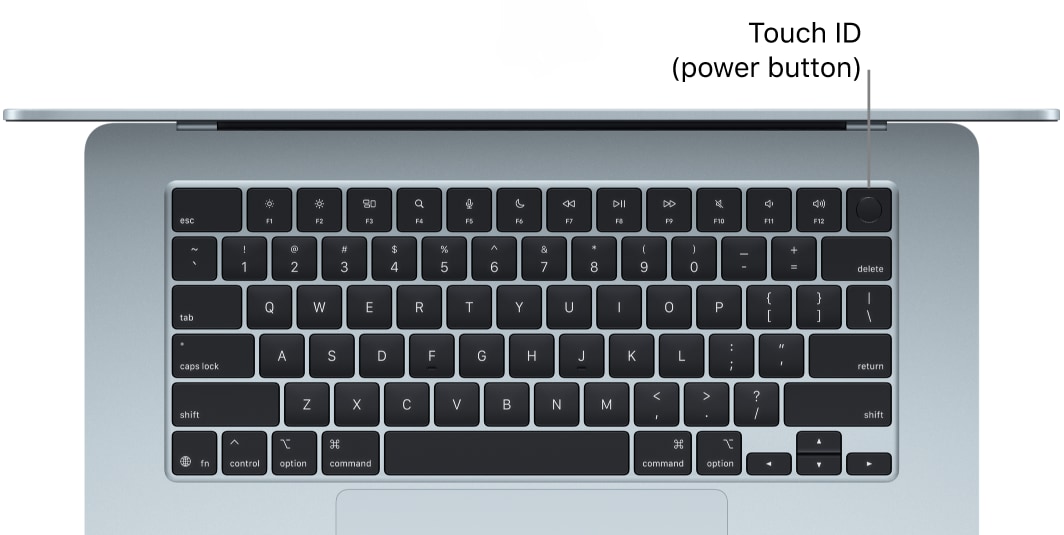
- Press and hold the power button for 15 seconds.
- Restart your computer.
Option 5: Change macOS Display Settings
If your external drive works fine and you can see that it is mounted to your Mac in Disk Utility, it’s a good idea to check your computer’s settings. It’s quite possible that you can’t view the external drive neither on the desktop nor in Finder because of these settings.
Here’s what you should do to make your external drive viewable again on your Mac:
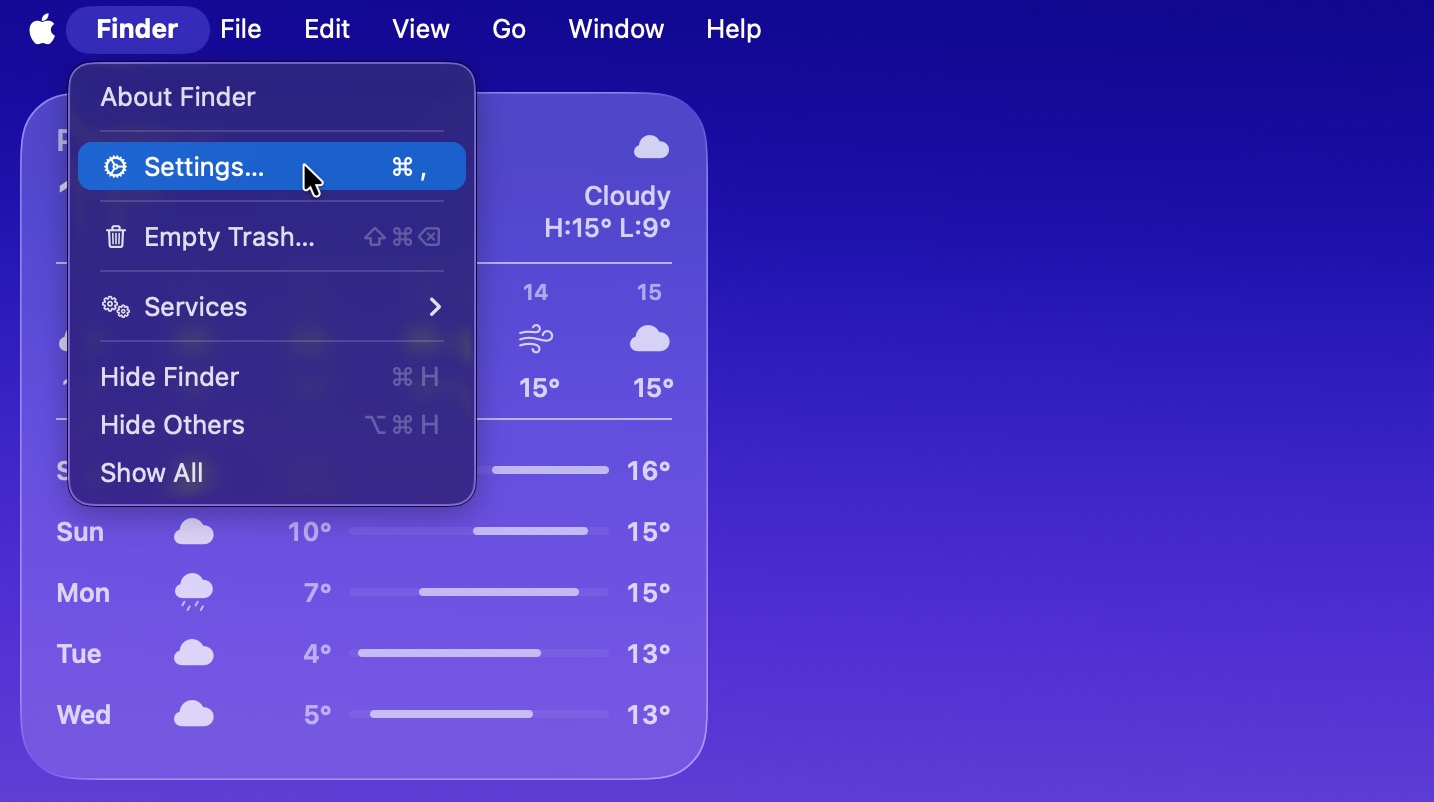
- Click your Mac’s desktop and then choose Finder from the menu at the top.
- Choose Settings from the drop-down menu.
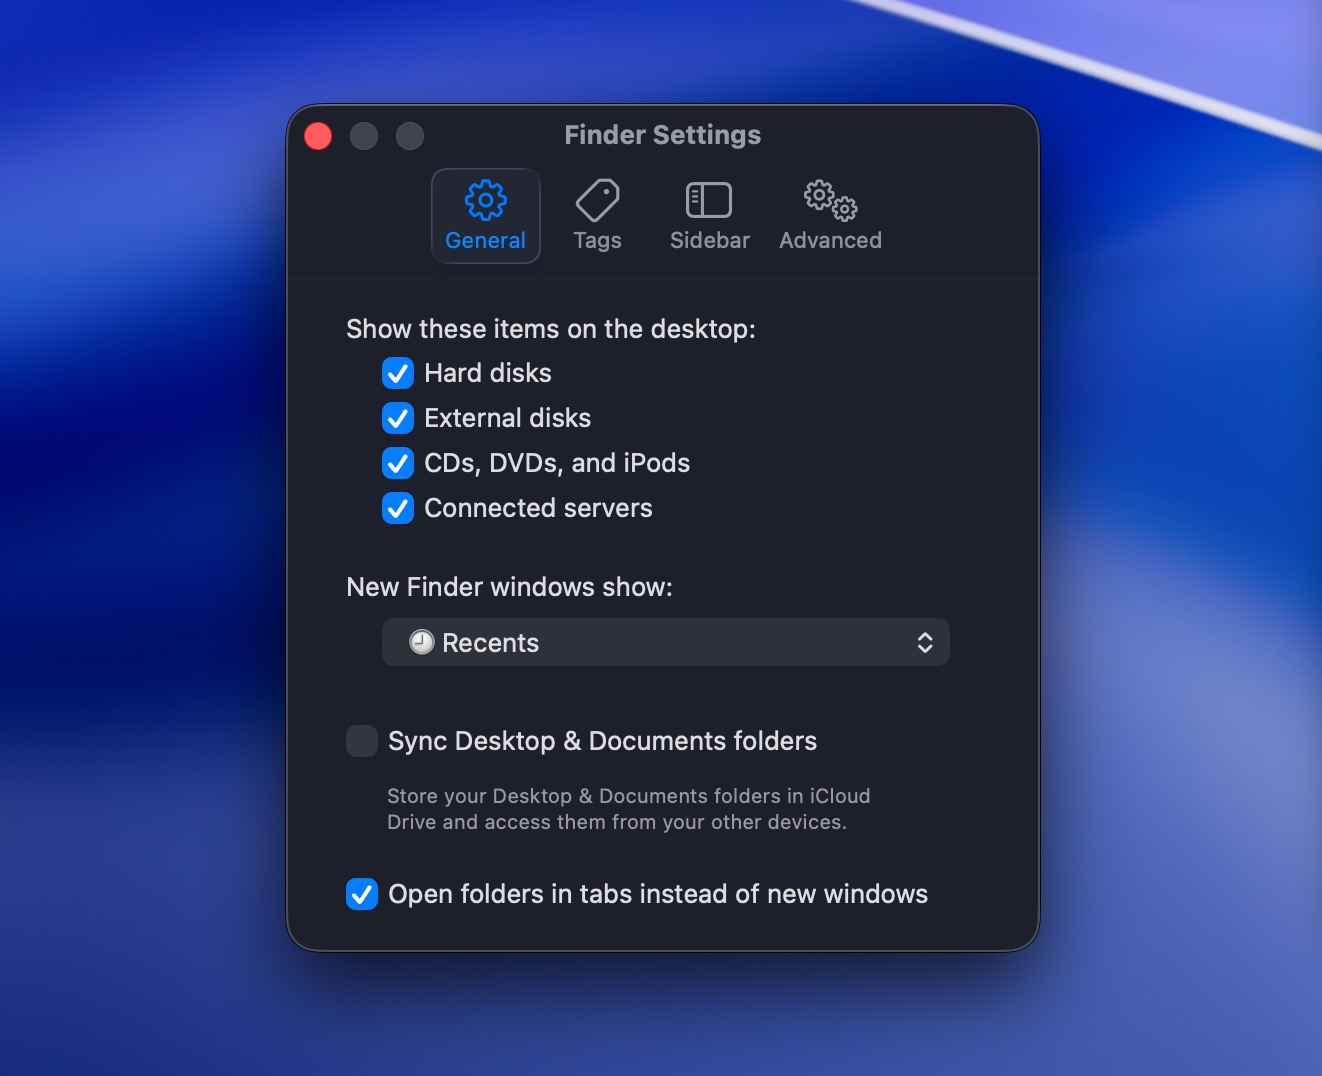
- Click the General tab and click the box near External disks to place a tick (if it’s already selected, move to the next step).
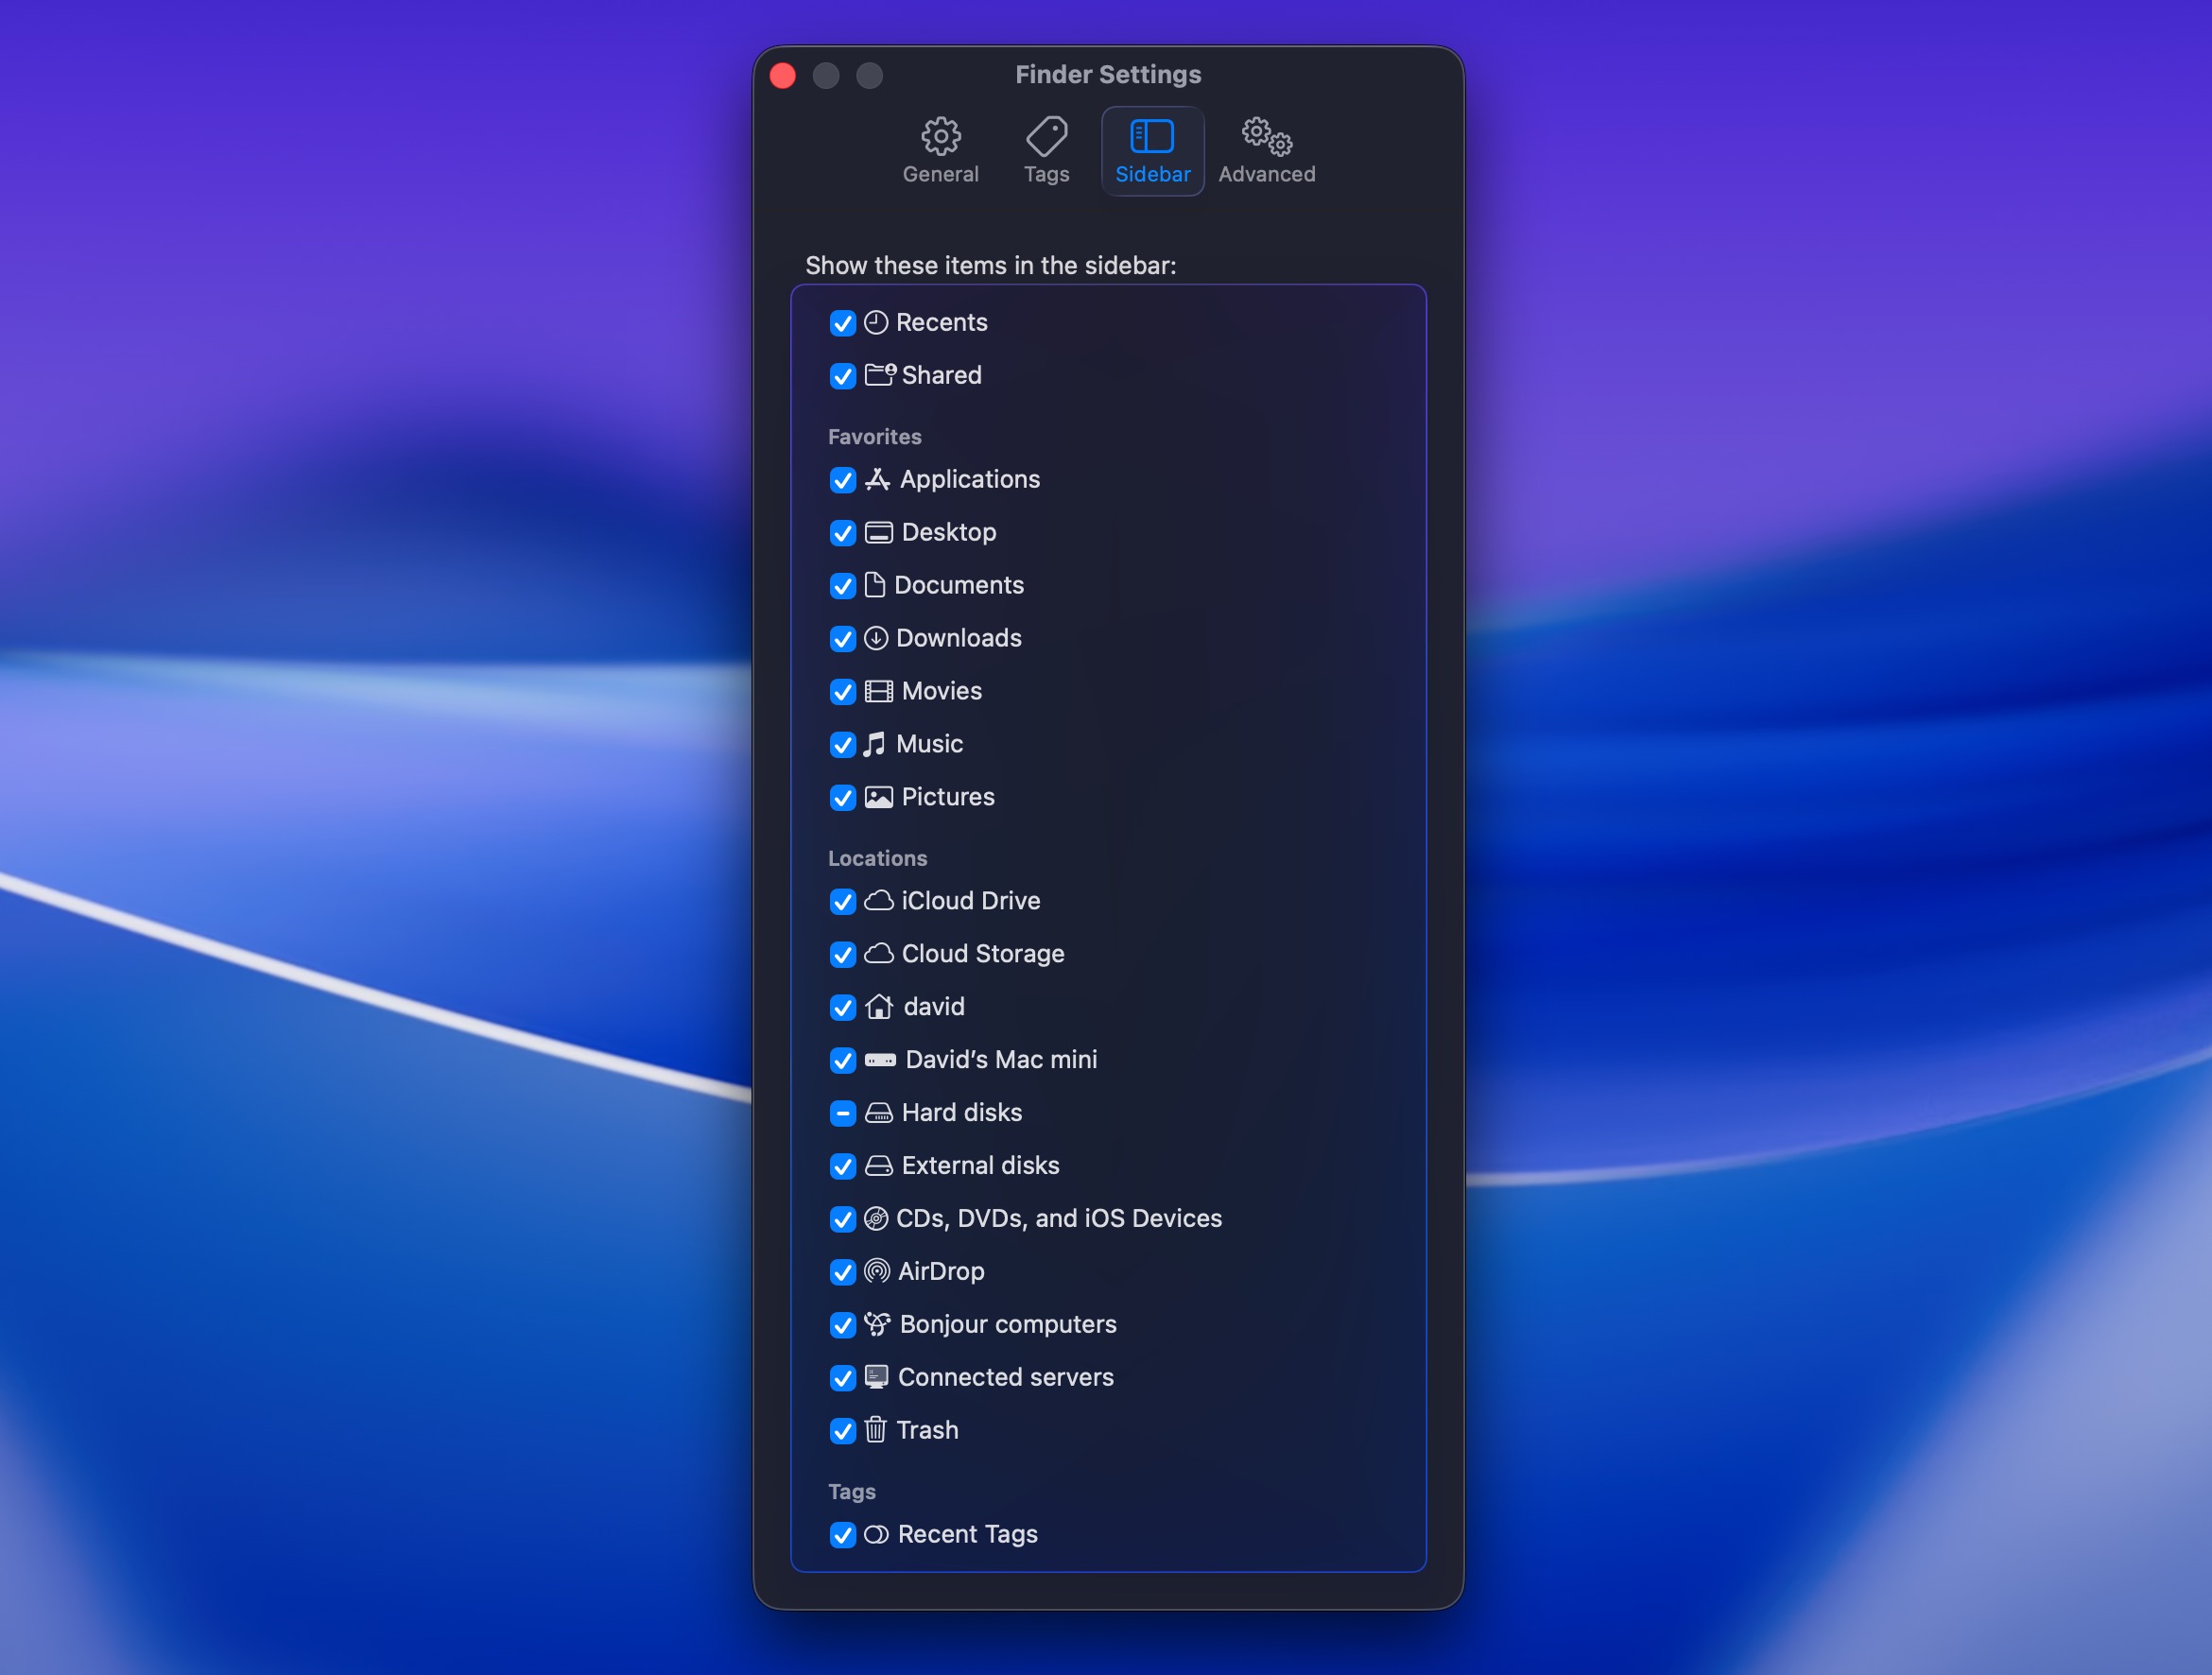
- Go to the Sidebar tab and look for External disks under the Locations section. Click the box near it to place a tick and start seeing the connected external disks in the Finder’s sidebar.
Option 6: Use a Third-Party External Drive Mounter
While macOS can read NTFS drives, it can’t write to them without third-party software. Additionally, certain drive configurations won’t mount at all, including NTFS drives with BitLocker encryption or NTFS volumes with non-standard cluster sizes. macOS also doesn’t natively support Linux file systems like ext3, ext4, or Btrfs. If your external drive uses an unsupported format, you’ll need a specialized third-party mounter app to fully access your data.
Option 7: Run First Aid in Disk Utility
Every Mac comes equipped with a tool called Disk Utility which you can use to perform various drive-related tasks. If you think that your external hard drive might have file system errors and, because of that, doesn’t mount to your Mac, you can use this app to try to find and repair those errors.
Here’s what you should do:
- Launch Disk Utility on your Mac (go to Finder > Applications > Utilities and click Disk Utility to open it).
- Select your external drive from the sidebar on the left.
- Click the First Aid button at the top.
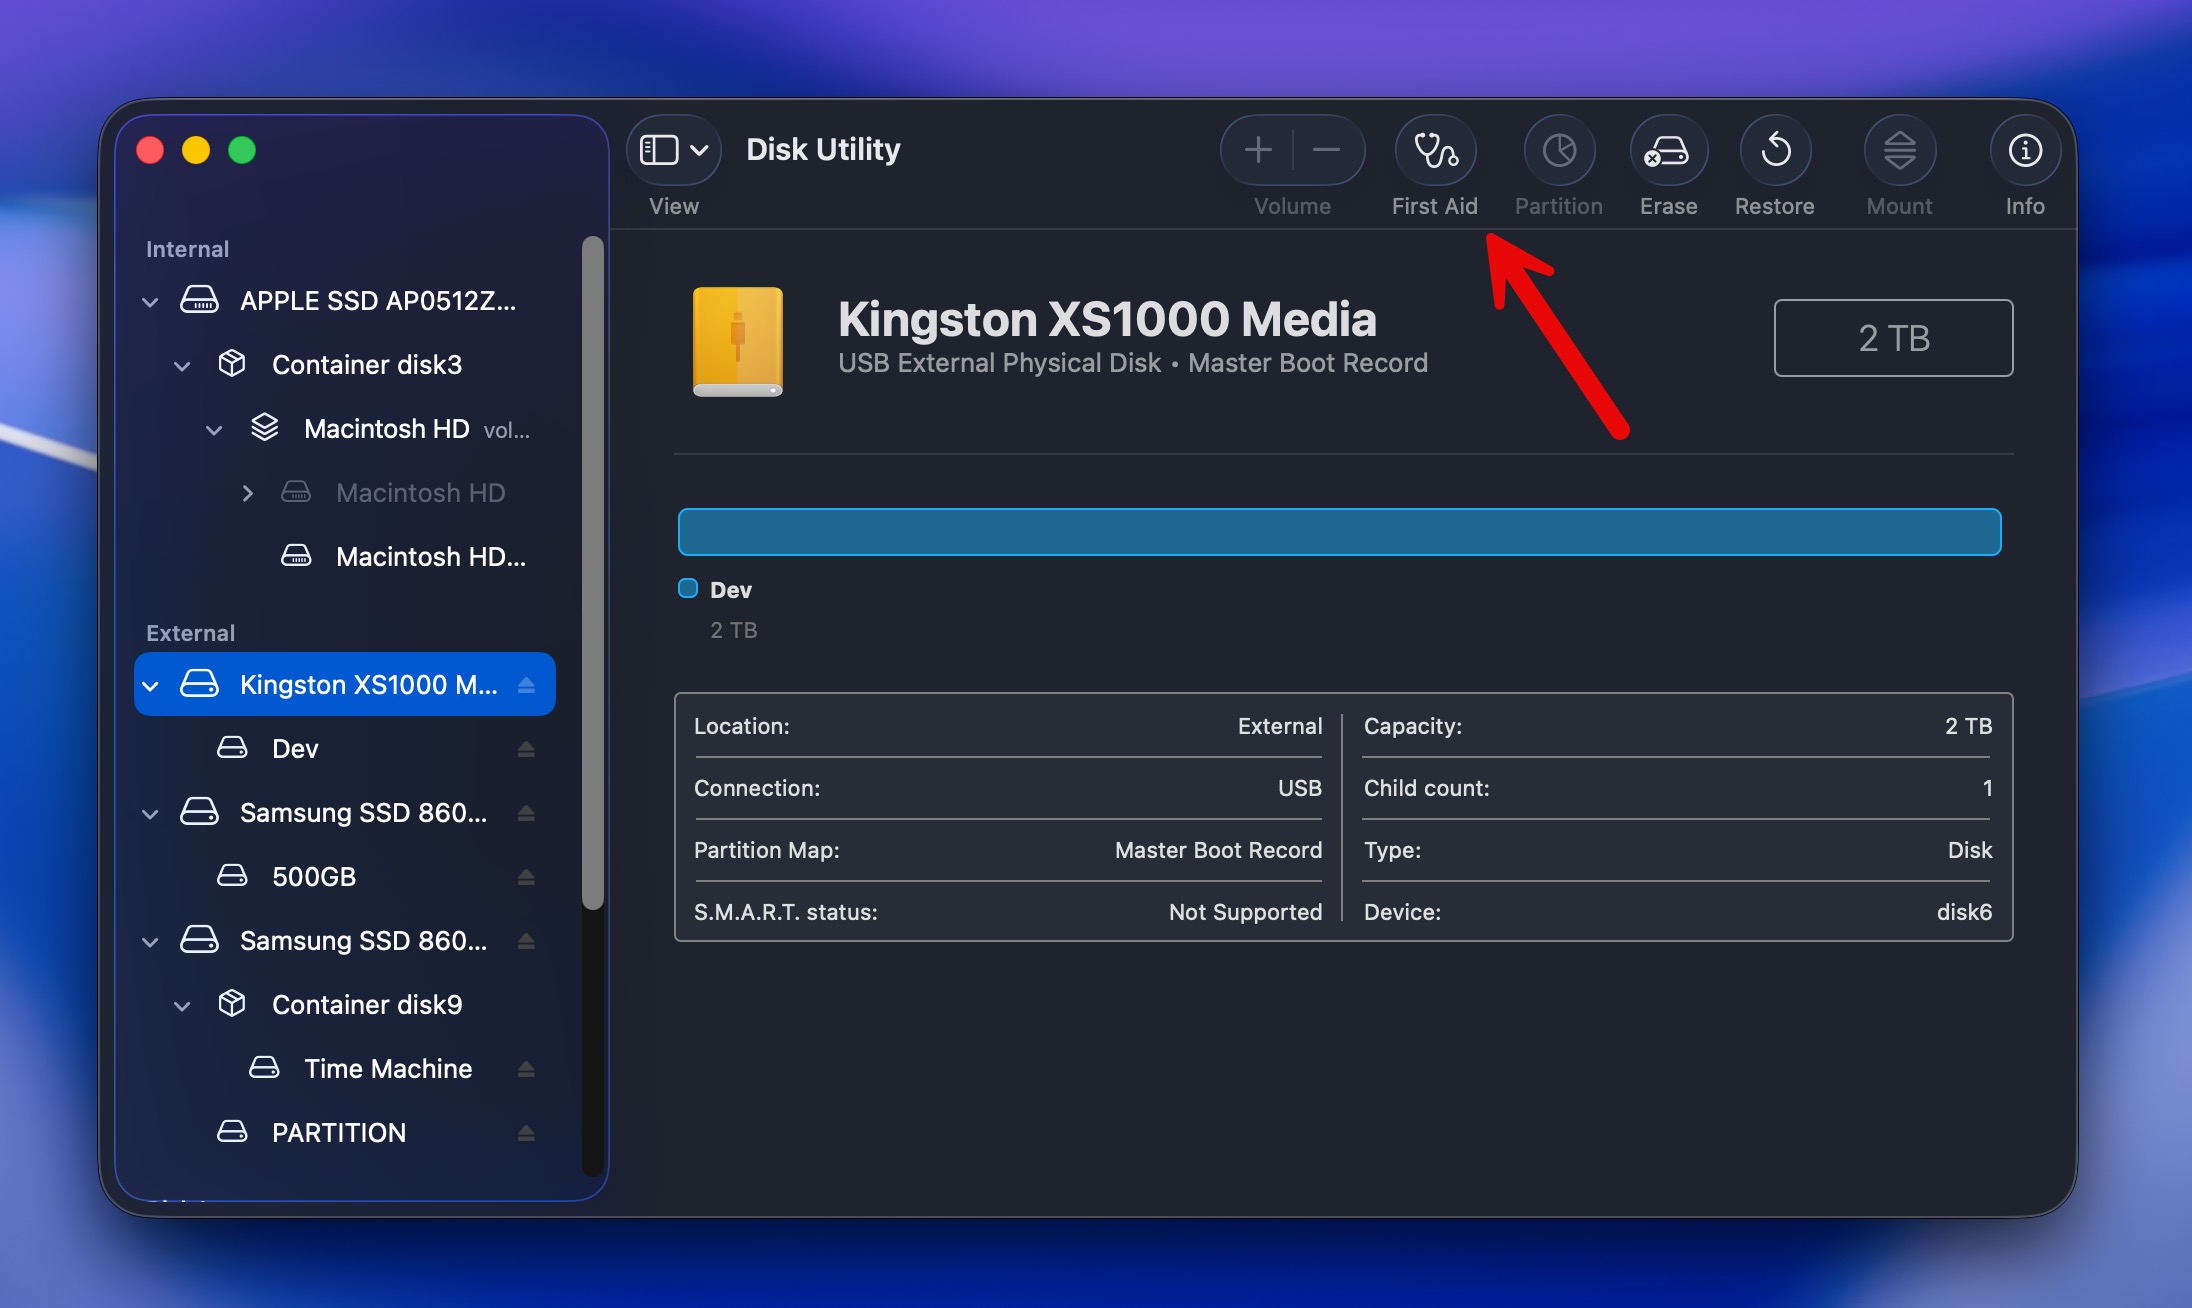
- Click Run to confirm.
Option 8: Force Mount the Drive in Disk Utility
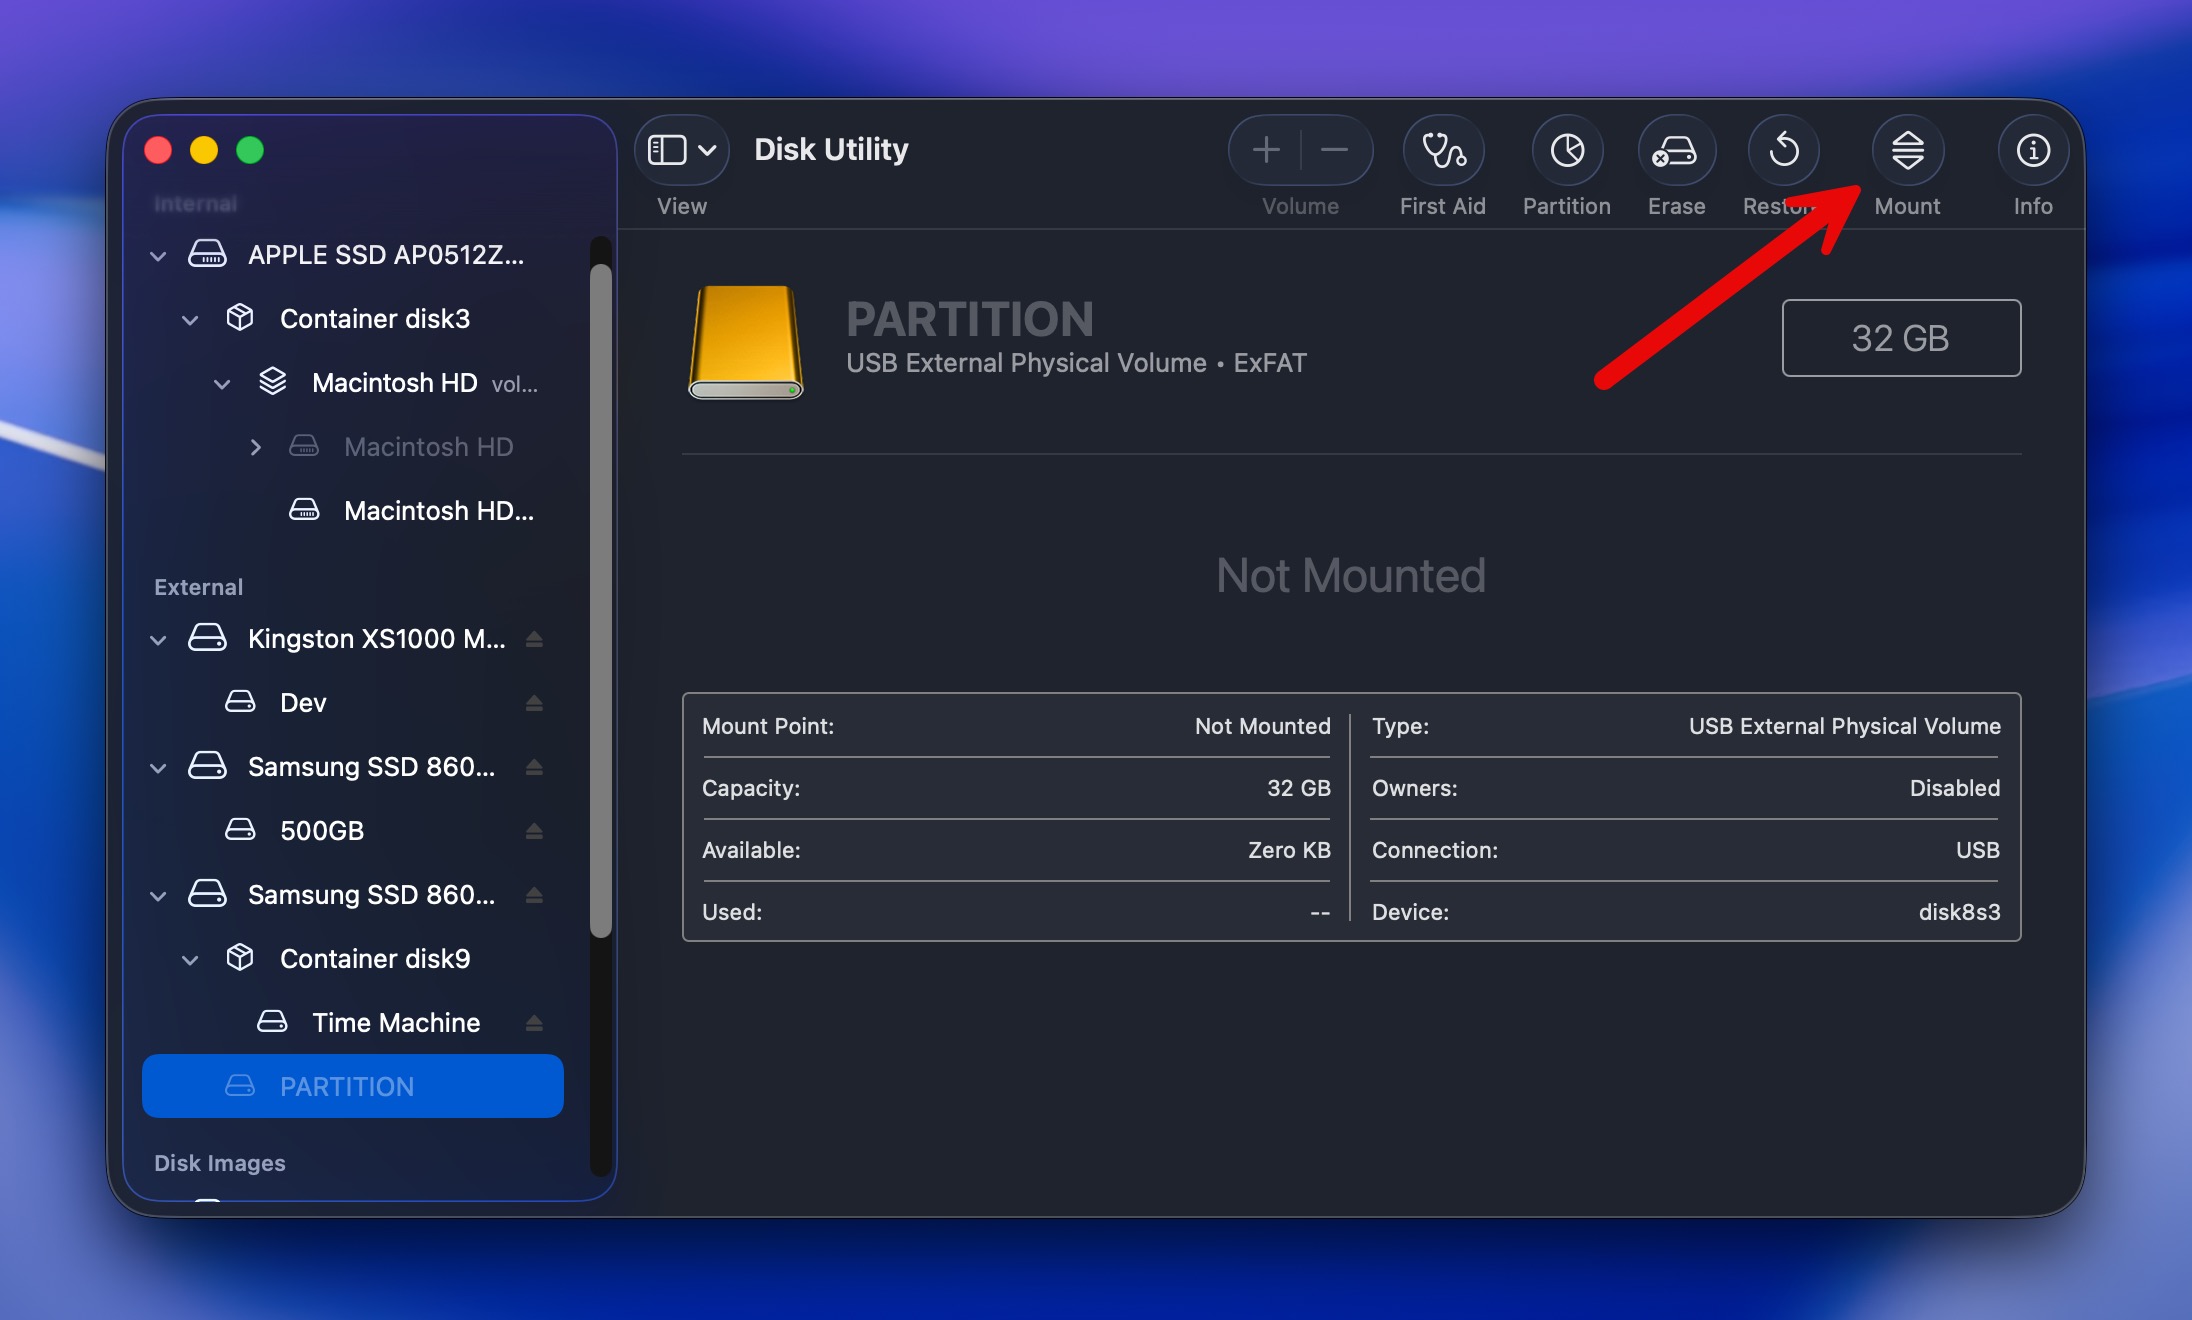
If the external hard drive is viewable in Disk Utility, but you can’t access the data located there, it’s possible to force mount the disk in this application. Once you succeed, you should be able to access the files stored on that drive on your Mac.
Here’s what you should do to manually force mount a hard drive on a Mac:
- Launch Disk Utility on your Mac (go to Finder > Applications > Utilities and click Disk Utility to open it).
- Choose the needed external drive from the sidebar on the left.
- Click the Mount button at the top.
Option 9: Format the Drive
If you’ve tried the above-mentioned methods and still were unable to mount the external hard drive to your Mac, there is one more option for you to try, which is formatting it. It’s a great option since it can fix your external drive and make it mountable again if the reason for the trouble is a corrupted filesystem.
📝 Note: Keep in mind that formatting will erase all of the files from your drive. If you still need any of the data, we strongly recommend scanning the drive with Disk Drill and recovering what you can before you format it. Recovery may still be possible afterward, but your chances can drop if new data is written to the drive.
You can format an external hard drive either via Disk Utility or Terminal.
Here’s how to format an external hard drive on your Mac using Disk Utility:
- Launch Disk Utility on your Mac (go to Finder > Applications > Utilities and click Disk Utility to open it).
- Choose the needed external drive from the sidebar on the left.
- Click the Erase button at the top.
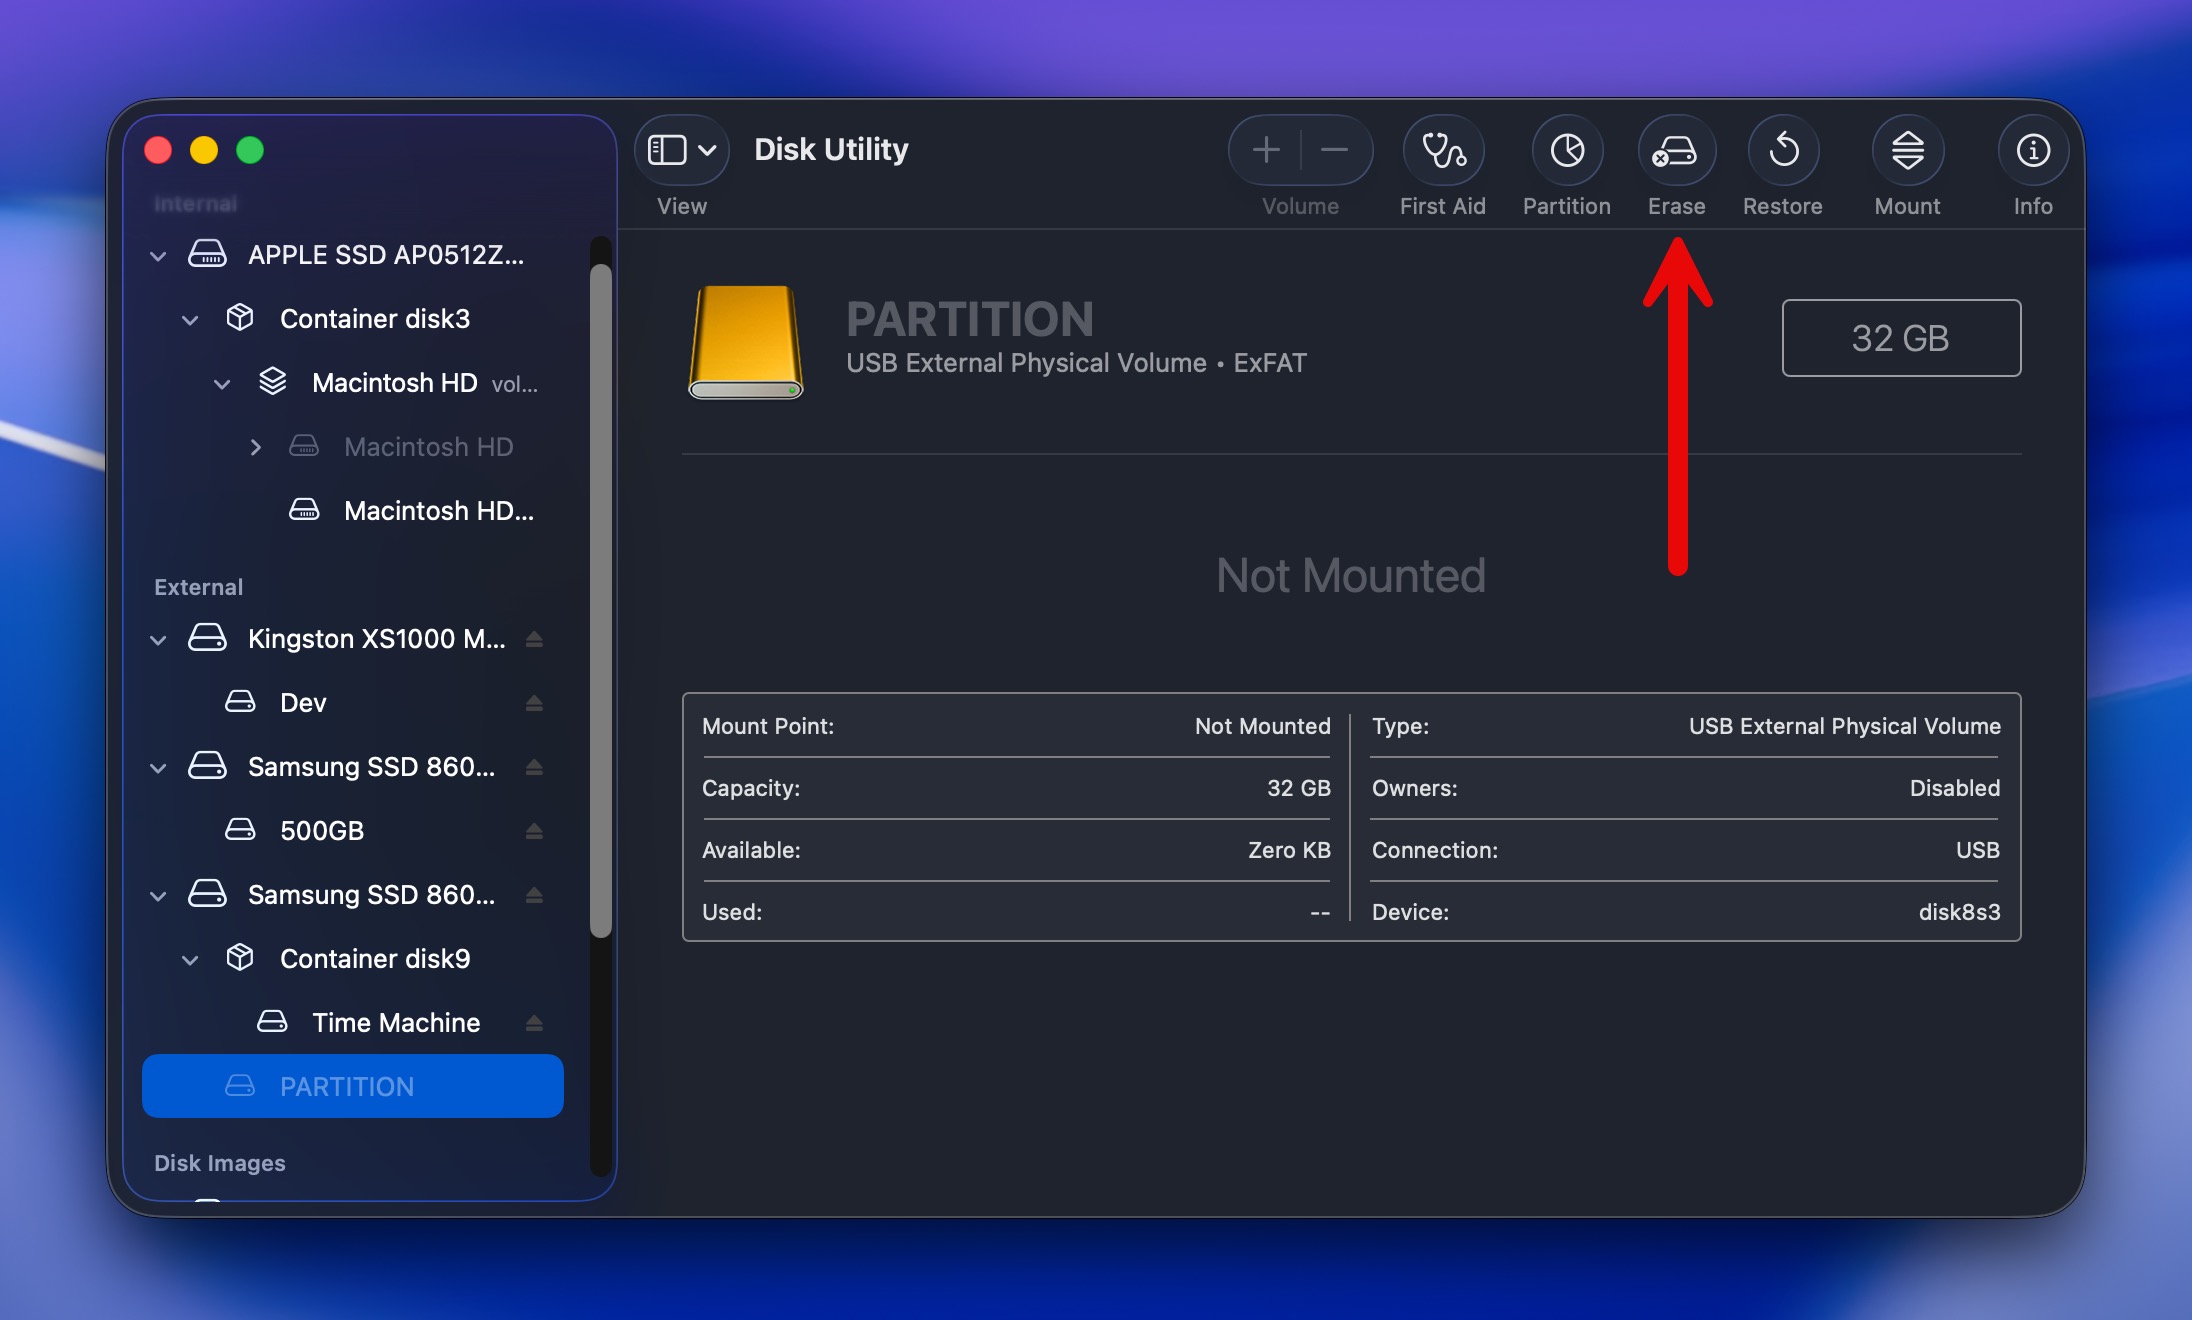
- Type in a preferred name for your hard drive, choose a format, and scheme.
Terminal offers more control and can sometimes format drives that Disk Utility can’t handle, but requires careful command entry:
- Open Terminal (Finder > Applications > Utilities > Terminal).
- Type diskutil list and press Enter to identify your drive’s identifier (like disk2 or disk3).
- Unmount the drive: diskutil unmountDisk /dev/diskX (replace X with your disk number).
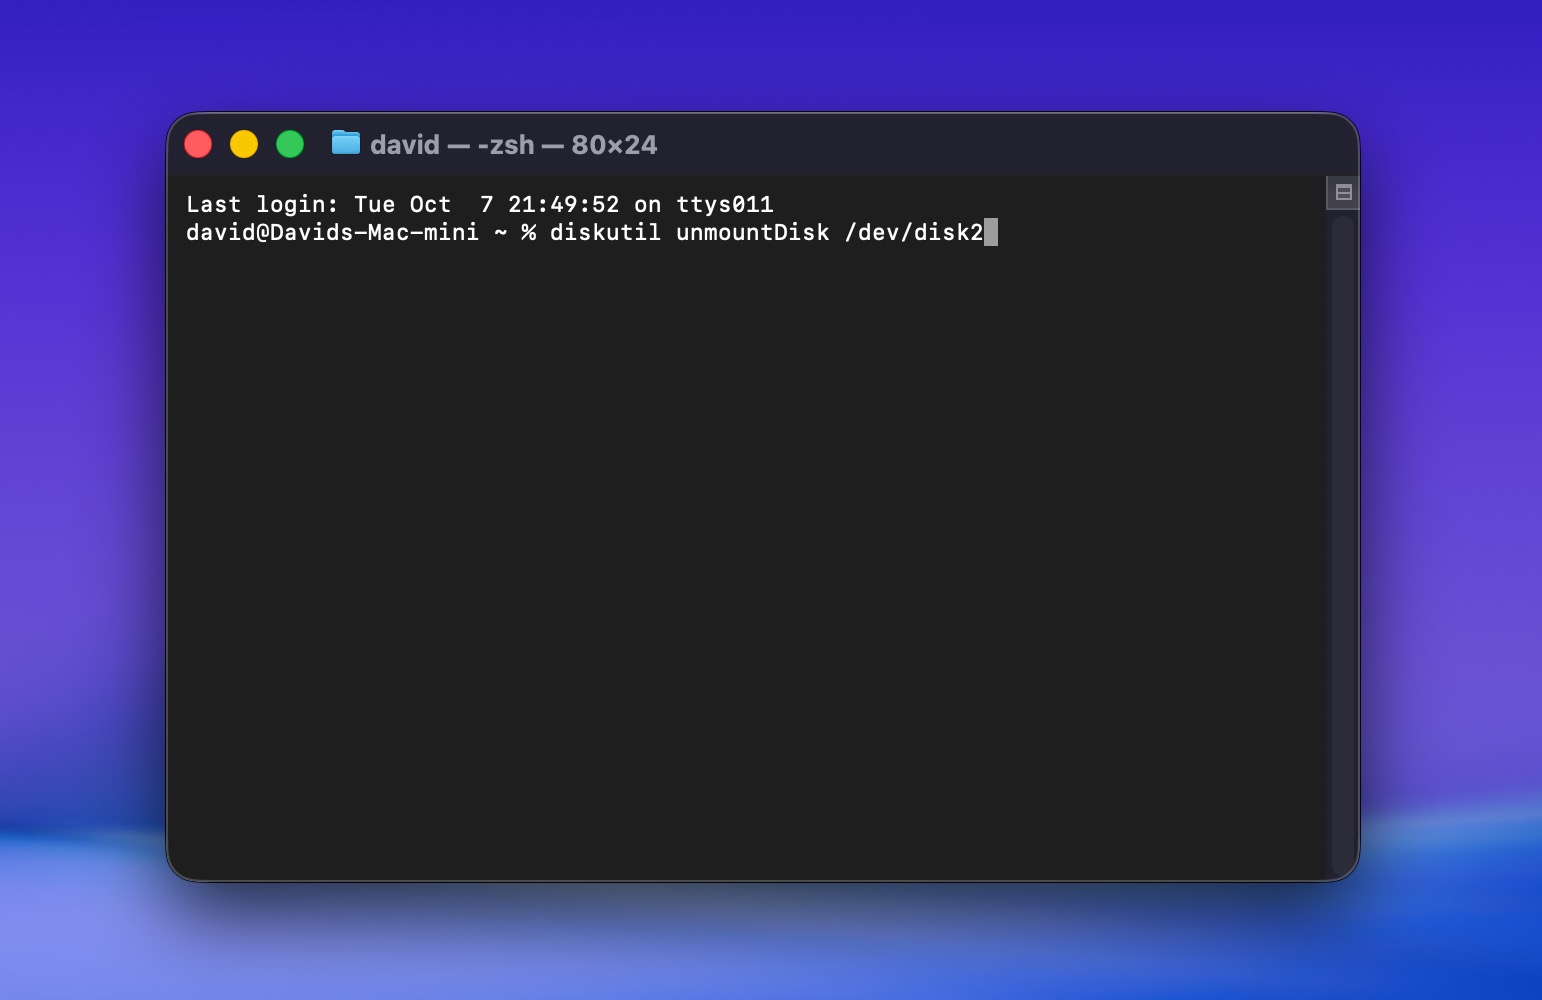
- Format the drive with your chosen file system, such as: diskutil eraseDisk APFS “DriveName” /dev/diskX for APFS.
- Press Enter and wait for the process to complete.
Terminal should only be used when Disk Utility fails or when you need specific formatting options not available in the GUI. One wrong character in a Terminal command could format the wrong drive instantly, with no undo option.
Still Stuck? Here’s What to Do Next
If none of the above solutions worked and your hard drive is not mounting on Mac, don’t give up yet. Here are your final troubleshooting steps and when to seek professional help:
- Connect your drive to a different Mac or even a Windows PC. If it mounts there, the issue is with your Mac’s configuration, not the drive itself.
- Try a powered USB hub. Many mounting failures are simply power issues in disguise. A powered hub provides consistent electricity that your Mac’s ports might not deliver, especially for older or high-capacity drives.
- Not all USB cables are equal. Some only carry power, not data. Use a cable you know works with other drives, preferably the original that came with your external drive or a certified Thunderbolt/USB-C cable for newer drives.
When you’ve exhausted all options or suspect physical damage, professional recovery services become necessary. They have clean rooms and specialized equipment to recover data from failed drives. Yes, it’s expensive (typically $500-3000), but it’s your only option for physically damaged drives with important data.
When choosing a service, look for one that follows a no-data-no-charge policy, so you won’t have to pay a recovery fee if your files can’t be recovered. CleverFiles Data Recovery Center is one option that offers this policy. Alternatively, you can look for a reputable data recovery lab near you and ask for an initial consultation and evaluation. Many labs provide this for free, and the results should give you a better idea of the chances of recovery and the expected cost before you decide whether to proceed.
🔗 For more comprehensive guidance on recovering data from problematic external drives, check out our detailed guide on external hard drive recovery for Mac.
Final Thoughts
So, what do we have? An external hard drive that won’t mount on Mac doesn’t automatically mean the drive is dead or your files are gone. Sometimes the problem is as simple as a bad cable, insufficient power, or a volume that macOS failed to mount. In other cases, you may be dealing with file system corruption, partition damage, or a failing drive.
The important part is doing things in the right order:
- Start with the basic checks. Check the cable, ports, power supply, Finder settings, and whether the drive appears in Disk Utility.
- Recover important files before repairs. If macOS can still detect the drive, Disk Drill is our main recommendation for data recovery. It can work with drives that won’t mount normally and gives you a chance to save your files before making changes to the storage device.
- Move on to repair or formatting only after your data is safe. First Aid and other repair methods may help with logical problems, while formatting gives you a fresh file system when repair isn’t possible.
- Know when to stop. If the drive isn’t detected on any computer or shows signs of physical damage, software won’t help. At that point, contact a professional data recovery service and ask for an evaluation before deciding whether the data is worth the recovery cost.
And once your drive is working again, a little prevention can save you from repeating the whole process:
- ✅ Always eject an external drive before unplugging it.
- ✅ Avoid unpowered USB hubs, especially with drives that require more power.
- ✅ Use reliable data cables rather than charge-only or questionable adapters.
- ✅ Keep a separate backup of important files instead of relying on a single external drive.
If you’ve gone through this guide carefully and still have questions, check the FAQ section below first. If you still can’t find an answer that matches your case, visit the 7 Data Recovery Forum. You’ll find existing discussions about external hard drives on Mac, so there’s a good chance someone has already dealt with a similar problem. And if not, you can create your own thread, describe what’s happening with your drive, and get advice specific to your situation.
FAQ
- Connect the drive to your Mac.
- Open Disk Utility on your computer (go to Finder > Applications > Utilities and click Disk Utility to open it).
- Select your external HDD on the sidebar on the left.
- Click the Mount button at the top.
- Click Finder on the Dock on your MacBook.
- Click Finder at the menu on the top of the screen and choose Preferences from the drop-down menu.
- Select the Sidebar tab.
- Place a tick in the box near External disks by clicking it.