 You likely equate formatting with the permanent deletion of your files, but that’s not true – at least not always. In most cases, you can recover data from a formatted hard drive. How? Well, by using a capable data recovery tool, or contacting a professional data recovery service. The sections below will guide you through the process, and answer any questions you may have about data recovery from a formatted hard drive.
Stop using the formatted drive and set it aside for now. Take a moment to read through this guide first, so you understand the next steps. Acting too quickly or using the drive without a plan may make it impossible to recover erased hard drive Mac data.
When Is It Possible to Recover Data from a Formatted Hard Drive
Data recovery chances from a formatted internal, or external hard drive on your Mac depend on how actively the drive was used after formatting. Why? Because after you format a hard drive on macOS, the blocks occupied by your files are marked as available for use, allowing new data to be written to them. The previous files can be recovered as long as new data isn’t written to the drive. The more new files you write to the drive, the higher the likelihood of them overwriting the deleted files you want to recover.
Attention‼️ Currently, macOS only offers a single formatting method, which works as described above. However, older versions of macOS included Secure Erase options with multiple passes. The number of passes determined how many times the data was overwritten with random values, making recovery impossible. If your hard drive was formatted using one of these Secure Erase methods, mac hard drive recovery is unfortunately not possible.
If you want to recover a formatted SSD, I have some bad news for you. SSD data recovery is significantly more complex than an HDD – thanks to the TRIM feature which clears up unused data blocks at regular intervals. However, not all external SSDs support TRIM, so it’s still worth attempting data recovery. That said, it’s best to keep low expectations when dealing with SSDs.
How to Recover Data From a Formatted Hard Drive on Mac
To recover files from a formatted hard drive on a Mac, you have several options. The right one depends on the type of drive you’re dealing with (internal or external), as well as your specific situation. All available methods are outlined and explained in detail below, so you can choose the one that fits your case best.
Method 1: Use Data Recovery Tools
Data recovery software is often the only available option to restore formatted hard drive Mac data. These tools scan your drive for traces of formatted files and attempt to recover files that haven’t yet been overwritten. This is exactly why we recommended stopping use of the drive earlier (any new data can reduce your chances of recovery).
Data recovery tools are abundant on the web, and choosing one can be a tedious process. Different tools have different strengths, and many of the top results you see are there because of marketing, not actual performance. To simplify things, we’ll focus on a data recovery tool we have personally tested and can recommend – Disk Drill.
Disk Drill is our go-to tool for data recovery, mainly because of how easy it is to use. Scans are usually fast, and file selection is intuitive – thanks to its file filtering, and file preview features. It supports all major file systems and storage drive types. You can even scan drives with a missing, or corrupt file system using additional recovery algorithms, which we cover in more detail in our full Disk Drill review.
Here’s how to recover data from an accidentally formatted hard drive using Disk Drill:
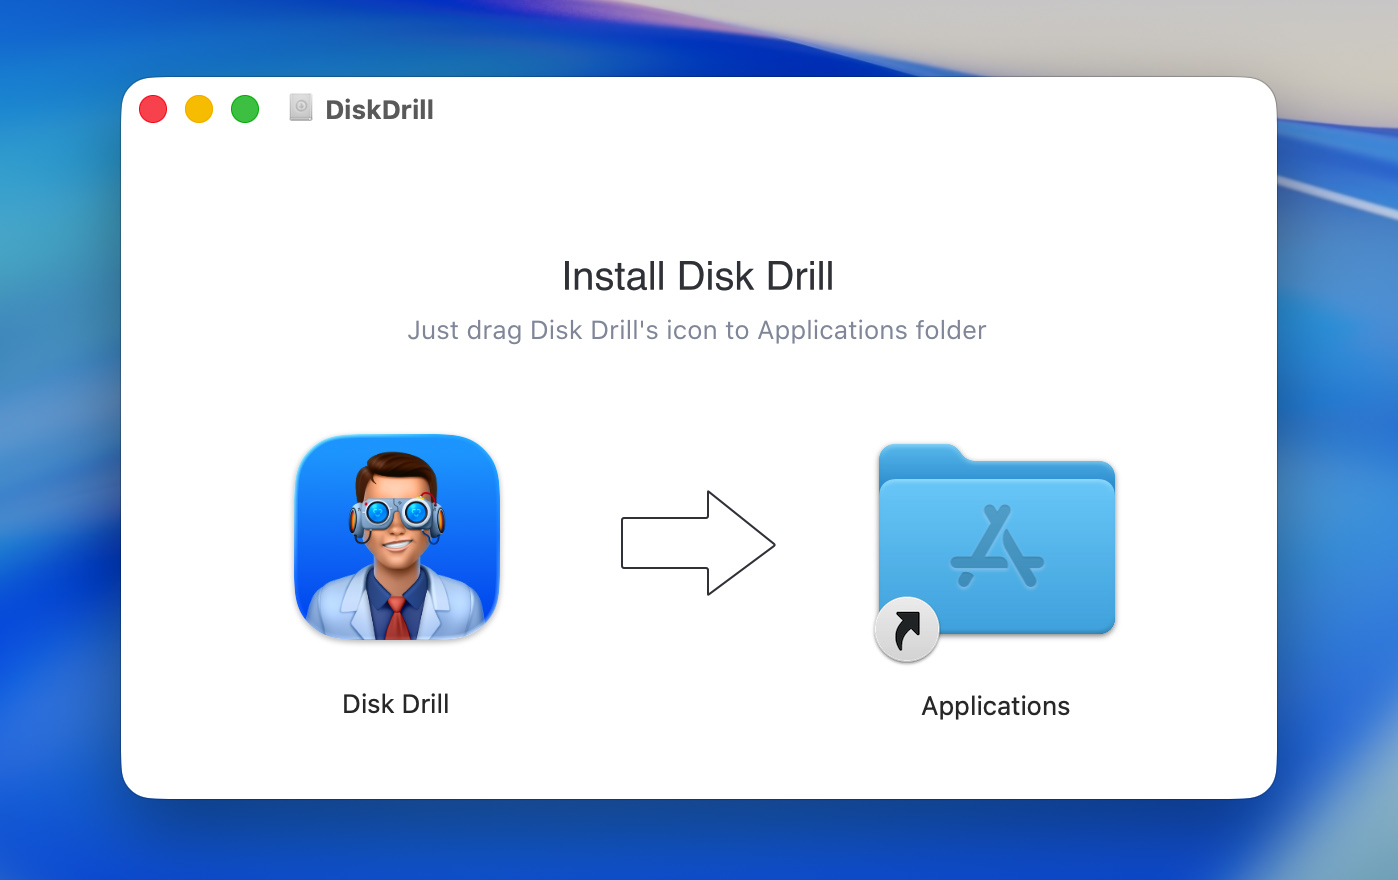
- Download Disk Drill and install it. If you’re attempting internal disk recovery on Mac, do not install the program on the same drive.
- If applicable, ensure the formatted external hard drive is connected to your Mac. Open Disk Drill.
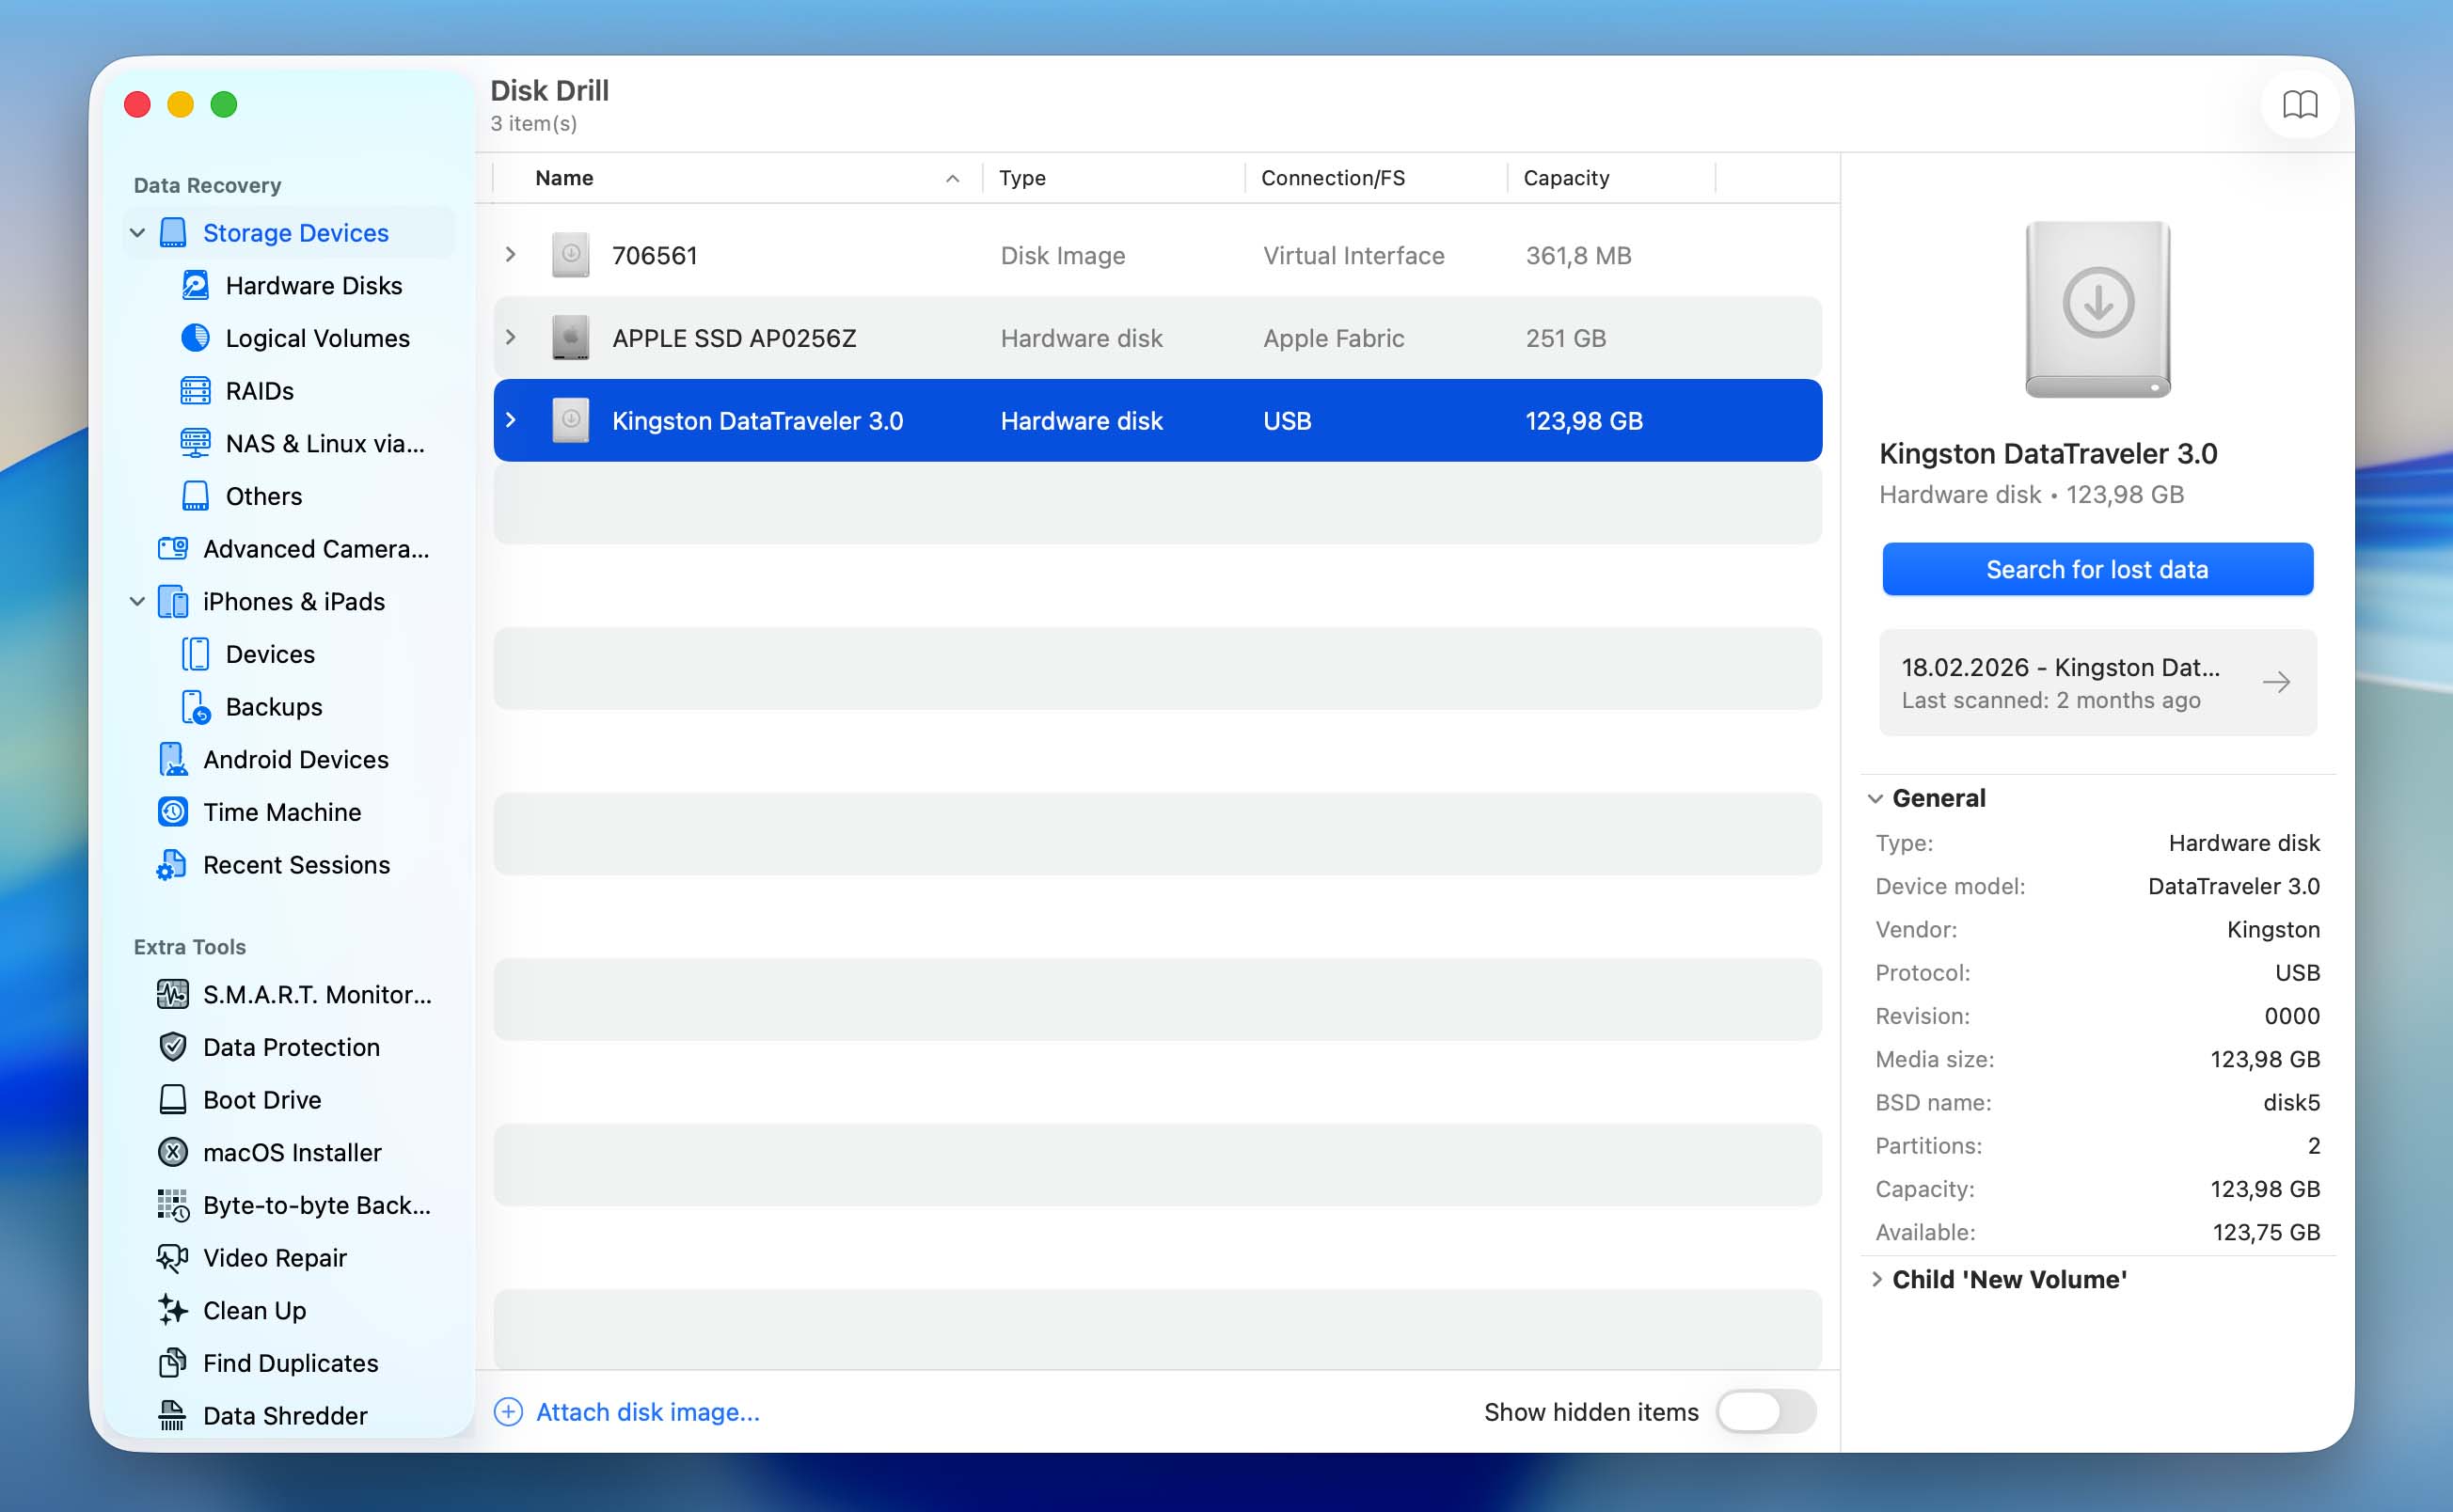
- Select the hard drive from the list, and click Search for lost data.
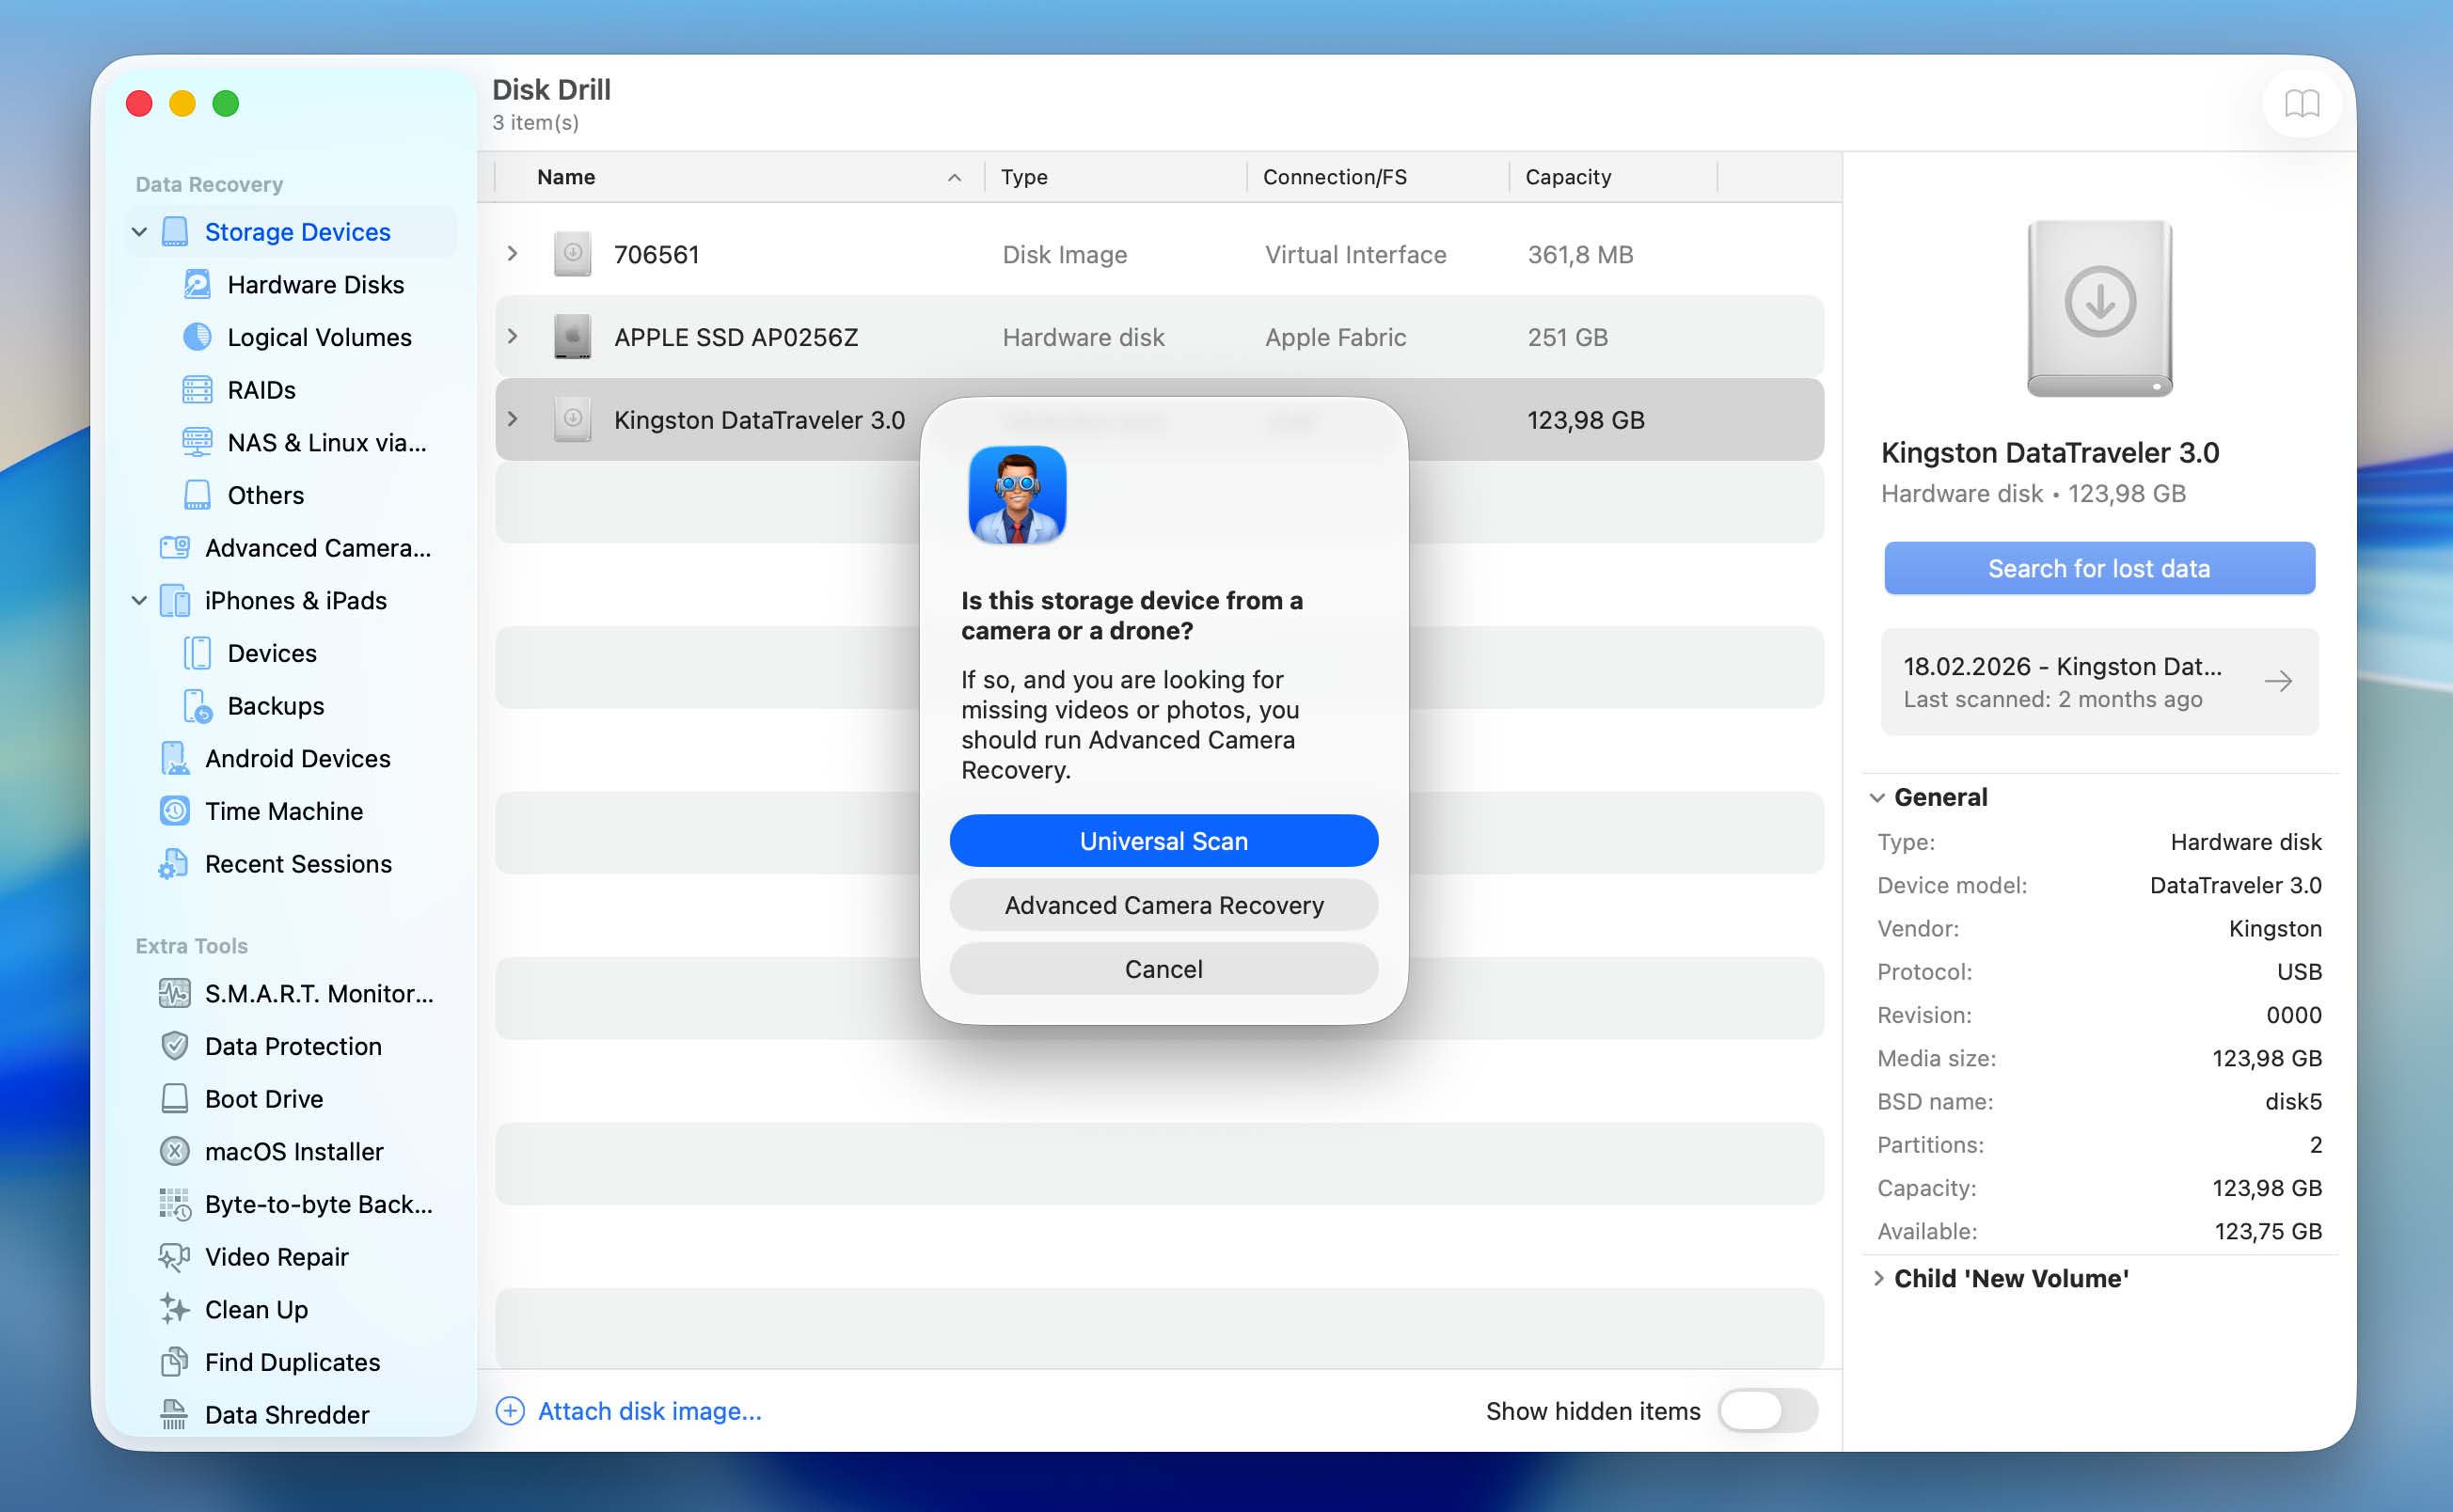
- You’ll then be prompted to choose a scan type – Universal Scan or Advanced Camera Recovery. You should select Universal Scan. If you’re scanning an internal drive, this step will be skipped and the scan will start automatically.
- Wait for the scan to complete. Once finished, click Review found items to view all recoverable files. Only want to see a specific file type? Click on the relevant tile instead (Pictures, Videos, Audio, Documents, Archives, and Other).
- Expand the Deleted or lost and Reconstructed sections.
- Select the files you want to recover. Disk Drill shows a preview of the selected file, but you can manually preview any file by clicking the eye icon next to its name. Click Recover once you’ve confirmed your selection.

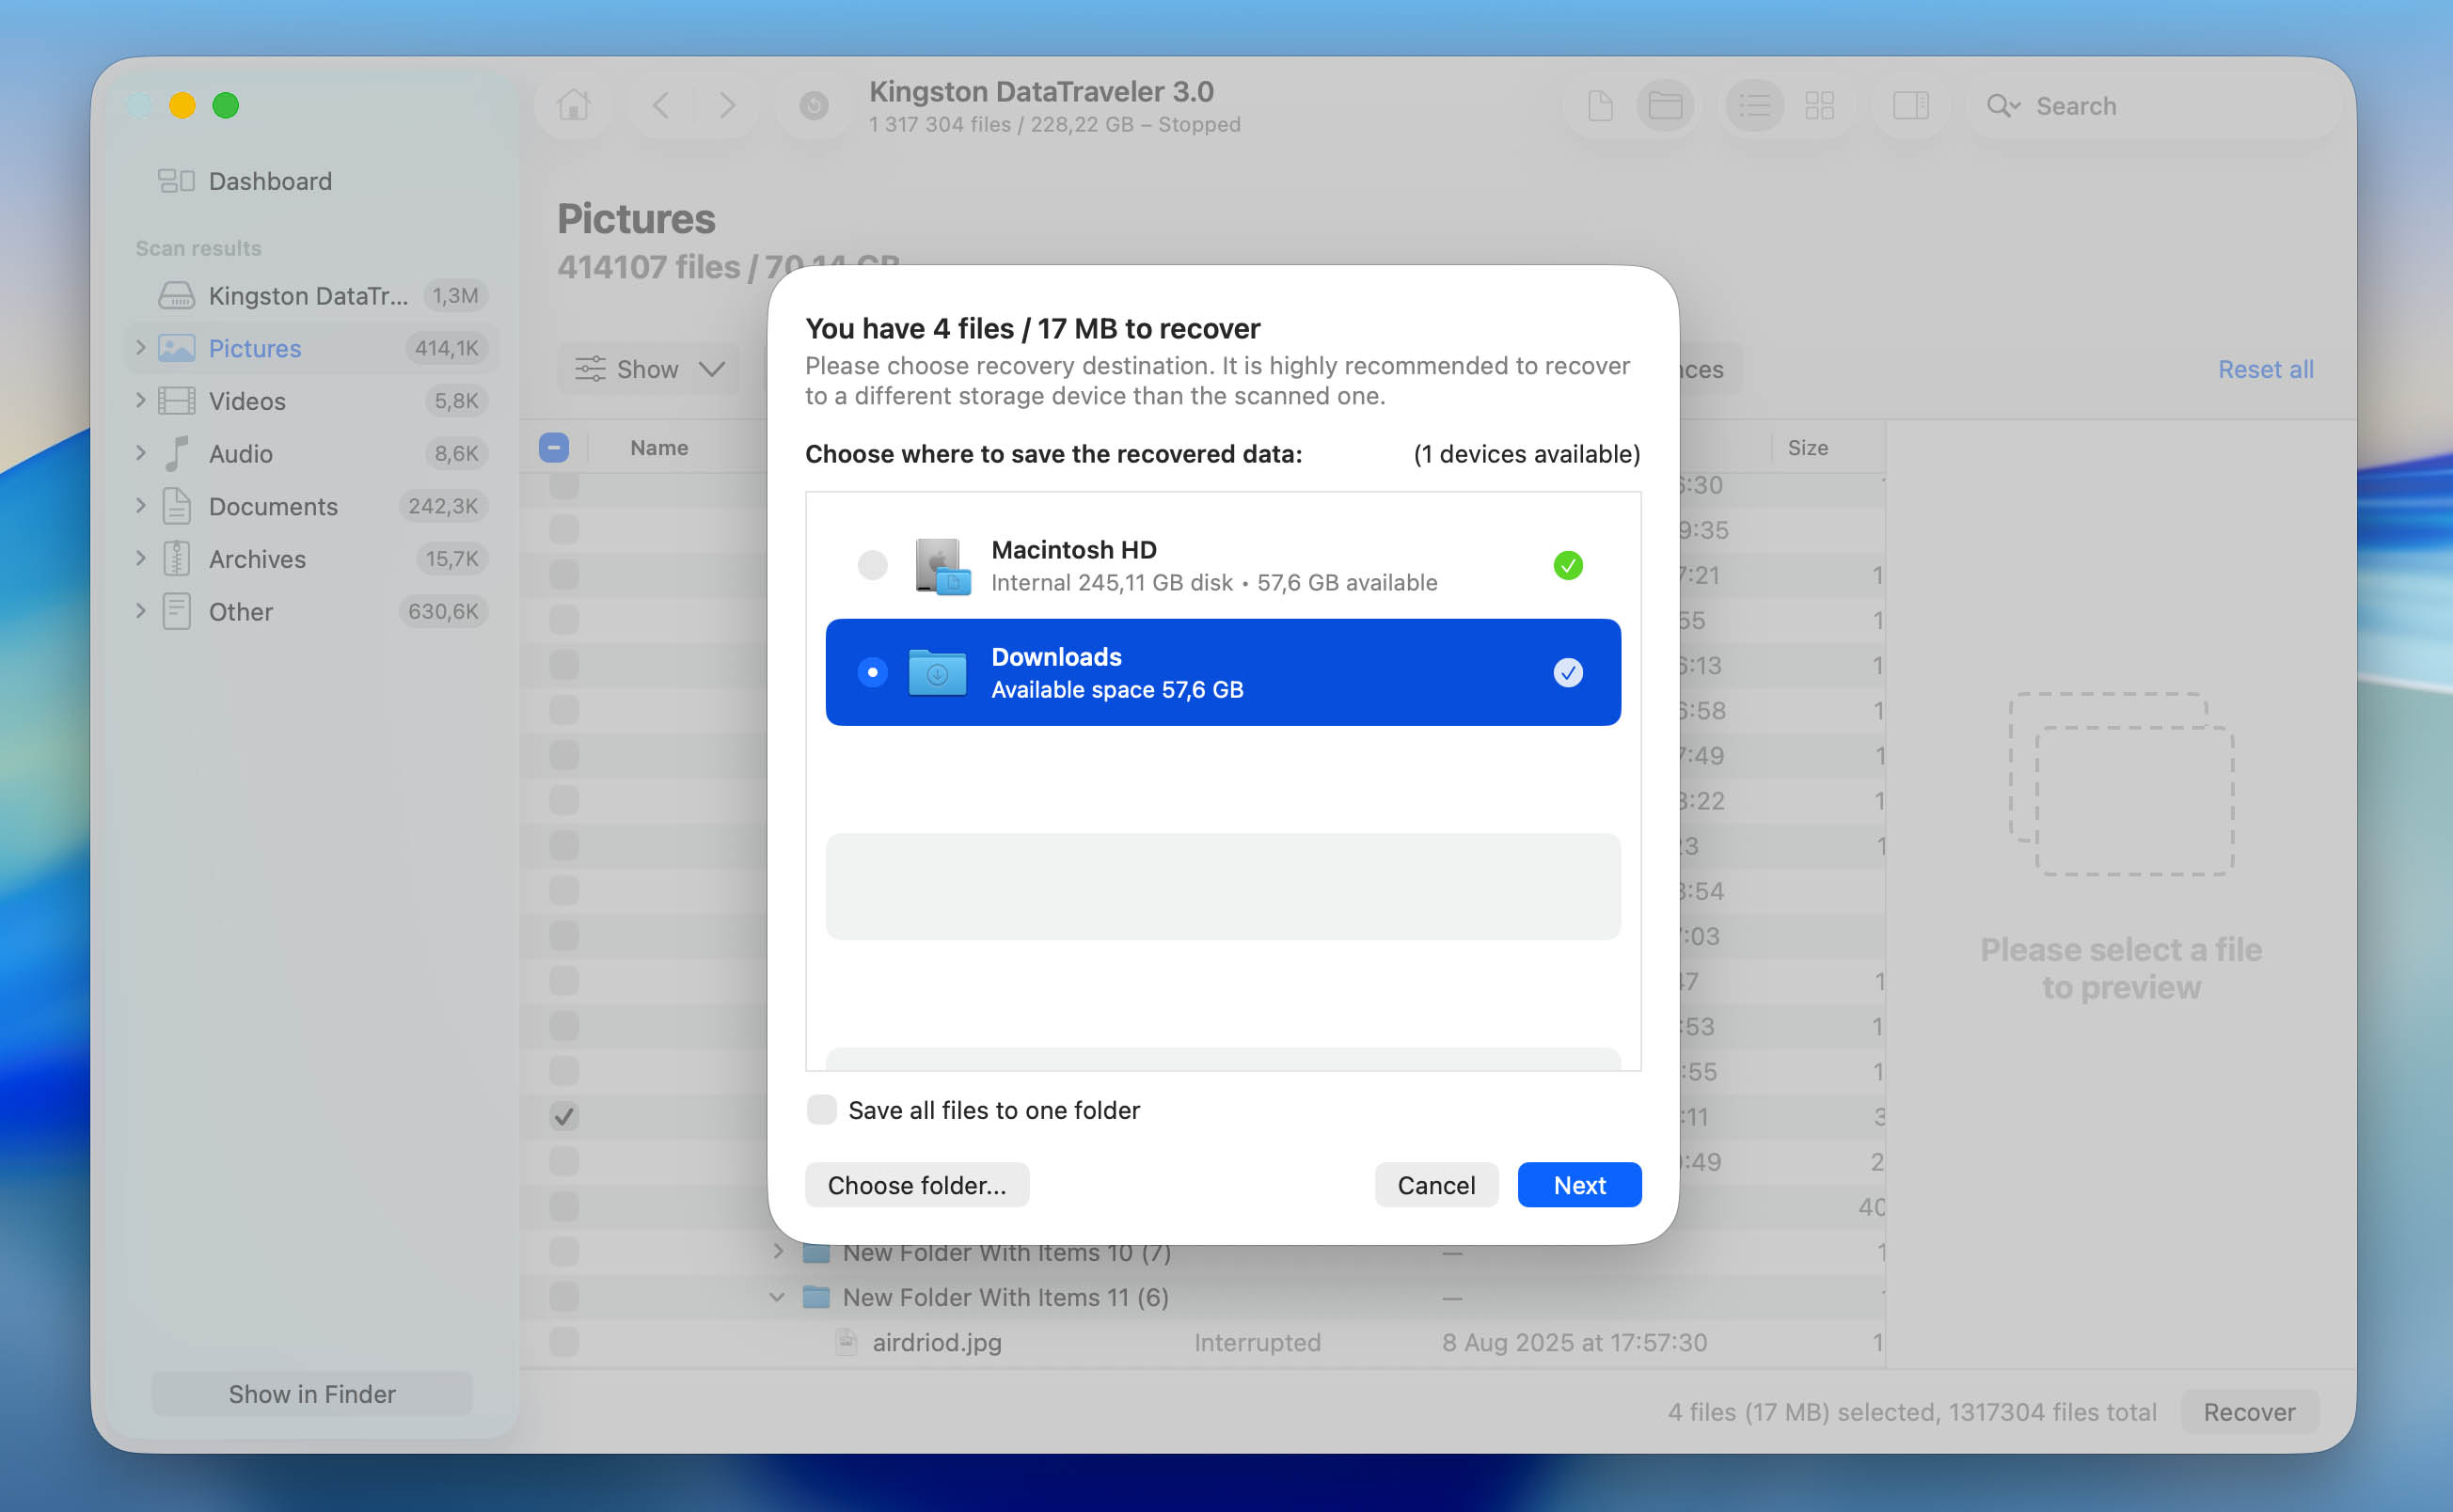
- Choose a recovery destination and click Next. We suggest saving the recovered files to a different drive, not the one you formatted. This helps avoid overwriting data in case you want to recover more files later.
- Disk Drill will recover the selected files to the chosen location. Once the process is complete, close the program and open the destination folder to check the recovered files.
You can download Disk Drill and scan your drive for free to check whether your files are still recoverable. This allows you to preview found data before making any decisions. However, to actually recover data from formatted Mac hard drive, you’ll need to upgrade to the Pro version of Disk Drill.
Method 2: Restore Files from a Time Machine Backup
If you had Time Machine set up before formatting the drive, you may be able to restore your files from a backup(this method is most commonly used for internal drives on a Mac).
Time Machine is a built-in macOS feature that creates backups of your files over time. It works with drives formatted in APFS or HFS+, and saves snapshots of your data at different points. Backups are created automatically (typically hourly for the past 24 hours, daily for the past month, and weekly beyond that, as long as the backup drive is connected). Keep in mind that older backups may be removed once the backup disk runs out of space.
Here’s how to restore files from a Time Machine backup:
- Connect the drive that contains your Time Machine backup to your Mac.
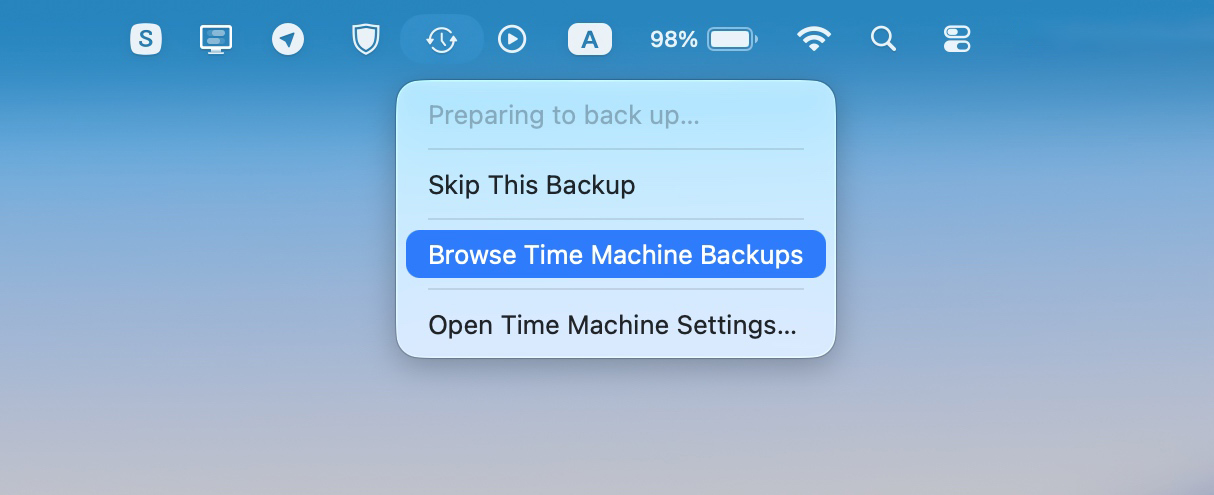
- Click the Time Machine icon in the menu bar and select Browse Time Machine Backups.
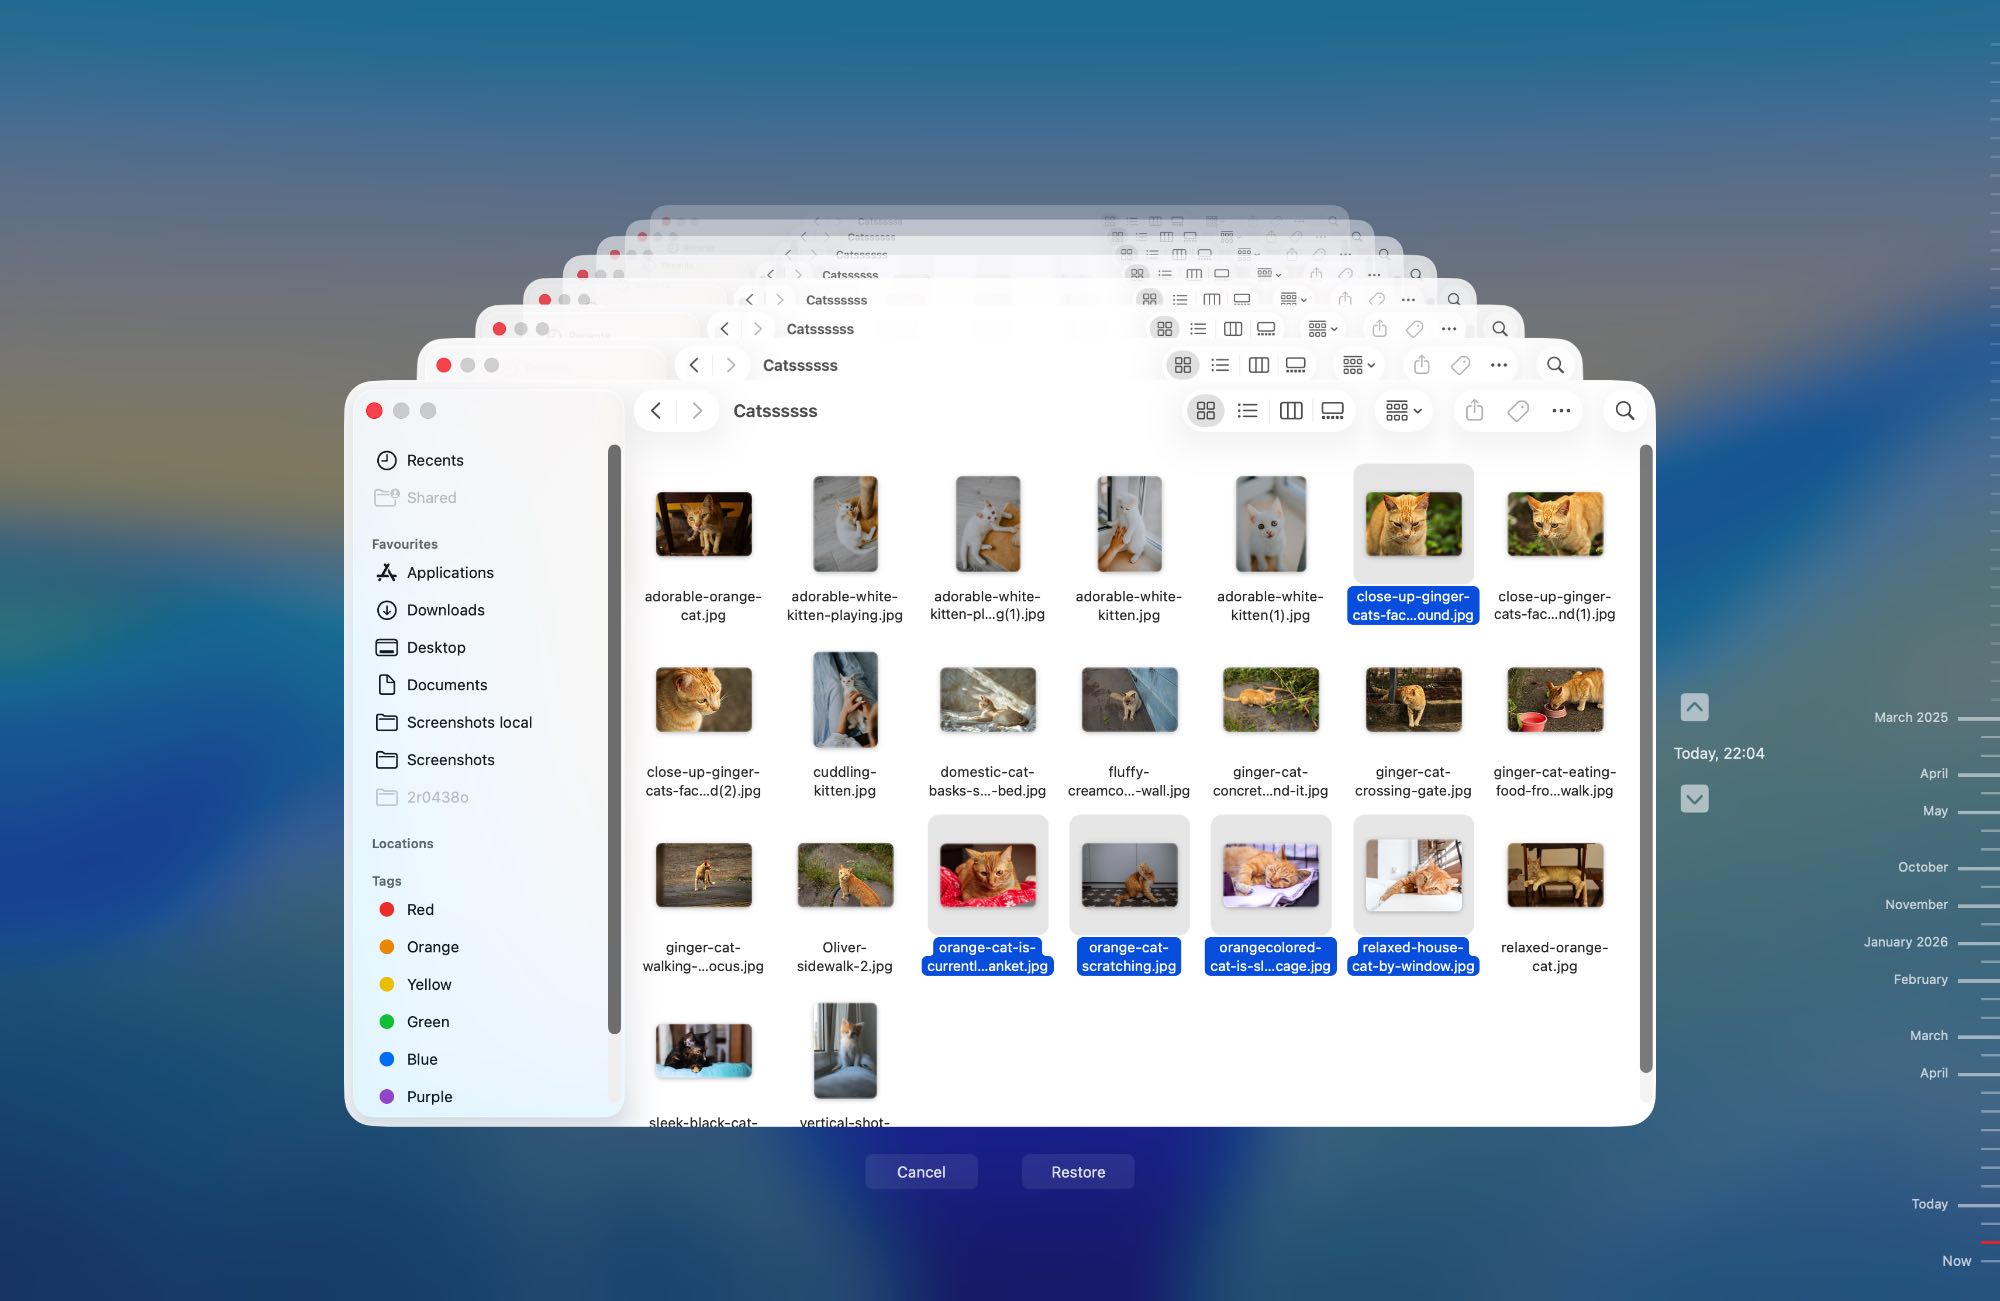
- Use the timeline on the right side of the screen to navigate to a backup created before the drive was formatted.
- Browse through the available files and folders. You can preview items before restoring them.
- Select the files you want, then click Restore or right-click and choose Restore to… if you want to recover them to a different location.
If your system drive was formatted, you should use Migration Assistant to transfer your entire system (files, apps, and settings) from a Time Machine backup back to your Mac.
Method 3: Contact a Professional Data Recovery Service
Data recovery services are usually the best option to recover data from a Mac hard drive if the previous methods didn’t work, or if the drive has physical damage. Why?
If the drive itself is healthy, professionals will typically rely on the same type of data recovery software described above, just with commercial licenses and more advanced setups. In that case, the results may be similar, but the cost will be significantly higher than if you use a tool on your own.
However, if the drive is physically damaged, recovery services can go beyond software-based methods and perform chip-level recovery, which can’t be done at home. Ultimately, the choice depends on how critical your data is and how much you’re willing to spend.
Here’s what to expect when contacting a professional data recovery company:
- Email, or call up a local data recovery company. Most companies have a 24*7 hotline.
- Explain your data loss scenario, when the drive was formatted, and how you formatted it.
- Then, you’ll need to ship the drive to the company, or drop it off at a drop-off point.
- The data recovery experts will analyze the drive and get back to you with a quote. This is usually free.
- You can then choose whether to proceed with data recovery or not.
Conclusion
To sum up, recovering data from a formatted hard drive mostly depends on how much the drive was used after formatting, and whether your data has been overwritten. Once that’s clear, the next step is choosing the right recovery method.
Not sure which one to go with? Ask yourself a few simple questions. Do you have a Time Machine backup? If yes, use it. If not, are you willing to handle the recovery yourself? If you are, data recovery tools like Disk Drill can help. If not, you can turn to professional data recovery services.
Going forward, it’s a good idea to avoid storing important data in just one place. Keep copies on multiple devices, and use cloud storage as an extra layer of protection. It also helps to be more careful with disk operations, so you don’t end up formatting a Mac hard drive unnecessarily.
Have more questions? Check the FAQ section below. If you don’t find what you’re looking for, you can visit our forum to search for similar cases or start your own discussion.
FAQ
- Scan the affected drive using a data recovery program.
- Contact a professional data recovery service.
- Check the iCloud Drive for your files.


