Flash drives can be an easy way to carry your work documents or movies around, until that one day when your computer can’t seem to read it. When that happens, there’s a good chance that your flash drive has become corrupt. This is the point where you should focus on recovering files from a corrupted USB drive while it’s still possible.
That’s exactly what this guide covers. We simulated different corrupted USB scenarios to test both data recovery methods and ways to fix the device itself. If you’re dealing with this right now or think you might soon, keep reading.
All the methods in this guide apply to logically corrupted USB flash drives. These are cases where the drive behaves strangely but is still visible in Disk Management with the correct capacity. If your USB drive doesn’t show up there at all, or if it has physical damage, it’s best not to try fixing it at home.
How to Recover Files from a Corrupted Flash Drive
A corrupted USB flash drive doesn’t mean you’ve lost your files, and in most cases, the data is still there, it’s just no longer accessible through normal methods. Below, we’ll go through several ways you can use to recover files from a corrupted USB drive.
Method 1:Use Data Recovery Software
When dealing with a corrupted USB flash drive, Disk Drill turned out to be our top choice during testing. It’s a reliable tool for data recovery and can access drives even when they don’t appear in File Explorer. It also works with RAW USB drives and those that prompt you to format them, which makes it suitable for different corruption scenarios.
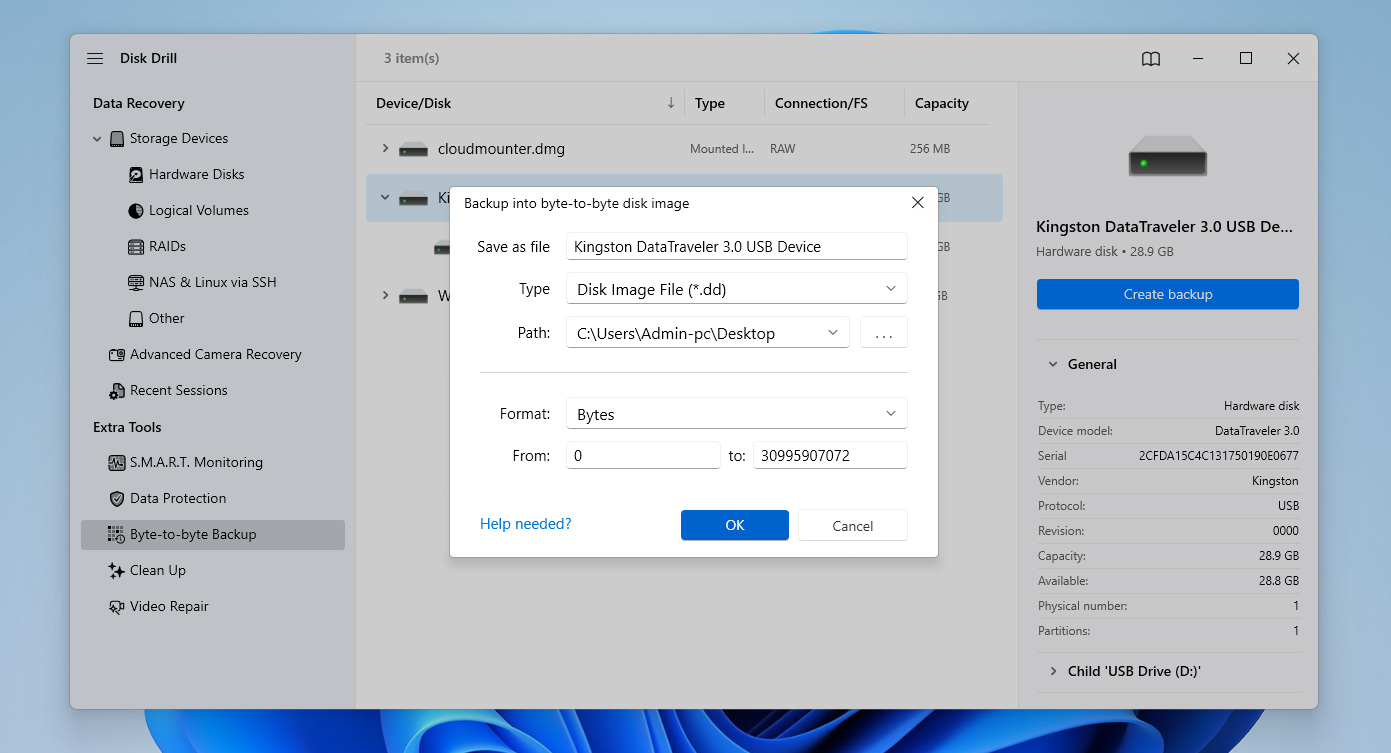
Besides data recovery, Disk Drill includes several other useful features, which you can explore in more detail in its full review. In the context of corrupted USB recovery, one feature that stands out is the ability to create a disk image. This lets you work with a copy of the drive instead of the original, which helps reduce the risk of further damage during the recovery process.
- Connect your USB flash drive to your computer.
- Download and install Disk Drill, then launch it. You’ll see a list of available storage devices on the main screen.
- Open the Byte-to-Byte Backup feature, select your corrupted USB flash drive from the list and click Create backup.

- Choose a name and location for the backup file. It’s best to save it on a different drive with enough free space. Click OK and wait for the process to finish.
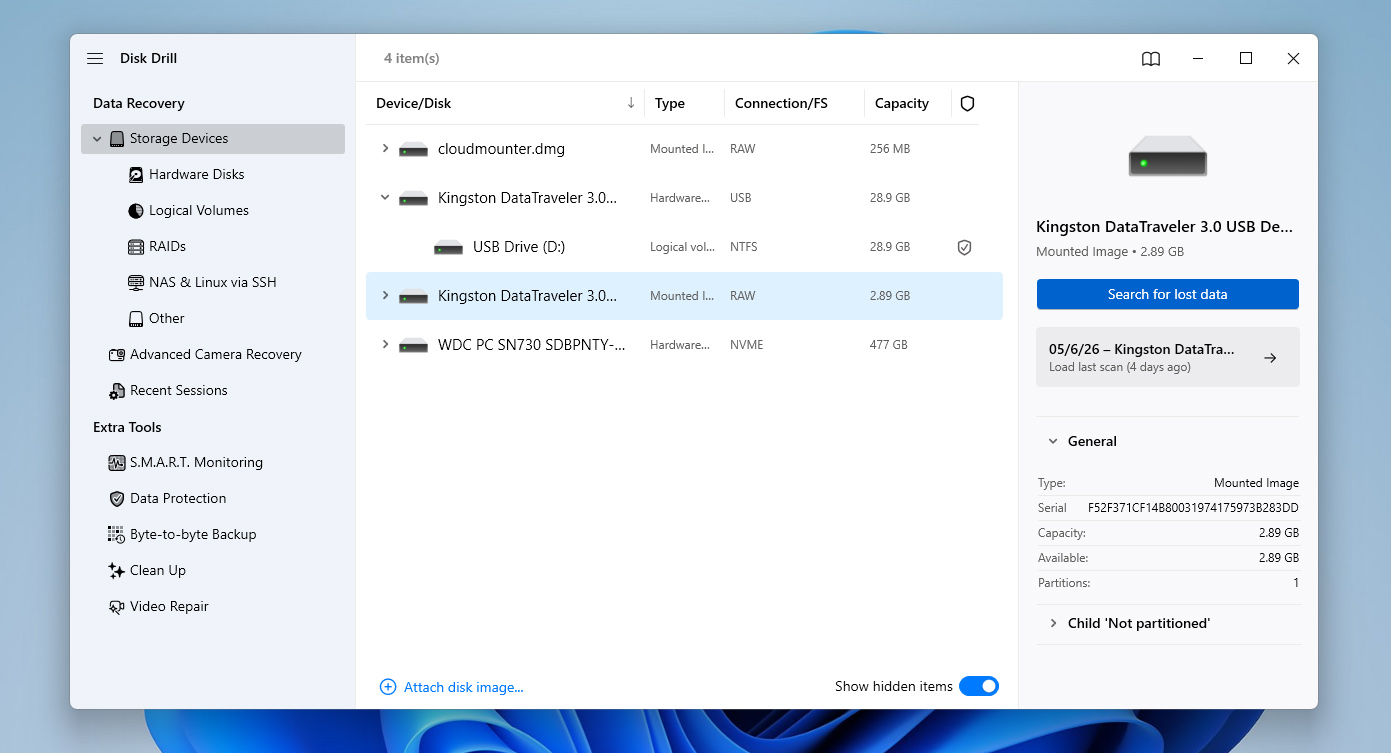
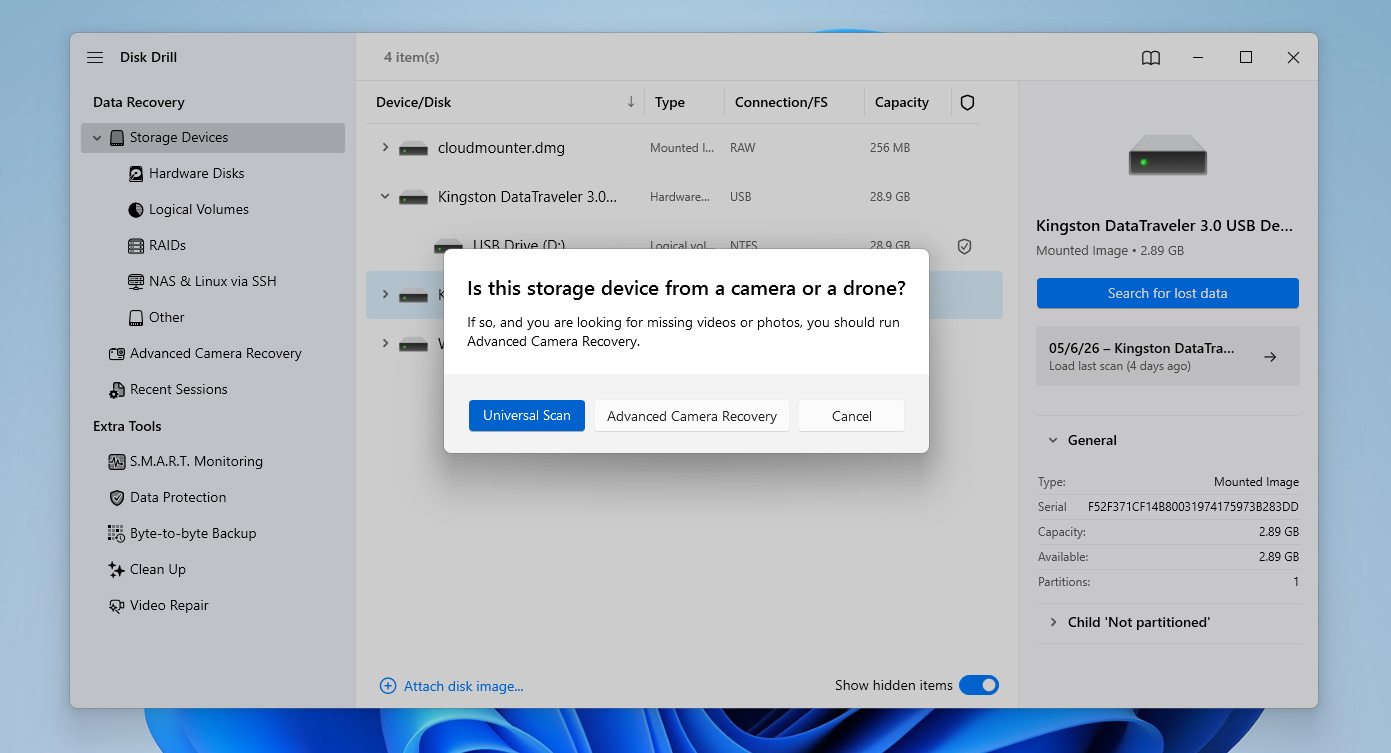
- Once the backup is ready, go back to the main screen and use the option to Attach disk image. Select the image file you just created. Select the mounted image from the list and click Search for lost data to begin scanning.
- When prompted, choose Universal Scan. If you’re recovering footage from a camera or drone, you can later run Advanced Camera Recovery as an additional scan.
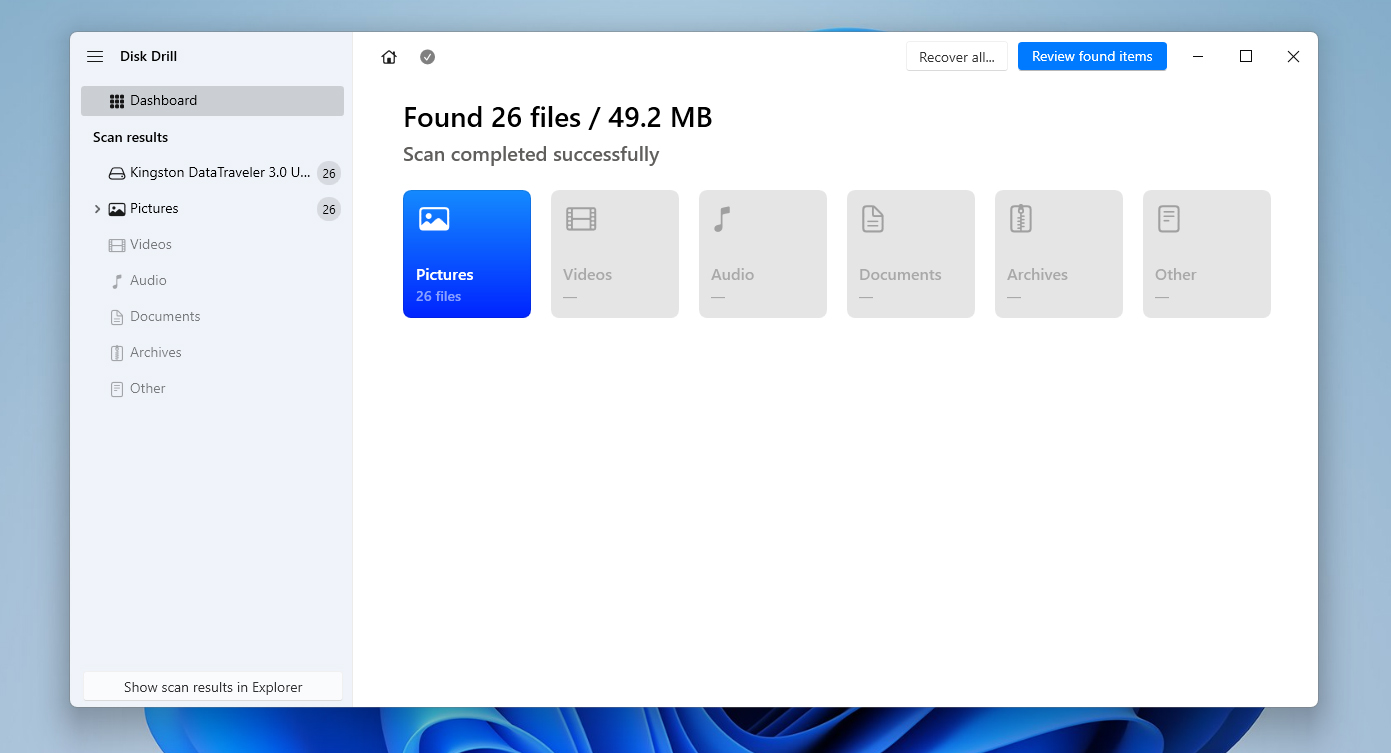
- After the scan completes, click Review found items to check the results, or use Recover all if you want to restore everything at once.
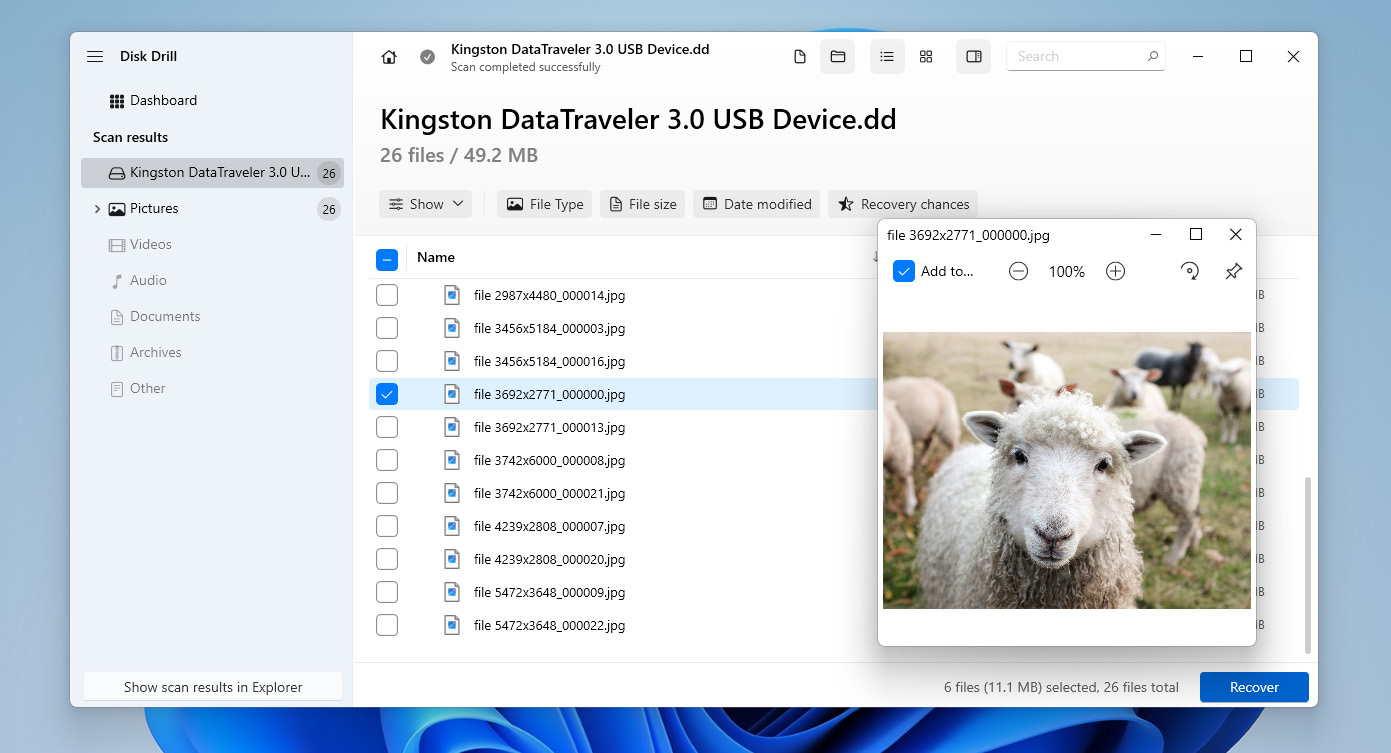
- Browse through the found files, select what you want to recover, and use filters or preview when needed. When ready, click Recover.
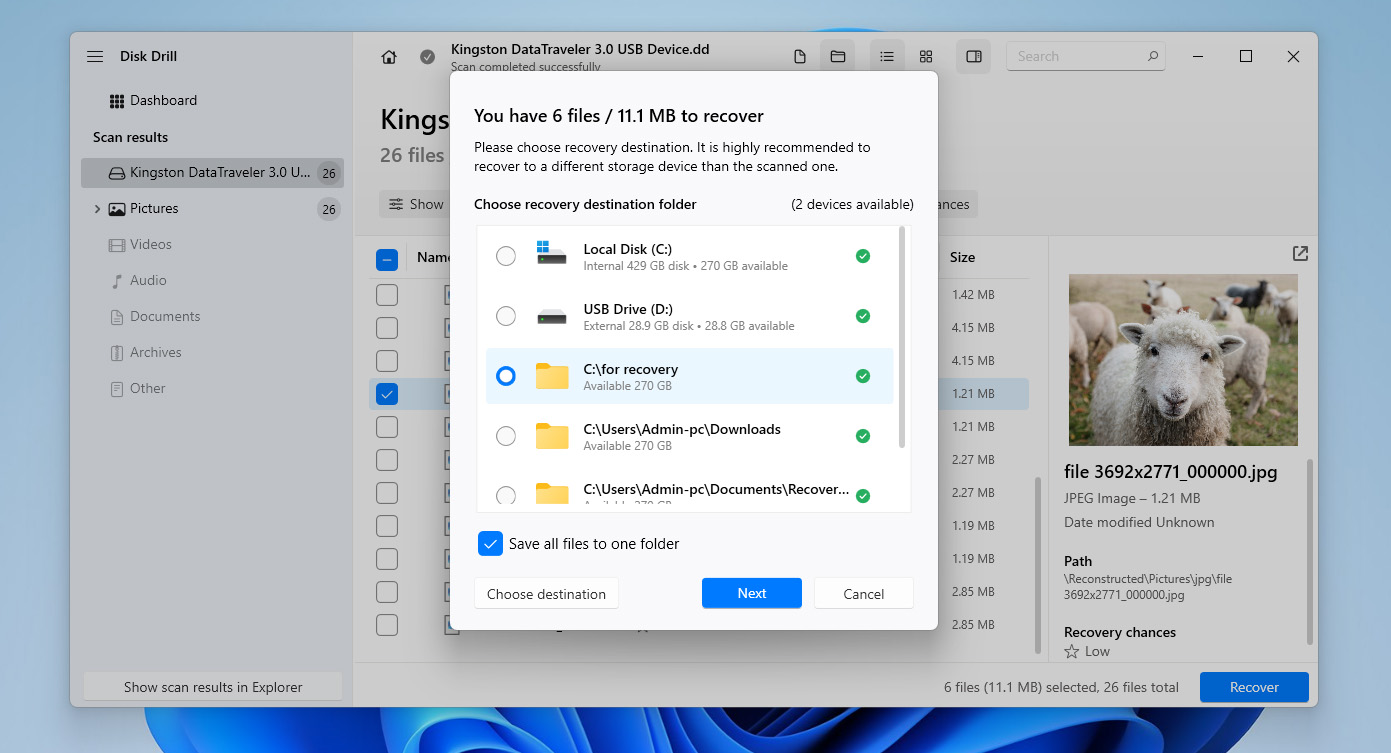
- Choose a safe location (not the same USB drive) and click Next to complete the recovery. Once finished, Disk Drill will show the results and provide quick access to the recovered files.
You can download Disk Drill for free and use it to create a disk image of your corrupted USB drive and scan it. However, the free version only allows you to recover up to 100 MB of data. That’s usually enough to test how the tool works and preview your files, but not enough to recover all data from a corrupted USB drive. For full recovery, you’ll need to upgrade to the Pro version.
Method 2:Use the ATTRIB Command
In case you’ve recently detected malware on the flash drive and no longer see the files in there, the reason could be changed attributes. This means you haven’t lost the data; the data is just invisible right now.
All folders, subfolders, and files have attributes. Malware uses the fact that Windows uses these attributes for access control to make these files disappear. When malware changes these attributes, you won’t see the files on your USB drive even though they’re still present.
It’s easy to fix the changed attributes using the ATTRIB command. Here’s how to bring those files back:
- Press Ctrl + R, type cmd, and press Ctrl + Shift + Enter.
- Navigate to the flash drive by typing in the drive letter assigned to the drive.
- Type the following command and press Enter:
attrib -h -r -s /s /d *.*

- When you’re done, access the flash drive using File Explorer. You should see all your files there.
If the corruption prevents you from accessing the drive in File Explorer and you can’t verify the results of the command, you can fall back to the previous method with Disk Drill. It can scan the USB drive directly and detect hidden files, bypassing any access limitations caused by corruption, and allows you to recover them if needed.
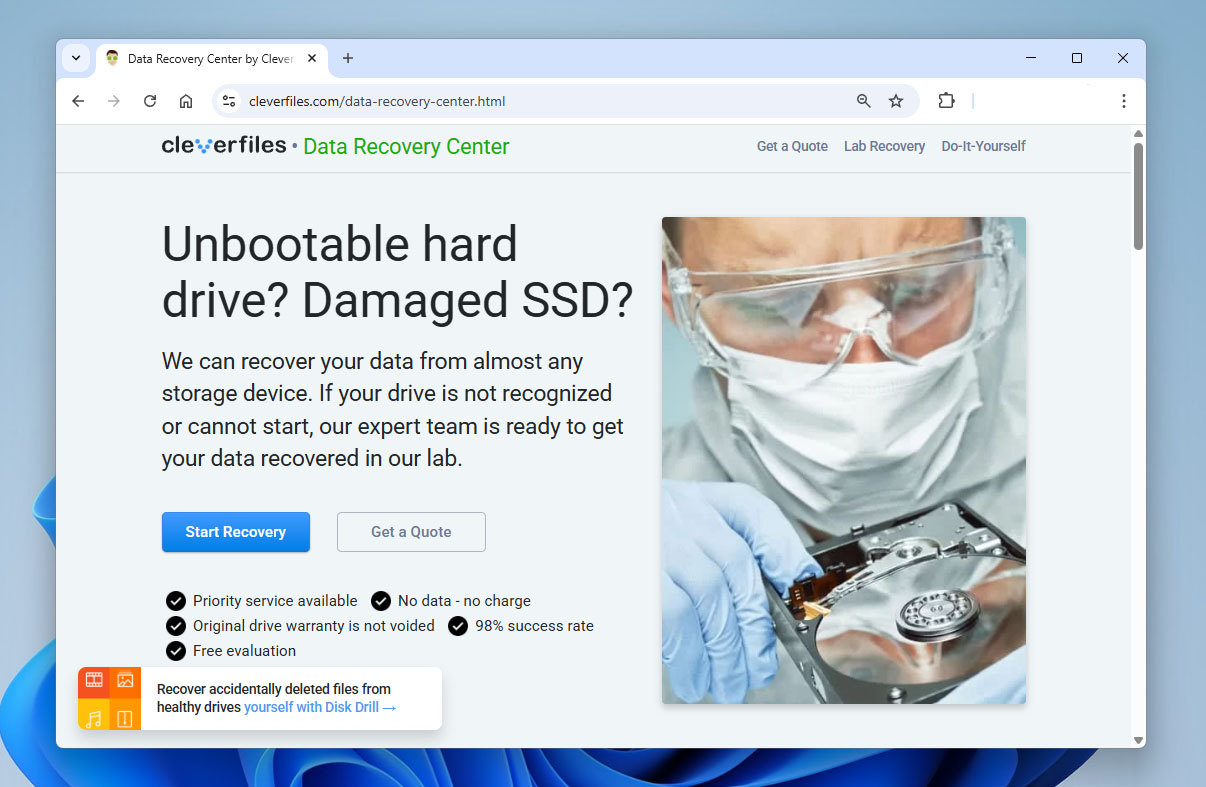
Method 3:Apply to Data Recovery Service
If the corruption is severe and the previous data recovery methods didn’t work, or if the USB flash drive is physically damaged, you can turn to a professional data recovery service. These specialists can perform chip-level recovery, which isn’t something you can do at home without the proper tools and expertise.
When you contact a data recovery service, they’ll quote a price. If it’s acceptable, you ship the drive to them. They work on recovering the data in their lab using specialized equipment. Once the data is recovered, they send the hard drive back to you.
The most reliable services like Cleverfiles will return the drive at no charge in cases where they can’t recover the data.
How to Fix Corrupted USB on Windows
Once you’ve recovered the files, you can start trying to fix the corrupt USB flash drive. There are several fixes you can try based on what caused the flash drive to become corrupt as discussed below.
Before you proceed, don’t attempt to repair a corrupted flash drive if you haven’t recovered your data yet. Most of the fixes below work directly with the file system and may lead to data loss. This can make recovery much harder or even impossible. If there’s still important data on the drive, avoid applying these methods until your files are safely recovered.
Method 1:Connect the Corrupt Flash Drive to Another Computer or USB Slot
Sometimes, your computer won’t detect a USB flash drive because of reasons other than corruption. For instance, if your USB is formatted as a file system that isn’t compatible with your PC, it won’t detect your flash drive.
It can also be a hardware issue. If your USB port is damaged, your computer probably won’t detect the flash drive.
You can fix both issues by inserting your pen drive into another PC or a different USB slot.
Method 2:Check Disk Utility (CHKDSK)
Chkdsk is a built-in command-line utility in Windows that allows you to check file system integrity and fix logical file system errors and bad sectors on a volume. It can be helpful when you’re trying to fix a corrupt USB flash drive because it doesn’t require using any third-party tool and is fairly easy to use.
- Start by pressing Win + R, typing cmd, and pressing Ctrl + Shift + Enter. This will launch an elevated Command Prompt.
- Execute the following command in the Command Prompt:
chkdsk F: /r /x
(Replace F: with the relevant drive letter)
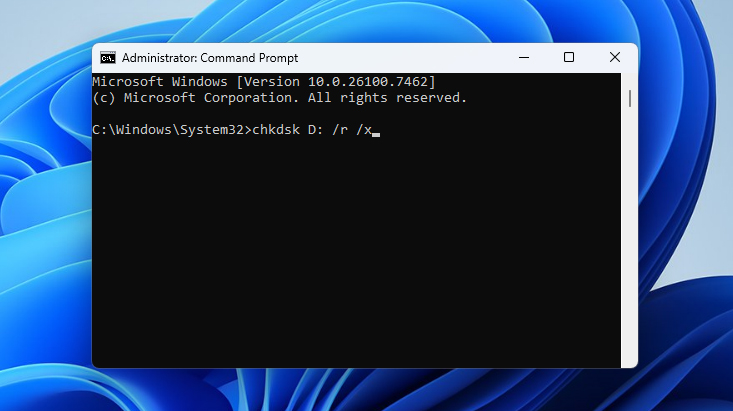
If you don’t want to use Command Prompt, you can run the Check Disk utility through its graphical interface. Open Disk Management, right-click your USB drive, go to Properties > Tools, and click Check. The system will scan the drive and attempt to fix any detected errors.
Method 3:Repair the Partition of a Corrupted USB
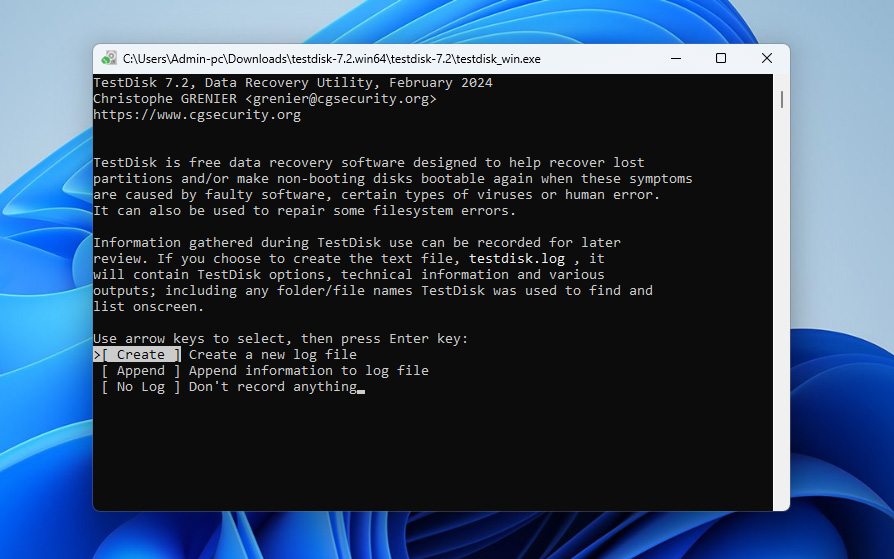
If your USB flash drive is corrupted and no longer opens properly, but still shows up in Disk Management, you can try repairing its partition structure using TestDisk. In some cases, this can restore access to the drive and make the files visible again without separate recovery.
TestDisk uses a command-line interface, so it may look a bit technical at first. Still, the process is straightforward if you follow the steps below:
- Download TestDisk and extract the archive. Open testdisk_win.exe.
- Press Enter to create a new log file.
- Use the arrow keys to select your USB flash drive, then press Enter.
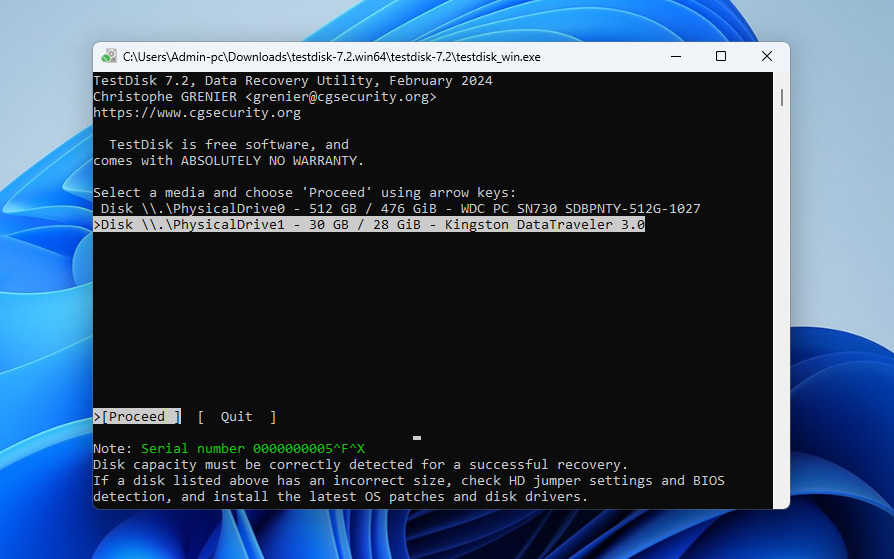
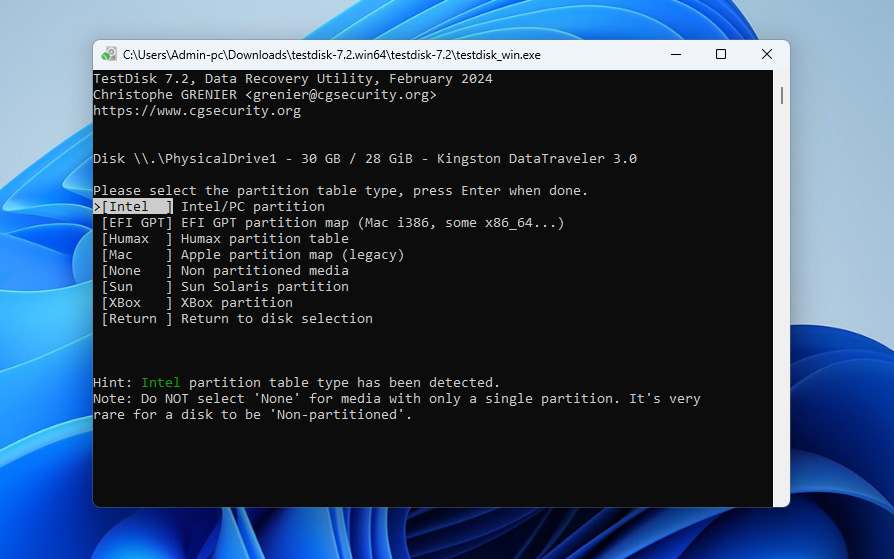
- Choose the partition table type. If you’re not sure, leave the default option selected and press Enter.
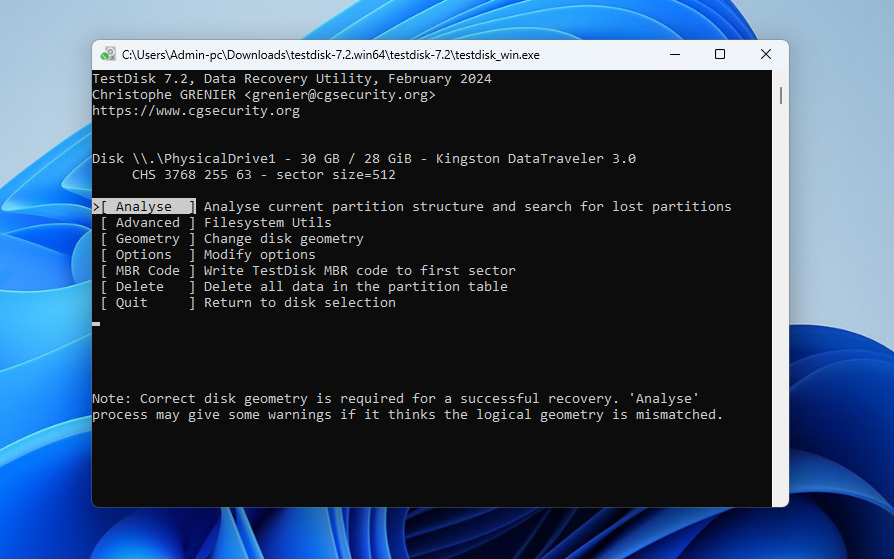
- Select Analyse and press Enter to scan the drive for existing and lost partitions.
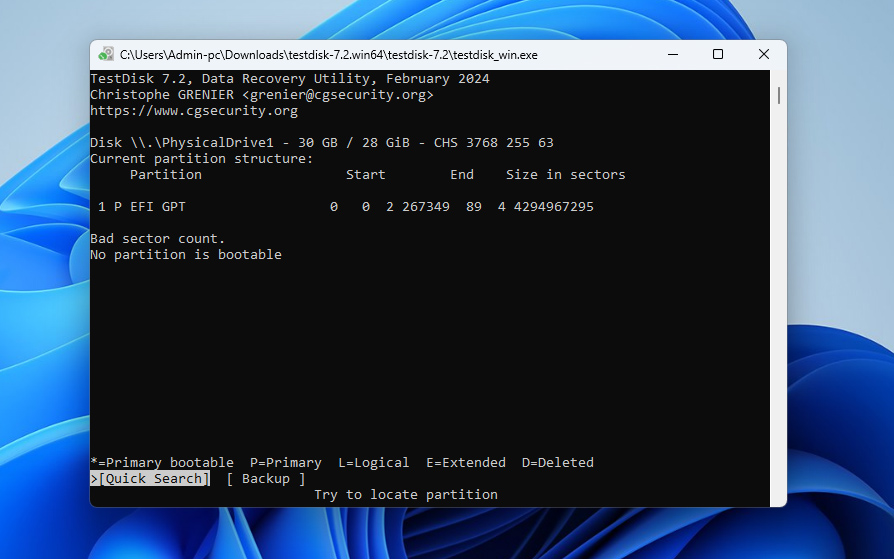
- Press Enter again to start a Quick Search.
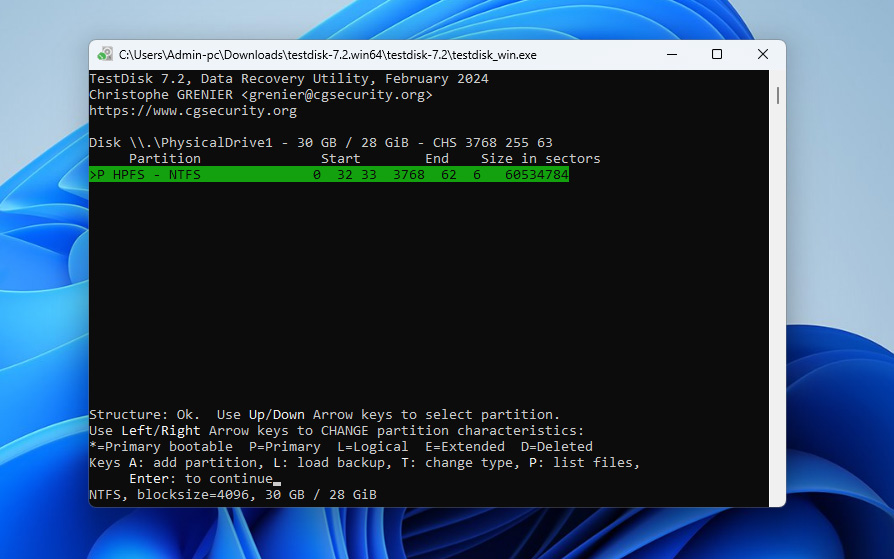
- Once the scan completes, select the partition that matches your USB drive and press Enter.
- Choose the Write option and press Enter to restore the partition structure.
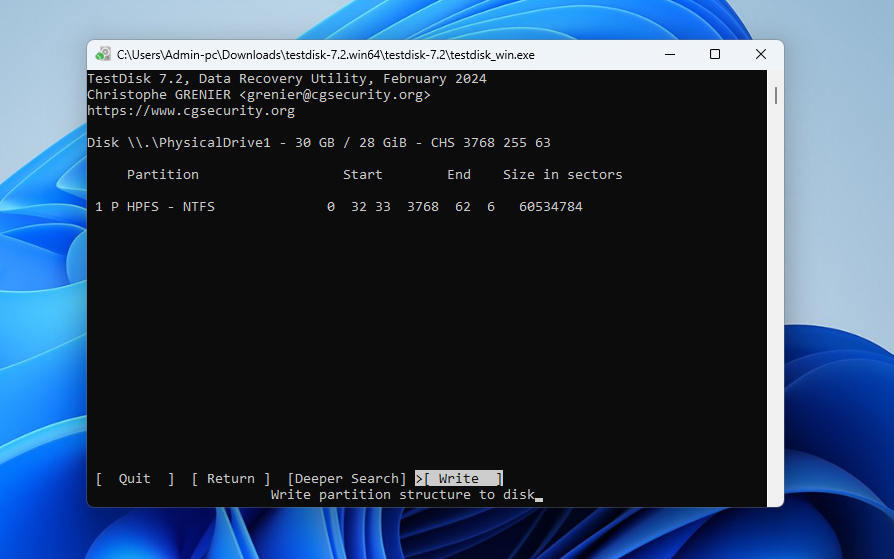
- Press Y to confirm and apply the changes. After this, reconnect your USB drive and check if it becomes accessible again.
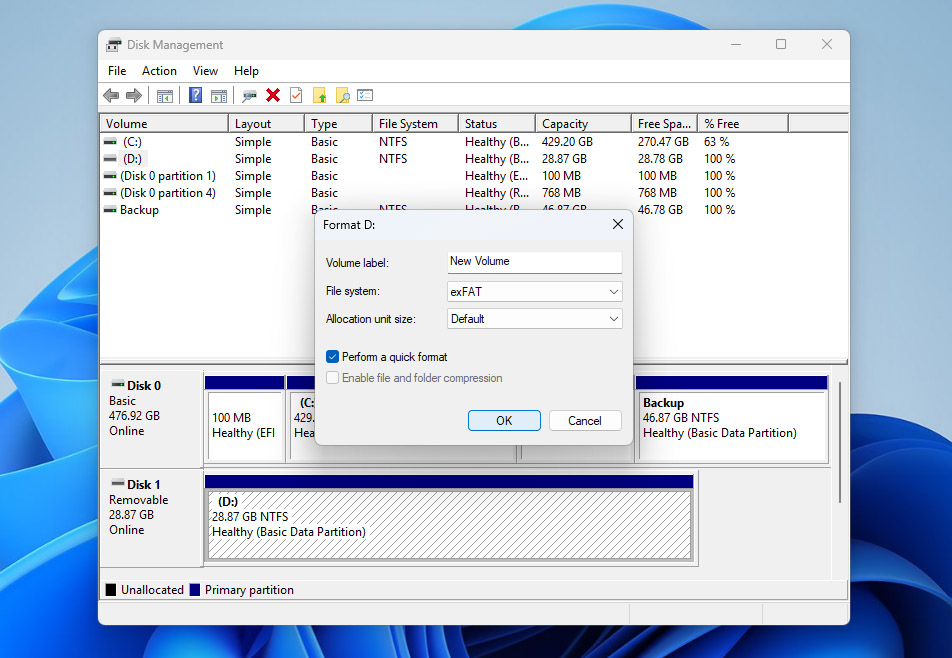
Method 4:Format the Corrupt USB Flash Drive
As a last resort, you might consider formatting your flash drive. Formatting will eliminate all logical issues on your USB flash drives, and will also wipe out any data you’ve stored on it. If you’ve already recovered your files, this shouldn’t be a problem.
- Start by pressing Win + R, typing diskmgmt.msc, and pressing Enter. Doing this will launch the Disk Management console.
- Right-click on the USB flash drive and select Format.
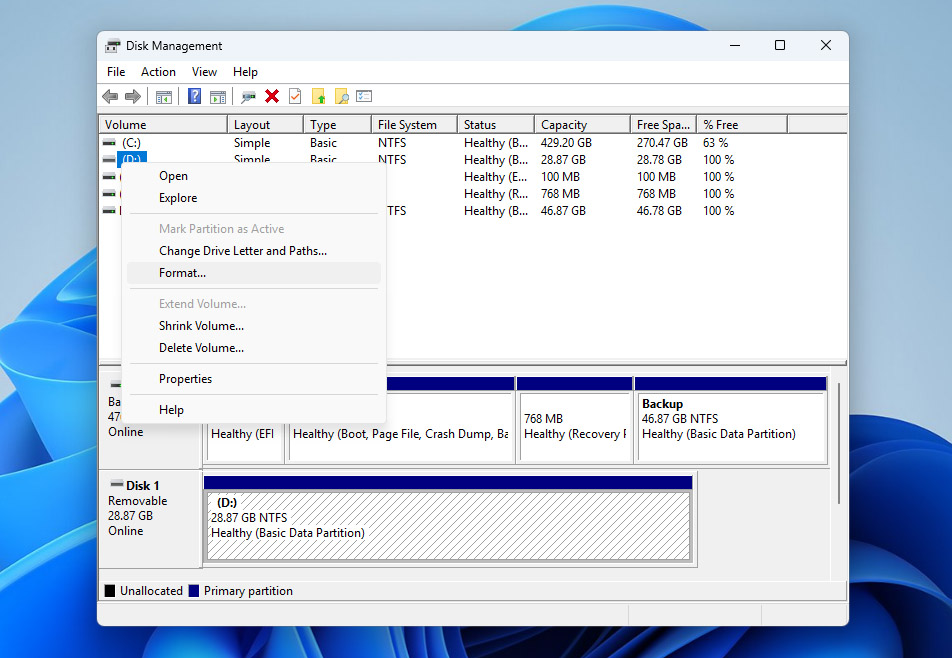
- Select a file system, check the box next to Perform a quick format, and click OK.
Using Disk Management is just one way to format a USB flash drive. If you want to explore other options, you can check our guide on how to safely format a USB drive.
What is a Corrupted USB Flash Drive?
Now that you’ve (hopefully) managed to recover a corrupted flash drive, it’s a good time to understand what corruption actually means and what might have caused it in the first place.
Your USB flash drive is considered corrupted when the computer fails to complete a requested process because of either a logical or physical issue with the drive’s memory chip. Below are some of the most common reasons this can happen, along with ways to avoid them:
| Reason | Description | How to Avoid It |
| 📉 Wearing down of NAND memory | The NAND flash memory’s floating gate transistors rely on an oxide layer. Each erase cycle gradually degrades this layer, and over time, the drive may become unstable or corrupted. | Avoid using the same USB drive for constant rewriting. Replace older drives and keep backups of important data. |
| ⚡ Abrupt power loss | Losing power while the USB drive is in use can interrupt operations and cause logical errors. | Don’t remove the drive during file transfers. Use a stable system and avoid sudden shutdowns. |
| 🖥️ Problems with the USB driver | The USB driver enables communication between the device and your system. If it’s outdated or faulty, the drive may not function properly. | Keep your system and drivers up to date. Install drivers from official sources when needed. |
| ⏏️ Removing the flash drive without ejecting it first | Pulling out the drive without safely ejecting it can interrupt active processes and corrupt data. | Always use the “Safely Remove Hardware” option before unplugging the drive. |
| 💥 Operating system crashes | A system crash while the USB drive is in use can lead to file system corruption and inaccessible data. | Avoid heavy operations on unstable systems and keep your OS updated to reduce crash risks. |
When your USB flash drive is corrupt, you’ll typically encounter issues like disappearing files or errors like “file not recognized” when you try to open the files. If this happens again, remember the basics: stop using the drive immediately and start trying to recover files from the corrupted USB flash drive.
In this guide, we’ve covered the key methods that can help you recover your corrupted USB drive and get it working again. If you still have questions or run into unexpected issues while dealing with a corrupted USB, you can head over to our forum and start a discussion. Our team and other users who have faced similar situations are there to share their experience and help you figure things out.
FAQ:
- Download and install Disk Drill.
- Scan the flash drive.
- Select the files you want to recover from the ones found during the scan.
- Recover the files.


")
