

 You can recover files from a formatted hard drive as long as the original data hasn’t been overwritten. Your chances of success depend mainly on the type of format and whether new data has been written to the drive afterward. Files are often recoverable after a quick format, especially if you stopped using the drive immediately. Recovery after a full format is usually not possible because the data has been overwritten.
Based on our testing of multiple recovery tools and real-world recovery scenarios, quick action makes a big difference. In this guide, we’ll explain what happens when you format a hard drive, which recovery methods actually work, and walk you through the best ways to recover your files on Windows.
Quick Overview of Formatted Hard Drive Recovery
Your recovery options depend on how the drive was formatted and what happened afterward. The table below summarizes the most common situations, the recommended recovery method, and your chances of getting the files back.
| Situation | Recommended Method | Recovery Chances | Notes |
| Quick formatted hard drive | Data recovery software | High | Best chance if you stop using the drive immediately. |
| Full formatted hard drive | Backup | Impossible (no backup) | A full format overwrites the data, making software recovery impossible without backups. |
| Full format interrupted before completion | Data recovery software | Moderate to low | Files may still exist in sectors that weren’t overwritten. |
| Drive shows as RAW after formatting | Data recovery software | Moderate to High if quick format was performed | Don’t format the drive again before attempting recovery. |
| Formatted drive, but you have a recent backup | Restore from backup | Very High | The fastest and most reliable recovery method. |
Formatting is of two types: low-level formatting and high-level formatting. As an end user, you can perform high-level formatting through your operating system. Low-level formatting isn’t available through Windows, although some manufacturers and third-party utilities can perform it on supported drives. During a high-level format, all files are cleared from the disk and a file system is created on the drive, which facilitates the storage and management of files on the disk.
High-level formatting can be further subdivided into quick formatting and full formatting:
- A quick format is, well, quick. It doesn’t check the drive for bad sectors. Instead of deleting your files, it creates a new file system that replaces the old one. The data remains on the drive even though you can no longer see or access it through Windows. As new files are written to the drive, they gradually overwrite the old data. Until that happens, data recovery software can often recover the files.
- On the other hand, a full format is more extensive and takes much more time to complete. In it, all data blocks on the drive are overwritten with zeroes, and the OS also looks for bad sectors in the process.
Files are often recoverable after a quick format because the original data usually remains on the drive until it’s overwritten. After a full format, recovery is generally not possible because the format process overwrites the existing data. One exception is an interrupted full format. A full format on a hard drive usually takes hours, and on large drives it can even take a day or more.
Many people cancel the process because it takes so long. If the format stopped before it finished, sectors that hadn’t yet been overwritten may still contain your original data, so partial recovery may still be possible. On the other hand, if the format completed in just a few minutes, you almost certainly used a quick format rather than a full format.
If you quick formatted a drive and switched to a different file system, such as NTFS to FAT32 or APFS to HFS+, recovery chances may actually be better. That’s because the new file system often leaves parts of the old file system structure intact, giving recovery software more information to work with.
How to Recover Data from a Formatted Drive on Windows
Now that you’ve chosen the recovery method that best fits your situation, it’s time to recover your files. Follow the instructions for your selected method, and avoid writing new data to the formatted drive until the recovery is complete.
Using a Mac? The steps are slightly different because macOS uses different file systems and recovery tools. See our full guide on how to recover a formatted hard drive on Mac.
Method 1: Restore Data from Backup
If you have a backup, restoring it is usually the fastest and safest way to recover files from a formatted hard drive. Unlike recovery software, backups don’t rely on the original data still being present on the drive. Even if the drive was fully formatted, you can still restore your files as long as they were included in a backup created before the format.
File History is Windows’ built-in backup feature that automatically saves copies of your personal files at regular intervals. If it was enabled before the drive was formatted, you can restore previous versions of your files even if the originals are no longer on the drive.
By default, File History backs up folders such as Desktop, Documents, Pictures, Videos, Music, and other folders included in your Windows libraries. If you added files from a non-system drive to a Windows library or Favorites before formatting that drive, File History may still contain backup copies that you can restore.
To recover your files:
- Connect the drive that contains your File History backup.
- Open Control Panel and select File History.
- Click Restore personal files in the left pane.
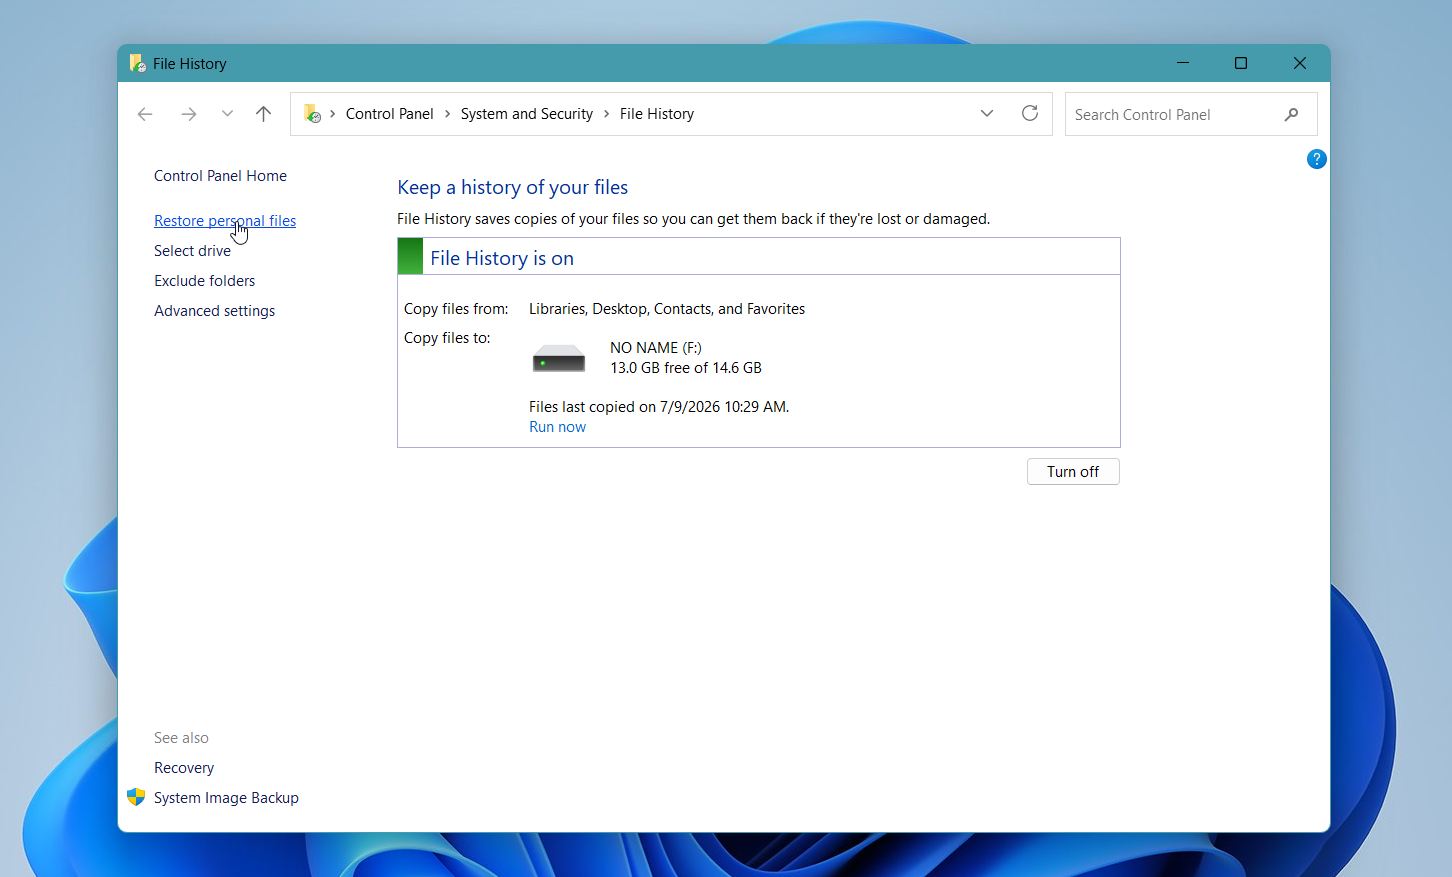
- Browse through the available backups using the navigation arrows to switch between backup dates.
- Select the files or folders you want to recover.
- Right-click the Restore button and choose Restore to, then select a folder.
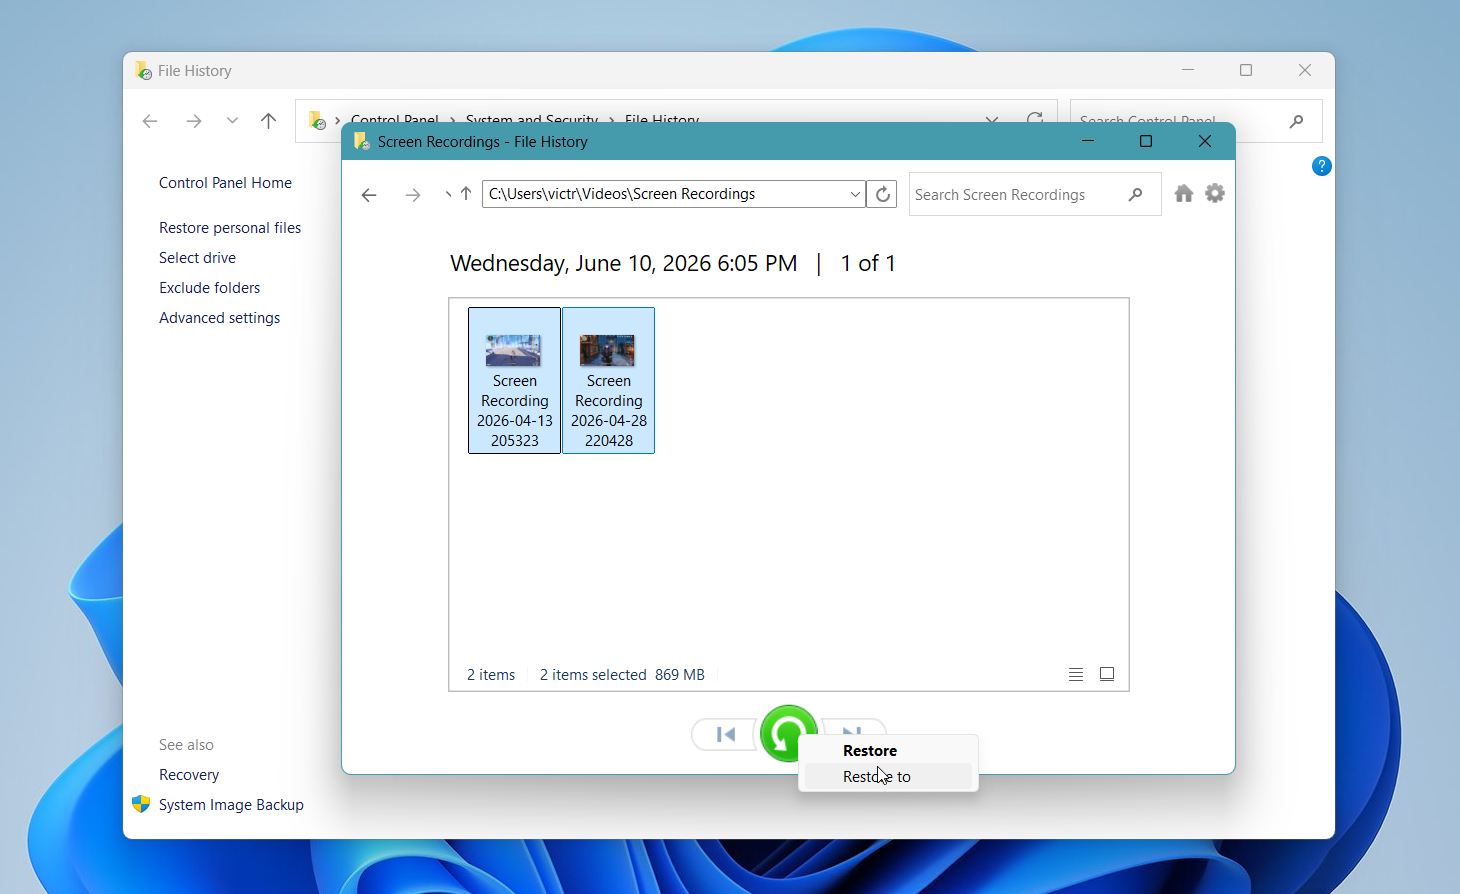
If you don’t see the files you’re looking for, check older backup versions. File History keeps multiple versions of your files, so you may be able to recover an earlier copy if the most recent one isn’t available.
Method 2:Use Professional Data Recovery Software
When you need to recover data from a formatted drive or deal with another type of data loss, third-party recovery software is usually the easiest and most affordable option. With so many data recovery programs online, all claiming to be the best, it can be difficult to know which ones to choose. We’ve rounded up the best data recovery apps to help you find the ones that are actually worth your time and money.
To avoid making this guide unnecessarily long with all the options, we’ll use Disk Drill as an example. It’s one of the best data recovery apps for both beginners and experienced users. During our testing, it successfully recovered files from formatted storage devices with excellent results, while also restoring fragmented camera videos that many other recovery programs fail to reconstruct properly. The software supports a lot of file formats, most major file systems, and a wide range of storage devices, from USB flash drives and memory cards to internal and external hard drives and SSDs.
Here is how to recover a formatted disk using Disk Drill:
- Download Disk Drill and install it on a drive that wasn’t formatted. The Windows installation wizard will guide you through the process.
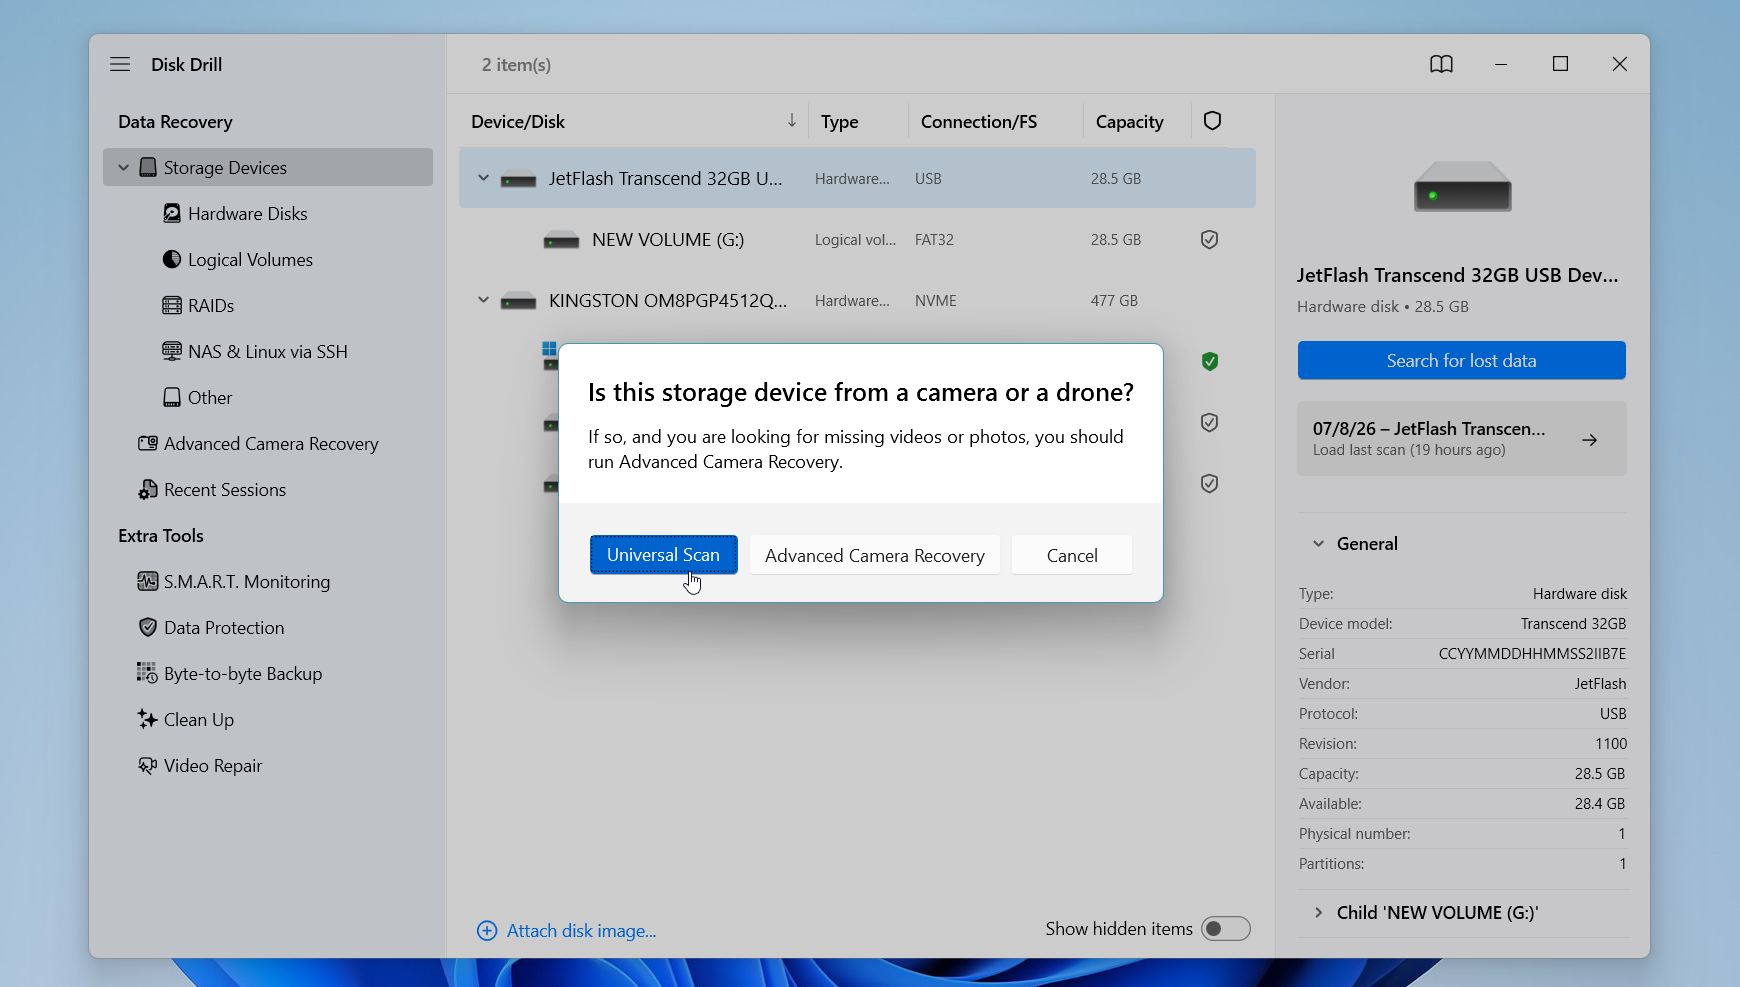
- Launch Disk Drill, select the drive you formatted, then click Search for Lost Data.
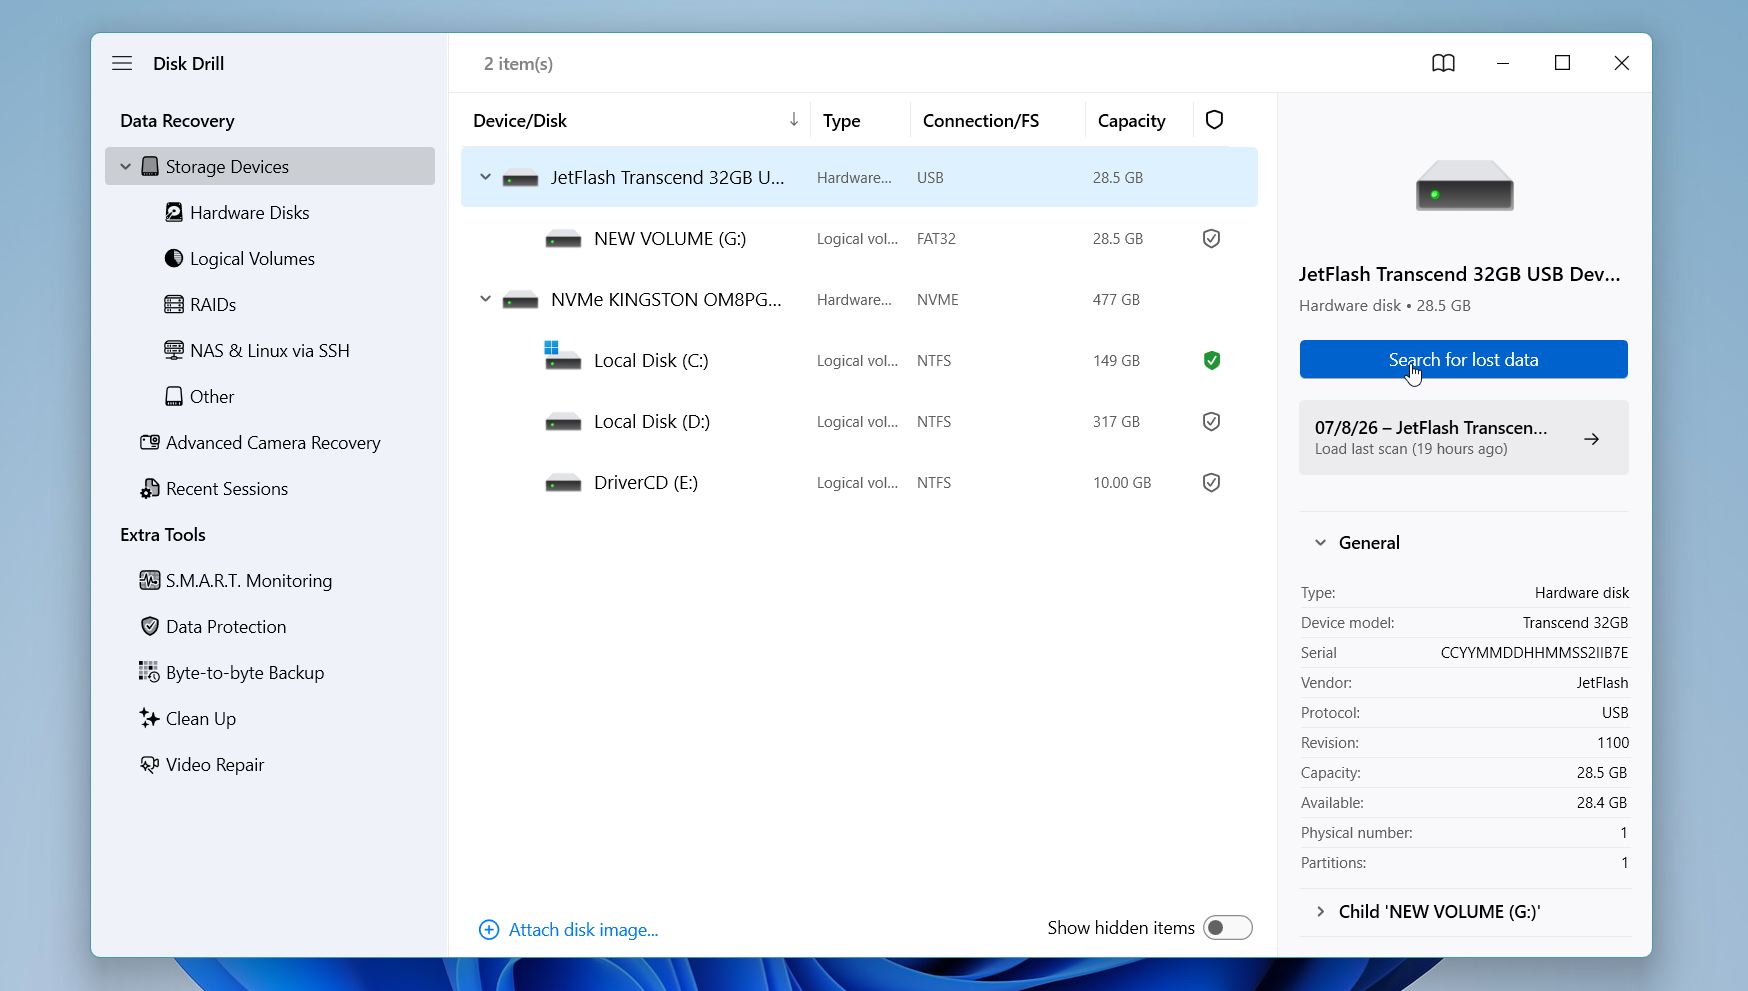
- If Disk Drill asks you to select a recovery mode, choose Universal Scan. It’s the best option for most formatted hard drives. If you’re recovering files from a formatted camera memory card, such as an SD card, Advanced Camera Recovery is usually the better choice.
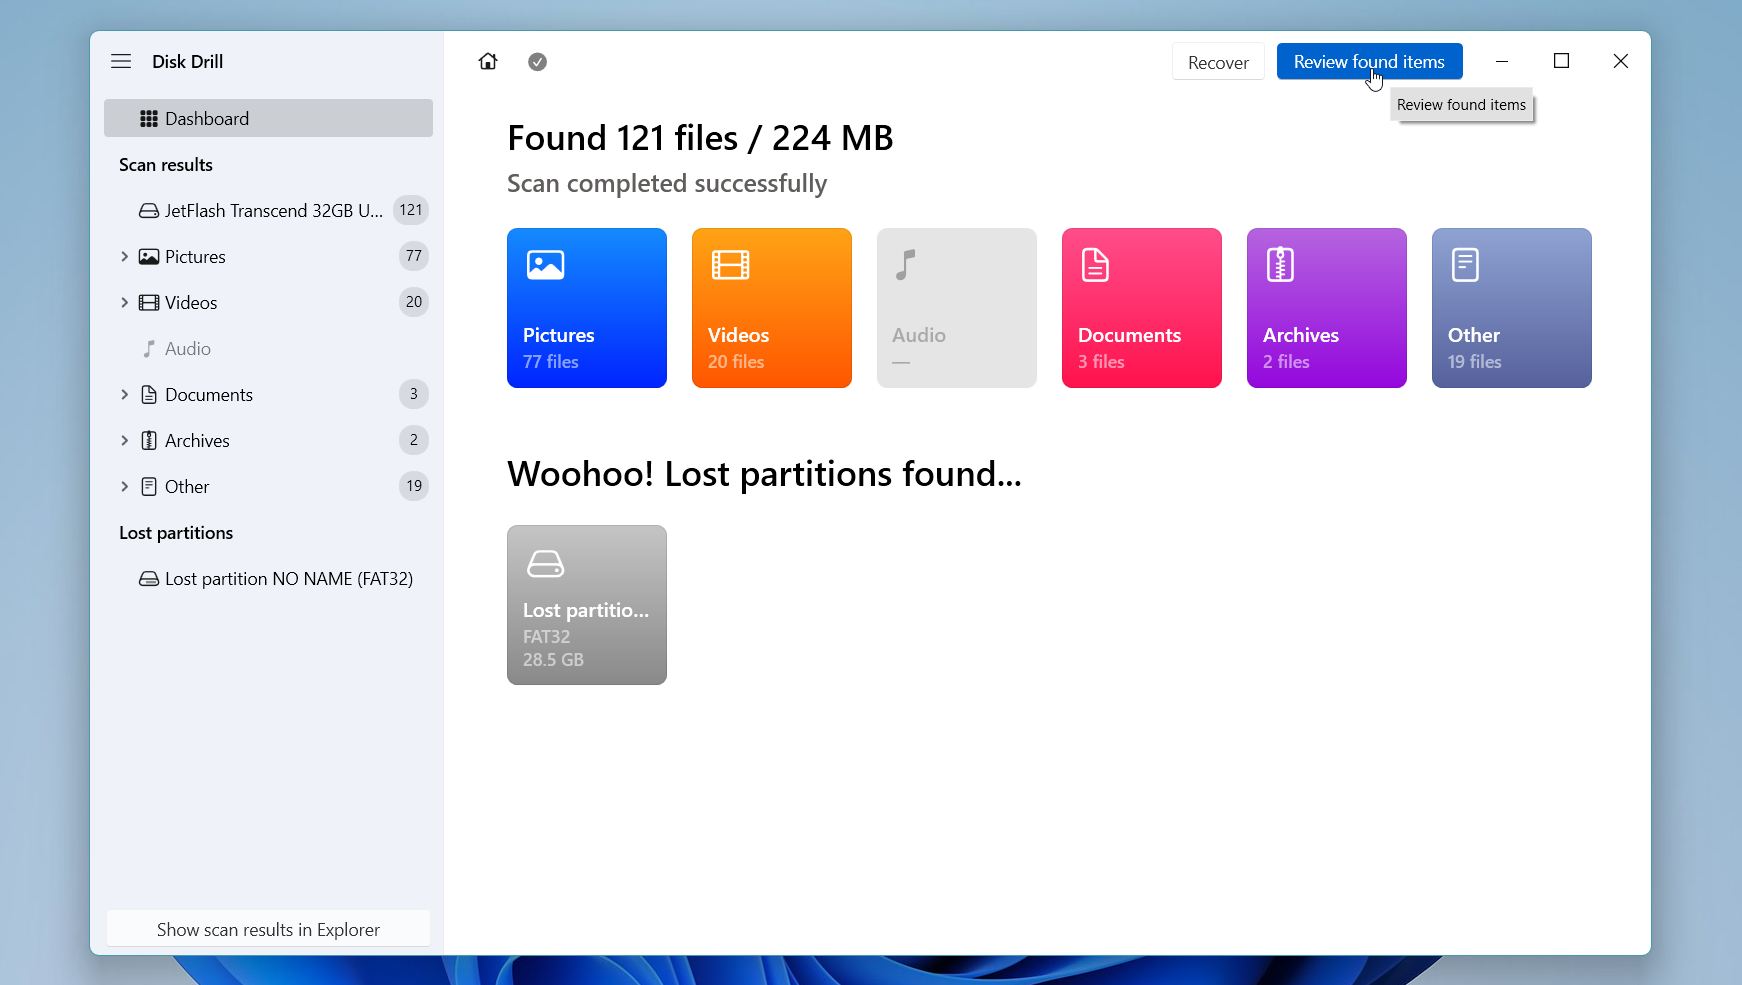
- Wait for the scan to finish. Although Disk Drill lets you browse found files before the scan is complete, we recommend waiting until it finishes. Click Review Found Items.
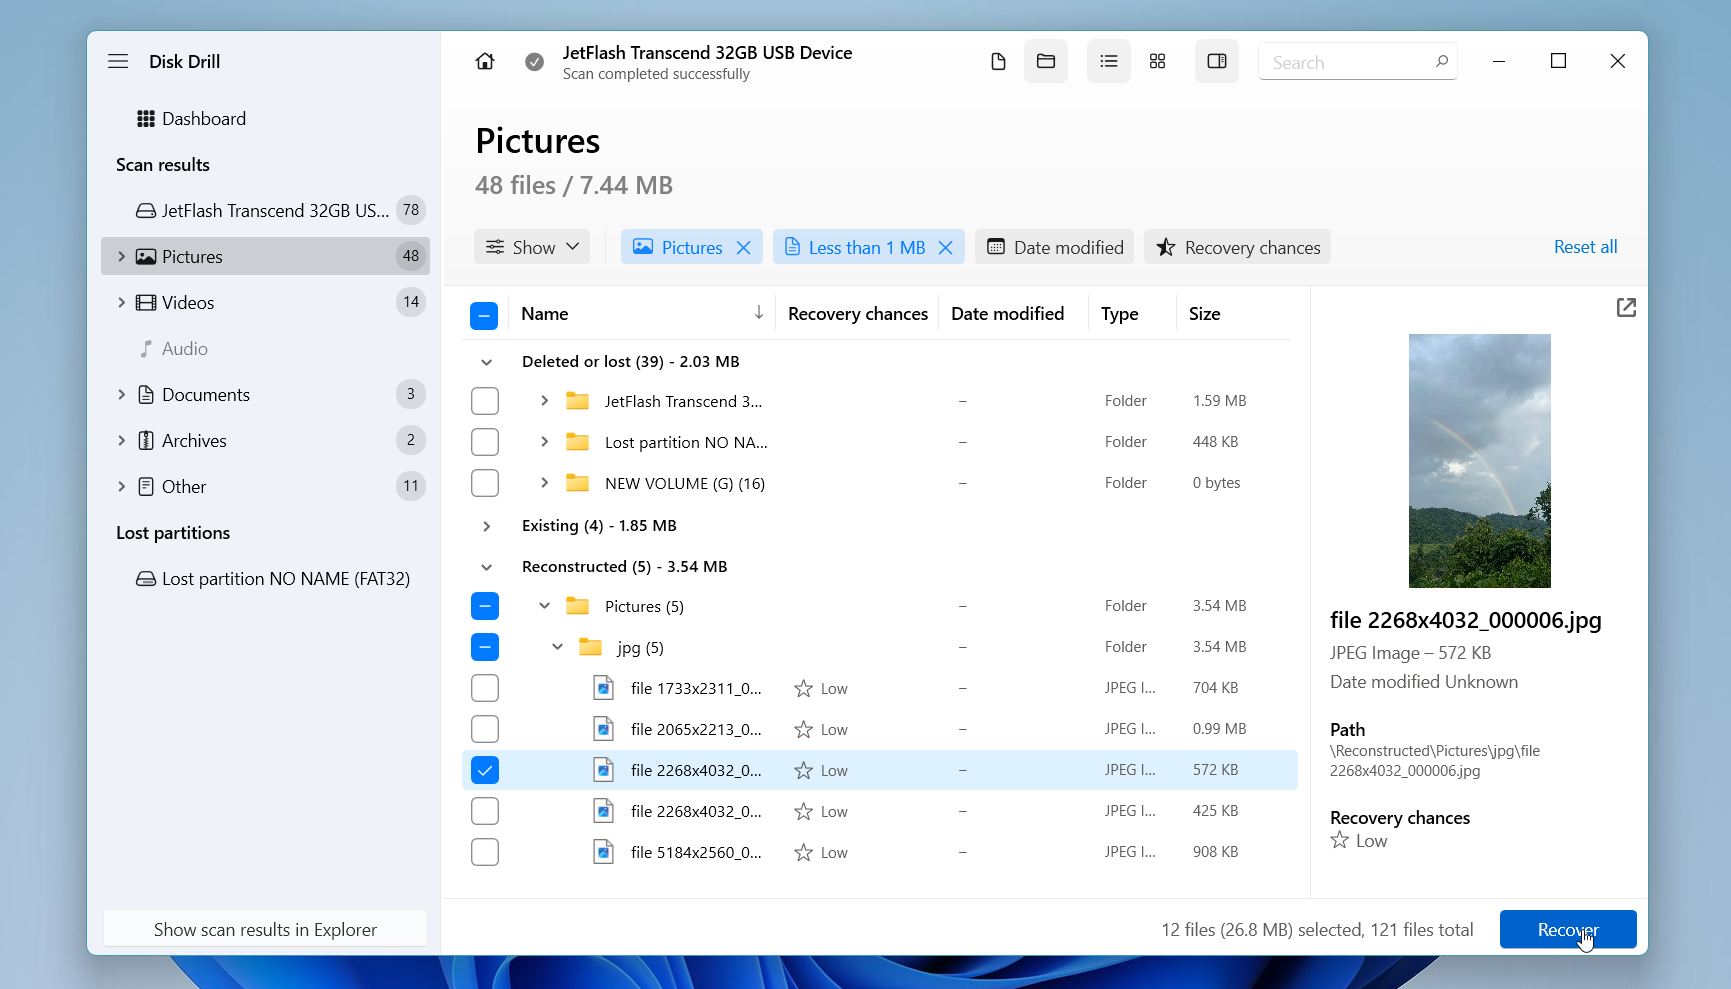
- Browse the scan results by category, such as Pictures, Videos, Documents, or Archives, or use the search bar and filters to locate specific files more quickly. If the original folder structure was preserved, you can also browse by path. Preview files whenever possible. If a file opens correctly in the preview window, it is usually a good sign that the recovered version will also be intact. Select the files and folders you want to recover, then click Recover.
- Choose a recovery destination on a different drive. Never save recovered files back to the formatted drive, as doing so may overwrite other recoverable data that hasn’t yet been restored. Click Next.
After the recovery completes, open the destination folder and verify that your files open correctly and are not corrupted. The free version of Disk Drill for Windows lets you scan formatted drives, preview recoverable files, and recover up to 100 MB of data at no cost. This is often enough to confirm that your files are recoverable before deciding whether to upgrade to the Pro version.
We tested Disk Drill ourselves and had excellent results recovering files from formatted drives, including a USB flash drive and a camera SD card. On a USB flash drive with a corrupted file system, it recovered all of our test files, and on a DJI drone SD card image, it successfully restored all 4 fragmented videos intact. If you’d like to learn more about how it performed, its features, pricing, and supported devices, check out our full Disk Drill review.
Method 3: Try Free Microsoft Recovery Software
While Disk Drill is still our top recommendation because it’s easier to use and supports more recovery situations, it’s not your only option. Microsoft also offers a free tool called Windows File Recovery. It can recover deleted files from hard drives, SSDs, USB flash drives, and memory cards, but it’s designed for more experienced users. It also works best with NTFS drives. Although it supports file systems like FAT, exFAT, and ReFS, recovery results on those file systems are generally less reliable than on NTFS.
Unlike Disk Drill, Windows File Recovery doesn’t have a graphical interface. Instead, you control it by typing commands into Terminal. It also doesn’t let you preview files before recovery or browse scan results, so you won’t know what was found until the recovery is finished.
Here is how to recover files from a formatted hard drive for free with Windows File Recovery:
- Download Windows File Recovery from the Microsoft Store.
- Open Terminal as an administrator.
- Enter a recovery command using this format:
winfr source-drive: destination-drive: /mode /switches. - Replace source-drive with the drive that contained your deleted files and destination-drive with a different drive or a folder where you want to save the recovered files. If you specify only a drive letter, Windows File Recovery saves the recovered files in the root of that drive. A separate folder makes the recovered files easier to find.
- Next, choose a recovery mode.
/regularworks for recently deleted files on a healthy NTFS drive. For formatted drives, we recommend using/extensive. This mode performs a deeper scan and usually finds more recoverable files, although it takes longer. - You can also add optional switches to narrow the search. For example, /n lets you recover a specific file or folder, or search for files that match a filename or extension such as *.jpg or *.docx. If you’re not looking for anything specific, you can skip these switches and scan the entire drive.
- Wait for the scan to finish.
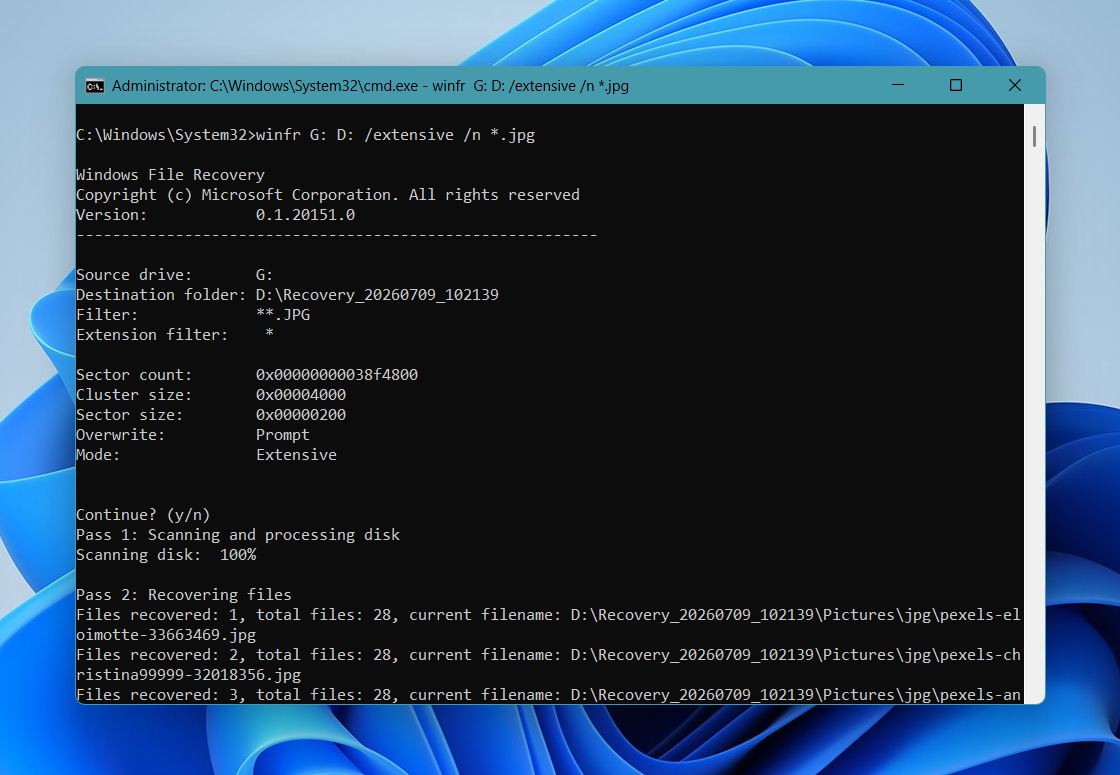
- Open the recovery folder on the destination drive and check the recovered files.
Windows File Recovery works best when the deleted files haven’t been overwritten. Since you have to build the recovery command yourself, it can be confusing if you’ve never used command-line tools before. If you’d rather use a simpler program with file previews, filters, and support for more recovery situations, a third-party app like Disk Drill is usually the better choice.
Method 4: Use a Professional Data Recovery Service
If recovery software later reports many bad sectors, the scan repeatedly fails, or the drive keeps disconnecting, the drive is likely physically damaged. At that point, it’s best to stop using it and contact a professional data recovery service. These companies use specialized equipment and cleanroom facilities to recover data from damaged storage devices. They can replace failed components, repair firmware problems, and recover data from drives that Windows can’t access.
If you notice any of the following signs, stop using the drive immediately and contact a recovery service instead of trying additional recovery attempts:
- The drive makes clicking, grinding, or beeping noises.
- The drive was dropped, exposed to water, or suffered another physical impact.
- The drive no longer appears in Windows or Disk Management.
- The data is extremely important and you don’t want to risk making the situation worse.
Professional recovery services can’t recover overwritten data. If the drive was fully formatted instead of quick formatted, the original data has been erased and can’t be restored.
Professional recovery is more expensive than recovery software, but most reputable companies offer a No Data, No Fee policy. If they can’t recover your files, you usually don’t pay for the recovery itself, although shipping and return delivery charges may still apply. The initial evaluation is also free in most cases.
The final cost depends on the type of drive, the cause of the data loss, and whether the drive needs hardware repairs. As a general guide:
| Recovery scenario | Typical price |
| Deleted files, quick format, corrupted file system | $300–$700 |
| Minor hardware or firmware problems | $700–$1,200 |
| Severe physical damage or complex recovery | $1,200–$3,000+ |
| Emergency (24–48 hour) service |
Usually 25–100% more |
The recovery process is usually simple:
- Contact the recovery company and describe what happened to the drive.
- Ship the drive to their lab or deliver it in person.
- The technicians inspect the drive and provide a recovery estimate, expected turnaround time, and price quote. This evaluation is usually free.
- Decide whether you want to proceed with the recovery.
- If you approve the quote, the company recovers the data and copies it to a new storage device before returning it to you.
Standard recovery usually takes a few business days to two weeks, depending on the condition of the drive and the amount of data. Many companies also offer emergency recovery that can reduce the turnaround time to 24–48 hours if you need your files as quickly as possible.
Closing Thoughts
Files often remain recoverable after a quick format, especially if you stop using the drive before new data overwrites the original files. Recovery after a full format is usually not possible because the format process overwrites the data. The main exception is a full format that was interrupted before it finished, since sectors that weren’t overwritten may still contain recoverable files.
If you have a backup, restore your files from it first. If you don’t, scan the drive as soon as possible with a reliable recovery tool such as Disk Drill. If the drive has physical damage, a professional data recovery service is your best option.
For additional information, visit our forum. You’ll find real recovery cases, discussions about formatted hard drives, SSDs, RAW drives, and other data loss scenarios, along with solutions that helped other users recover their files.
FAQ:
- Download and install a Mac data recovery tool such as Disk Drill. Install it on a different drive than the formatted one whenever possible.
- Connect the formatted drive to your Mac and launch the recovery software.
- Select the formatted drive and start a scan.
- Wait for the scan to finish, then browse the results. Use the preview feature to confirm that your files are recoverable.
- Select the files you want to restore and save them to a different drive, not the formatted one.