 When Windows says that your USB needs to be formatted, it’s often due to an error that has occurred. In most cases, the USB flash drive will still contain data you need to retrieve. But, what do you do if the problem that has arisen is preventing you from accessing the USB? Thankfully, there are proven solutions that will help you get your data back and restore the flash drive to working order. Read on to explore our curated and tested methods on how to format a flash drive without losing data.
Can You Format a USB Without Losing Data?
Formatting, by design, wipes all file system metadata. In doing so, any reference to the data is removed. Then, depending on the type of format you performed, the data is either recoverable or lost for good. Here is how the two most common formats work:
- Quick format – A quick format deletes the metadata only. The data itself is still on the flash drive, albeit inaccessible. This data can be recovered. Keep in mind that if you reformat with the same file system, only recovery by file signature will be possible.
- Full format – With a full format, zeros are written to each sector or block. Unlike a quick format, the contents of each file are erased too. After a full format has wiped all the drive’s data, recovery is unrealistic in any capacity.
To format a USB without losing data, the data needs to be backed up or recovered. However, it can be challenging if the USB is faced with a problem where it can’t be accessed like normal (for example, a corrupted file system). This is where data recovery software comes in. It can scan your flash drive and recover the data that was deleted by a quick format.
We’ve broken down this guide into two parts. First, we’ll focus on data recovery, then we’ll guide you through formatting the USB flash drive.
How to Back Up Data From a USB Flash Drive
We’ll show you two possible methods for recovering data from a USB flash drive, one where the data isn’t accessible, and one where it is.
Scenario 1: The Data Isn’t Accessible
Based on our experience, most readers who land on this page are looking for a solution because the data is inaccessible, likely due to USB corruption or system-related errors. In this state, apps like File Explorer won’t see the files. To bypass what’s causing the data to be inaccessible, you’ll need data recovery software. There are many to choose from, but we prefer Disk Drill, as it offers great support for common flash drive file systems (FAT32, exFAT, NTFS) and supports an extensive library of file signatures – perfect if the file system records have been (1) too severely corrupted, or (2) overwritten by a reformat of the same file system.
Data recovery works even in most instances where the USB flash drive isn’t being recognized. As long as it’s showing in Disk Management with the correct size, Disk Drill can scan it.
The steps below will guide you through recovering data from a flash drive:
- Download and install Disk Drill.
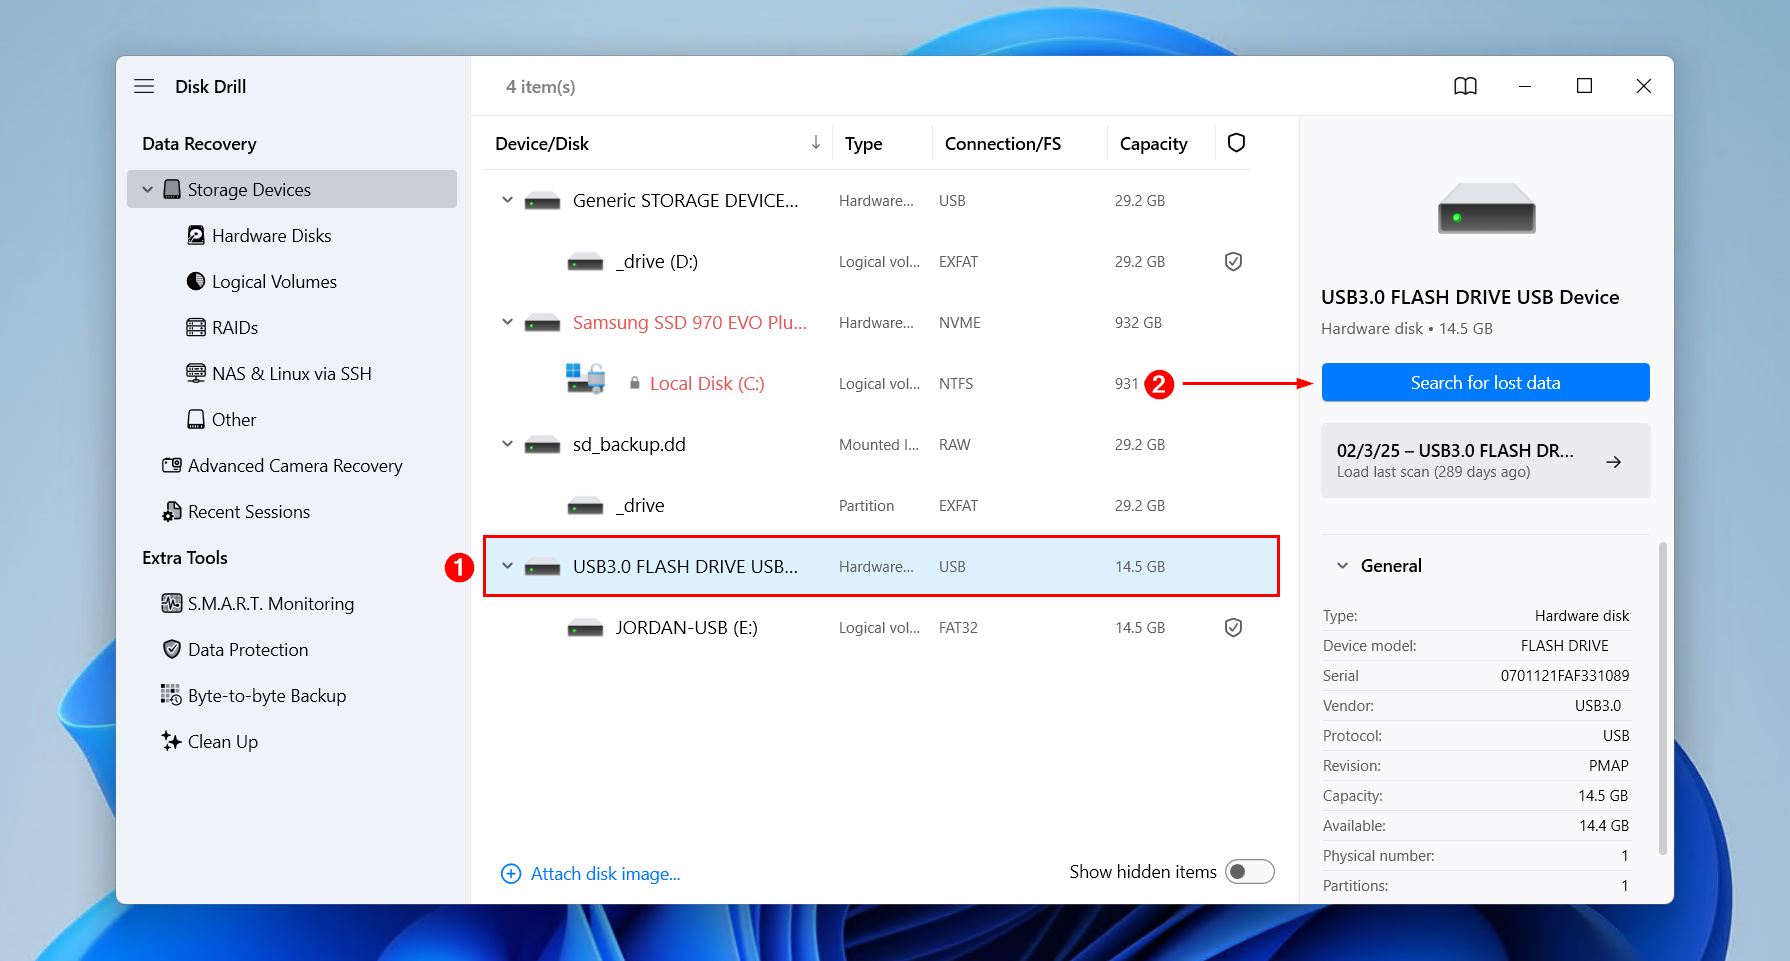
- Connect your USB thumb drive and select it. Click Search for lost data.
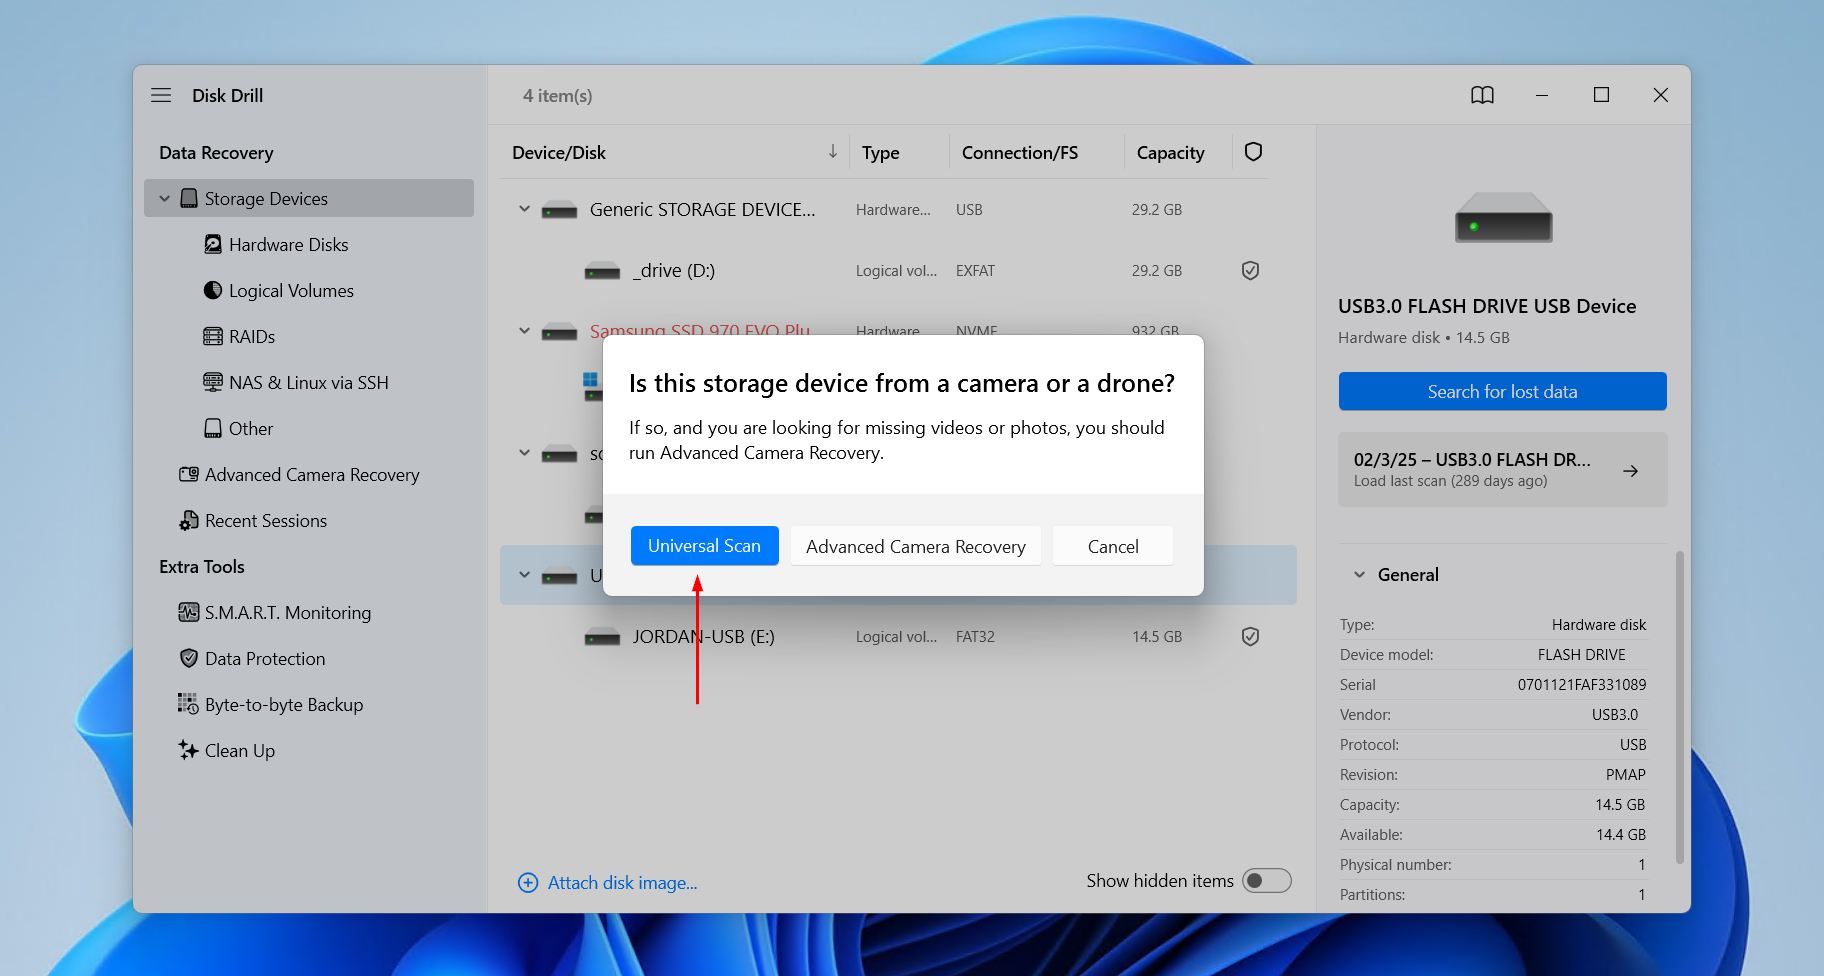
- Click Universal Scan if you want to scan for any and all data. Advanced Camera Recovery is for fragmented video recovery from cameras and drones.
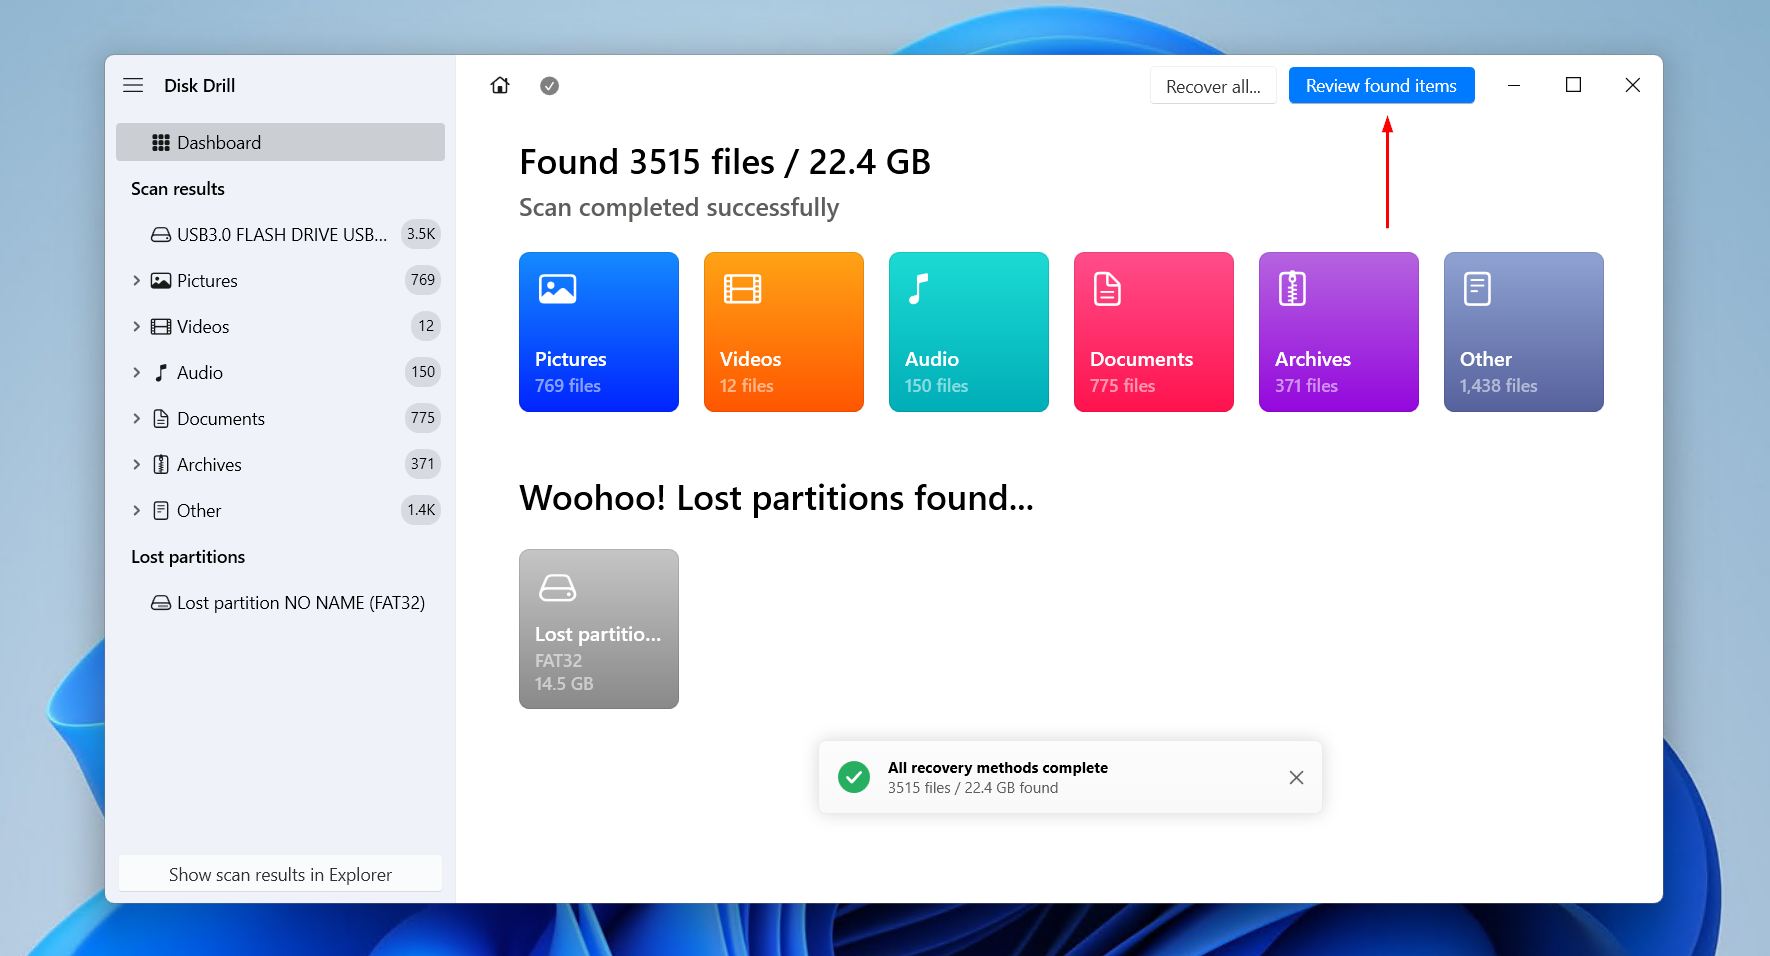
- Click Review found items when the scan is finished. If you want to recover everything straight away, click Recover all… instead.
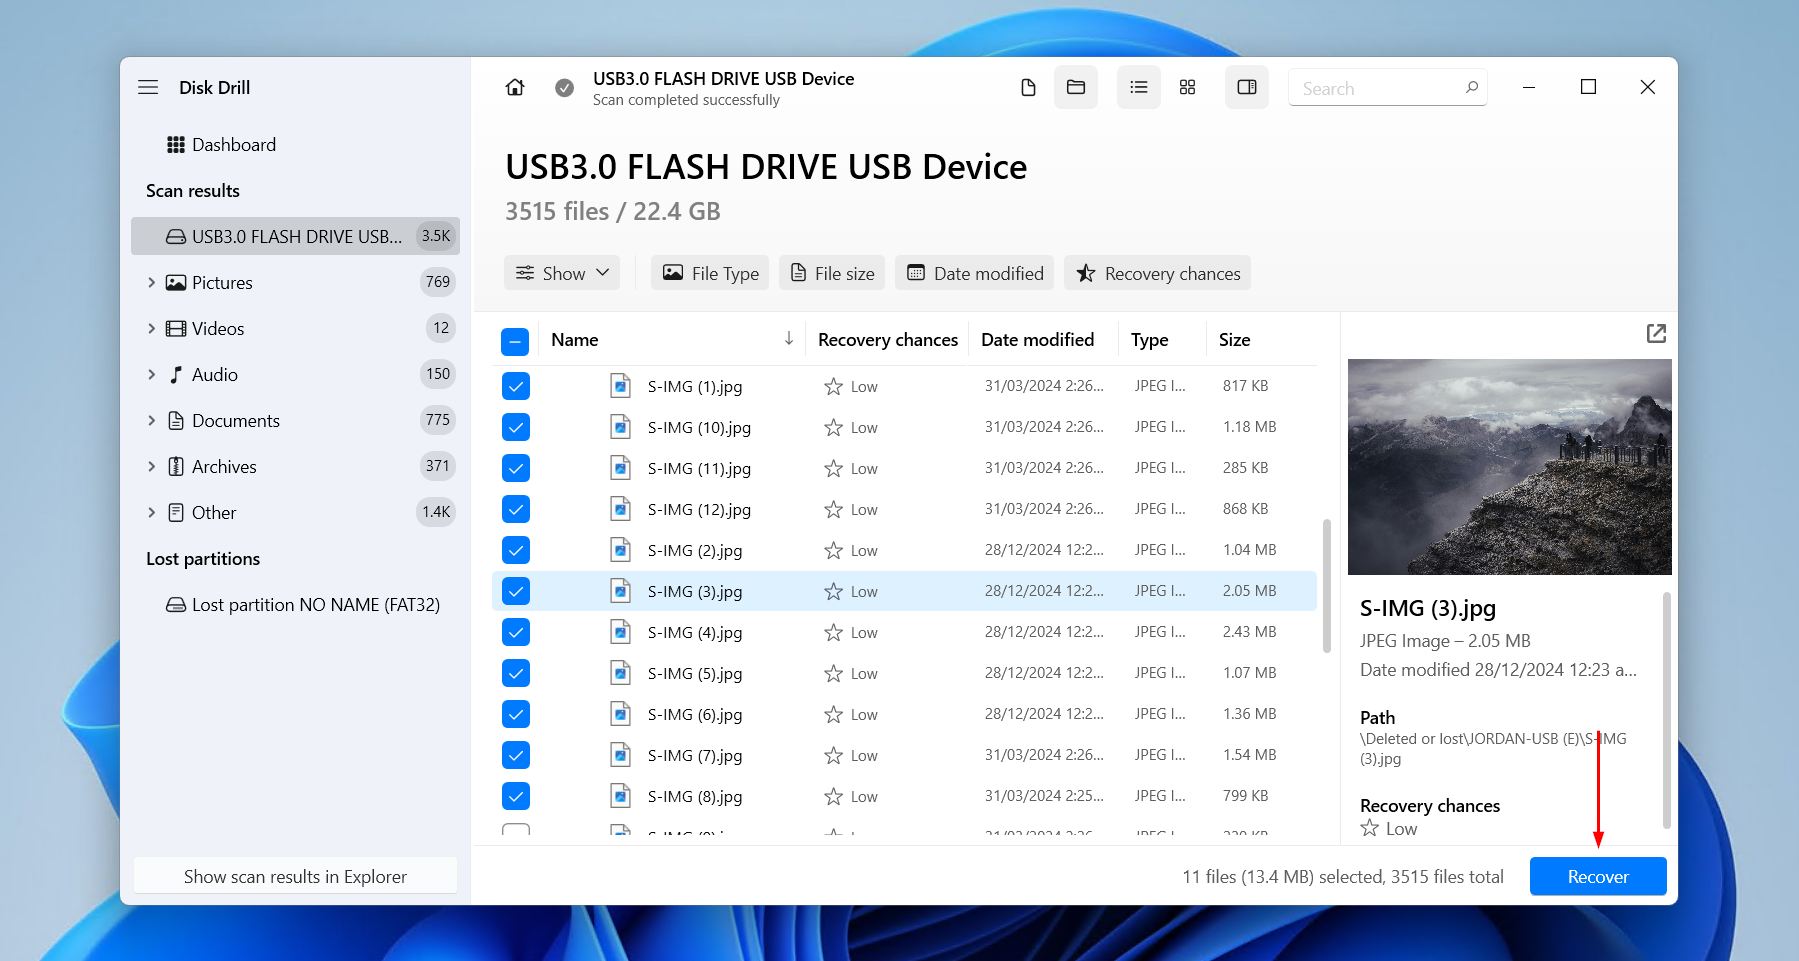
- Select the data that you want to recover. Be sure to use the preview panel where necessary, and keep in mind that any file that’s previewable can be recovered. To make it faster, you can also use the filter buttons to refine your search. Existing data will be under the Existing dropdown, while deleted or lost files will be under Deleted or lost, as well as Reconstructed if they were found by signature. When you’re ready, click Recover.
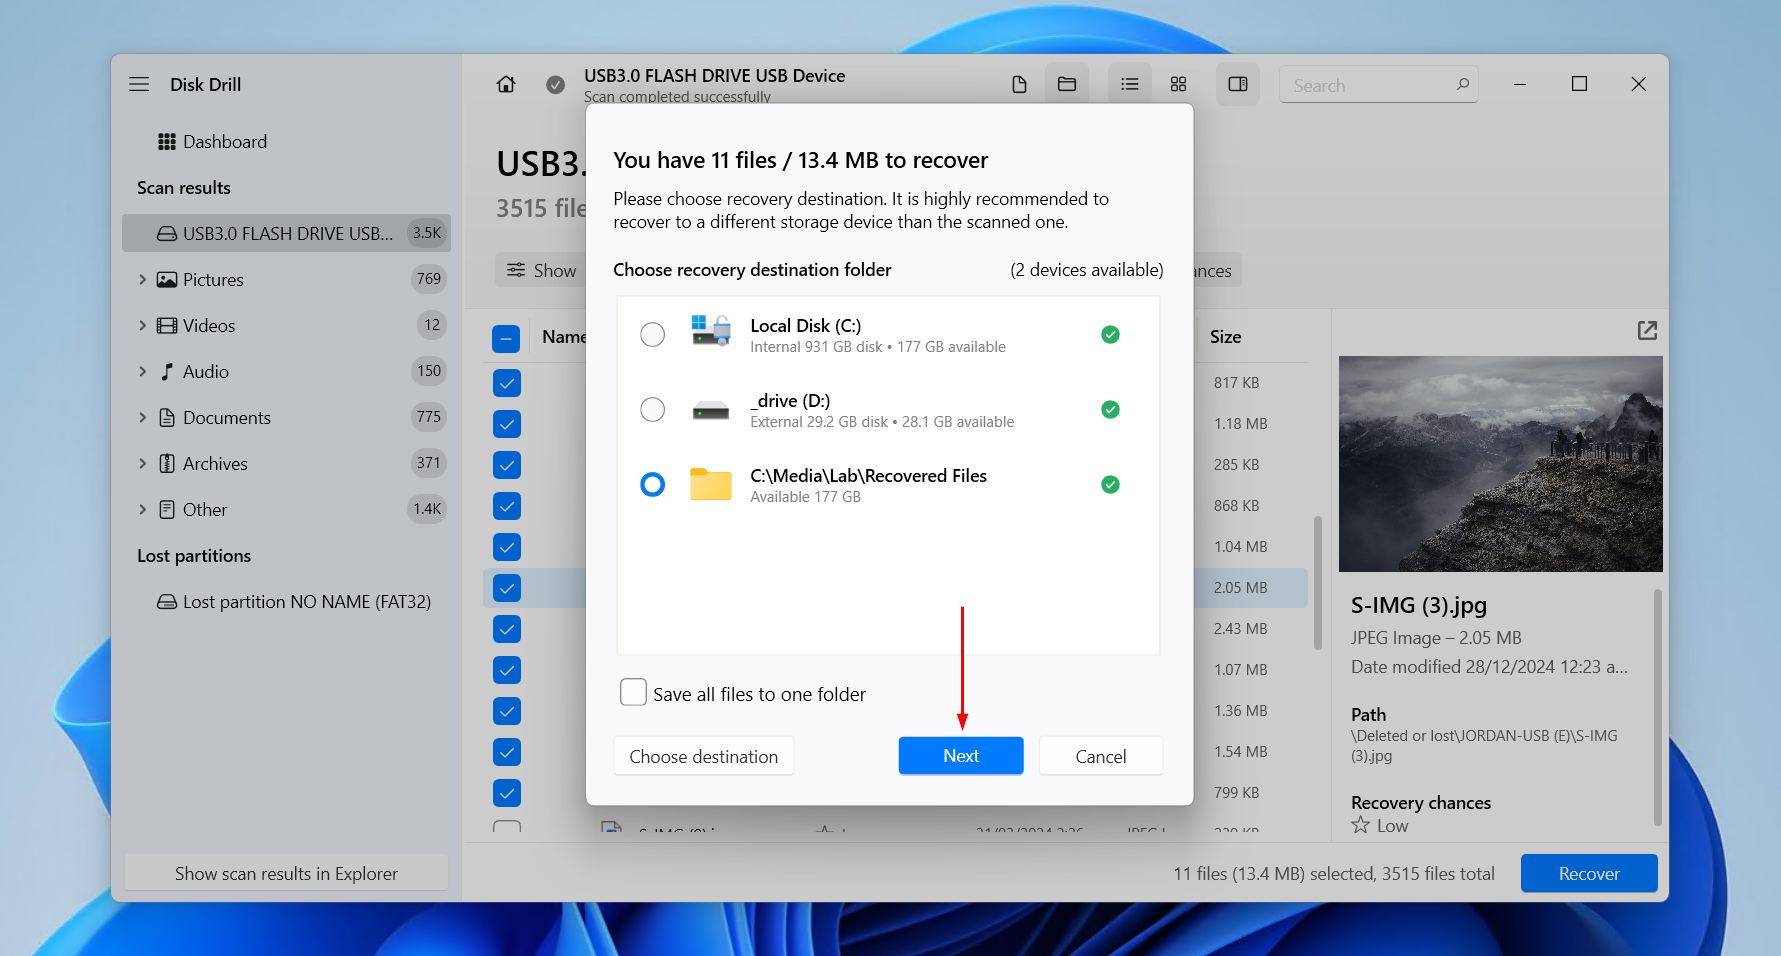
- Choose an appropriate output location. If the drive is still accessible, make sure you’re not choosing a location on the same USB you’re recovering from. To finish, click Next.
Disk Drill lets you recover up to 100 MB for free on Windows, which is usually enough to recover essential files or just try the software. However, scanning for and previewing data, backing up your flash drive, or enabling active data protection are all completely free.
Scenario 2: The Data Is Accessible
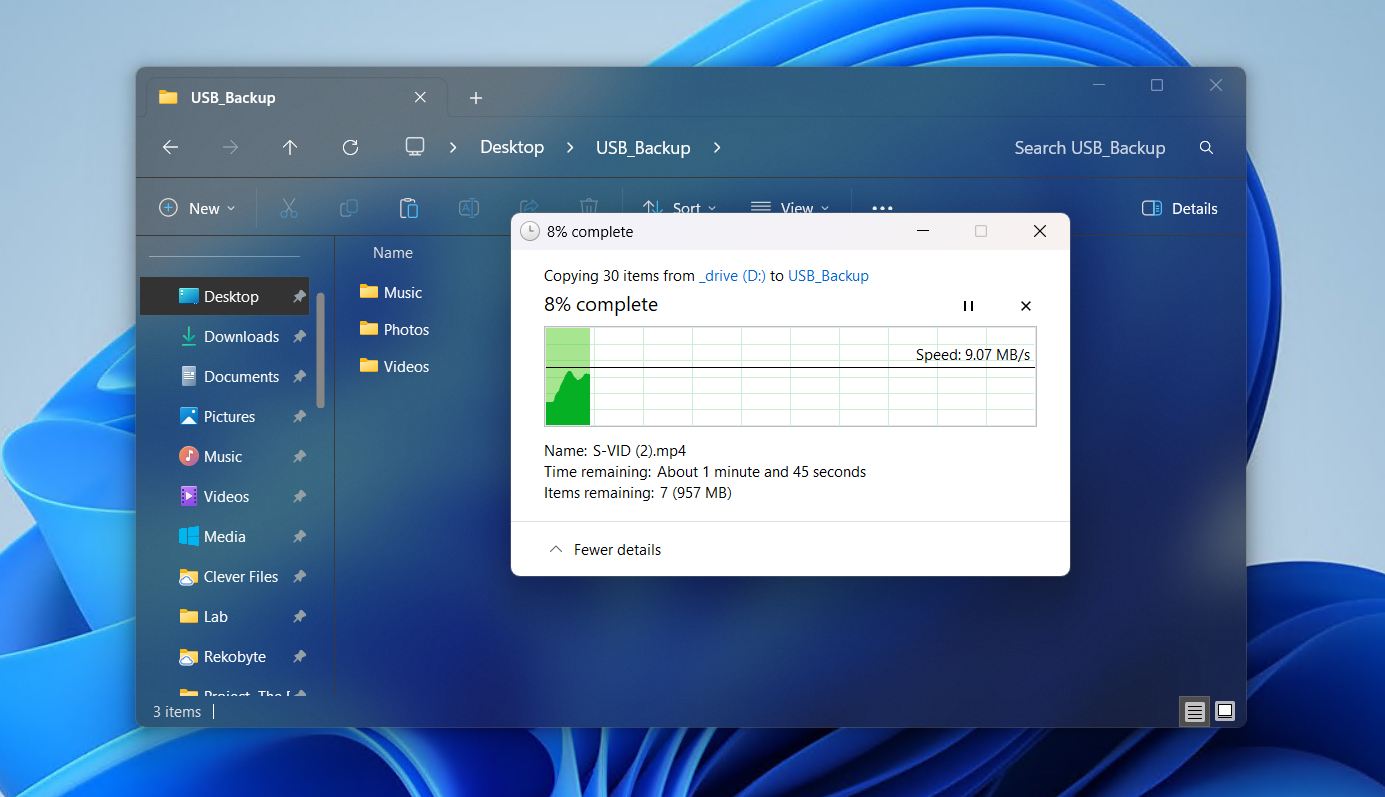
If your USB is being read by your computer like normal and you can access all of its contents, you simply need to back up the data using File Explorer. This may be obvious to many, but it’s worth mentioning anyway. The data should be copied to a local drive or another external storage device with sufficient space. Furthermore, this copy should be left intact until after the reformat is complete. Follow these steps to back up data in File Explorer:
- Open File Explorer and navigate to your USB.
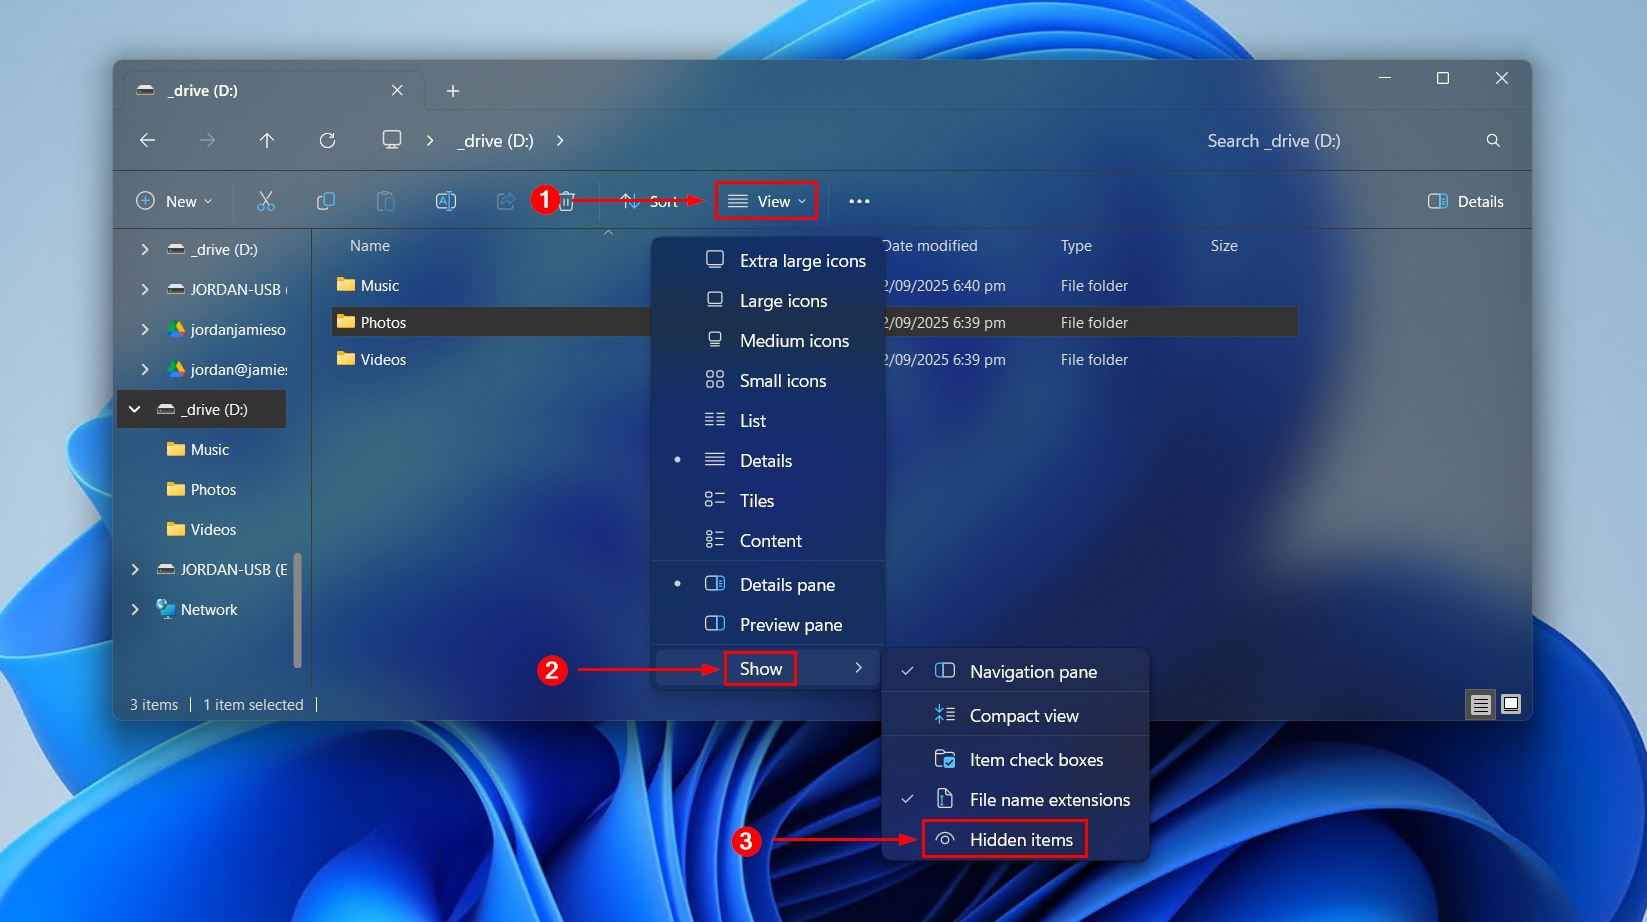
- Click View, then Show, then make sure Hidden items is ticked. This lets us view files even if they’re hidden, so they’re not missed.
- Copy the contents of the USB.
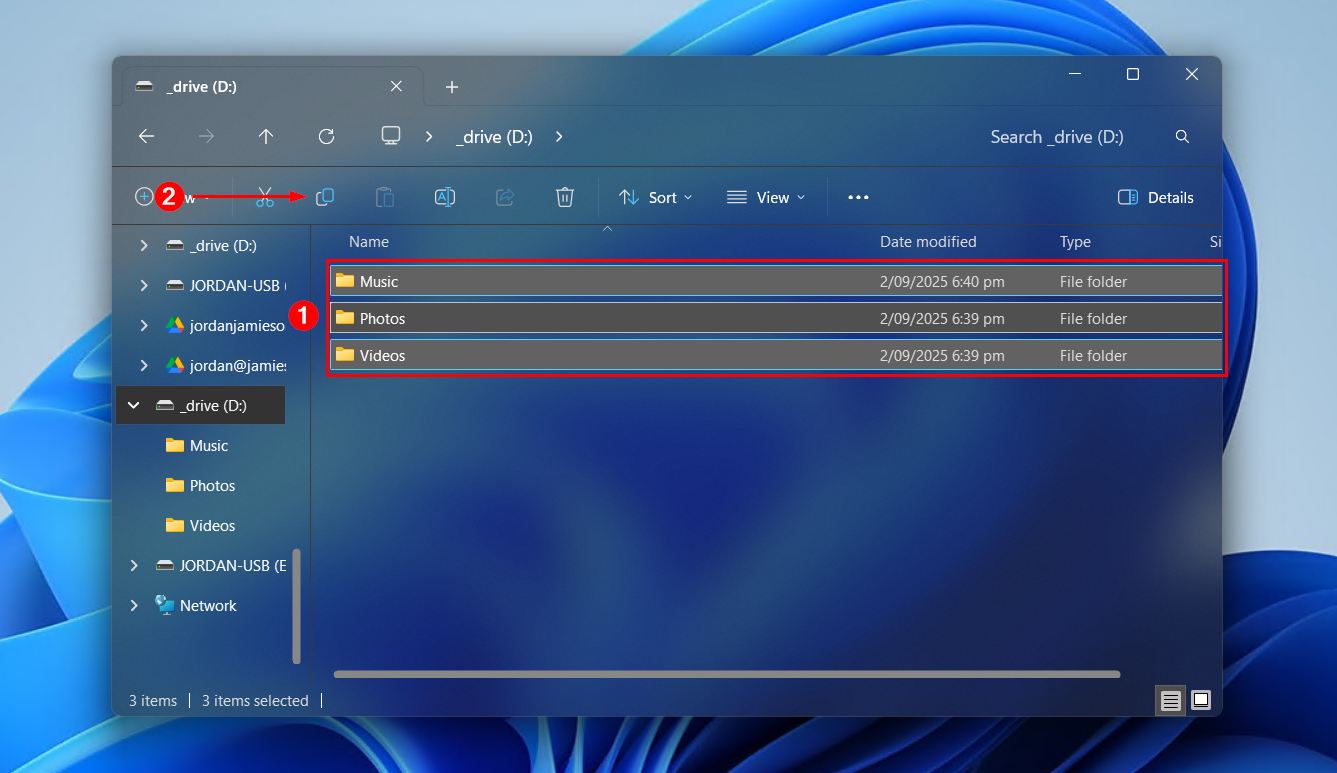
- Paste it to a location on your computer or another healthy storage device.
How to Format USB Drive on Windows
Once your data is safely recovered and backed up, you can proceed to format the USB. Formatting a USB is a great way to remove most forms of logical damage it has sustained and restore it back to working order. We’re going to show you a few ways you can go about formatting your USB drive.
For the vast majority of you, Method 1 or Method 2 will suffice. Even so, we’ve included some command-line alternatives that may be useful in some edge cases.
Method 1: File Explorer
File Explorer is most probably the easiest way to format a USB flash drive, as all Windows users are familiar with it. In just a few clicks, your USB drive can be formatted and ready to store data once more. Here’s how you can format your USB flash drive through File Explorer:
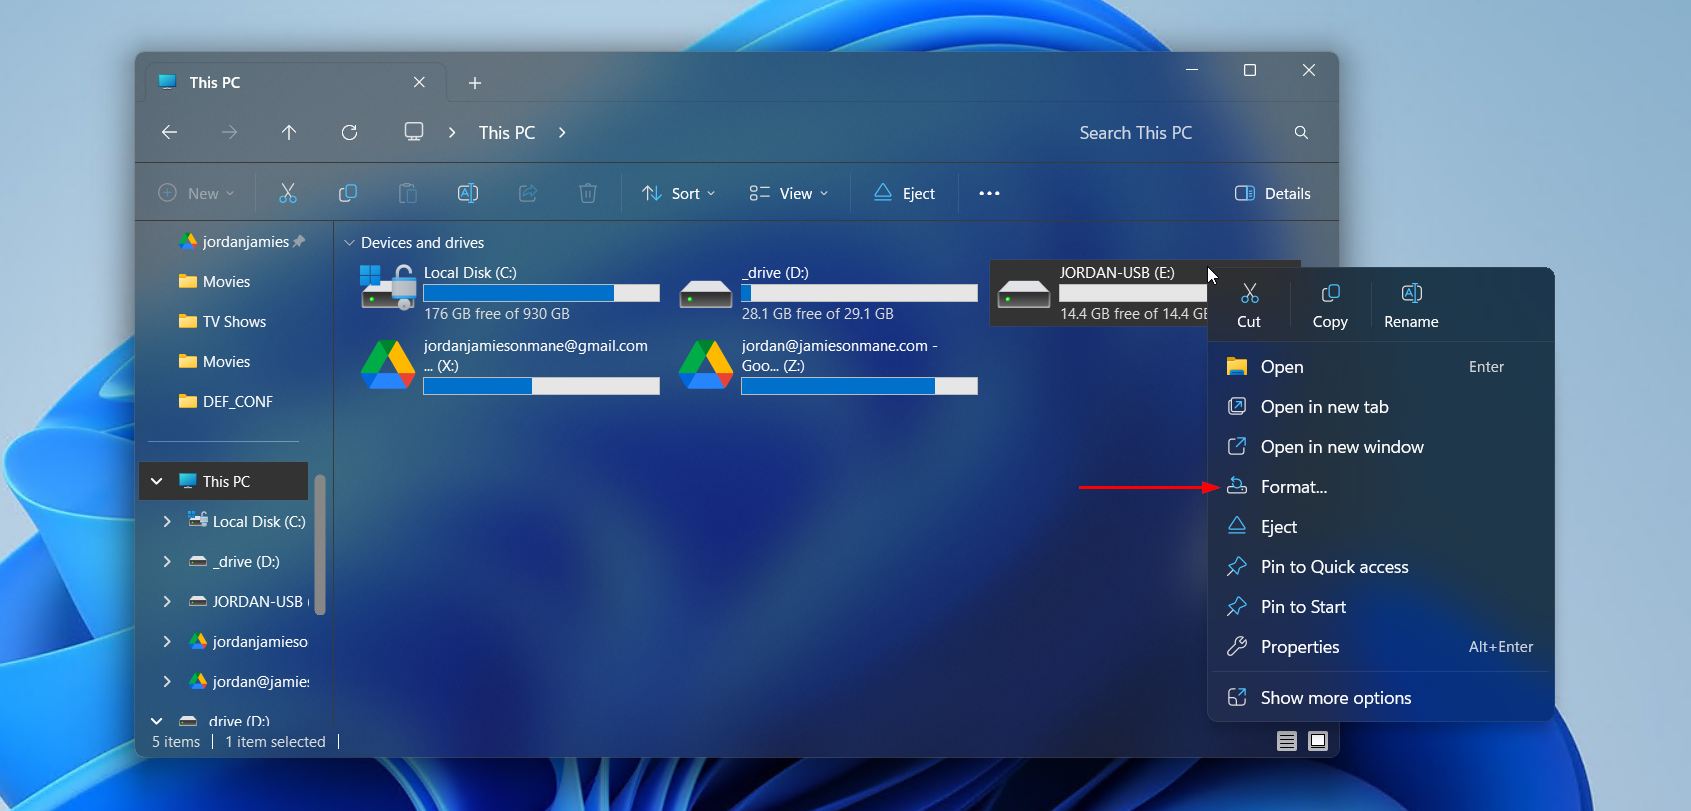
- Open File Explorer and click This PC.
- Right-click your USB flash drive and click Format.
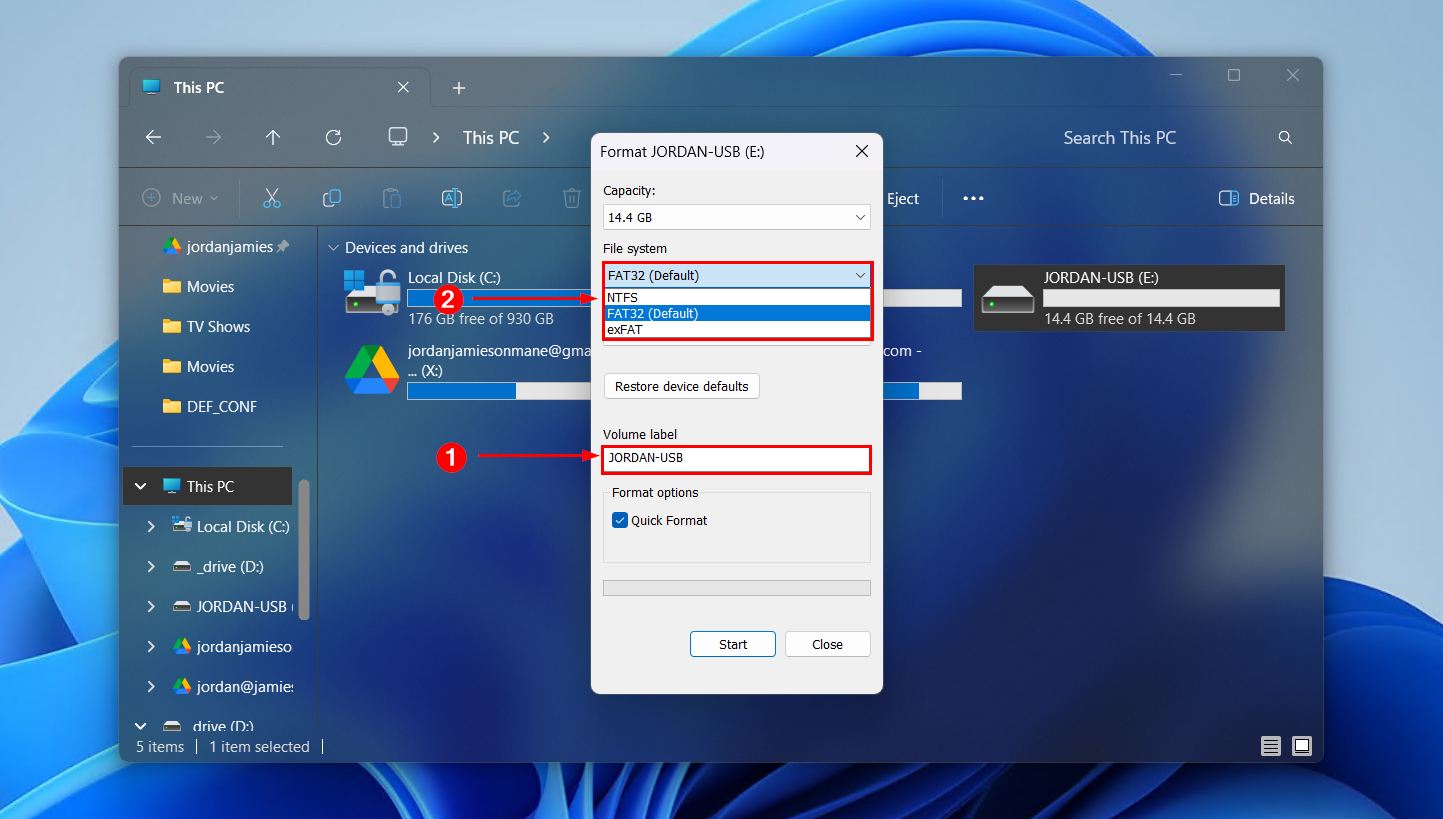
- Input a volume label and choose a file system. The file system you choose depends on how you want to use the flash drive:
-
- exFAT is the default for flash drives and offers excellent cross-compatibility with other operating systems (OS).
- NTFS is for Windows-only use where you’ll be storing large files or making use of its built-in security features.
-
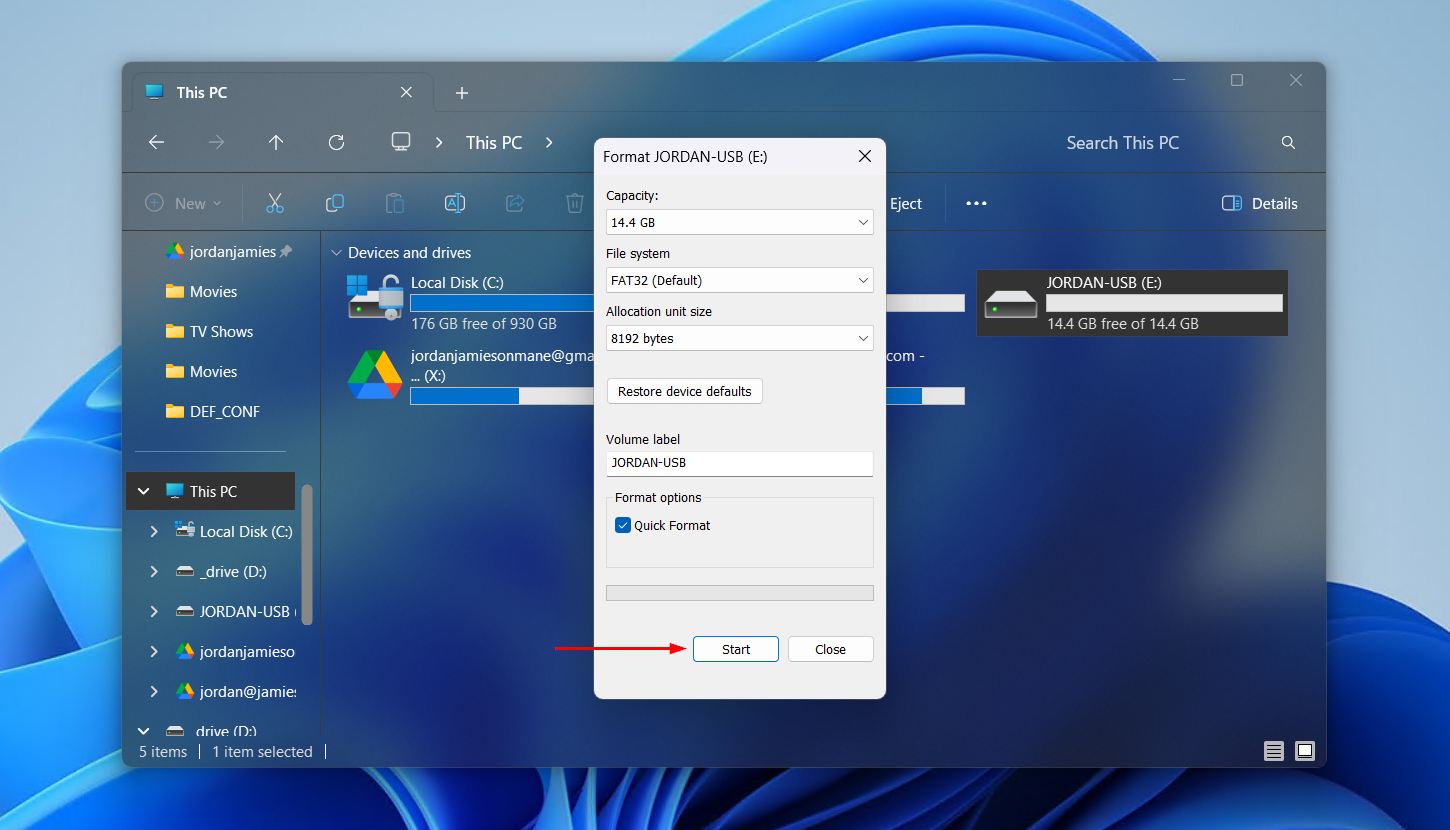
- Choose which format you’d like to perform. The Quick Format option is ticked by default, as it’s the generally preferred option, especially if time is a priority. However, you can untick to perform a full format, which can be useful in instances like:
-
- The USB drive is showing signs of instability.
- The drive is being reused, and you want to erase sensitive files.
- You want to scan for bad sectors early to avoid future issues.

-
- Click Start.
- Click OK when asked to confirm the action.
Method 2: Disk Management
Disk Management is another easy way to format a USB drive, and is sometimes the better option if the USB drive isn’t showing up in File Explorer at all. However, you must be careful, as Disk Management shows all currently connected drives. To make sure you’re selecting the correct USB drive, cross-check the capacity with what’s physically printed on the flash drive casing and make sure it has the “Removable” label in Disk Management. Follow these steps to format your USB drive using Windows Disk Management:
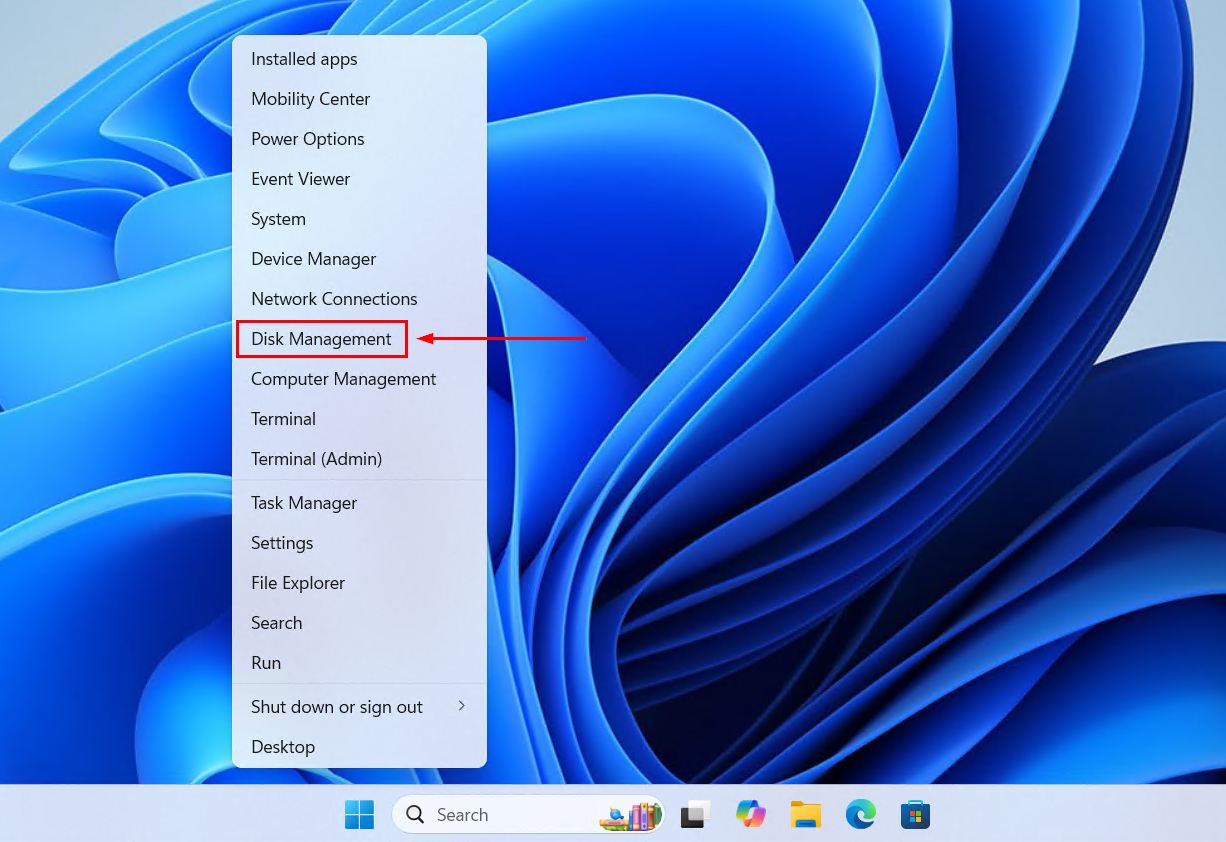
- Right-click Start and click Disk Management.
- Right-click the volume of your USB and click Format.
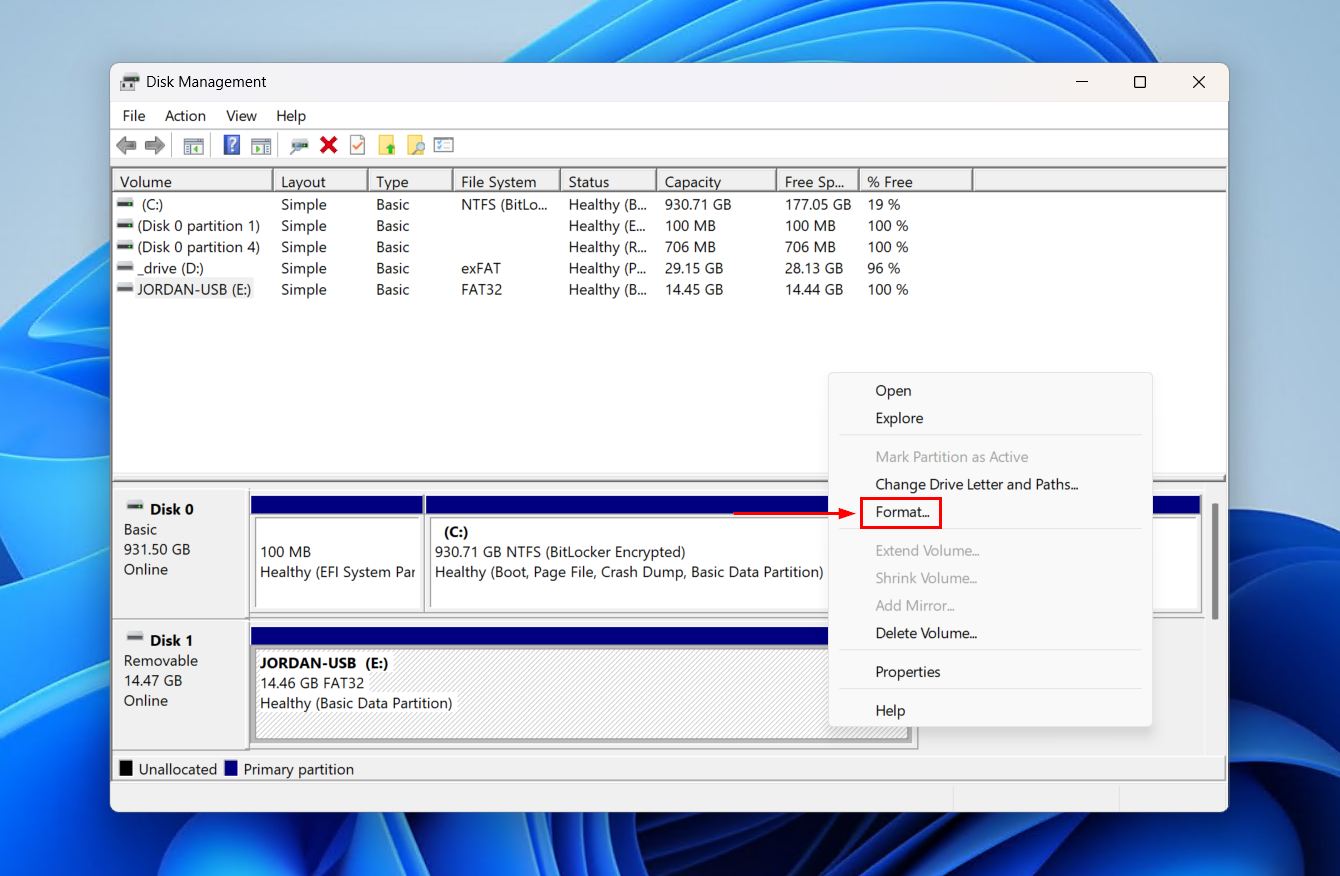
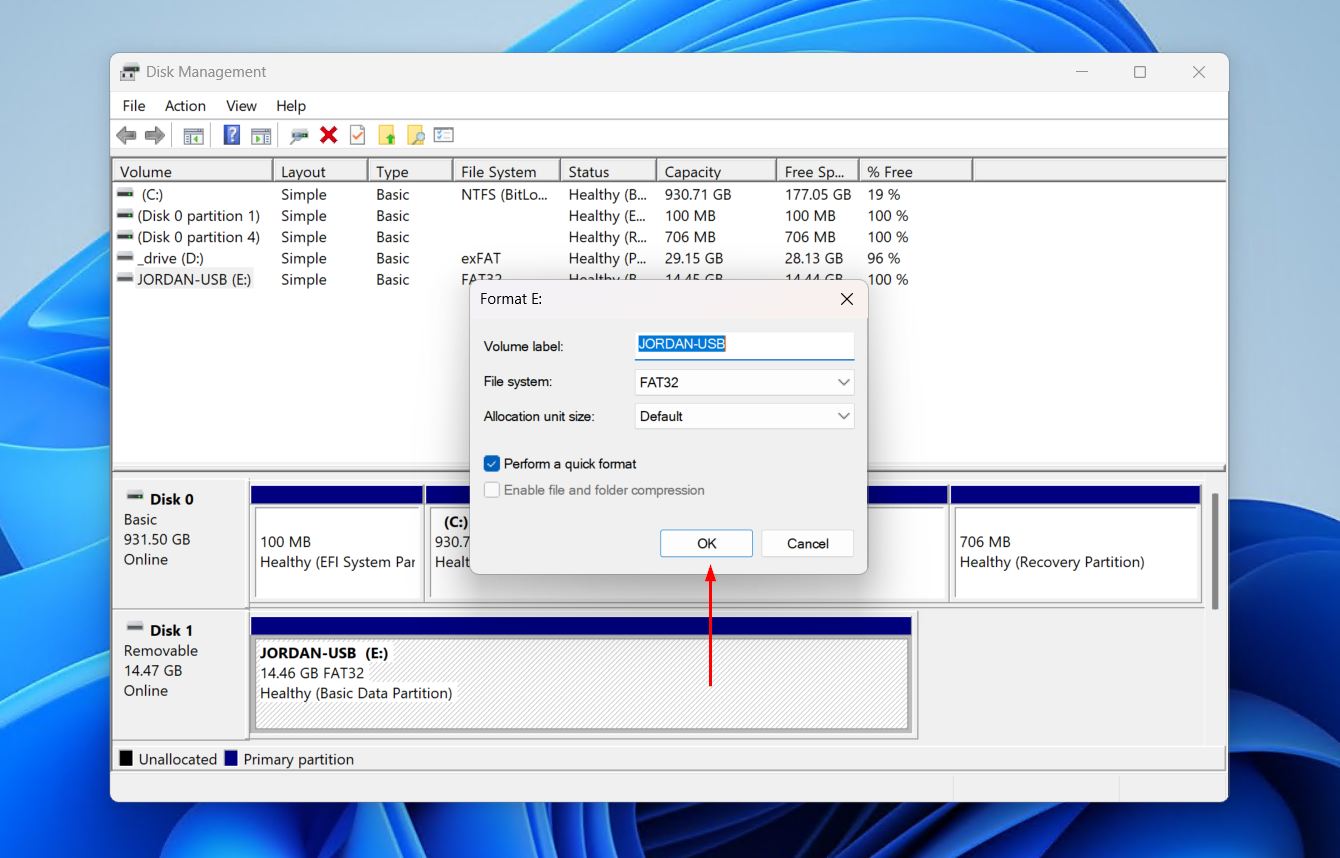
- Choose your desired format parameters. This is where you can also change the format of the USB. Make sure Perform a quick format is ticked if you’re intending to do a quick format, then click OK.
- Click OK again.
Is your disk showing as Not Initialized? You’ll need to initialize it by right-clicking disk (in the left pane), then clicking Initialize Disk. You’ll have the option to choose between MBR (for older systems with legacy BIOS) or GPT (for modern systems with UEFI). Learn more about GPT vs MBR.
Method 3: PowerShell
PowerShell is a command-line config management program. With it, you can perform various administrative tasks and operations, such as formatting.
This method will involve formatting the entire flash drive and creating a single partition. So, if you have other partitions on the flash drive, be sure to back the data up first.
The below instructions will guide you through formatting a USB flash drive using PowerShell:
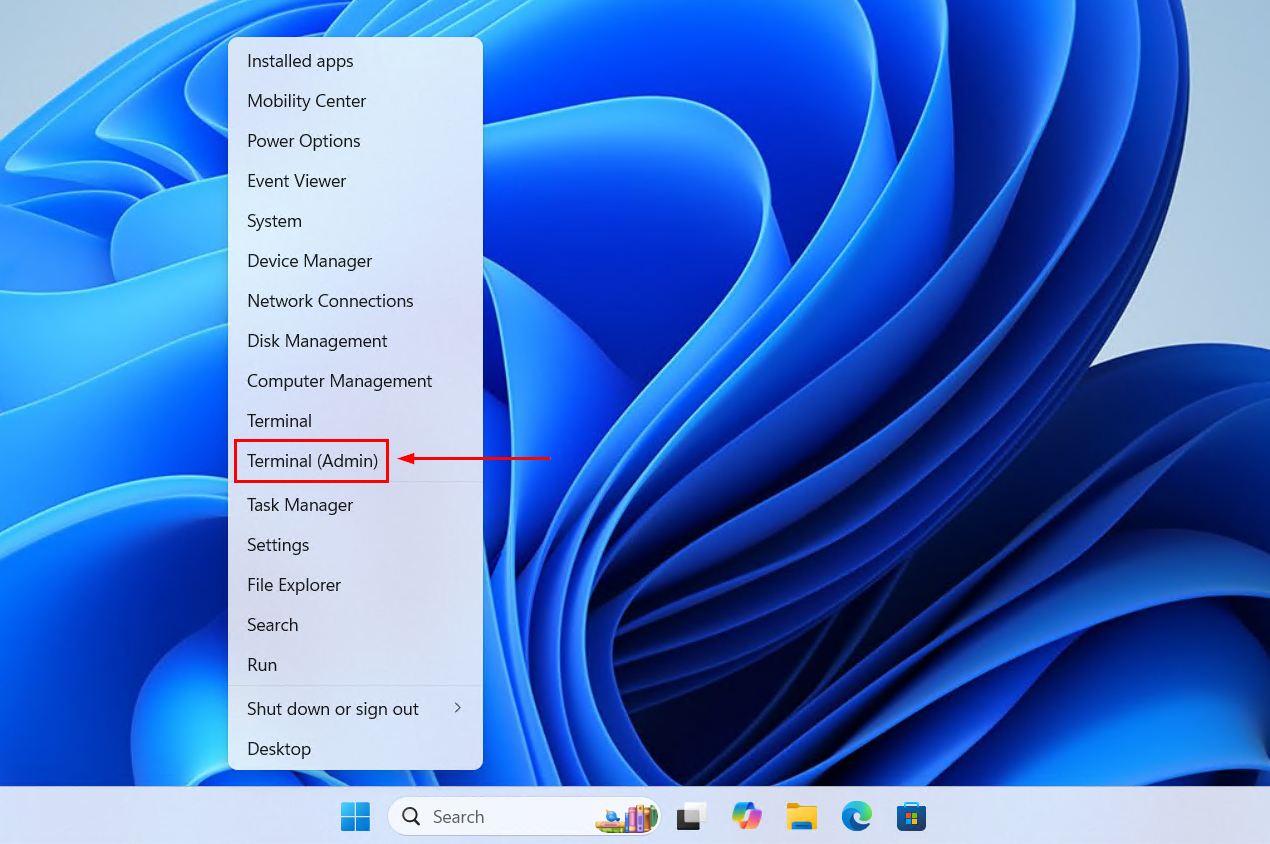
- Right-click Start and click Terminal (Admin). Alternatively, open Start and search for PowerShell. Open it as an administrator.
- Type
Get-Diskand press Enter. Make note of the disk number associated with your USB flash drive.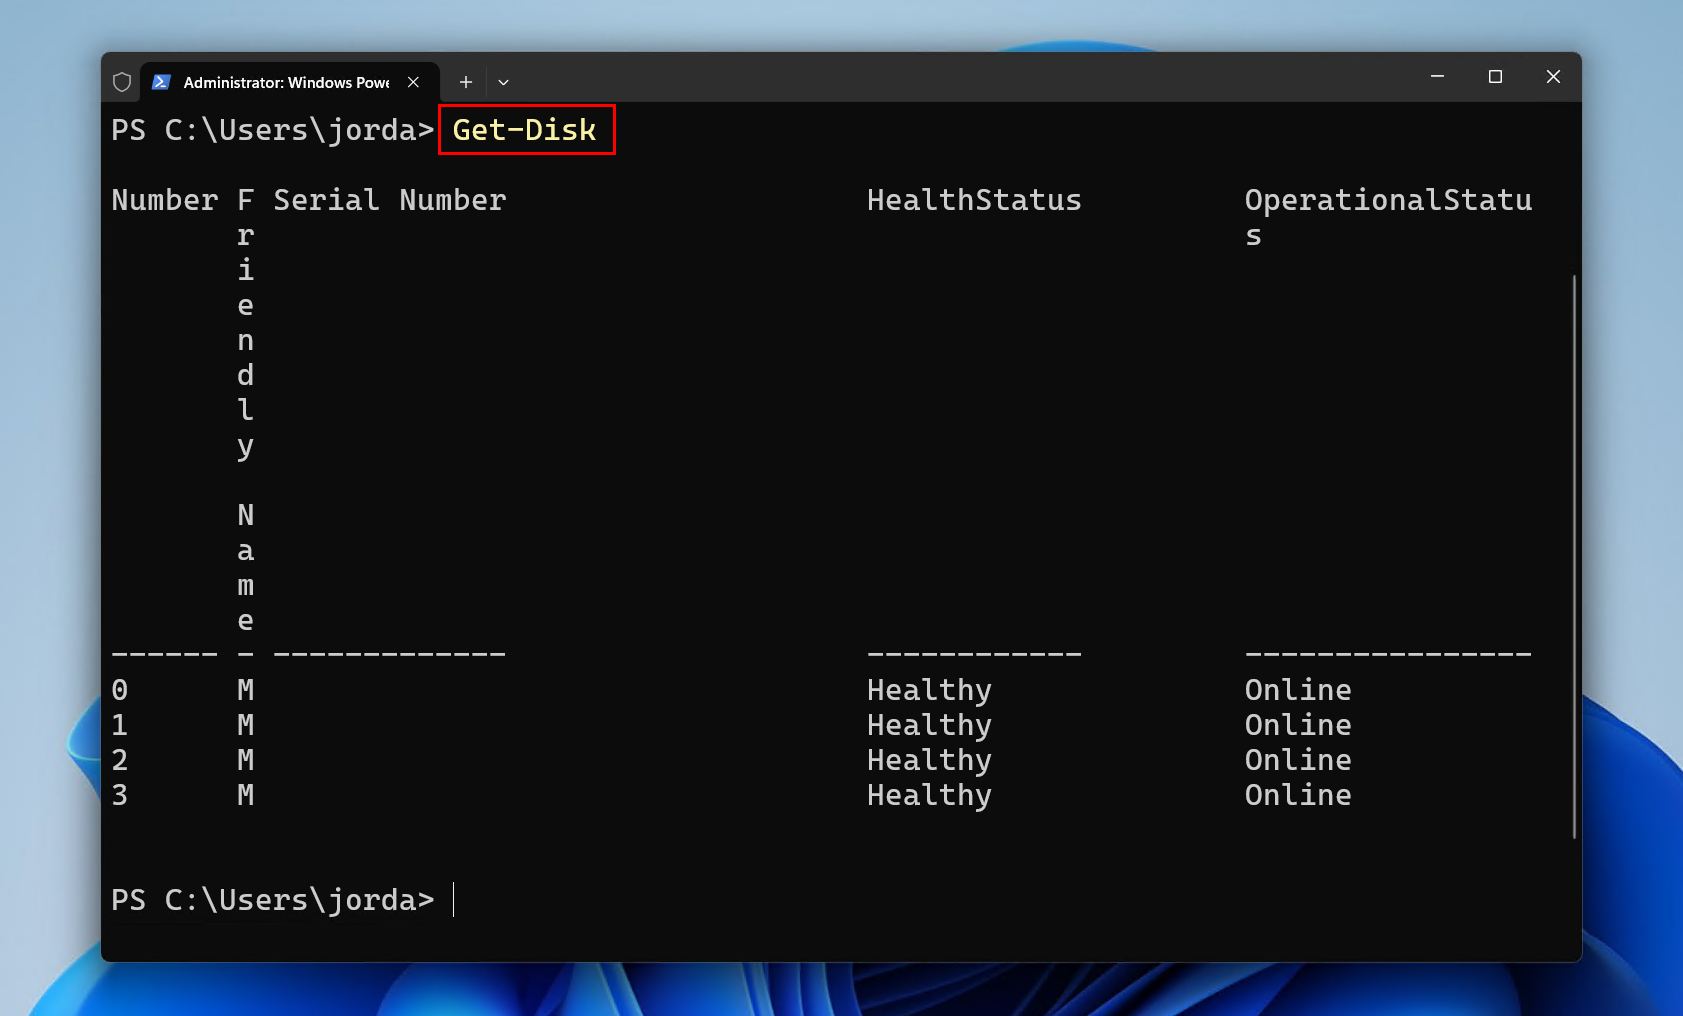
- Type
Clear-Disk -Number X -RemoveData -Confirm:$false. Replace X with your USB drive number. Press Enter.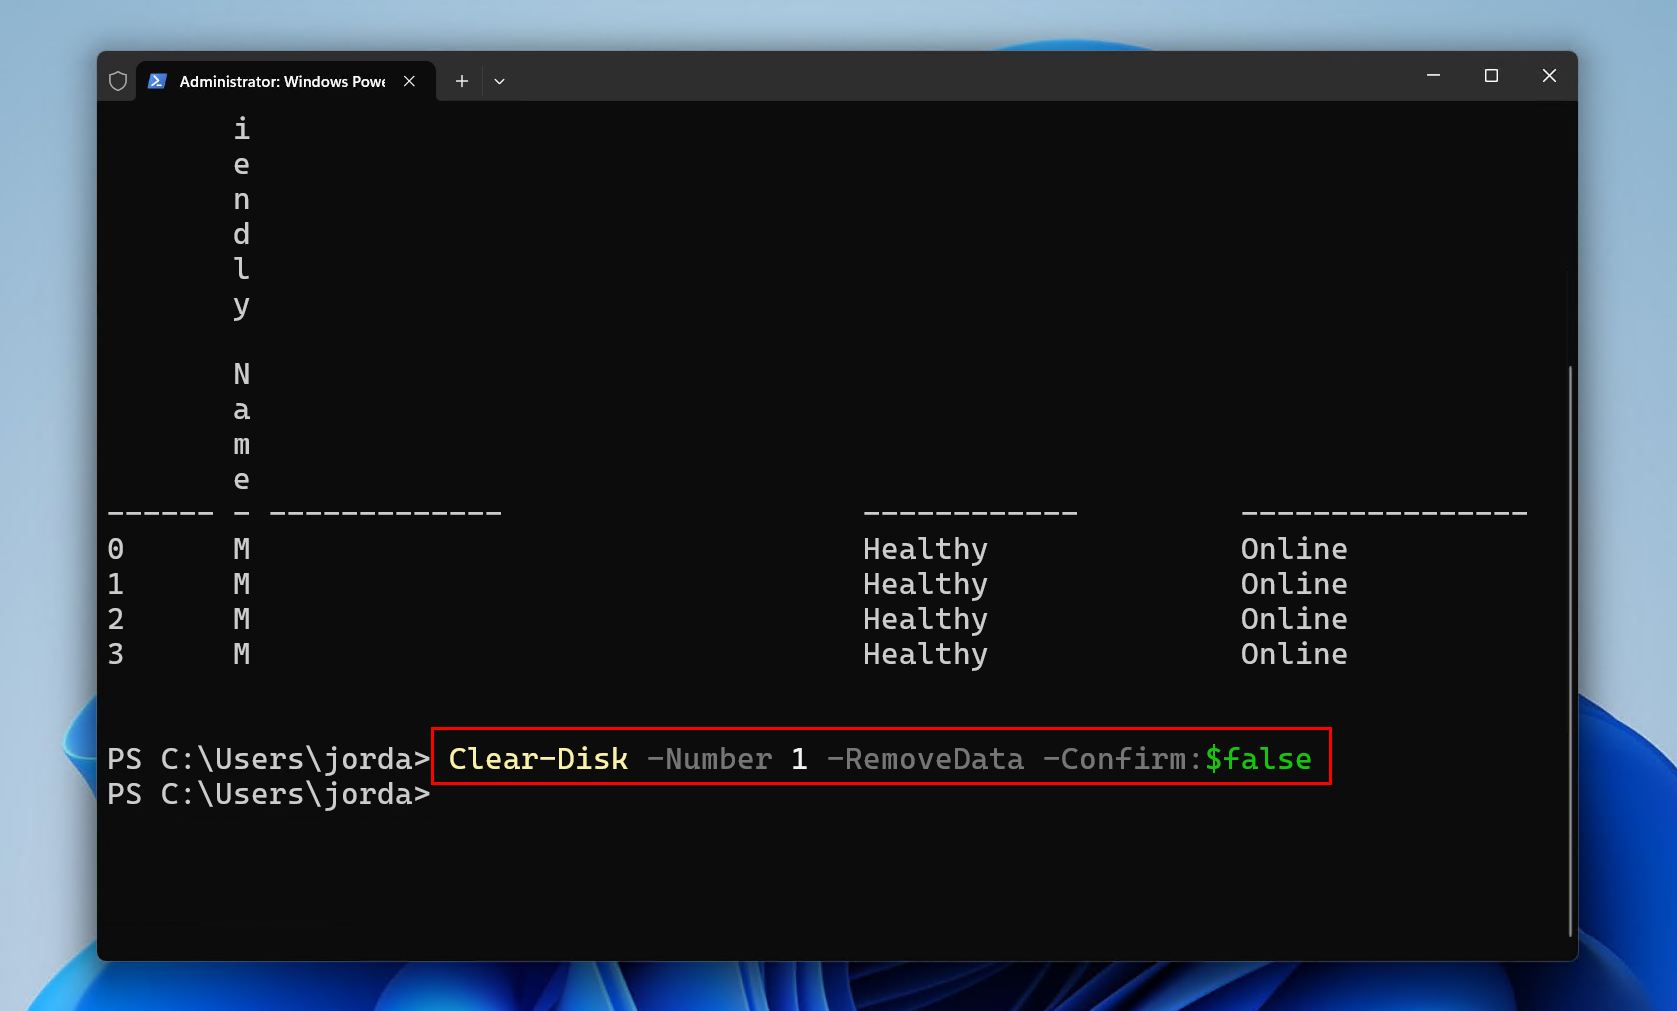
- Type
Initialize-Disk -Number X -PartitionStyle MBR. If you want to use GPT instead, replace MBR with GPT. Press Enter.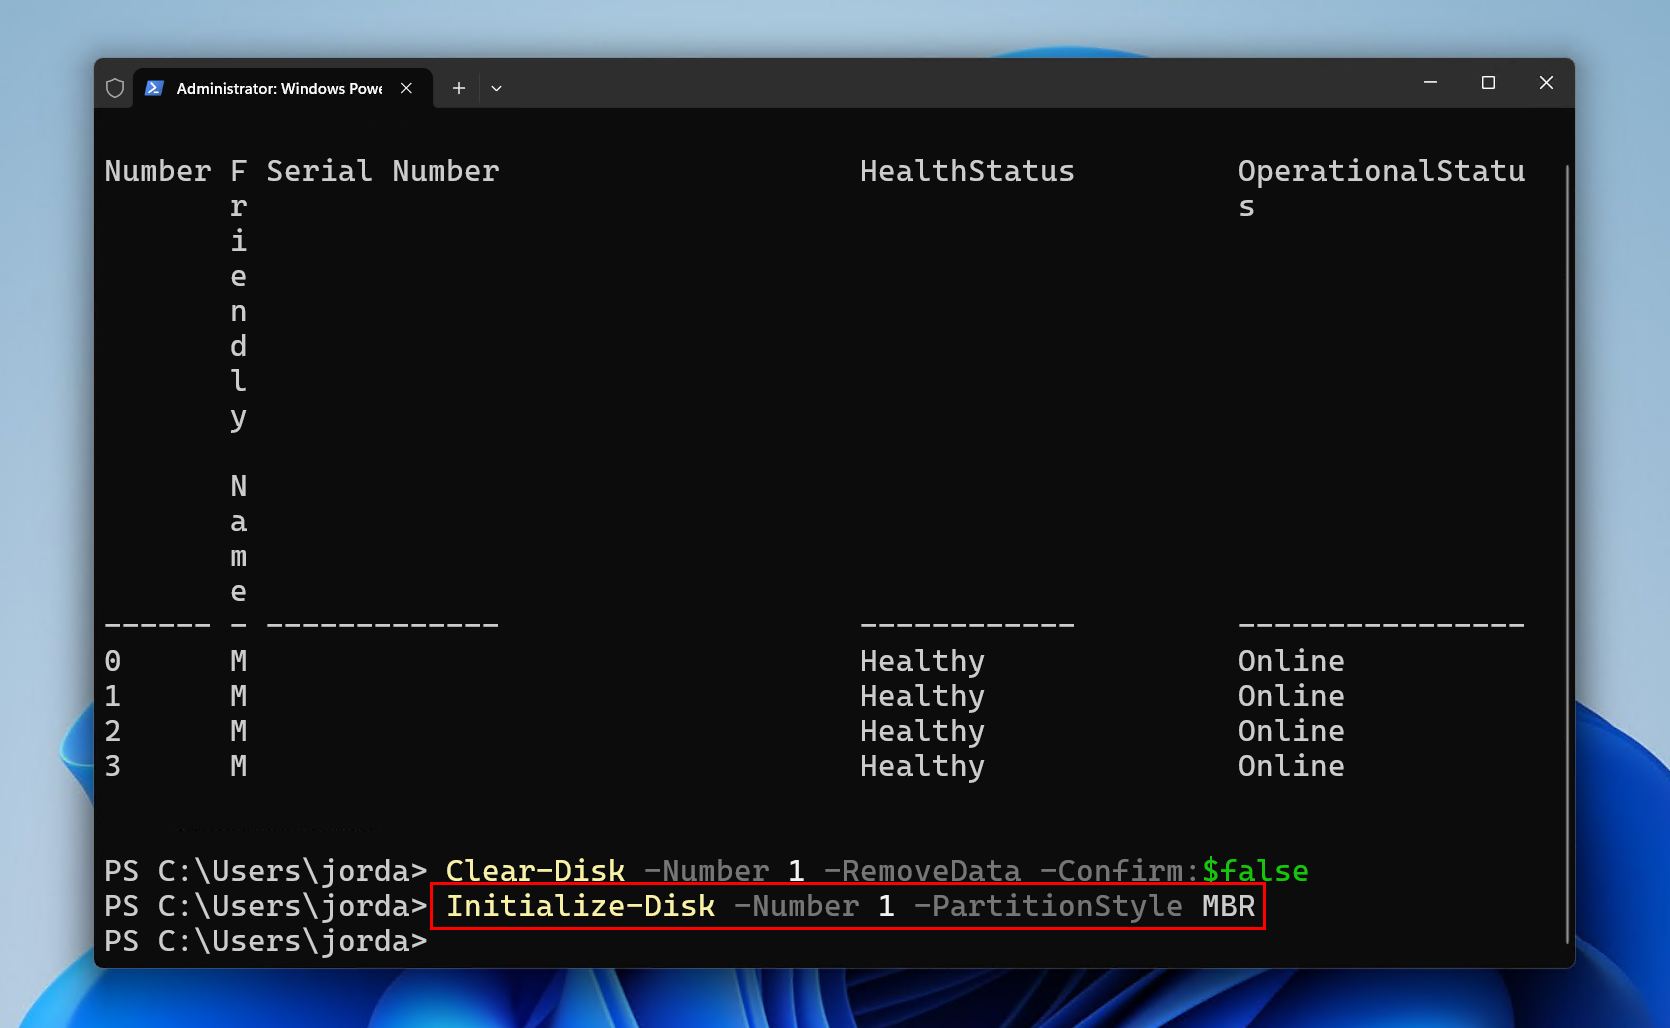
- Type
New-Partition -DiskNumber X -UseMaximumSize -AssignDriveLetter | Format-Volume -FileSystem FAT32 -NewFileSystemLabel "MyUSB" -Confirm:$false.. Replace X with your USB drive number, and MyUSB with what you want to name the drive. Press Enter.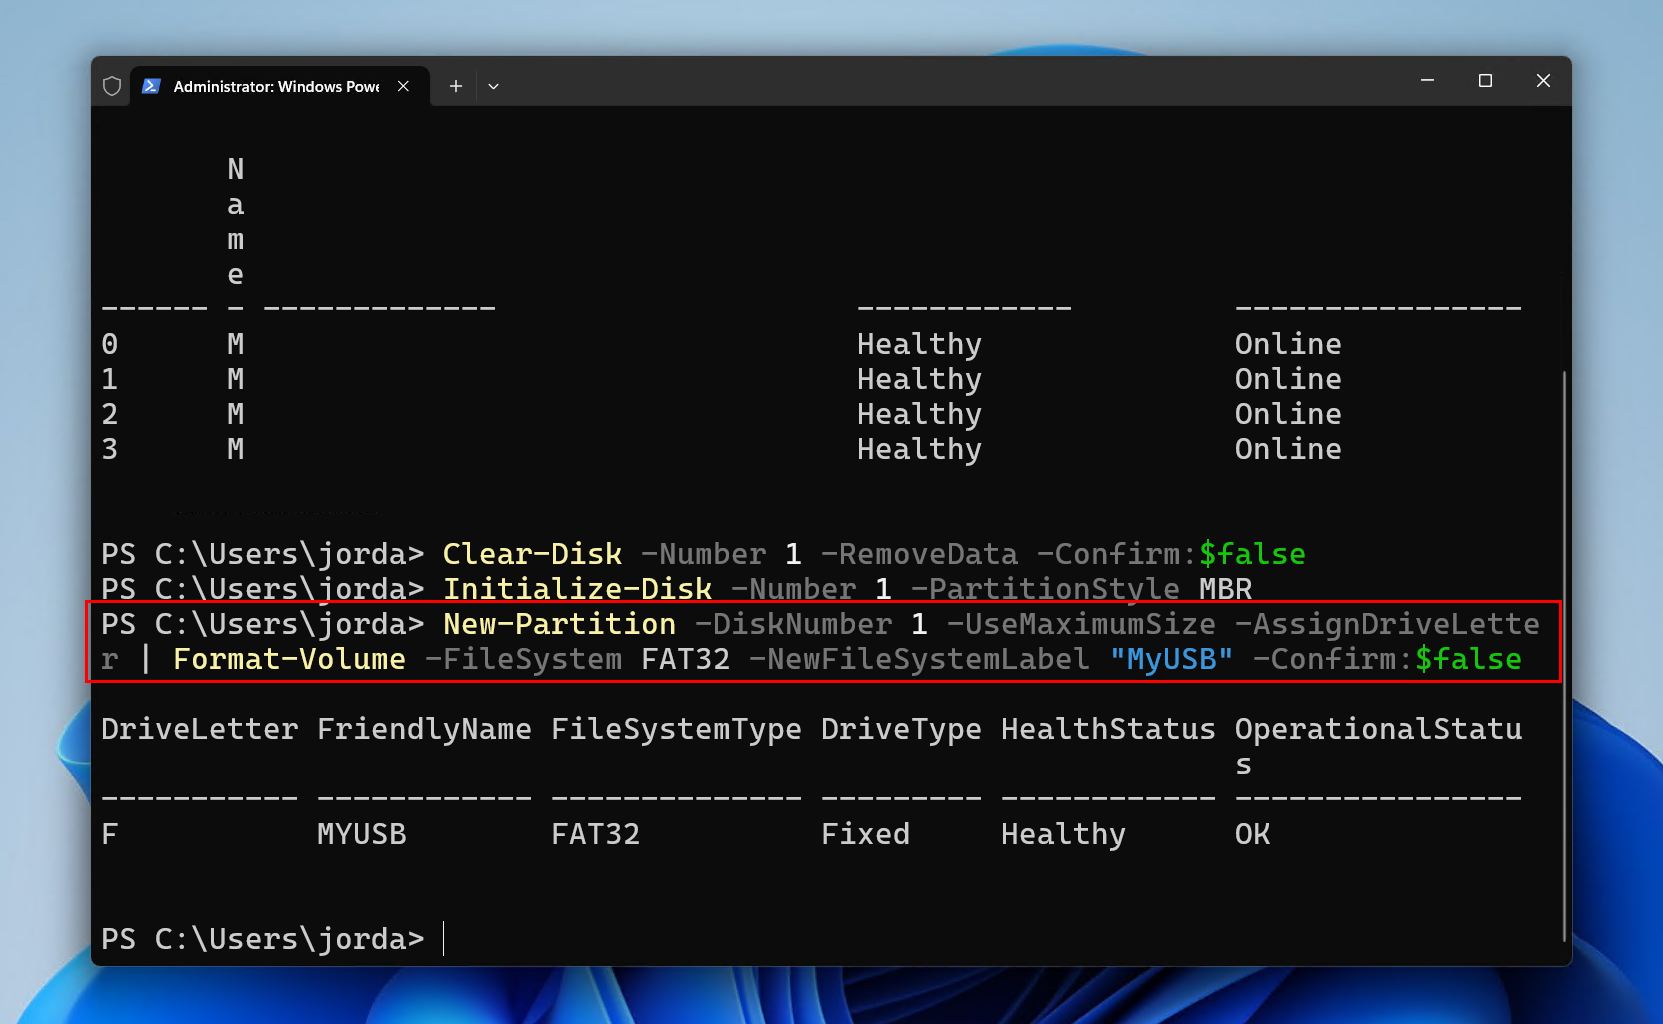
Method 4: Command Prompt (CMD)
Command Prompt is another reliable way to format a USB flash drive using a CLI. We’re going to guide you through two ways, one using DiskPart and the other using the standalone format command.
Format Command
- Right-click Start and click Terminal (Admin).
- Type
format *: /q /fs:exfat. Replace * with the drive letter that’s assigned to your USB drive. If you’re planning on formatting in NTFS, replace /fs:exfat with /fs:ntfs instead. Press Enter, and press Y if prompted to confirm.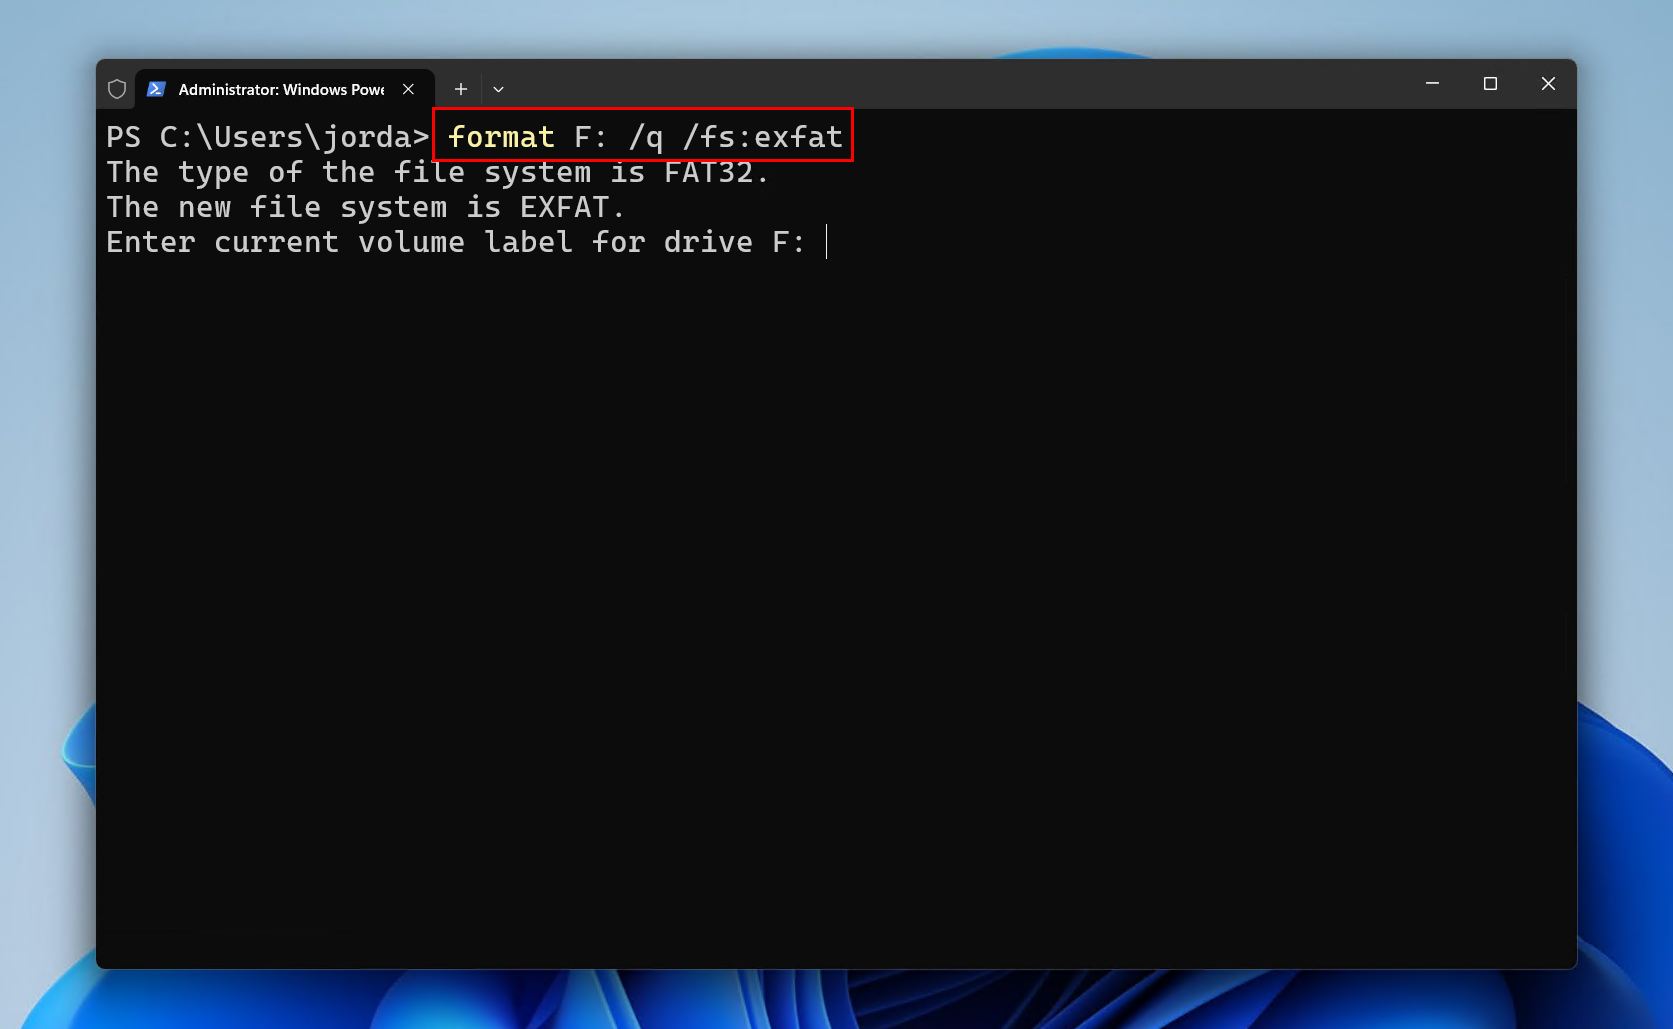
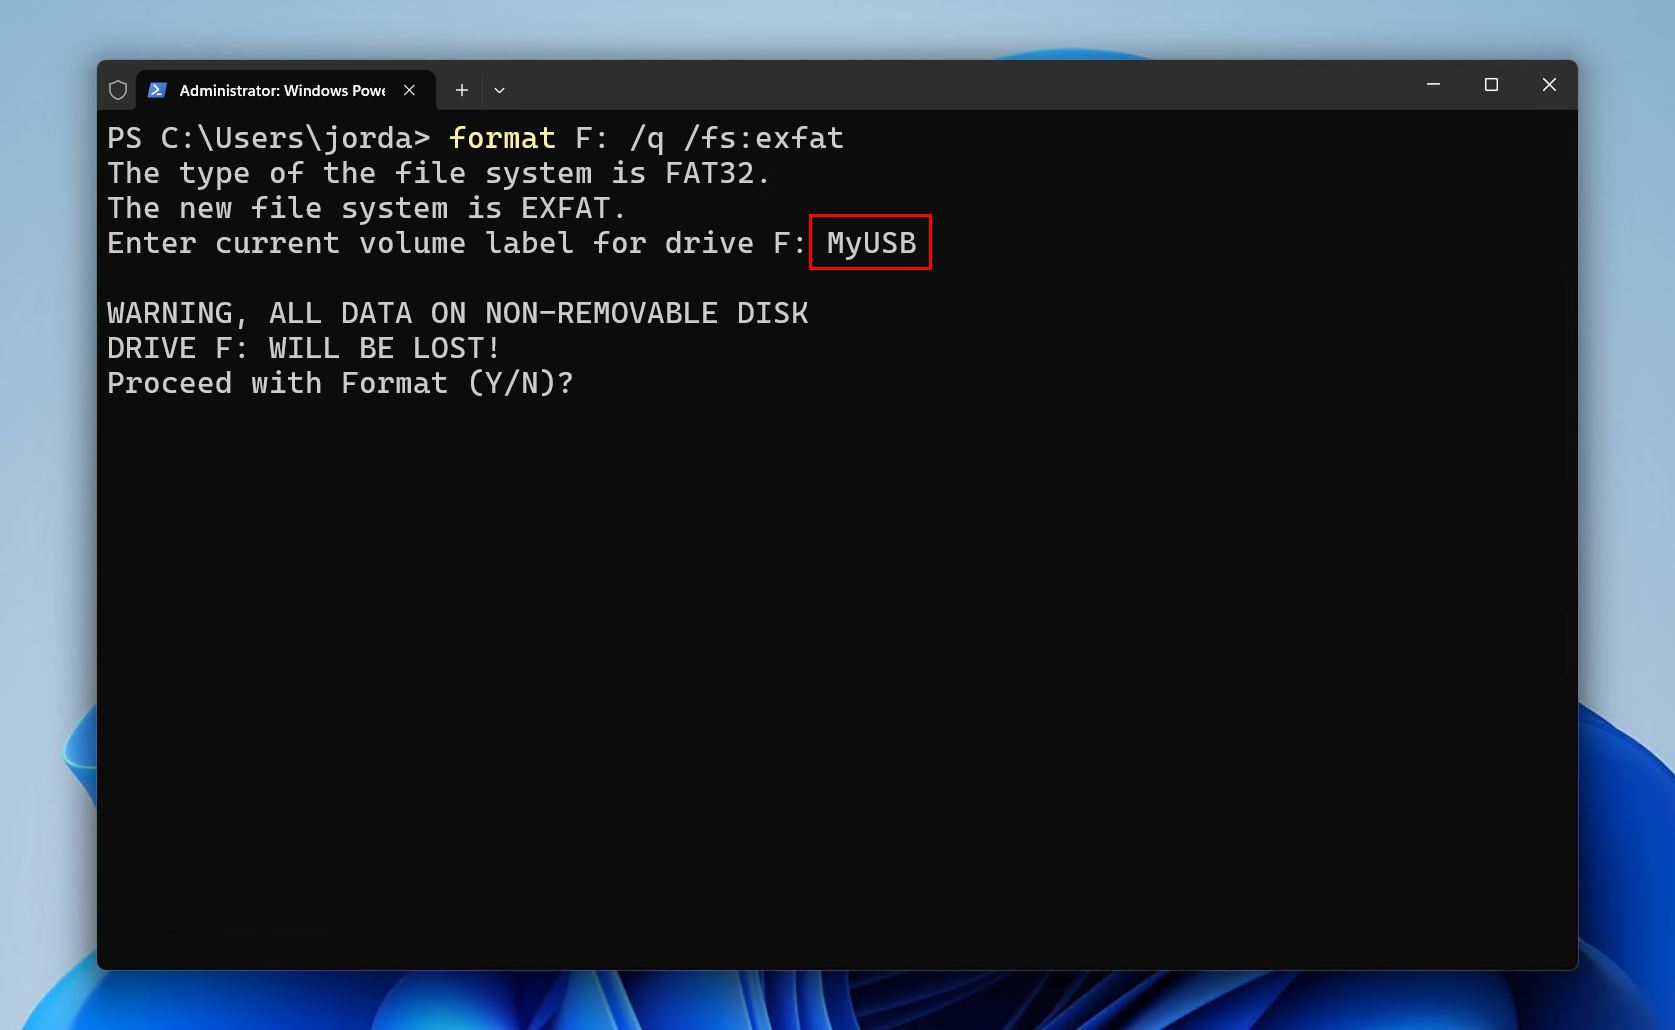
- Provide a volume label if needed, then press Enter.
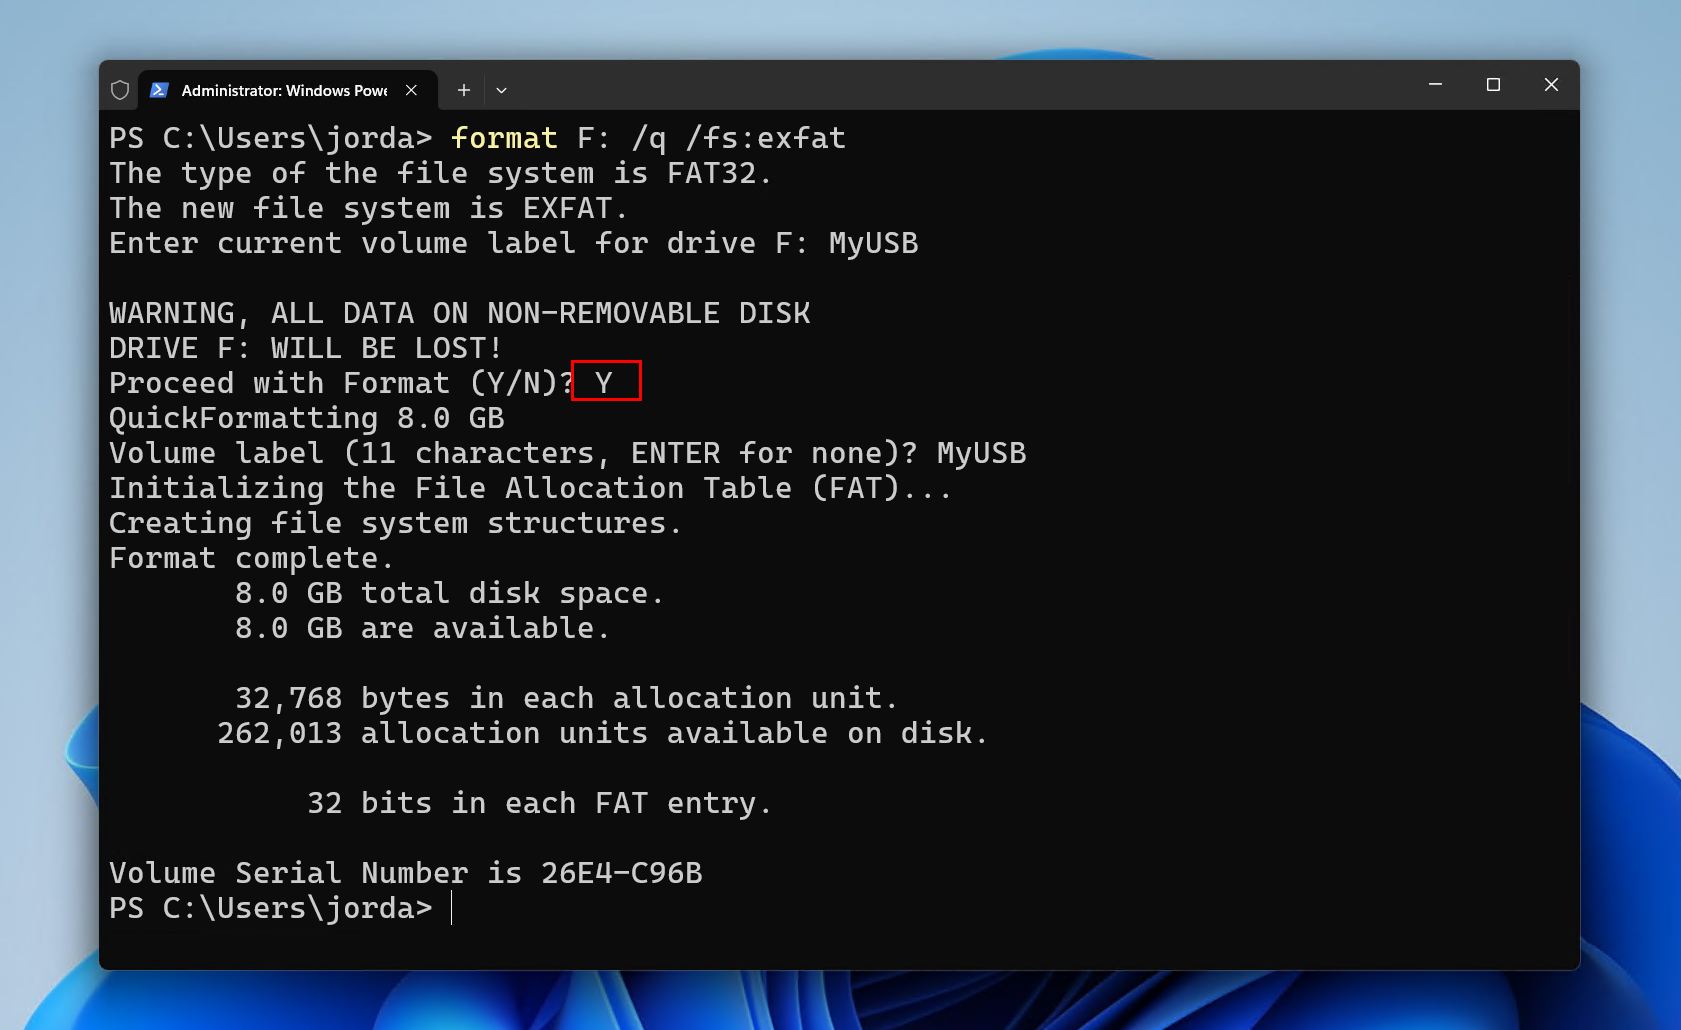
- Type Y then press Enter to confirm the format.
DiskPart
- Right-click Start and click Terminal (Admin).
- Type
diskpartand press Enter.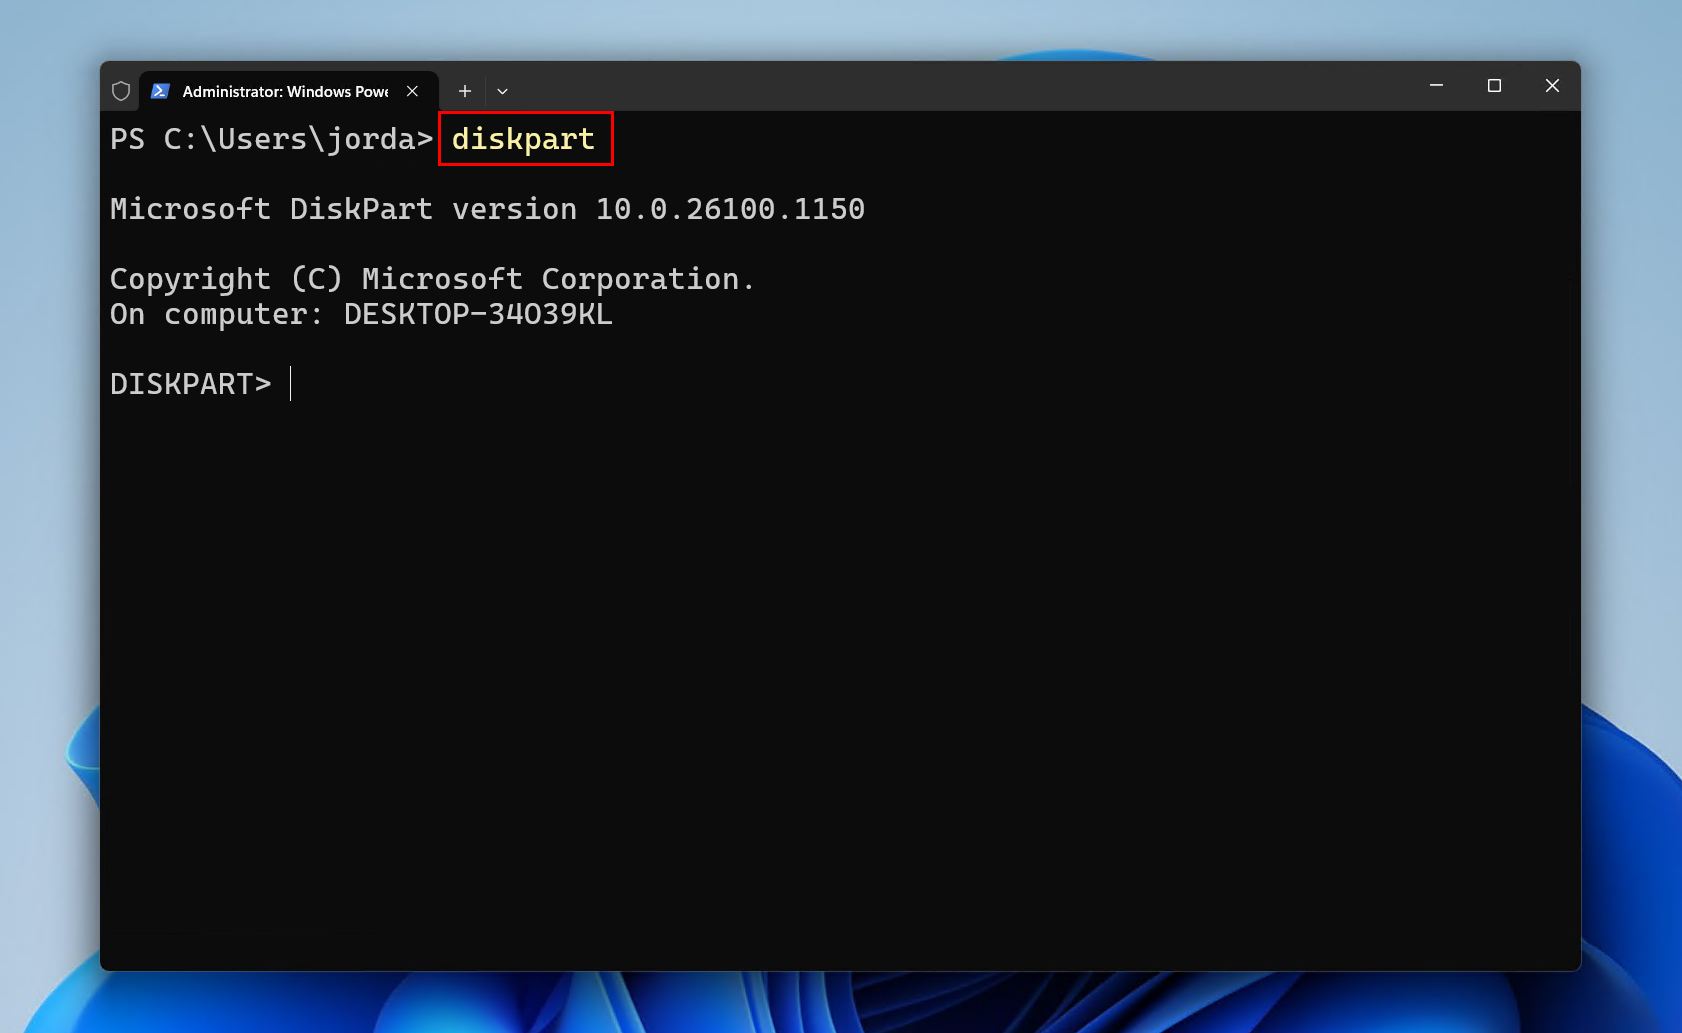
- Type
list diskand press Enter. Make note of your flash drive’s disk number.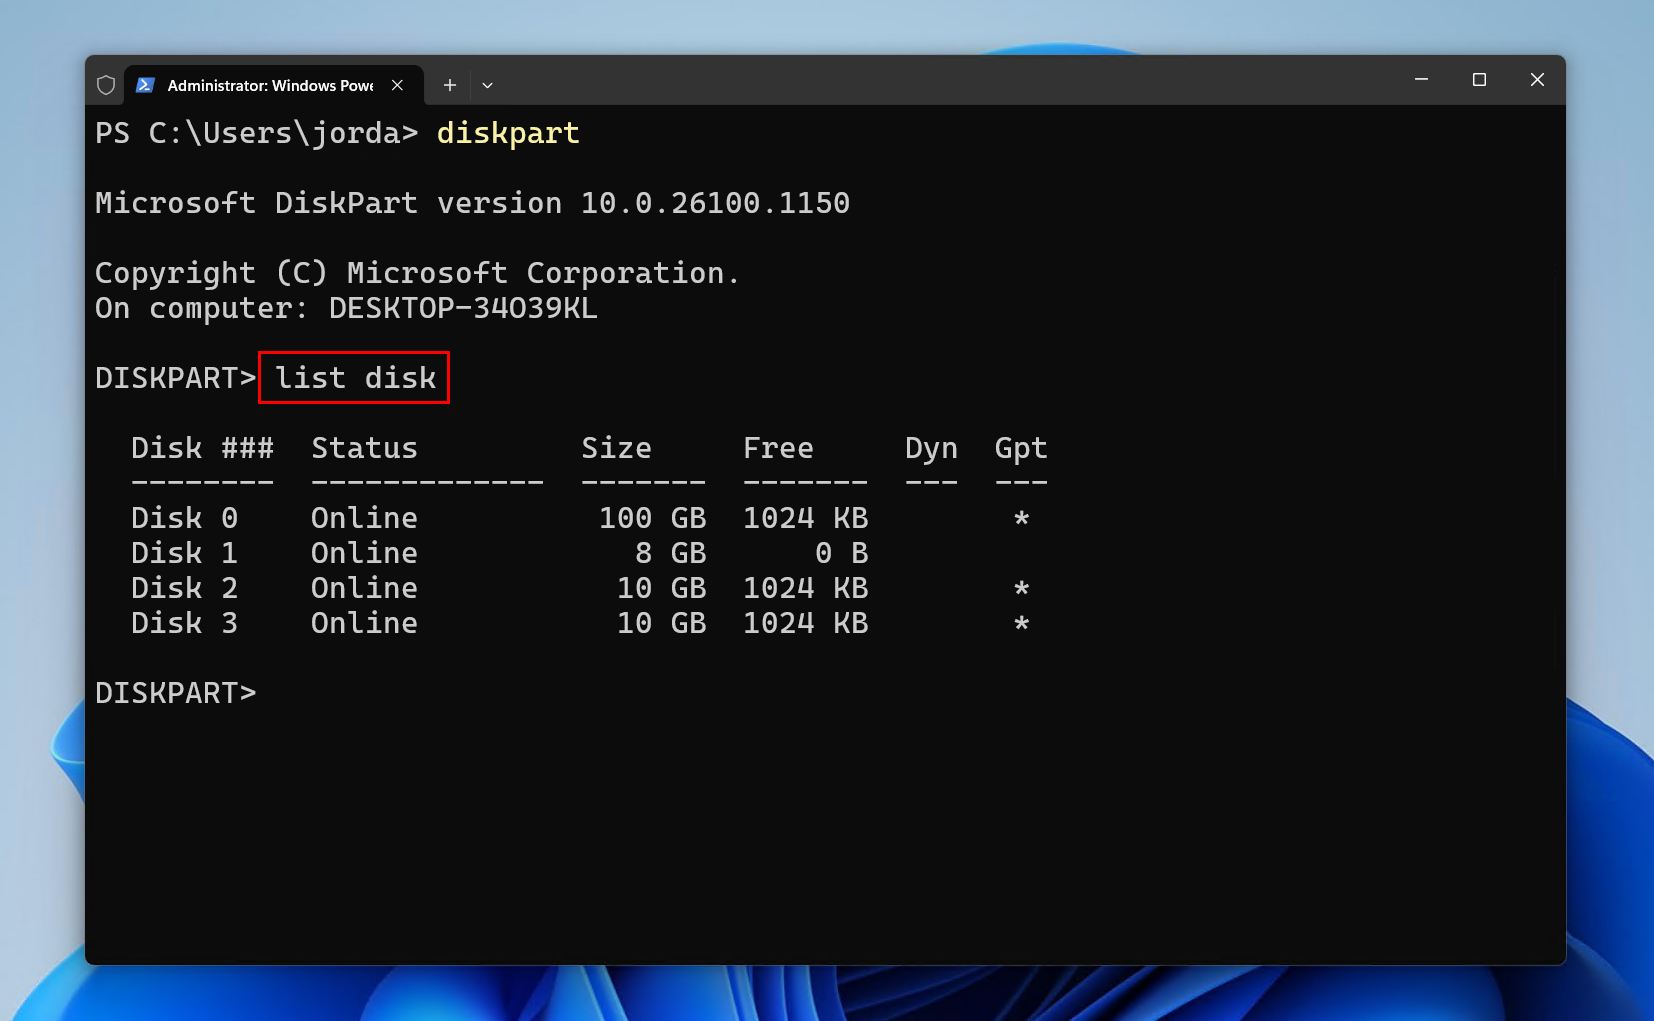
- Type
select disk *. Replace * with your disk number. Press Enter.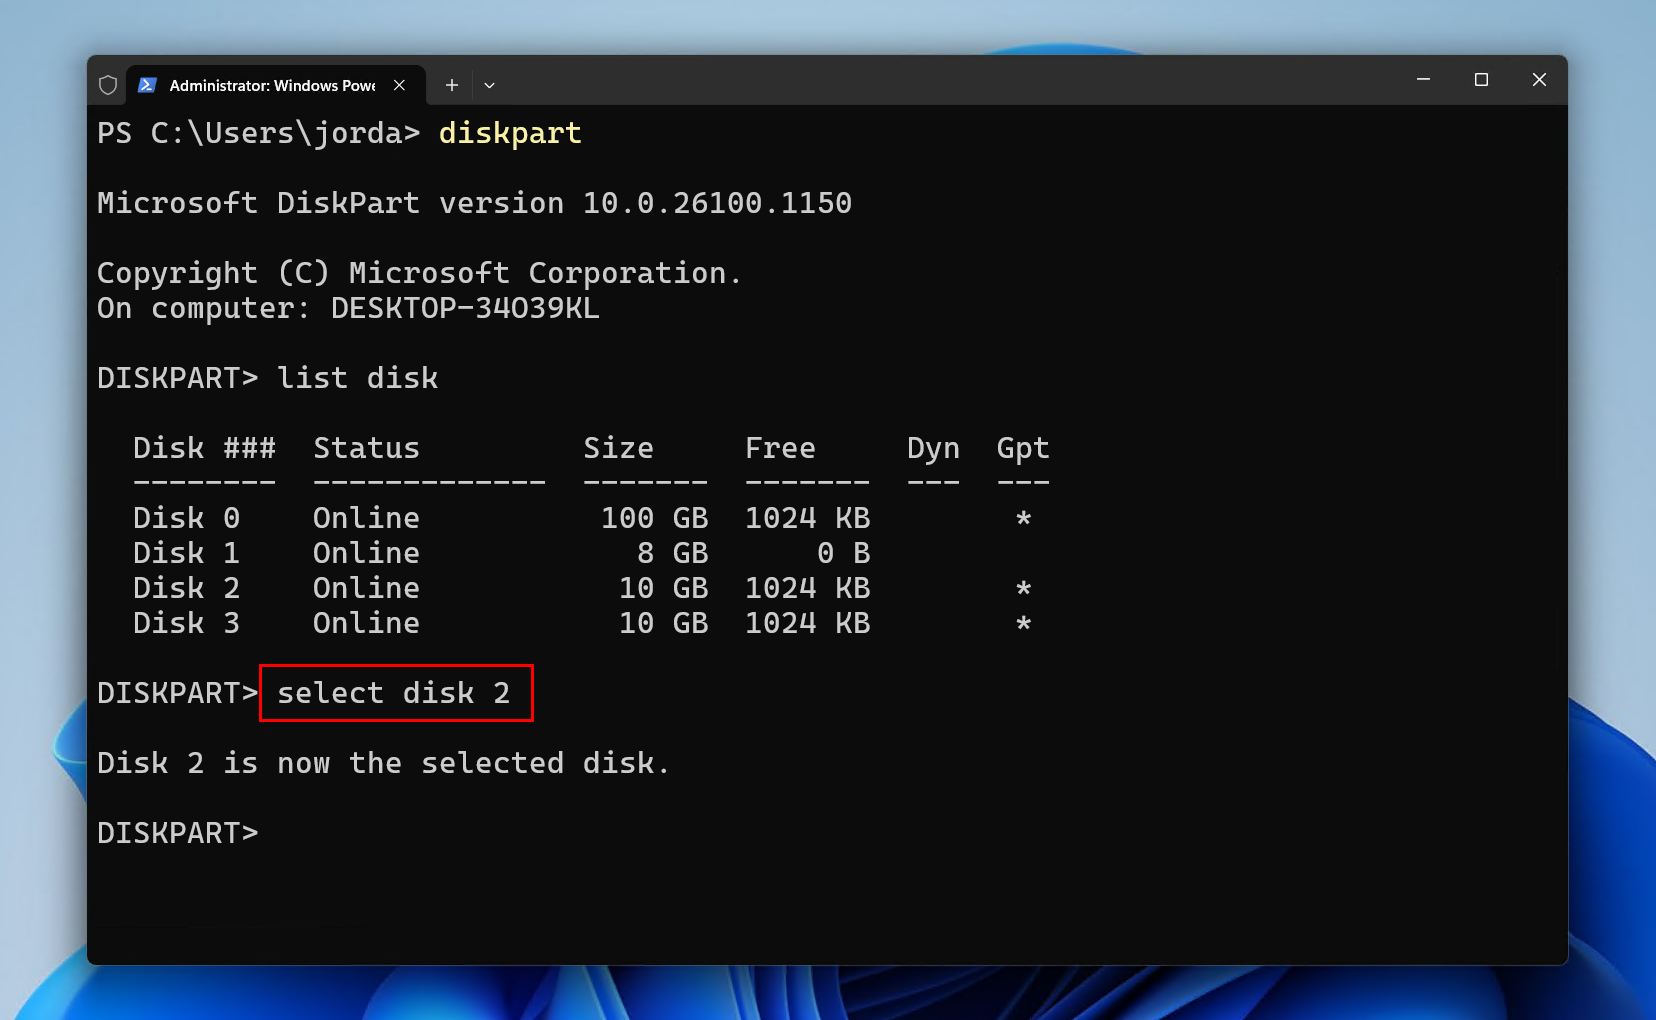
- Type
cleanand press Enter.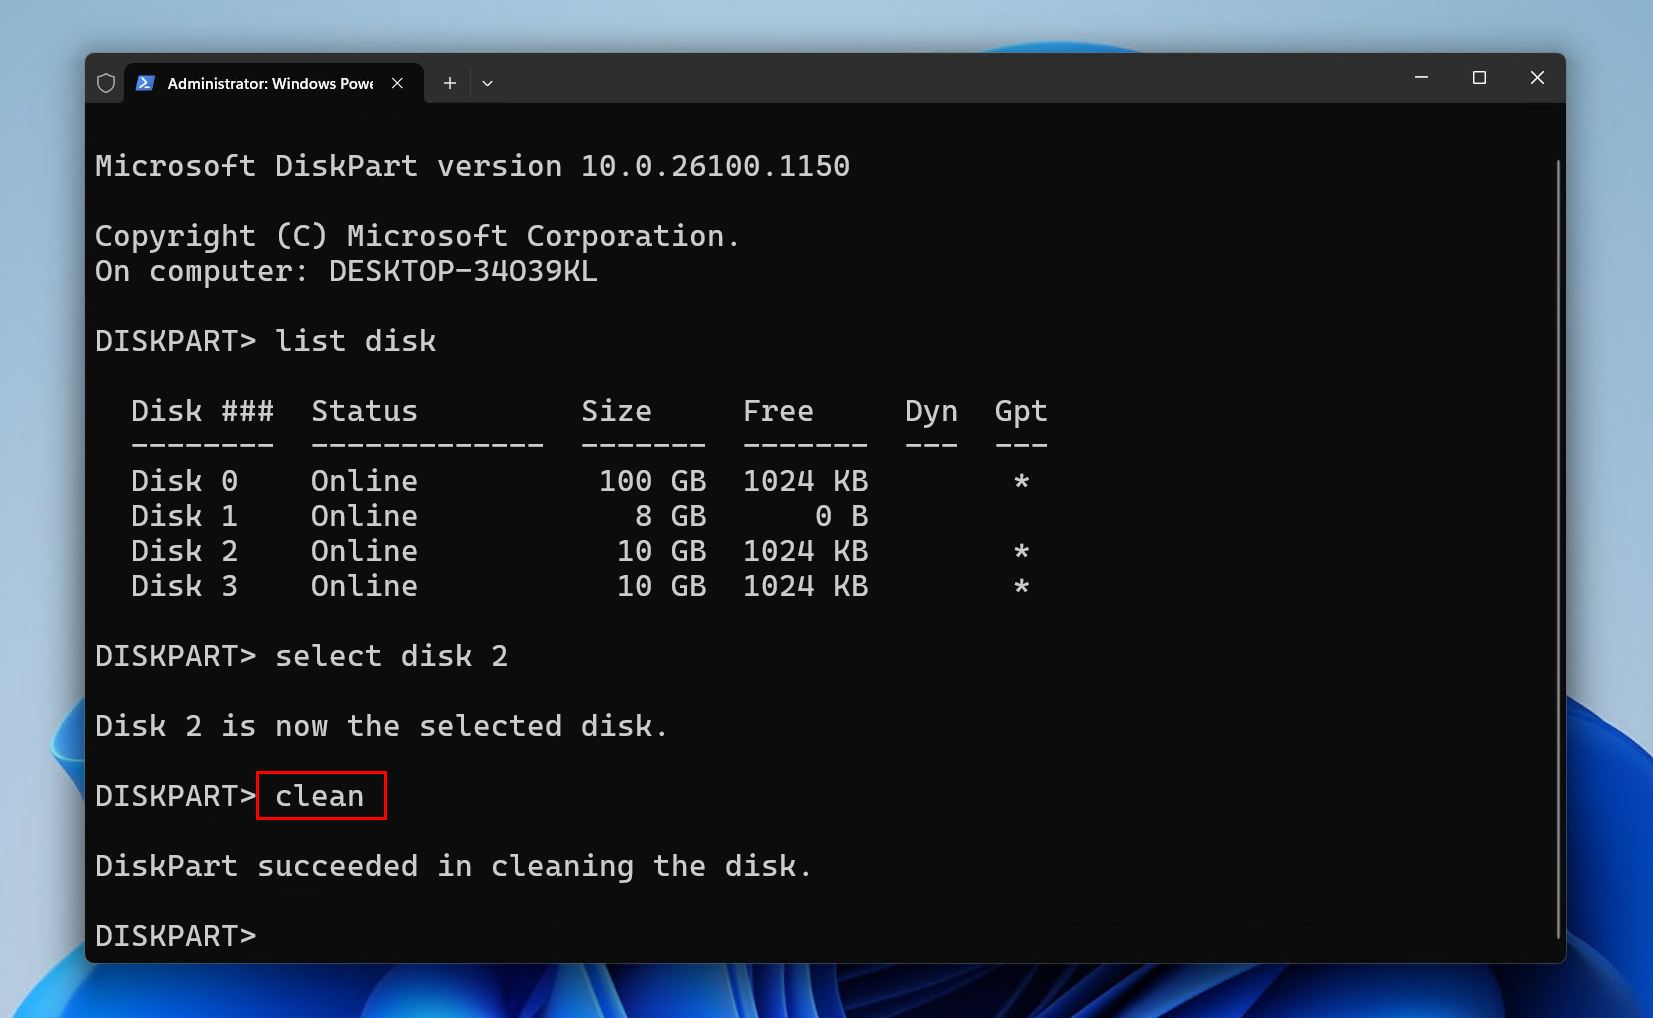
- Type
create partition primaryand press Enter.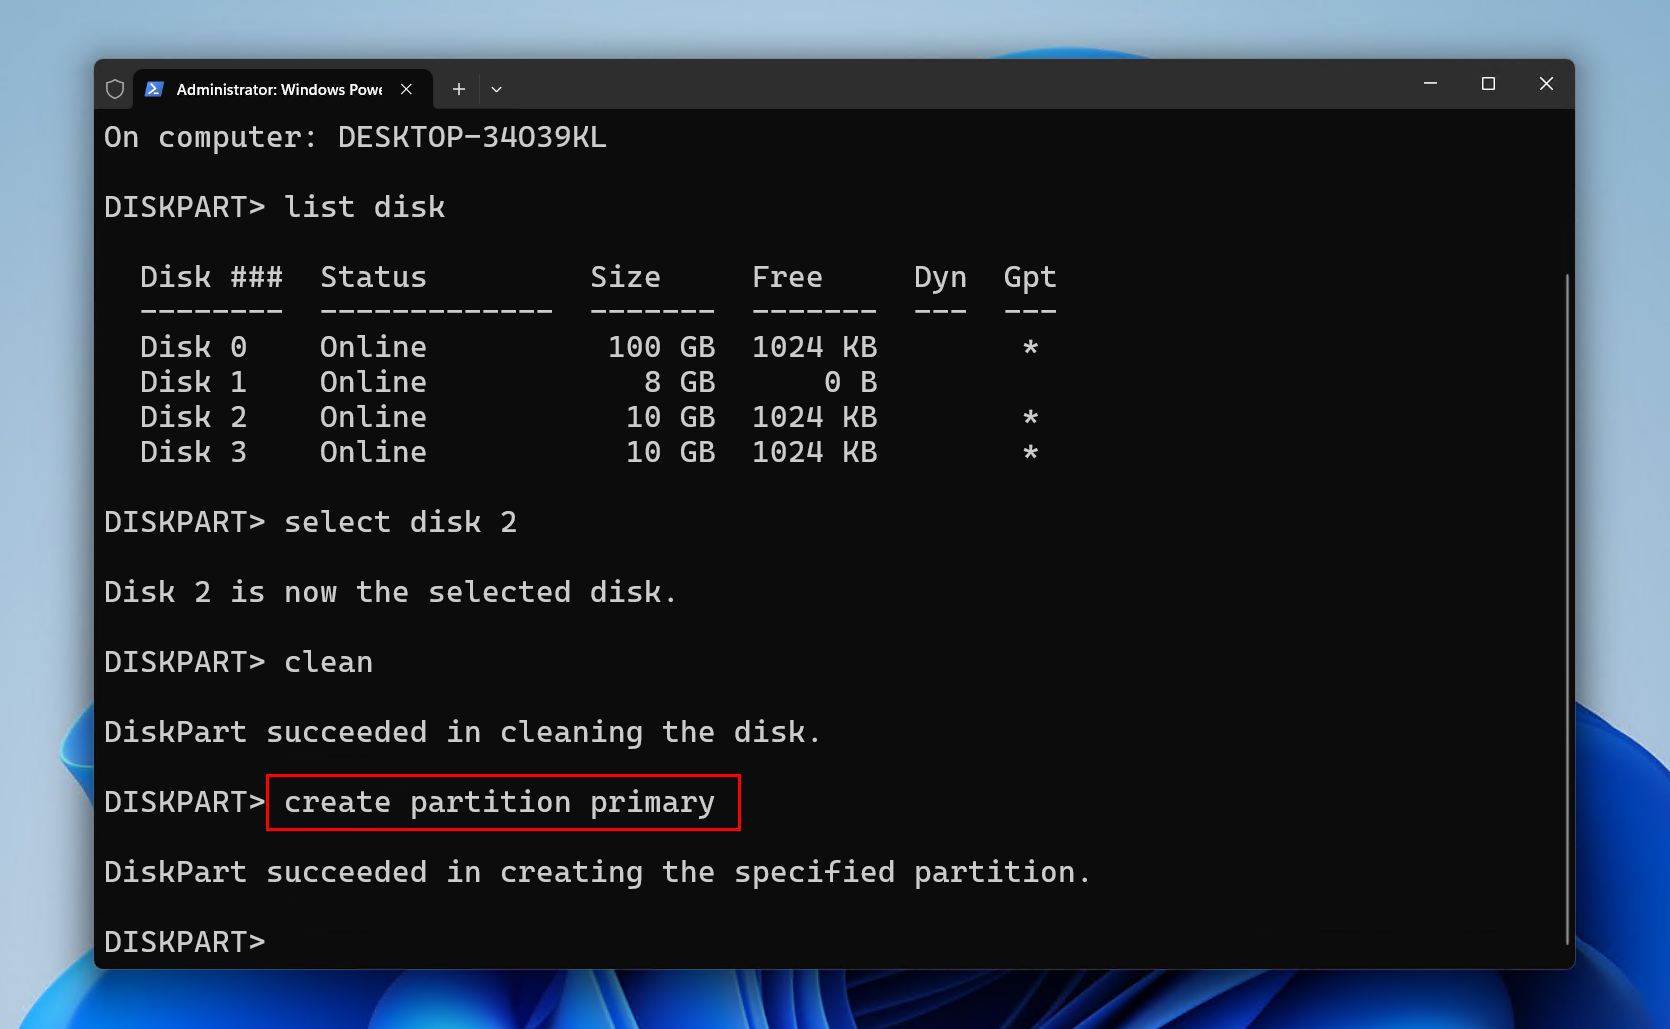
- Type
format fs=FAT32quick and press Enter.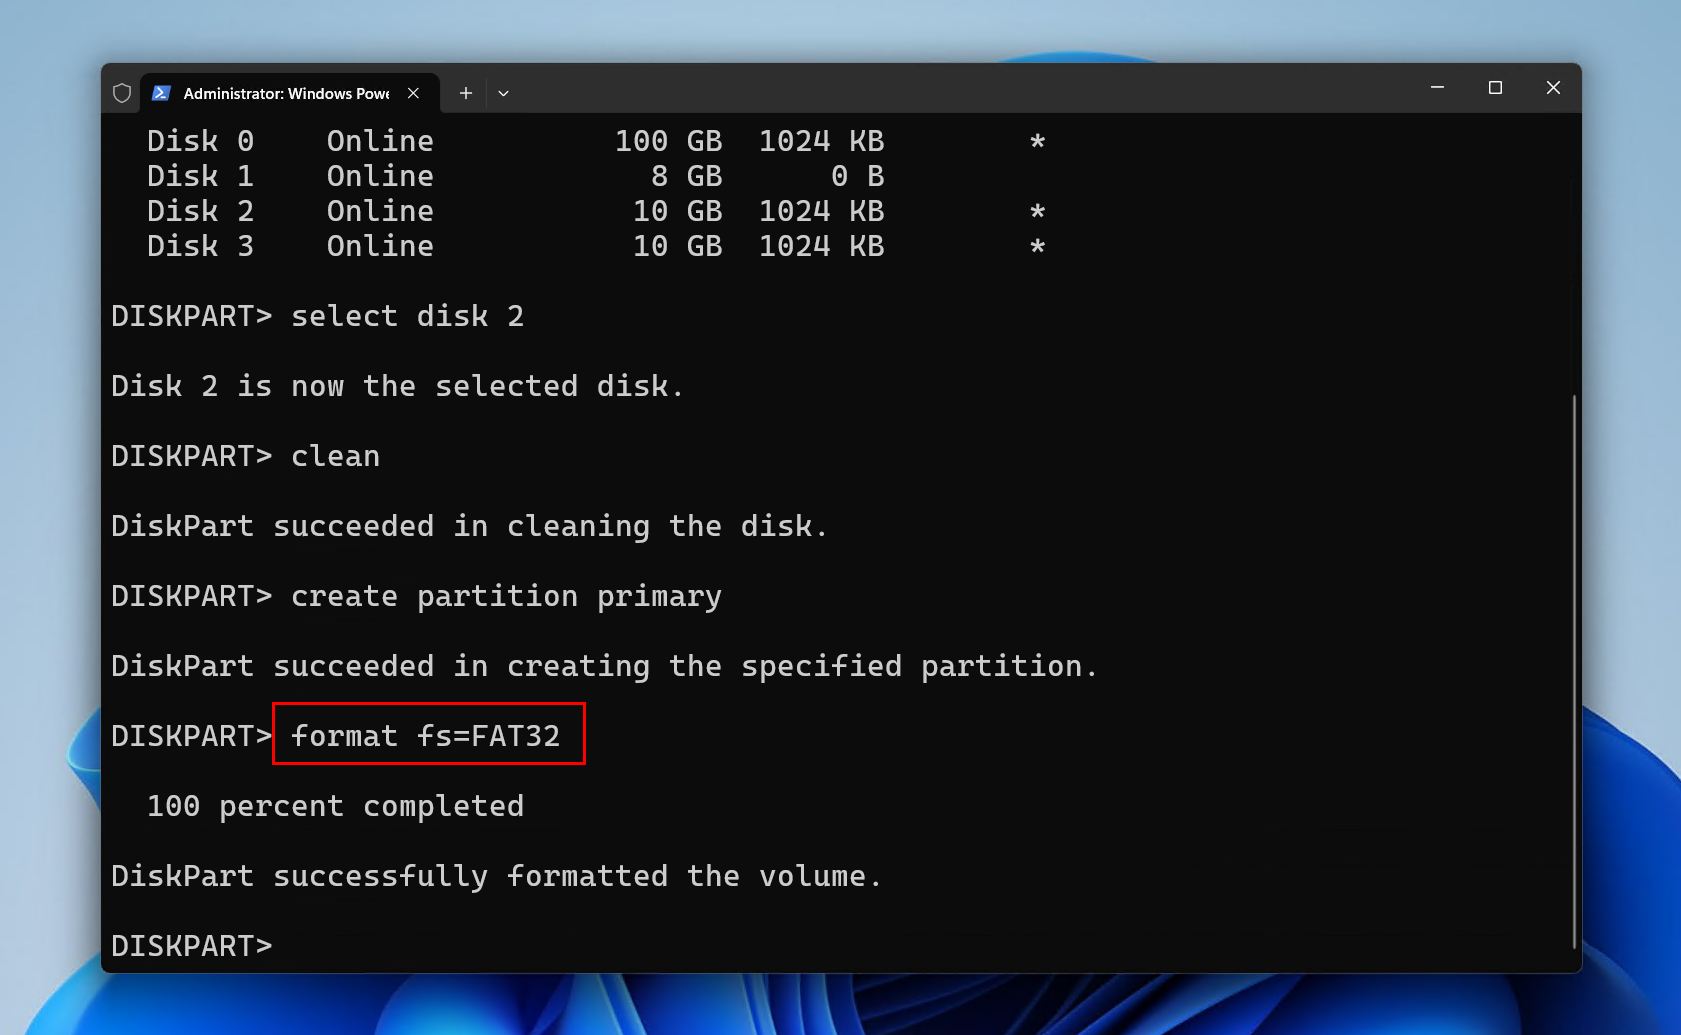
- Type
assignand press Enter.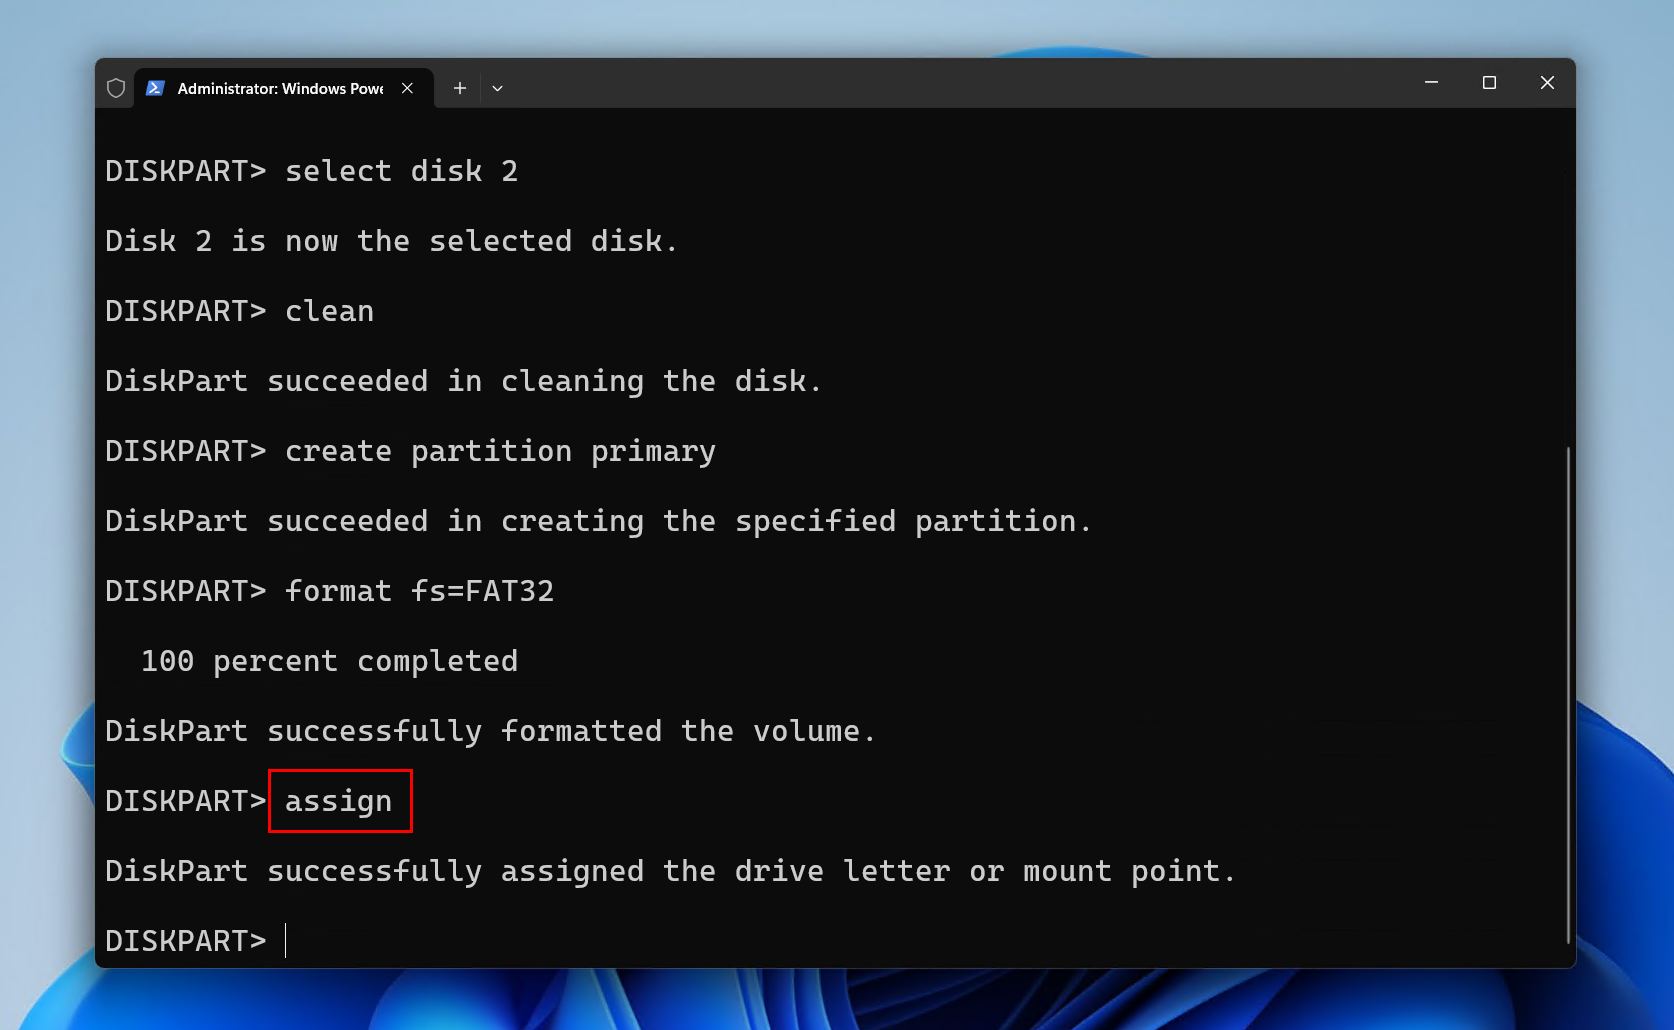
Trouble Formatting Your Flash Drive?
Tried all of the methods in this guide and still unable to format your flash drive? You’re not the first, and this is likely indicative of more severe USB drive issues. It’s not uncommon for Windows to throw an error when trying to format a problematic drive, even with multiple different tools. Even though you may know how to format a pendrive without losing data, formatting still usually fails when:
- The drive is write-protected. While write-protected, you won’t be able to format the USB drive. If it’s software-related, you will need to select the drive in DiskPart and run attributes disk clear readonly. You can also do this in Disk Drill by right-clicking the drive and clicking Remount volume in read/write mode. Some rare USB drives even have a physical write-protection switch, which you can flip to the “Off” position to allow formatting.
- There’s a physical issue. Worn-out NAND flash cells, a failing or damaged controller, loose or bent connectors, and PCB damage are just some of the physical issues that could be impacting your USB flash drive. These problems are more extreme, and specific steps are required to recover data from a broken USB flash drive.
- Firmware-level issues prevent formatting. If the flash drive’s internal firmware is corrupted, the controller may report the incorrect capacity, lock the drive into read-only mode, or fail during low-level operations like formatting. Sometimes these issues are only resolved through your flash drive manufacturer’s repair utilities.
You may have a better shot of formatting with third-party tools instead, as they can sometimes be more aggressive in forcing the format. The HP USB Disk Storage Format Tool, for example, is a very simple tool that works well on older, more stubborn drives. And as we mentioned above, it’s worth checking your manufacturer’s support site for dedicated tools. Some examples include SanDisk’s RescuePRO Deluxe, PNY USB Flash Driver Format Tool (Ufix), and Transcend JetFlash Online Recovery. It is possible that the USB drive is simply too far gone. The drive may be physically damaged, or nearing the end of its read/write limit. That said, most flash drive can be revived with the right approach. If you’re not sure whether the USB is failing or just acting up, see our guide on how to check your USB flash drive’s health.


")

