
Accidentally deleted the wrong photos from your SD card? Or formatted it in your camera before realizing it still contained photos you need? It seems there are nearly endless ways your photos can become lost or deleted. Fortunately, there are ways of getting even ‘permanently’ deleted photos back. Our team of 7 Data Recovery Experts has hand-tested the best photo recovery solutions in simulated data loss scenarios to figure out which ones have merit. Check out this guide on how to recover deleted photos from an SD card used in cameras, drones, or any other device.
You should stop using the SD card as soon as you notice some of your photos have been deleted. This reduces the chance of your deleted photos being overwritten and maximizes your chances of recovering them.
How to Recover Deleted Photos From an SD Card
We’ll show you how to recover deleted photos from SD cards using the native options available to you, and introduce you to recovery software for instances where the deleted photos are a bit more stubborn.
Recover Deleted Photos from Trash/Recycle Bin
Restoring photos from the trash is by far the most convenient method when it’s available. The trash acts as an interim where your files are sent after deletion but before they’re permanently deleted, giving you an opportunity to restore them.
On Mac/Windows
On macOS, deleted files are sent to the Bin (accessible from the Dock). Files sent to the Bin will remain there until they’re emptied. Regular files won’t be automatically deleted unless automatic deletion is manually enabled.
On Windows, when you delete photos from the SD card, they are not sent to the Recycle Bin. They get permanently deleted straight away. But don’t worry, you still have options. Windows users should jump ahead to the next solution.
Follow these steps to recover deleted images from SD card that were sent to the Recycle Bin on macOS:
- Open the Bin by clicking its icon in the Dock.
- Drag the file out of the Bin and into a different folder.
- Alternatively, select the file and click File, then Put Back.
On Android Phone
Most Android phones now come with a trash feature in their native photo apps. For instance, Samsung photos will have photos sent to the Recycle Bin in their Gallery app, where they will sit for 30 days before being deleted forever. Similarly, Pixel has Google Photos, which sends photos to the Deleted Items folder before they’re cleared after 30 days (or 60 days if backups are turned on).
We’ll show you how to restore something from Google Photos, but the process won’t be too dissimilar for other photo apps:
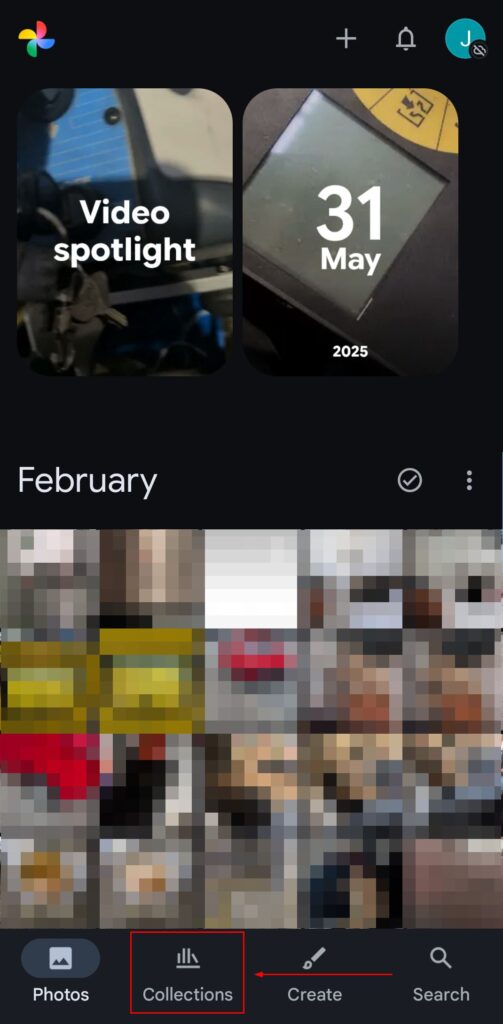
- Open the Photos app.
- Go to Collections.
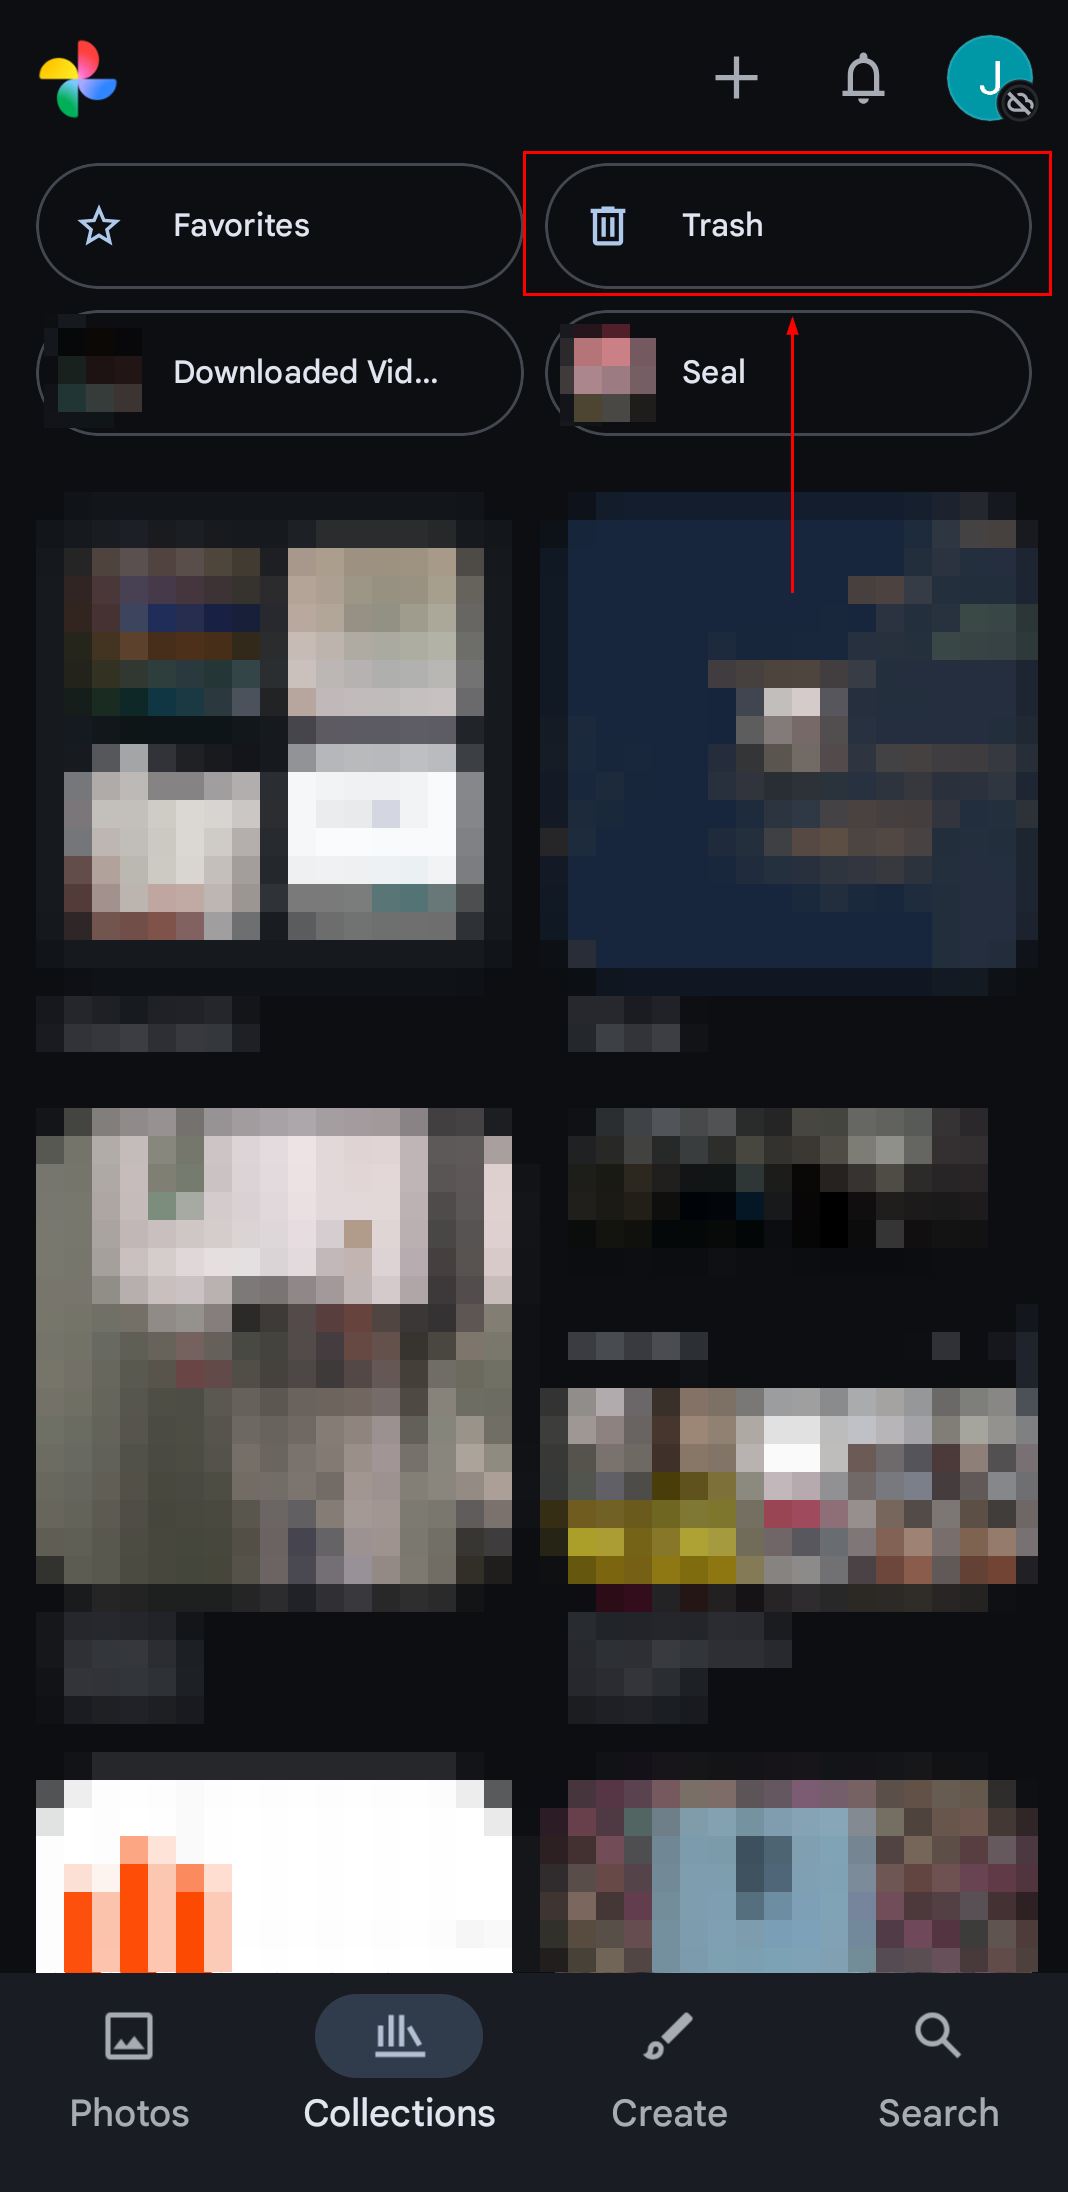
- Access the Trash folder.
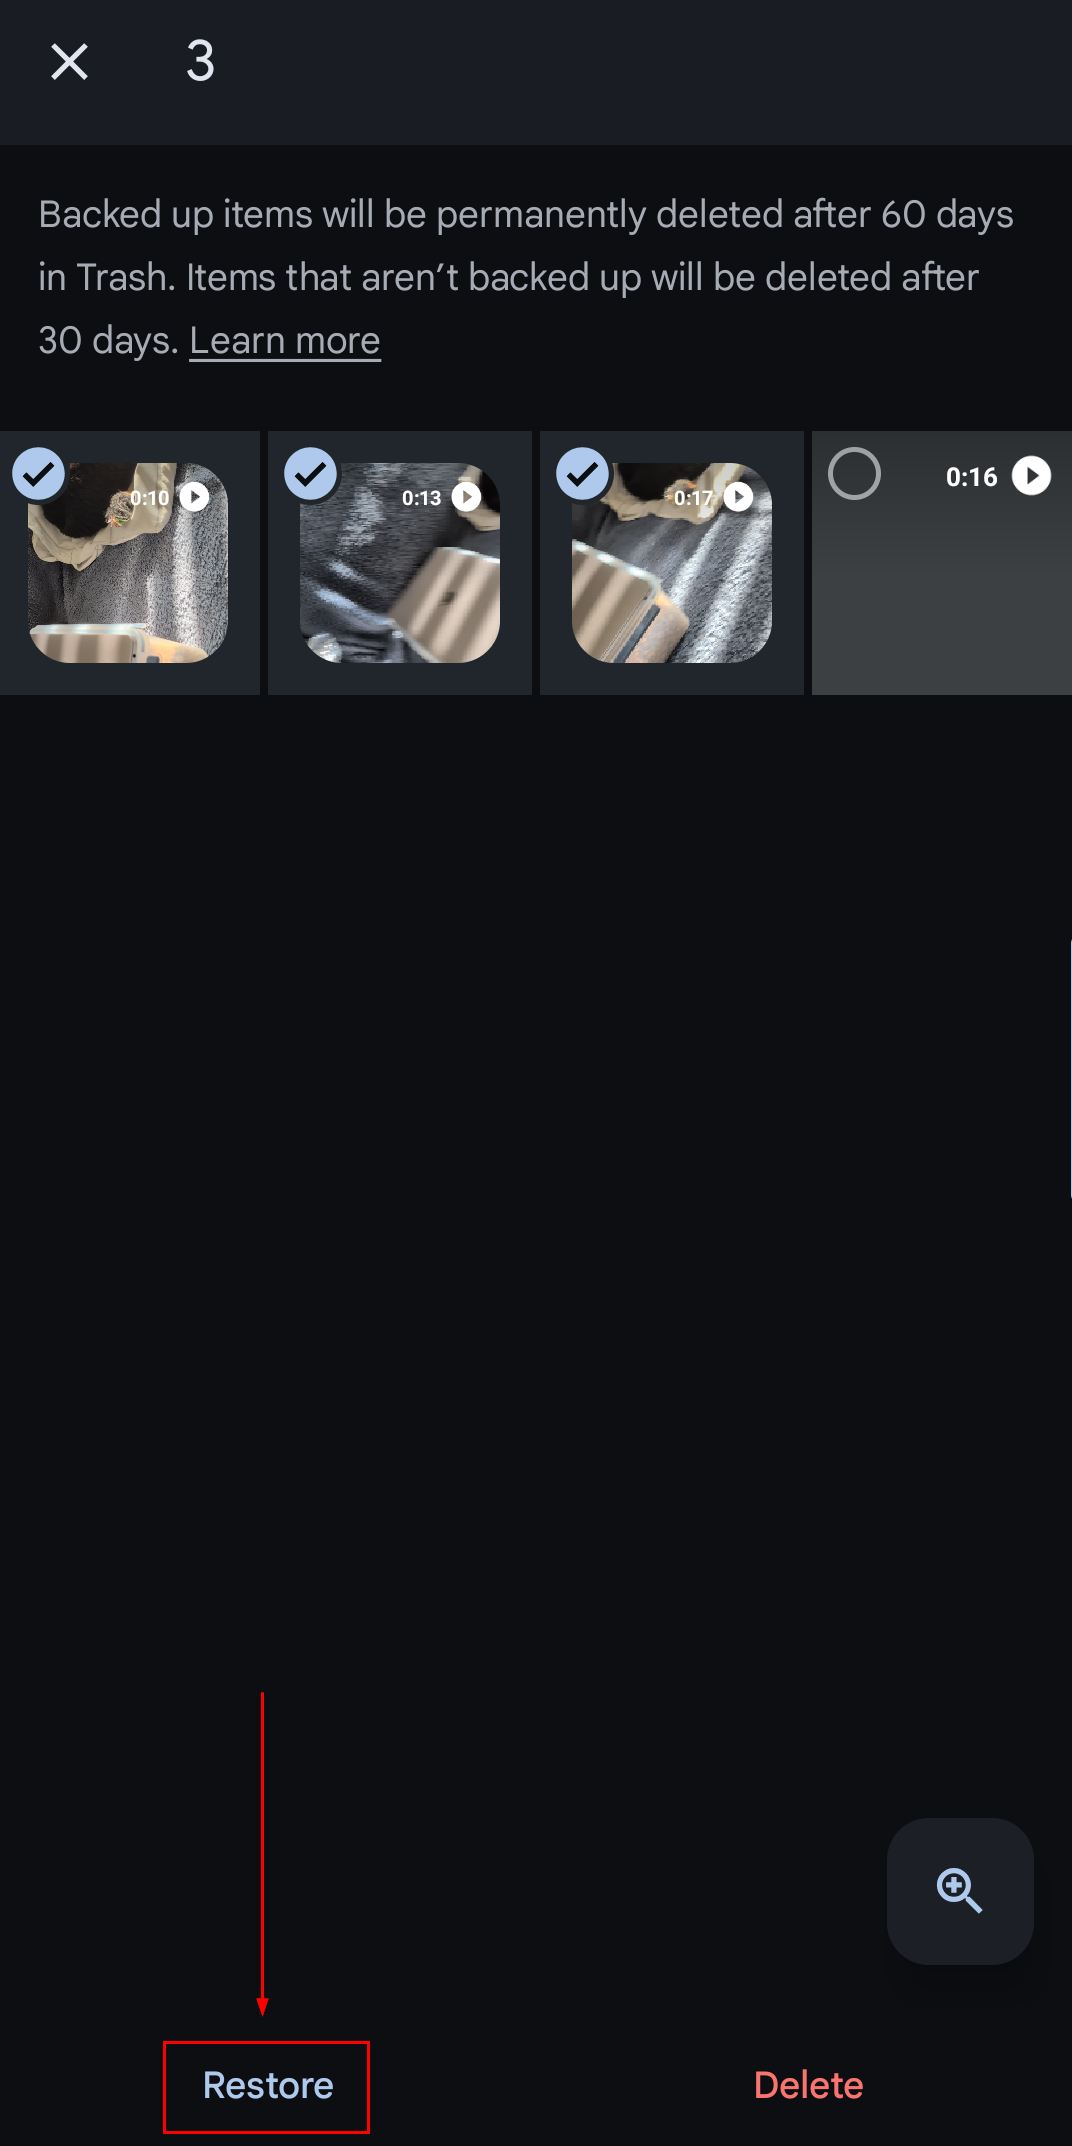
- Select the photos you want, then click Restore.
Use SD Card Data Recovery Software
When a photo is deleted, the actual photo isn’t deleted right away. Instead, only the reference to the file is deleted. You have the opportunity to restore the photo using data recovery software, at least until new data is written to that same physical location. Data recovery software uses a mix of file system records and file carving to find and recover files that haven’t been overwritten.
Once a deleted photo has been overwritten, there is no chance of recovery. This is why it’s important to avoid using the card after data loss is identified. Regardless, it’s still worth scanning the SD card to see what can be recovered.
On Mac/Windows
Disk Drill is our first pick as the best SD card recovery software for restoring deleted photos. We regard it highly as it’s not only incredibly easy to use, but its mixture of metadata and signature-based recovery algorithms makes it suitable even for more complex data loss scenarios, like when you need to recover data from a corrupted SD card on Mac, or restore data from a RAW SD card that’s without a usable file system. Plus, the file-by-file preview is convenient for easily flicking through file previews, something we covered in our Disk Drill review.
Here’s how to recover deleted photos from an SD card with a computer:
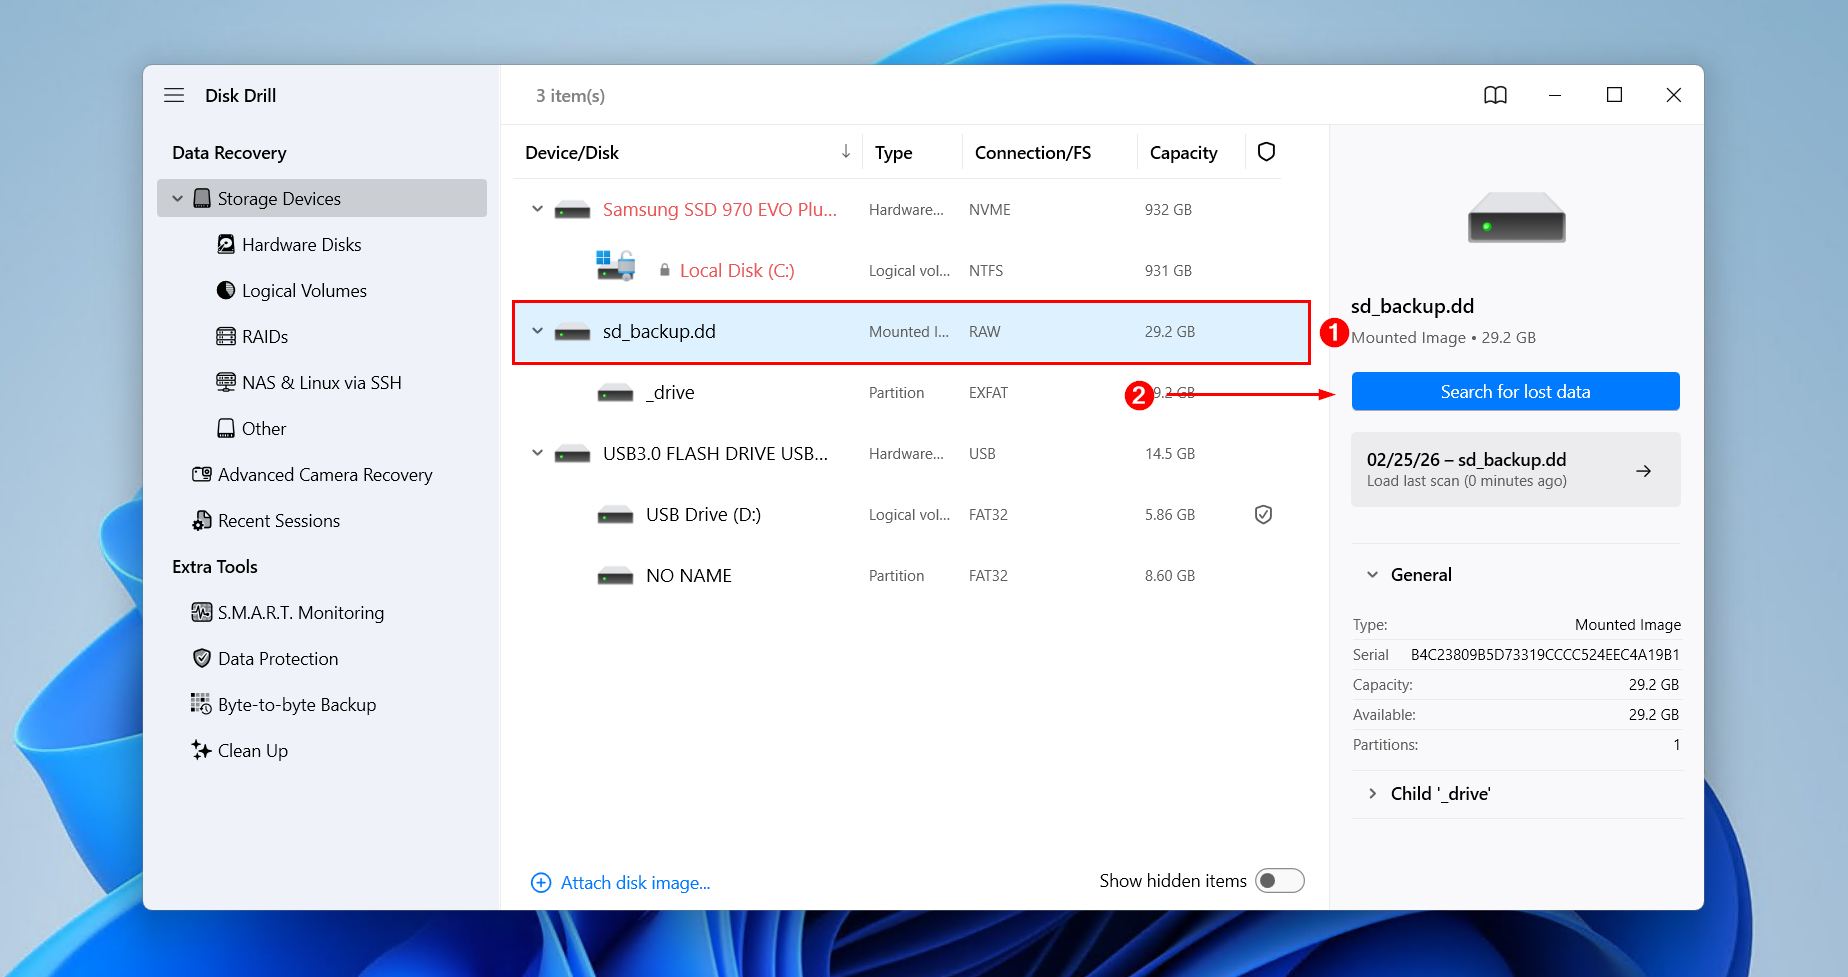
- Download, install, and open Disk Drill.
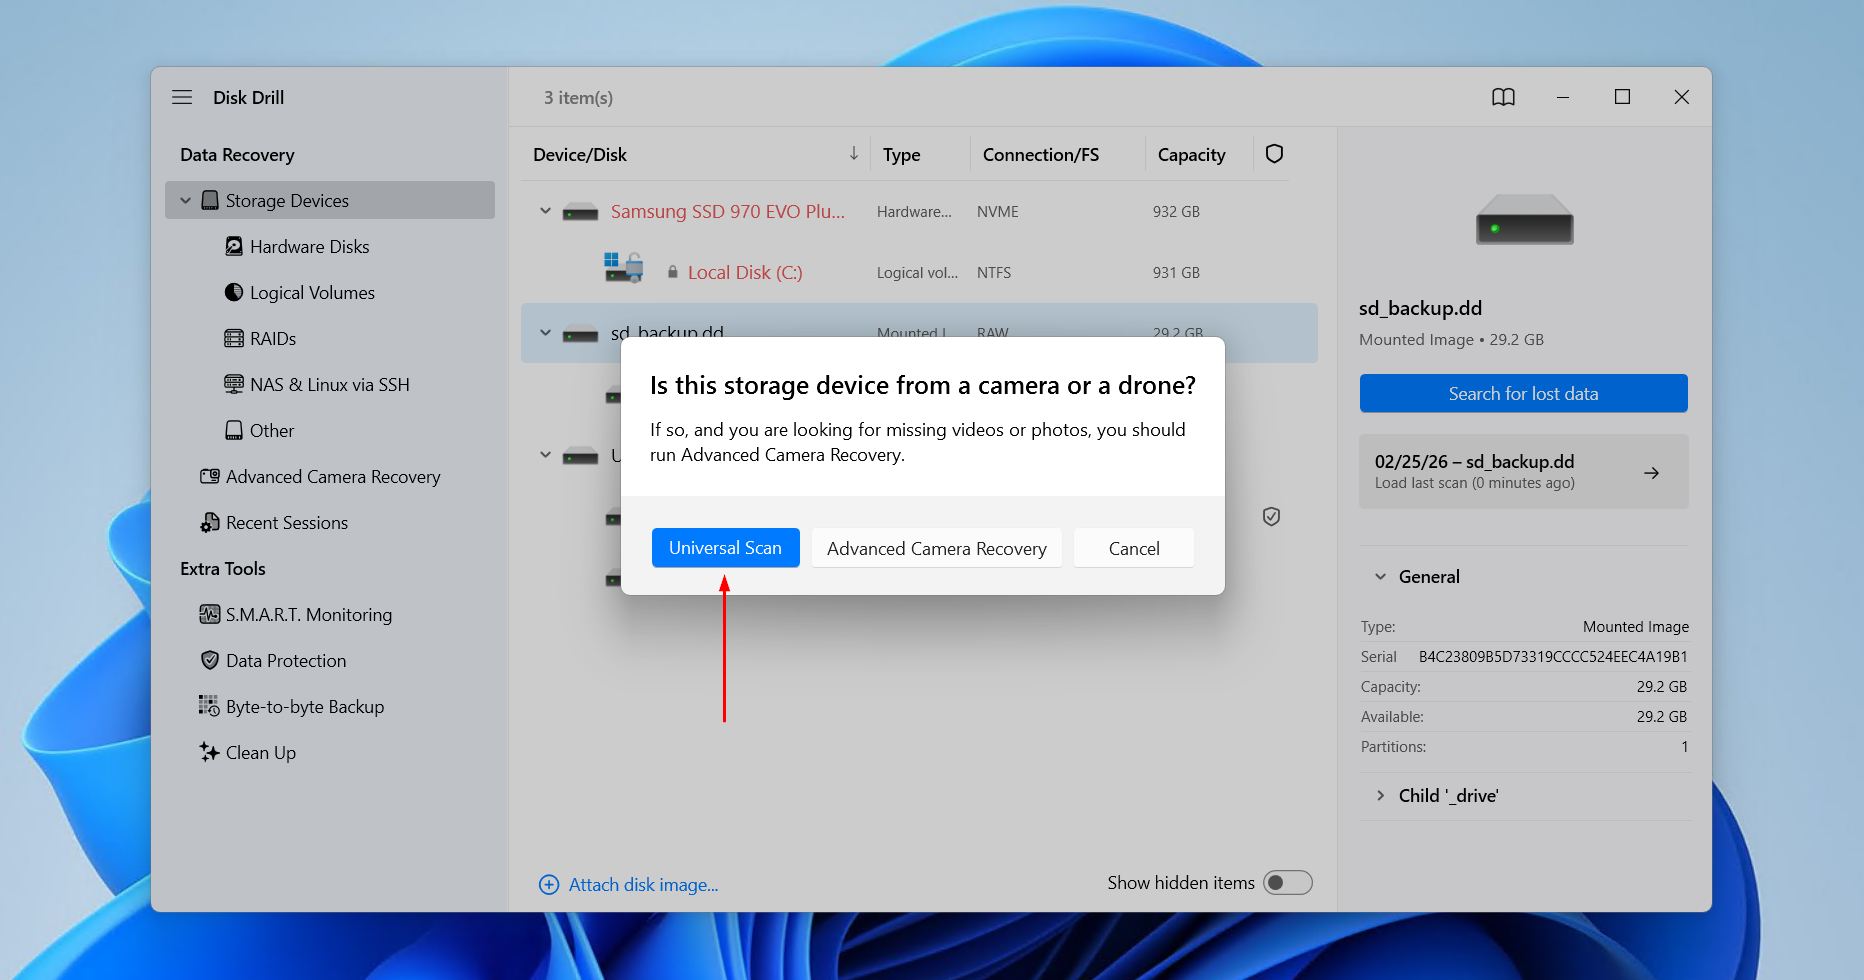
- Select your SD card from the list of devices, then click Search for lost data.
- Click Universal Scan for a general, all-encompassing search of all files. Advanced Camera Recovery is exclusively for recovering fragmented video files.
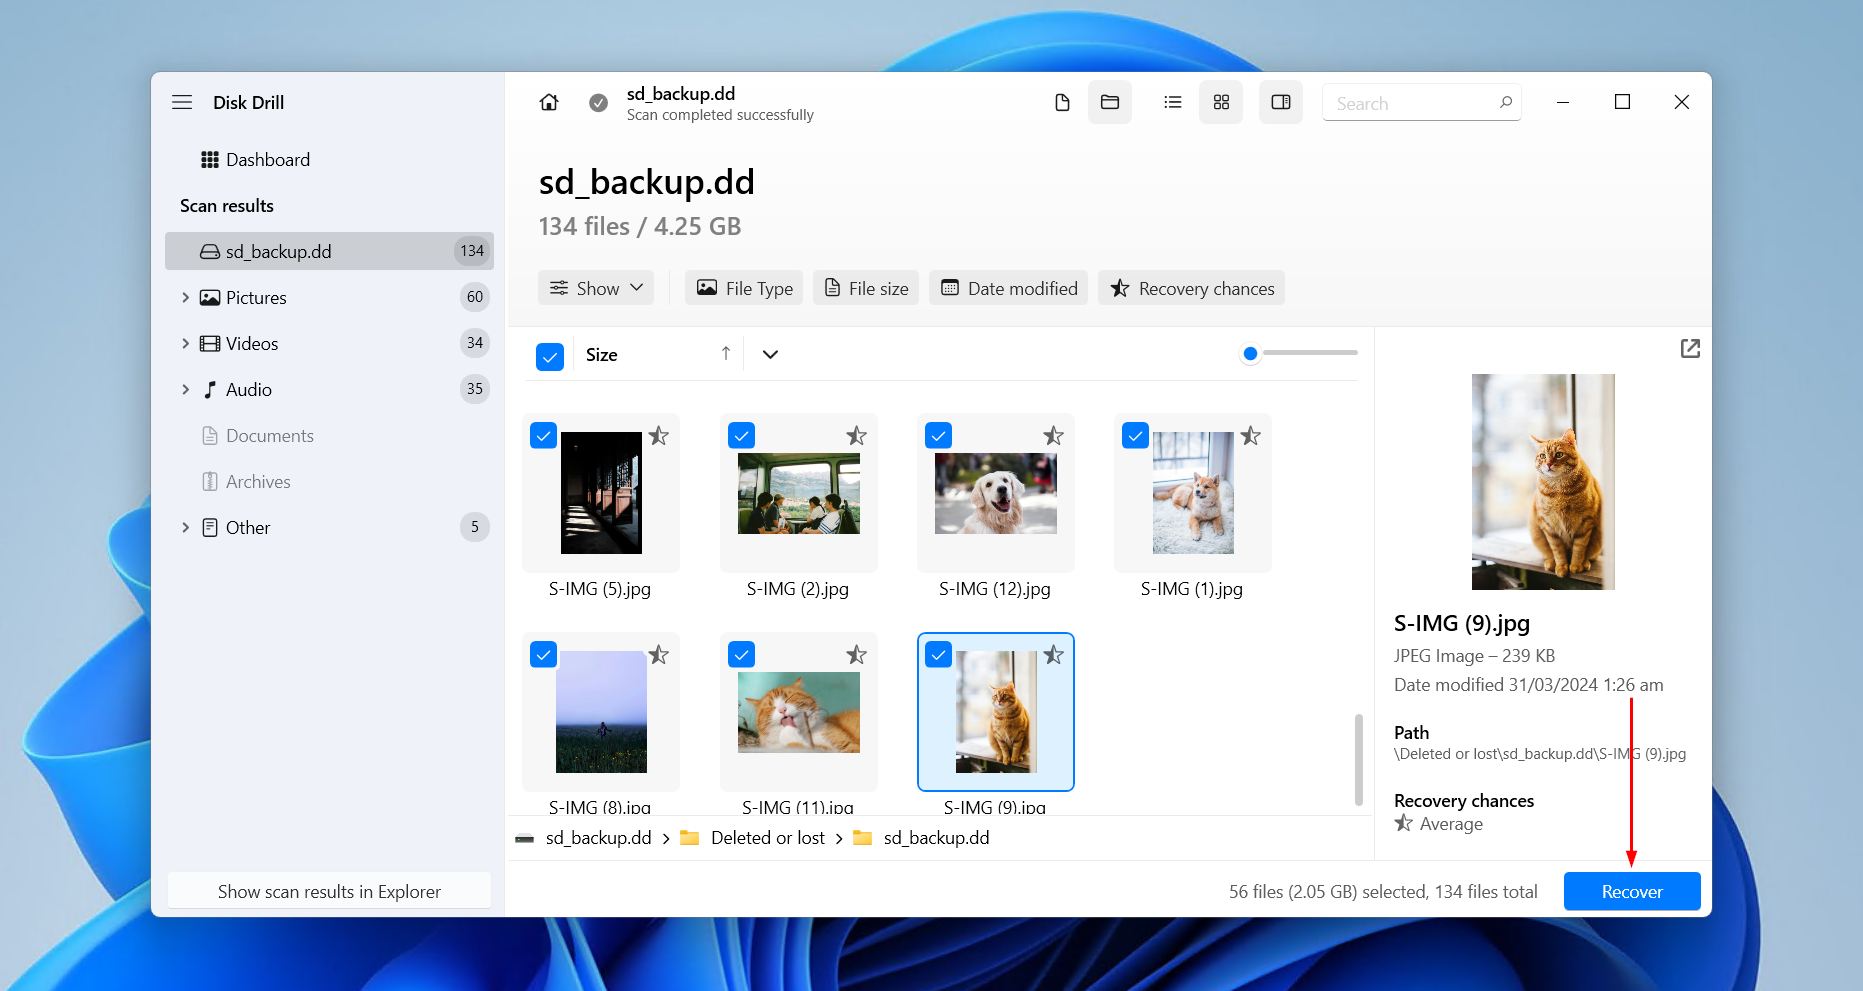
- Click Review found items to explore what Disk Drill has found. You can do this while the scan progresses, but it’s best to wait until it’s finished to see everything.

- Preview and select the photos you wish to recover. You can filter the results to only show images by clicking the Pictures open in the left pane, and quickly scroll file previews by switching to the Icons view at the top. When ready, click Recover.
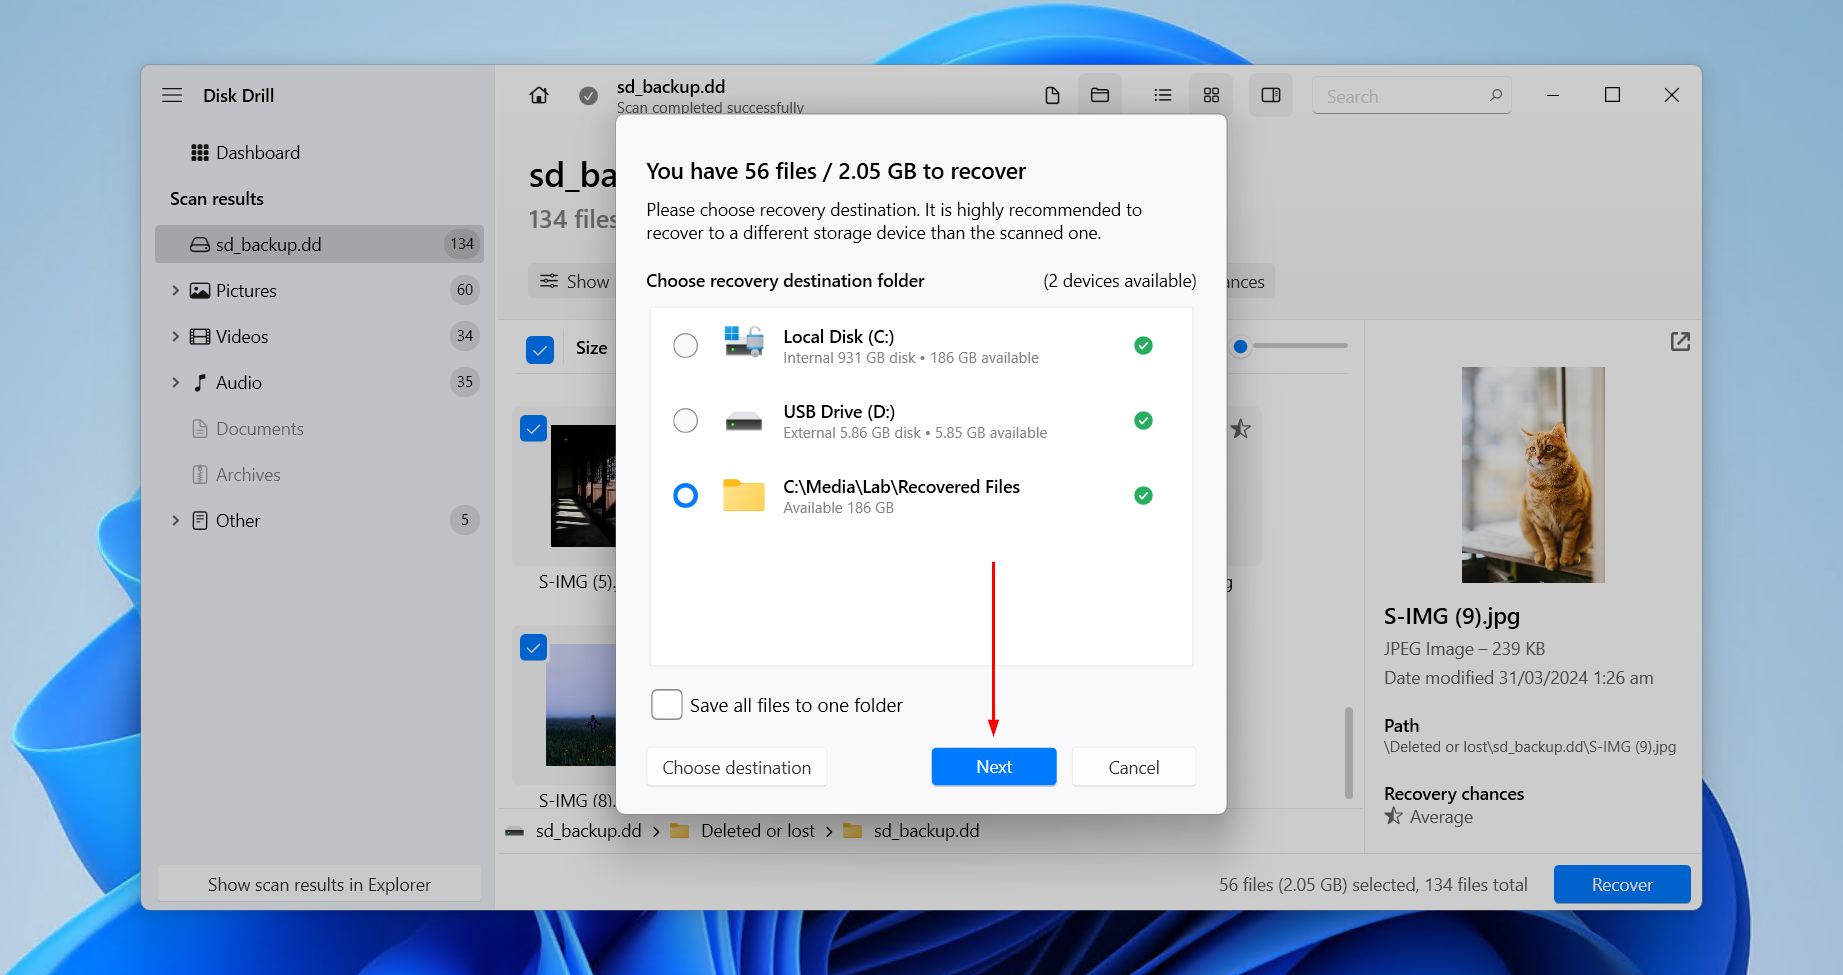
- Choose where to store the recovered photos. Don’t choose a location on the SD card you’re recovering these photos from, as it risks corrupting the very data you’re trying to recover (you can move them back after recovery). To finish photo recovery, click Next.
You can perform unlimited scans and preview as much data as you want with Disk Drill. It also lets you recover up to 100 MB for free on Windows, which is enough to try the software and confirm it actually works.
Disk Drill for macOS can actually also be used to recover deleted photos from Android SD cards by connecting the Android device via cable. However, this requires root access to the device first. Instead, it’s generally best to remove the SD card and connect it to your computer using a card reader, except in cases where the card is used as an extension of internal storage.
On Android Phone
While we recommend scanning the SD card using a computer, we understand this isn’t always possible. Sometimes you need to urgently recover photos and don’t have access to a computer. Thankfully, there are data recovery options for Android, too. Again, however, this will require you have root access to the device if you want to recover anything more than small, thumbnail-sized versions of your photos.
This can be achieved with DiskDigger, a recovery app you can install directly to your device that we’ve also mentioned in our list of the best Android data recovery apps. We’ll explain how to retrieve deleted photos from an SD card using DiskDigger:
- Install DiskDigger for Android on your device.
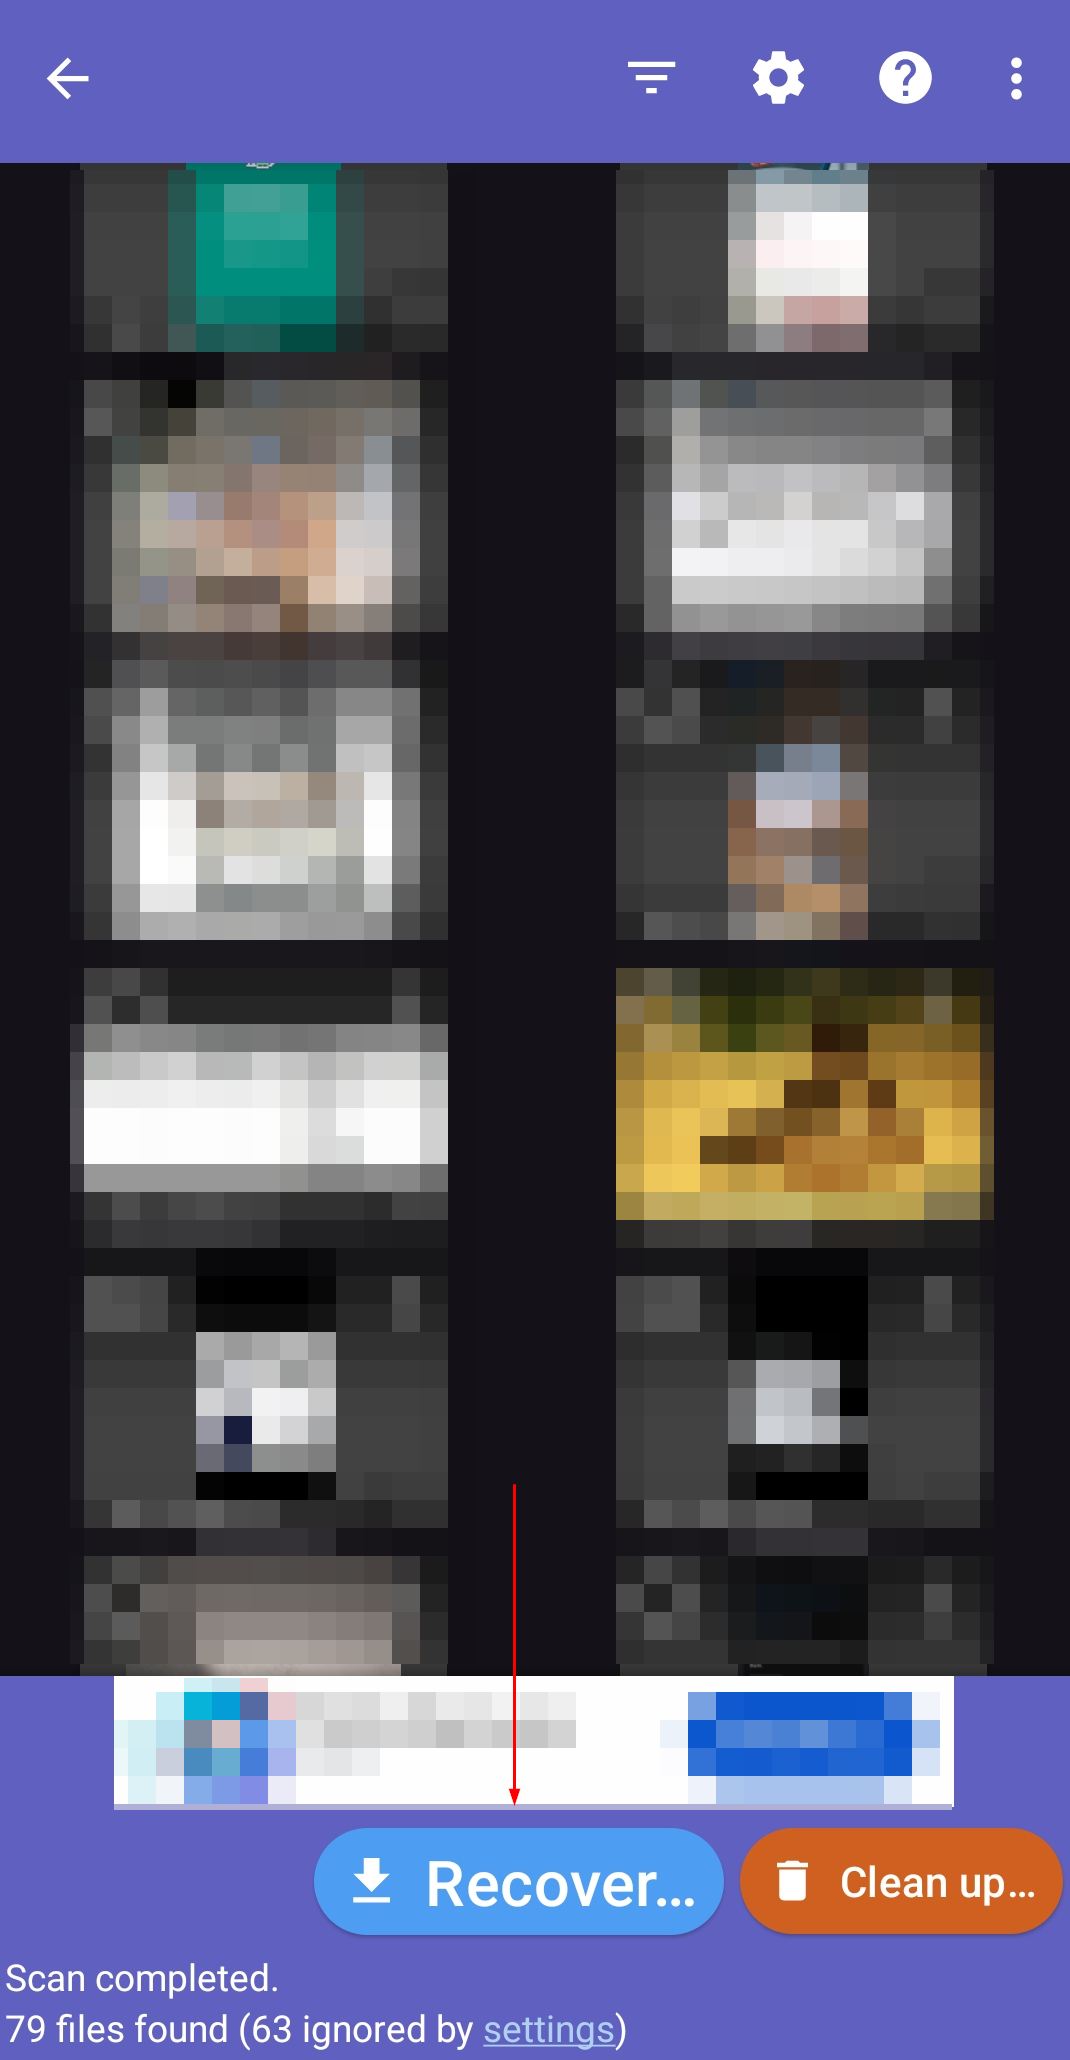
- Choose Search for lost photos.

- Select the photos you want to recover, then choose Recover.
- Choose where you want to store the recovered photos.

If you find DIY photo recovery too difficult, or too risky due to visible signs of physical damage to the card, it’s best to consult a professional data recovery service instead. This is the most expensive recovery option, but it’s also the one that offers the best odds of getting your data back.
Conclusion
In most real-world data loss cases you encounter, DIY recovery with software like Disk Drill is the most universal and reliable method, assuming the photos can’t easily be restored from the Trash. A full SD card scan covers your typical accidental deletion in addition to other cases like deletion by formatting or file system corruption.
To give yourself the best chance going forward, follow these simple best practices:
- Transfer photos to your computer before deletion. Simply transferring photos from your SD card to a Windows or Mac computer before deletion affords you the option of restoring them from the Recycle Bin or Trash.
- Don’t use SD cards for long-term storage. These cards are designed for portability, not long-term retention. At every opportunity you get, back these files up to a more robust storage option, like an external hard drive.
- Implement a backup strategy. Backups are inherently difficult with portable storage like SD cards, but they’re not useless. Consider using the 3-2-1 rule: three copies of your data, on two different media types, with one storage off-site or in the cloud.
- Always safely eject SD cards. Ejecting safely stops delicate read/write operations the correct way, preventing corruption to the file system or data itself through improper removal.
A little prevention can be the difference between spending a few minutes restoring photos from a backup versus hours trying to recover them from the card directly.
Found this guide helpful? Feel free to rate the article and share your experience in the comments. If you have a unique recovery scenario you’d like help with, start a discussion in our forum to receive expert and community help.


