 Did you mistakenly delete a file from your Mac and are pretty sure that it’s gone forever? Well, you might be wrong. Even if you think that you’ve permanently deleted data on your computer, it might still be possible to bring it back.
In this article, you’ll find out how to recover permanently deleted files on a Mac and learn about the ways to increase your chances of successful data recovery.
Make Sure That Files are Deleted Permanently
Before attempting a recovery, it’s best to make sure that you actually permanently deleted the files that you are looking for and not just moved or hid them by mistake or due to a bug. Go through the checks below in order:
Option 1: Search in Finder
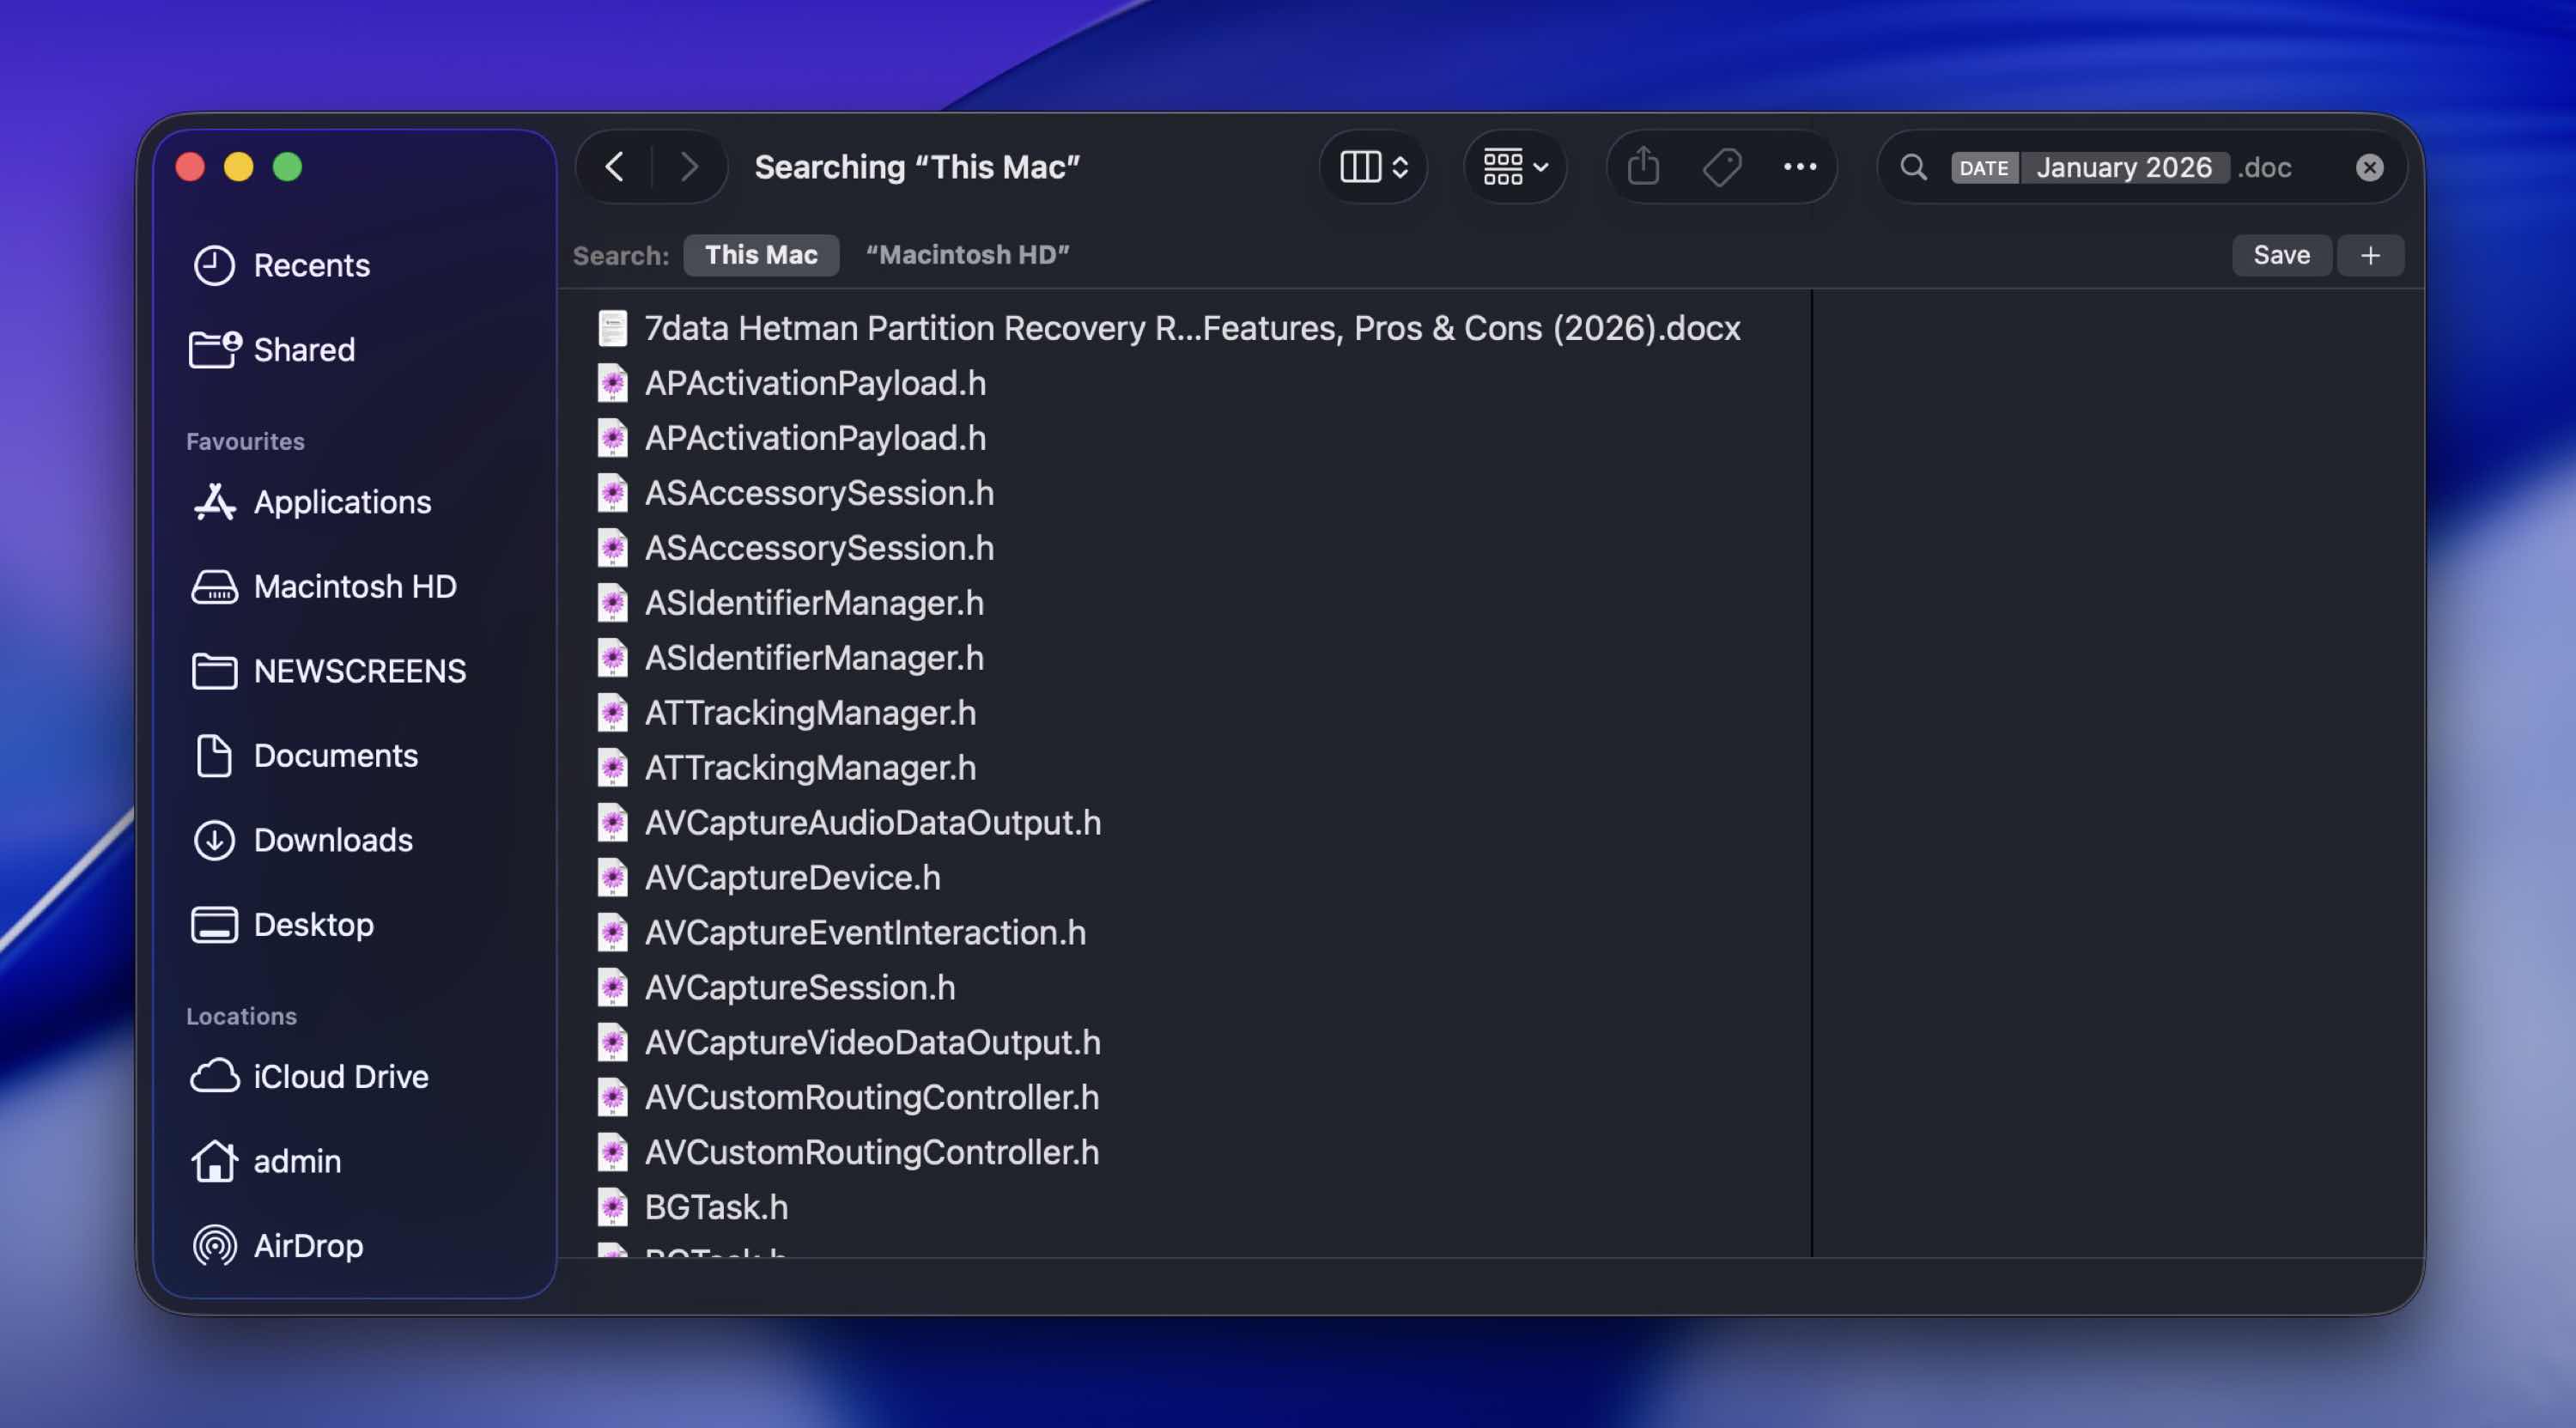
Since Finder is the native search tool on Macs, you can use it to make an attempt at locating the missing file. Here’s how to use Finder to search for a lost file on your Mac:
- Launch Finder on your MacBook (click the first icon from the left on the Dock).
- If you remember in which folder exactly the file was located, click Go from the top menu and choose Go to Folder. Then type in the folder’s name and click Go.
- To search for the file using its name, click the search icon at the top-right of the screen and type in the name. If you’re not sure about the file name, you can type its date (e.g., January 2022) or the file’s extension (e.g., .pages) in the search field to narrow down the options.
Option 2: Check Trash Bin
Yes, this one is obvious, and you’ve probably already checked.
Still, it’s worth double-checking before you move on to more advanced steps to recover deleted files Mac users typically rely on.
When you delete a file, normally it isn’t immediately erased from your drive. It simply gets moved to the Trash folder and stays there until you manually empty it.
To check:
- Click the Trash icon in the Dock.
- Look for your missing file or folder.
- If you find it, right-click it.
- Choose Put Back.
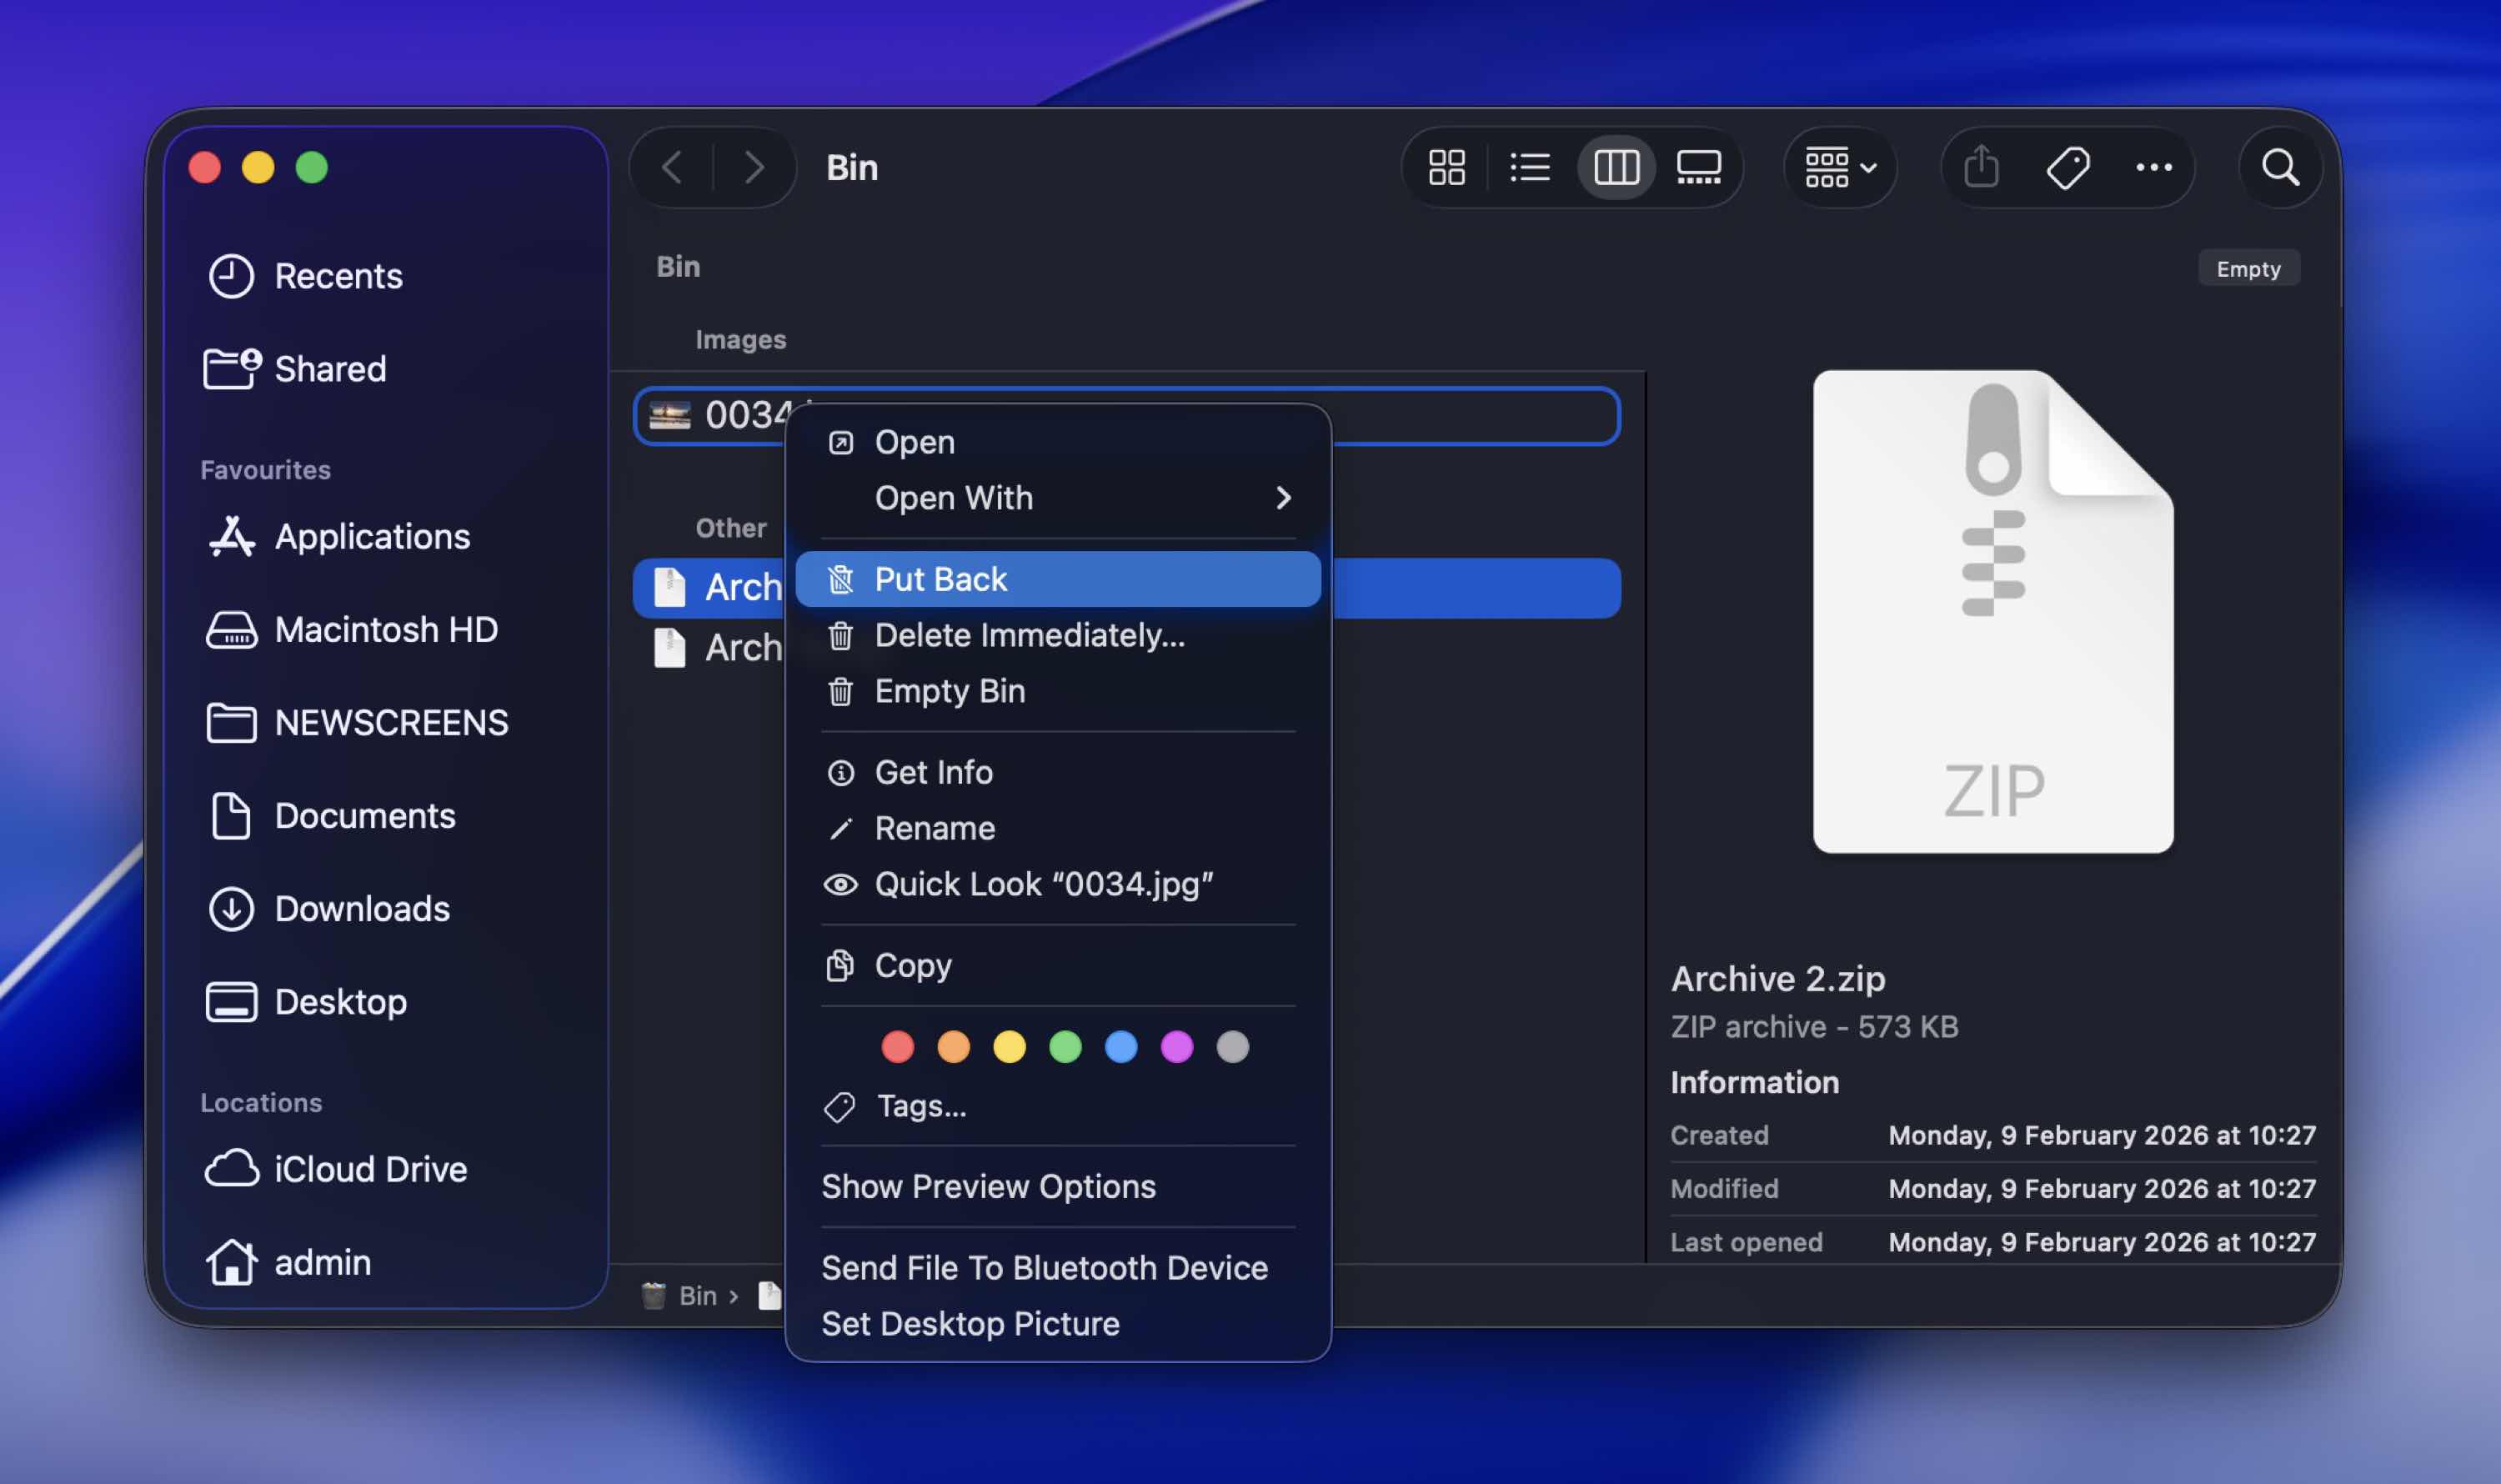
That instantly restores the file to its original location.
Option 3: Check Hidden Files
It’s possible that you’ve hidden a file on your MacBook by yourself and, because of that, are having a hard time finding it. If that’s the case, there are two ways to unhide a file on a Mac:
- By using a special key combination (simply open the folder where the missing file was located and press Command+Shift+. (period))
- With the help of a special Terminal command
If you want to permanently show the hidden files on your Mac, then you should use Terminal. Here’s how to unhide files on your computer using the Terminal app:
- Open the Terminal application (go to Launchpad and type Terminal in the search field at the top).
- Copy-paste the following command:
defaults write com.apple.Finder AppleShowAllFiles true - Press the Return key.
- Type in killall Finder and hit the Return key again.
How to Recover Permanently Deleted Files on Mac
If you’ve realized that you’ve permanently deleted the wrong folder or file by mistake, the methods described below should help you get back the deleted files on your Mac.
Method 1:Use Data Recovery Software
Probably the easiest and quickest way to recover permanently deleted files on a MacBook is with the help of a specialized data recovery tool.
Our team at 7 Data Recovery Experts has tested dozens of them over the years, and we even maintain a dedicated ranking of the best recovery apps for Mac.
For this guide, we’ll demonstrate how to recover deleted files on Mac using Disk Drill. It’s one of the most capable apps we’ve tested, and it’s also very beginner-friendly.
Here’s how to restore permanently deleted files on a Mac via Disk Drill:
- Download Disk Drill and follow the onscreen instructions to install it.
- Launch the application.
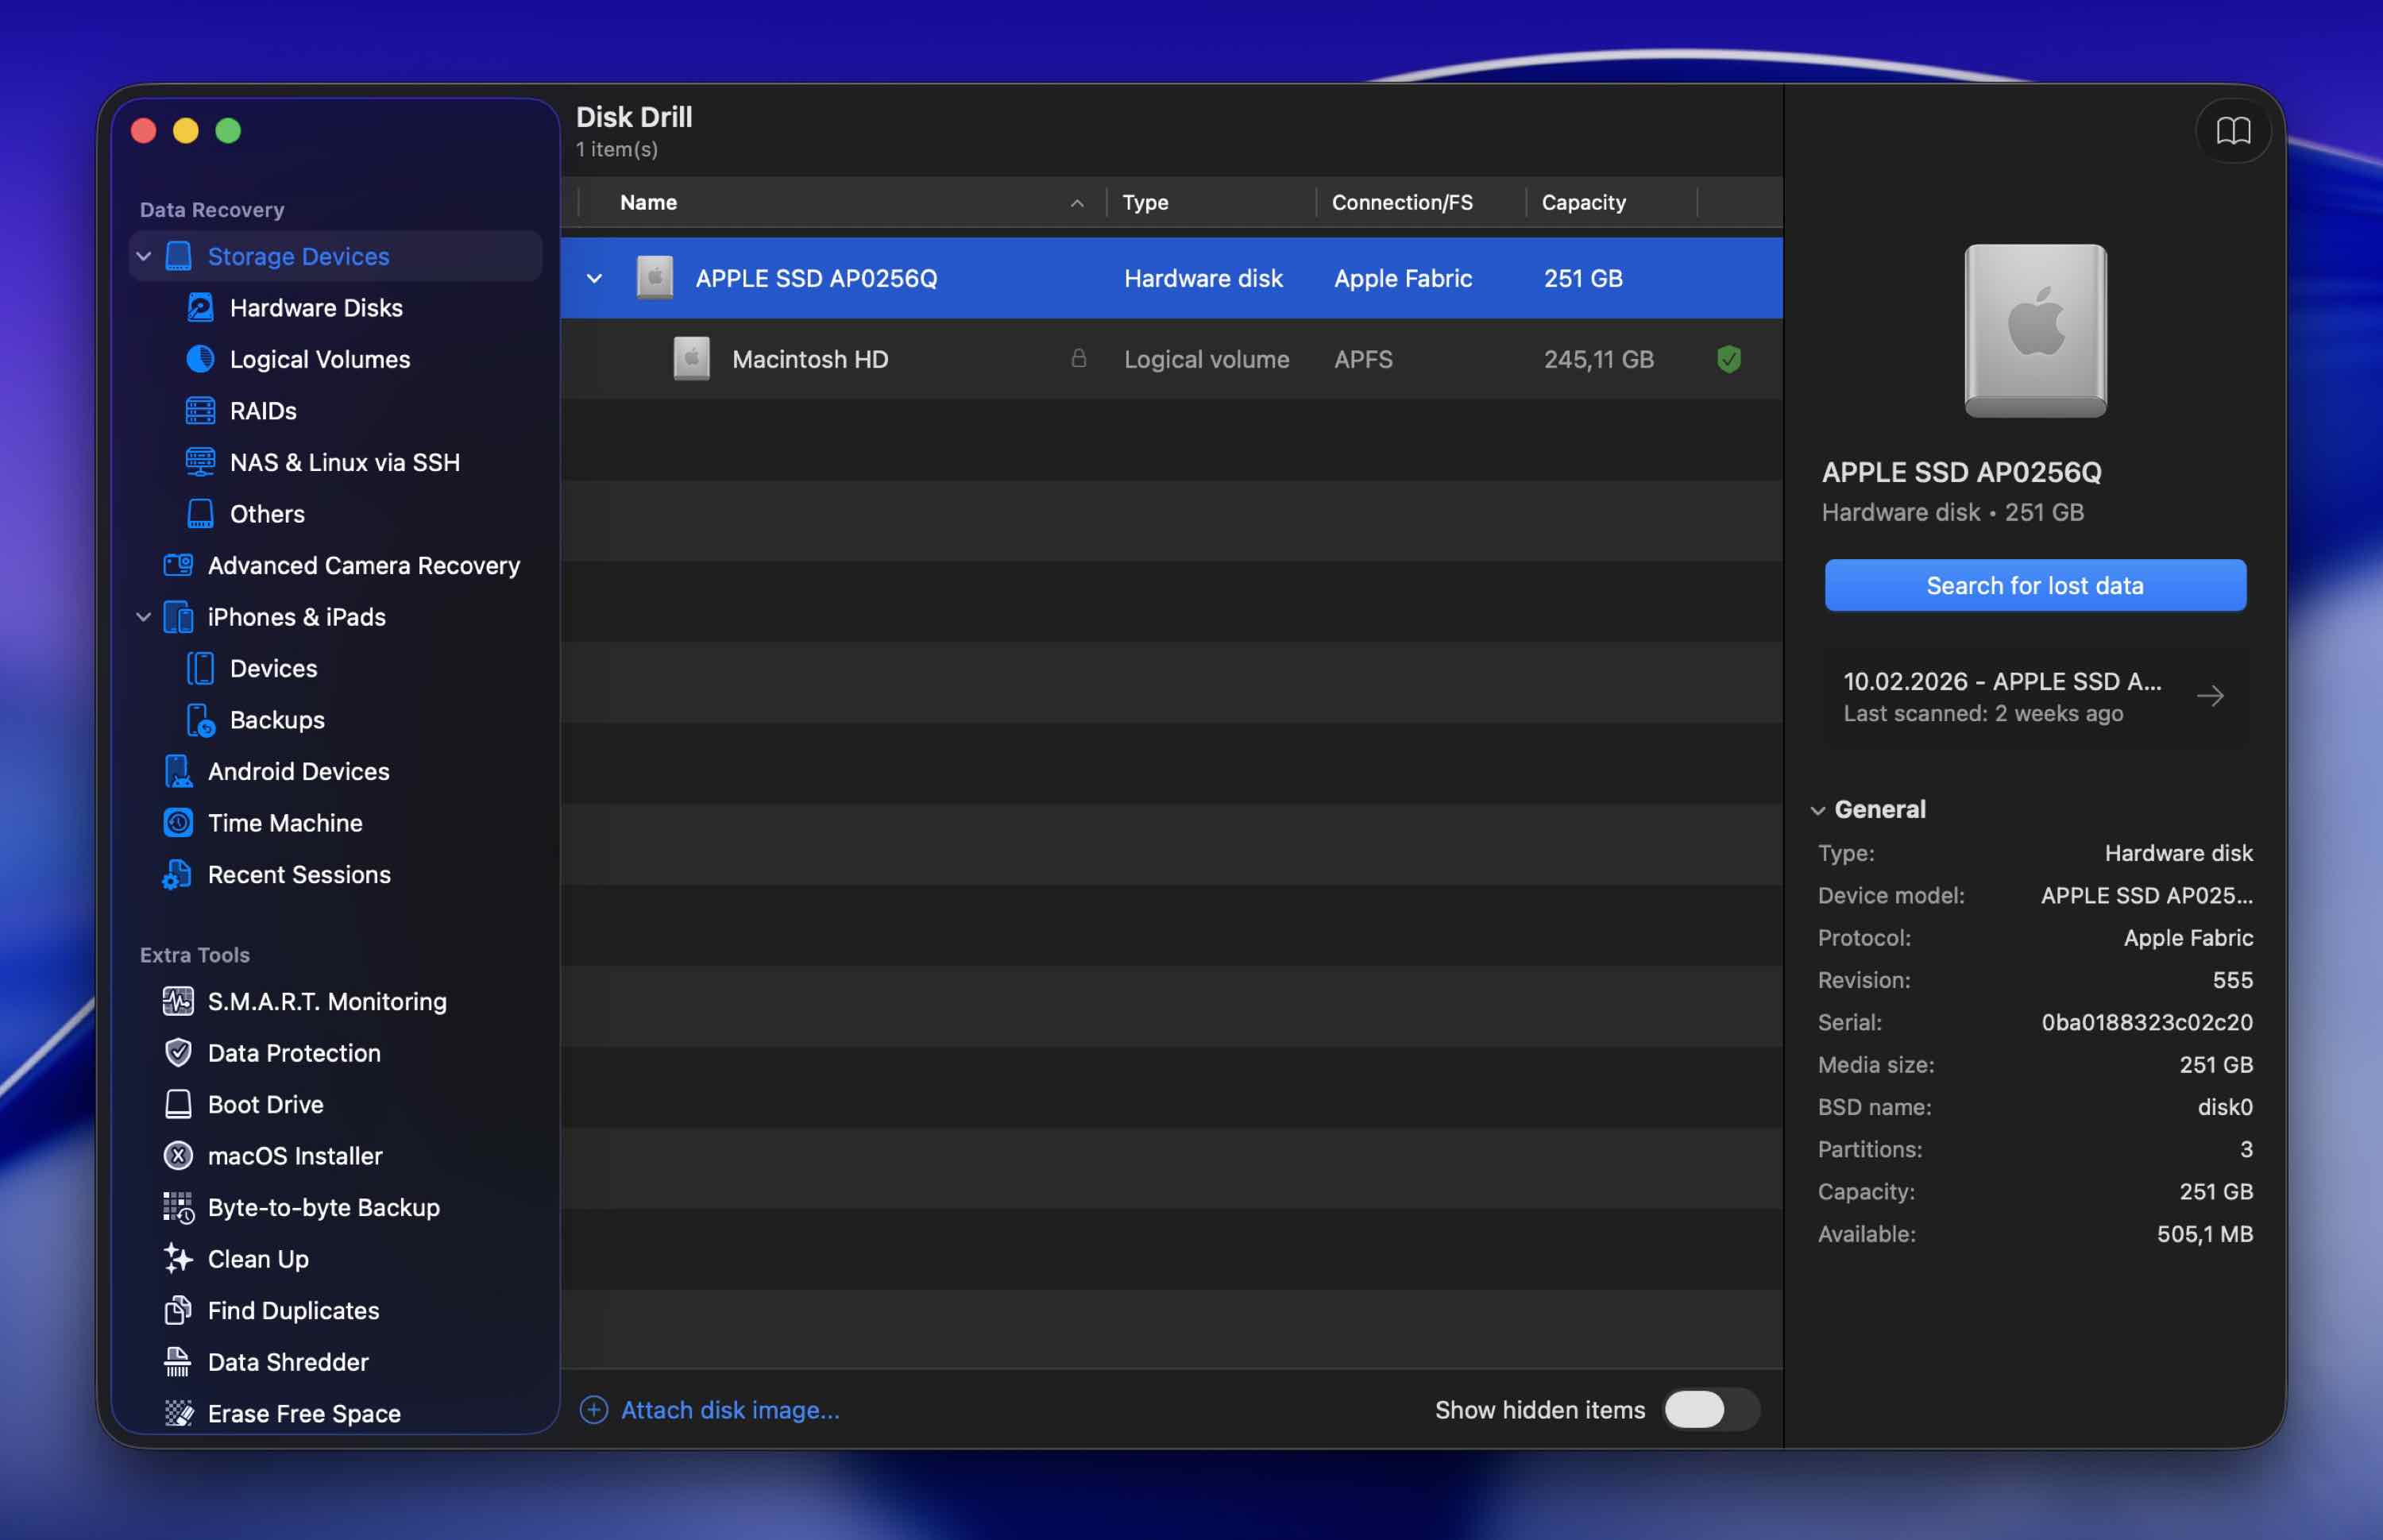
- Select the Storage devices tab from the sidebar on the left, and then click the drive that you wish to recover from (for example, your “Apple SSD…” system drive, or an external drive).
- Click Search for lost data to start the scan. If the app asks which scan type to use, choose Universal Scan. This option combines multiple scanning methods and gives you the best chance to recover permanently deleted files on Mac.
- Once the app finishes scanning your device, click Review found items.
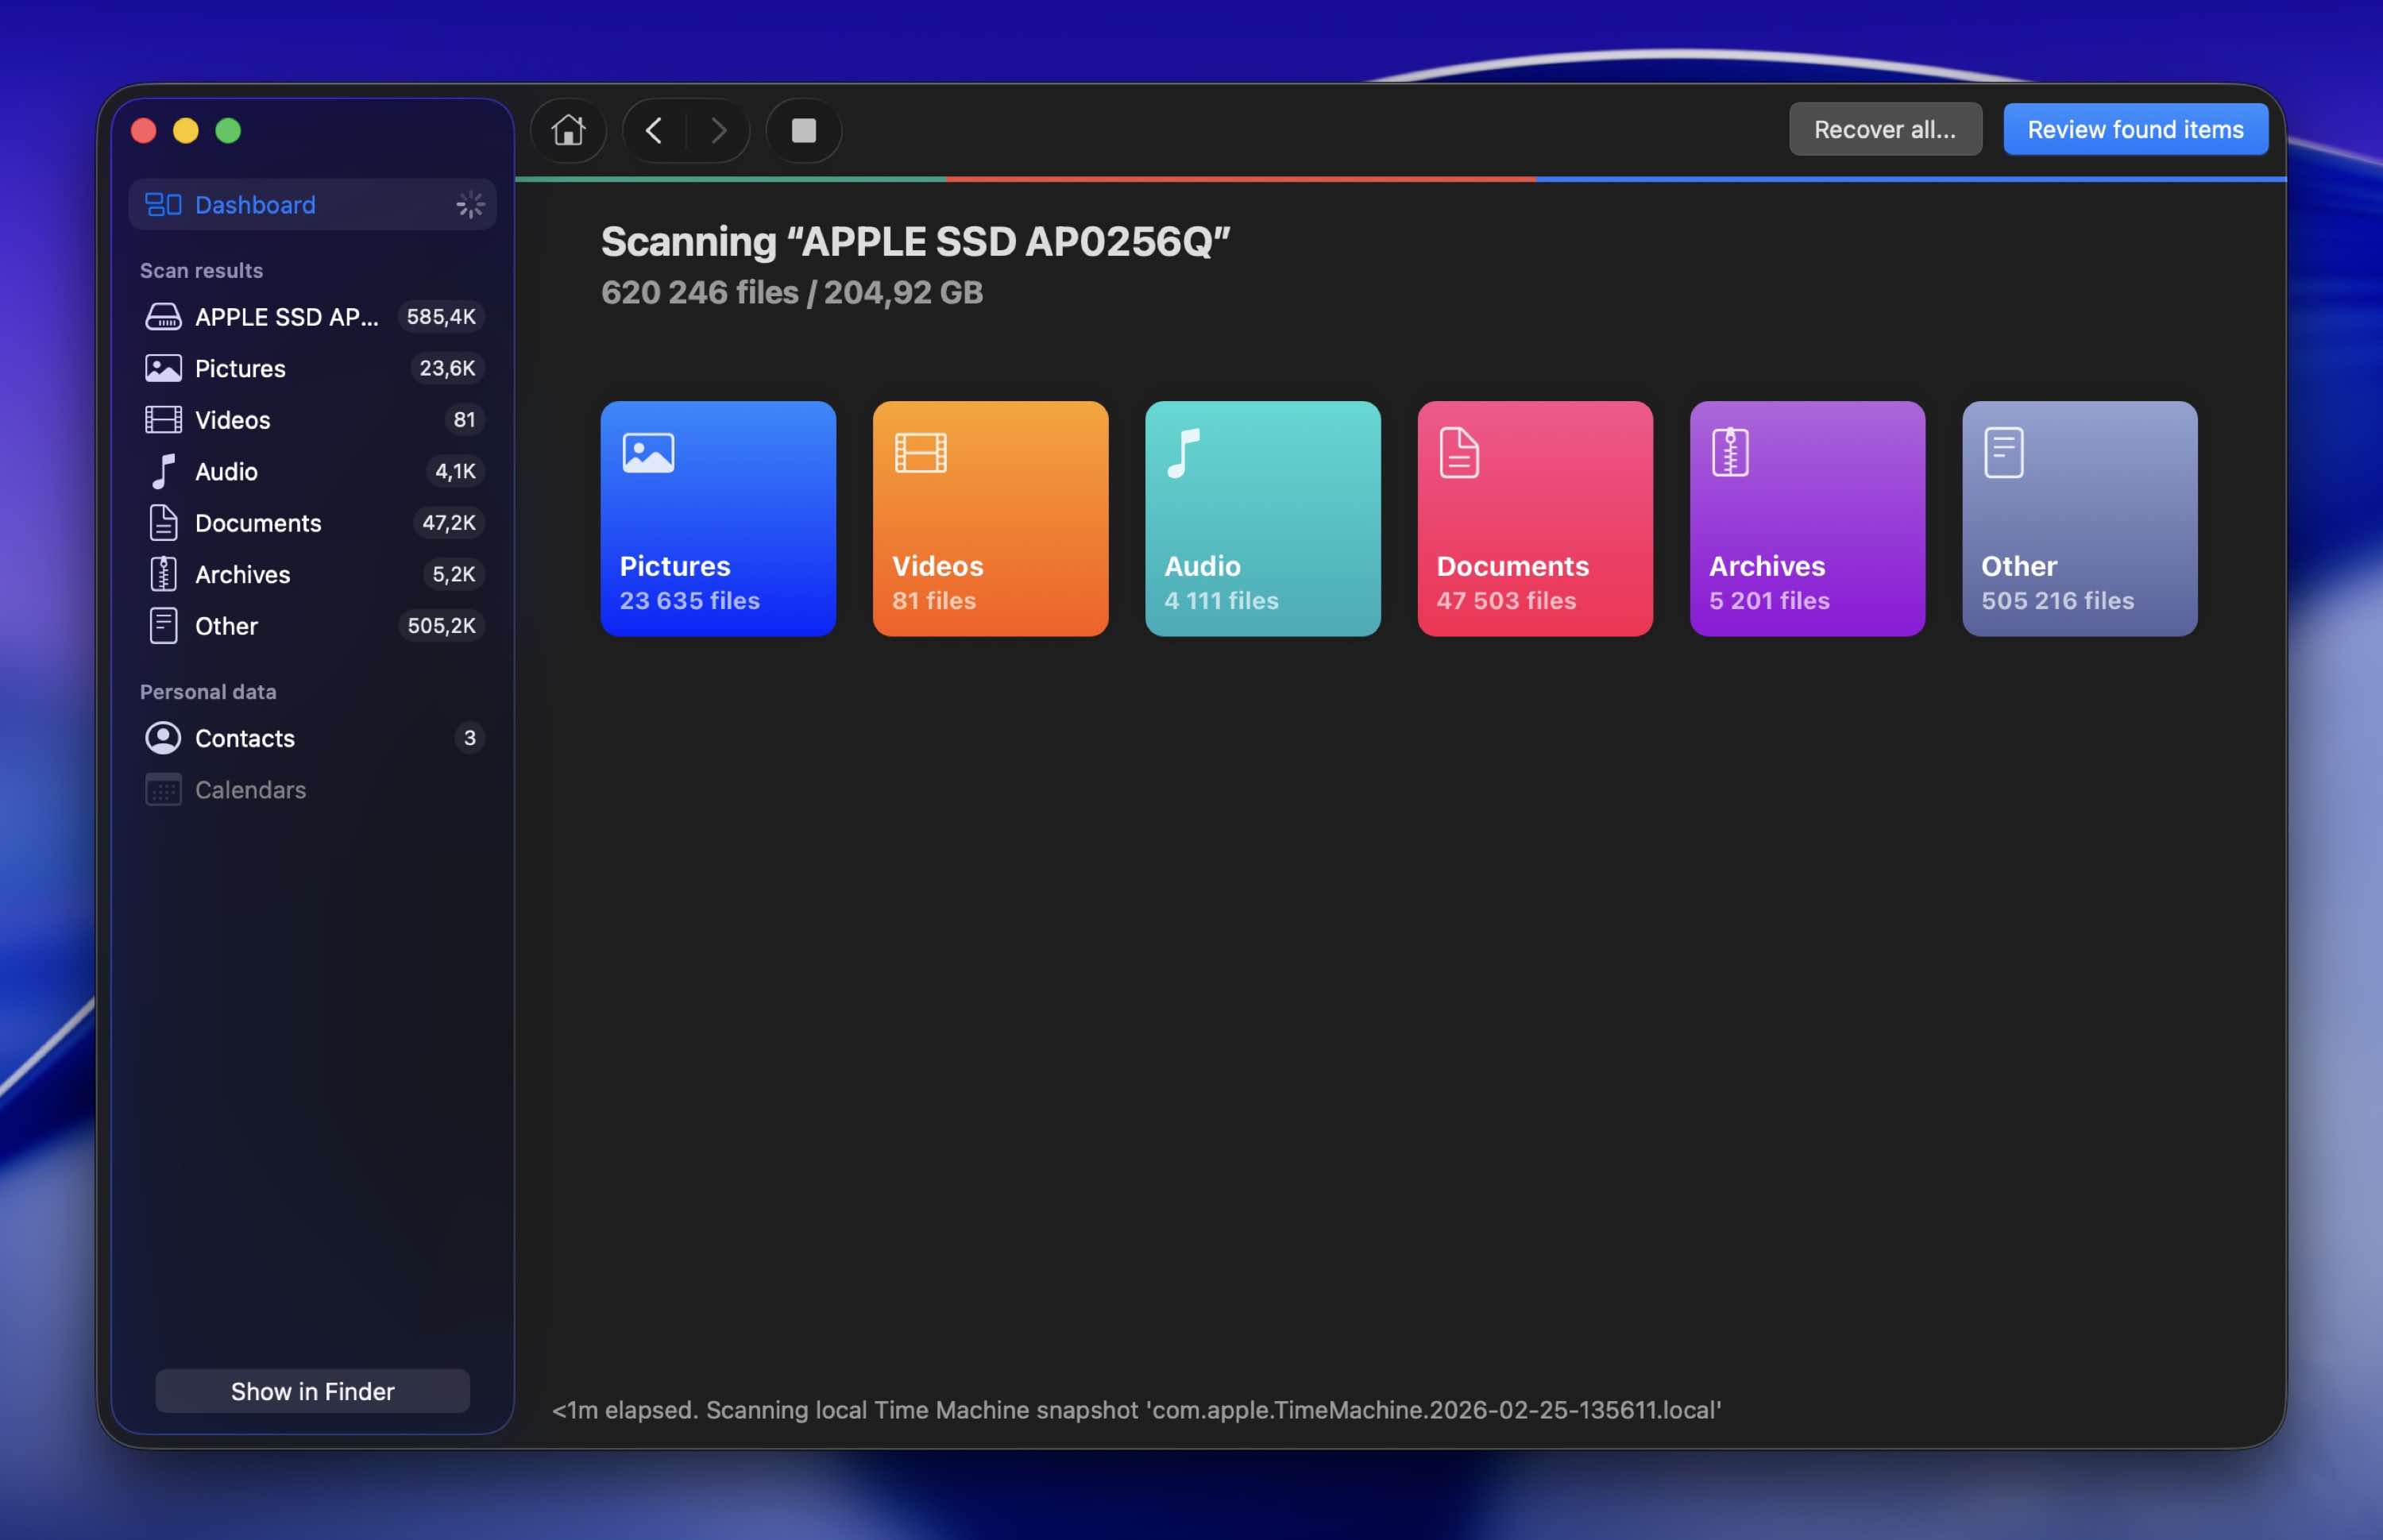
- To navigate to the needed data quicker, choose a tab corresponding to the file type from the sidebar on the left. Or if you know the exact file extension or the name of the deleted file, type it in the search field on the top-right of the screen.
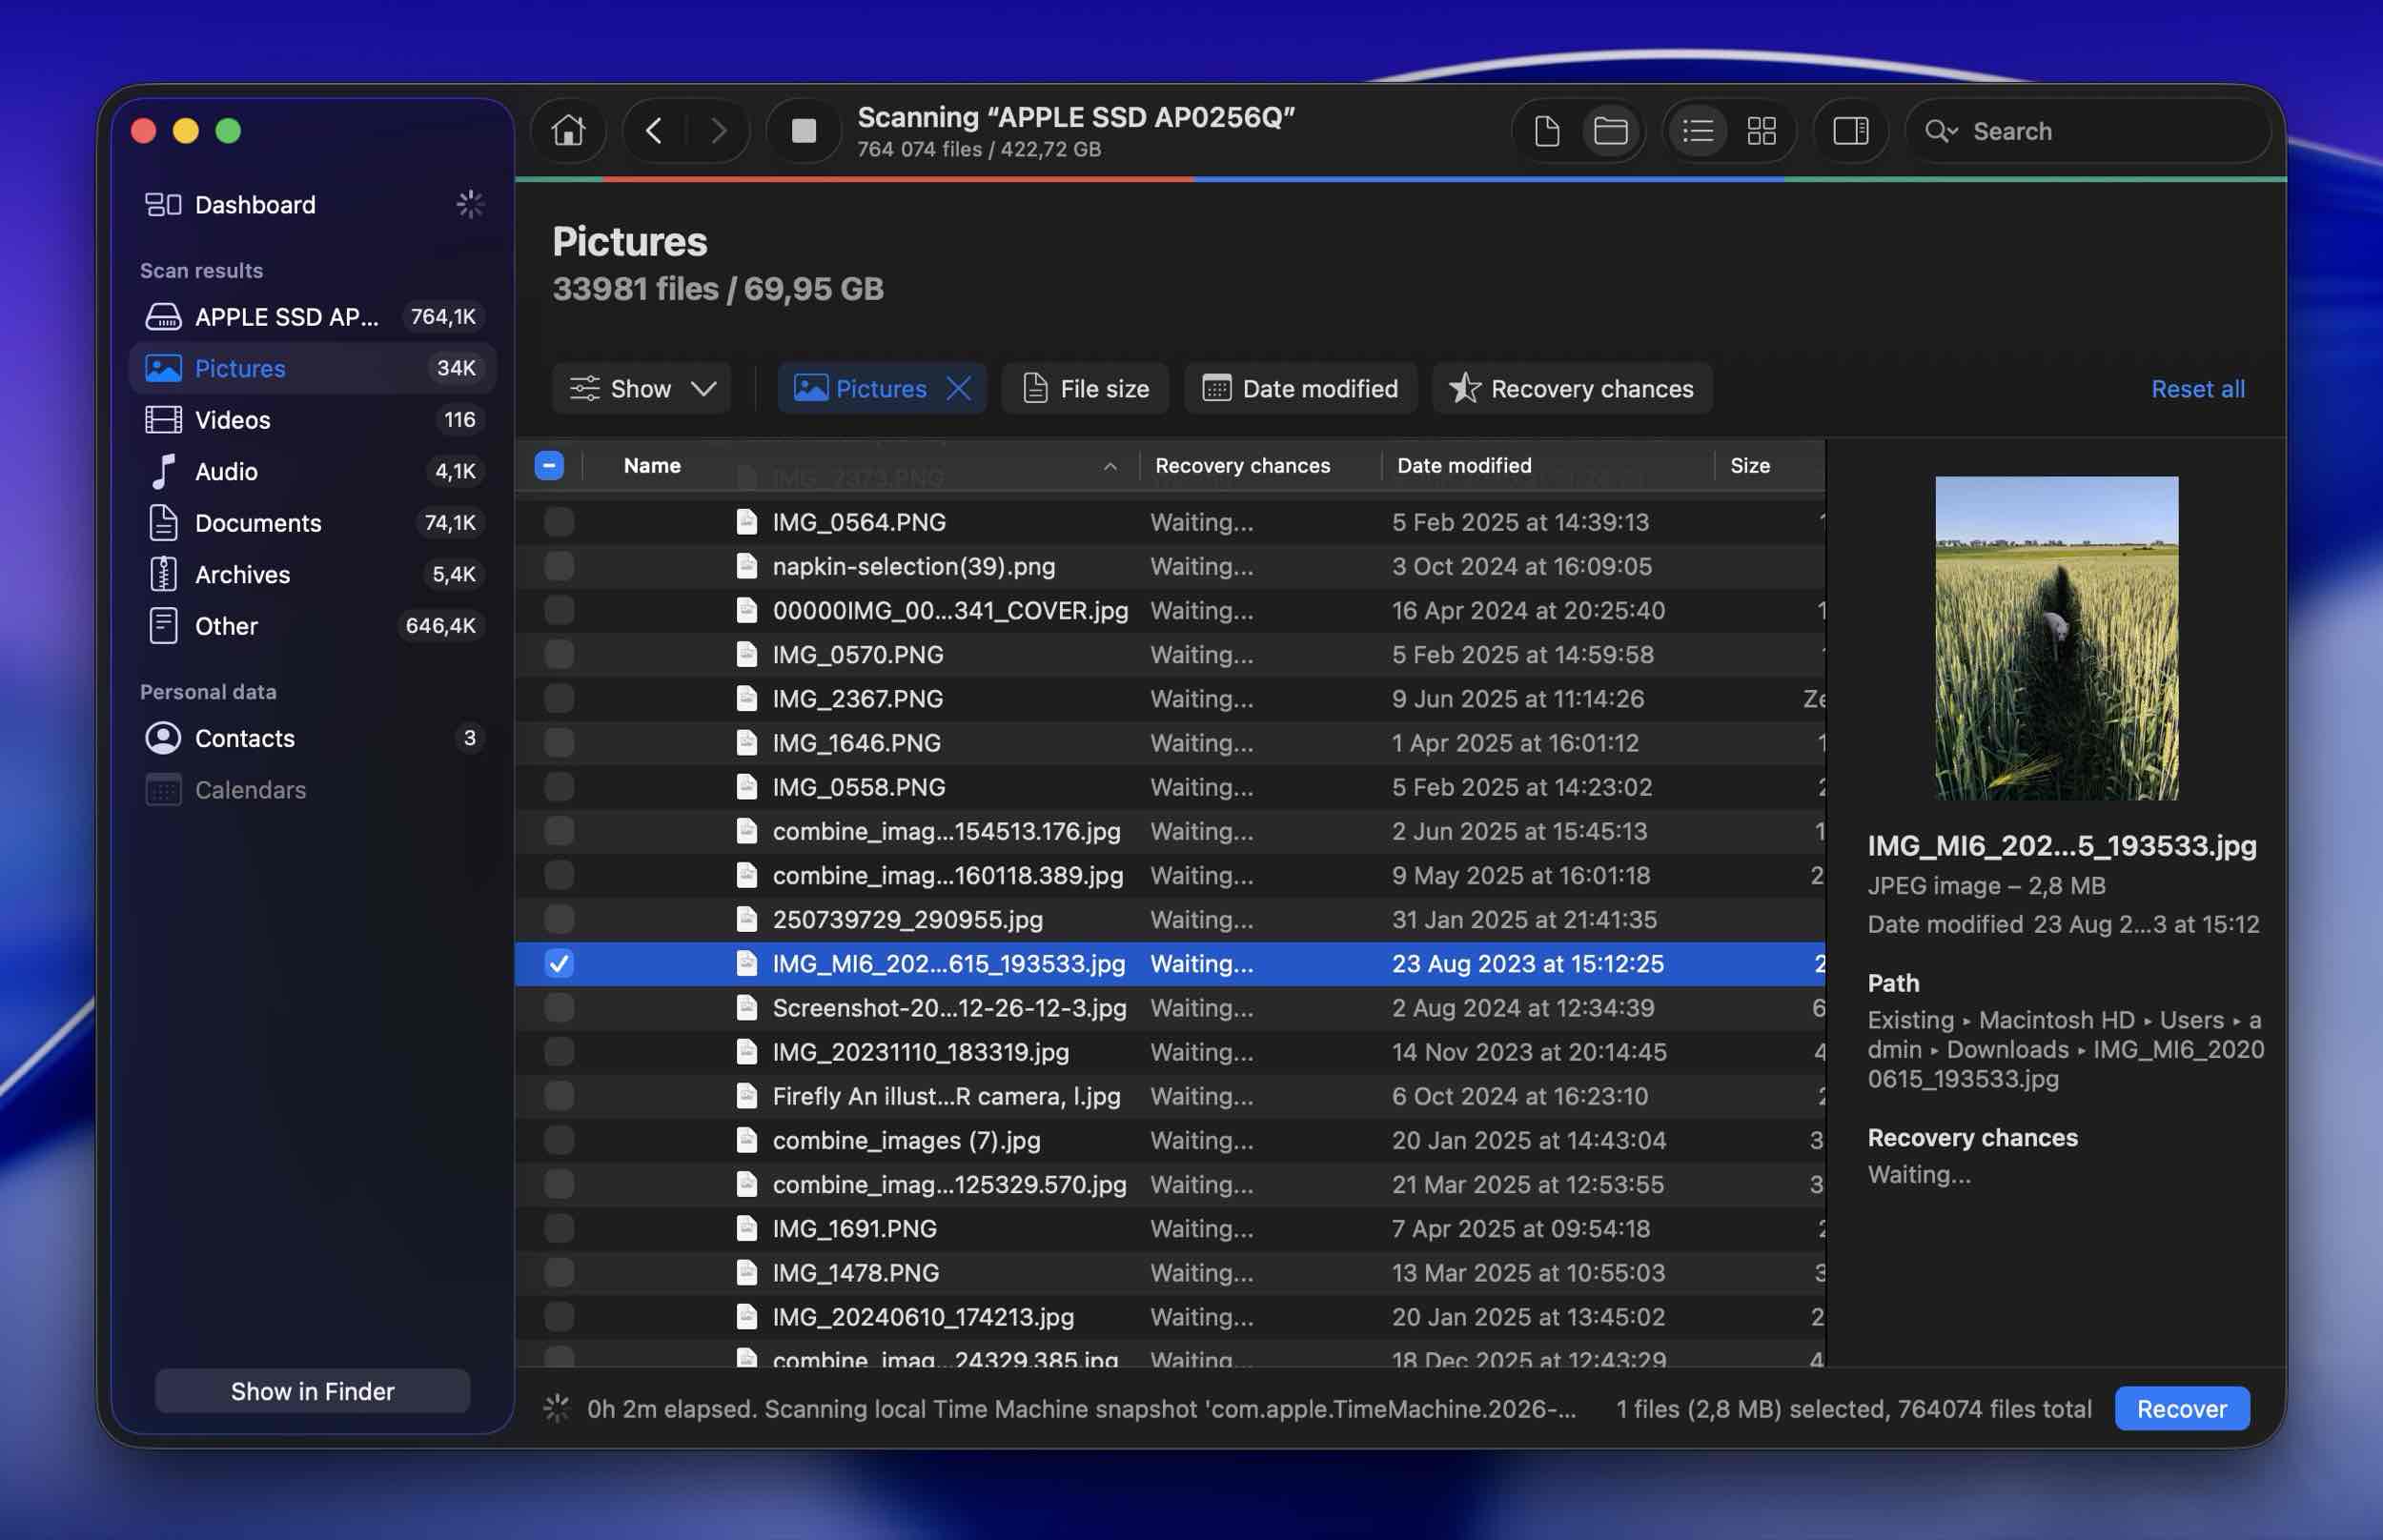
- Click the eye icon near a file to preview it and make sure that it’s the one that you were looking for.
- Click the box on the left side of the file that you wish to restore to select it, and then click the Recover button.
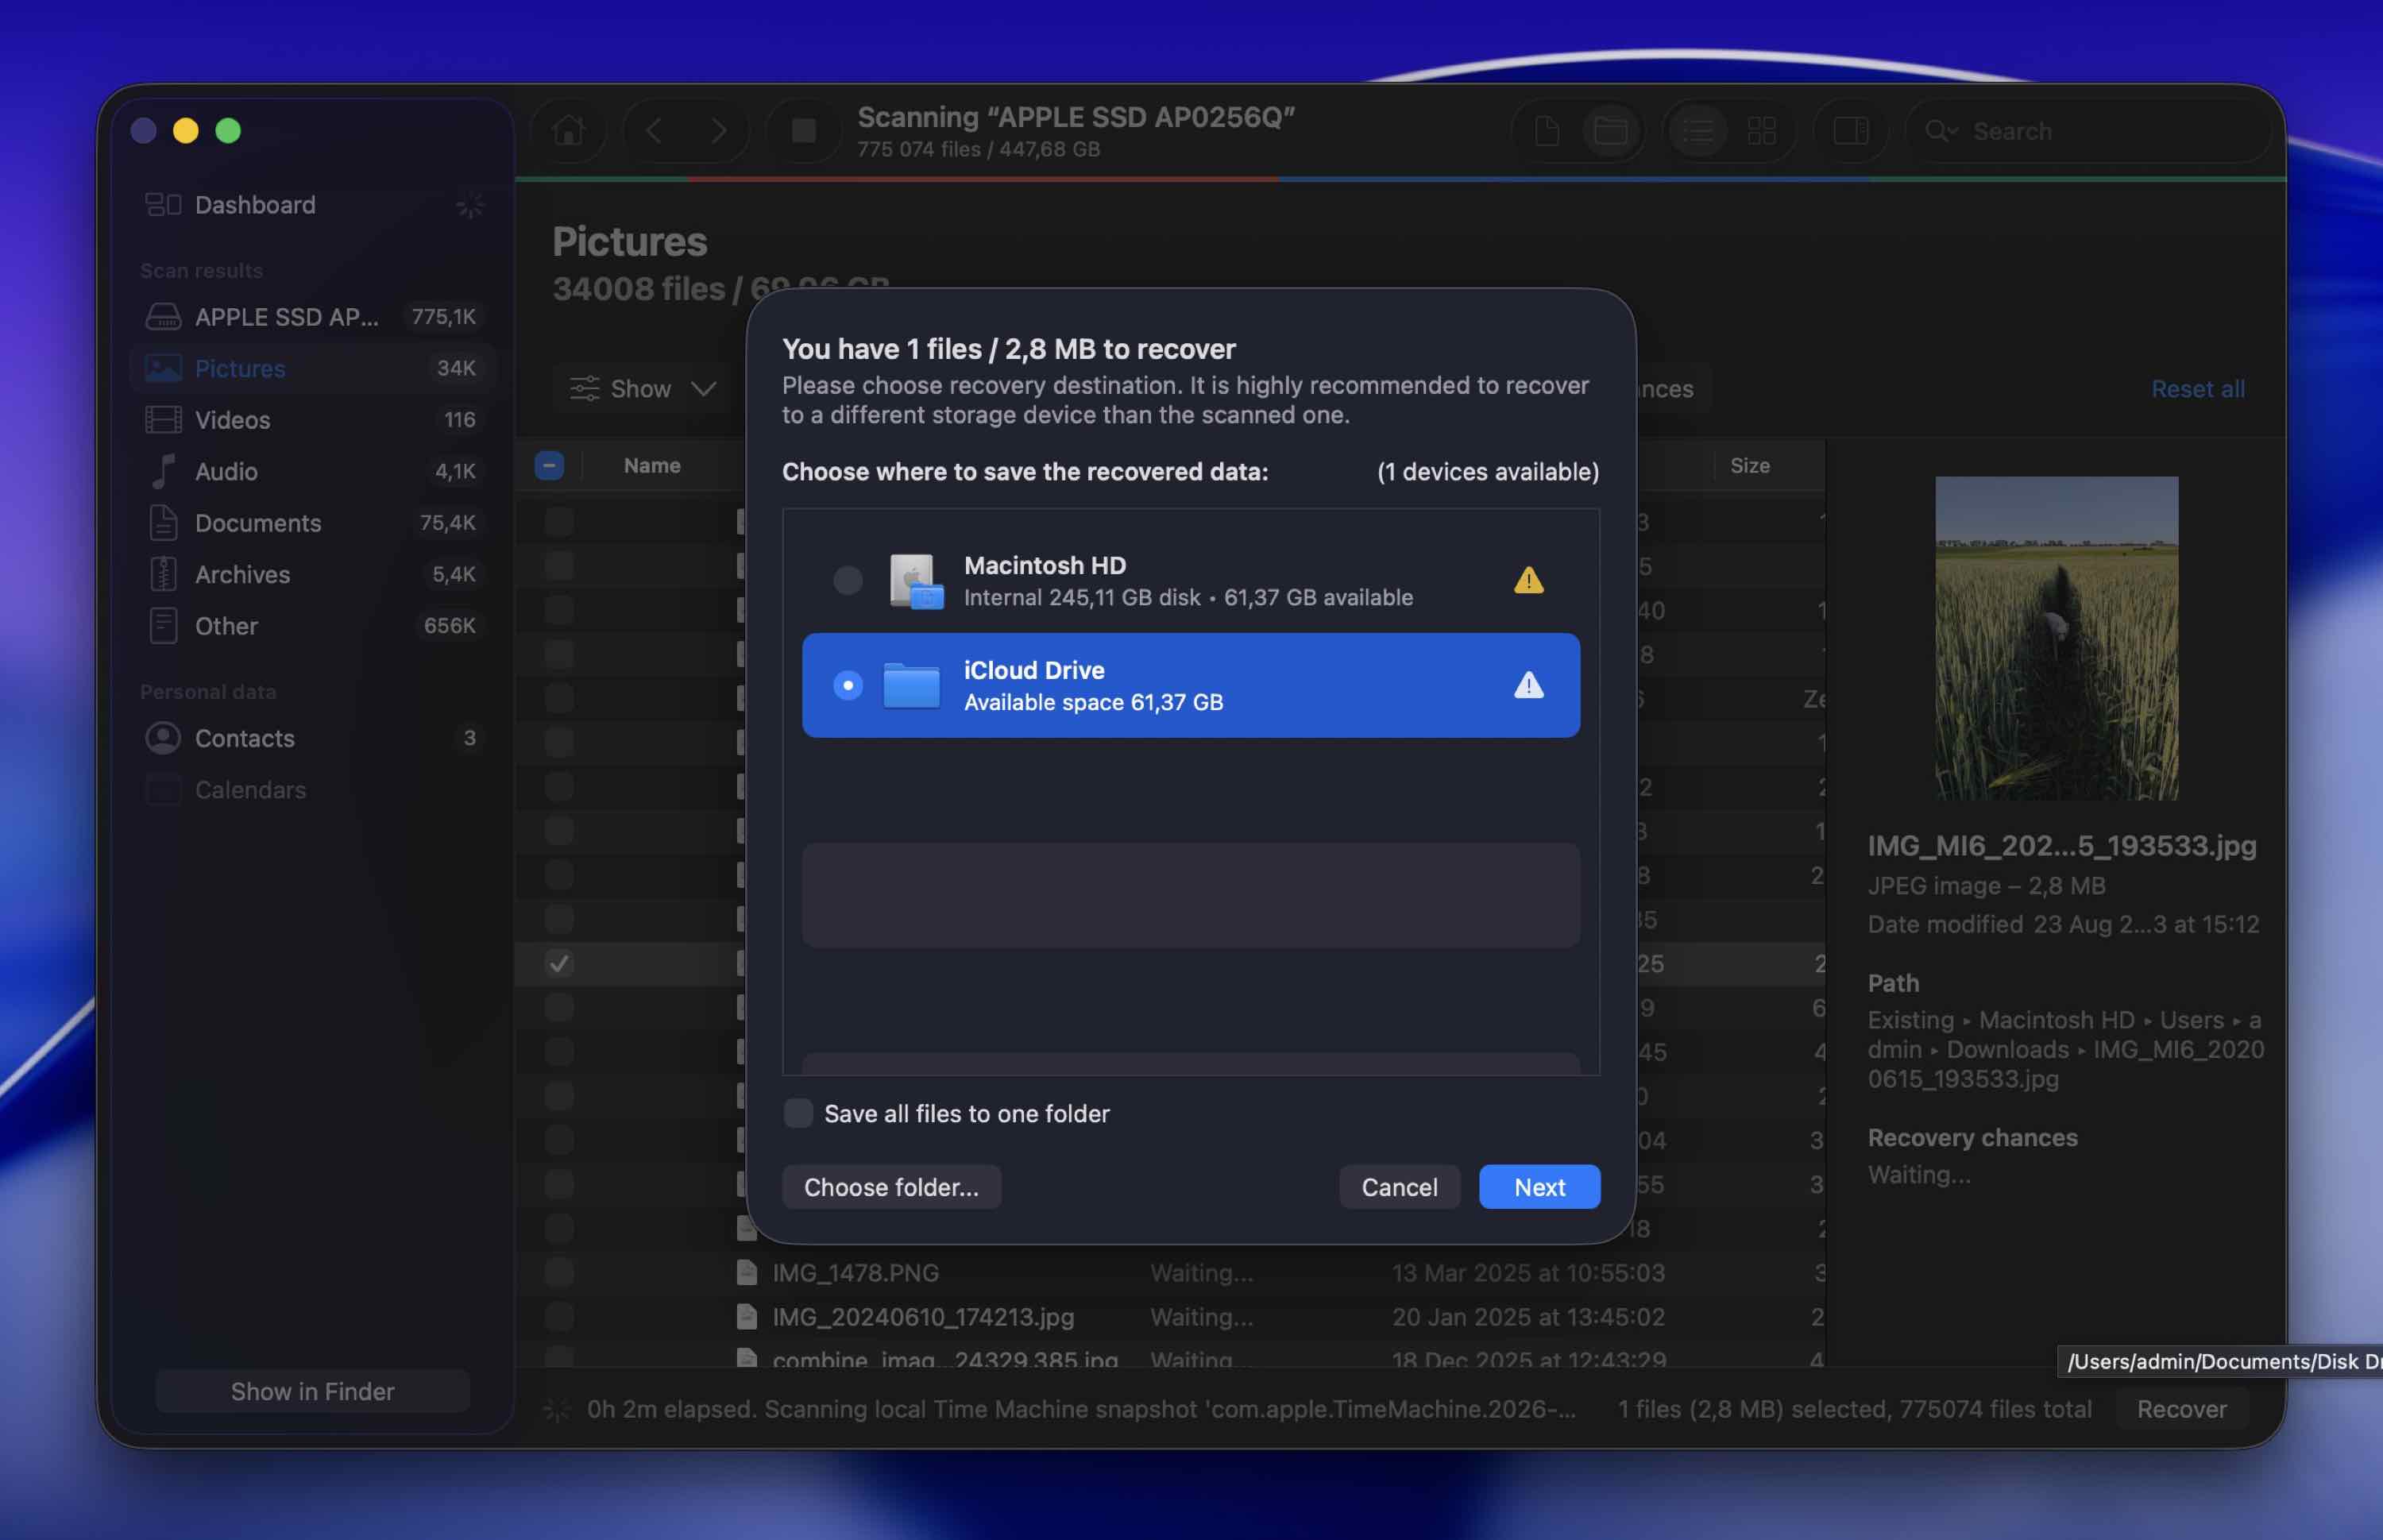
- Choose a destination folder for the recovered file and click Next to confirm. To actually save the recovered files, you’ll need a license. However, you can scan and preview files without limits. That means you can verify whether your deleted files are still intact before spending anything. If the files show up and preview correctly, you know they survived. If nothing useful appears in the results, you won’t waste money on a recovery that isn’t possible.
A pop-up window will appear saying that you’ve successfully recovered your file. Once that happens, quit the Disk Drill app. Then all you need to do to access the recovered data is go to the previously chosen location.
Method 2:Restore From a Time Machine Backup
Another effective solution is to restore the permanently deleted file from a Time Machine backup. Using this app is easy, and recovering files with it won’t take up much of your time.
However, this method has one huge limitation: you will be able to recover an accidentally deleted file on your Mac with Time Machine only if you’ve used this tool to backup your computer prior to losing the files.
Here’s how to retrieve permanently deleted files on your Mac with Time Machine:
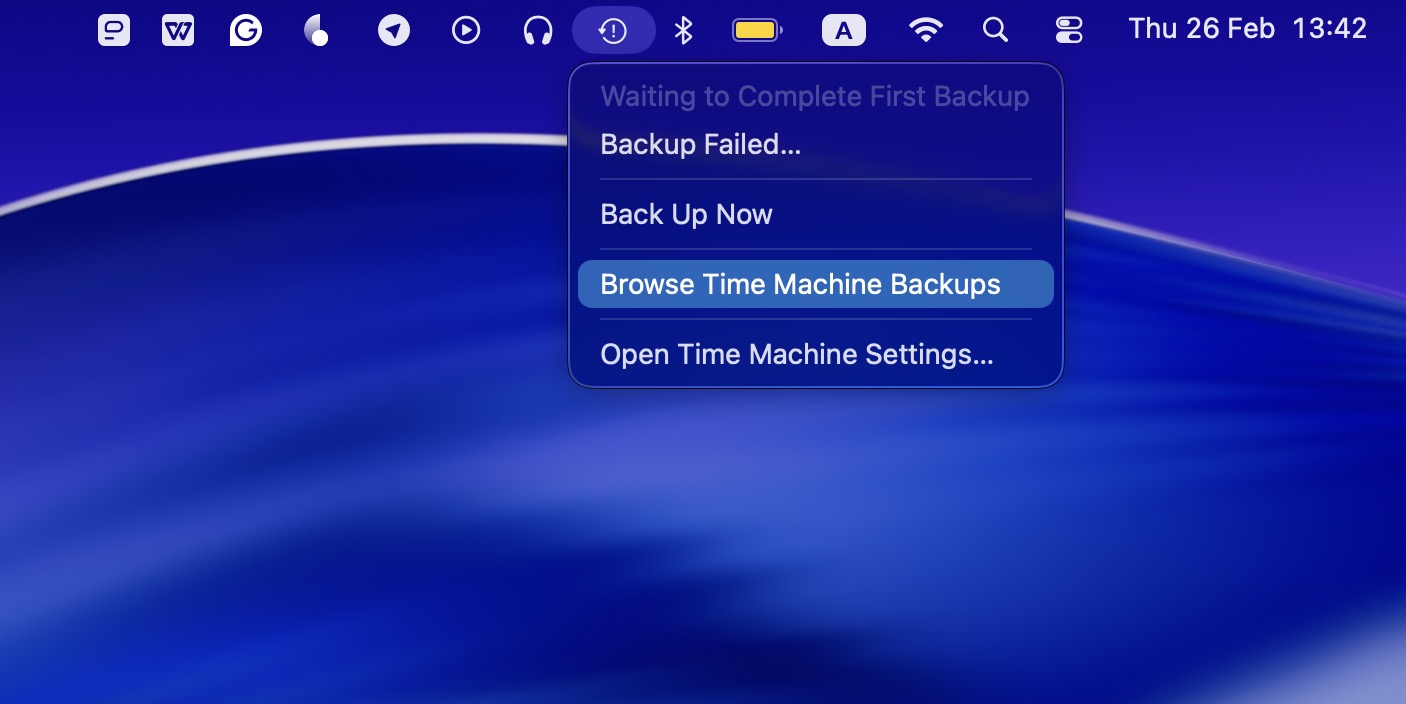
- Connect the drive containing your Time Machine backups to your computer. If you don’t have the backup drive at hand, you can still try launching Time Machine. macOS creates local snapshots on your internal drive, which may allow you to retrieve deleted files from Mac even without the external backup disk connected (if the deletion happened recently).
- Launch Time Machine (go to Launchpad or open the app from the menu bar at the top of your screen).
- Navigate to the folder where the deleted file used to be located or if you remember the name of the file, type it in the search field.
- Use the timeline on the right to choose the needed backup version.
- Choose the file or files that you wish to recover and click the Restore button.
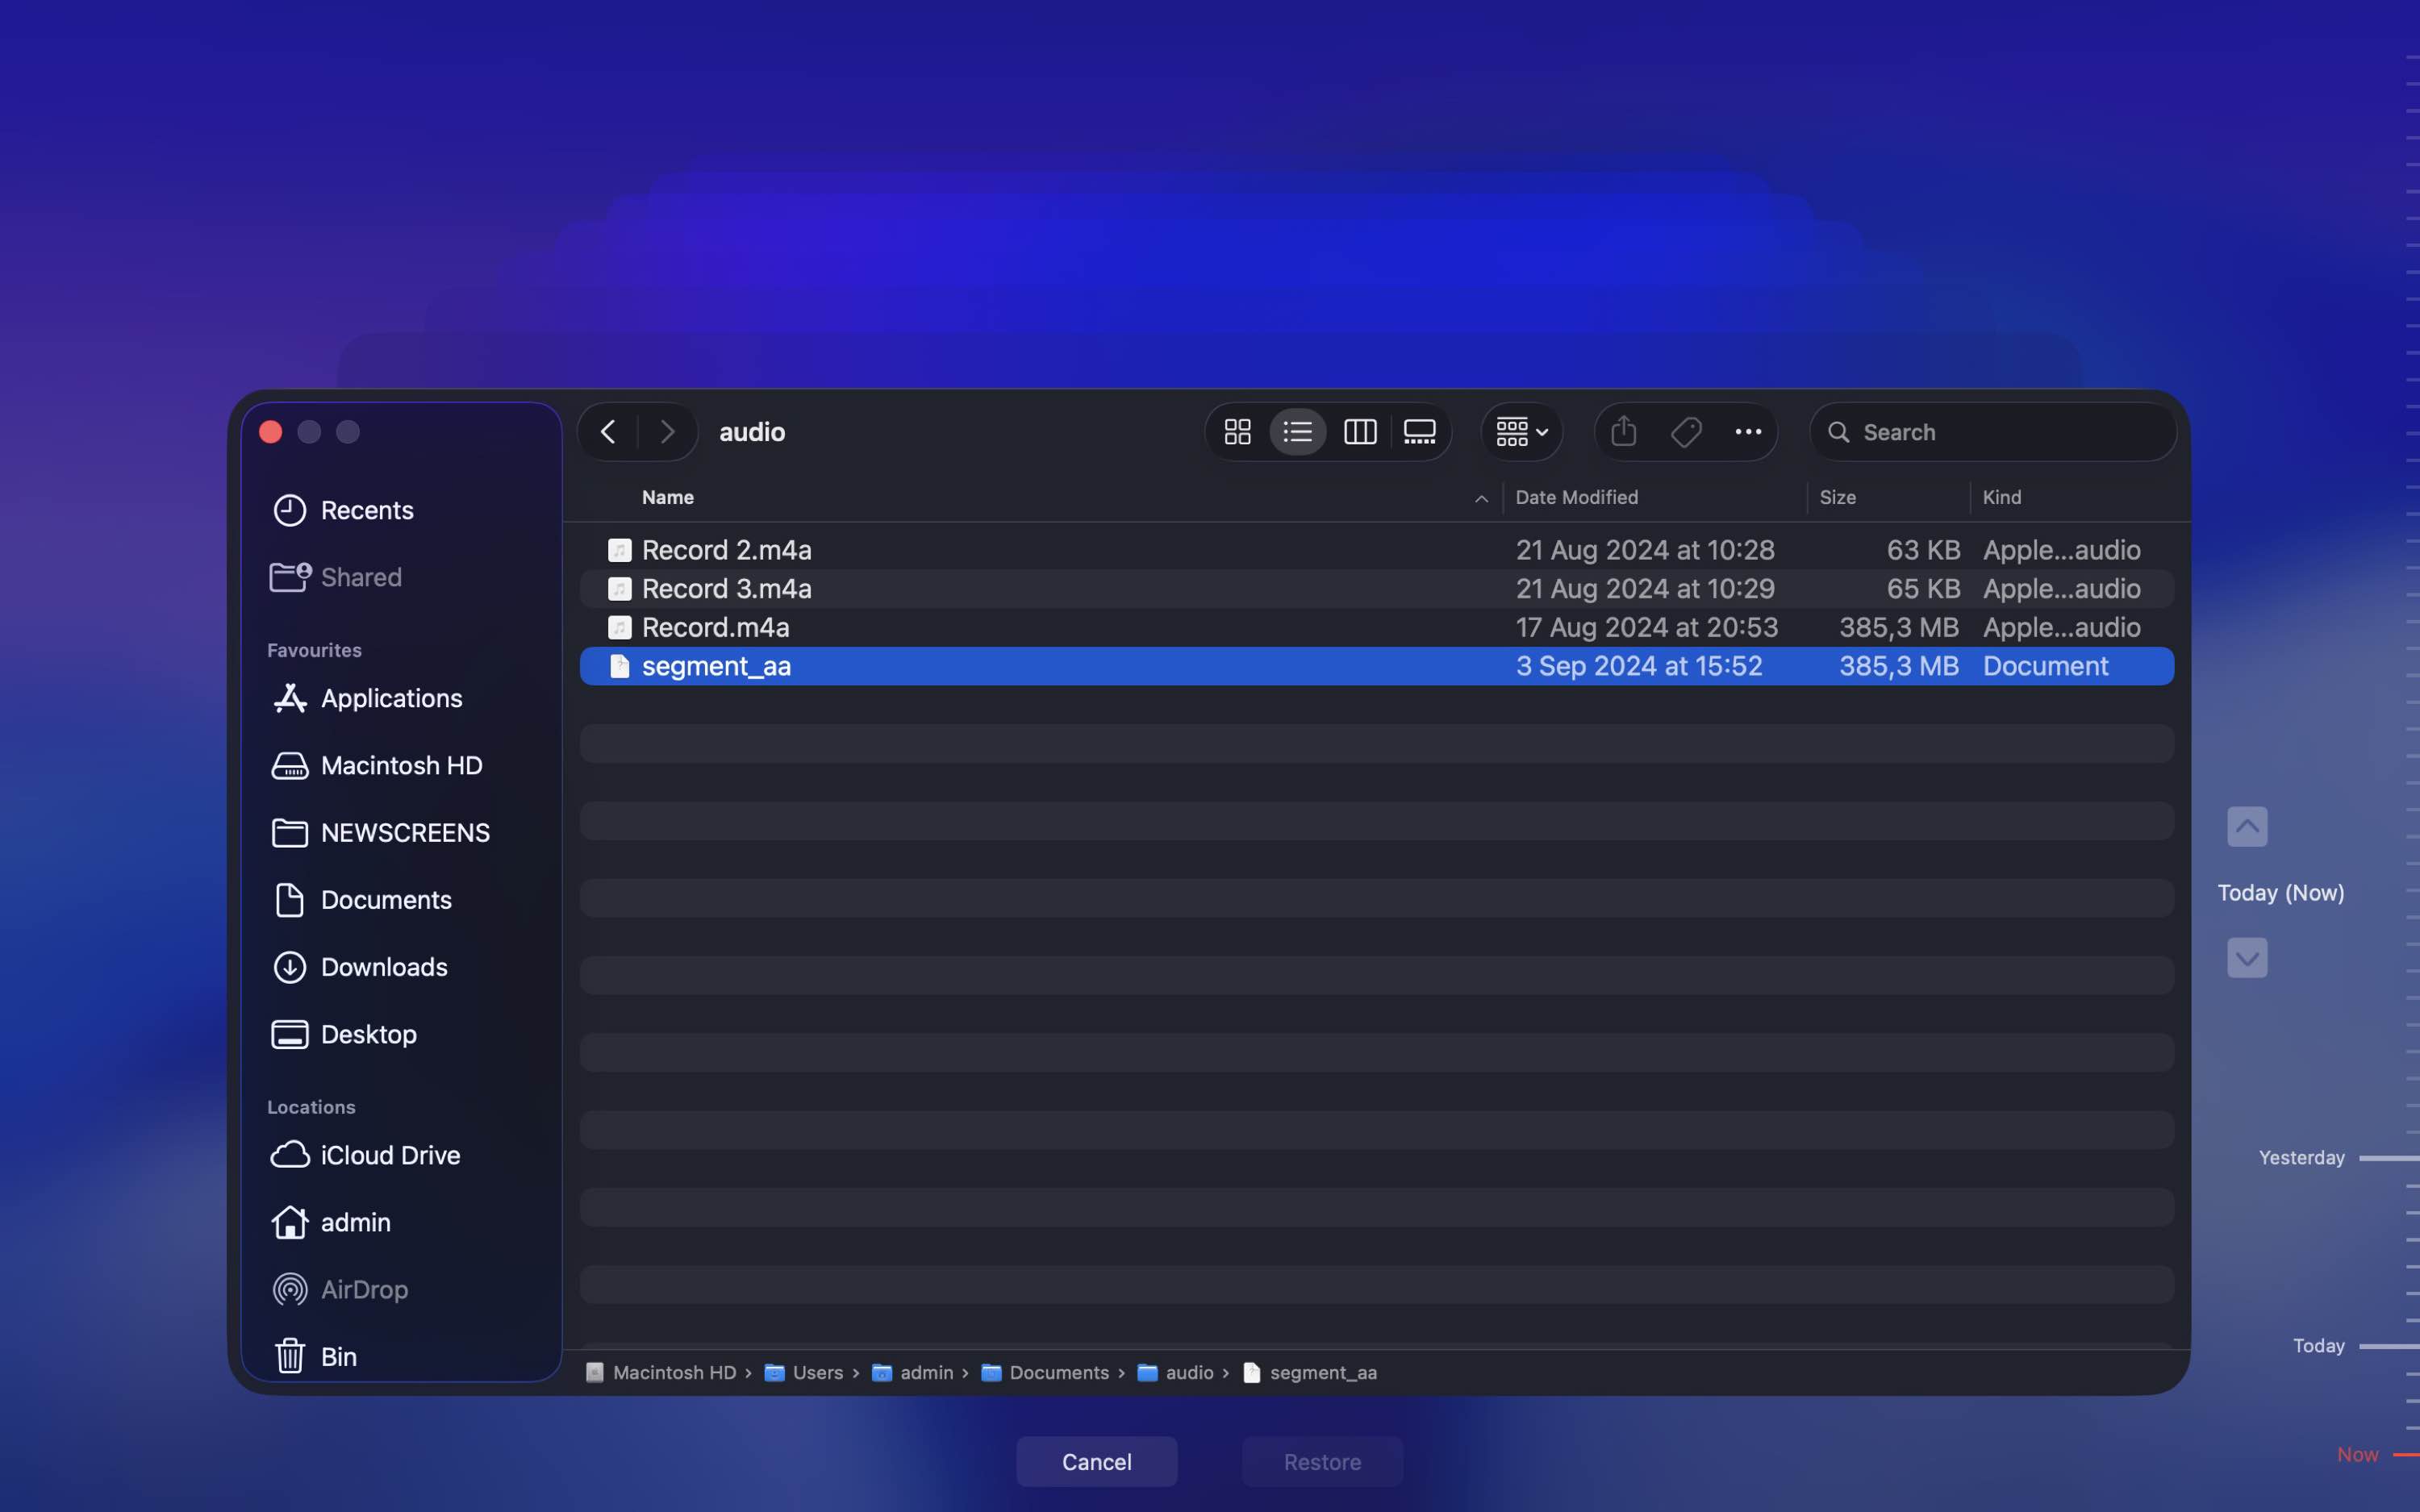
The file will be returned back to its original location. So to open the recovered file, navigate to the folder where the file used to be stored before deletion.
Method 3:Restore Files on Mac from APFS Snapshots
If your Mac uses the APFS file system (which most Macs running macOS High Sierra and later do), the system may create local snapshots. These snapshots temporarily preserve the state of your drive at specific points in time.
That means you may be able to recover deleted files Mac systems no longer show.
Here’s how to restore recently deleted files on Mac using APFS snapshots:
- Open Disk Utility (use Spotlight or go to Applications > Utilities).
- Select Macintosh HD (or whatever your main system volume is called).
- In the top menu, click View > Show APFS Snapshots.
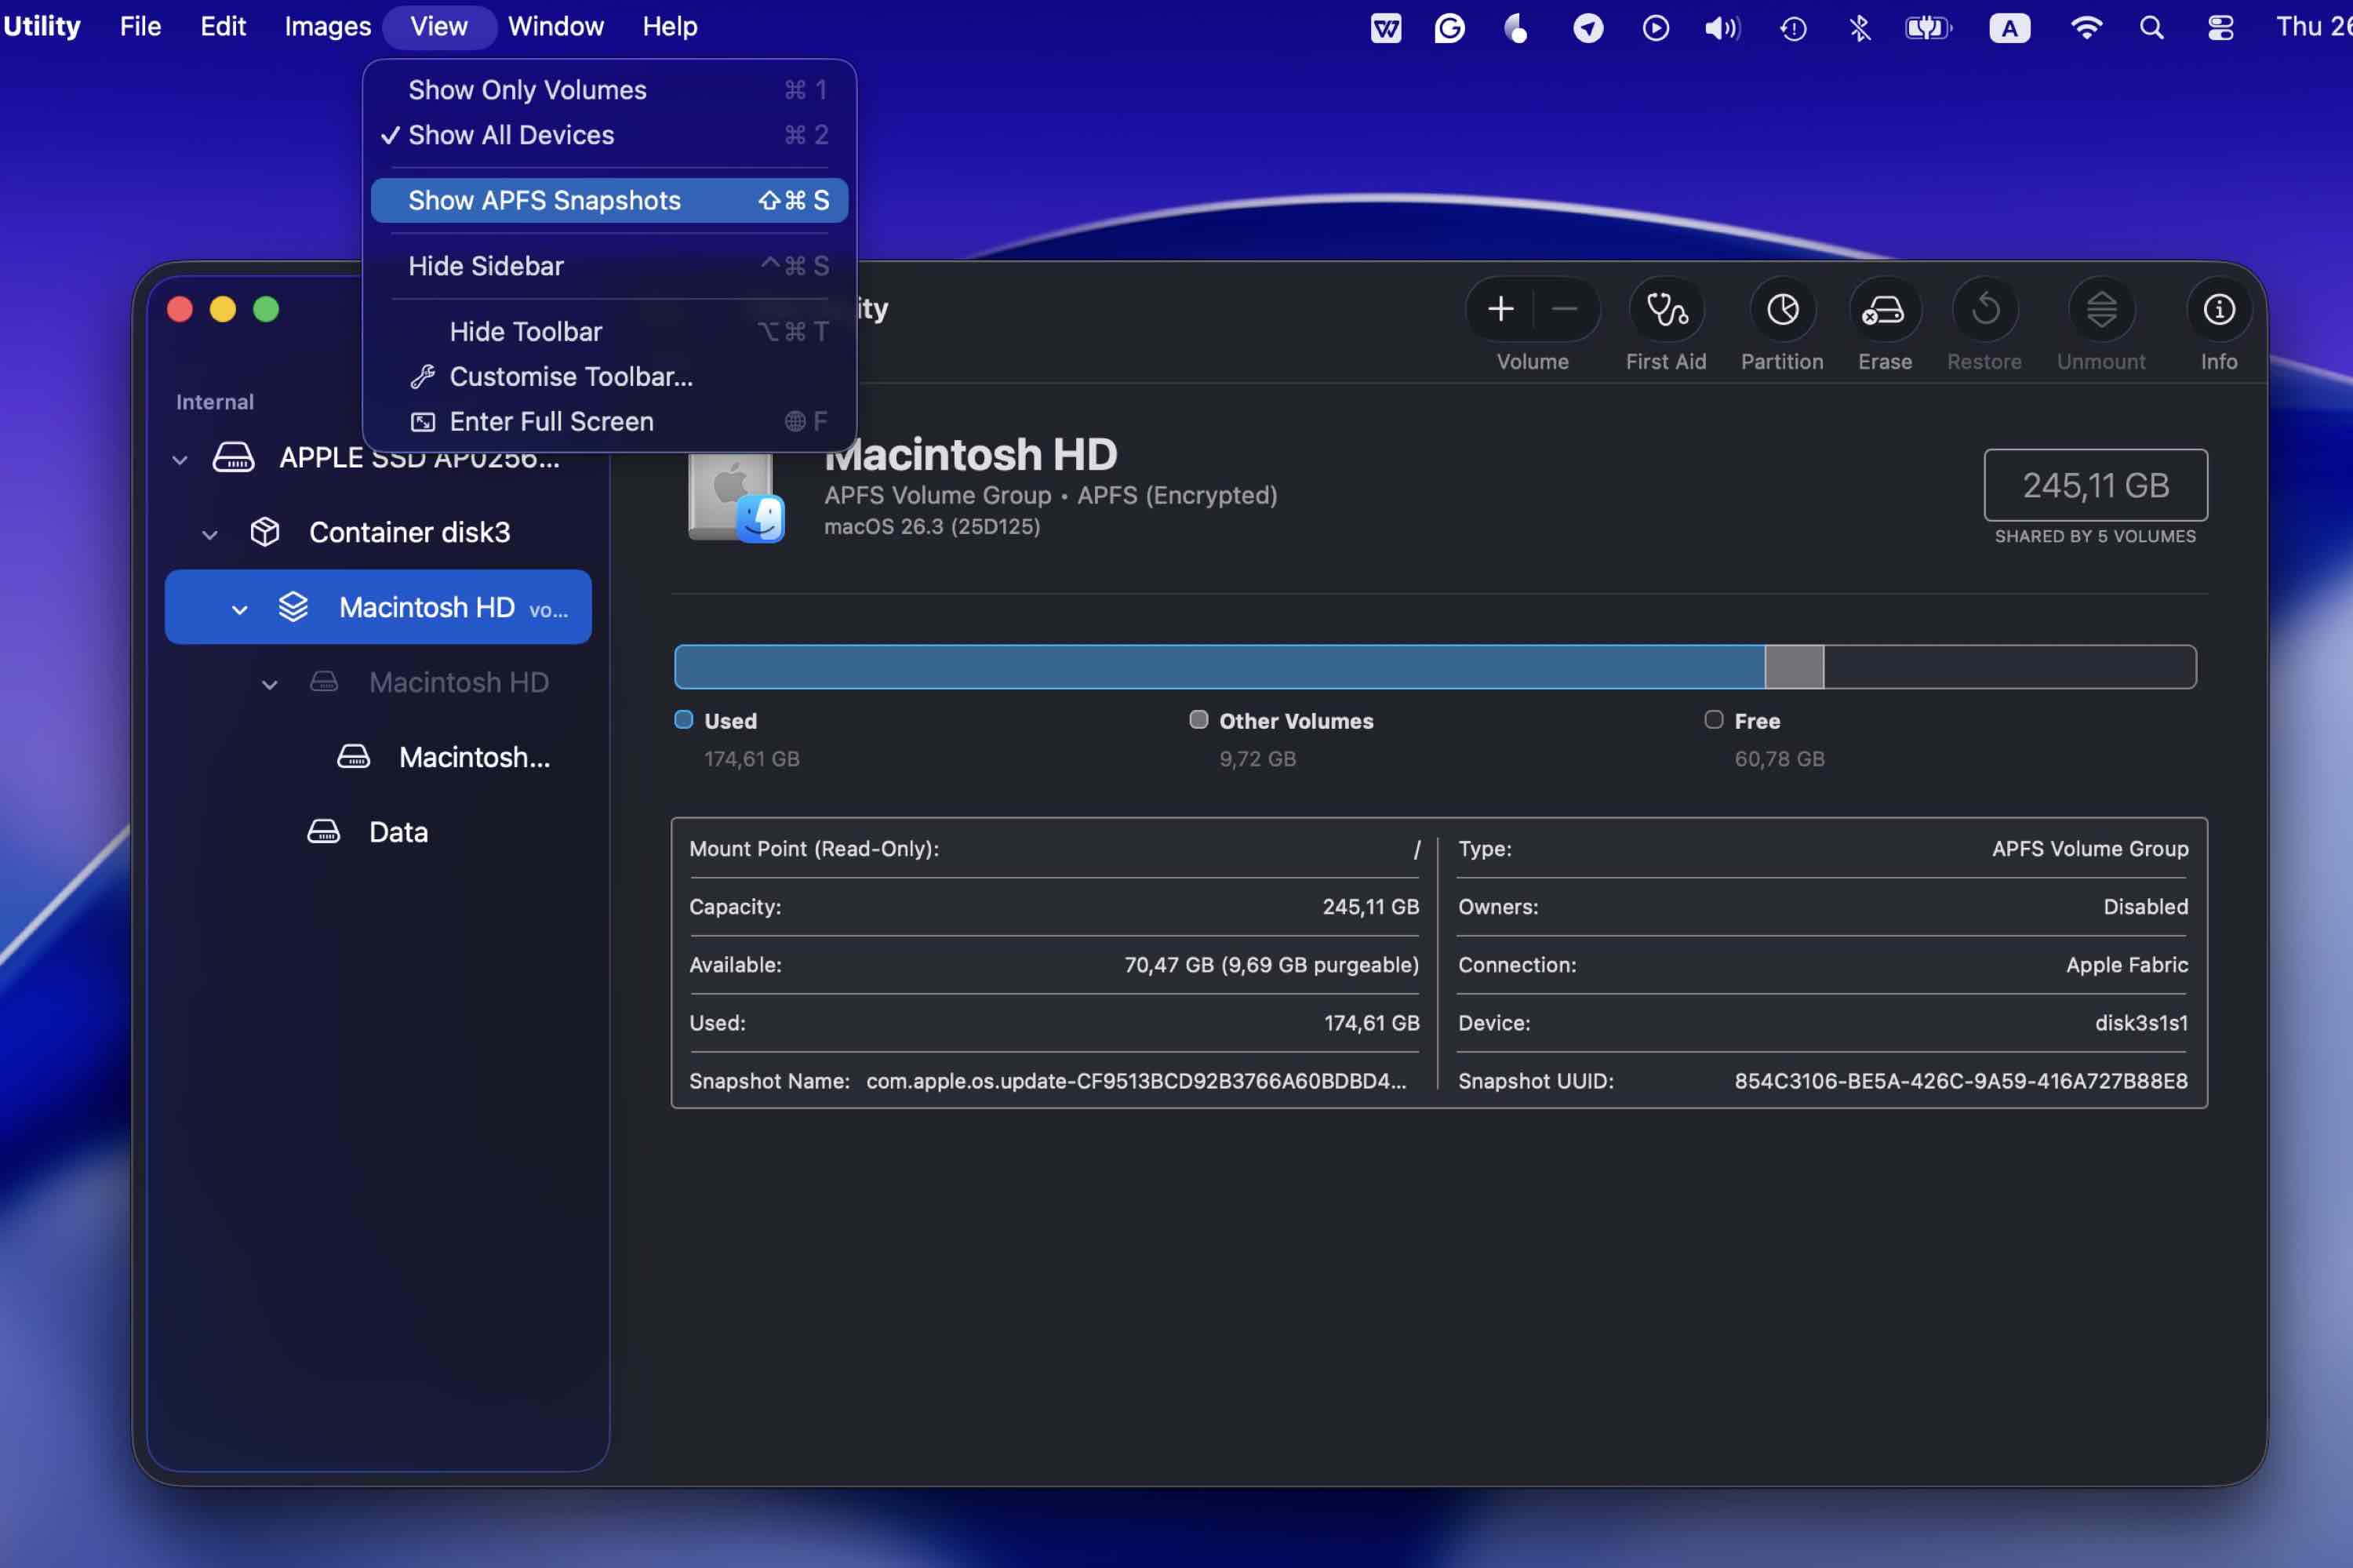
- If snapshots are available, you’ll see a list with timestamps.

- You can double-click a snapshot to mount it.
- It will appear in Finder as a separate, read-only volume.
- From there, you can browse your old Desktop, Documents, Downloads, or other folders and manually copy files back to your Mac.
Method 4:Resort for Help From a Data Recovery Service
If the previous methods didn’t work in your situation and you’re searching for a way to recover deleted files on a Mac without software, the only other option that you have left is to let data recovery professionals take care of the issue. A data recovery center like CleverFiles is capable of restoring single files or data in bulk and retrieving data from damaged drives.
And even though the results depend on whether the deleted file was already overwritten with new data or not, this method still offers a high chance of successful data recovery.
Tips for dealing with data recovery labs:
- Look for transparent pricing, real reviews, and a “no data, no fee” policy.
- Make sure they have clear data confidentiality and secure handling procedures.
- Request a written quote first.
- Understand the cost range. Professional recovery can range from a few hundred to several thousand dollars depending on the issue.
- Ask whether recovered data will be returned on a new drive and whether your original device will be sent back.
- Be honest about the situation. Tell them if you used the drive after deletion or tried recovery software.
How to Recover Permanently Deleted Files Using Mac Terminal
If, for some reason, you specifically need to use Terminal to recover deleted files on Mac, there are a couple of options available.
Option 1: Recover Files from Trash Using Terminal
If the Trash hasn’t been emptied yet, you can restore files via Terminal:
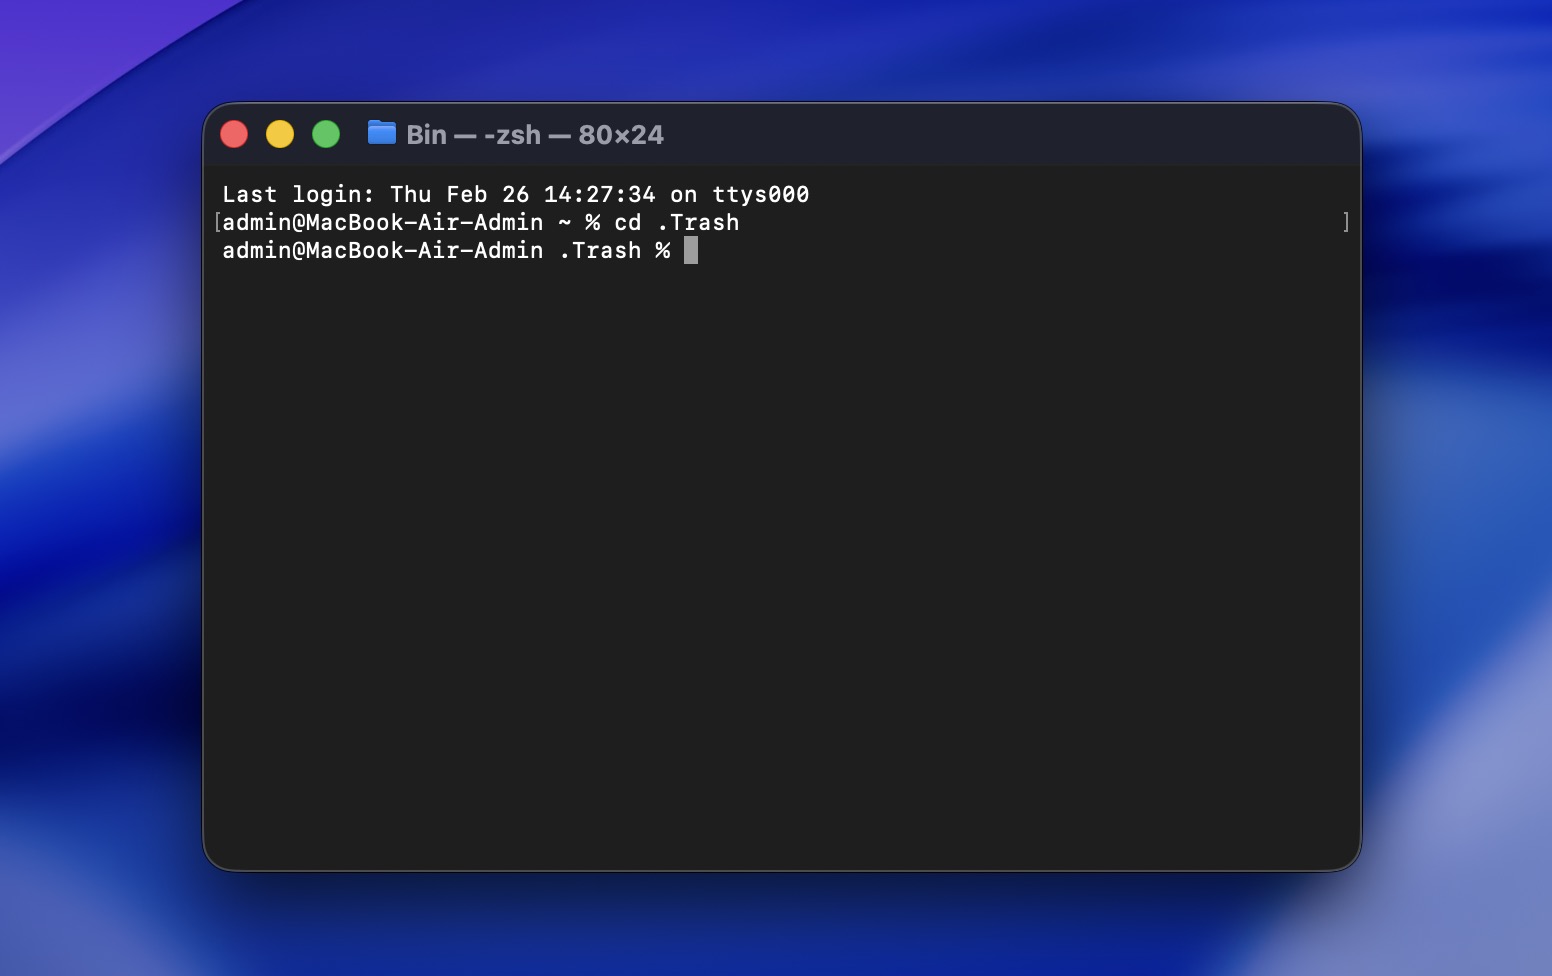
- Launch Terminal (go to Launchpad and type Terminal in the search field at the top).
- Enter cd .Trash to navigate to the Trash folder.
- Type in ls -al ~/.Trash to view the content of the Trash folder.
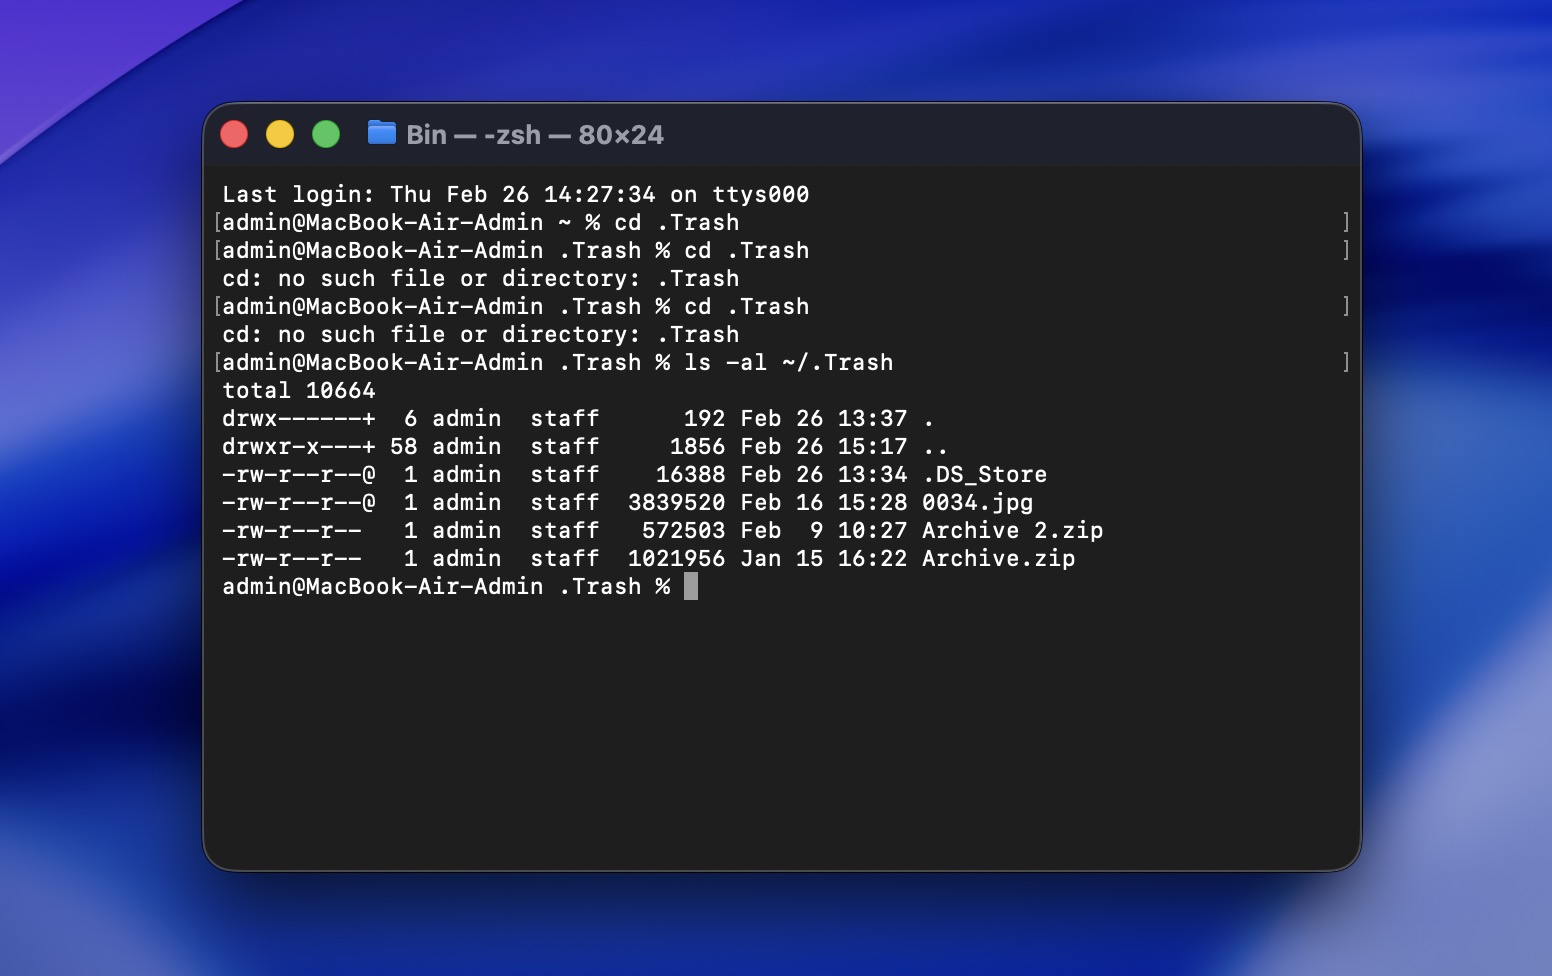
- Type in mv filename ../ to move a specific file to your home folder (replace filename with the name of the file you want to recover).
This is useful if you’re trying to recover deleted files Mac without software and the files are still in Trash.
Option 2: Check for Local Snapshots via Terminal
If Time Machine was enabled at any point, you can check for local APFS snapshots:
tmutil listlocalsnapshots /
If snapshots exist, you may be able to restore files through Time Machine’s interface.
Option 3: Use a Data Recovery Tool That Runs in Terminal
If you specifically want to recover permanently deleted files Mac Terminal style, you can use command-line recovery tools. The most common one on macOS is PhotoRec (part of the TestDisk package). It’s not as capable or as user-friendly as Disk Drill (which we covered earlier), especially when it comes to previewing files and preserving structure. But it’s free and runs entirely in Terminal, and that’s exactly what we’re focusing on in this section.
PhotoRec works by scanning the drive at a low level and carving files based on known file signatures. Just keep in mind: It won’t restore original file names or folder hierarchy, recovered files will have generic names, and you’ll need to sort through them manually.
Here’s how to recover permanently deleted files on Mac for free using Photorec:
- If you have Homebrew installed, open Terminal and run:
brew install testdisk - In Terminal, type: sudo photorec.

- Enter your password and press Return.
- Use the arrow keys to choose the drive where files were deleted, then press Enter.
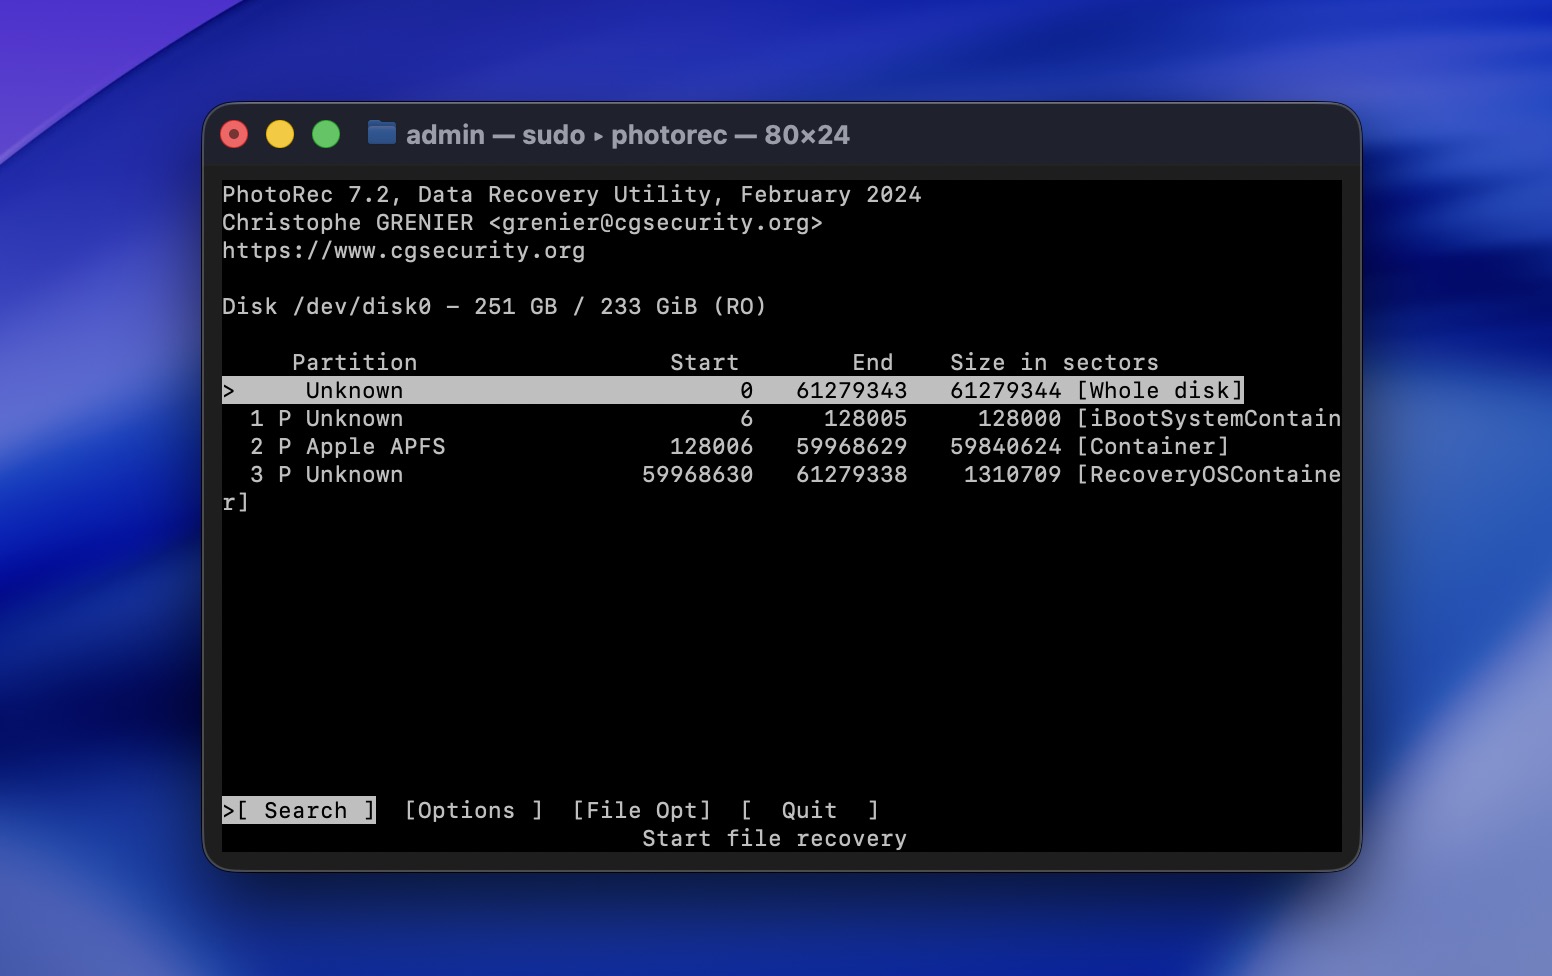
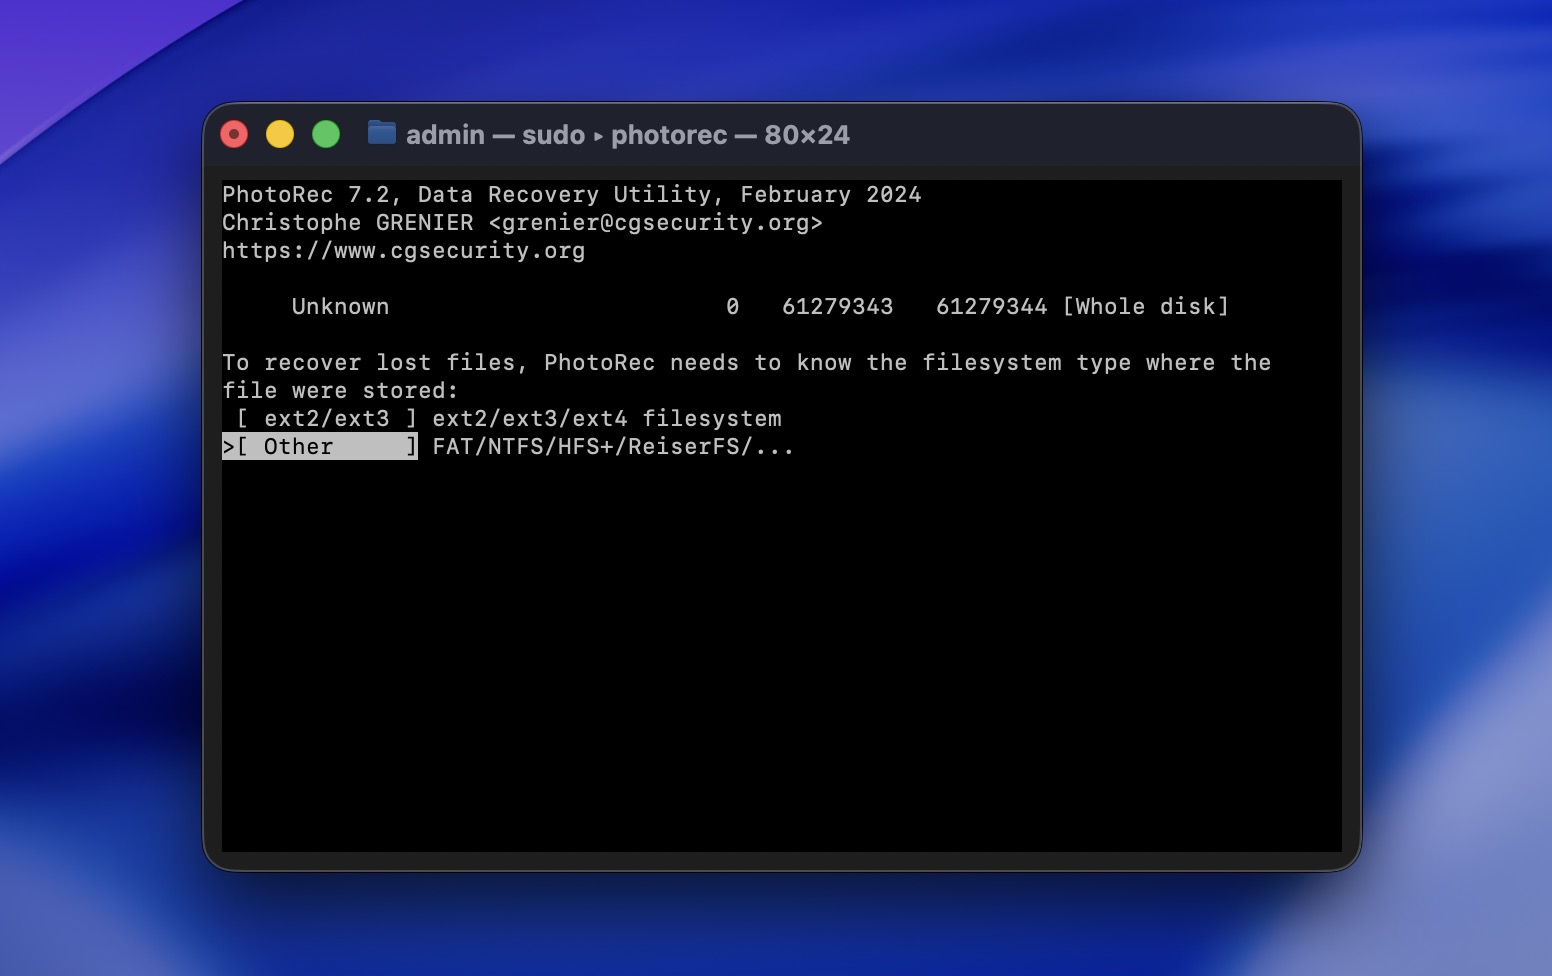
- Choose the main partition (usually the largest one). Select Whole disk.

- Select Other for APFS, HFS+, exFAT, or FAT drives (most Mac and USB drives).
- Select Free space if files were deleted normally. if the partition is corrupted or formatted.
- Select a different drive to save recovered files. Never recover back to the same disk.
- Wait for the scan to finish. PhotoRec will automatically save recovered files into folders as it scans.
How to Increase Chances for Successful Data Recovery
Unfortunately, no data recovery method can guarantee a 100 percent successful outcome. But the good news is that there are ways to maximize the chances of effectively retrieving lost data:
| Method | Description |
| ✍🏻 Don’t let your computer overwrite the data | You can never know for sure how long it might take your Mac to overwrite the deleted file with new data. So to prevent that from happening, it’s best to stop using your device as soon as you notice that a file is missing. |
| 📁 Use a new destination for the recovered file | Never restore a deleted file to the same drive where it used to be located before deletion. This will also keep it from getting overwritten. |
| 💾 Regularly back up your Mac | It’s impossible to emphasize enough the importance of backing up your files. The more often you create backups, the more chances you’ll have for quick and effective data recovery. |
| ⚙️ Be careful when choosing data recovery software | Sometimes, you have only one chance of successfully recovering a deleted file, which is why it’s important to choose a reliable tool. |
Conclusion
To sum it up, from our experience, most people who successfully undelete files on Mac fall into one of two categories:
- Those who had some kind of backup in place (usually Time Machine)
- Those who acted quickly and used reliable data recovery software
Between the two, backups are always the safer and more predictable option. As we covered above, many factors can reduce recovery chances: overwritten data, SSD TRIM behavior, or continued device use. Once data is gone at the storage level, no tool can guarantee its return.
Data recovery software can absolutely work, and it does, especially if you act fast. But it’s still dependent on the data physically remaining on the drive.
That’s why the real long-term solution is prevention.
Keep in mind, the best way to protect yourself from this happening again is by regularly backing up your computer. This way, even if you lose or delete a file from your Mac again, you’ll have an easy solution already in place.
FAQ:
- Download and install a reputable Mac data recovery tool (install it on a different drive if possible).
- Launch the application.
- Select your Mac’s internal drive (or the drive where the photos were stored).
- Start a full scan.
- Wait for the scan to complete - this may take some time.
- Preview the discovered photos to confirm they’re intact.
- Select the photos you want and recover them to a different drive.
- If you haven’t emptied it yet, open Trash, right-click the file, and choose Put Back. This is the fastest and completely free solution.
- If you had Time Machine turned on, open the folder where the file was stored, enter Time Machine, go back to a date before deletion, and click Restore.
- macOS may have local snapshots saved on your internal drive. You can check via Disk Utility or by running “tmutil listlocalsnapshots /” in Terminal.\
- There are free tools like PhotoRec that can scan your drive and attempt recovery.
- Click the Trash bin icon on the Dock to open the folder.
- Locate the deleted file and right-click it.
- Choose Put Back from the drop-down menu to move the file back to its original folder.

")
")

