 Deleted files from a CF card and want them back? Or maybe you found an old CompactFlash card and want to check if it still holds anything worth saving? Even though CF cards are no longer as common as other types of flash storage, recovery is still very much possible.
Our team looked into CF card data recovery and tested different approaches on both healthy and corrupted cards. Based on these results, this guide explains what actually works. We show how to recover deleted files from a CF card and what to do if the card itself becomes corrupted.
Please note that most of this guide focuses on Windows. At the same time, a large number of users work on macOS, so the steps and fixes covered here also apply to CompactFlash card recovery on Mac.
Is It Possible to Recover Deleted Files from a CF Card?
The same recovery principles that apply to other storage devices also apply to CF cards, so data can be recovered as long as it still physically exists on the card. This is why it’s often possible to recover a formatted CF card.
How does it work? When you delete files or perform a quick format, the data itself does not disappear right away. The system simply removes references to it, marking the space as available for new files. The actual file content remains on the card until new data overwrites those storage blocks. This means that if you deleted photos or videos from your CF card and did not write anything new to it afterward, recovery is usually possible. The same applies to quick formatting.
To maximize your chances of successful recovery, avoid saving new files to the CF card. Don’t run defragmentation or any process that moves data around. Any write operation increases the risk of overwriting the deleted files, which makes recovery impossible.
These methods only work if your CF card is detected by the system and shows the correct capacity in Disk Management (Windows) or Disk Utility (macOS), with no physical damage. If the card has visible issues (bent pins, cracks, water damage) or isn’t detected properly, DIY recovery is not recommended. In that case, consider professional recovery if the data is important, and replace the card.
How to Recover Deleted Files from CF Card
The first thing you should do after losing data from a CF card is check if you still have copies of those files somewhere else. Look through other drives, your computer, or cloud storage. If you go through all options and realize that the only copies were stored on the CF card itself, then you need CF card recovery software that can scan the card and restore the files. There are plenty of tools available, but our favorite is Disk Drill. Why?
In practice, it handles the most common data loss cases well, such as deleted or formatted files and it also includes a byte-to-byte backup feature, which comes in handy if the CF card shows signs of corruption because you can scan an image instead of the original device. The software works with CF cards from different brands (SanDisk, Lexar, Sony, and others) and supports a wide range of file formats typically stored on them. It’s available on both Windows and macOS, and the interface is simple enough to understand even if you haven’t used recovery tools before. If you want more details, you can check our full Disk Drill review.
Let’s look at how to recover files from your CF card step by step using Disk Drill (this guide shows the Windows version, but Disk Drill works just as well on Mac):
- Download Disk Drill from the official website. You need administrator privileges to install and run the software.
- Insert your CF card into a card reader and connect it to your computer. Wait until Windows detects it (the card should appear in Disk Management/Disk Utility), then launch Disk Drill.

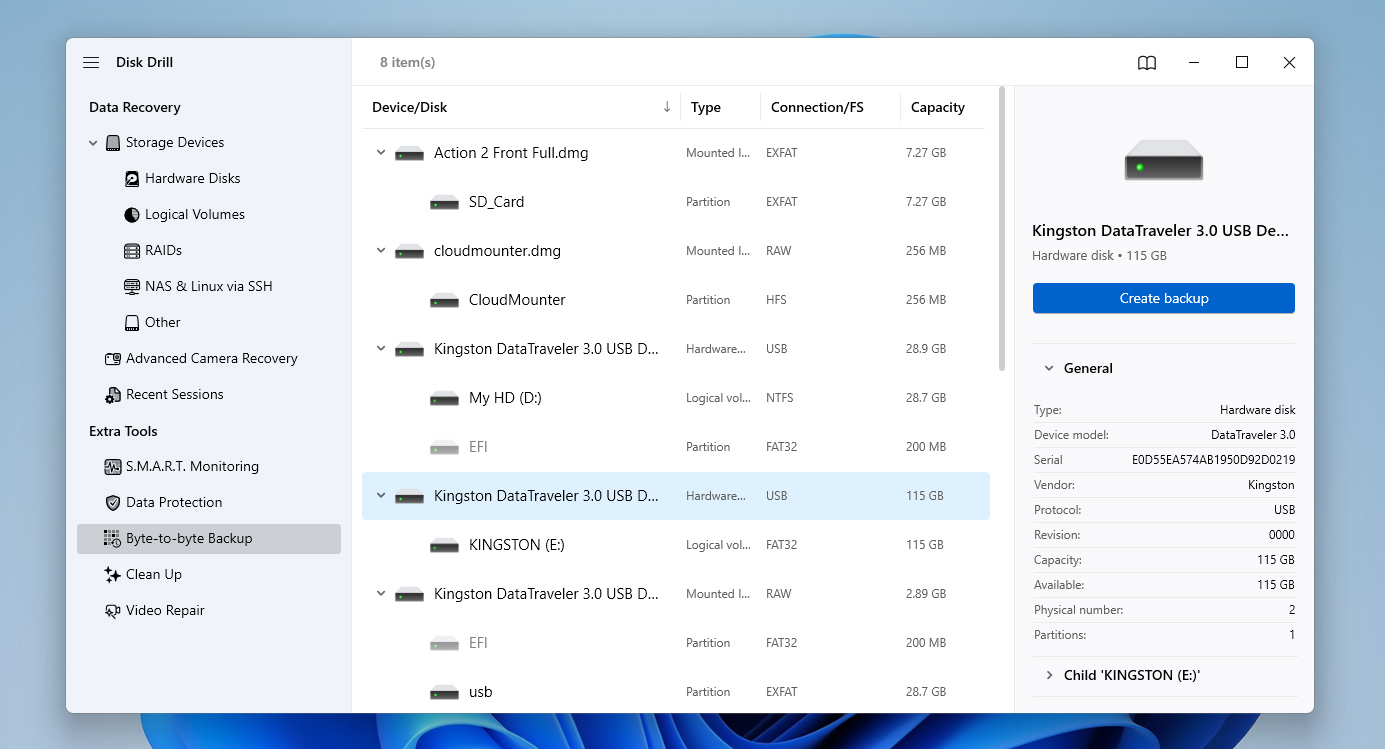
- If you suspect that your CF card is corrupted, or if it’s old and you’re not sure about its condition, it’s safer to create a byte-to-byte backup first (if the card works normally, you can skip this step and move to step 6). To create an image, open the Byte-to-byte Backup section from the left panel. Find your CF card in the list and click Create backup.
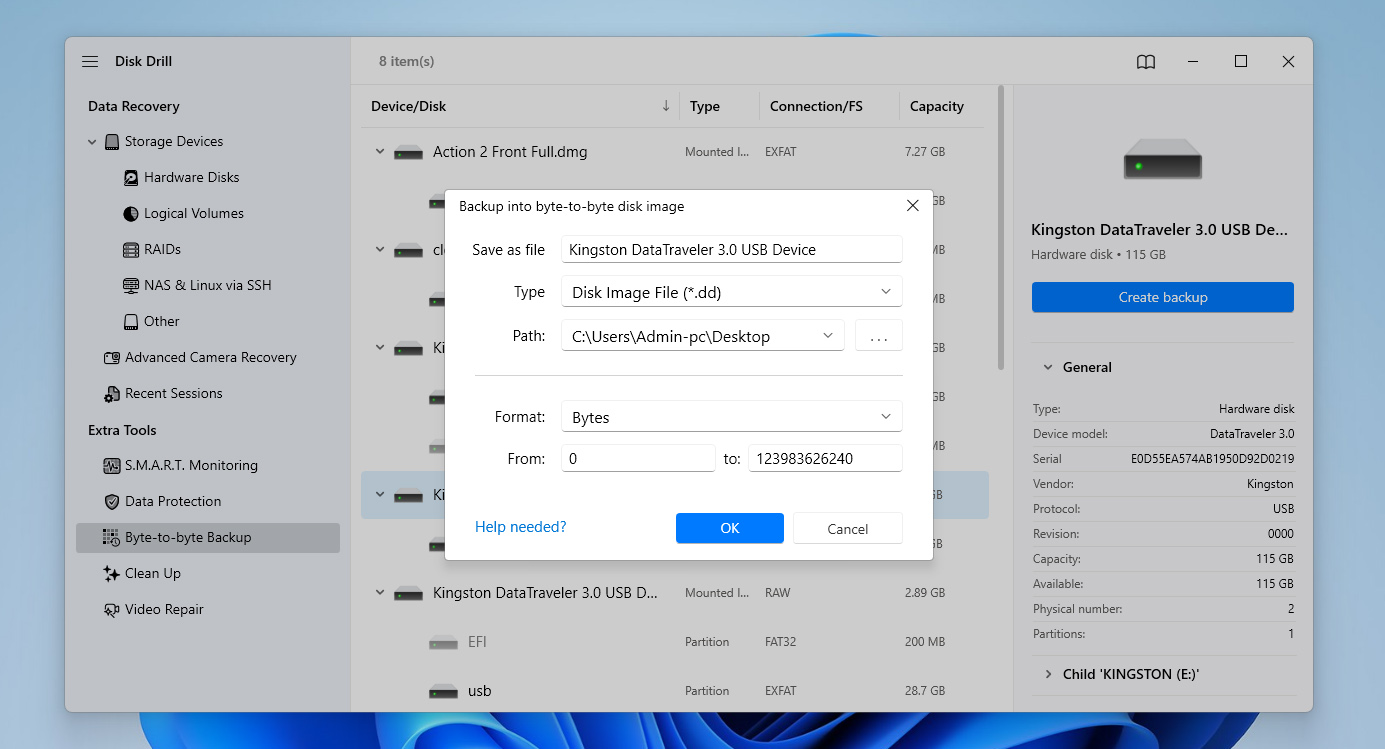
- A settings window will appear where you need to choose a location to save the image file. Confirm your choice and wait for the process to finish.
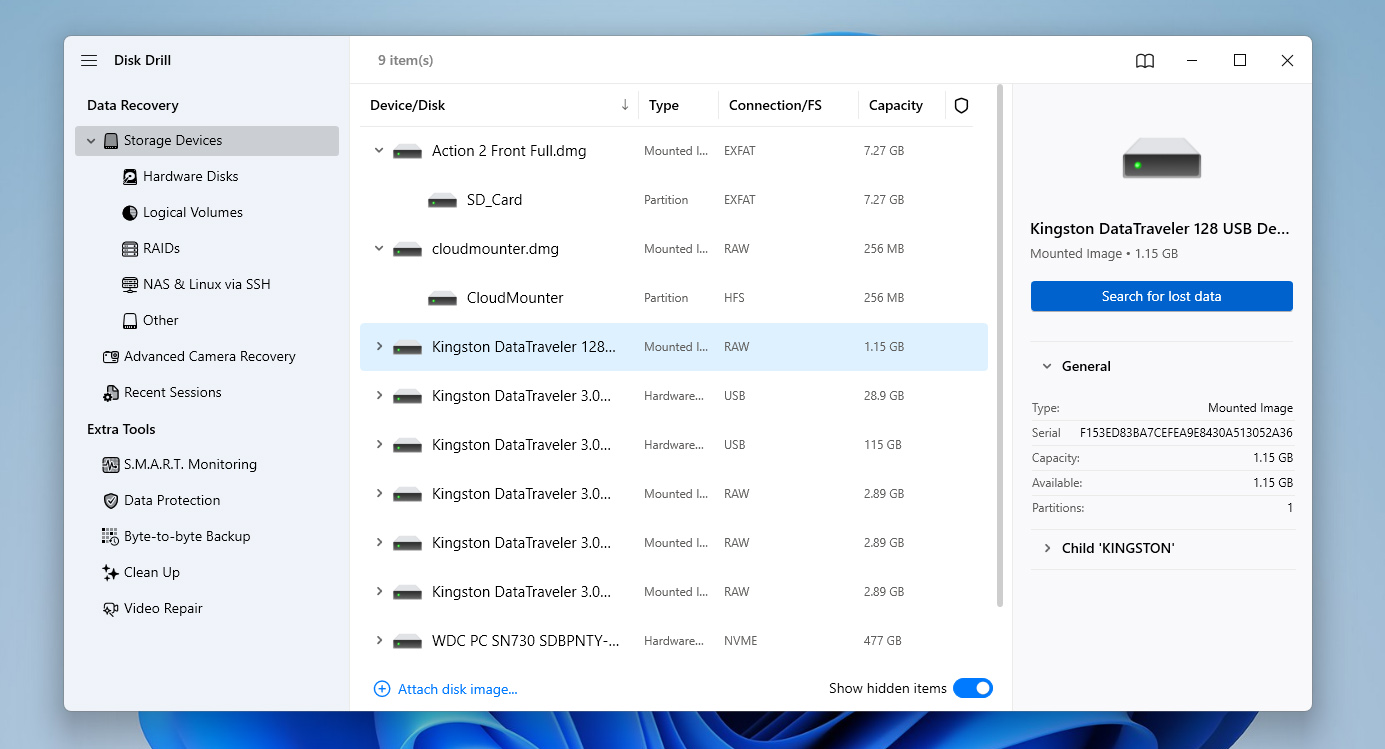
- Once the backup is ready, return to the Data Recovery section by selecting Storage Devices in the left panel. At the bottom of the window, click Attach disk image and select the image you just created so it appears in the device list.
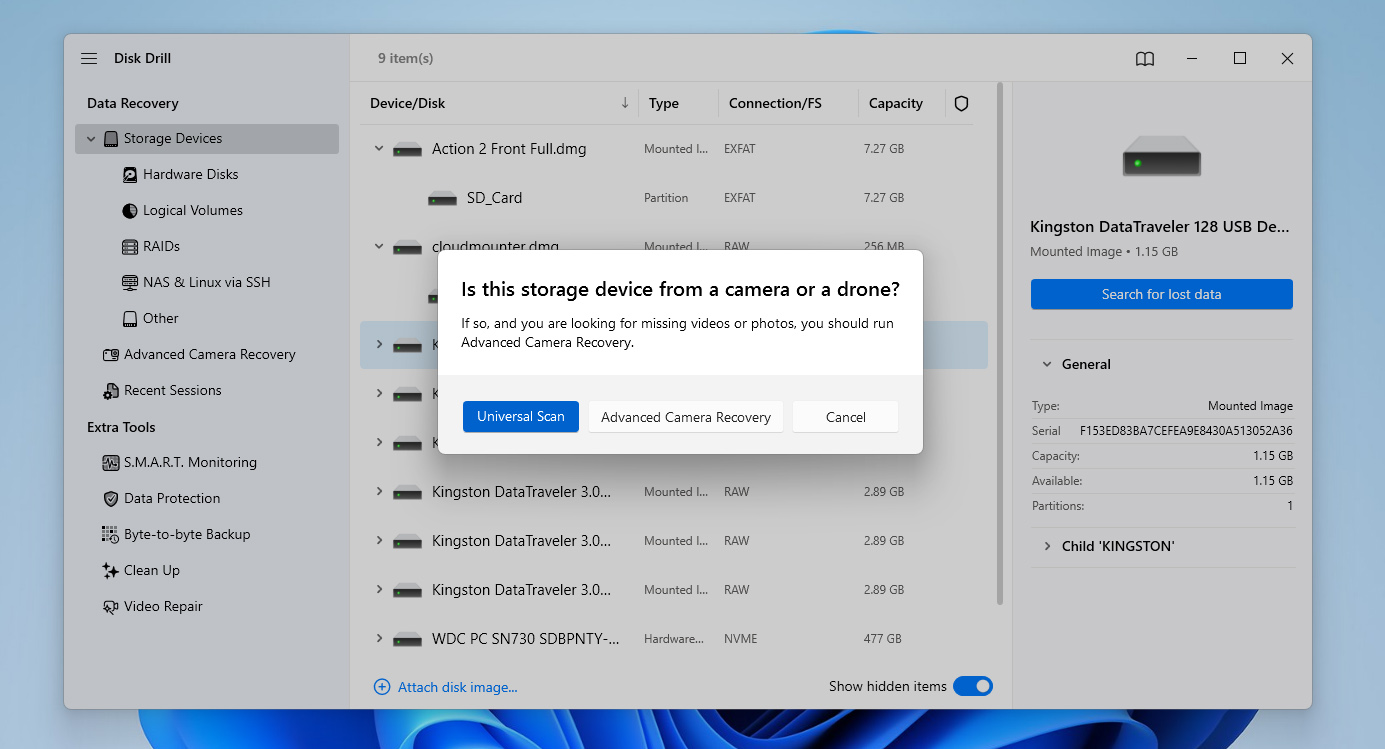
- Select the disk image (or the CF card itself if you work with it directly) and click Search for lost data.
- If Disk Drill asks you to choose a scan type, go with the Universal scan (not Advanced Camera Recovery) and wait until the scan completes. You will see a notification once it finishes.
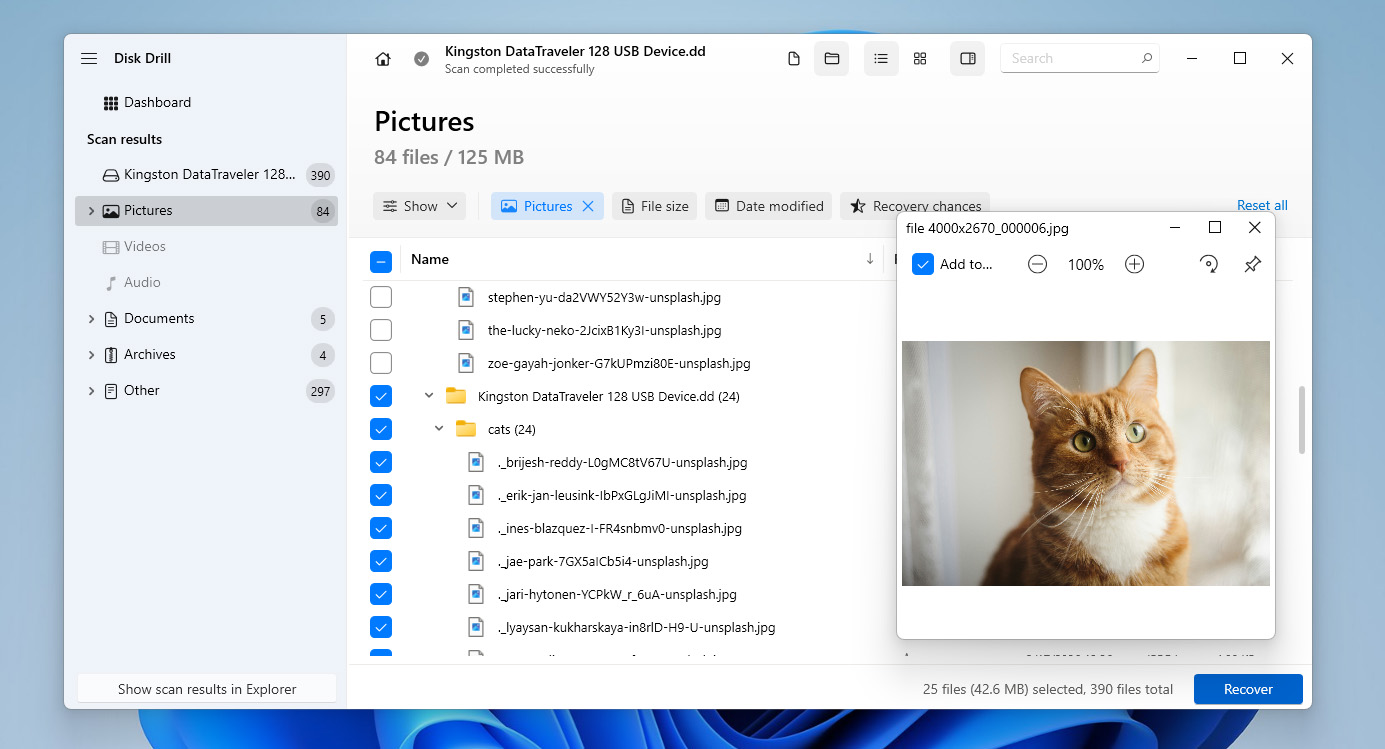
- Browse through the scan results and select the files you want to recover. Use the preview feature to check them before recovery. Filters help you narrow down results by file type, size, or date.
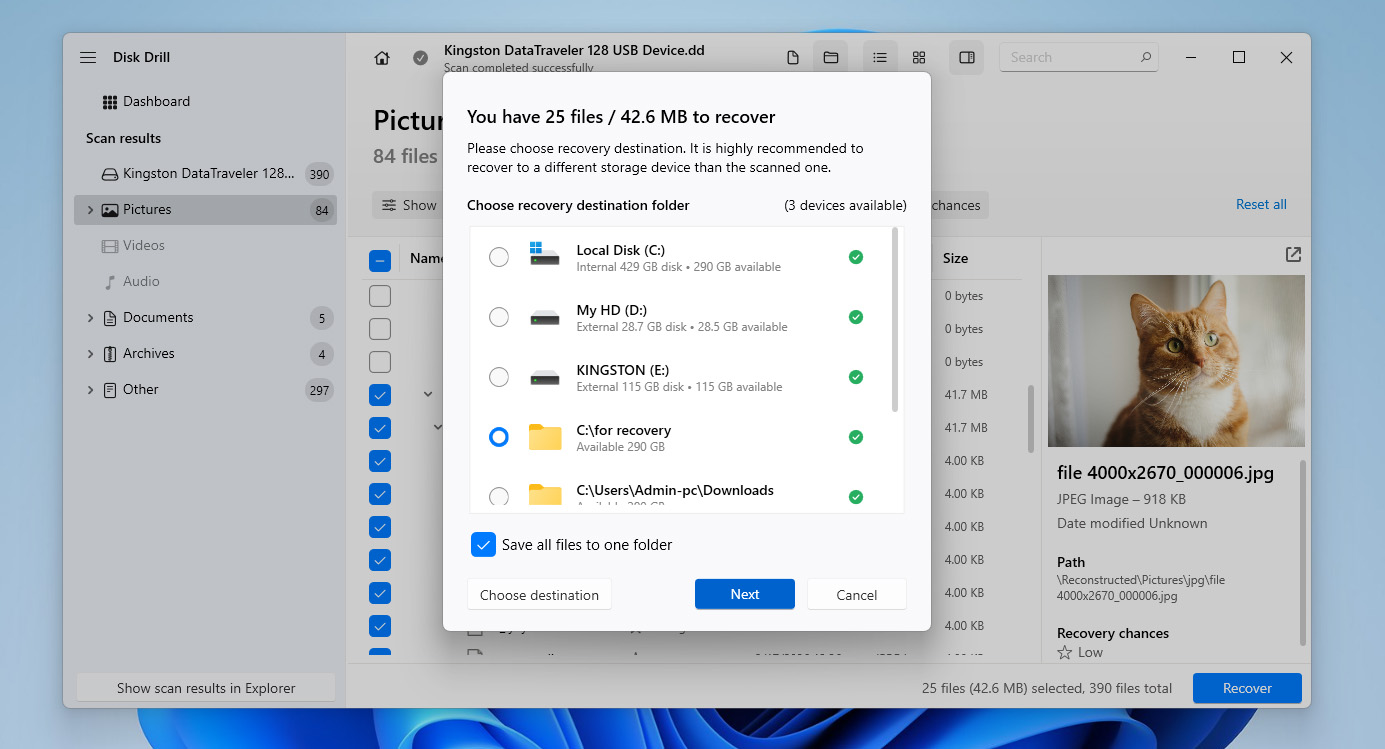
- Click the Recover button in the bottom-right corner and choose where to save the files. Always save them to a different drive, not the CF card itself. Then click Next and wait a few seconds for the process to complete.
In some cases, you may successfully recover photos from a CF card, while videos don’t look the way you expect. This usually happens because video files are often stored in fragments, which makes them harder to restore correctly. If that happens, return to the Disk Drill interface and run another scan of the CF card or its image, this time using the Advanced Camera Recovery option from the left panel. If the recovered videos still have issues (glitches, missing parts, or won’t play properly), the damage may have occurred during recording or storage. In that case, you can try the Video Repair tool available in the left panel to fix the files.
Disk Drill has different limits depending on your OS. On Windows, you can recover up to 100 MB for free. On macOS, recovery is limited to preview, so you need the Pro version to restore files. In both cases, you can scan and preview results first. If that’s not enough, you can check out our list of data recovery tools, which includes free alternatives.
How to Fix a Corrupted or Damaged CF Card
If your CF card is corrupted but you still want to keep using it, there are a few methods that may help fix it. Below are three common options, but their effectiveness depends on the cause of the corruption, and since it’s often hard to identify the exact reason, it makes sense to try them one by one.
Before you start, you should know that attempting to fix a corrupted CF card that still contains important data can lead to data loss. Always begin these steps only after you recover your files or at least create a backup image of the card. If you haven’t done that yet, go back to the previous section and follow the steps there first.
Fix 1: Check the CF Card for Errors
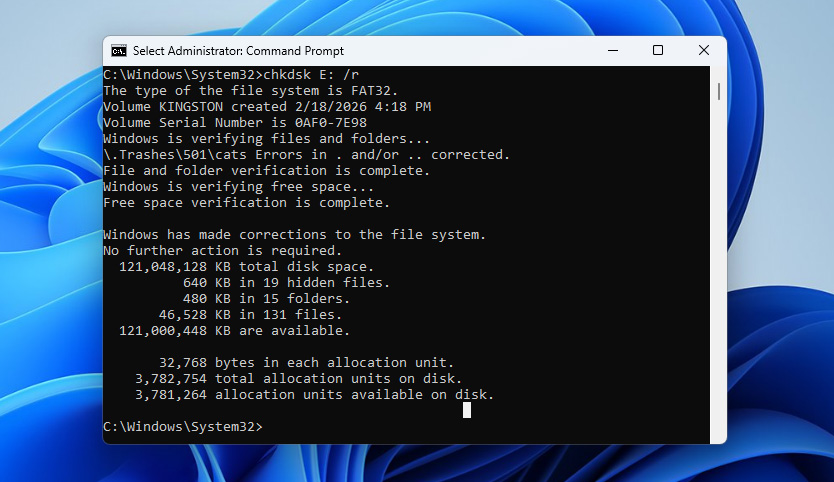
The first thing you should try is checking the CF card for file system errors. On Windows, you can do this using the built-in CHKDSK utility. It scans the card for logical issues, fixes file system errors, and can detect bad sectors.
To fix a corrupted CF card using the CHKDSK command:
- Type cmd in the search box on the taskbar and select Run as administrator.
- Enter the command chkdsk X: /r (replace X with the letter assigned to your CF card) and press Enter.
- Wait for the process to finish. It may take some time depending on the size and condition of the card.
- Once CHKDSK completes, review the report in the command window to see what issues were found and whether they were fixed.
If you’re on a Mac, the equivalent tool is First Aid in Disk Utility. It checks the file system structure and attempts to repair detected errors. To use it, open Disk Utility, select your CF card from the sidebar, click First Aid, and confirm the action.

Fix 2: Repair the File System Using TestDisk
If the first method didn’t help, the next step is to try repairing the CF card’s file system. There are no built-in tools for this, so you’ll need a third-party utility such as TestDisk. It’s a free tool that can rebuild partition tables, repair boot sectors, and restore damaged file systems. The only downside is that TestDisk runs in a terminal-style interface. If you’re not used to that, just follow the steps carefully.
Here’s how to use it:
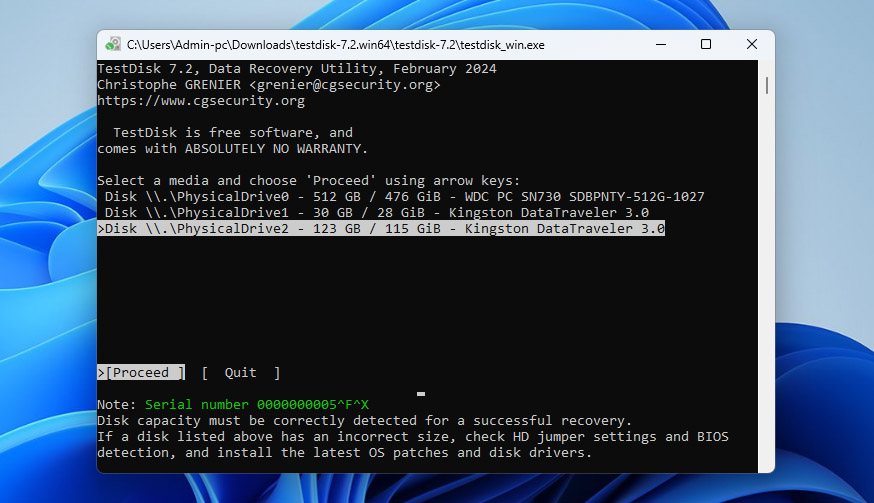
- Download TestDisk from the official website and extract the archive. Run the testdisk_win.exe file.
- When prompted, select Create to generate a new log file and press Enter.

- You’ll see a list of drives. Use the arrow keys to select your CF card and press Enter.
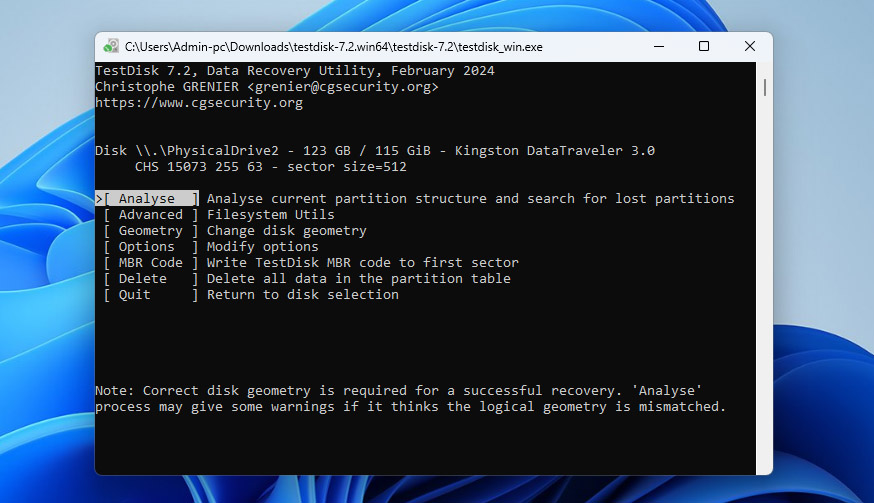
- Choose the partition table type (usually Intel for most CF cards) and press Enter.

- Select Analyse and press Enter to scan the card.
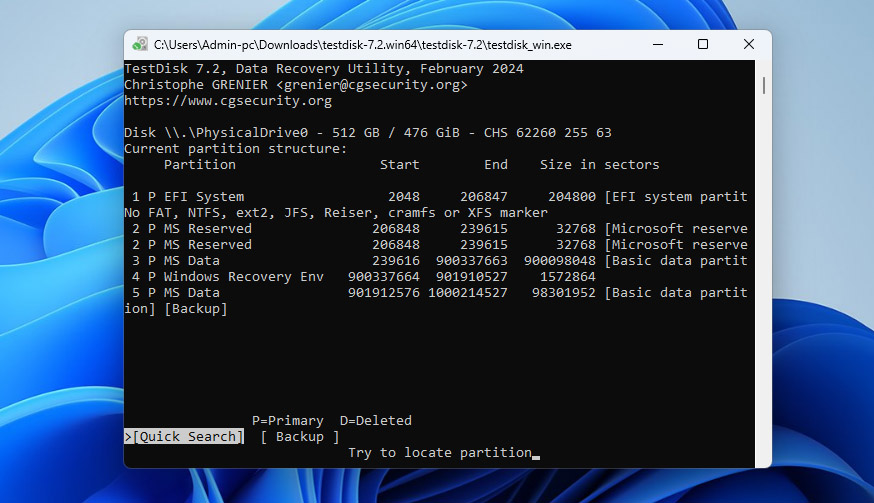
- If TestDisk finds a partition, choose Quick Search and press Enter.
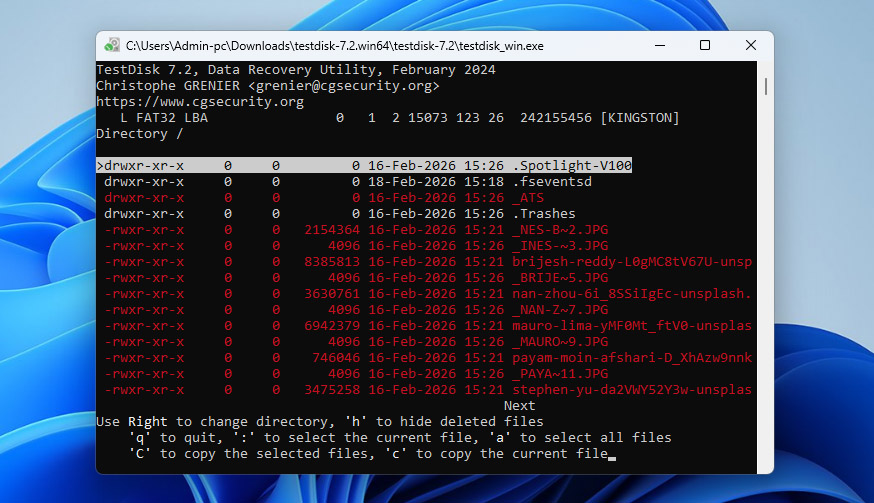
- Once the partition appears, select it and press P to preview files (optional but recommended). If everything looks correct, press Enter and choose Write to restore the partition. Confirm when prompted.
- After that, restart your computer and check if the CF card works normally.
TestDisk is also available on macOS. The core steps stay the same, but you install it using Homebrew (brew install testdisk) and run it from Terminal with sudo testdisk. From that point on, the process is identical.
Fix 3: Format the CF Card
If the previous two methods didn’t work, or you simply want a faster way to fix a corrupted CF card, you can format it. During formatting, the file system gets recreated from scratch. This removes corrupted structures, clears errors, and makes the card usable again. However, it also erases all data stored on the card.
Here’s how to format a CF card using Disk Management on Windows:
- Right-click the Start button and open Disk Management.
- Find your CF card in the list of drives, right-click its partition and select Format.
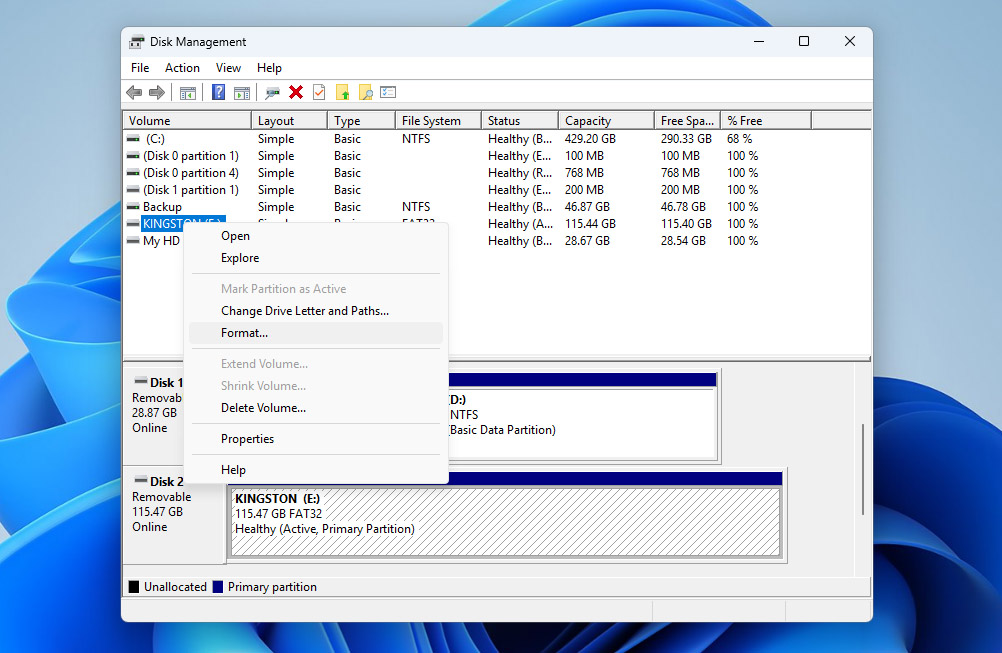
- Choose a file system (usually exFAT for compatibility), leave default settings, and click OK.
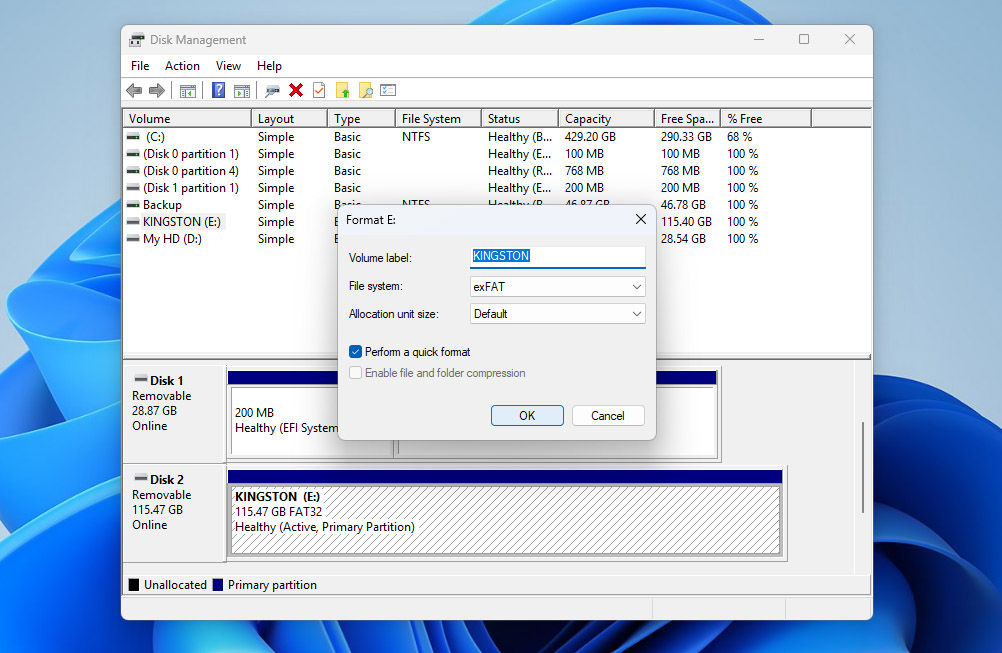
- Confirm the warning and wait for the process to complete. Once done, the card should be accessible again and ready to use.
If you’re on a Mac, you can do the same through Disk Utility. Open Disk Utility, select your CF card from the sidebar, click Erase, choose a file system (exFAT), confirm, and wait for the process to finish.
CF cards are quite outdated compared to modern storage used in cameras. They may show slower performance, compatibility issues with newer devices, or increased risk of errors over time. If you rely on your gear regularly, it may be worth switching to newer formats like CFexpress or SD cards, depending on your camera.
Conclusion
If you made it this far, you now know how to handle CF card recovery. From this point on, the best thing you can do is keep backups of your files somewhere else and not rely on a single card.
If things still go wrong at some point, here’s a simple checklist to follow:
- Stop using the card immediately
- Check if it’s detected correctly in Disk Management (Windows) or Disk Utility (macOS)
- Recover your data or create a backup image first
- Only then try to fix the card if needed
What’s important is that this logic doesn’t apply only to CF cards. The same principles work for SD cards, external drives, SSDs, and other storage devices. If you remember this sequence, you’ll always have a clear plan of action no matter what kind of data loss you run into.


")

