 If your external hard drive is acting up and your Mac suddenly won’t open it or even recognize it, you’re in the right place. Our team pulled together the most realistic fixes based on what actually works in day-to-day troubleshooting.
We’ll cover the most effective ways to fix a corrupted hard drive and restore access to the files located there.
Symptoms of Hard Drive Corruption on Mac
Not sure if your hard drive is really corrupted? Check out the table below with the most common signs of hard drive corruption, potential reasons for their occurrence, and solutions that might help fix those issues.
| What you notice on your Mac | What it usually points to | Methods that make sense (in a safe order) |
| The drive doesn’t show up in Finder or Disk Utility | Cable/port/hub issue, enclosure power issue, or the drive isn’t enumerating at all | Start with basic checks (different cable/port, no hub, direct connection). If it shows up after that, try Method 3. If it never appears in Disk Utility, skip DIY “repairs” and consider a pro lab. |
| The drive shows up in Disk Utility, but Finder won’t open it | File system damage or the volume won’t mount | Method 3 (Mount). If mount fails, run Method 1 (First Aid). If First Aid can’t repair it, try Method 2 (FSCK) or Method 6 (TestDisk). |
| You get “The disk you attached was not readable” | File system corruption or partition/boot-structure issues. Sometimes early hardware trouble | If Disk Utility sees the disk, try Method 1 first. If it fails, go Method 6 (TestDisk) when it looks like a lost partition/volume structure problem. Use Method 2 if it’s a straight file system check situation. |
| The drive mounts, but copying files hangs, Finder beachballs, the Mac slows down hard | Unstable reads (weak sectors) or a flaky enclosure/USB bridge | Don’t keep retrying copies. Try Method 7 (Safe Mode) to reduce background load, then attempt copying essentials. Avoid “repair attempts” if freezes continue.
If you must try something from the list, Method 1 is safer than format, but this is often a “recover first, replace drive” situation. |
| Disk Utility shows S.M.A.R.T. warnings (or anything that sounds like “failing”) | Hardware trouble | Skip First Aid/FSCK/TestDisk as “fixes.” Focus on getting data off while the drive still responds. If reads look unstable or it drops off, go pro. |
| You hear clicking, beeping, repeated spin-up/spin-down | Physical failure or power issue | Stop scans and repairs. Try a different cable/port once (and no hub). If noise continues, skip the rest and go straight to a recovery service. |
| You can’t write to the drive, or it mounts read-only | File system flagged as unsafe, permissions/ownership, or corruption | Method 1 (First Aid). If that doesn’t change anything, try Method 2 (FSCK). |
| Capacity looks wrong (0 bytes, tiny size, weird numbers), or the partition “vanished” | Partition table/boot sector damage, or an enclosure/controller issue | Try basic checks first. If Disk Utility sees the device, jump to Method 6 (TestDisk). If TestDisk can’t find a sane structure, stop before you write changes and consider pro recovery. |
| You see random errors, apps crash when accessing the drive, or the system acts weird only with the drive plugged in | I/O errors from the drive or USB stack glitches | Method 7 (Safe Mode) is a good quick filter. If behavior improves, try Method 3 (Mount) and copy important files. Then run Method 1. |
| You’ve recovered what matters, but the drive still won’t behave | The drive’s file system is too damaged or the disk is unreliable | Method 8 (Format) is the reset button. Use it only after recovery and only if you trust the hardware. If the drive shows instability, replace it instead of formatting. |
How to Recover Data from a Corrupted Hard Drive on Mac
If you notice any of the issues mentioned in the previous section affecting your drive, it’s a good idea to recover the data from the drive first before attempting any repairs.
There are three external hard drive data recovery methods that you can try: using a specialized data recovery tool, restoring the files from a Time Machine backup, or resorting to a data recovery service. The first method is the overall easiest and most effective in most cases, the second one is best if you have a Time Machine backup available, and the last one is for situations when the previous methods didn’t work or if the damage to your hard drive is too severe.
Method 1: Recover Files with Data Recovery Software
Usually, using data recovery software to retrieve your files from a corrupted hard drive is the safest and most effective option. To be able to use a data recovery application, the following should apply to the situation you’re experiencing with your corrupted drive:
- You should be able to connect the external hard drive to your Mac
- The drive should be visible in Disk Utility
- The size for your external HDD is displayed correctly on your computer
We recommend trying out a tool called Disk Drill since it has been considered as one of the best data recovery software for quite some time now and has a proven track record of successful recoveries of corrupted hard drives on Macs.
Some of the benefits of using Disk Drill for external hard drive recovery include the fact that this tool is compatible with all file systems (APFS, HFS+, exFAT, FAT32, etc.) and can restore almost any file type (videos, music files, presentations, photos, documents, archives, and others).
It also includes a disk imaging feature, which is critical for unstable drives. You can create a byte-to-byte copy (disk image) and scan that instead of stressing the original hardware. We’ll walk you through that process next.
Follow these steps to recover files from a corrupted external hard drive using Disk Drill for Mac:
- Download Disk Drill and follow the onscreen instructions to install the application.
- Connect the corrupted hard drive to your Mac.
- Double-click the Disk Drill icon to launch the tool.
- Go to Extra Tools. Click Byte-to-byte Backup.
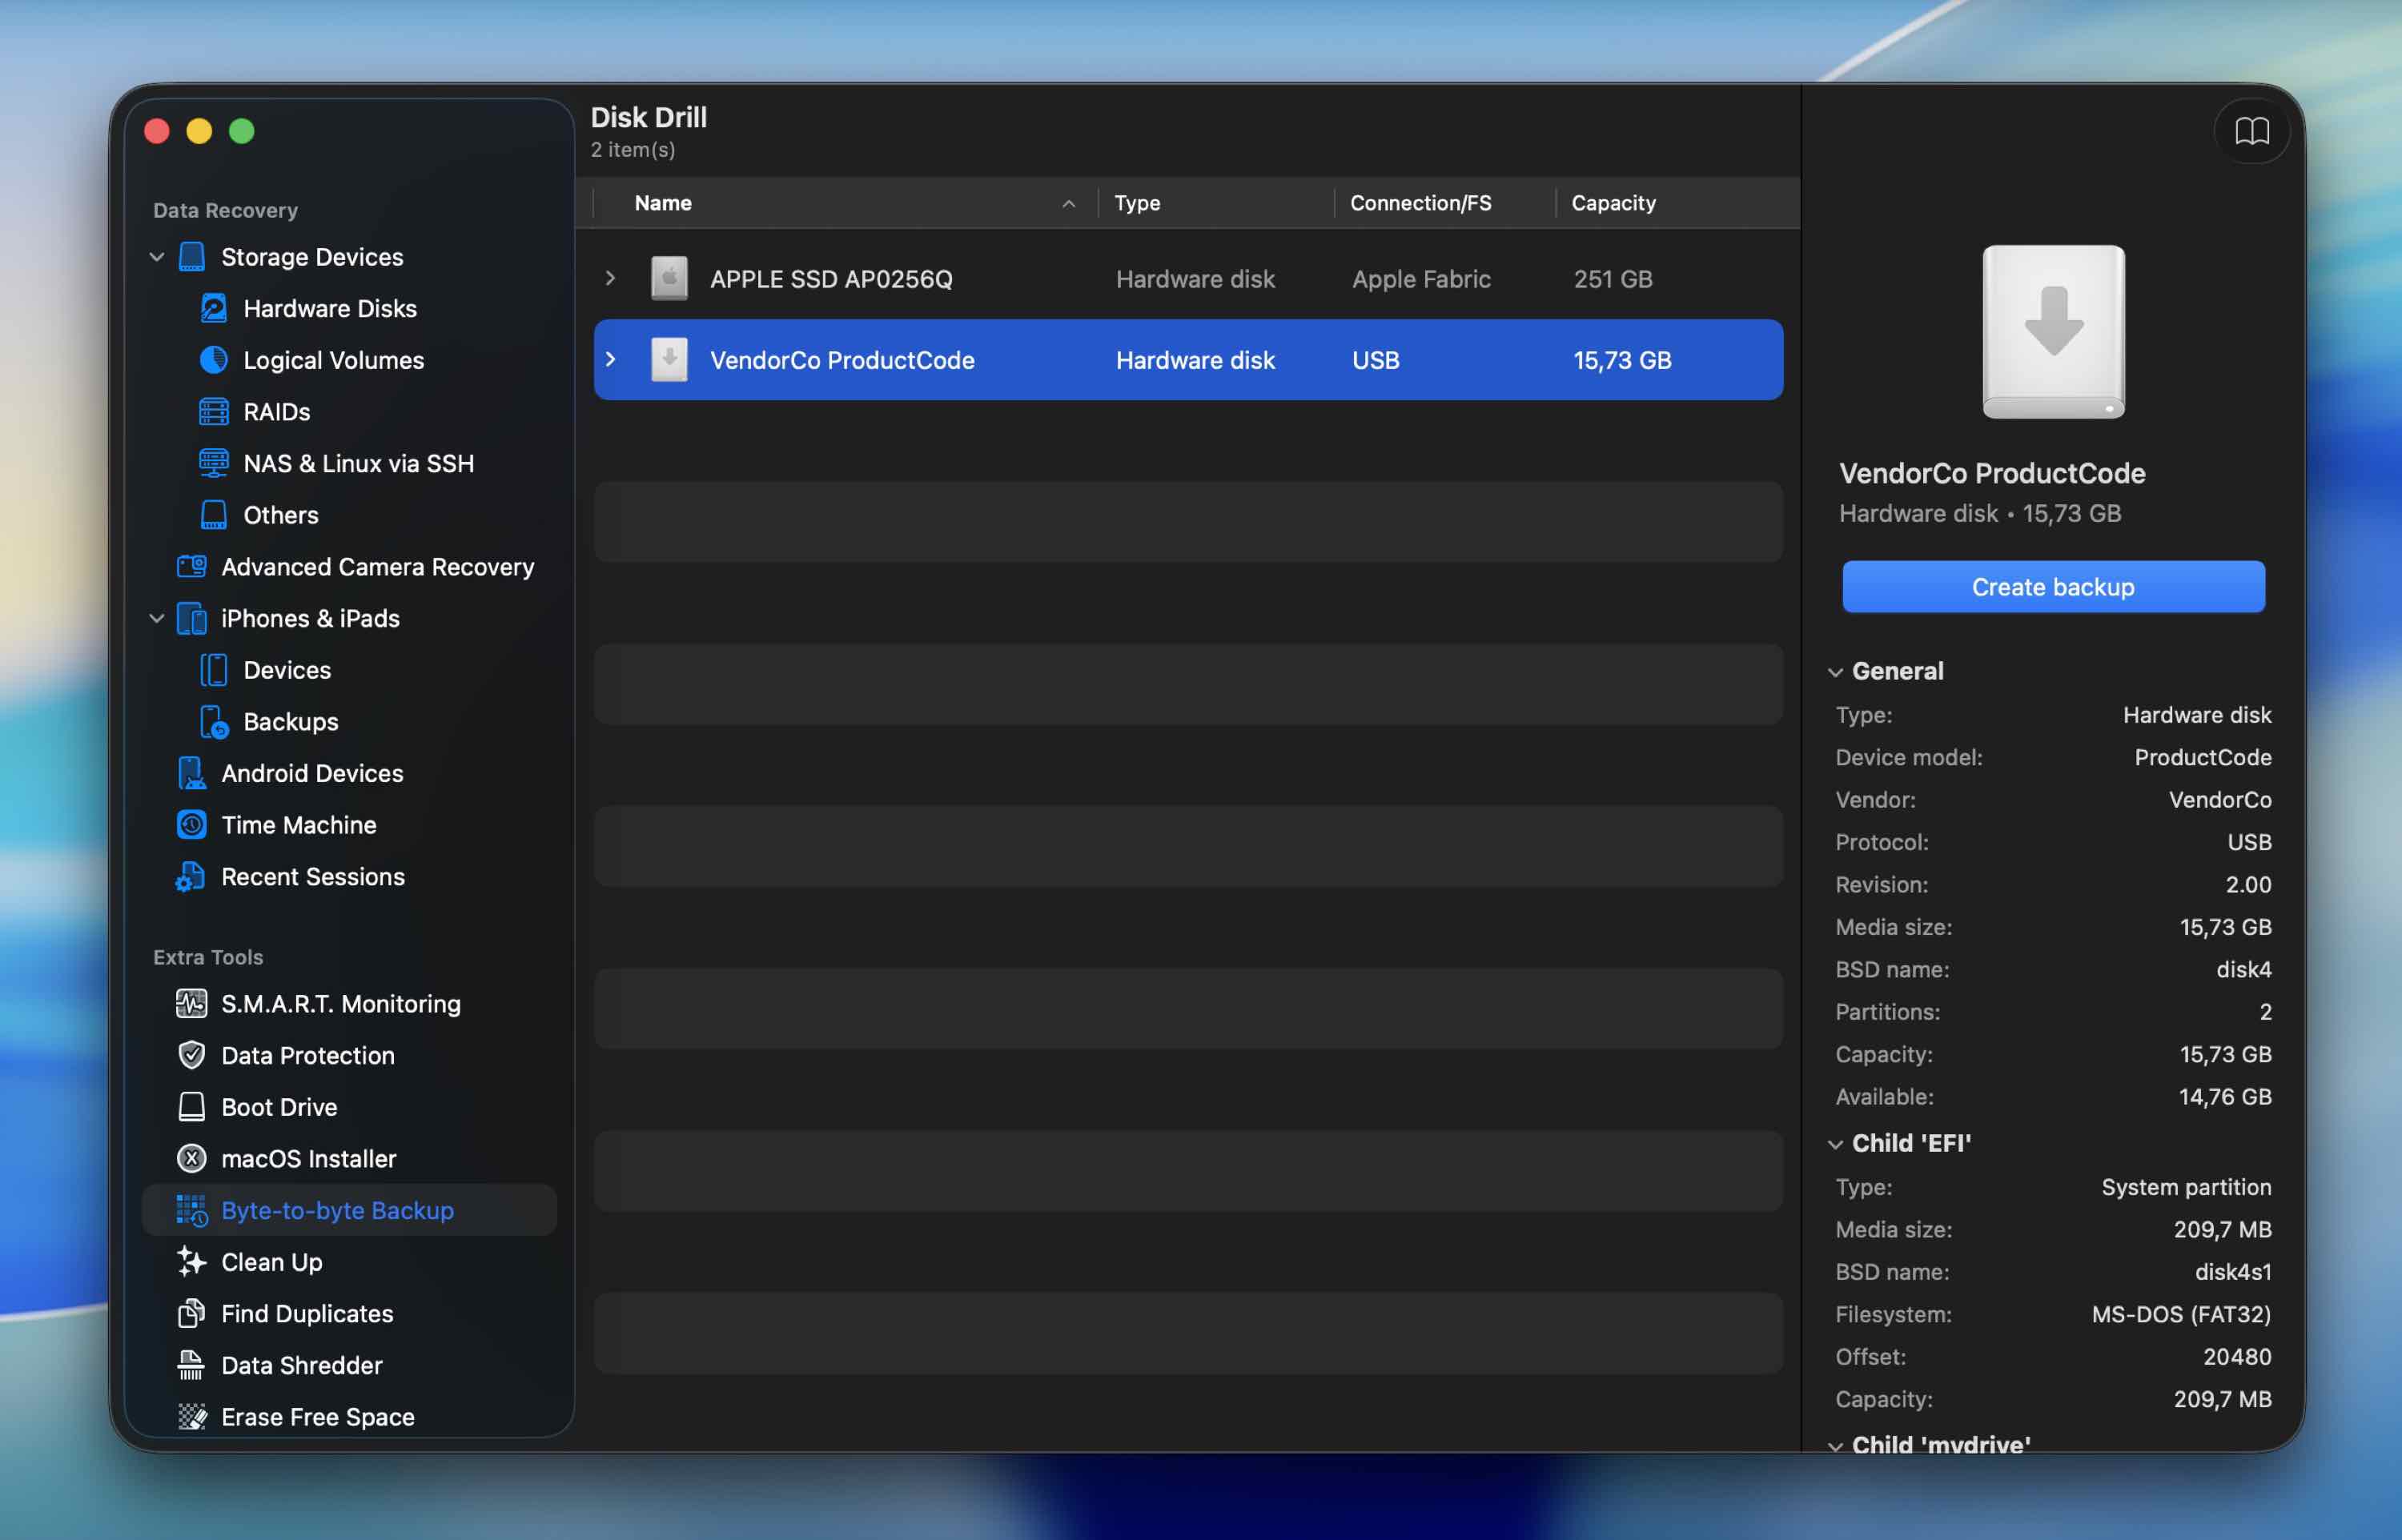
- Select your corrupted external drive from the list and click Create backup. Choose where to save the image file. The destination drive must have free space equal to (better larger) than the full size of the external HDD. Click OK.
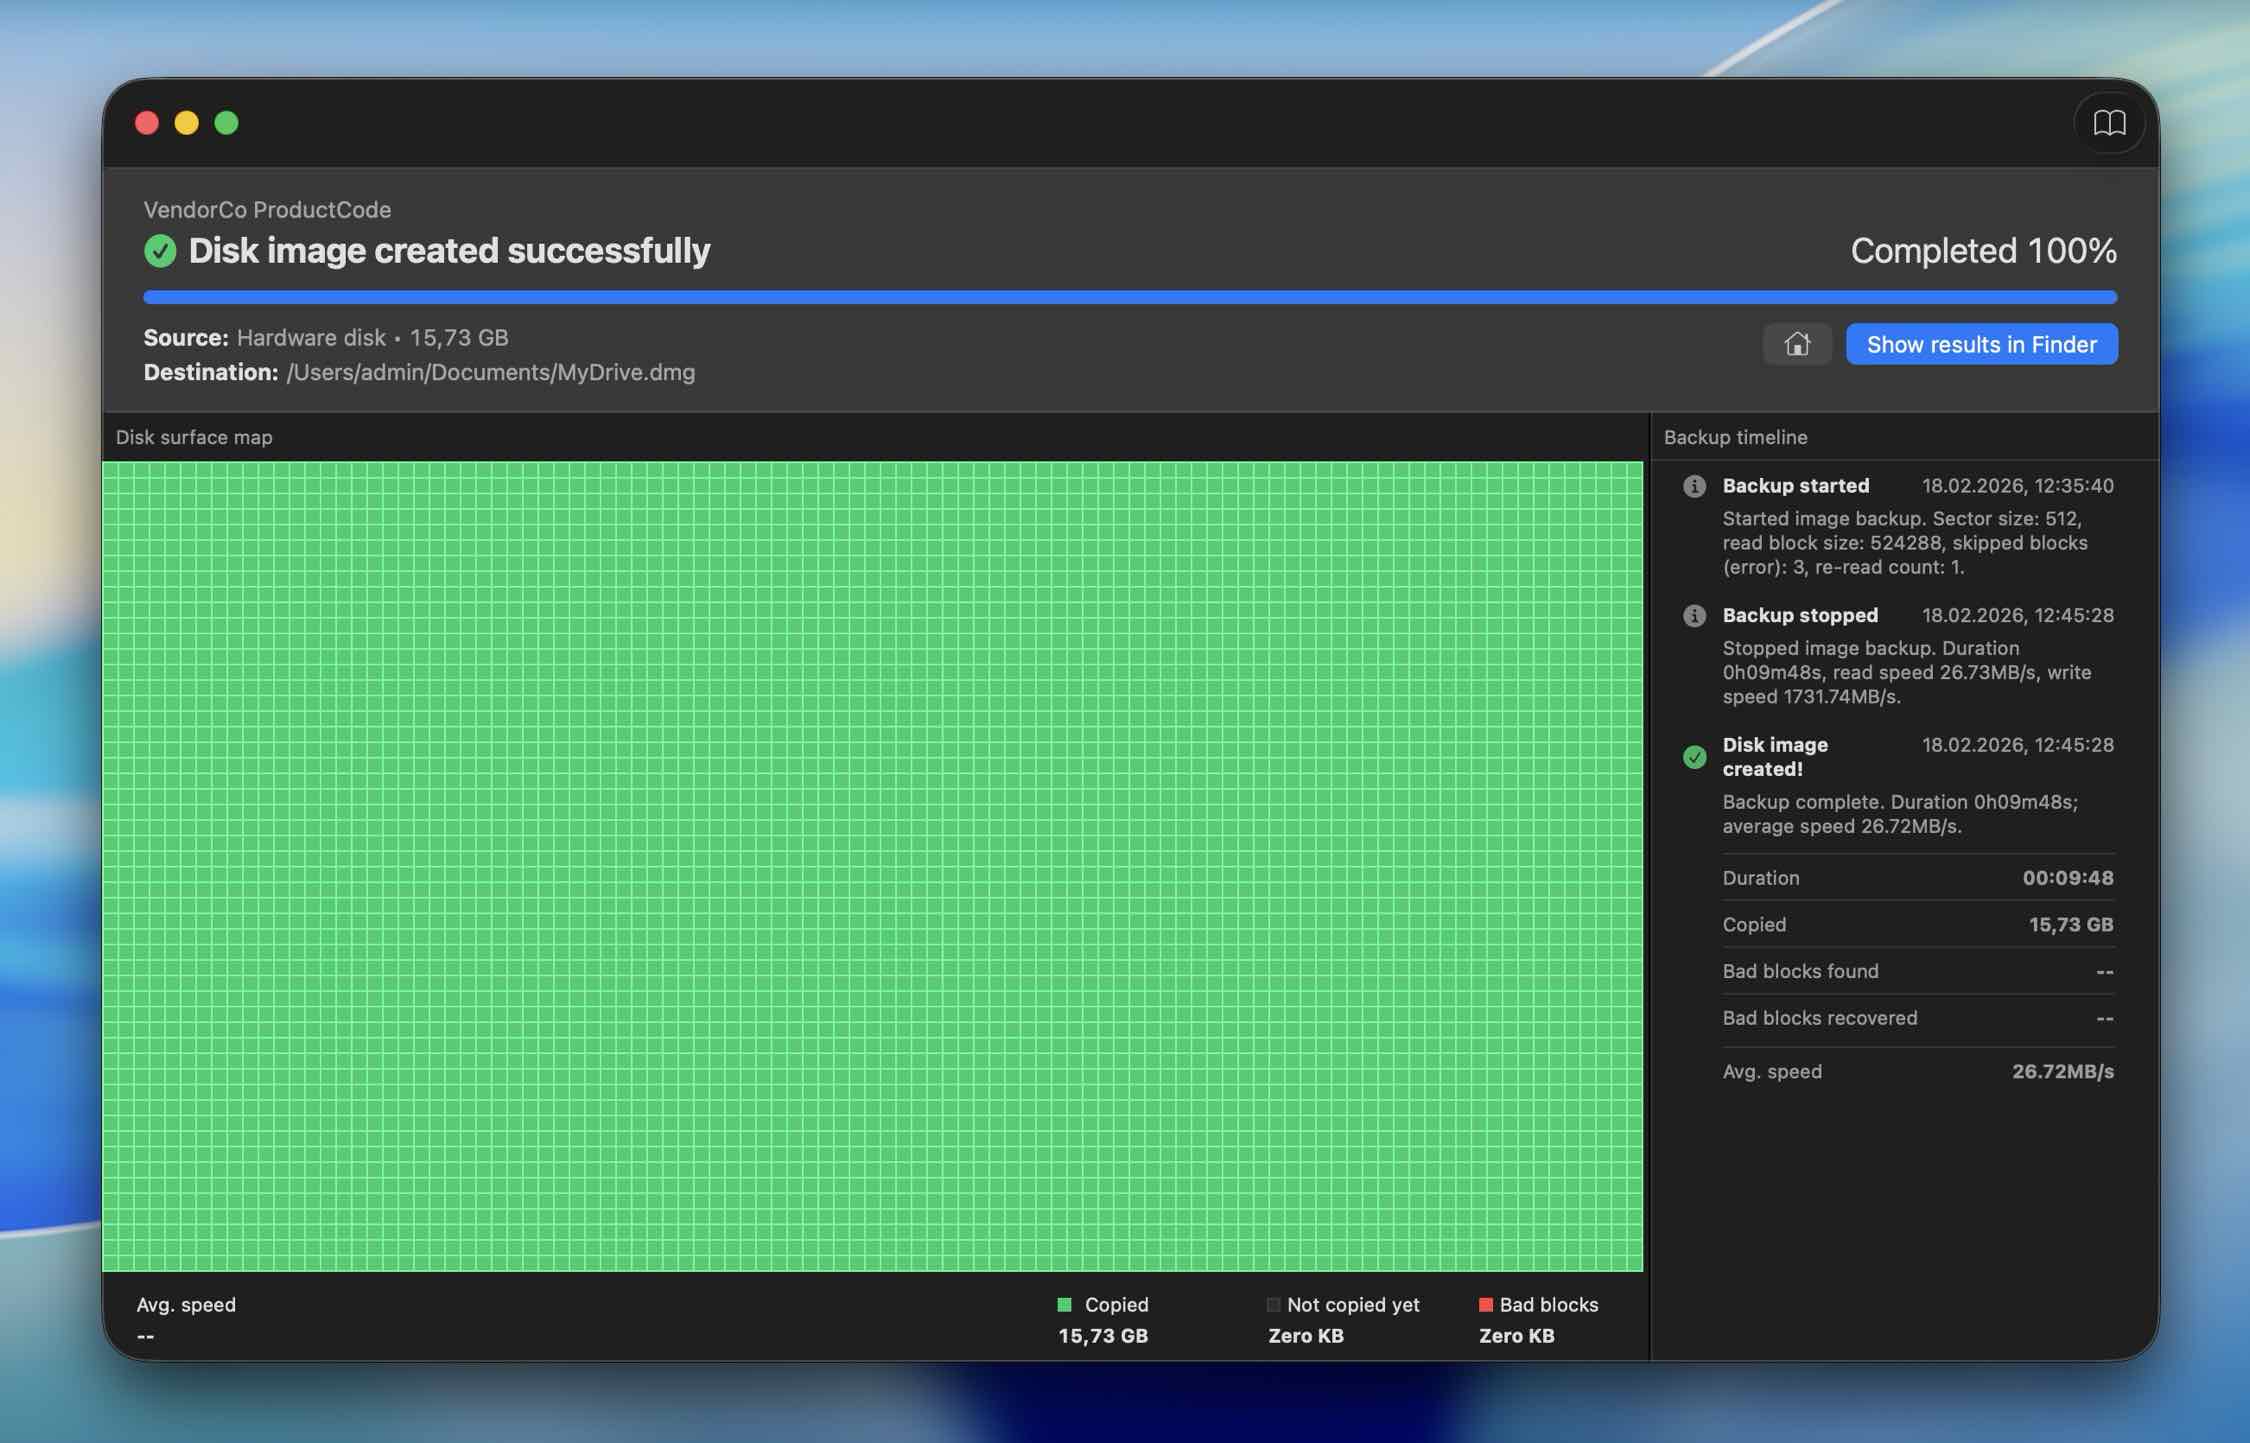 Wait while Disk Drill creates the image. Large drives can take a while.
 - Now go back to the Storage Devices screen.
- Click Attach disk image, browse to the image you just created, and double-click it. It will appear in the list like a regular drive.
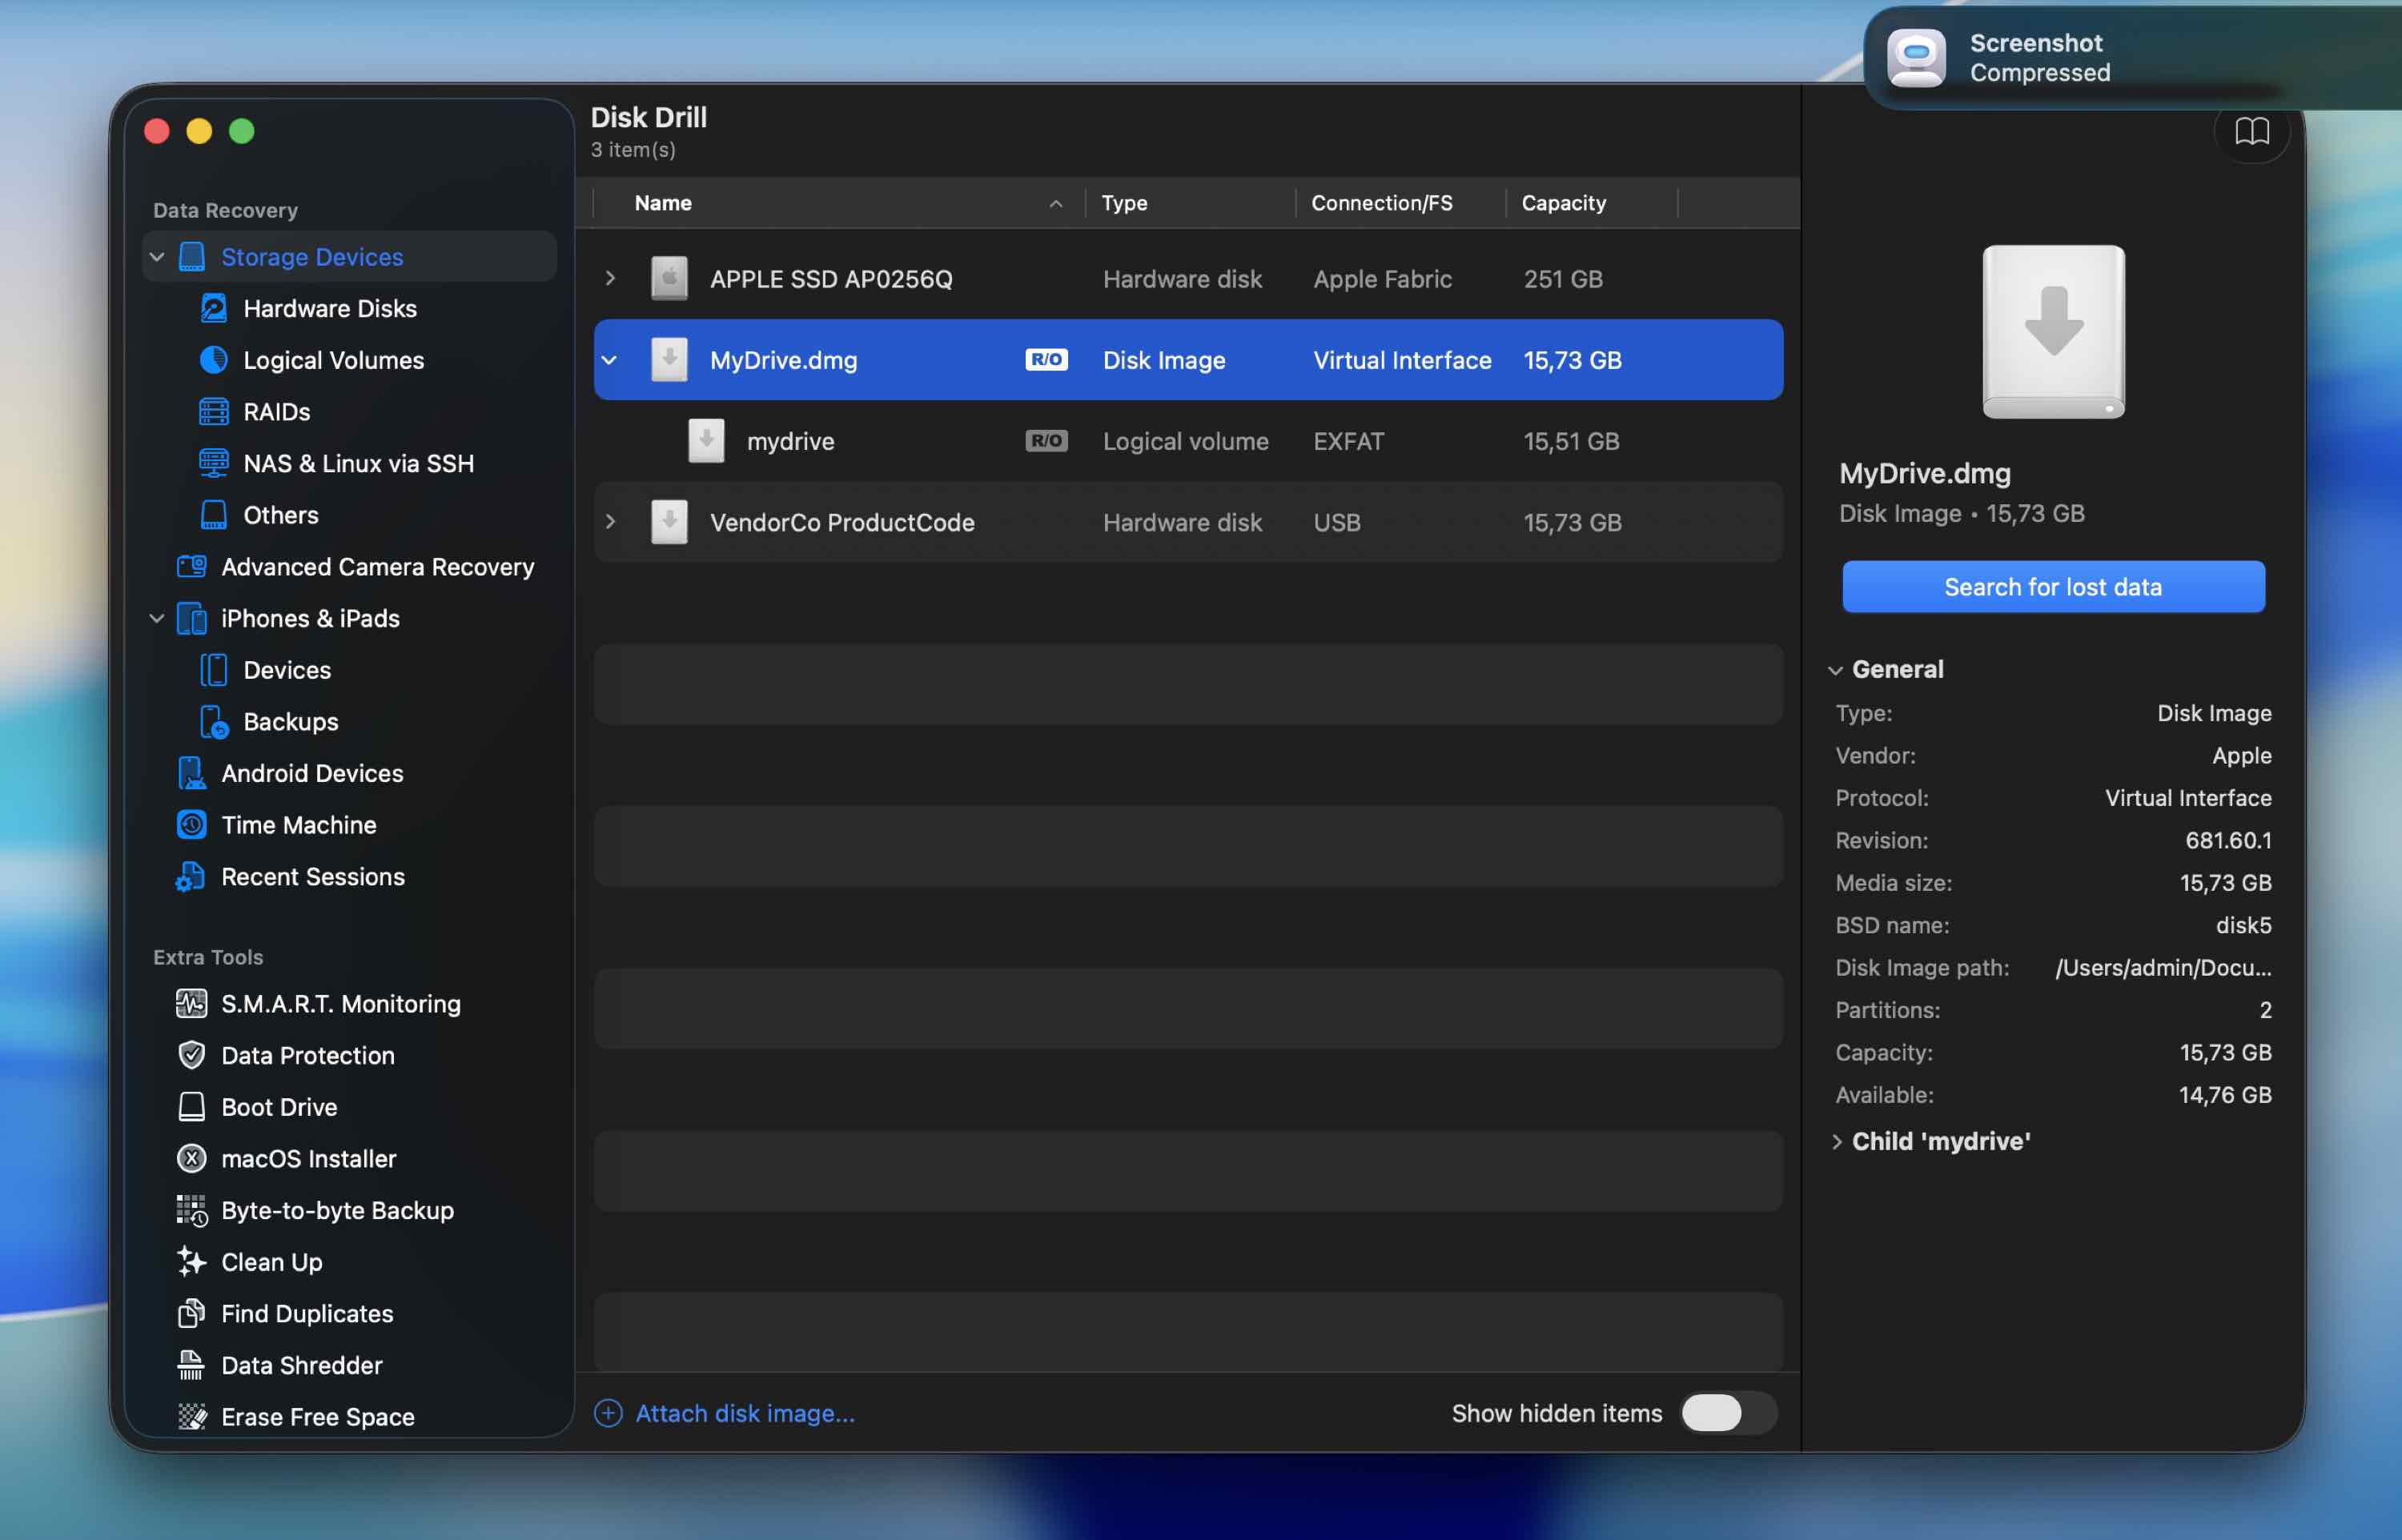
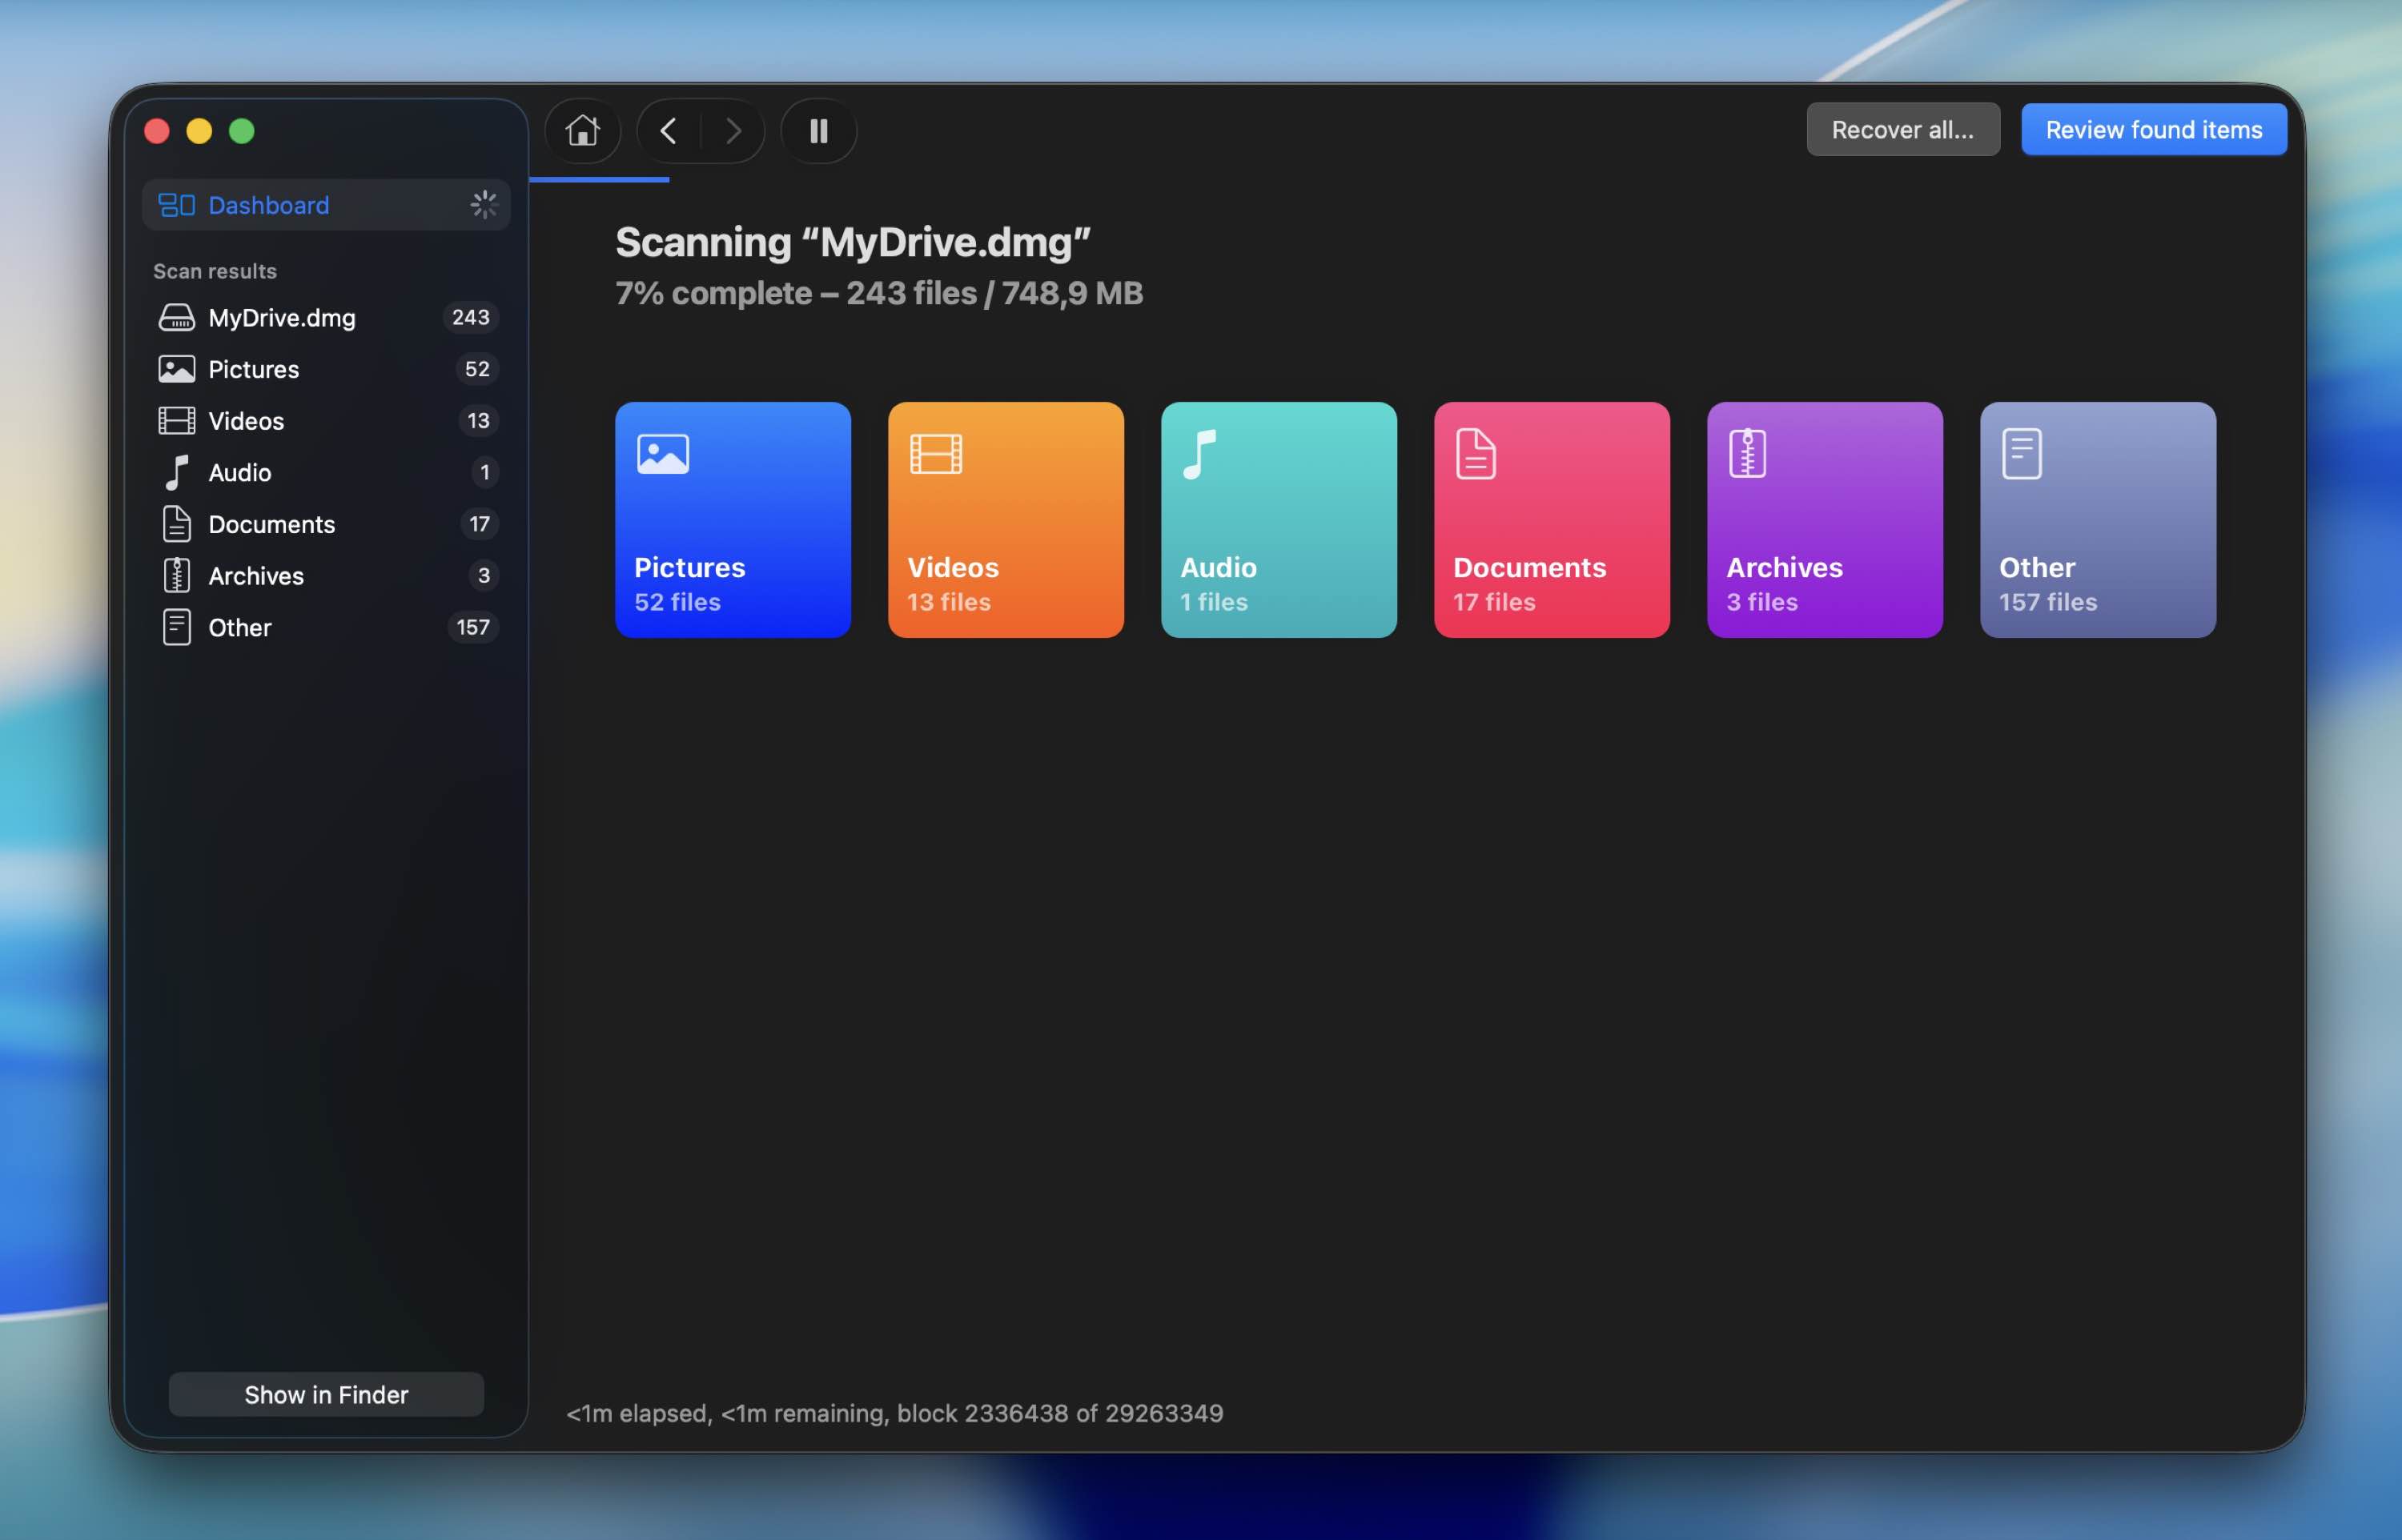
- Select the disk image and click Search for lost data. If prompted for scan mode, choose Universal Scan.
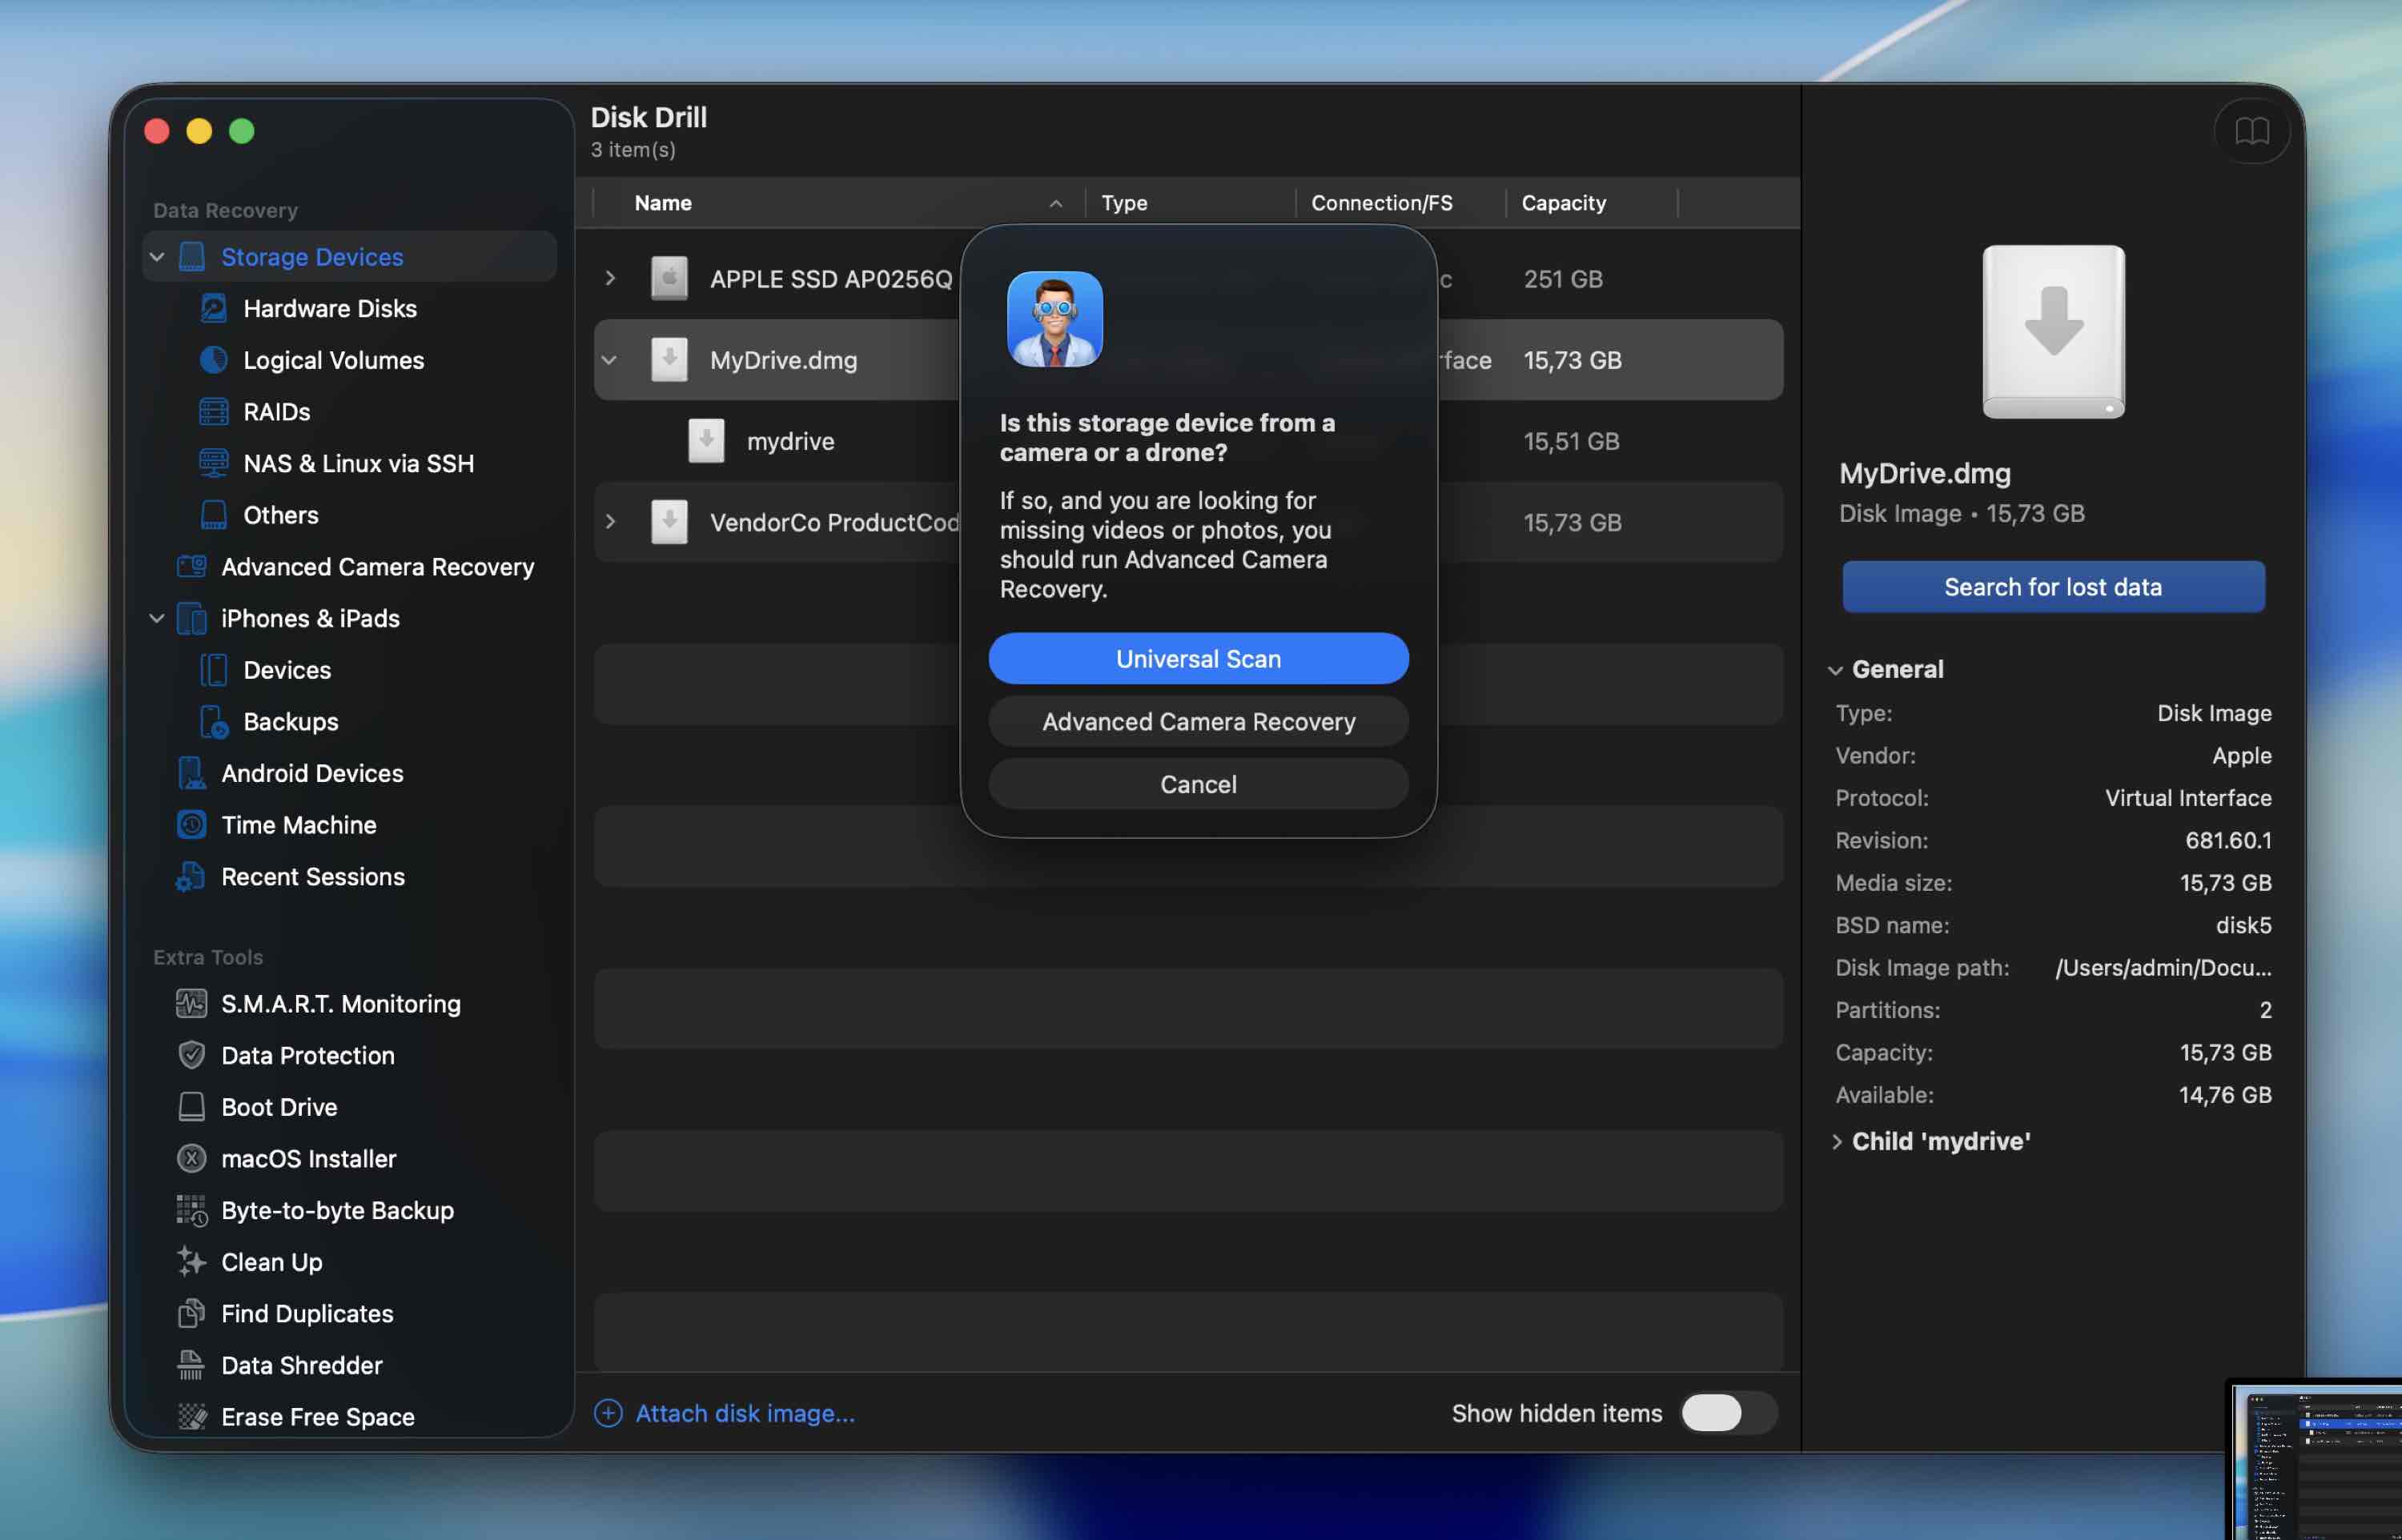
- When results appear, click Review found items. Use the left panel to filter by file type: Pictures, Video, Documents, and so on. Or – if you’re sure you want to recover everything, you can simply wait for the scan to finish and click Recover all instead.
- Use checkboxes to select what you need.
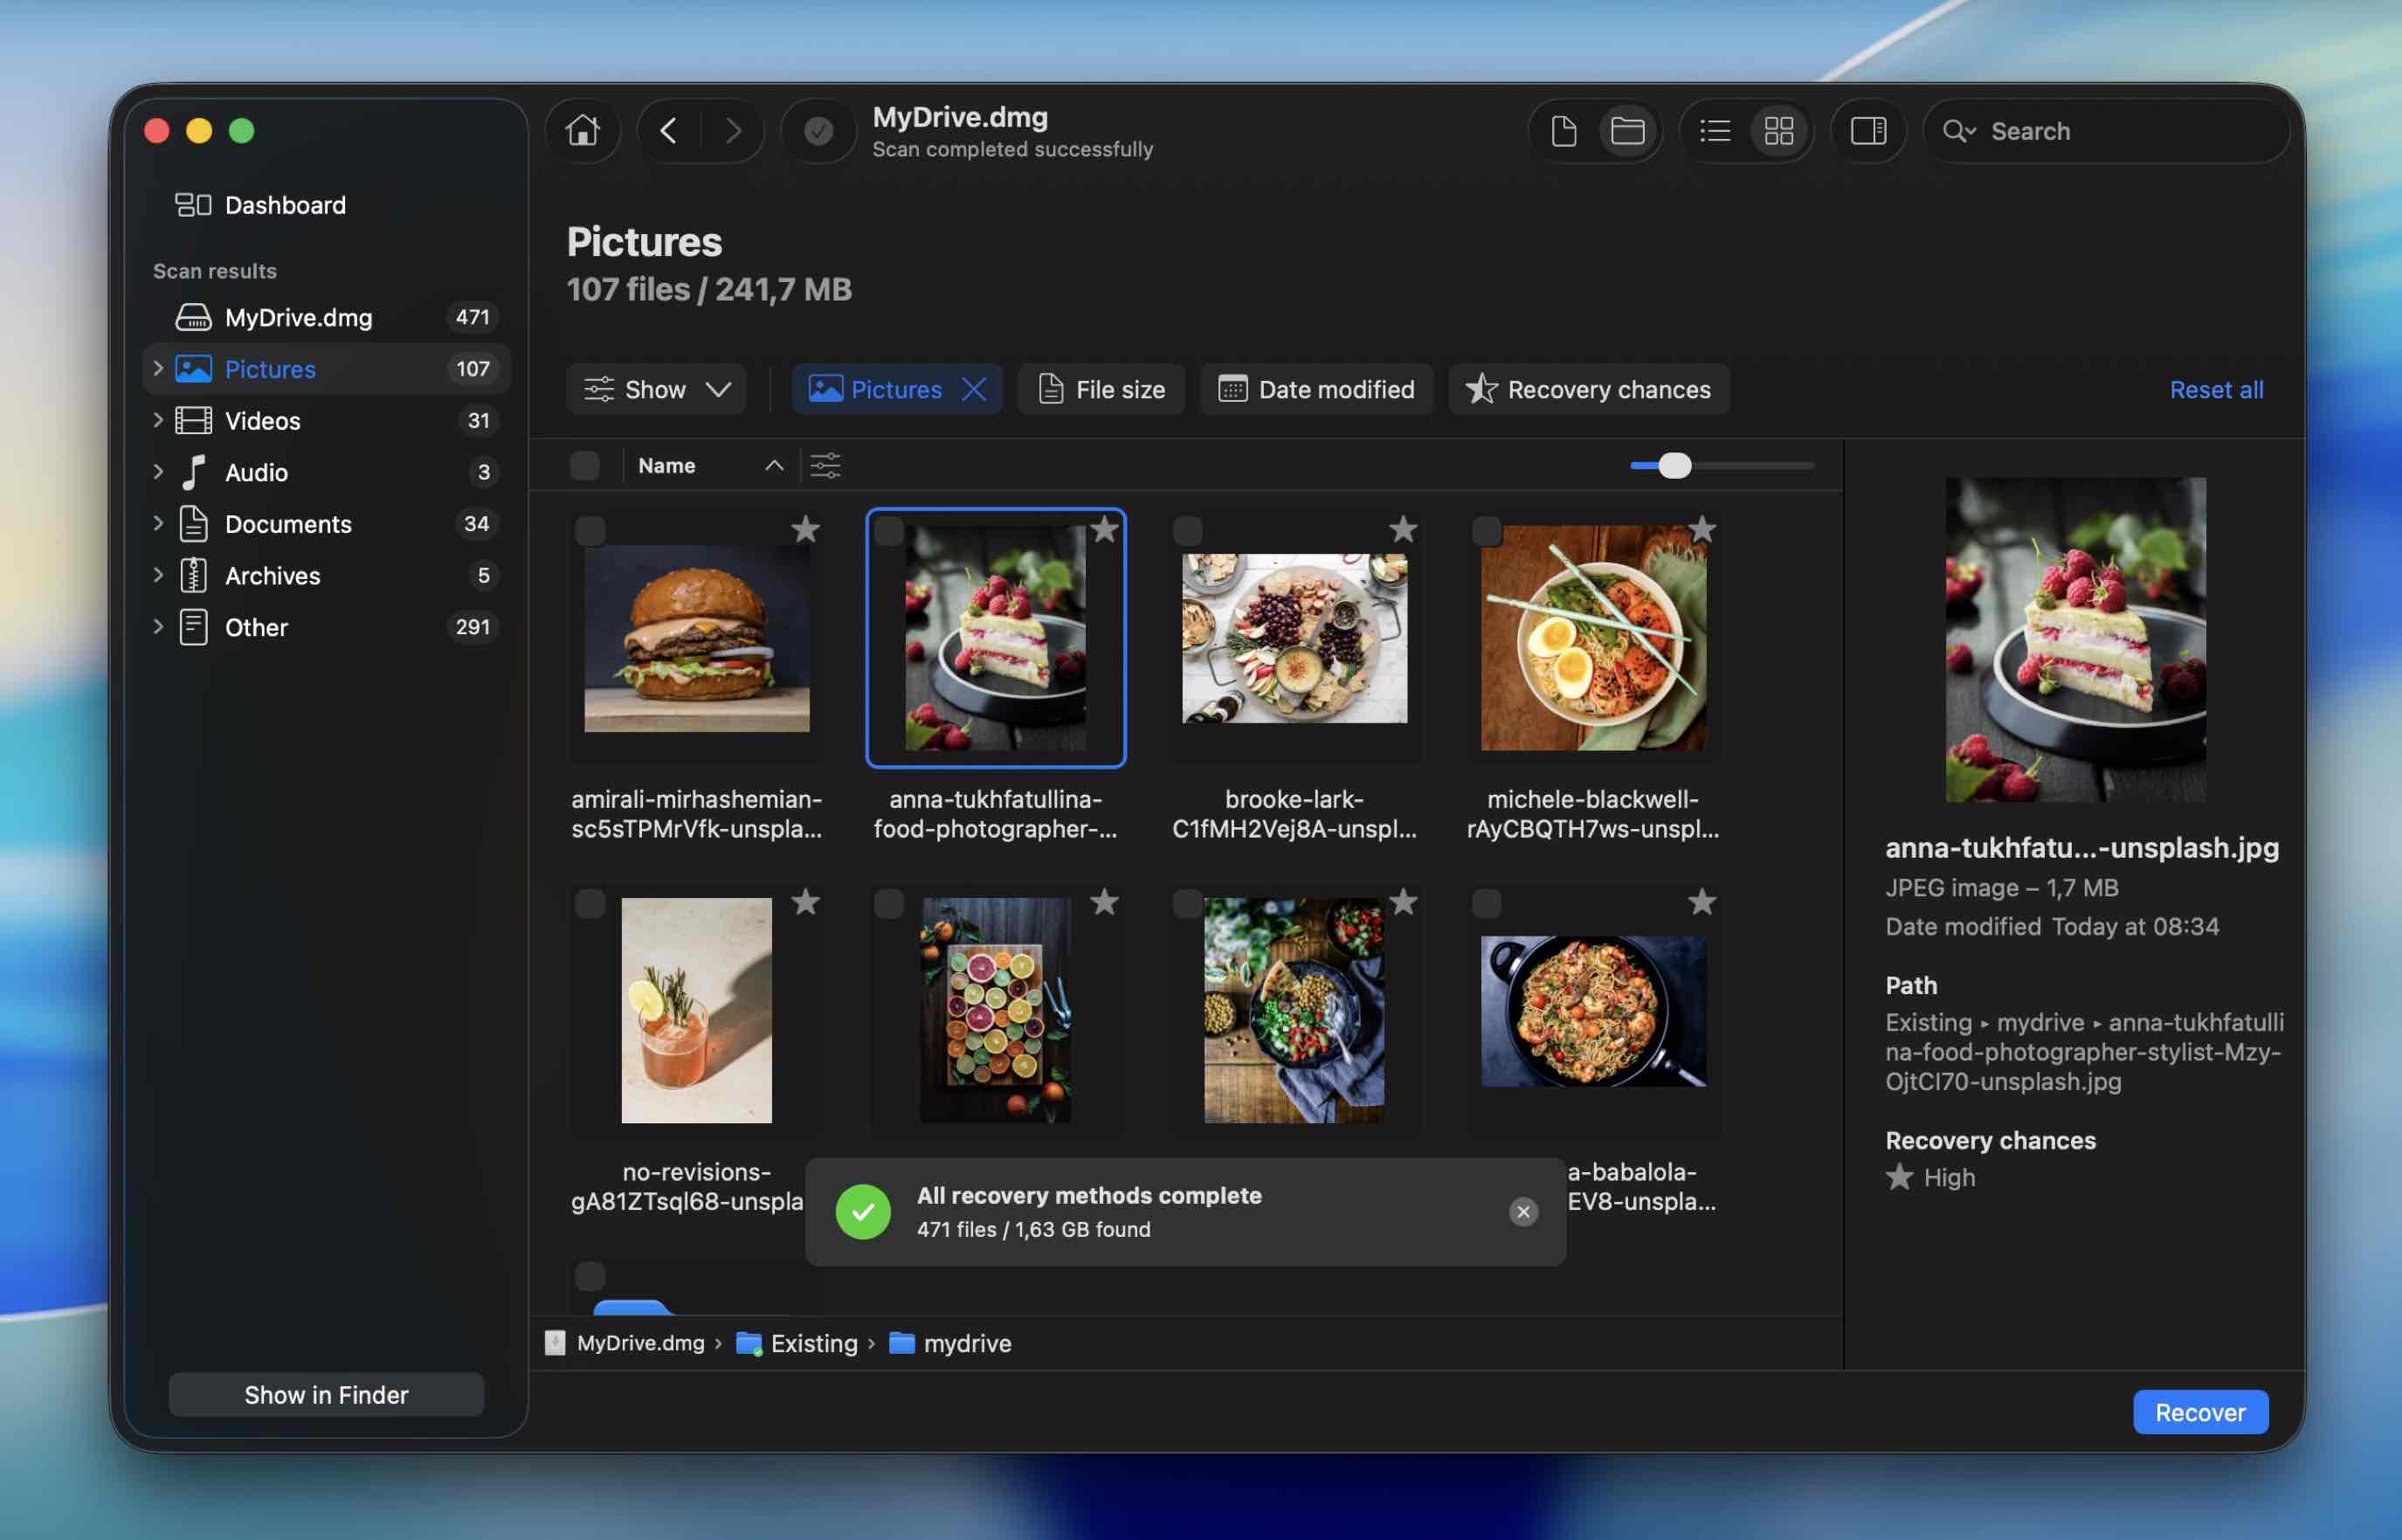 Click the small eye icon next to a file to preview it. If it opens or plays correctly in preview, it’s 100% recoverable.
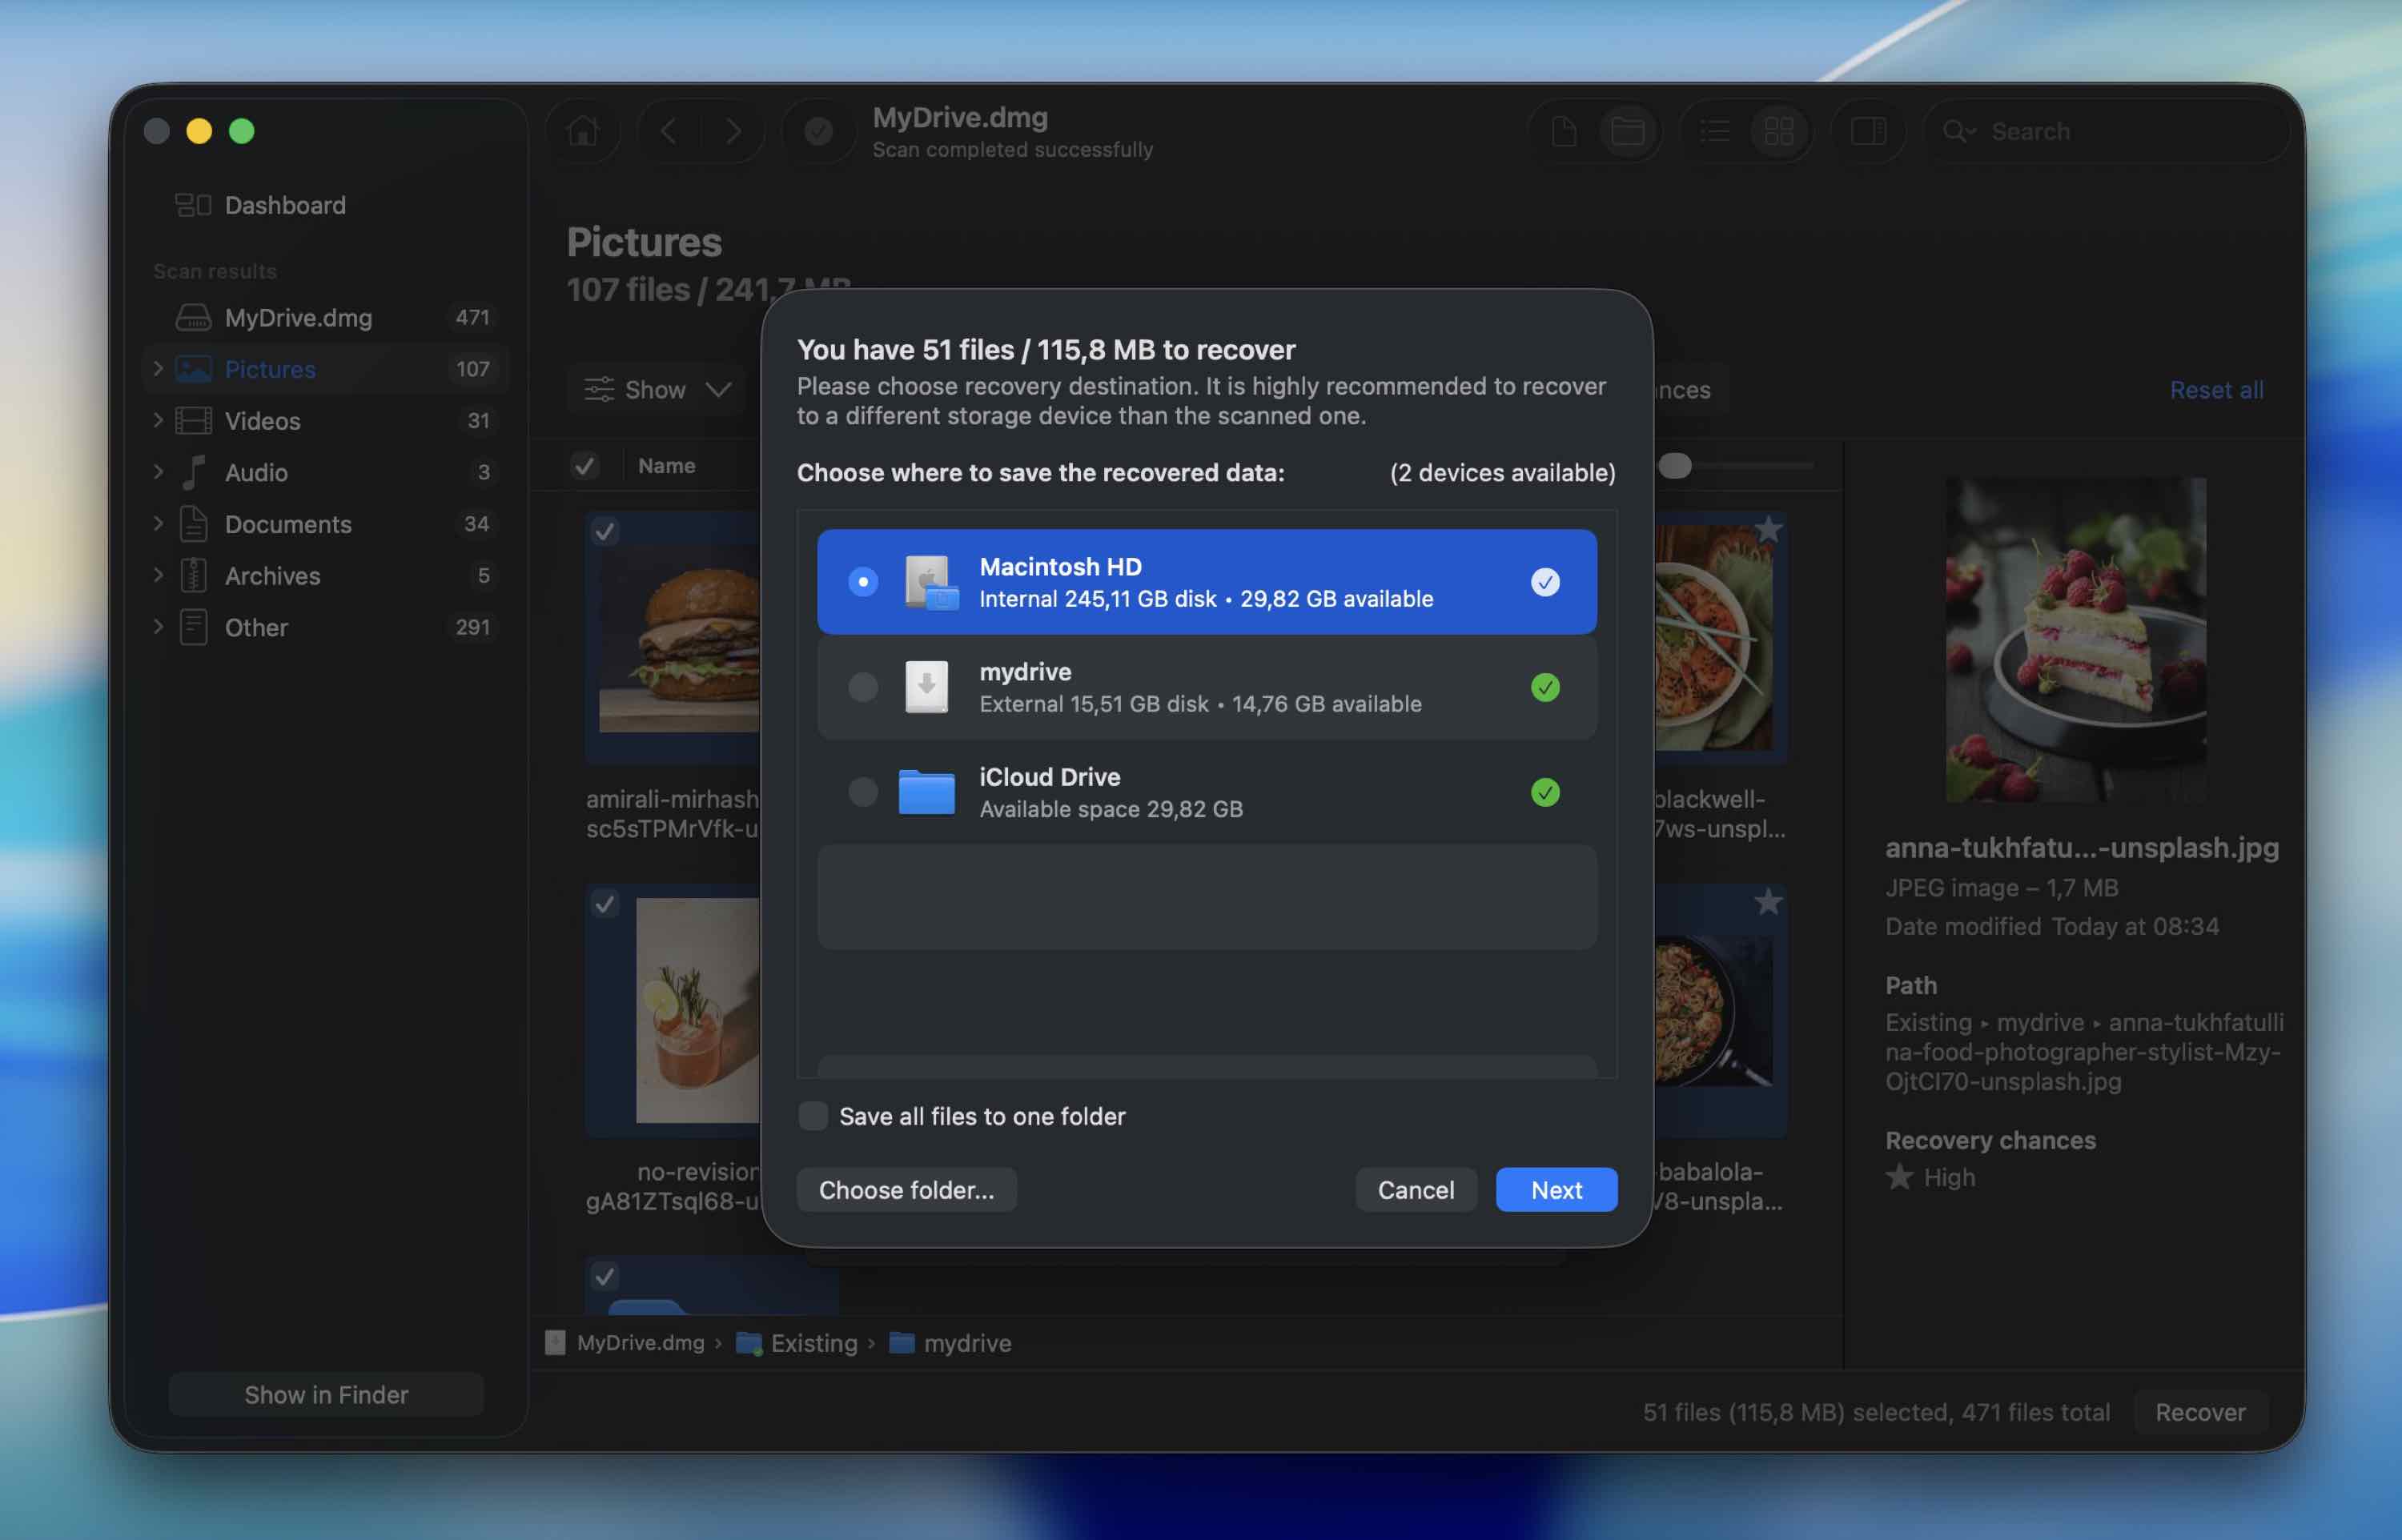
 - Click Recover, choose a different drive as the destination, and confirm.
Method 2: Recover Data From a Time Machine Backup
An even easier and quicker way to recover data from a corrupted hard drive on a Mac is by using a previously created Time Machine backup. All you need for this method is your MacBook, the Time Machine app (it comes pre-installed with every Mac), and the most recent backup of the faulty drive.
Follow these steps to recover data from a corrupted hard drive using a Time Machine backup on your Mac:
- Connect the drive containing the needed Time Machine backup to your Mac (or if the backup is stored internally on your computer, skip this step).
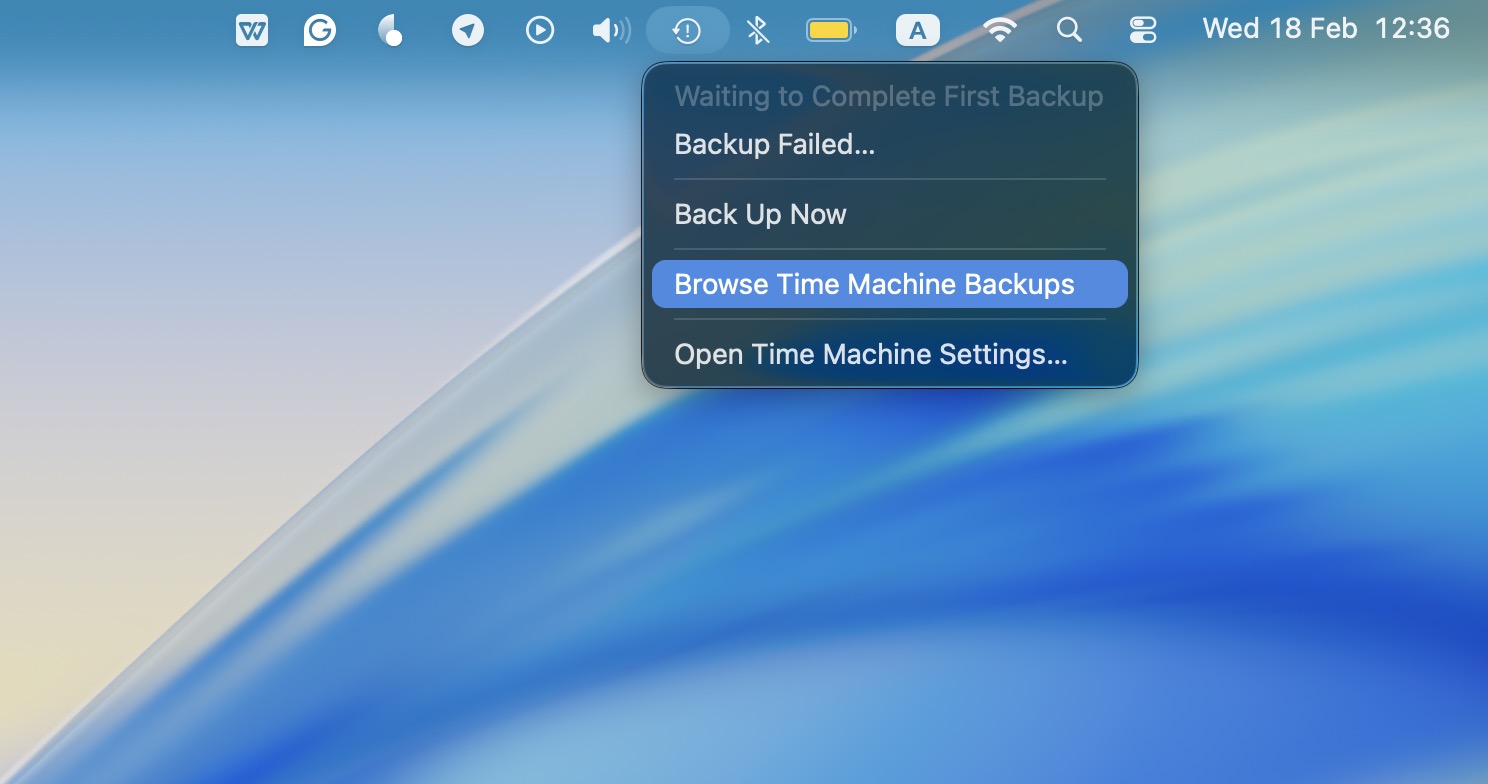
- Click the Time Machine icon on the menu bar at the top of your screen and choose Browse Time Machine Backups from the drop-down menu.
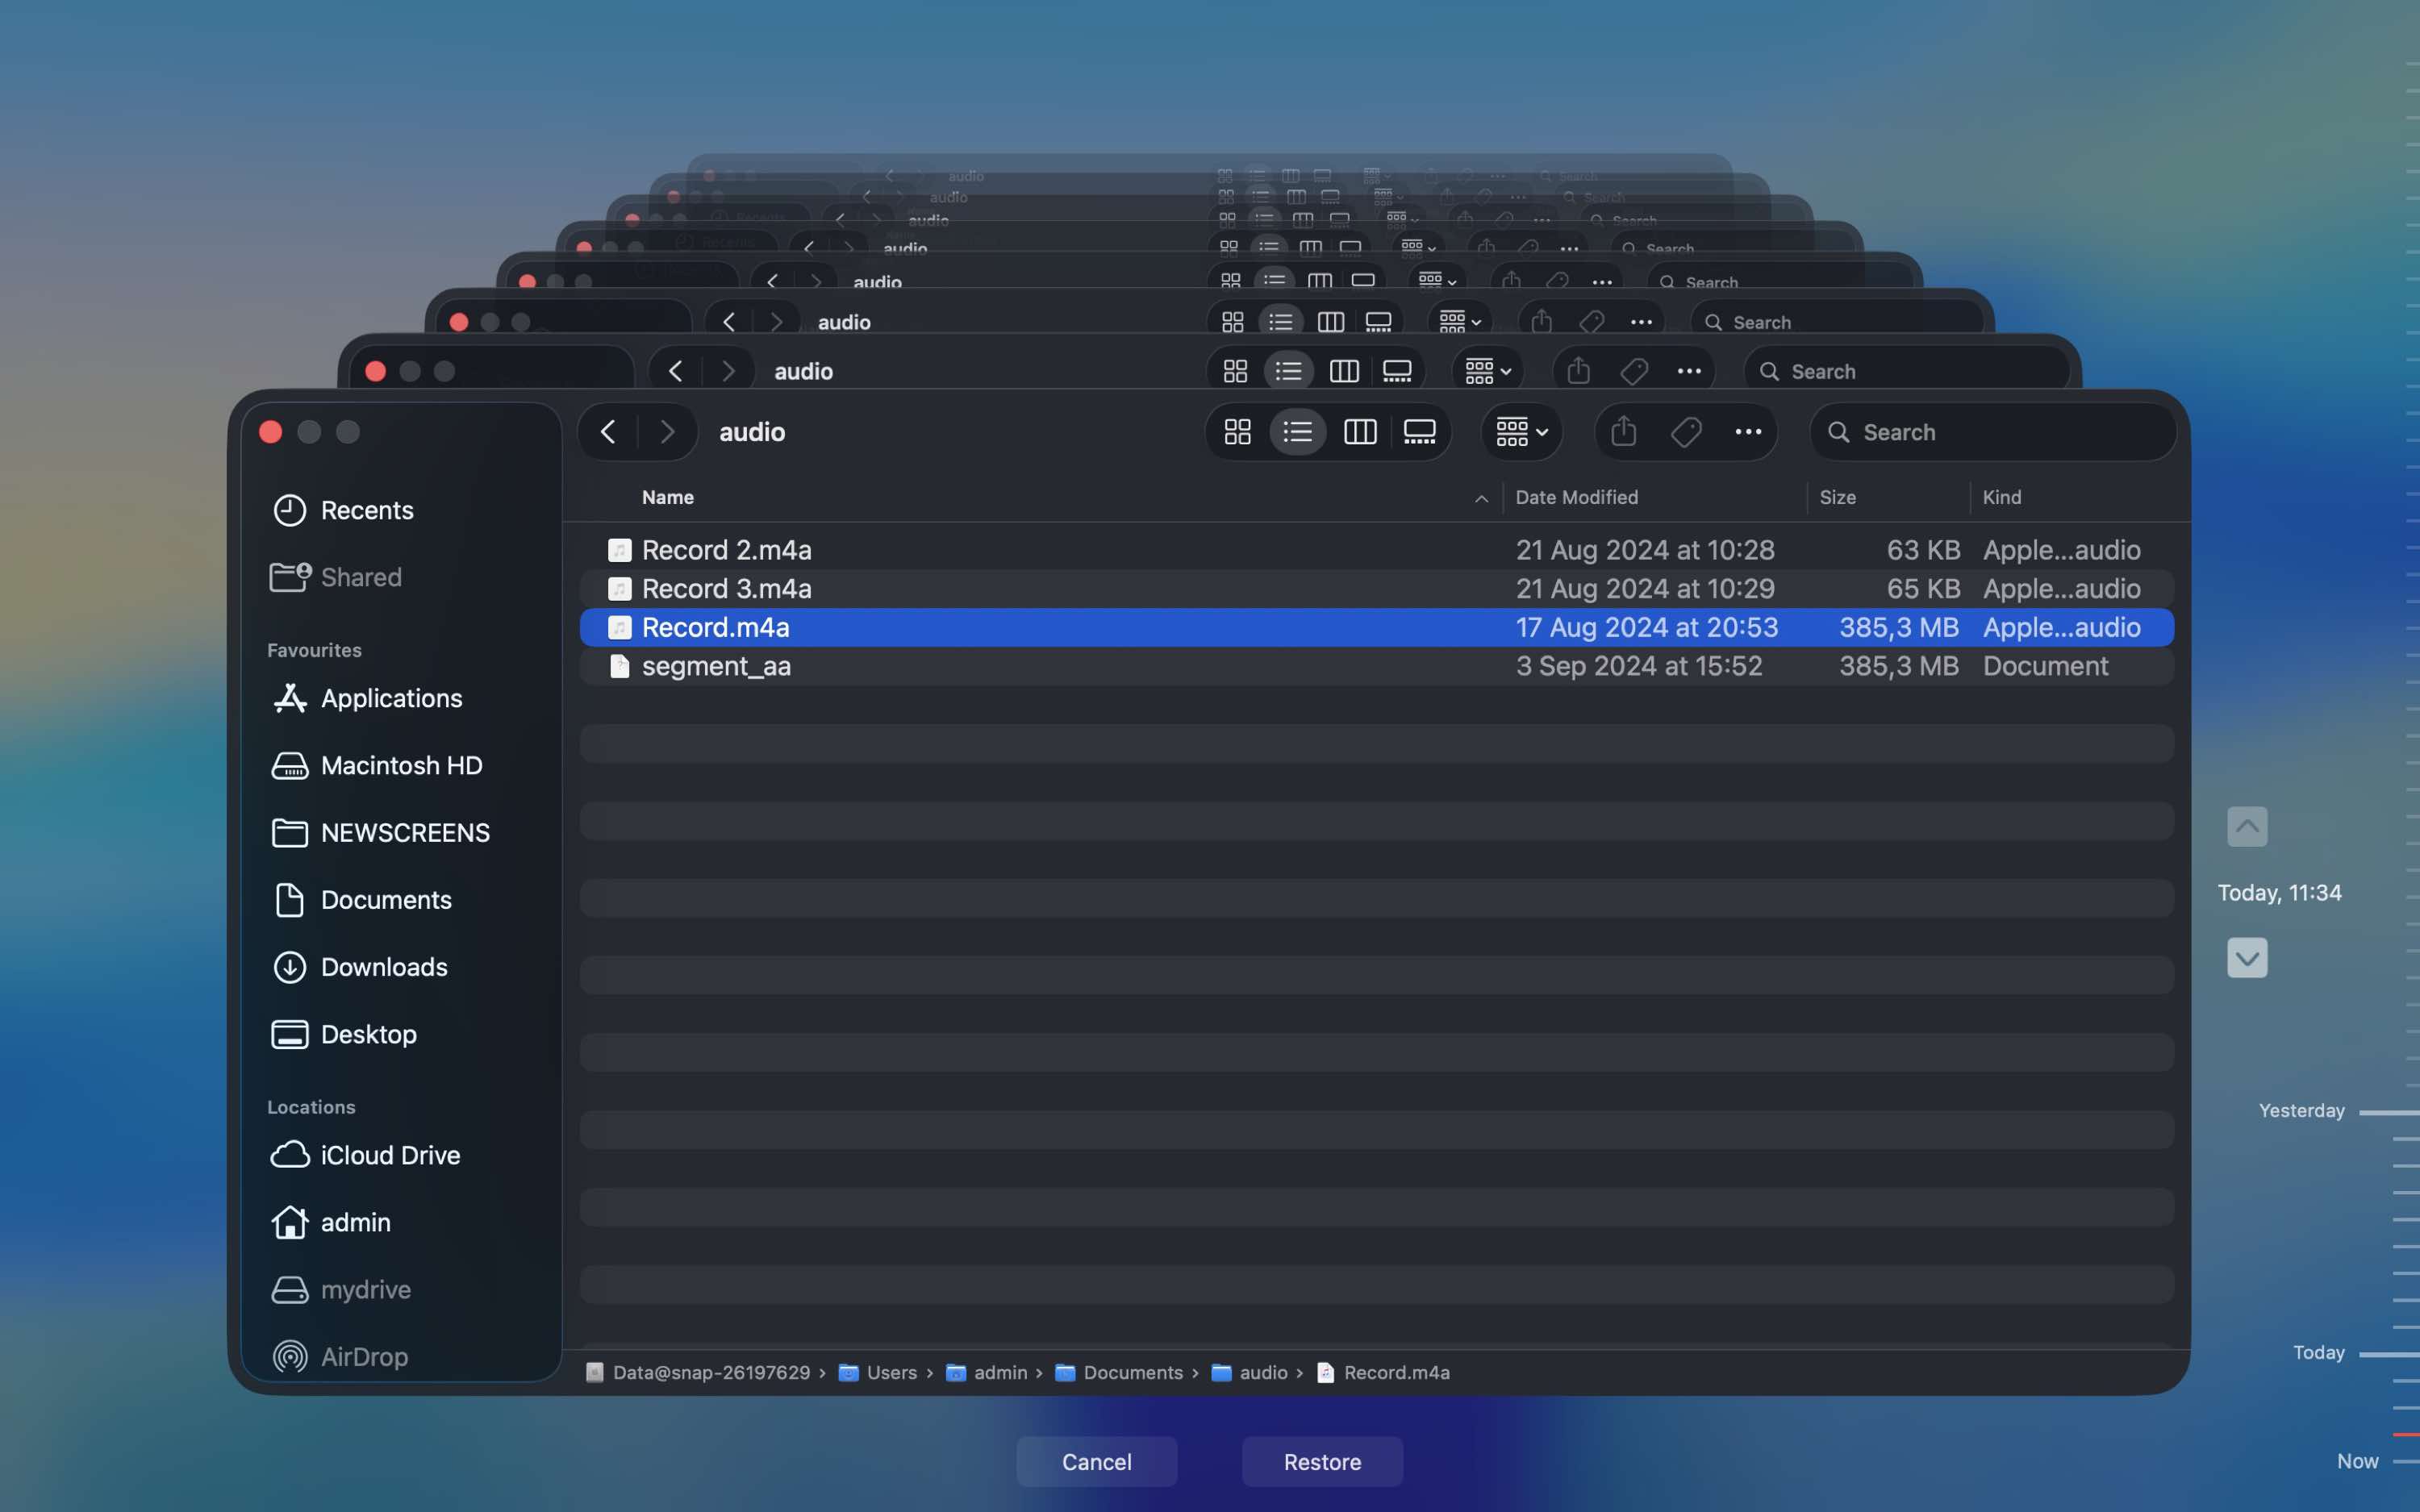
- Choose the files you wish to recover and click the Restore button.
Method 3: Turn to a Professional Recovery Lab
If your drive is too far gone for software to handle, this is the point where you stop experimenting.
Maybe it doesn’t show up at all in Disk Utility. Maybe it clicks when you plug it in or disconnects every few minutes. Those are signs the problem may be physical, not logical.
This is where home DIY stops being a good idea. Software can’t fix damaged heads, failing flash memory, or controller issues. At that point, the safest move is to power the drive down and let a professional lab handle it.
Professional recovery labs usually start with a diagnostic evaluation. You ship or drop off the drive, and they assess the damage in a controlled environment. If it’s a mechanical hard drive, they may open it in a cleanroom to repair or replace internal components. If it’s an SSD, they might work directly with the memory chips using specialized tools.
After the evaluation, they send you a quote. Costs vary widely depending on the damage and drive type.
- Logical recovery cases can start in the low hundreds.
- Physical damage (especially involving cleanroom work) often runs from several hundred to well over a thousand dollars.
- Severe cases can go even higher.
Most reputable labs follow a “no data, no charge” policy. That means you only pay if they successfully recover your files. When you shop around, look for that policy in writing (on their site or in the quote email).
Quick Checks That Might Help You Fix a Corrupted External Drive on Mac
It’s a good idea to check your external hard drive to make sure that it is actually corrupted before moving forward with the fixes. Here’s what you should do:
- Try a different USB cable. Cables fail more often than drives. If the drive suddenly stopped working, swap the cable first. It’s a simple test that takes 30 seconds.
- Plug the drive directly into your Mac. Remove USB hubs, docks, and adapters. Connect it straight to the computer to rule out power or signal issues.
- Use another USB port. Sometimes a single port misbehaves. Switch sides if you’re on a laptop.
- Restart your Mac, then reconnect the drive. Disconnect the drive first, reboot your Mac, wait until everything fully loads, then plug it back in.
- Check Disk Utility. Open Disk Utility and see if the drive appears there. Even if Finder doesn’t show it, seeing it in Disk Utility means the Mac still detects the hardware.
- Listen carefully. Clicking, beeping, or repeated spin-up sounds usually point to hardware trouble. If you hear that, stop testing.
- Test it on another computer if possible. This helps confirm whether the issue is with the drive itself or your Mac.
How to Fix a Corrupted Hard Drive on Mac (8 Methods)
Make sure that you have copied your data from the hard drive before moving forward with any of these fixes since any manipulations with a corrupted hard drive may lead to irretrievable data loss. Whenever you’re ready, you can go through the methods described below as they appear one after the other. This way, you’ll get everything covered, and luckily you’ll repair your external Mac hard drive.
Method 1: Repair a Storage Device Using First Aid
The First Aid feature in Disk Utility can help you fix a corrupted external hard drive on your Mac. This tool will scan your drive and fix the disk errors and directory structure issues, if there are any. It comes pre-installed on all Macs, so you won’t have to download any third-party apps to try this repair method.
Follow these steps to run First Aid and fix your corrupted hard drive on your Mac:
- Connect the hard drive to your computer.
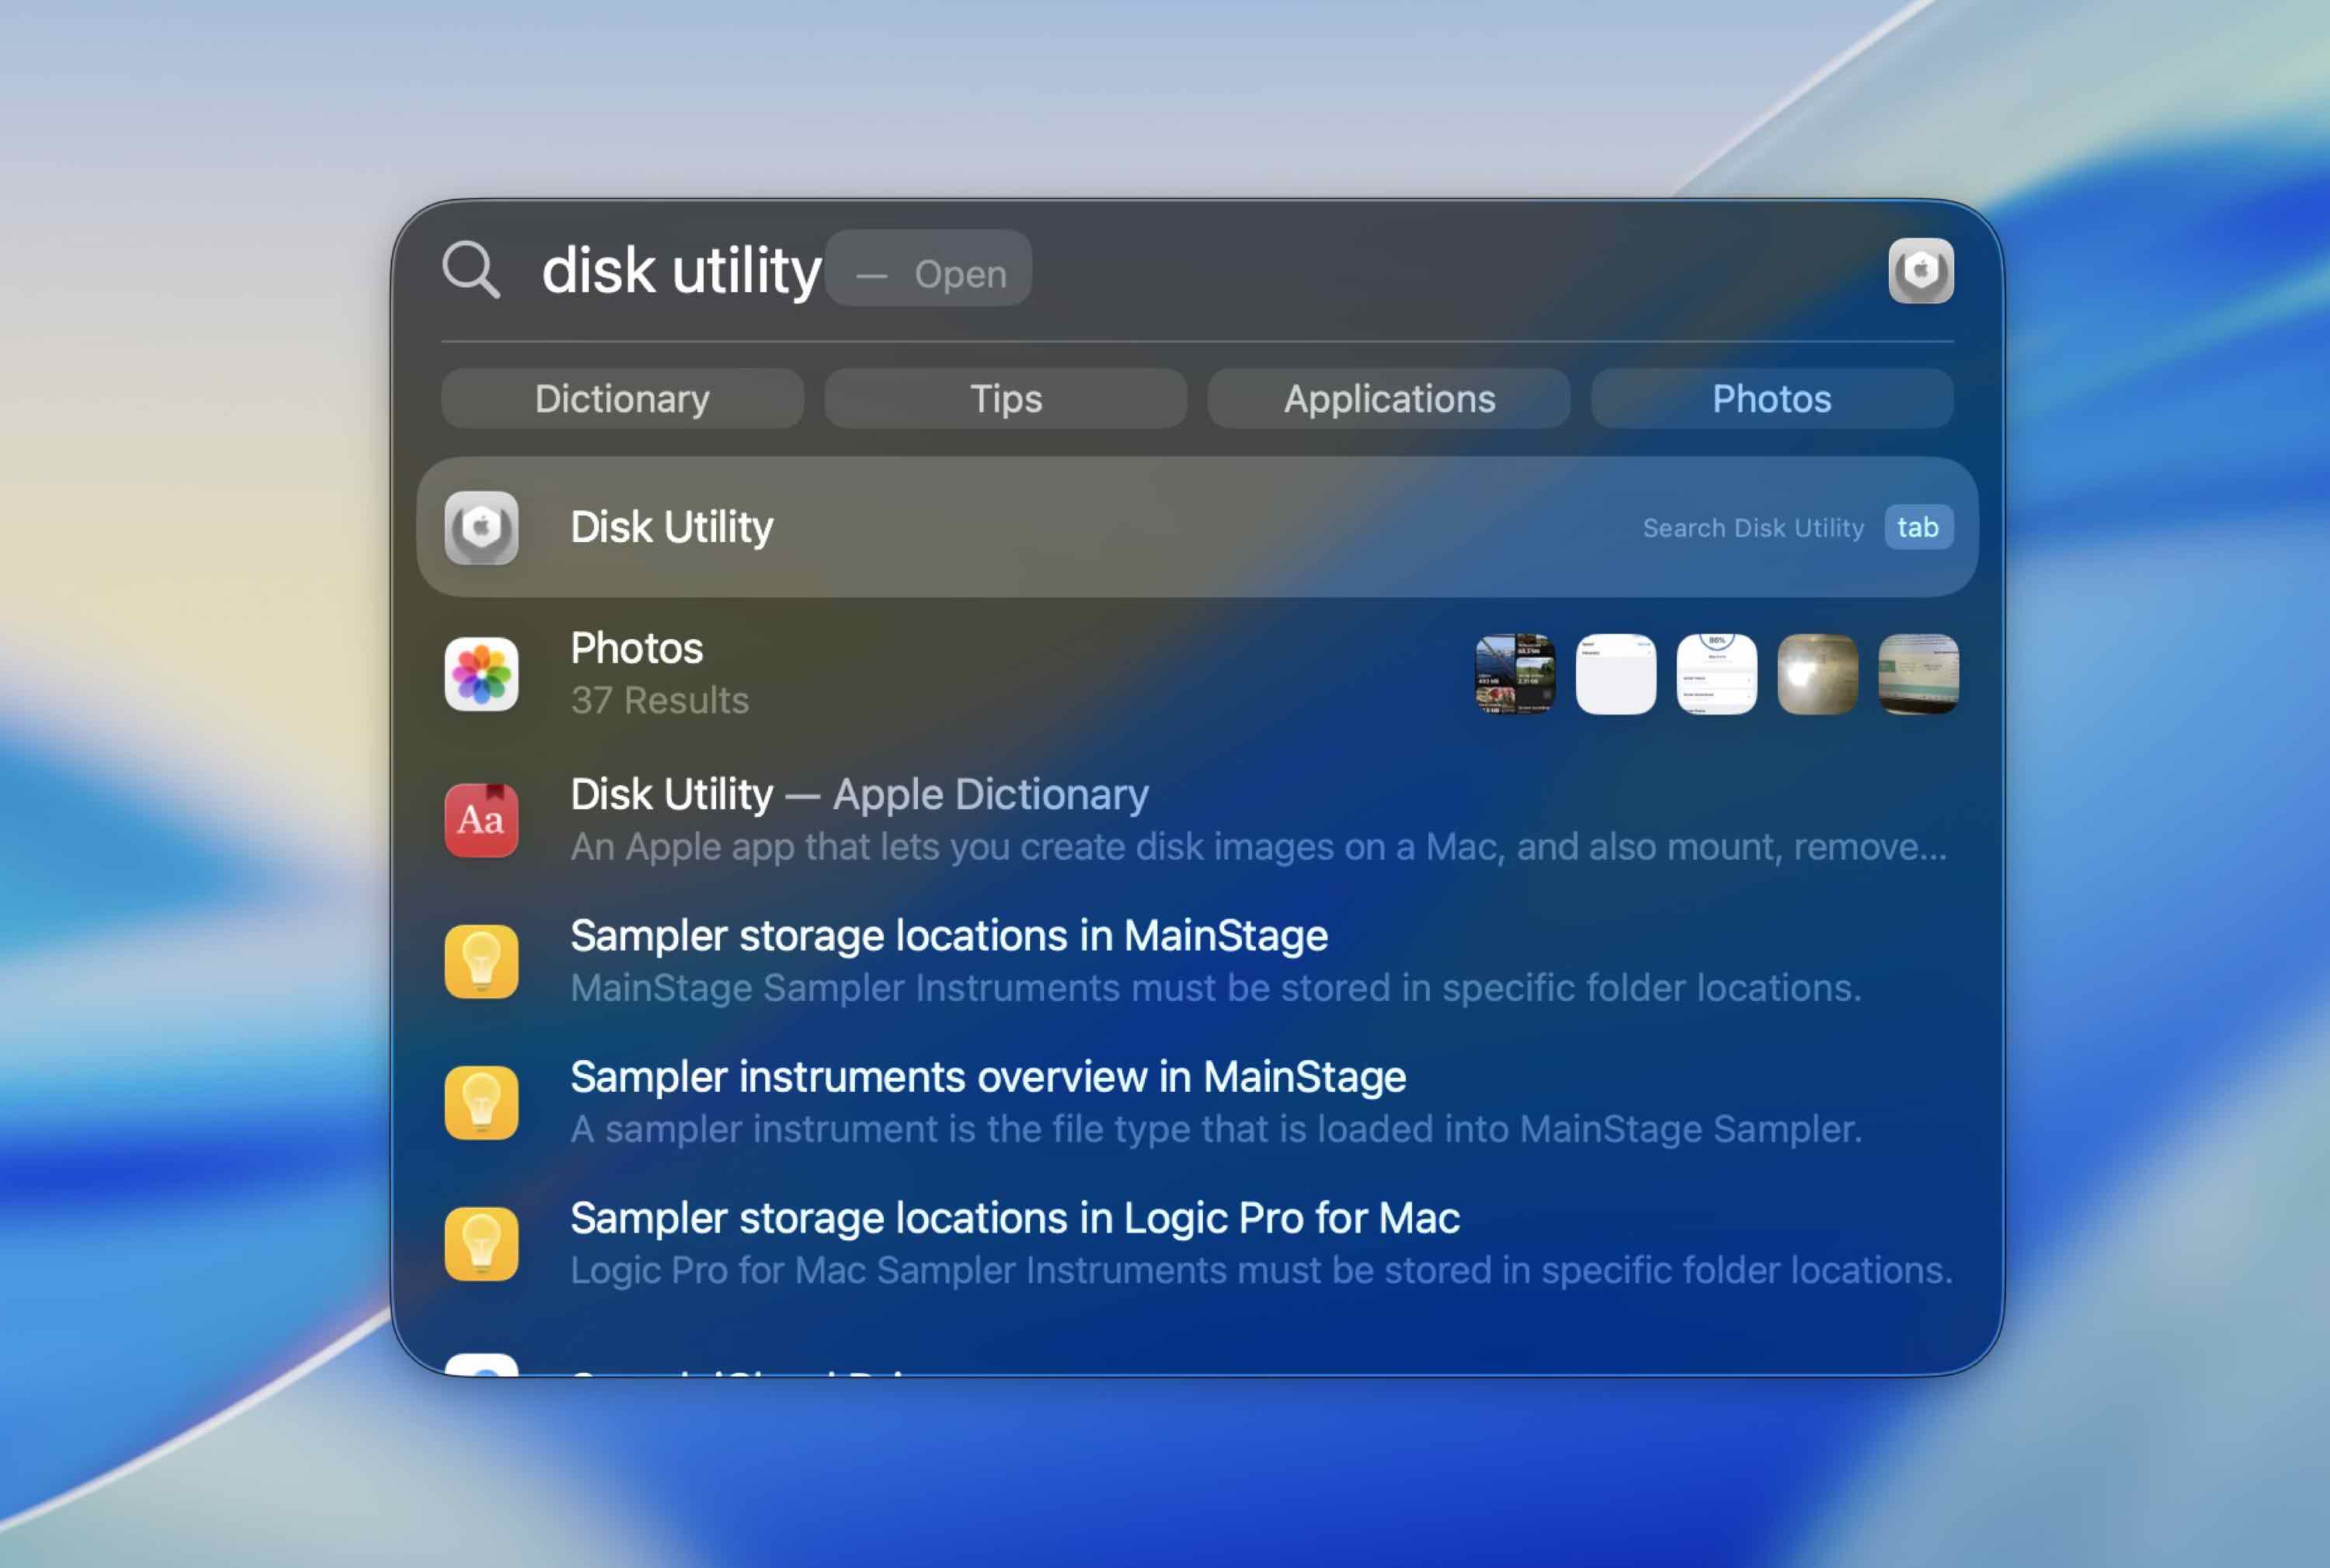
- Launch the Disk Utility app (to get to Disk Utility on your Mac, go to Launchpad and type in Disk Utility in the search field at the top).
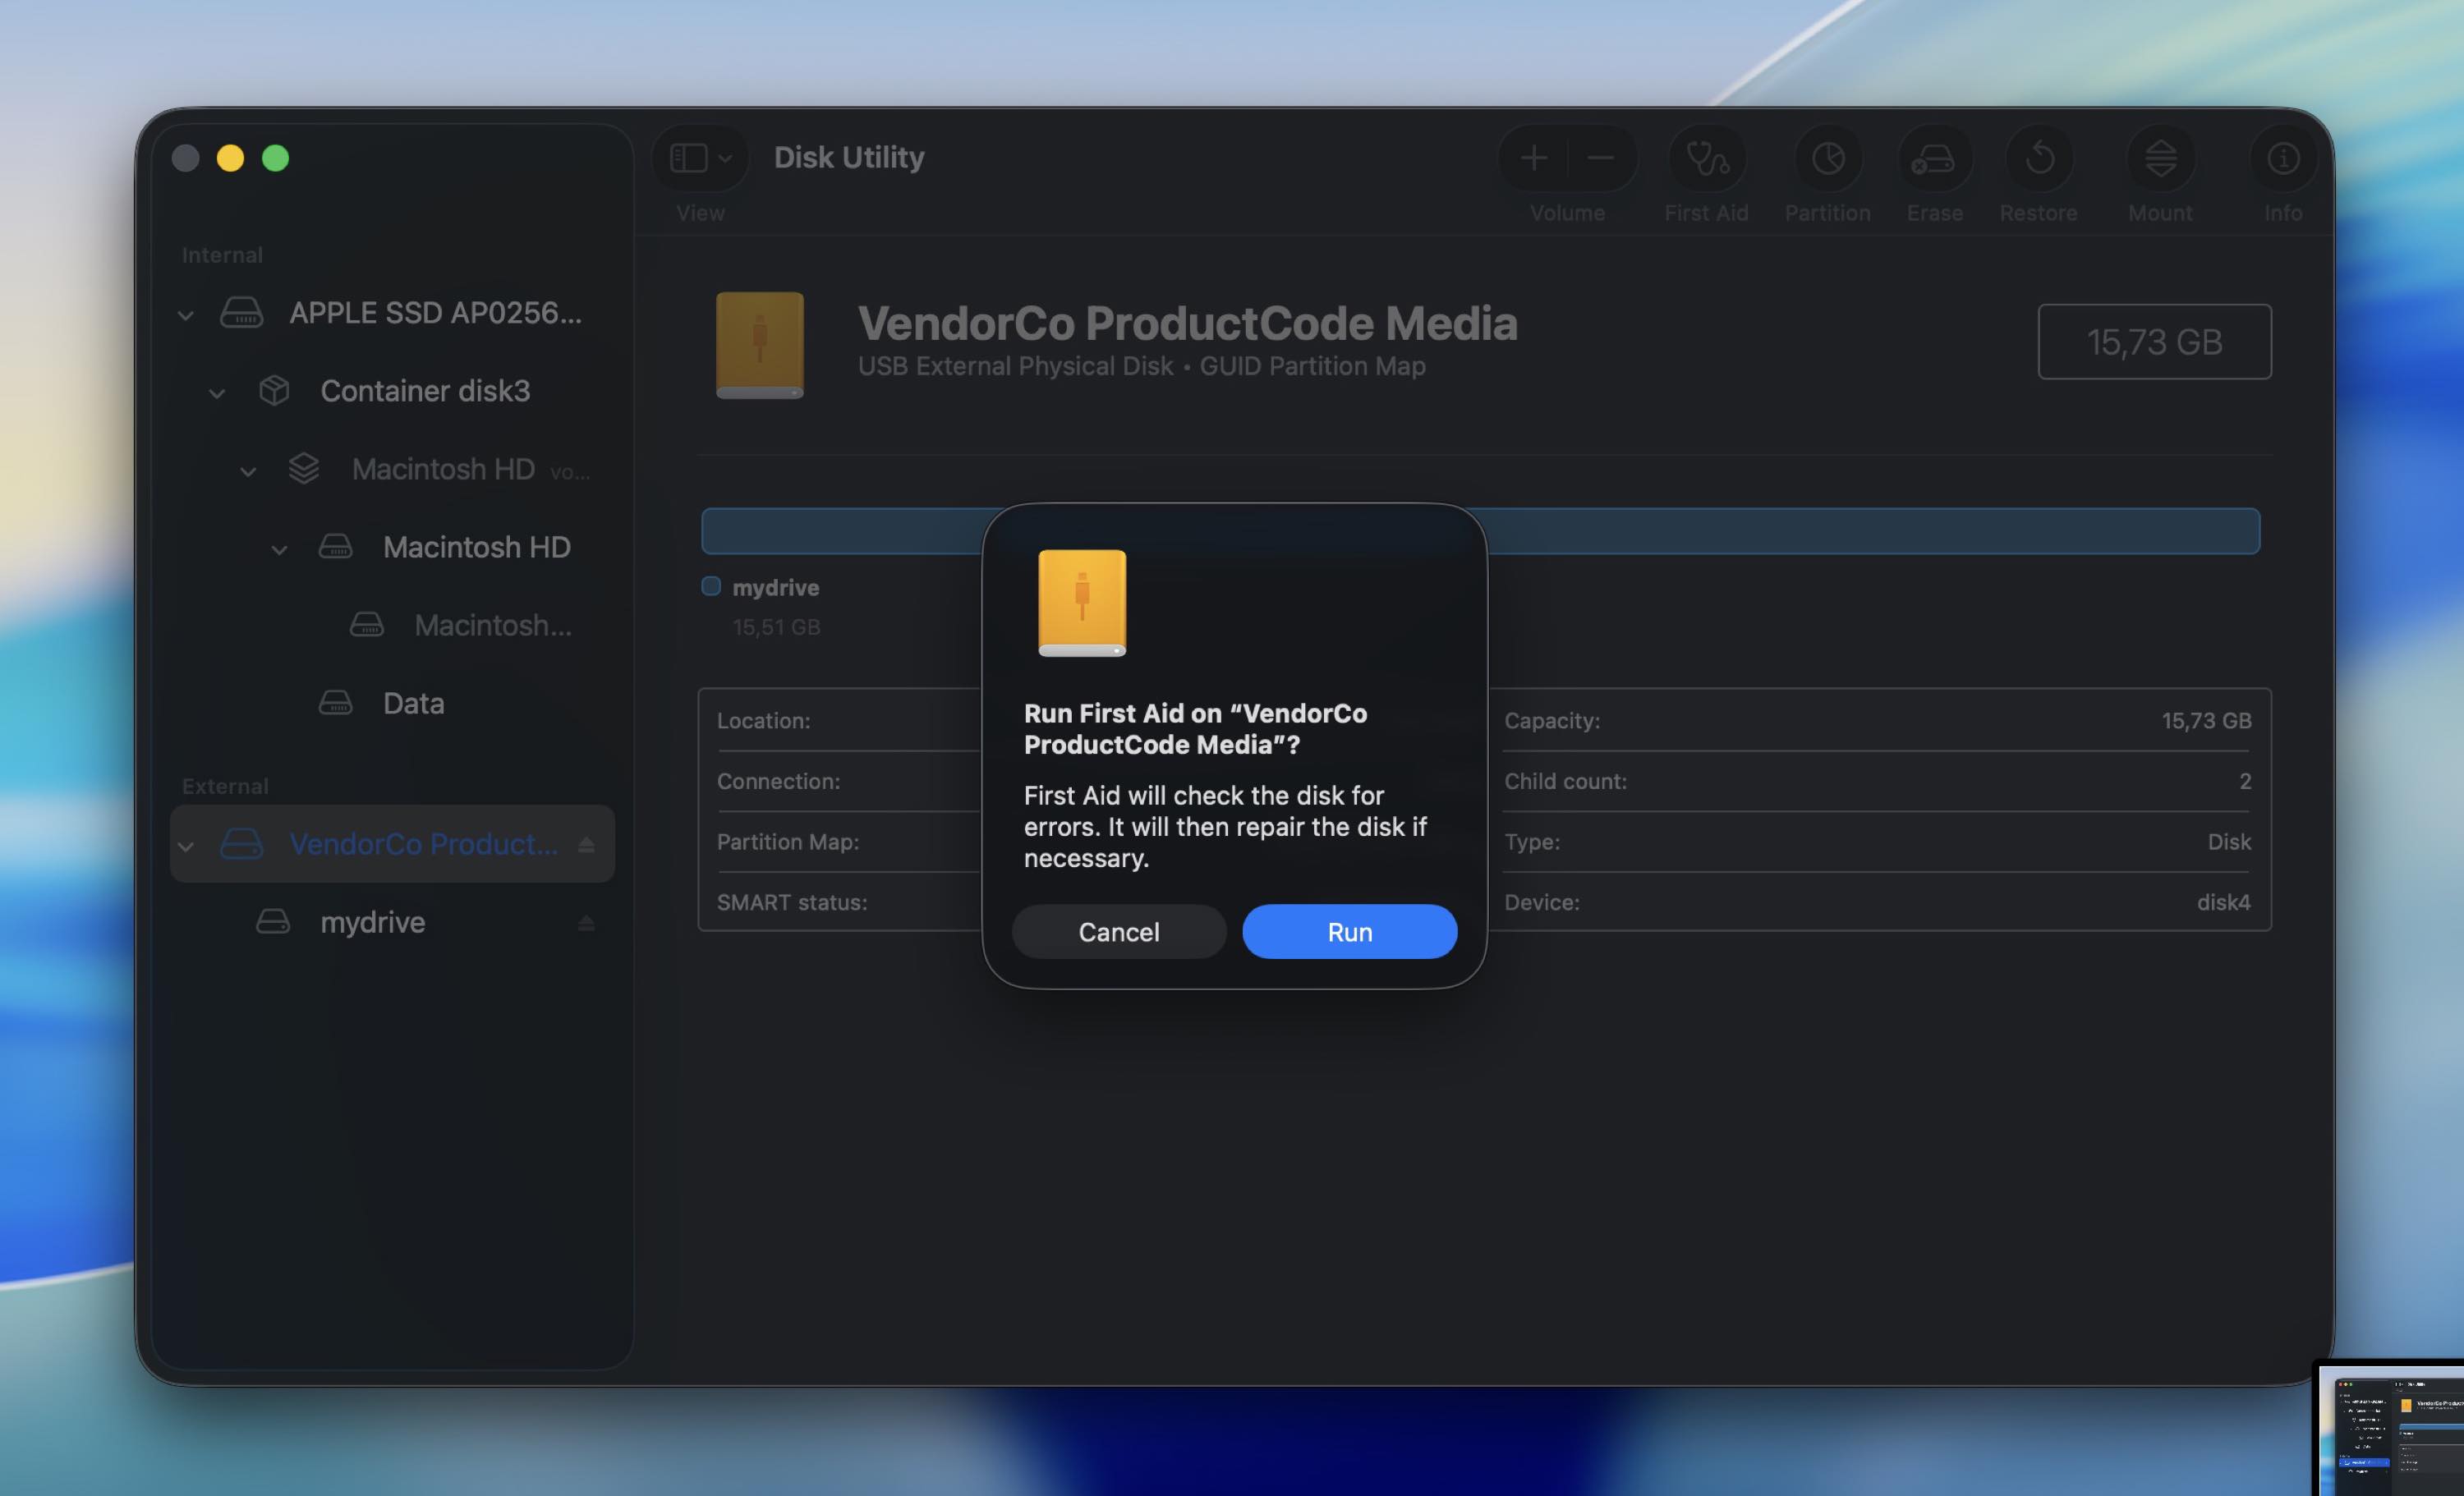
- Choose the faulty drive from the list of available devices on the sidebar on the left.
- Click the First Aid button.

- Click Run to start the tool.
Once the process is complete, unplug the external hard drive and then connect it again to see whether the problem has been solved and everything is working properly.
Method 2: Repair Corrupted Hard Drive on Mac with FSCK Command
If First Aid didn’t help and the drive still shows up in Disk Utility, you can try fsck (file system consistency check). Think of it as the Terminal version of a file system repair tool. It can fix certain directory and file system structure problems that prevent a volume from mounting correctly.
Here’s how you can use fsck to check and repair a corrupted external drive on a Mac:
- Open Terminal (Finder > Applications > Utilities > Terminal).
- Type the following and press Return:
diskutil list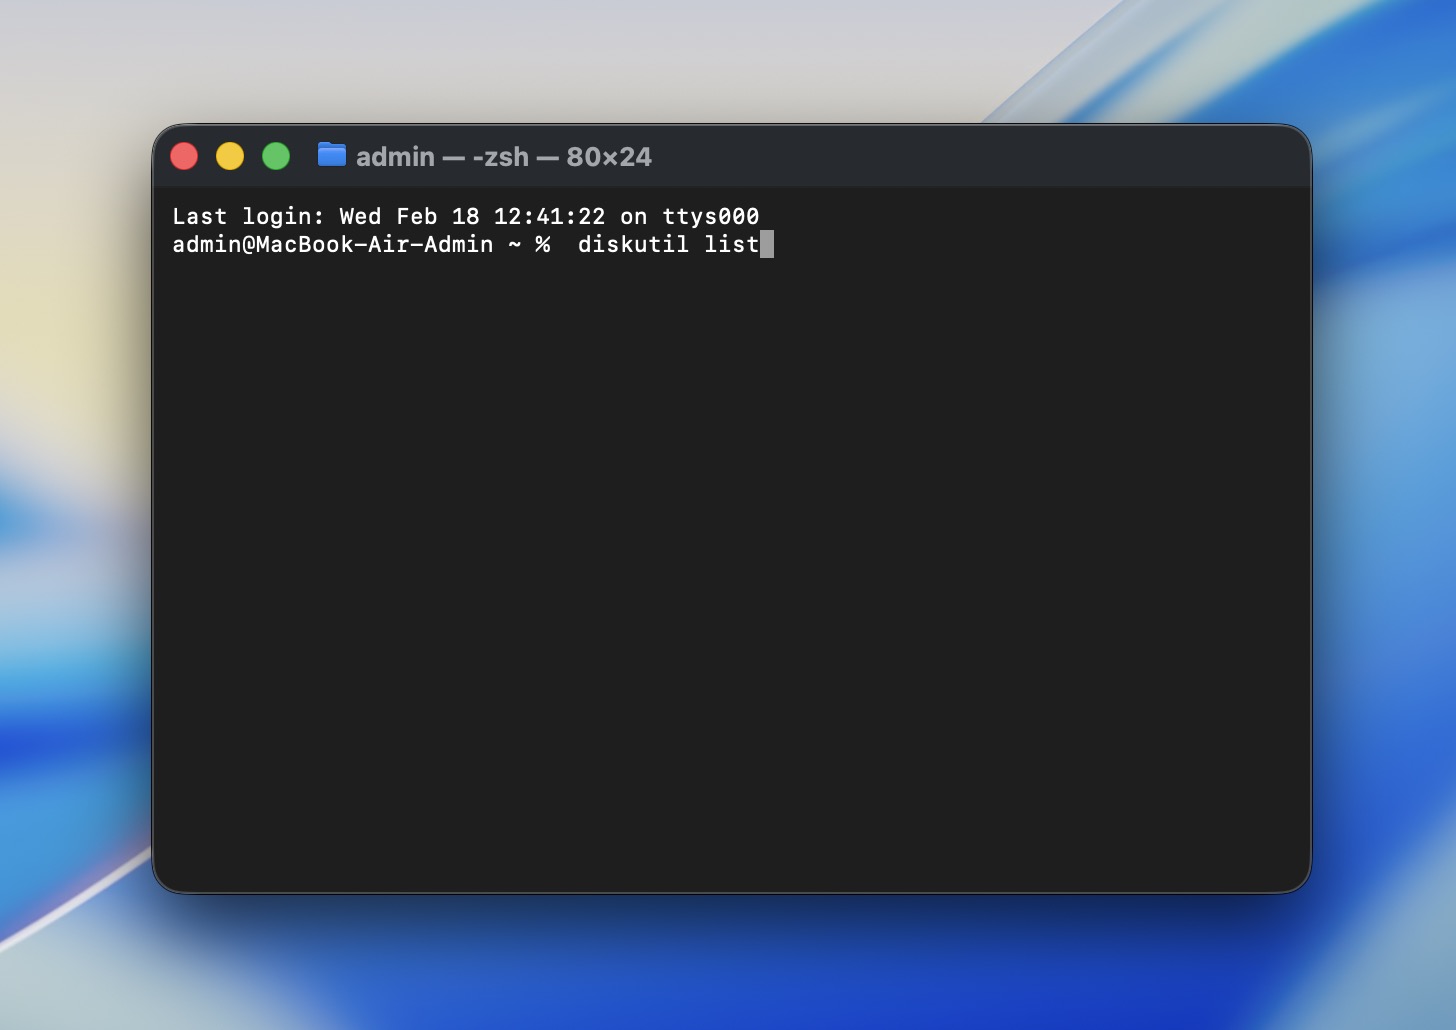
- Find your external drive in the list and note the volume identifier (for example, disk4s2).
- Unmount the volume (this does not erase anything). Run:
diskutil unmount /dev/disk4s2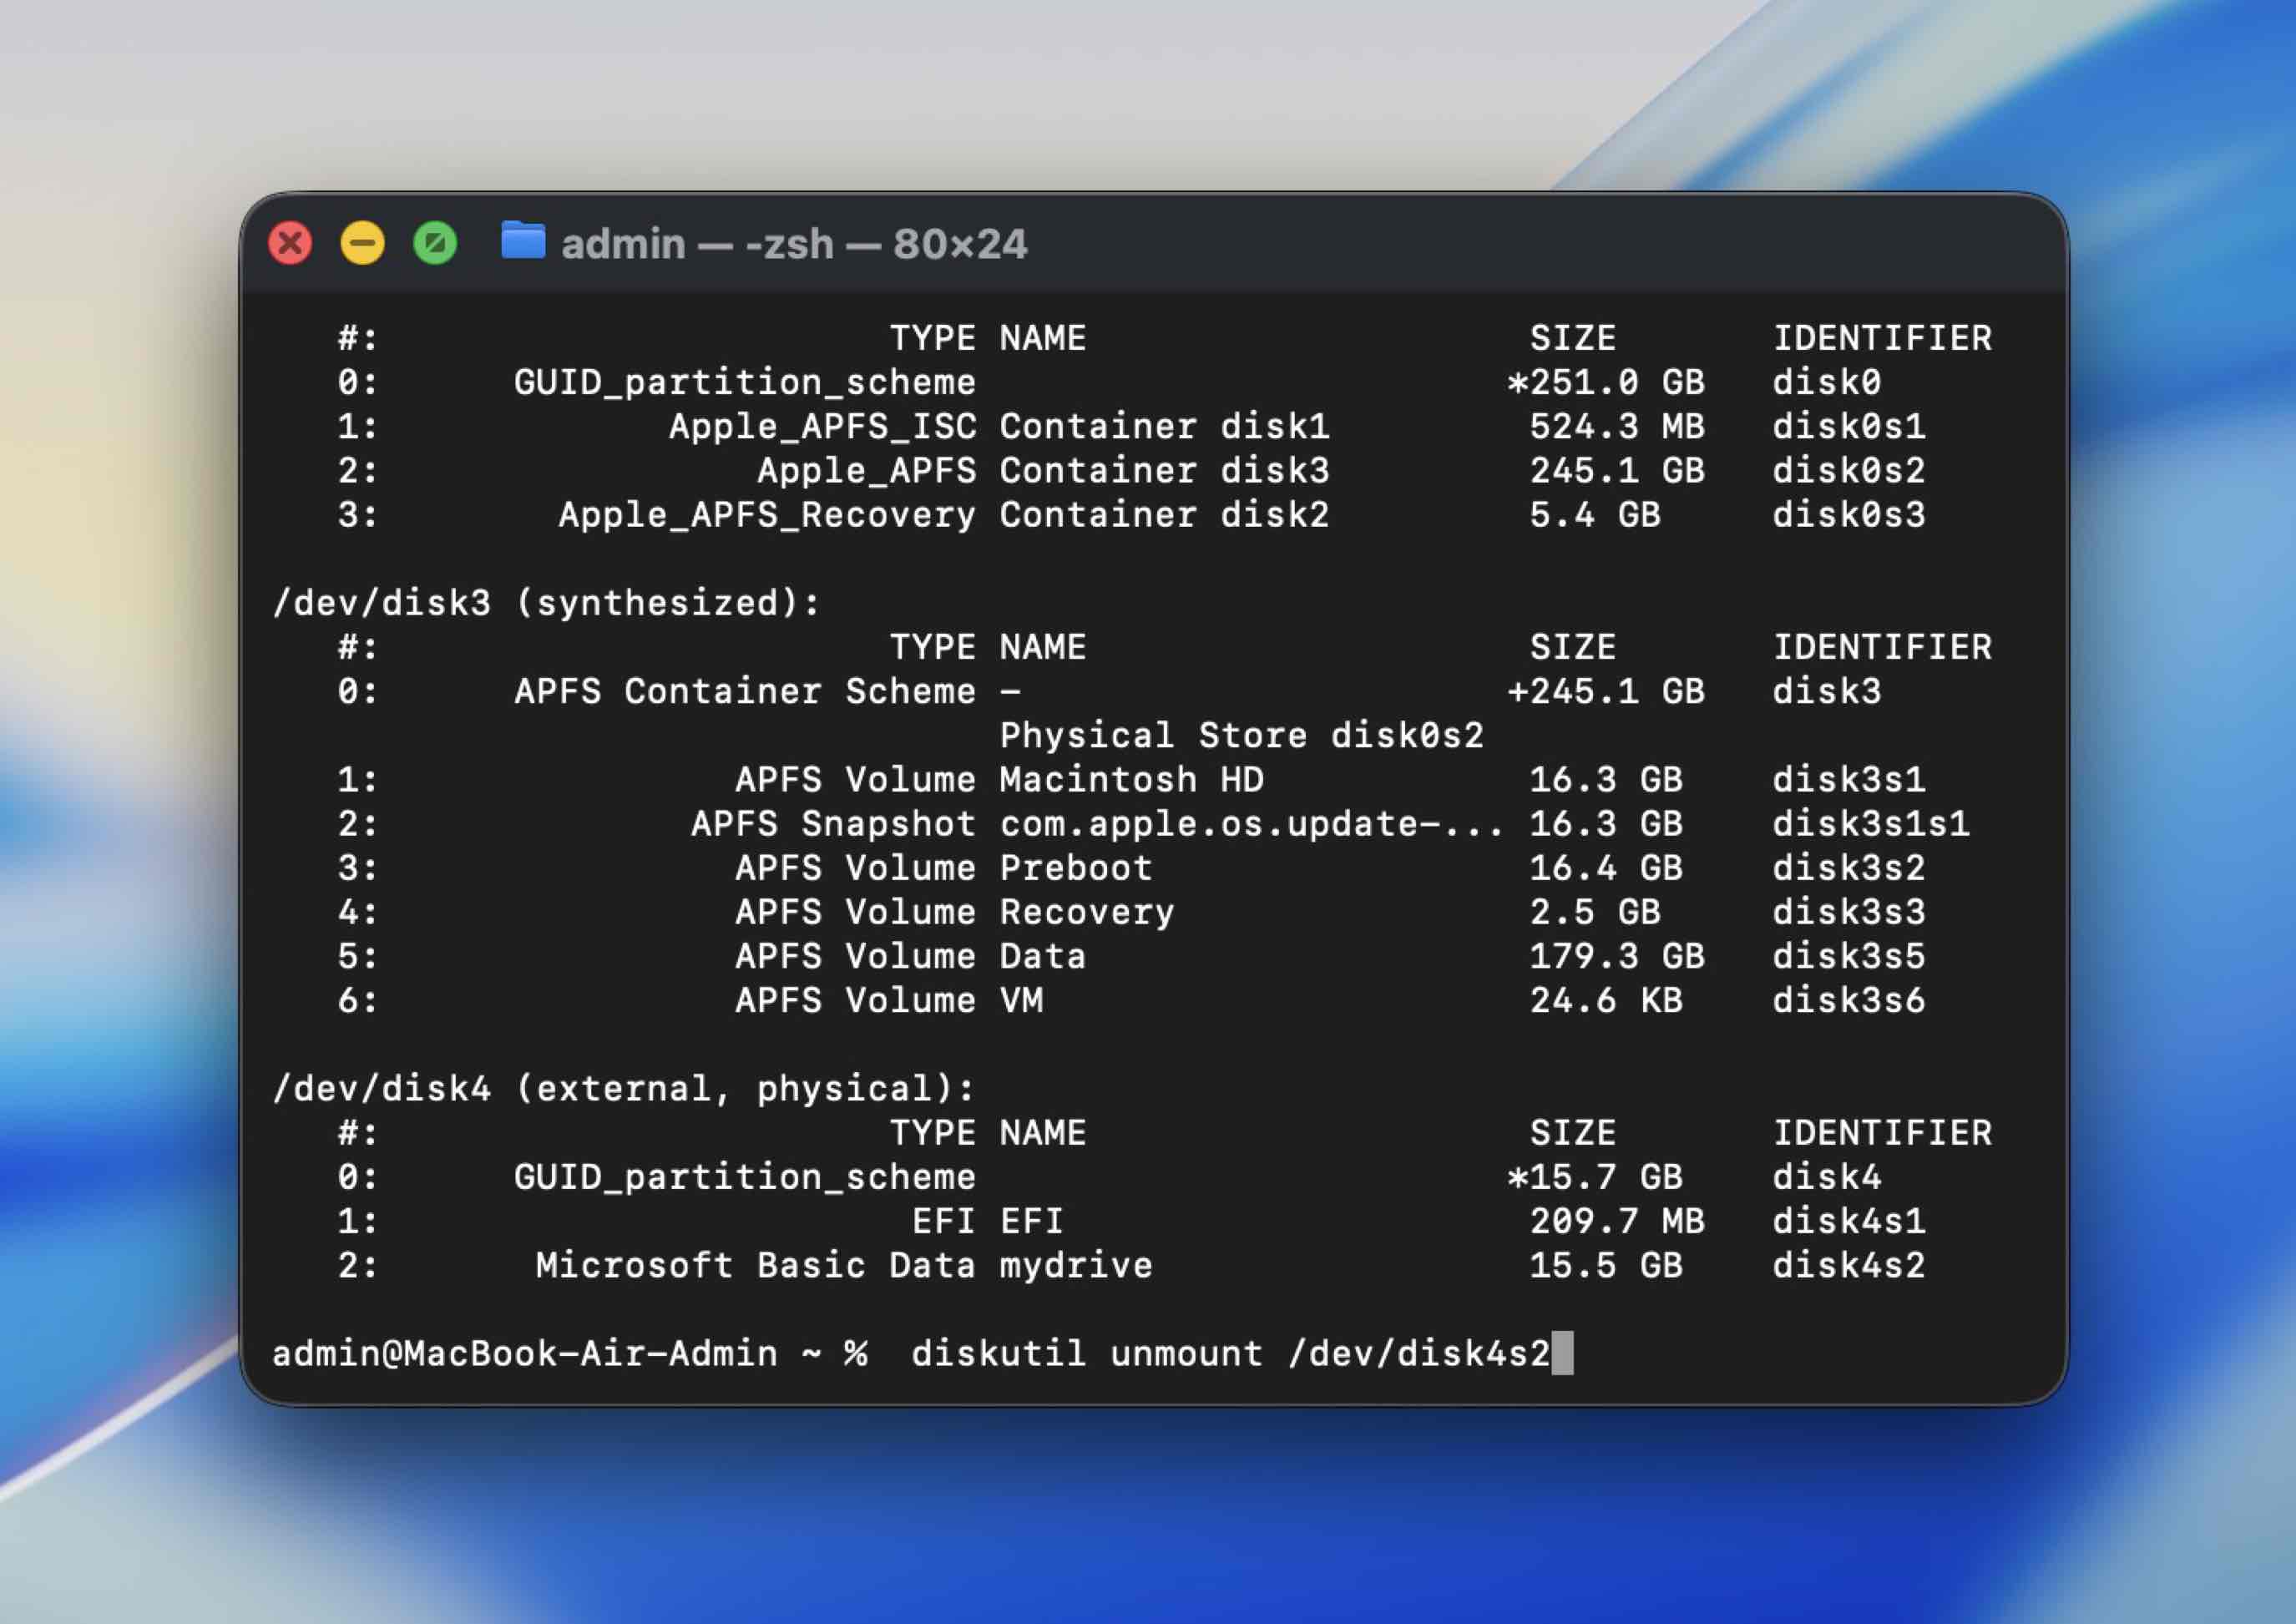 (Replace disk4s2 with your identifier)
 - Run fsck on that volume:
sudo fsck -fy /dev/disk4s2 Enter your admin password when prompted.
 - When it finishes, try mounting it again:
diskutil mount /dev/disk4s2
If fsck reports it made repairs, try opening the drive in Finder again.
Method 3: Mount Your Hard Drive in Disk Utility
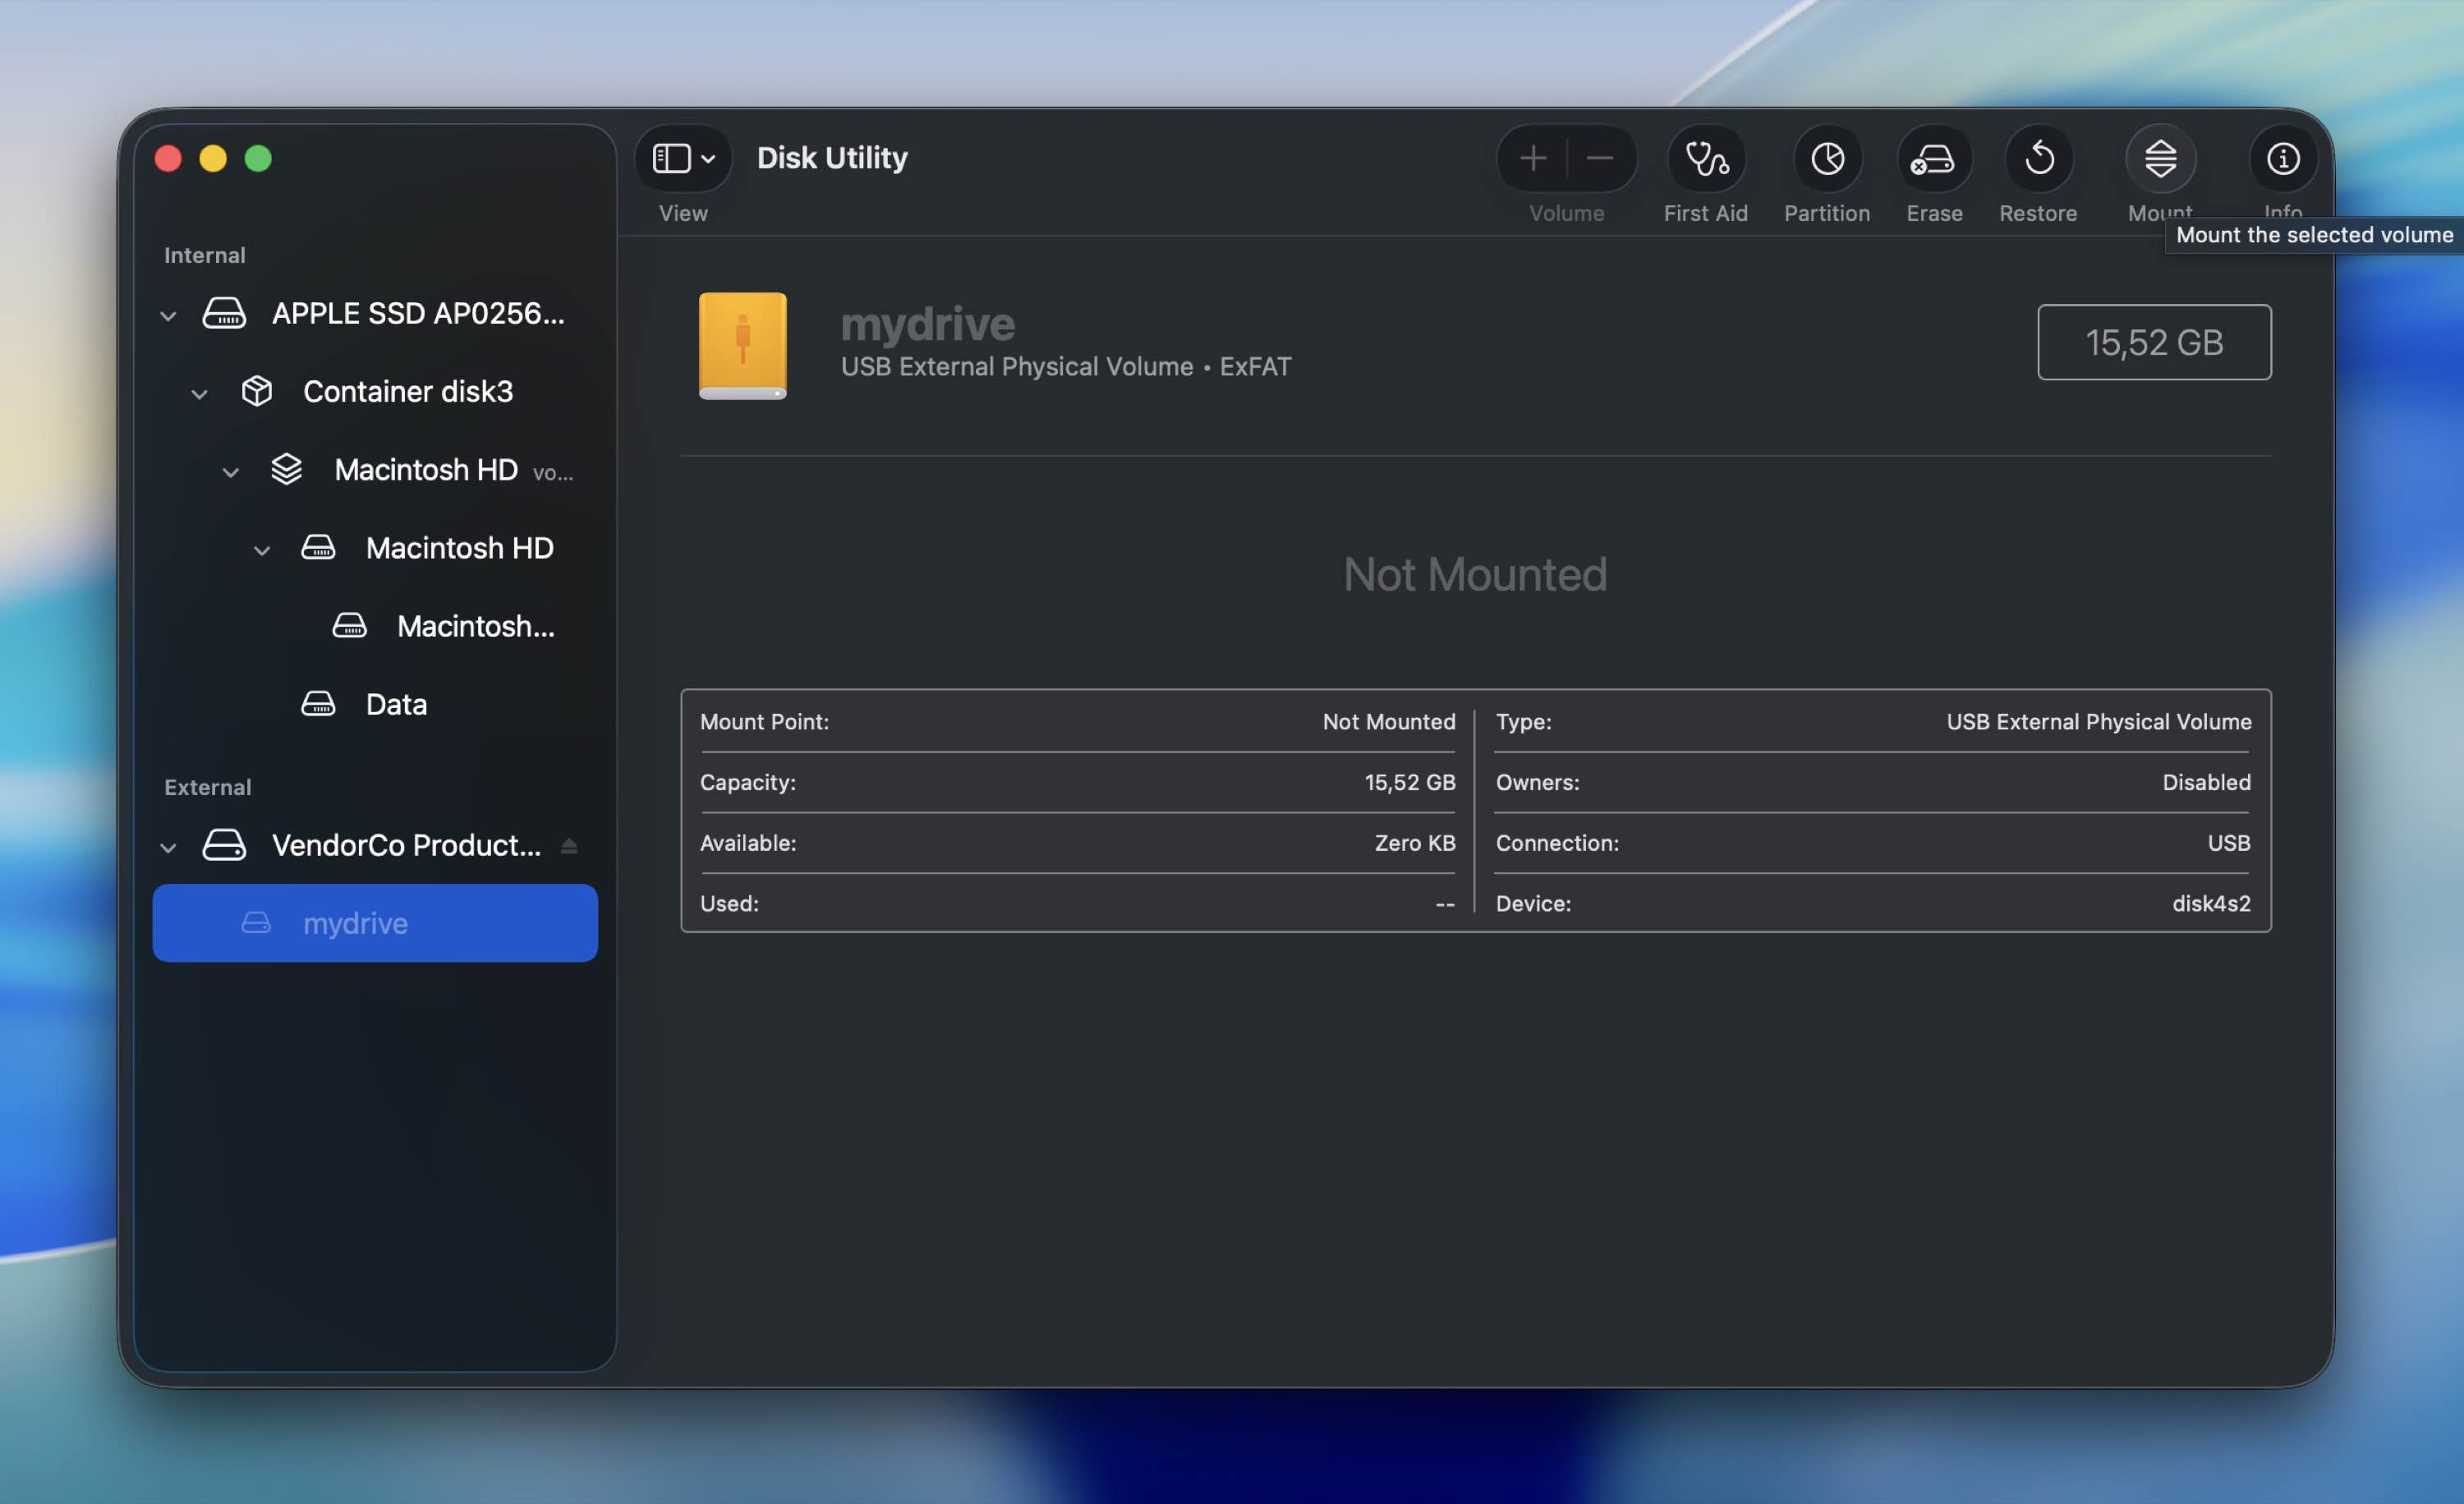
If you can see your hard drive listed in the Disk Utility app and its size is displayed correctly, but you can’t access the data stored there, you should try to force mount it.
Follow these steps to force mount your hard drive in Disk Utility on your Mac:
- Connect the hard drive to your computer.
- Launch the Disk Utility app (to get to Disk Utility on your Mac, go to Launchpad and type in Disk Utility in the search field at the top).
- Choose the faulty hard drive from the list of devices on the left.
- Click the Mount button at the top.
Method 4: Reset SMC
It’s possible that the reason why you’re experiencing issues with your hard drive is because of the SMC (System Management Controller) on your Mac. You should try resetting SMC on your computer to rule out this problem and fix your corrupted external hard drive.
If you’re using an Apple Silicon Mac, then all you should do to reset SMC is to restart the computer. Otherwise, follow these steps to reset SMC on your Mac:
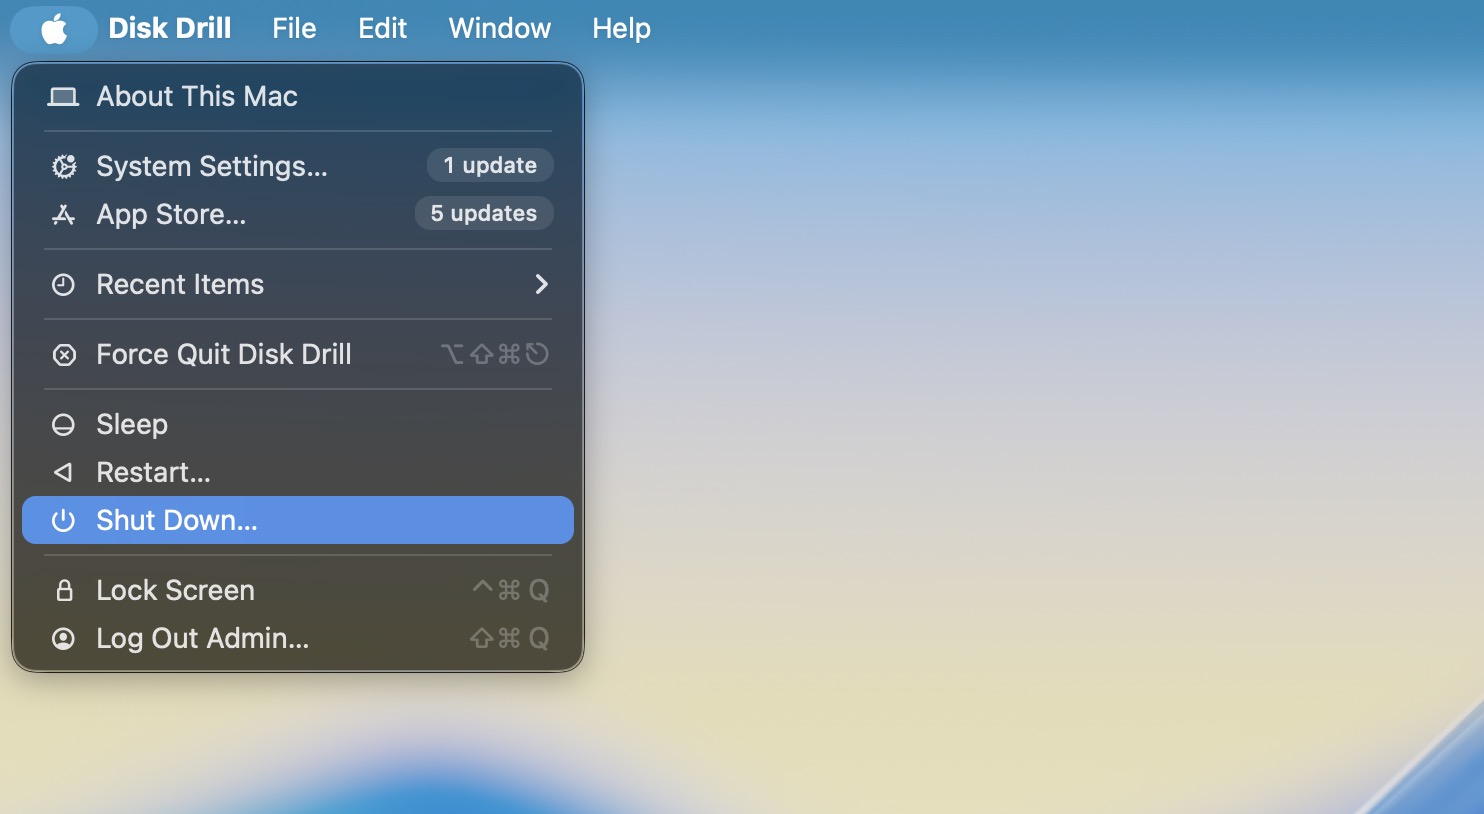
- Go to the Apple menu and click Shut Down from the drop-down menu.
- Press and hold the following key combination: Control + Option + Shift
- Keep holding the keys for about 7-10 seconds, then without releasing them, also press and hold the power button.
- Keep holding all of those keys for 7-10 more seconds.
- Release the keys and press the power button to turn your computer back on.
Method 5: Reset NVRAM
NVRAM (Non-Volatile Random Access Memory) is a certain amount of memory used by your computer to access specific system settings directly on your Mac and on the devices connected to your Mac. If one of those settings is not working properly, it might be the reason why you’re having an issue with accessing the data on your hard drive.
Follow these steps to reset NVRAM on your Mac:
- Go to the Apple menu and click Shut Down from the drop-down menu.
- Turn the computer back on by pressing the power button.
- Then press and hold the following key combination right after releasing the power button: Command + Option + P + R
- Keep holding those keys until the Apple logo appears (for around 20 seconds).
Method 6: Use TestDisk
TestDisk helps when your Mac can “see” the drive, but the volume structure is broken – cases like: the drive shows up in Disk Utility with the right size, but it won’t mount, Finder says it’s unreadable, or the partition looks like it vanished. That’s TestDisk territory.
Here’s how to fix a corrupted external hard drive on a Mac using TestDisk:
- Download TestDisk from the official CGSecurity site and install it (TestDisk and PhotoRec come together).
- Open Terminal (Applications > Utilities > Terminal).
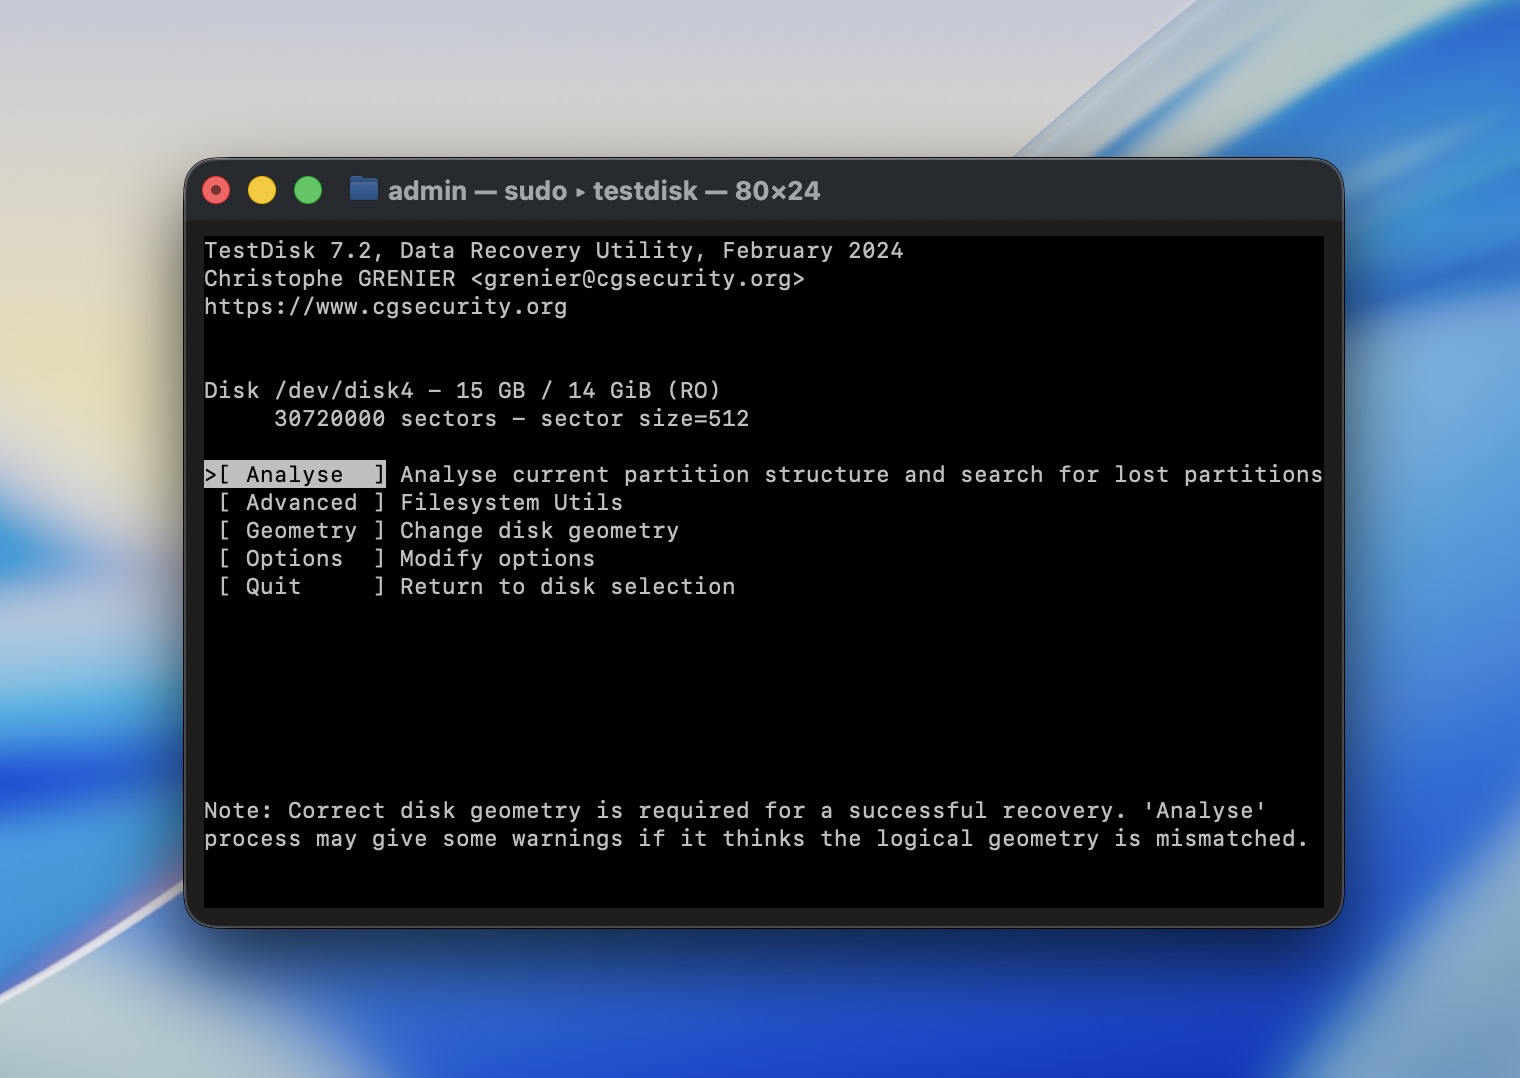
- Run TestDisk (use this command):
sudo testdisk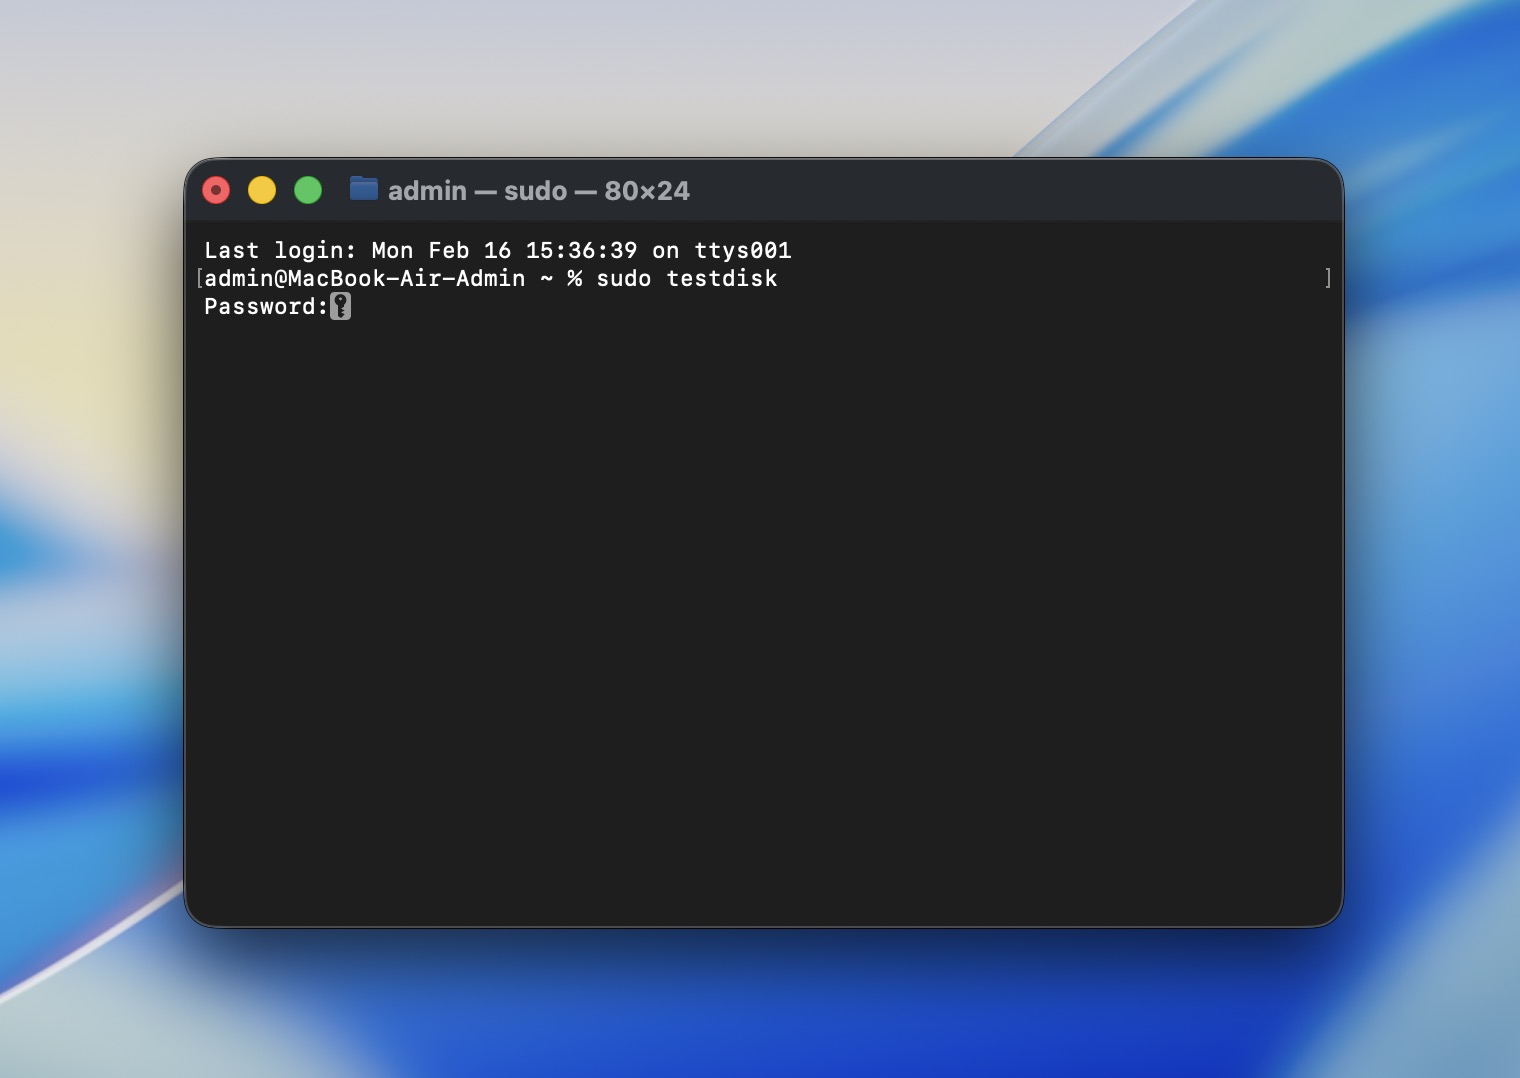 Enter your admin password when prompted.
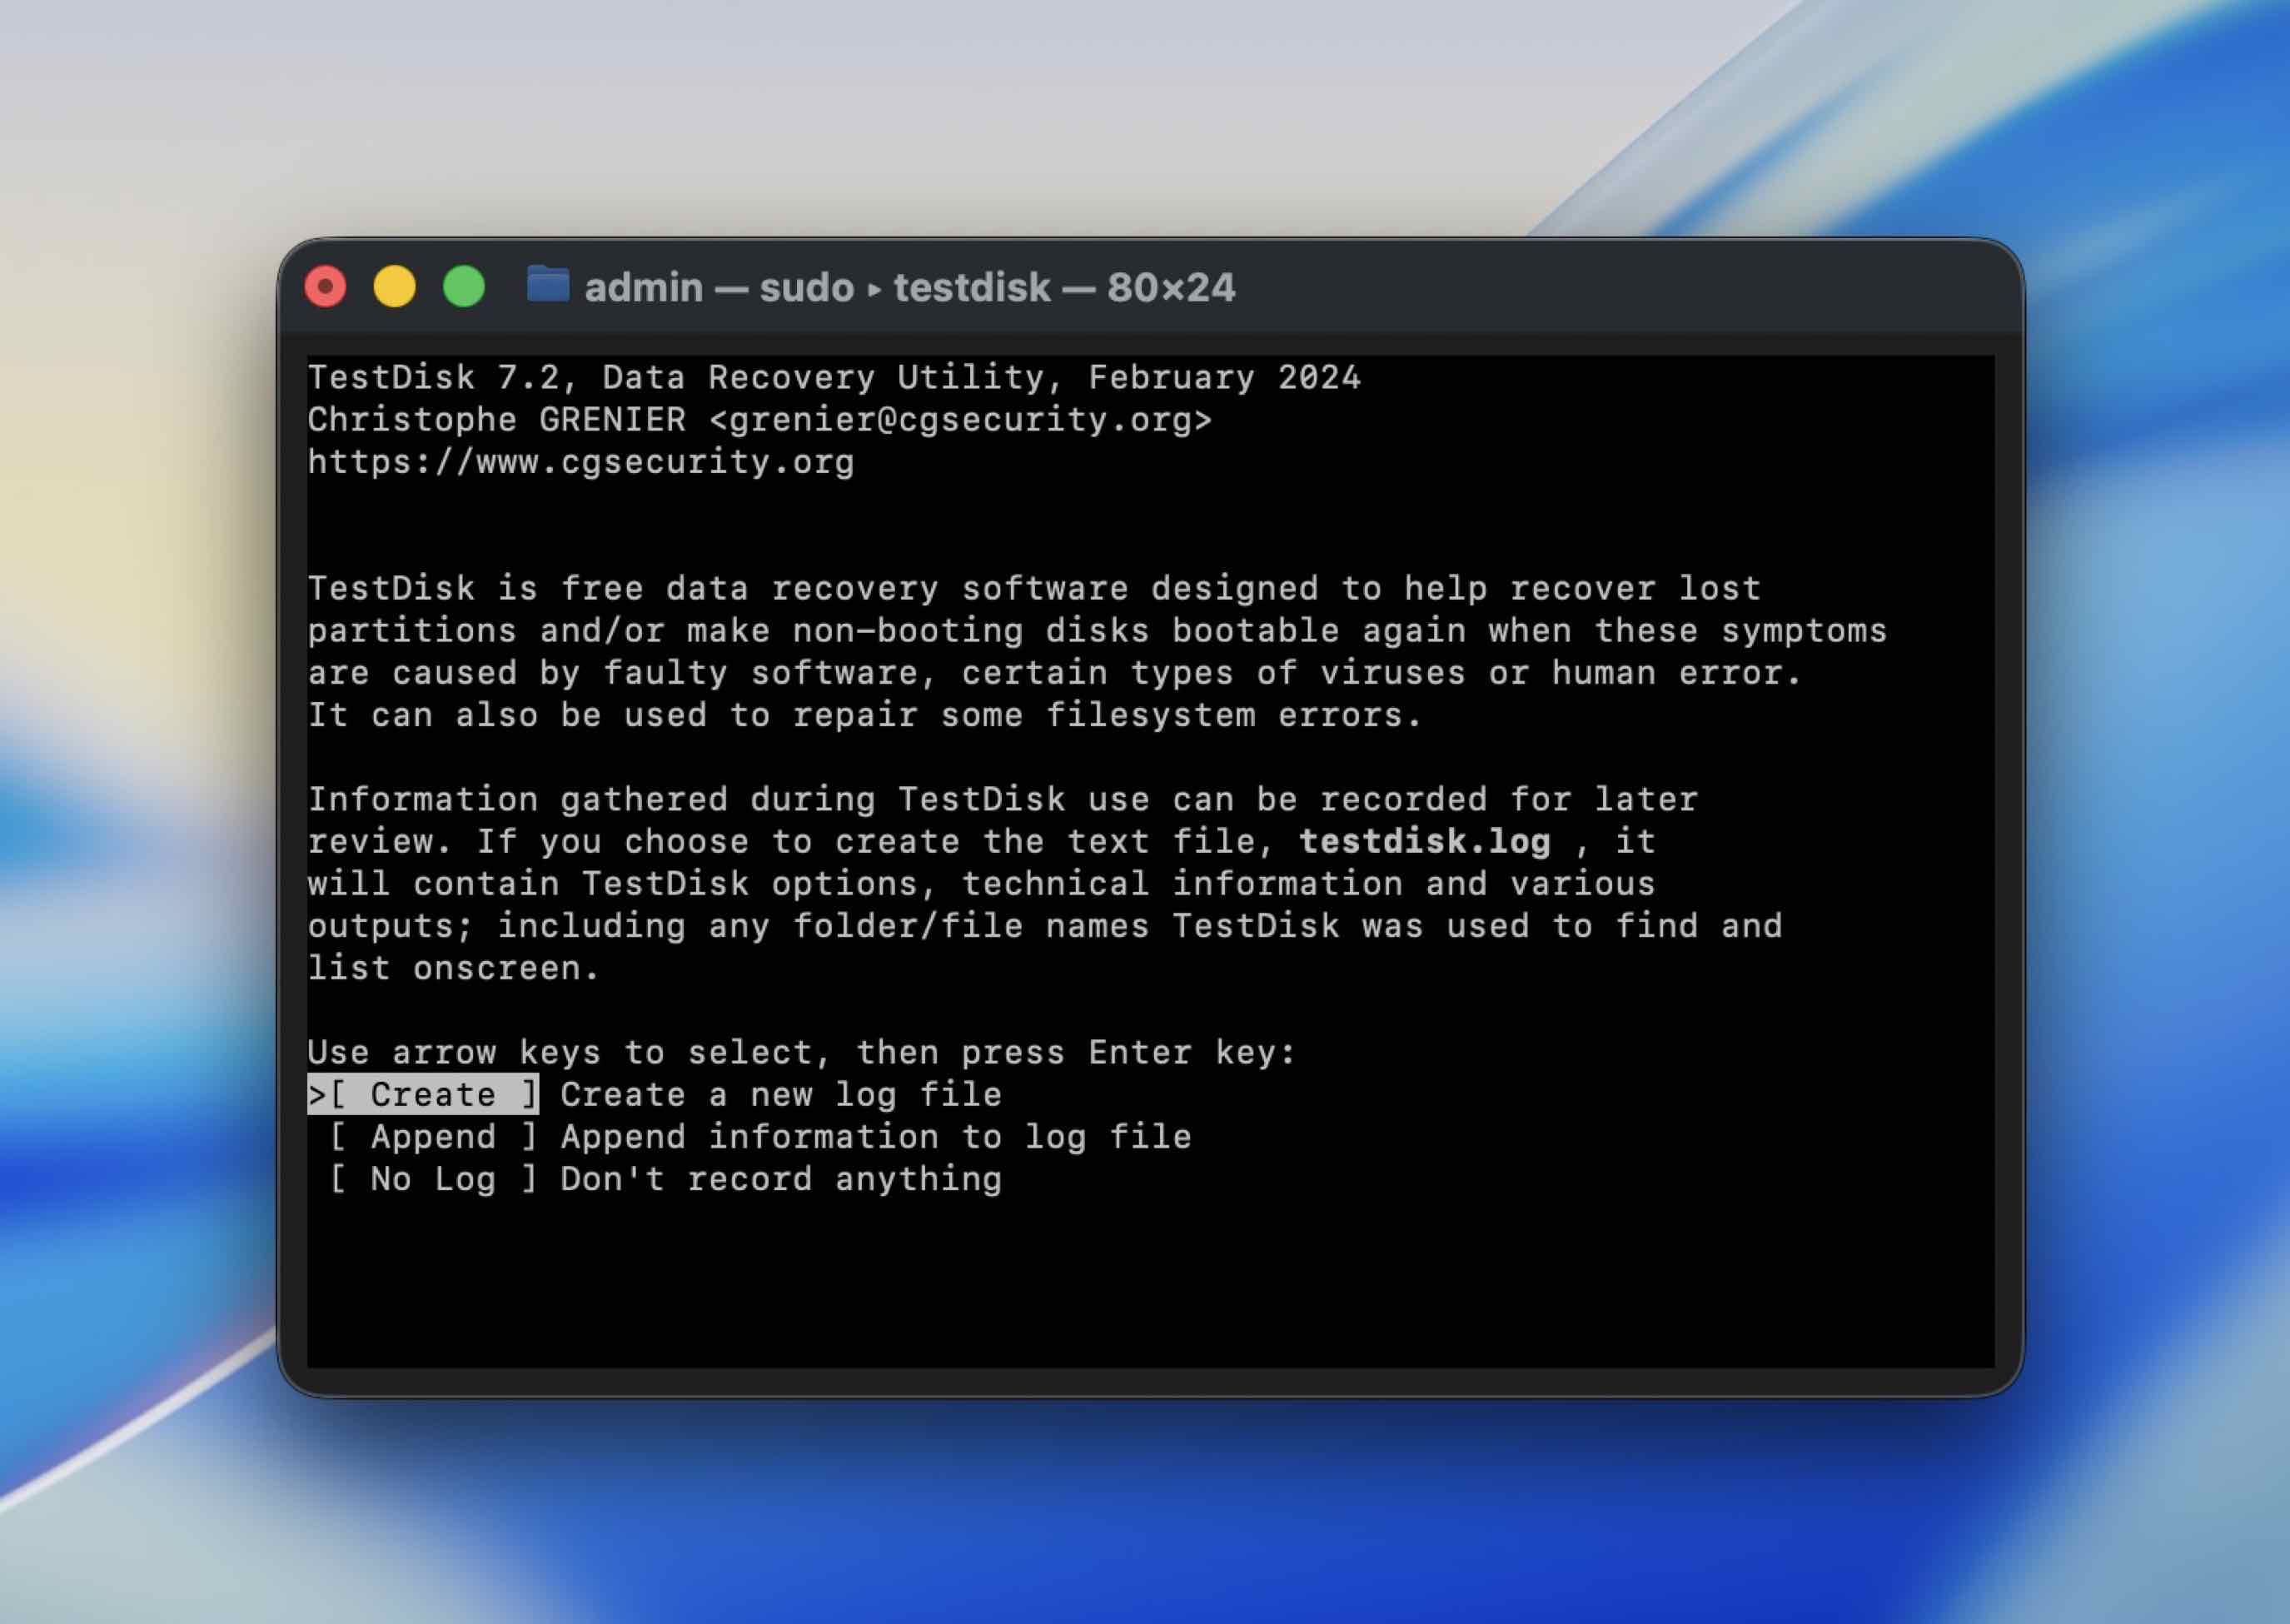
 - When TestDisk opens, choose Create (it makes a log file).
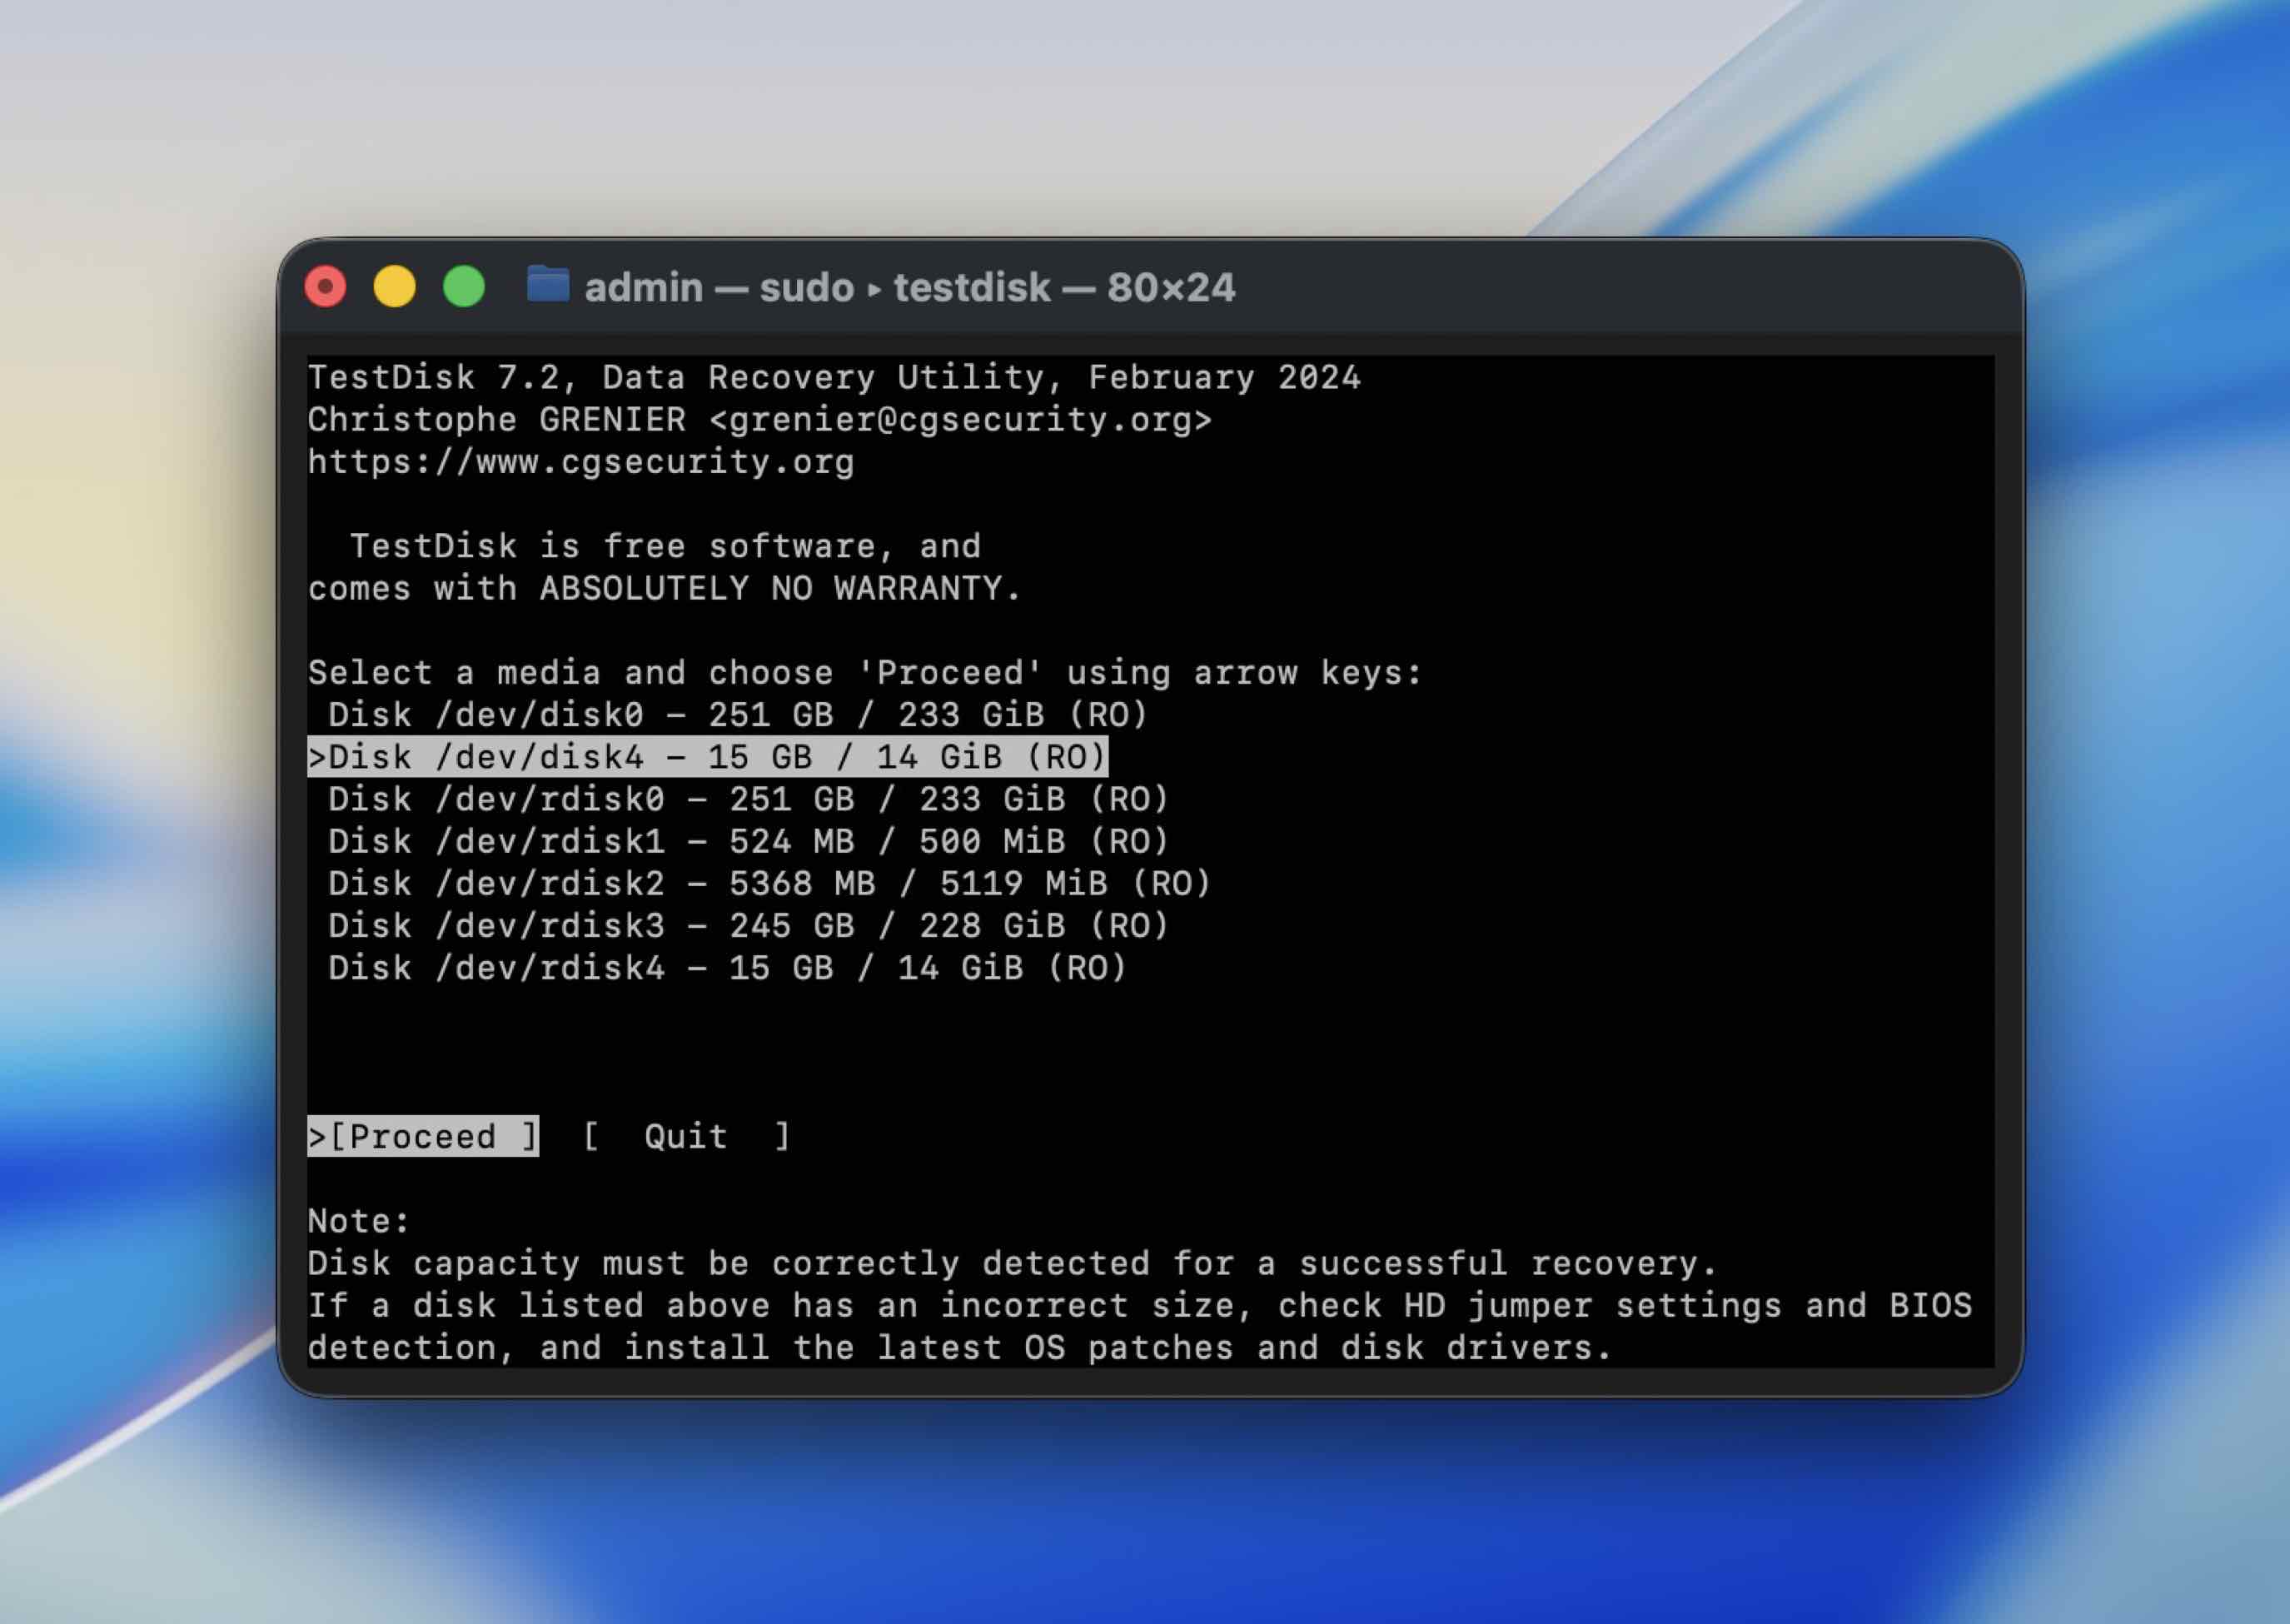
- Select your external drive from the list (use the arrow keys), then press Return.
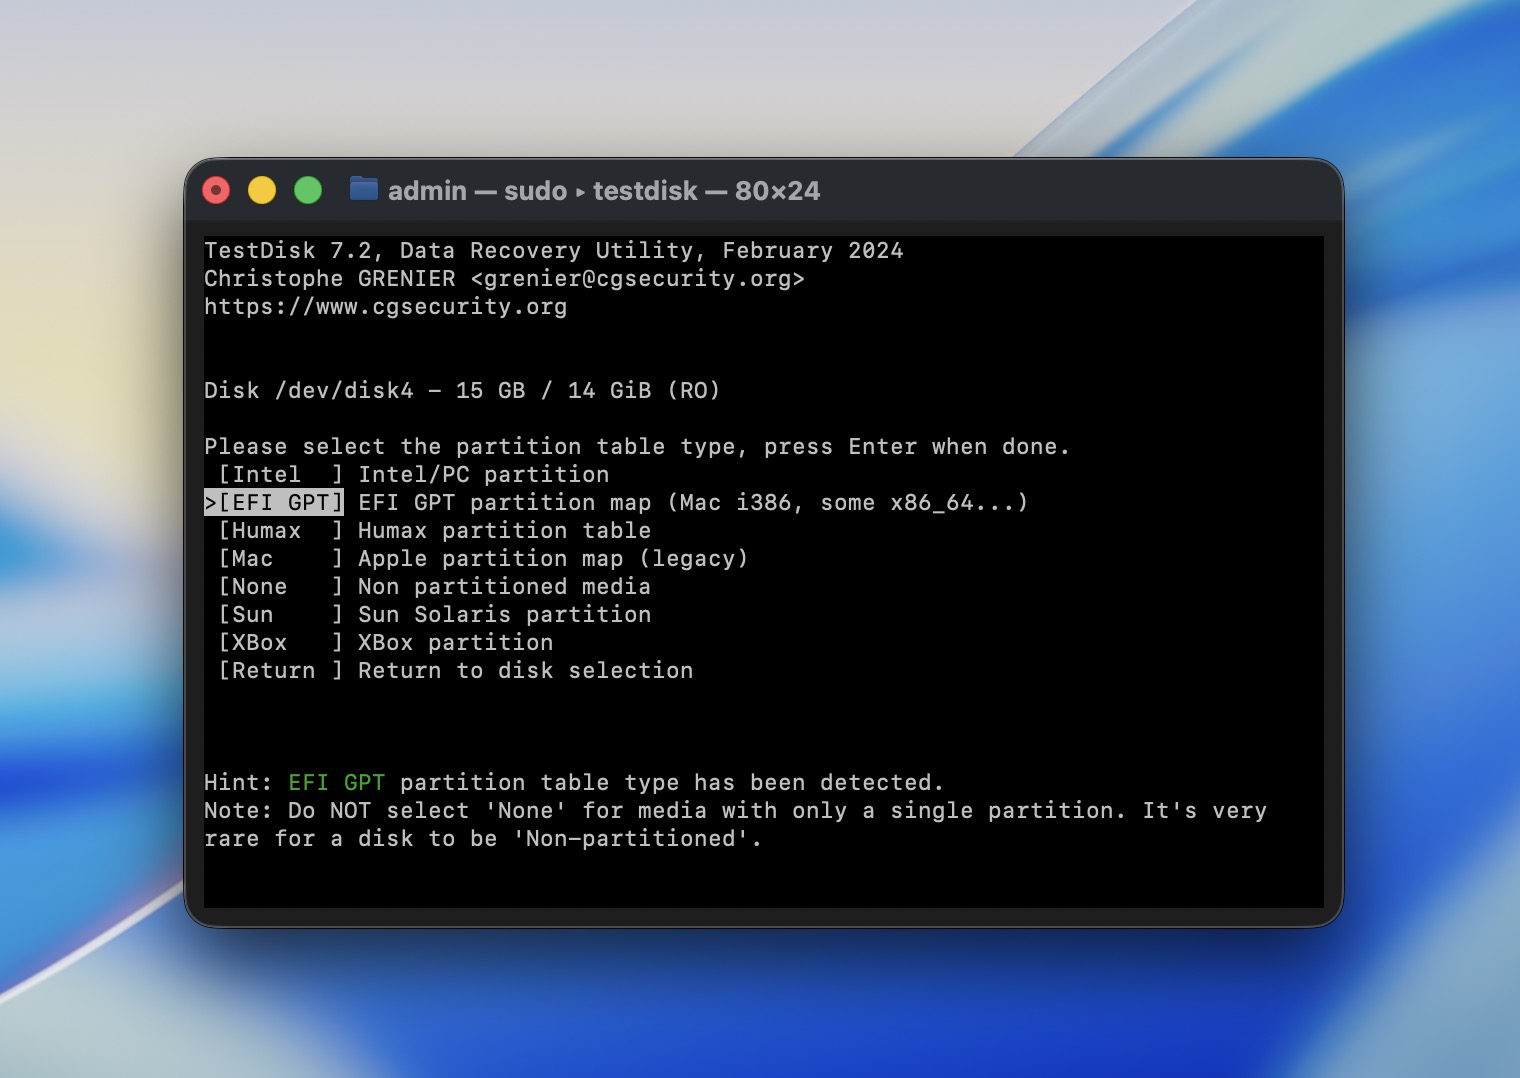
- Choose the partition table type. In most cases, TestDisk detects the right option automatically, so you can press Return to accept it.
- Select Analyse to search for lost partitions, then choose Quick Search.
- If TestDisk finds partitions, you can highlight one and press P to list files. This is the safest move: you’re checking whether your data is actually visible before you write anything.
- If you can see your files, copy them out to another drive (TestDisk will prompt for a destination).
- Only after you’ve copied what matters, consider using Write to update the partition structure – and only if you’re confident you selected the correct partition.
If TestDisk can’t find a valid structure, or the scan fails with repeated read errors, don’t keep hammering the drive. Switch to imaging + recovery software, or a recovery service if the drive acts unstable.
Method 7: Restart Mac in Safe Mode
Third-party apps may block drive connection, so you should try to limit any extra apps or process activities on your Macintosh. To do that, you should reboot your Mac in Safe Mode. However, keep in mind that this process is different for Apple silicon Macs and Intel-based ones.
If you’re using an Apple Silicon Mac, follow these steps to boot it in Safe Mode:
- Go to the Apple menu and click Shut Down from the drop-down menu.
- Press and hold the power button until you see the Startup screen.
- Choose a volume.
- Press and hold the Shift key.
- Click Continue in Safe Mode and wait for the computer to restart.
For Intel-based Macs, follow these steps:
- Go to the Apple menu and click Restart from the drop-down menu.
- Immediately after that, press and hold the Shift key (until the login window appears).
- Log in to your Mac.
Method 8: Try to Format Your Hard Drive
If nothing from the above-mentioned methods helped with repairing your Mac disk, your last option that might help is to format it. You can do this directly through the Disk Utility app on your Mac.
Follow these steps to format the hard drive on your Mac:
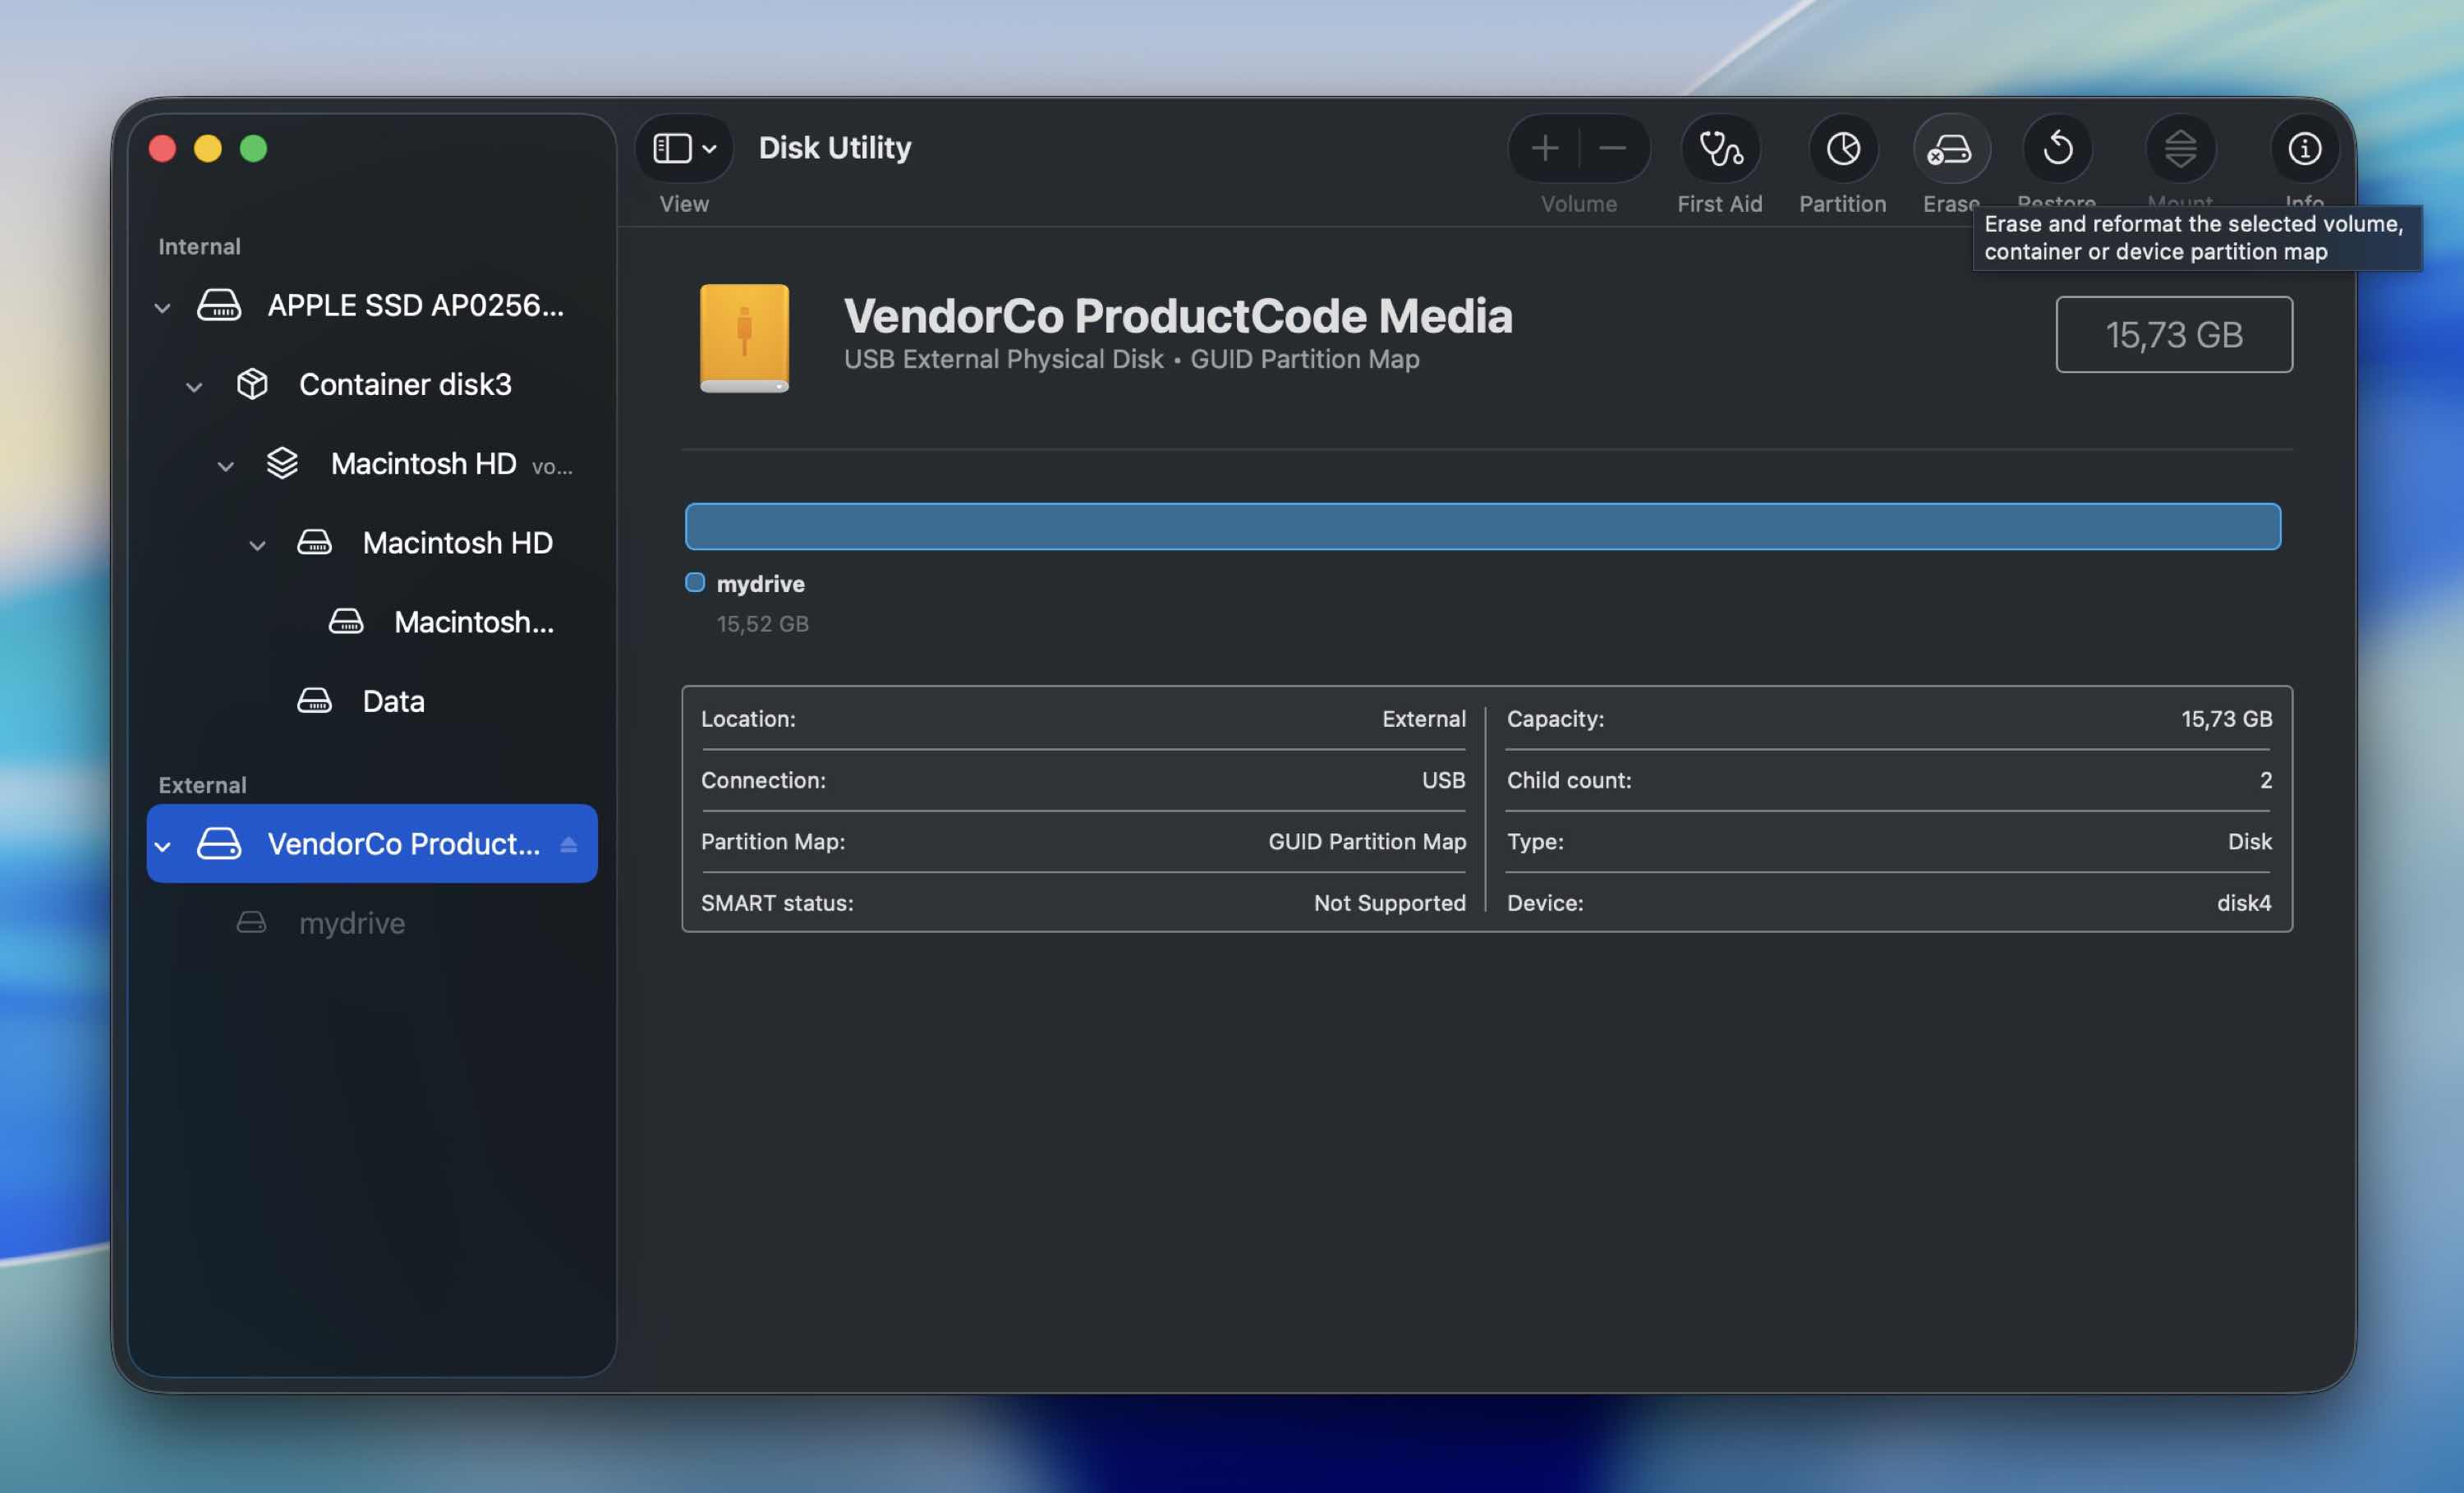
- Connect the hard drive to your computer.
- Launch the Disk Utility app (to get to Disk Utility on your Mac, go to Launchpad and type in Disk Utility in the search field at the top).
- Choose the corrupted drive from the list of available devices on the sidebar on the left.
- Click the Erase button.
- Enter a name for your hard drive, choose the needed file format, and select the scheme.
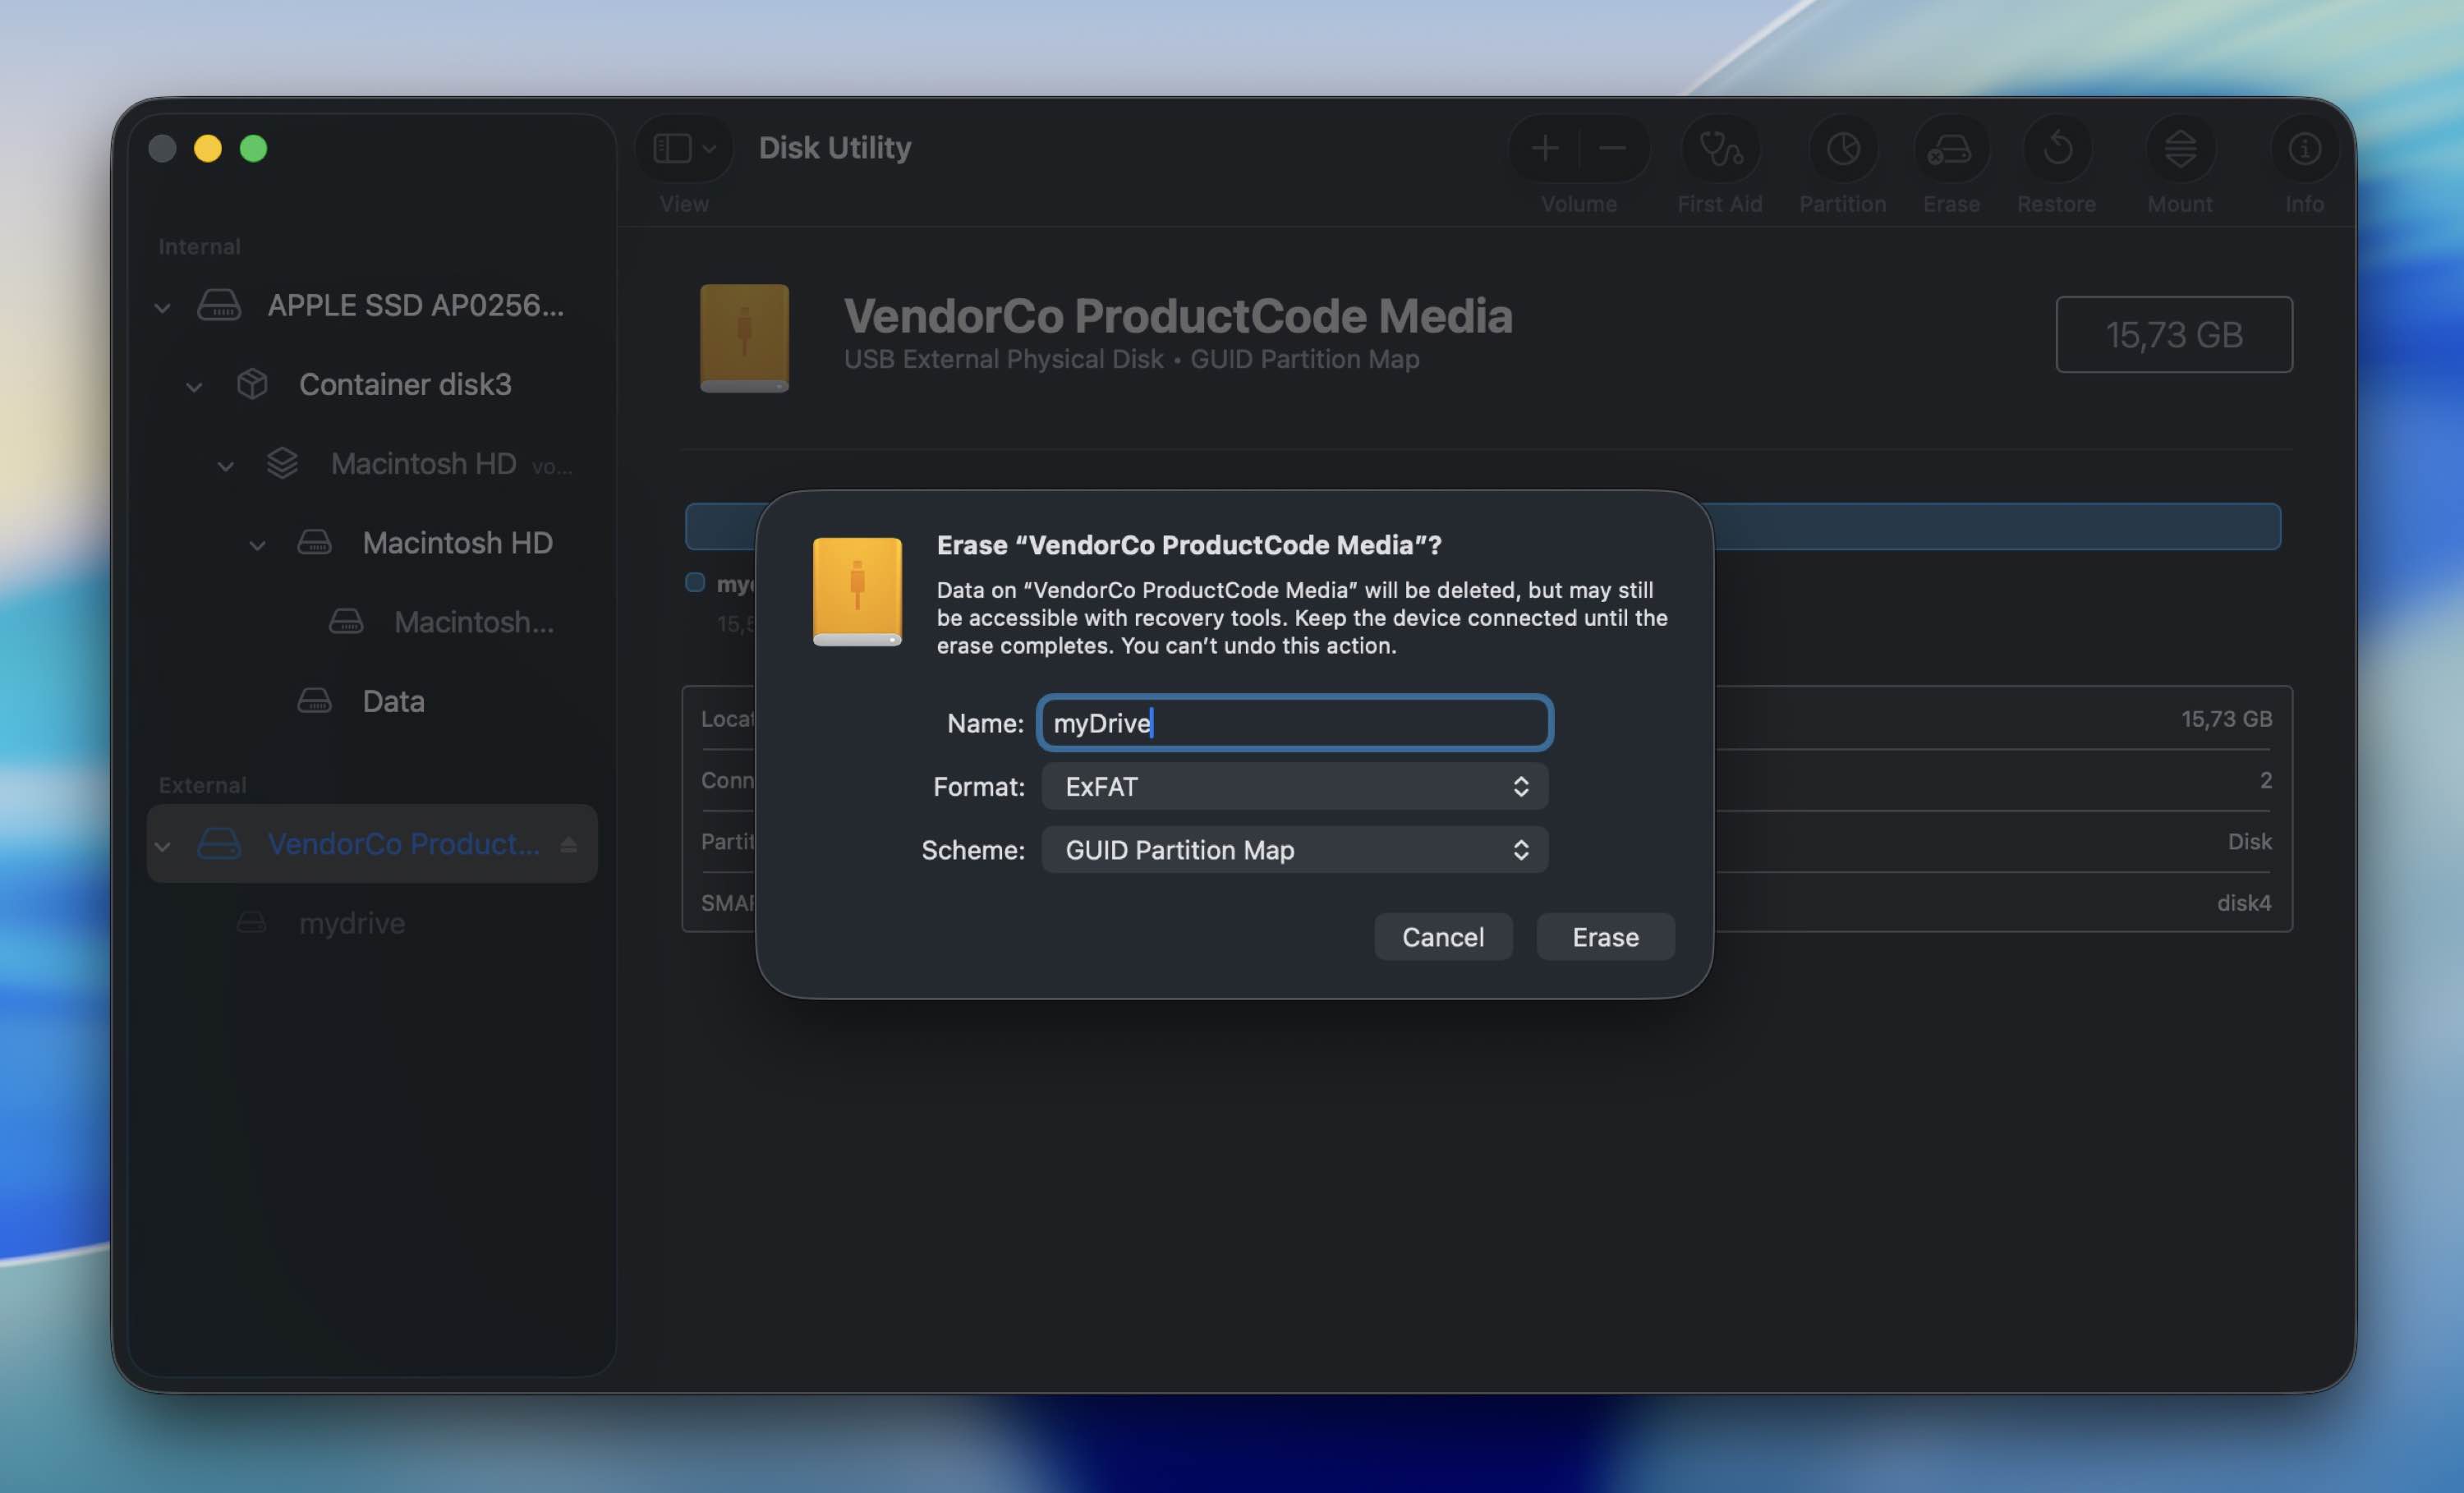
- Click Erase to confirm and wait for the process to finish.
If you’re not sure what to pick for Format and Scheme, choose based on where you’ll use the drive:
- For a Mac-only drive (best default for modern Macs) – APFS and GUID Partition Map
- For a drive you’ll use on both Mac and Windows (most compatible) – exFAT
and GUID Partition Map - For older Macs (or if you need Mac OS Extended for a specific reason) – Mac OS Extended (Journaled) and GUID Partition Map
FAQ
- Connect the hard drive to your computer.
- Launch Disk Utility on your Mac.
- Select the connected drive from the list of devices on the left side.
- Click the First Aid button at the top.
- Click Run and wait for the process to finish.
- First, check the basics: different cable, different port, direct connection.
- Then open Disk Utility and try mounting the drive manually.
- If it appears but won’t mount properly, run First Aid. That can repair certain file system errors without erasing data.
- If First Aid fails, you can try diskutil repairVolume or fsck from Terminal.
- If the issue looks like a lost partition rather than simple corruption, tools like TestDisk may help recover the structure or at least copy files out.
- Physical damage
- Buggy firmware
- Power issues
- Malware
- Mechanical failure
- Open Terminal (Finder > Applications > Utilities > Terminal).
- Type diskutil list and press Return to see all connected drives.
- Find your external drive and note its identifier (for example, disk4s2).
- Run diskutil verifyVolume /dev/disk4s2 to check the file system.
- If errors are found, run diskutil repairVolume /dev/disk4s2.
- Replace disk4s2 with your actual volume identifier.


