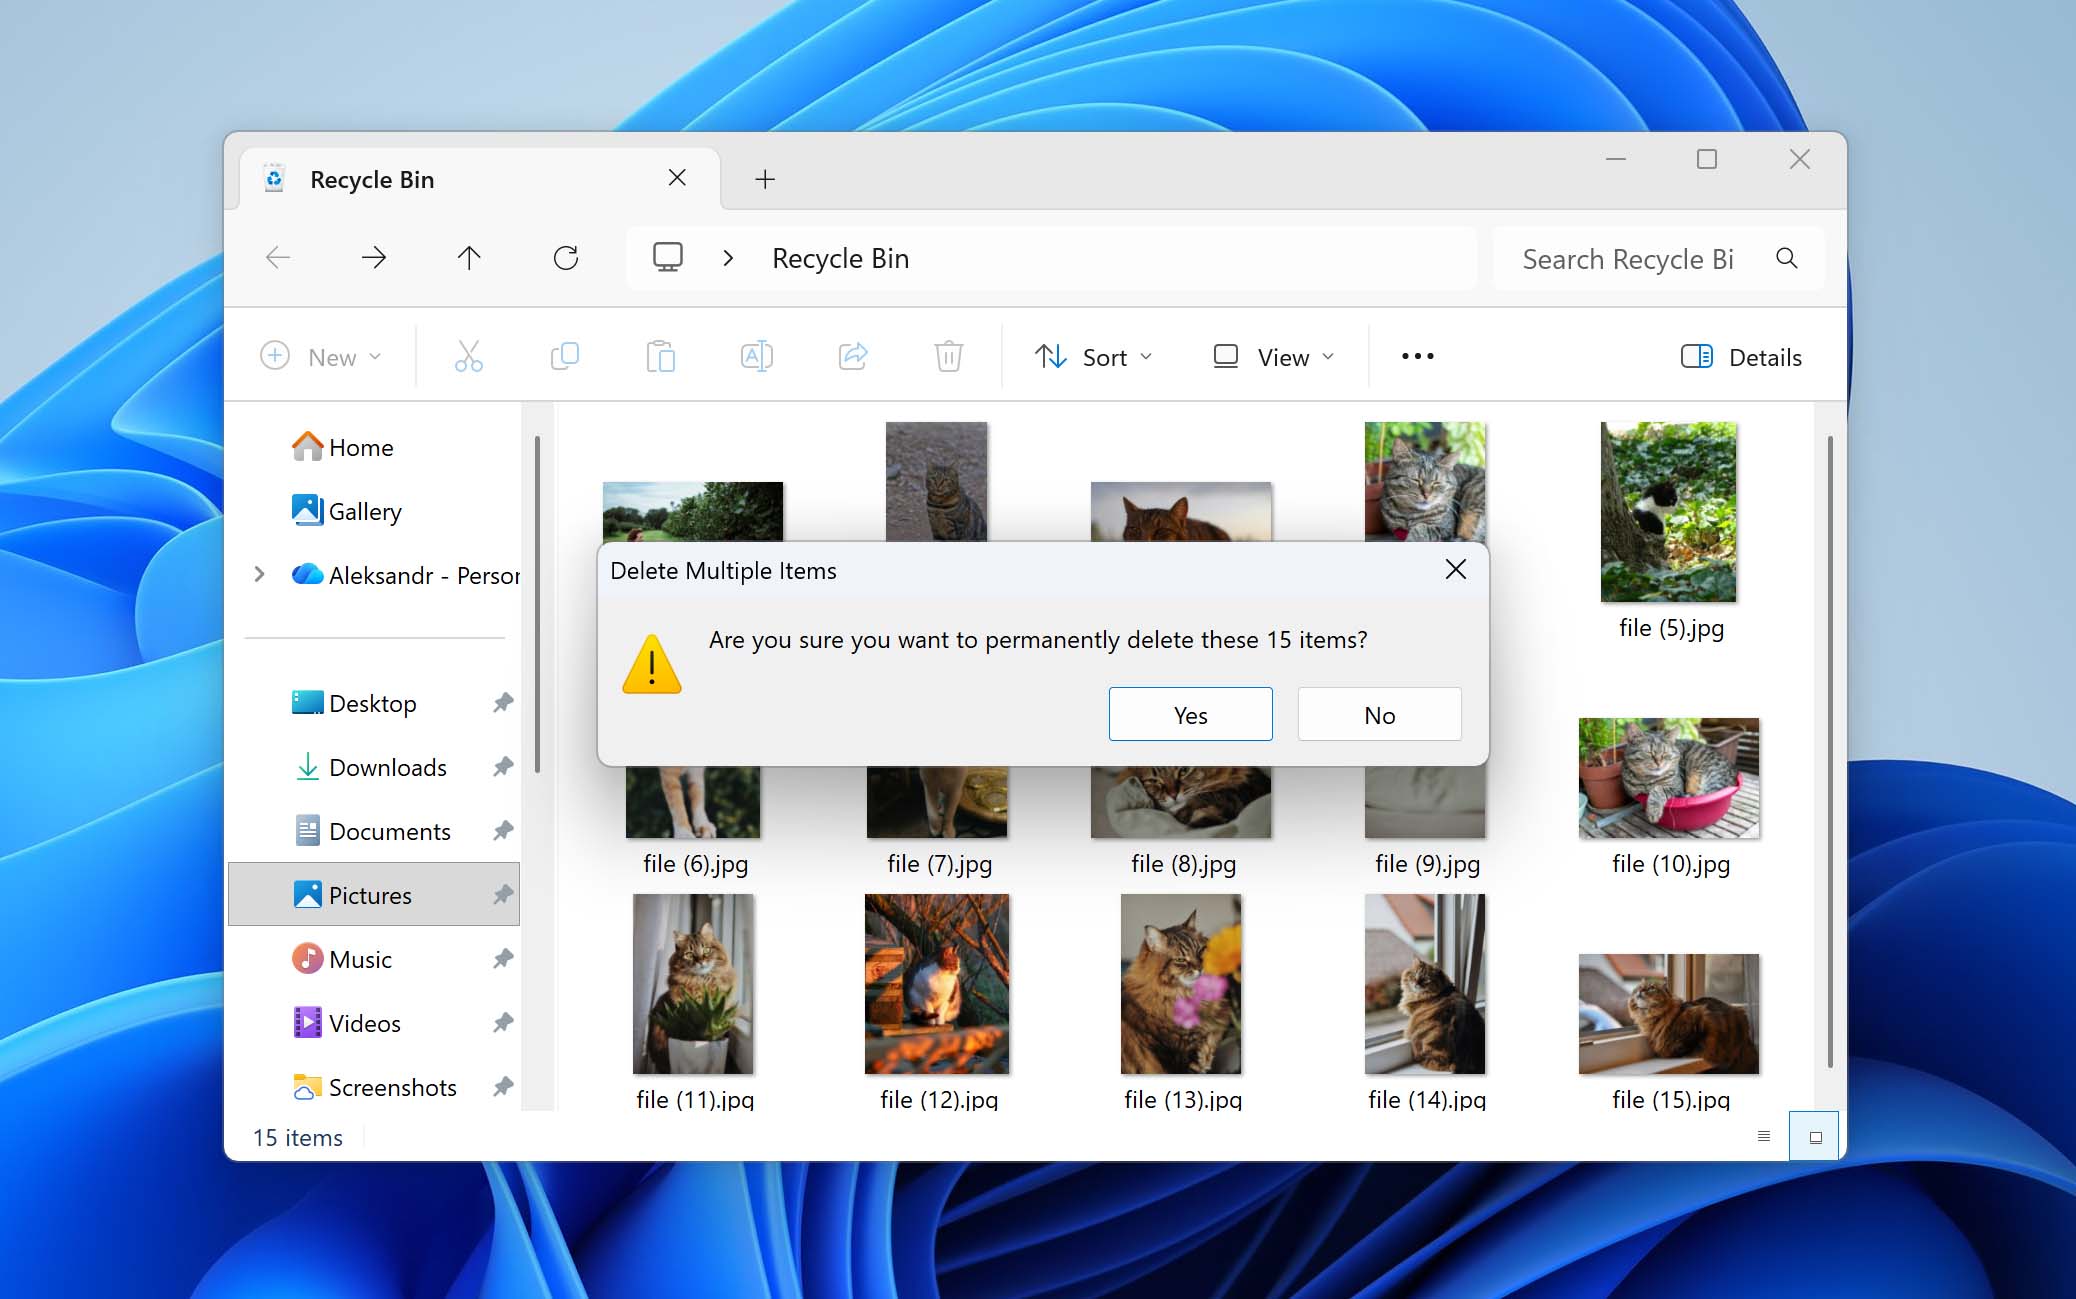
 Most of us are used to the Recycle Bin being the quickest way to undo a mistake. You delete a file by accident, open the Bin, click Restore, and the file goes back to its original location. Simple and predictable.
But what if the file you need is not there? How do you recover data deleted from the Recycle Bin? The good news is that this is possible, the bad news is that it does not always work. Still, there is no reason to panic just yet. Read this guide to the end, assess your specific case, and try the recovery method that fits it best. While you are reading, do not download anything or add new files to your PC, as this can reduce the chances of a successful recovery.
Is It Possible to Recover Files from an Emptied Recycle Bin?
Yes, it’s possible to recover files from the Recycle Bin even after it has been emptied. This is because deleting files from the Recycle Bin does not immediately remove the data from the storage device. Instead, the operating system removes the references to those files and marks the space they occupied as available for reuse. Until that space is overwritten, the data may still exist on the disk.
However, in practice, things are not always that simple. Whether recovery works or not usually comes down to a few key factors.
- If you have system backups that include the files deleted from the Recycle Bin, there is nothing to worry about. Recovery in this case is straightforward and does not depend on external factors.
- If no backups are available, your only option is data recovery software. For these tools to find and restore files deleted from the Recycle Bin, the data must not be overwritten. Overwriting can happen in two ways. One depends on user activity, such as downloading files, installing software, or saving new data to the same drive. The other happens automatically and is related to the TRIM command, which is enabled by default on most SSDs.
TRIM allows the operating system to inform the SSD which blocks of data are no longer needed, so they can be wiped internally. Once TRIM is applied to deleted data, recovery becomes impossible. This is why time is critical, and why it is best to act before the system processes TRIM. Ideally, TRIM should be temporarily disabled.
- Open Command Prompt as administrator.
- Type the fsutil behavior set DisableDeleteNotify 1 command and press Enter.
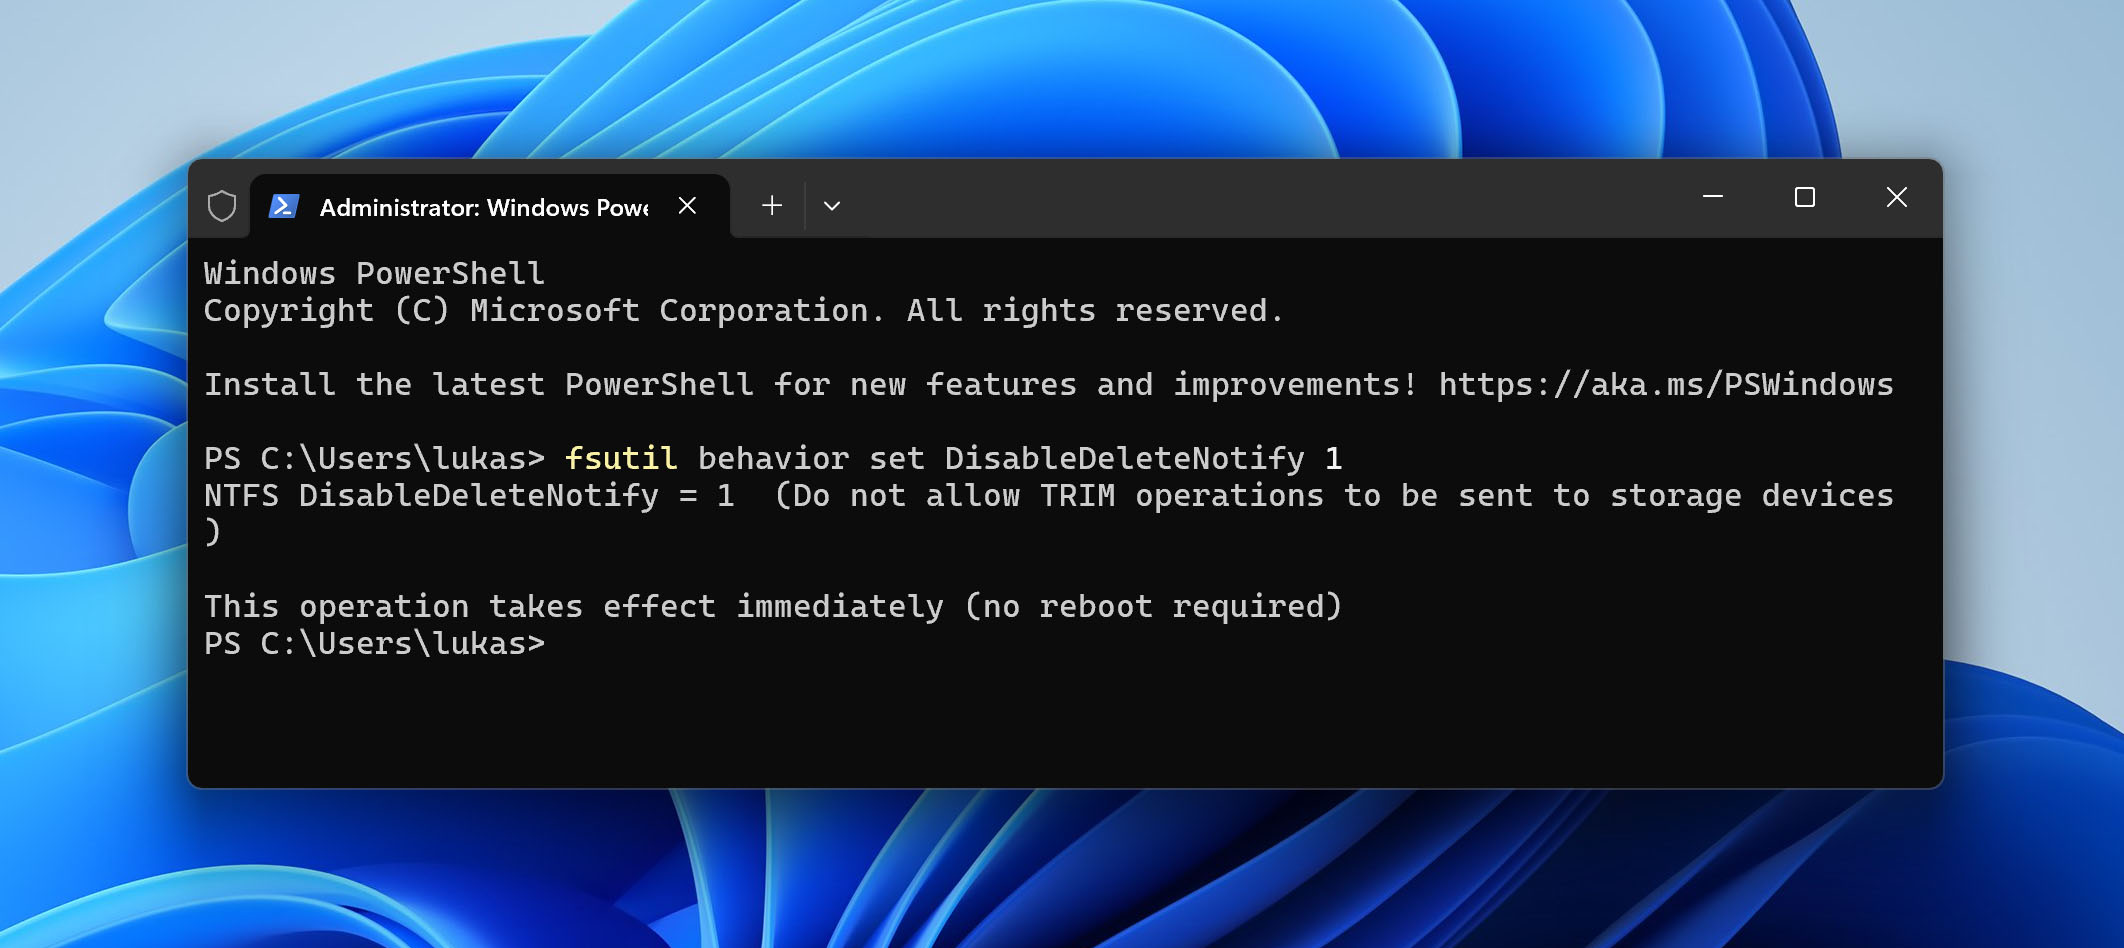
This command disables TRIM, which helps prevent the operating system from clearing deleted data on an SSD while you attempt recovery. After you finish the Recycle Bin recovery attempt, make sure to enable TRIM again by running the fsutil behavior set DisableDeleteNotify 0 command in Command Prompt as administrator.
How to Recover Deleted Files from an Emptied Recycle Bin
Now that you have a general idea of your chances of recovering files deleted from the Recycle Bin, we can move on to the actual methods. As mentioned earlier, there are two main approaches: (1)restoring files from system backups or (2)using data recovery software. Below, we will go through each option in more detail and provide clear steps to make it easier for you to handle restoring deleted files from the Recycle Bin.
- If you plan to rely on data recovery software, start with Method 1.
- If your recovery depends on backups, proceed directly to Method 2 and Method 3.
Method 1: Recover Files Using Data Recovery Software
We start with the method on how to get files back when they were deleted from the Recycle Bin using data recovery software, as delaying the process may reduce your chances of success.
All data recovery programs work on a similar principle. When files are deleted, the operating system removes their references and marks the storage space as available. Recovery tools scan the drive for this leftover data and attempt to reconstruct the deleted files before they are overwritten. However, while the underlying principle is similar, the actual usability and effectiveness of different tools can vary.
We most often recommend Disk Drill. It is a versatile solution that handles many deletion scenarios, including cases where the Recycle Bin is emptied. It can scan and recover files from major file systems such as NTFS, FAT32, exFAT, and others. As for file types, it supports everything from photos, videos, and documents to more specific and less common formats. In addition to data recovery, it also offers extra features, which you can read about in our full Disk Drill review.
It is important to note that performing data recovery as soon as possible is recommended. This is because the sooner you attempt data recovery, the less time your operating system has to overwrite the deleted files.
Follow these steps to use Disk Drill to recover deleted files after emptying the Recycle Bin:
- Download Disk Drill from the official website and install it on your computer. We suggest using a flash drive or external USB drive for the download and installation to preserve your lost data.
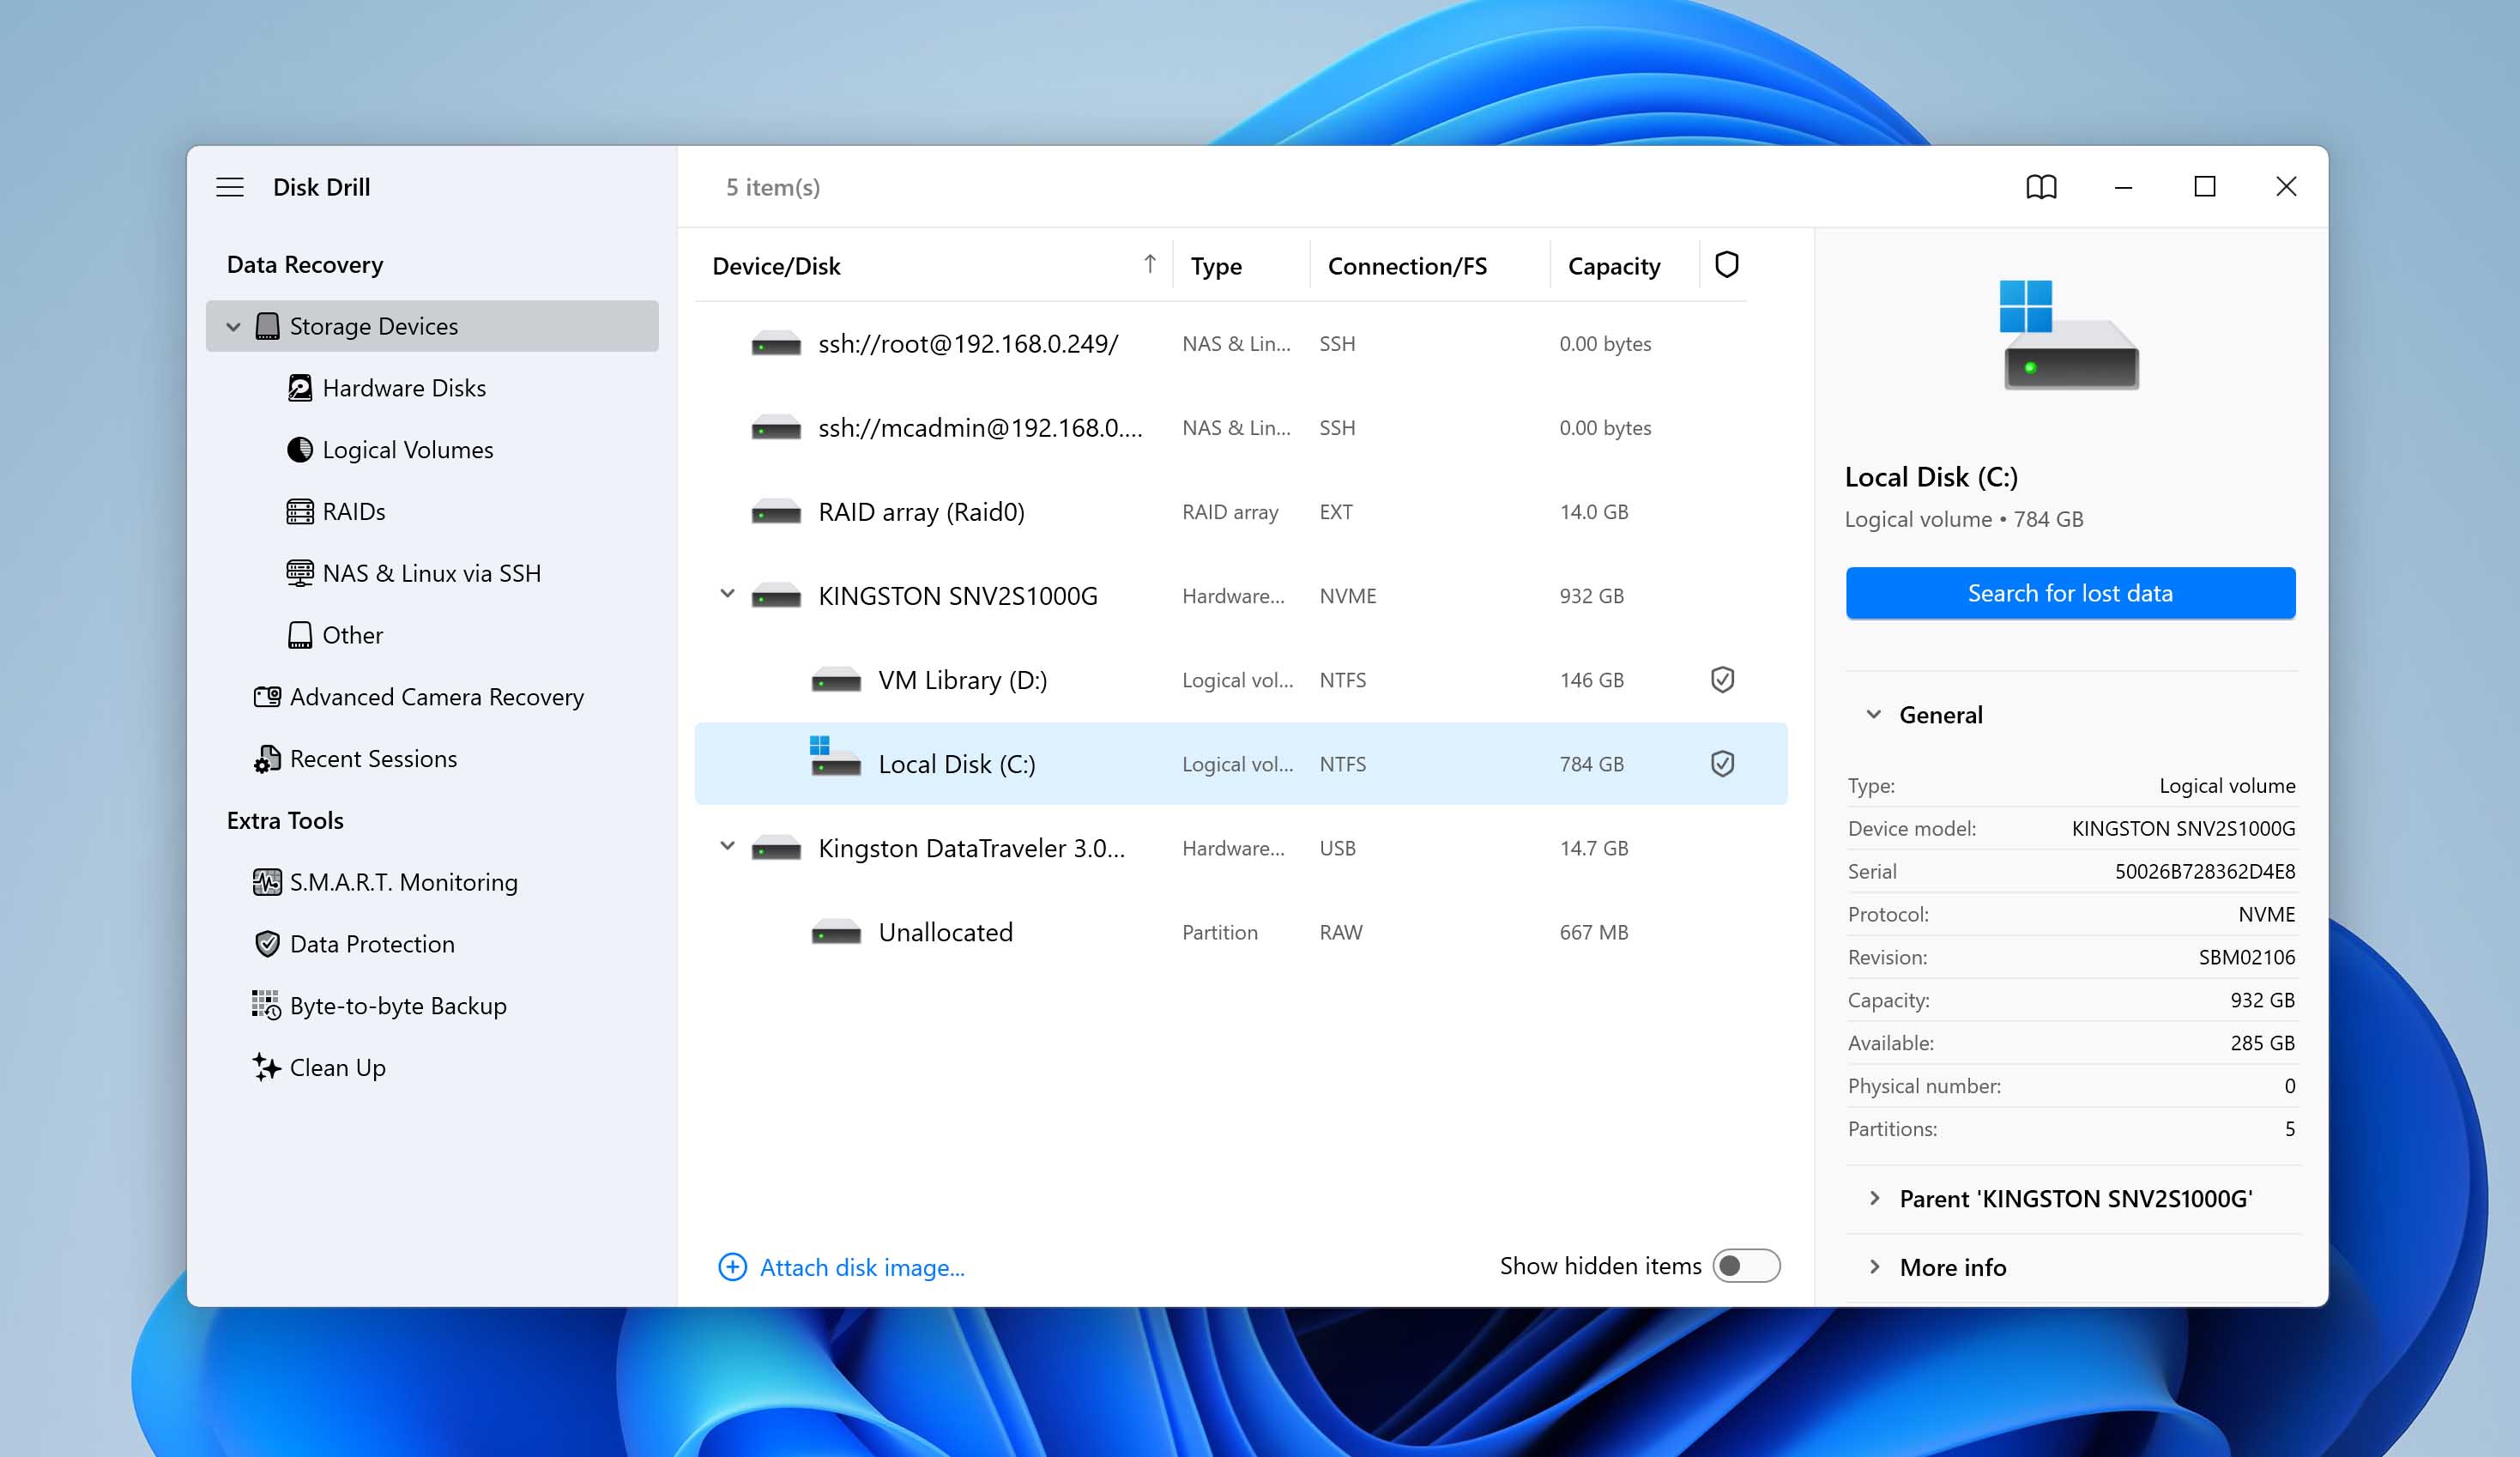
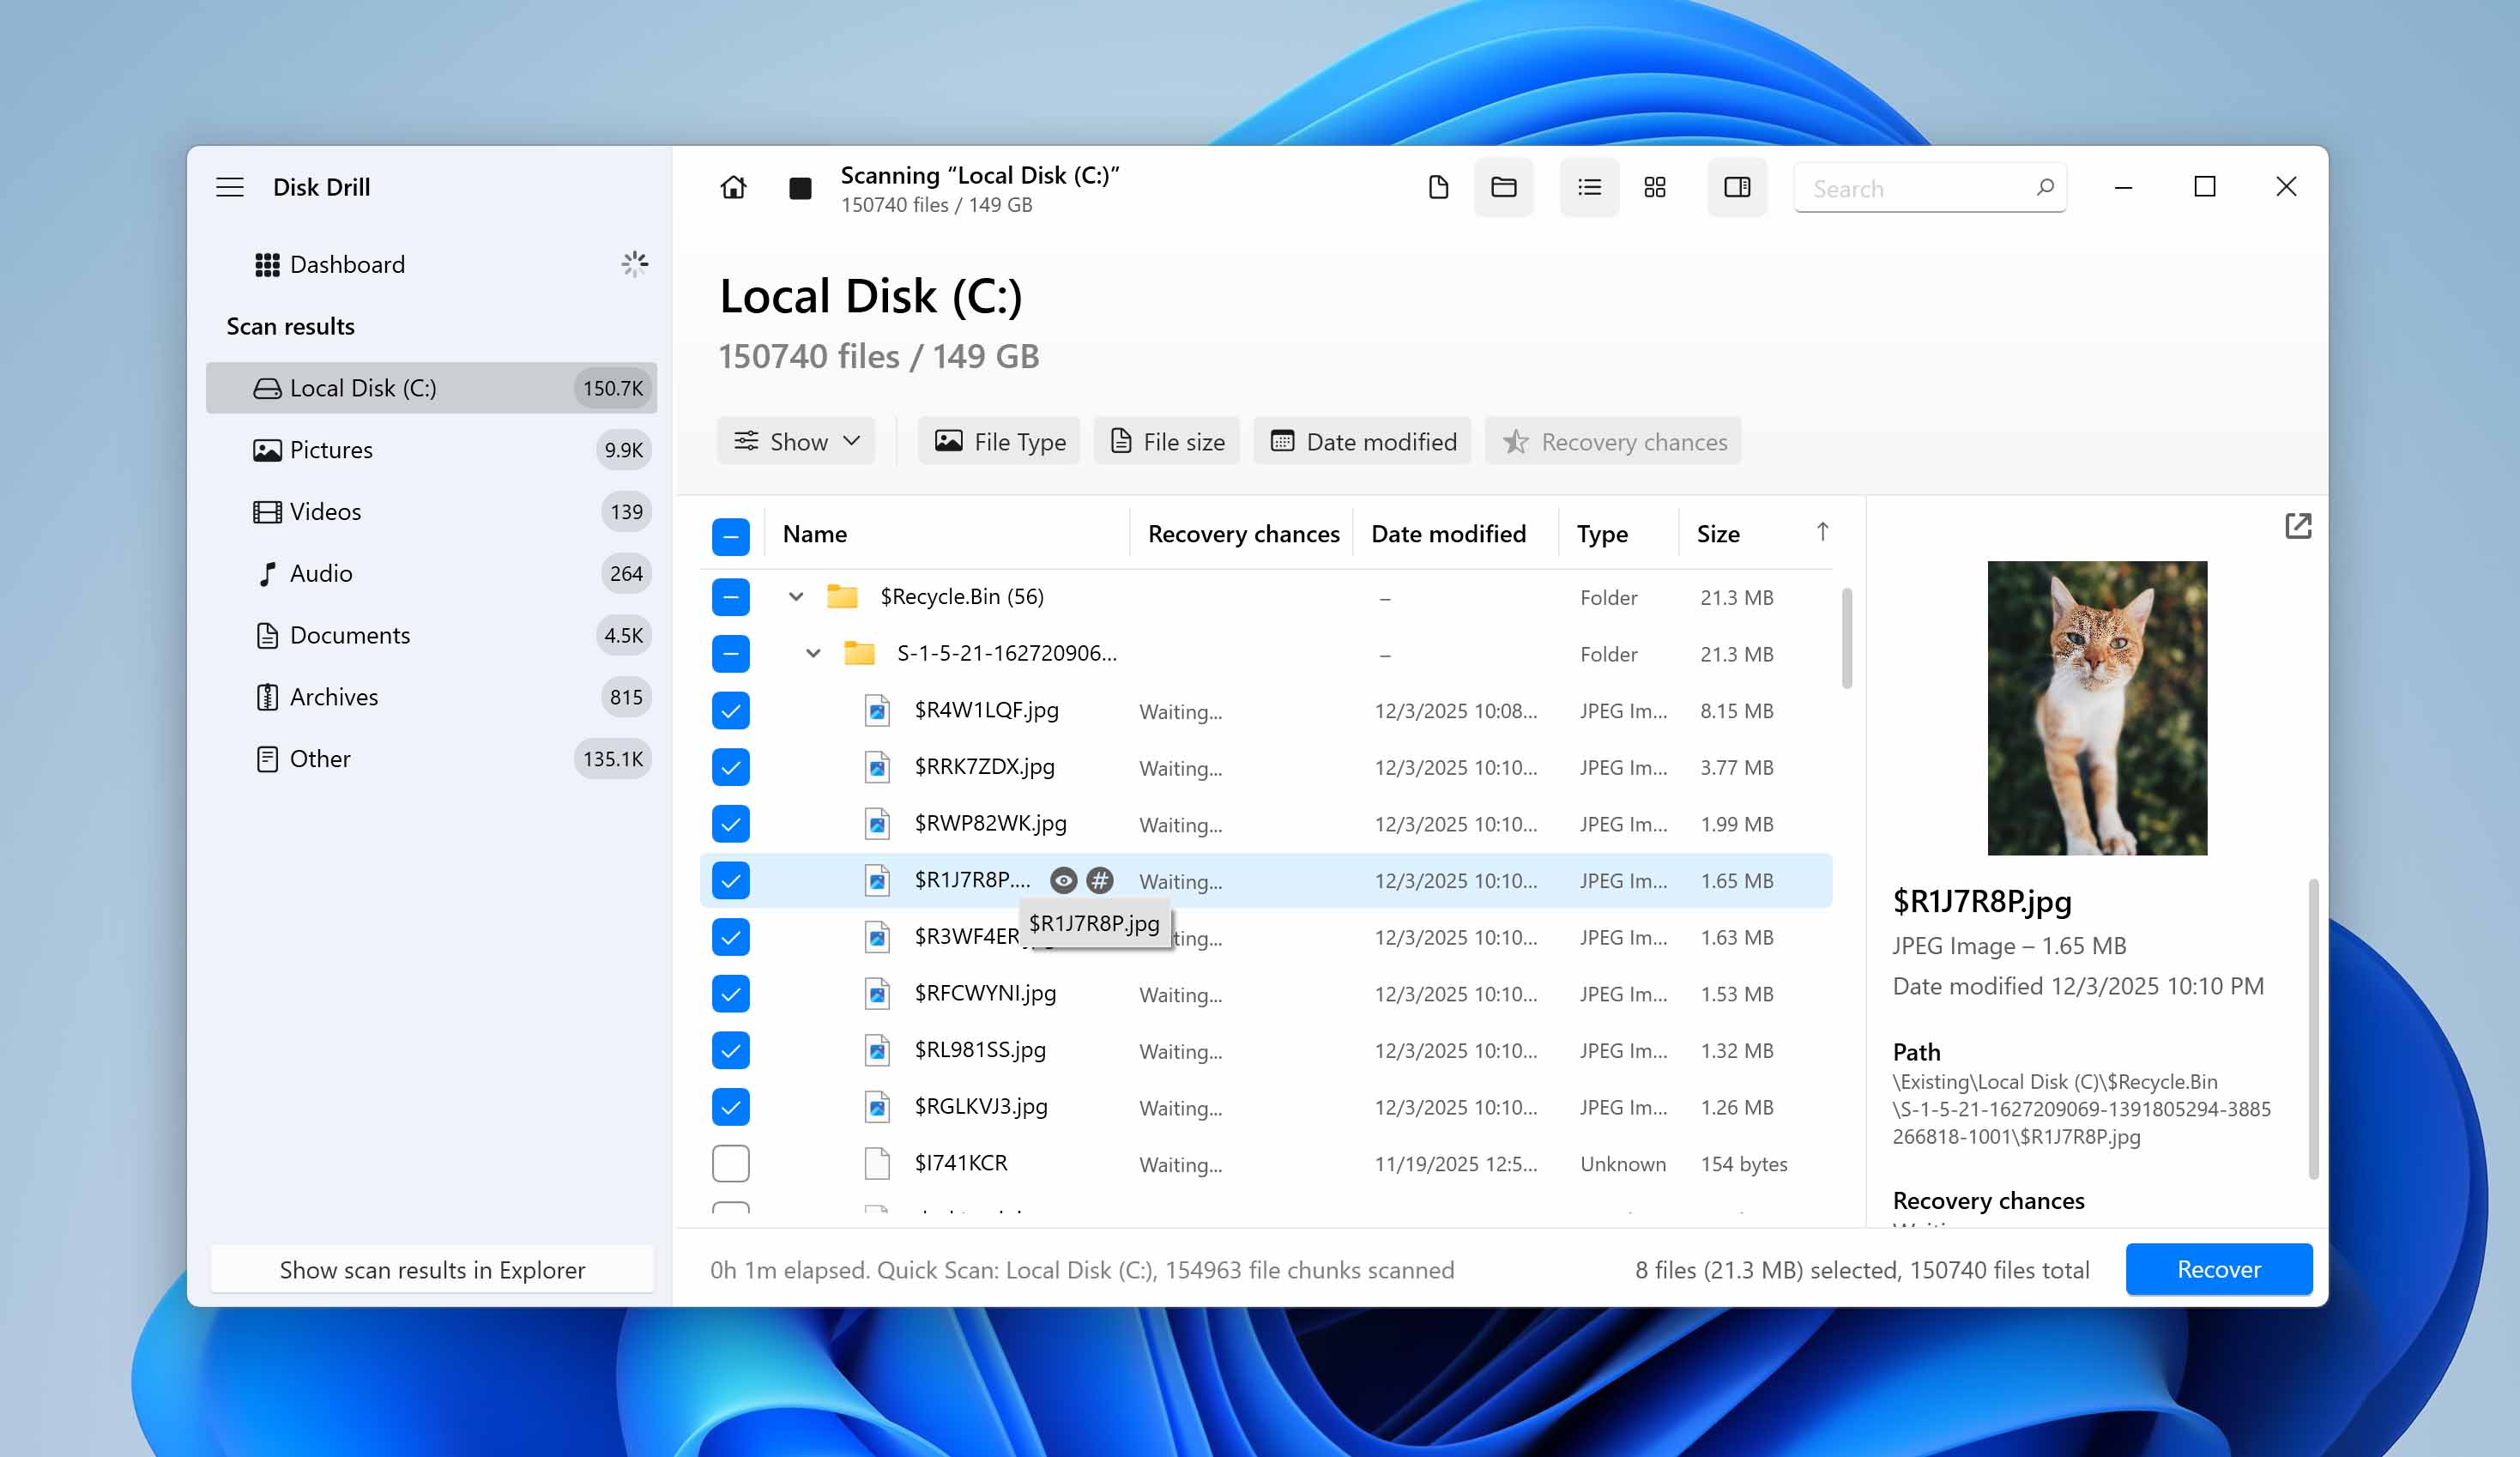
- After installation, open Disk Drill from the desktop shortcut or Start menu. Choose the drive where the deleted files were located before you emptied the Recycle Bin. In most cases, this will be your system drive (usually C:). Click Search for lost data to begin scanning.
- After the scan completes (or even while it is running), you can open the results and review the detected files.
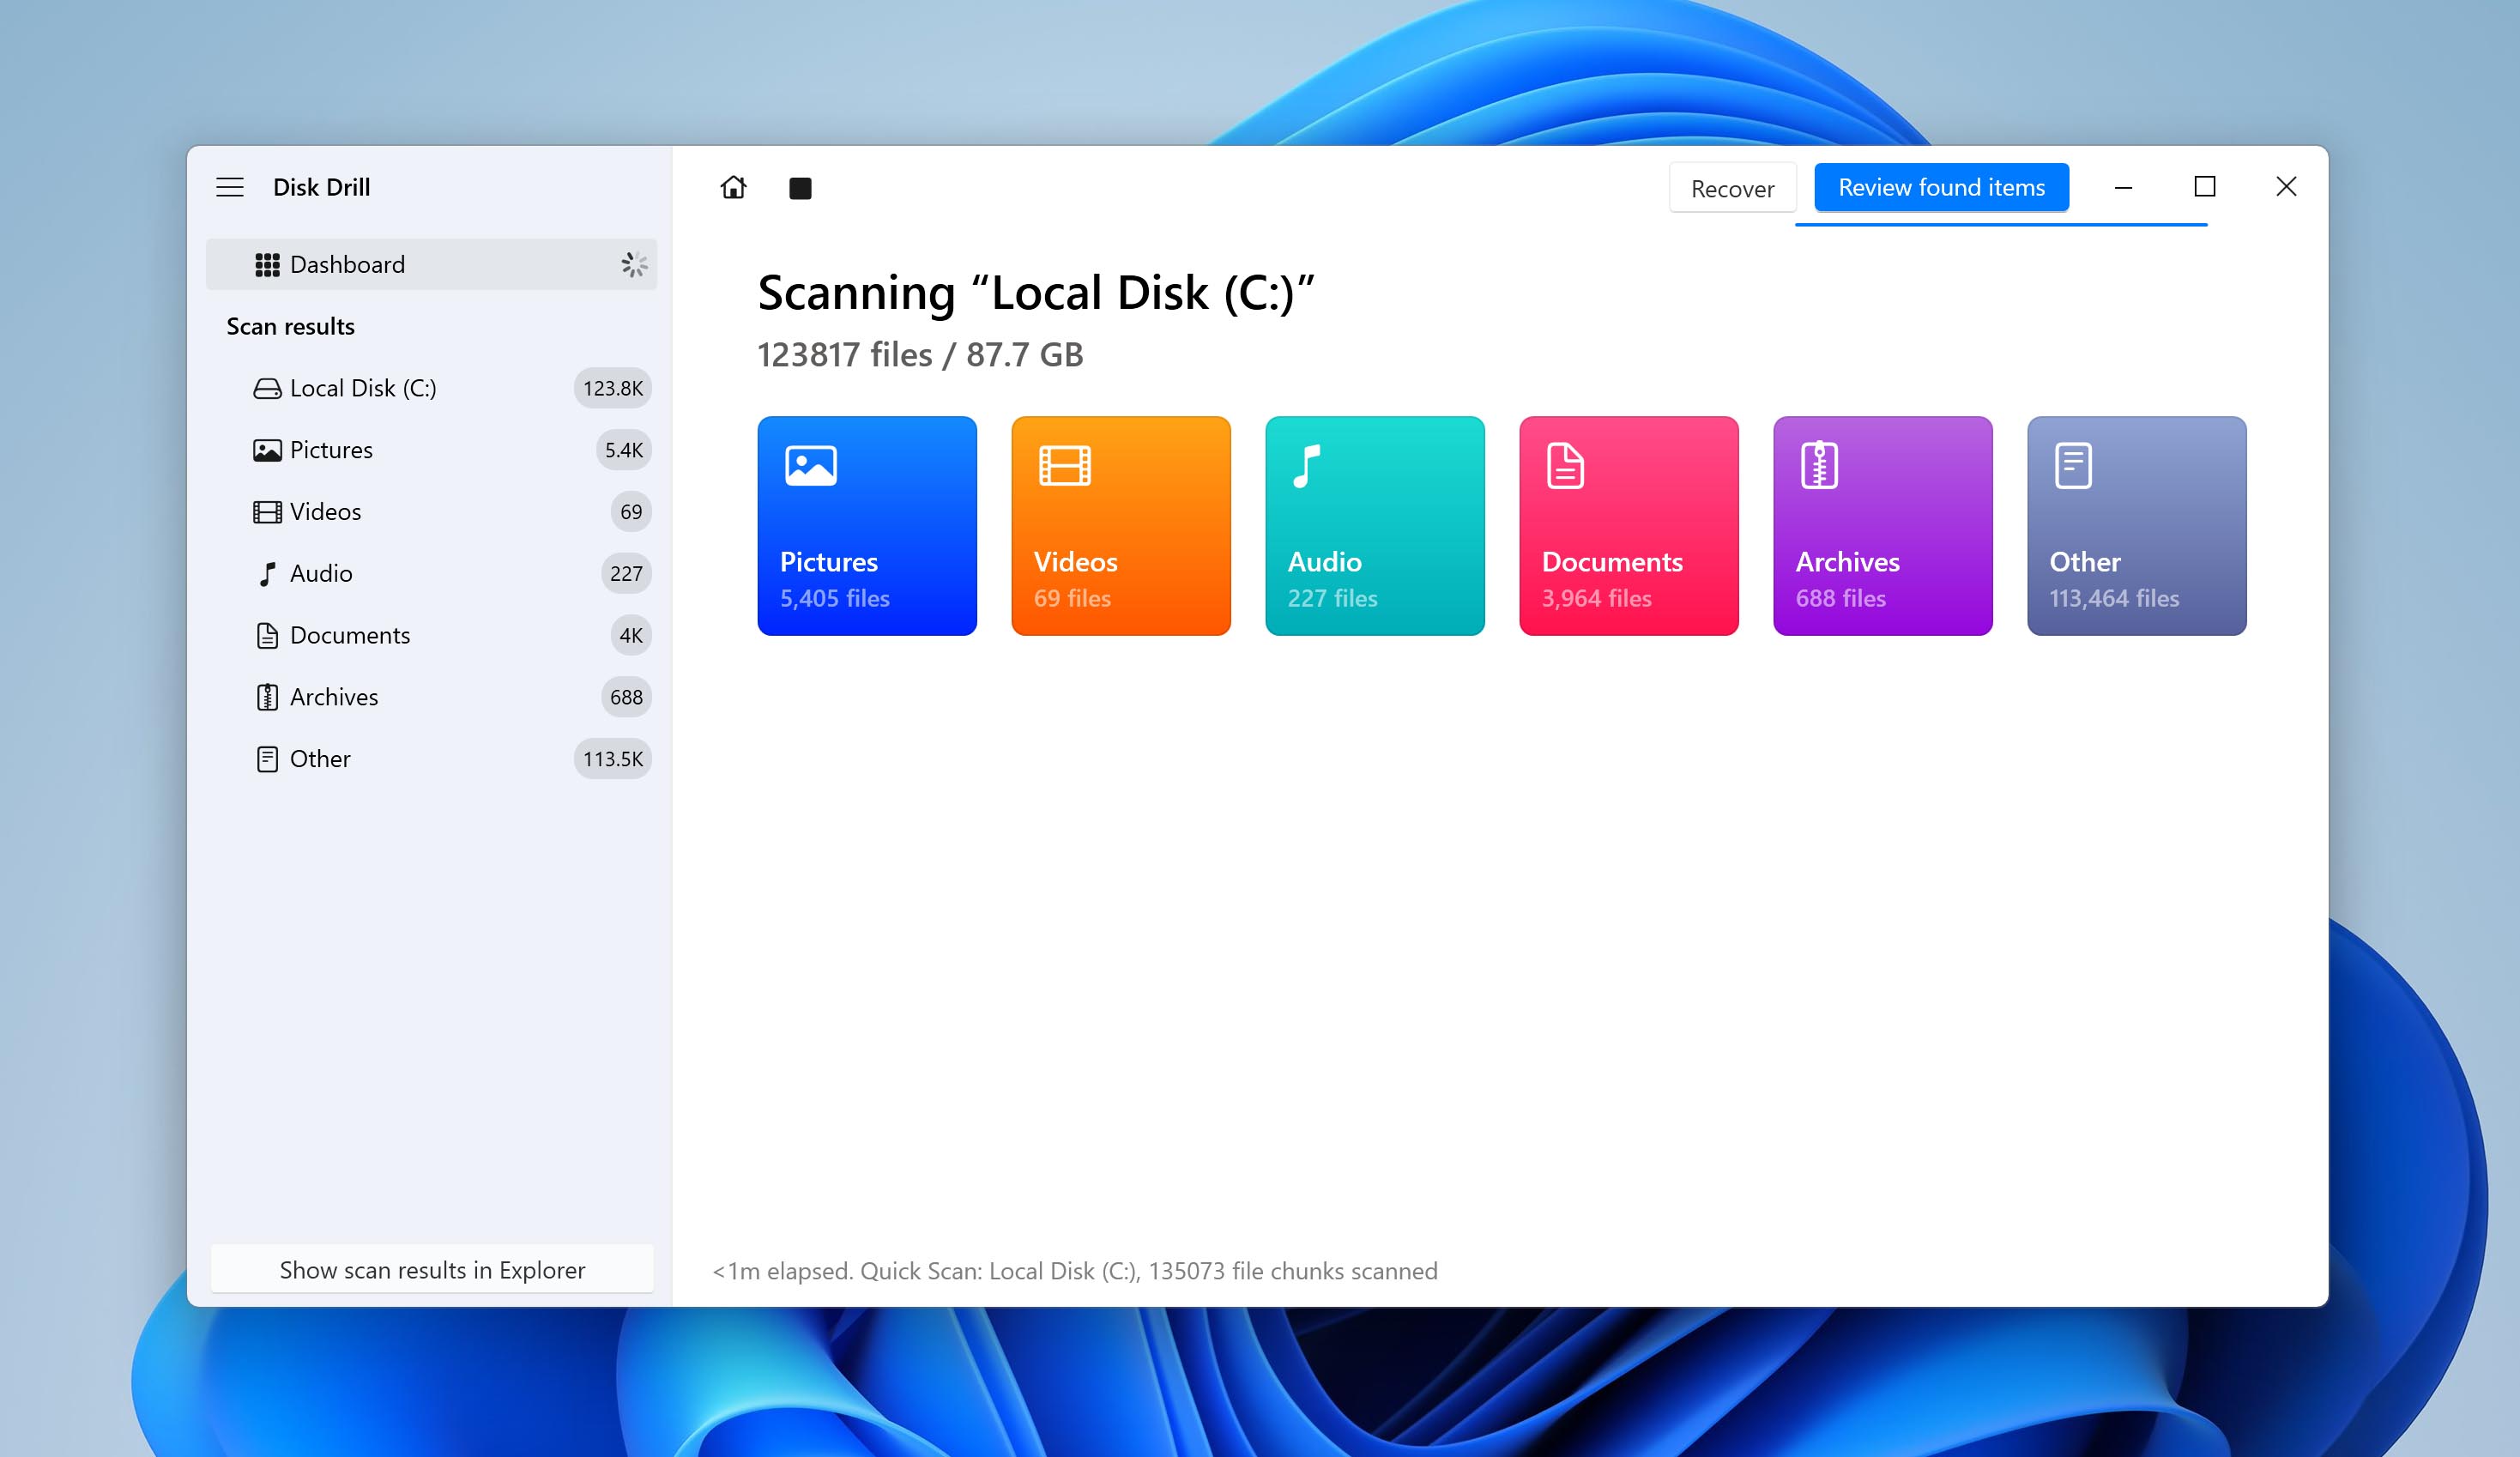
- Files are organized by categories such as Pictures, Videos, Documents, and Archives. You can also use the search bar or filters to narrow down the results.
- Mark the files or folders you want to restore by selecting the checkbox next to each item. Click the Recover button after selecting the files.
- You will be asked to specify where the recovered data should be saved. Do not choose the same drive you are recovering from. Instead, select an external drive, USB stick, or another internal disk. Confirm your choice and proceed with recovery.

- Once the process finishes, Disk Drill will notify you that recovery is complete. Open the destination folder and check the restored files to make sure they open correctly and are not corrupted.
The free version of Disk Drill for Windows allows you to recover up to 100 MB of data. This is usually more than enough to test the software, evaluate scan results, and verify whether your deleted files can be restored. If the total size of the files you need to recover exceeds this limit, you may need to upgrade to a paid version.
Method 2: Recover Files Using Backup and Restore
Now we move to recovery options based on system backups. The first one is the built-in Backup and Restore (Windows 7) feature.
Do not be confused by the Windows 7 part in the name. Backup and Restore (Windows 7) is still available and fully functional on Windows 10 and Windows 11. Microsoft kept the original name, but the feature works on modern versions of the operating system as well.
This tool allows you to create a full backup of your system. If configured as a system image, it stores an exact copy of the Windows installation, installed programs, system settings, and all files located on the selected partitions at the time the backup was created.
To recover deleted files from the Recycle Bin using this method, the backup must have been created before the files were deleted. If your system image includes the deleted data, you can restore it from that backup, if no backup exists, this method will not work.
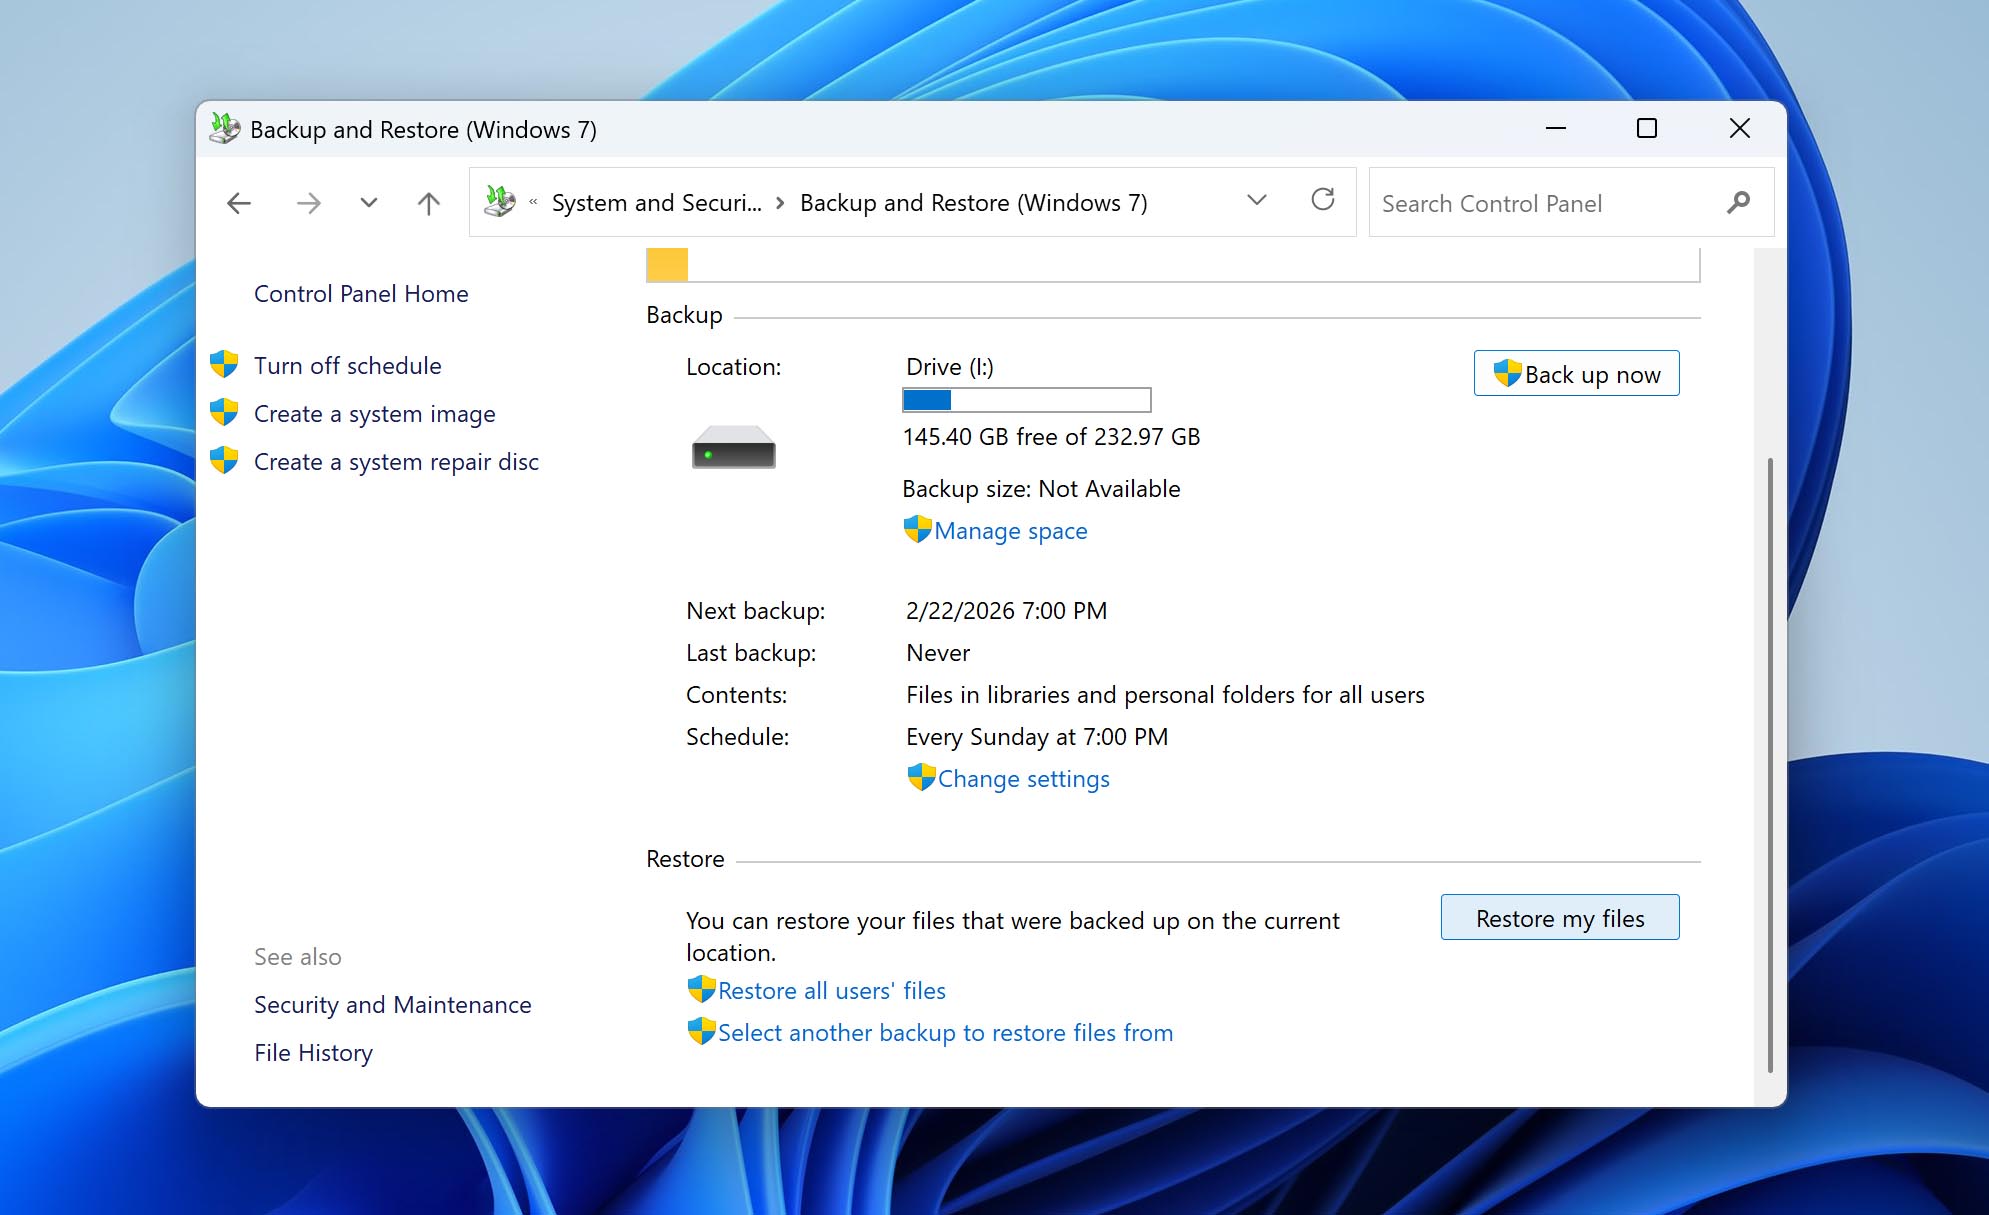
- Open the Control Panel and navigate to System and Security, then to Backup and Restore (Windows 7). If backups were previously configured, you will see the backup status and available restore options.
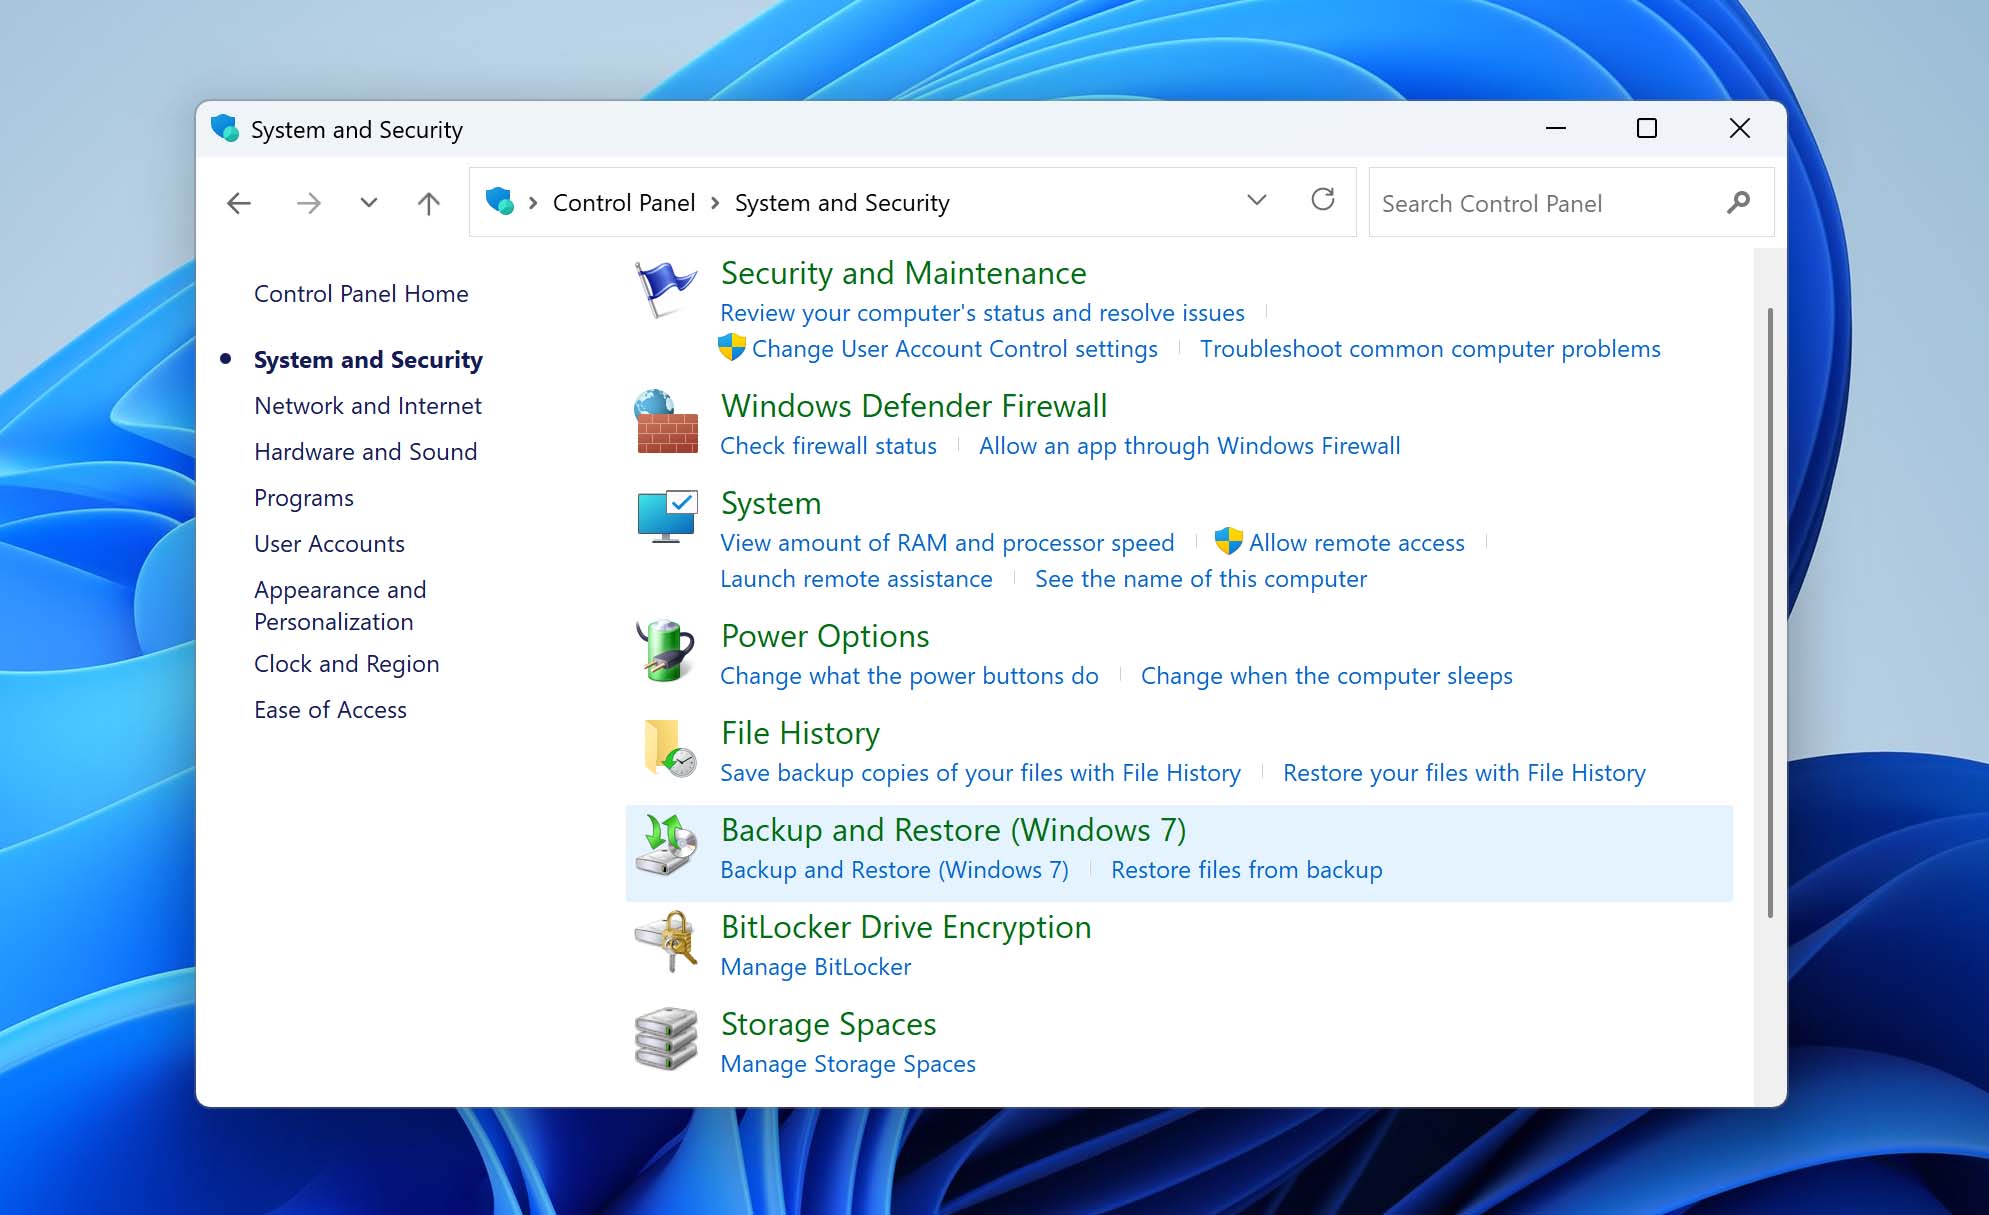
- Click Restore my files. A new window will open where you can browse or search for files included in your backups.
- If you remember their original location, navigate to that folder inside the backup structure.
- Select the files or folders you want to restore. Click Next.
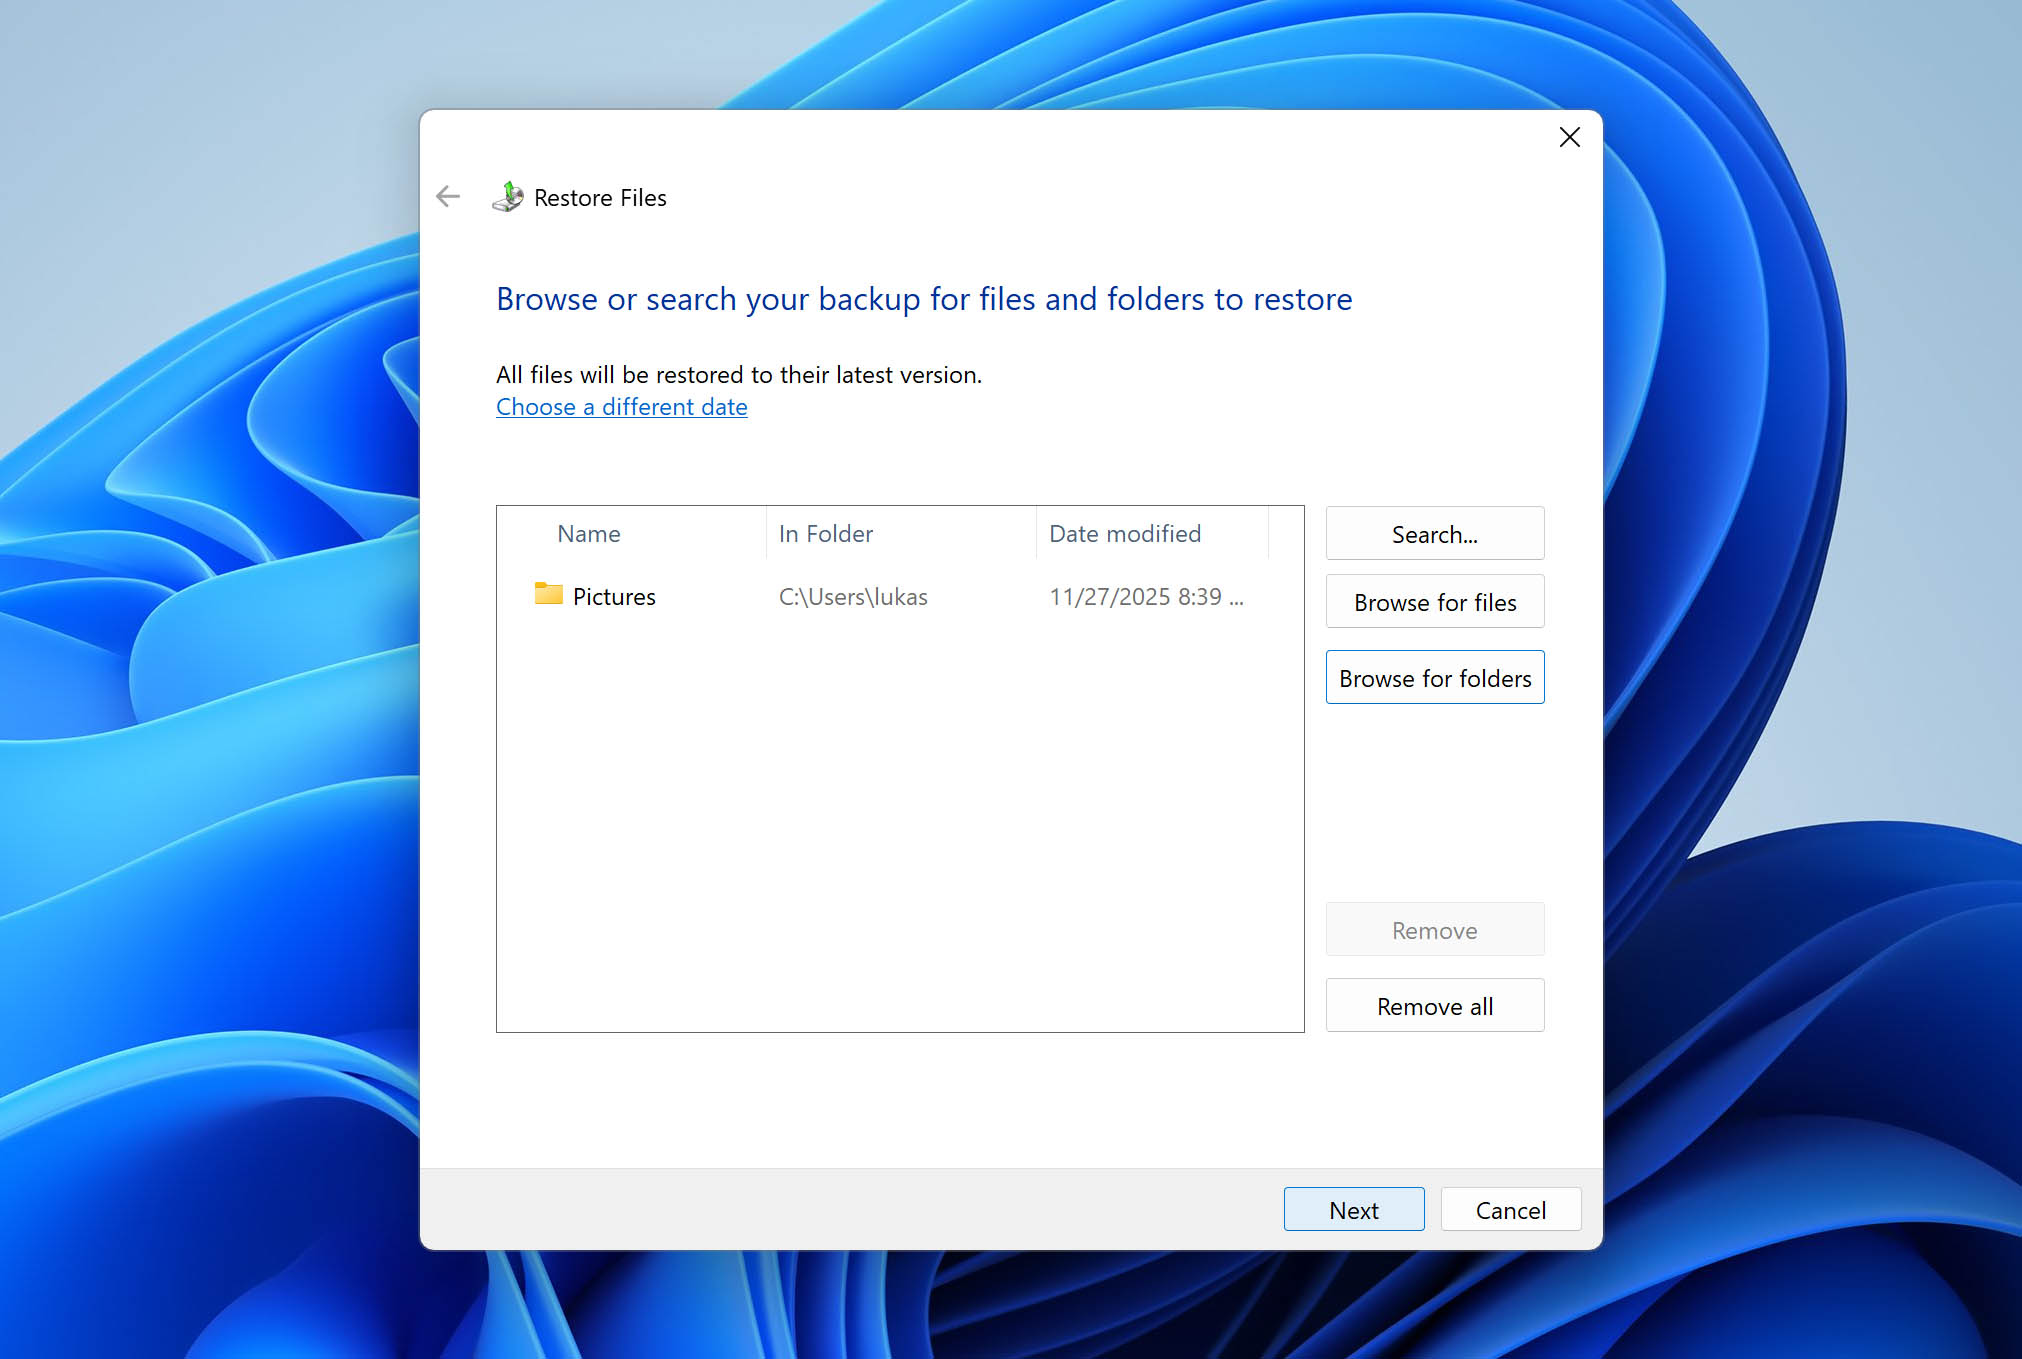
- You can restore the files to their original location, or a different location (recommended if you want to review the files first).
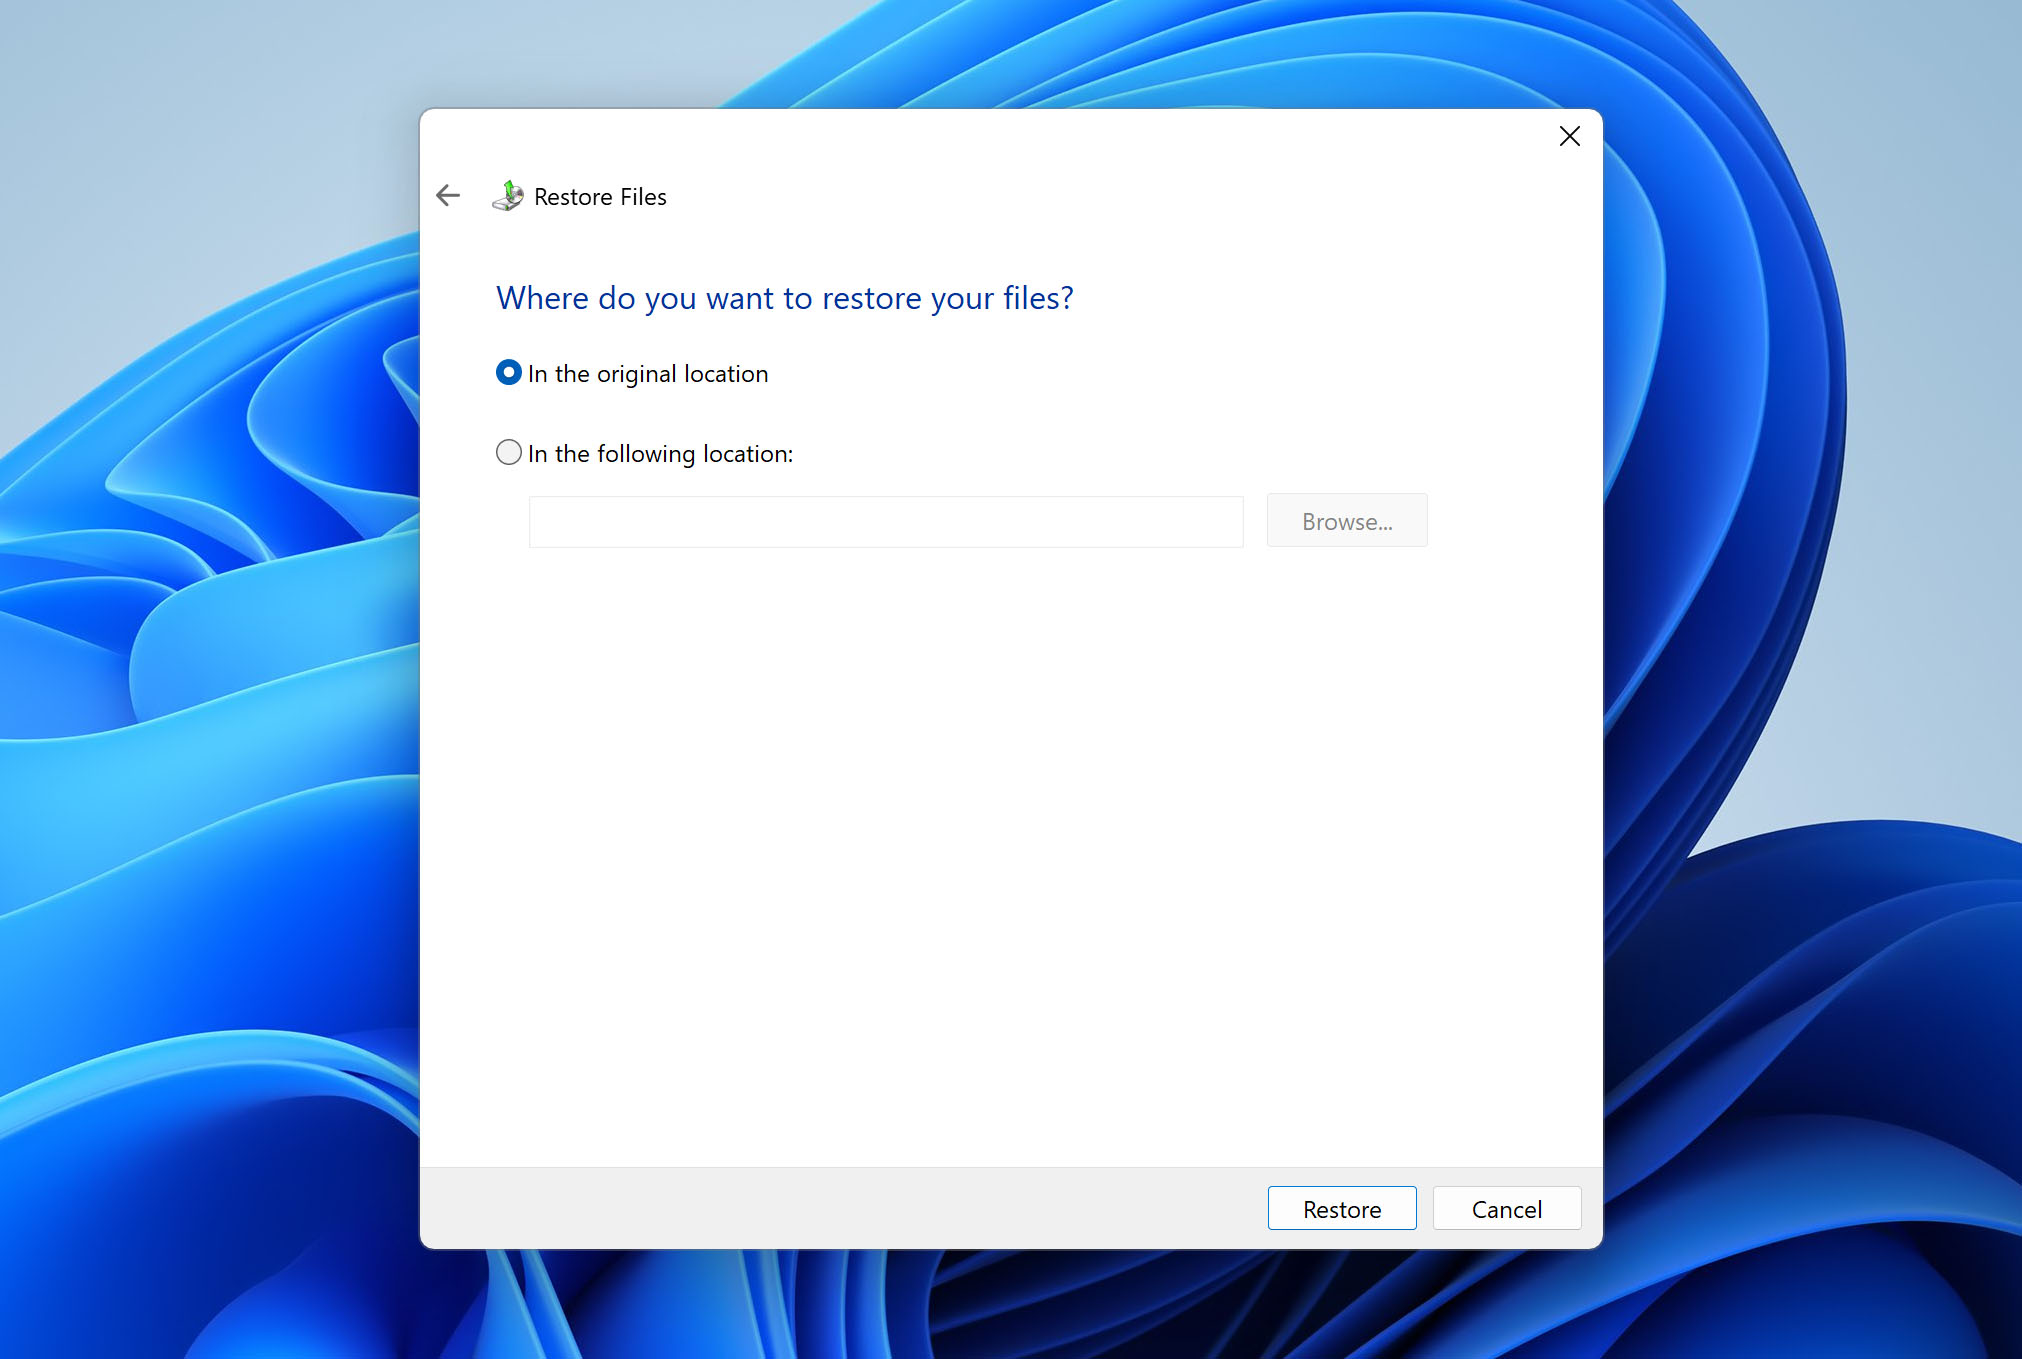
- Choose the preferred option and click Restore.
- Once the process completes, navigate to the selected location and confirm that the files open correctly.
Method 3: Recover Files Using File History
Another Windows backup option is File History. This is a newer feature compared to Backup and Restore, and it works differently.
While Backup and Restore can create a full system image, File History focuses on personal files. By default, it backs up user libraries such as Documents, Pictures, Music, Videos, Desktop, and other folders inside your user profile. However, you can manually add additional folders if needed. File History saves different versions of files over time. This allows you to restore a previous version of a folder or recover files that were deleted.
If the files deleted from the Recycle Bin were originally stored in one of the locations backed up by File History, you can attempt recovery using this method.
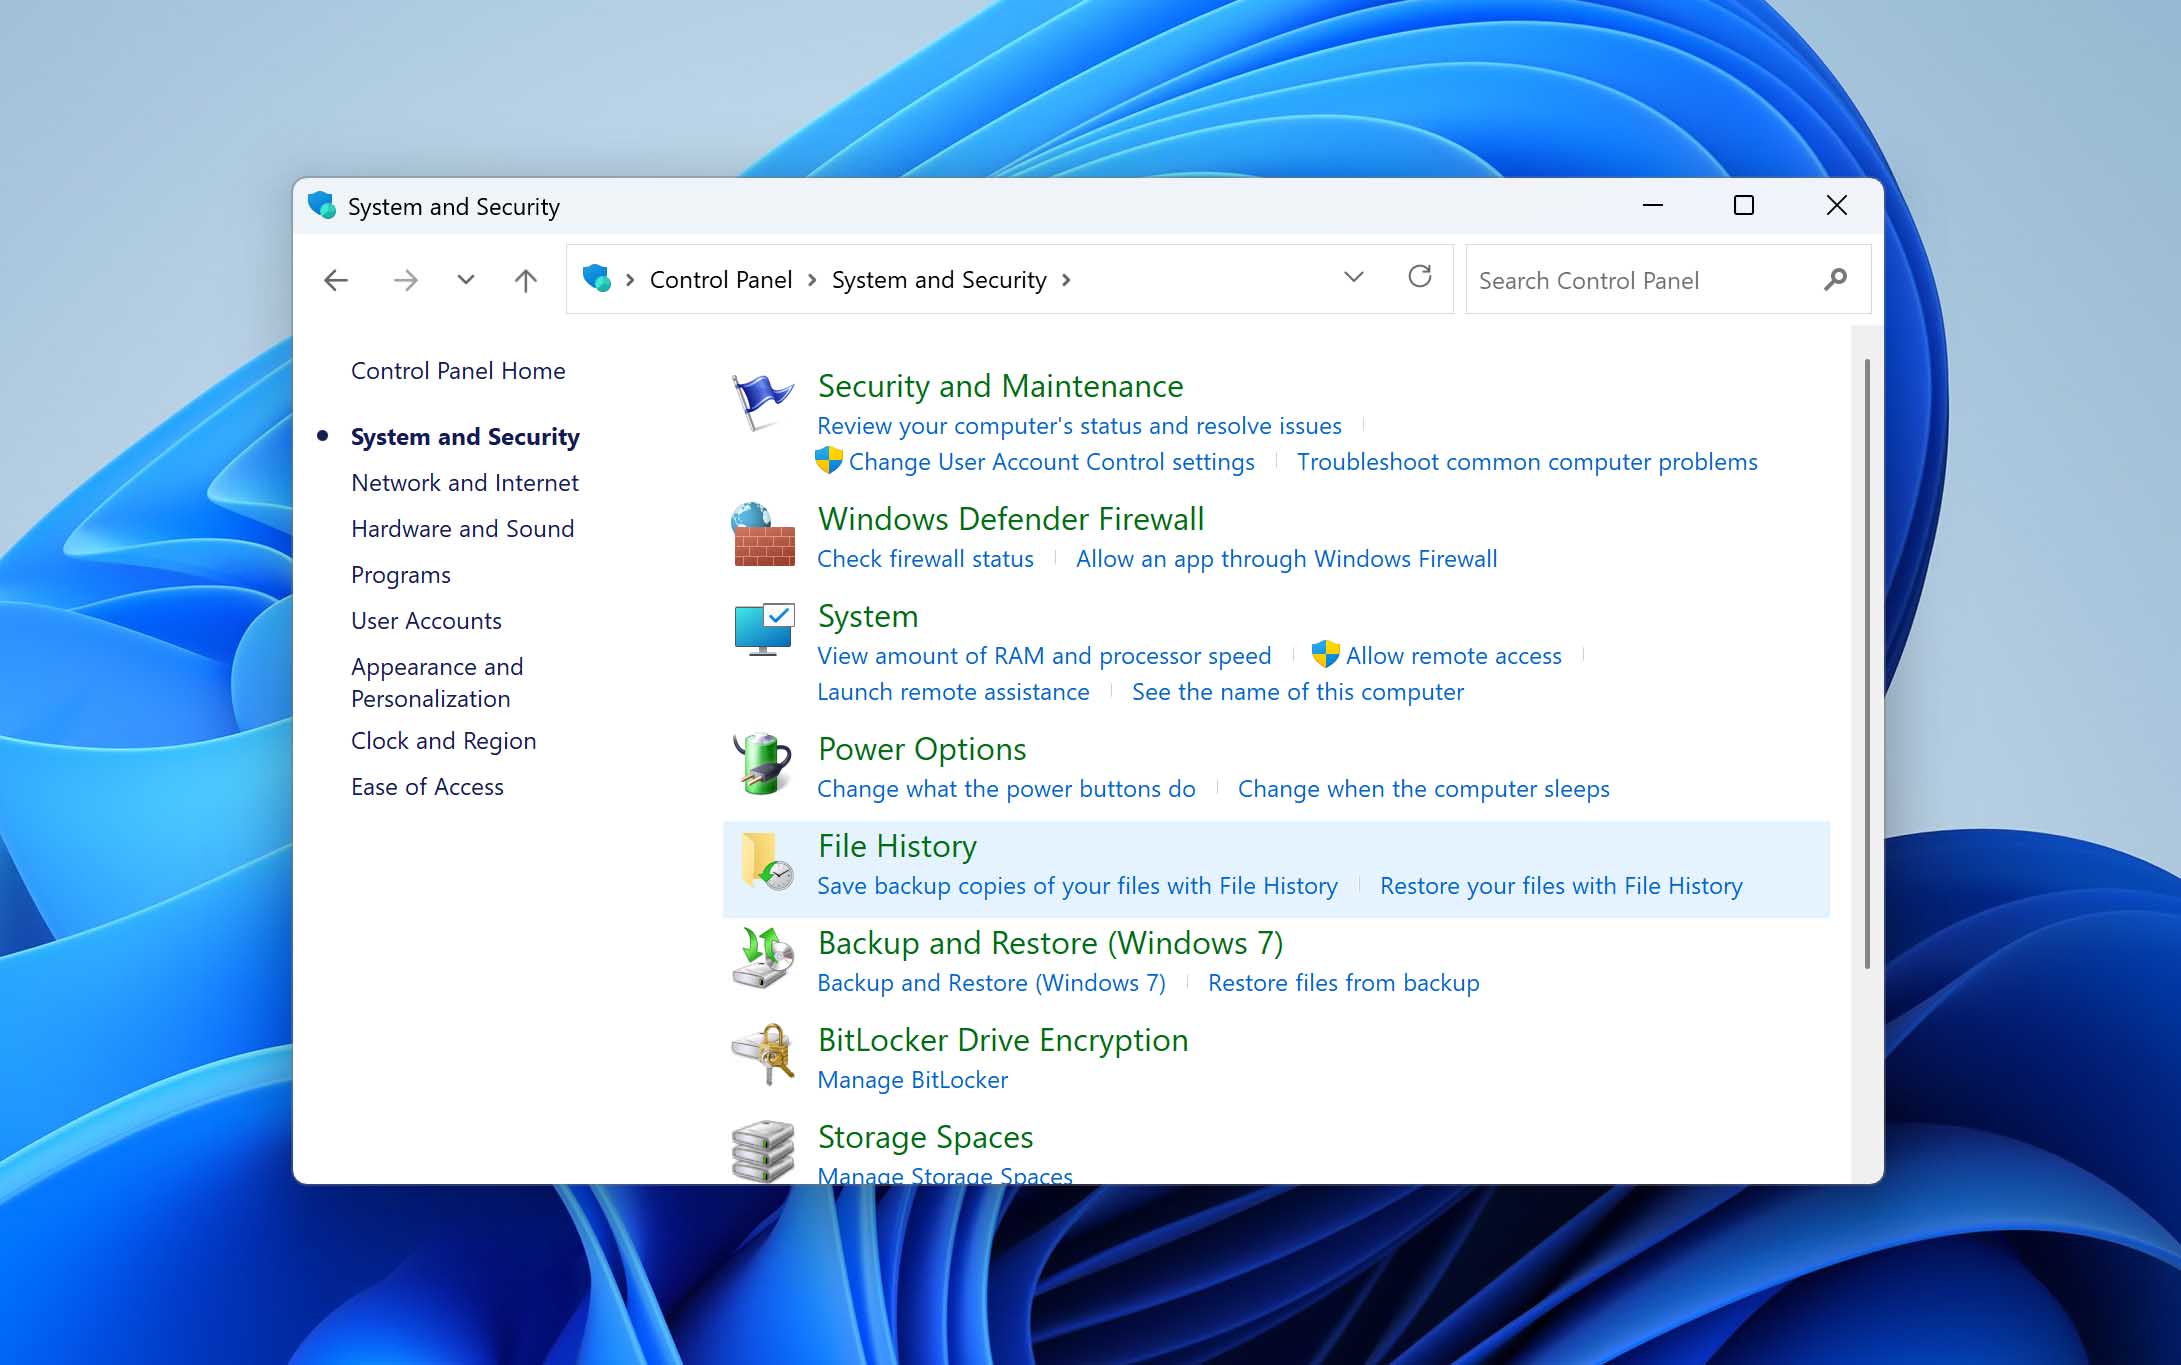
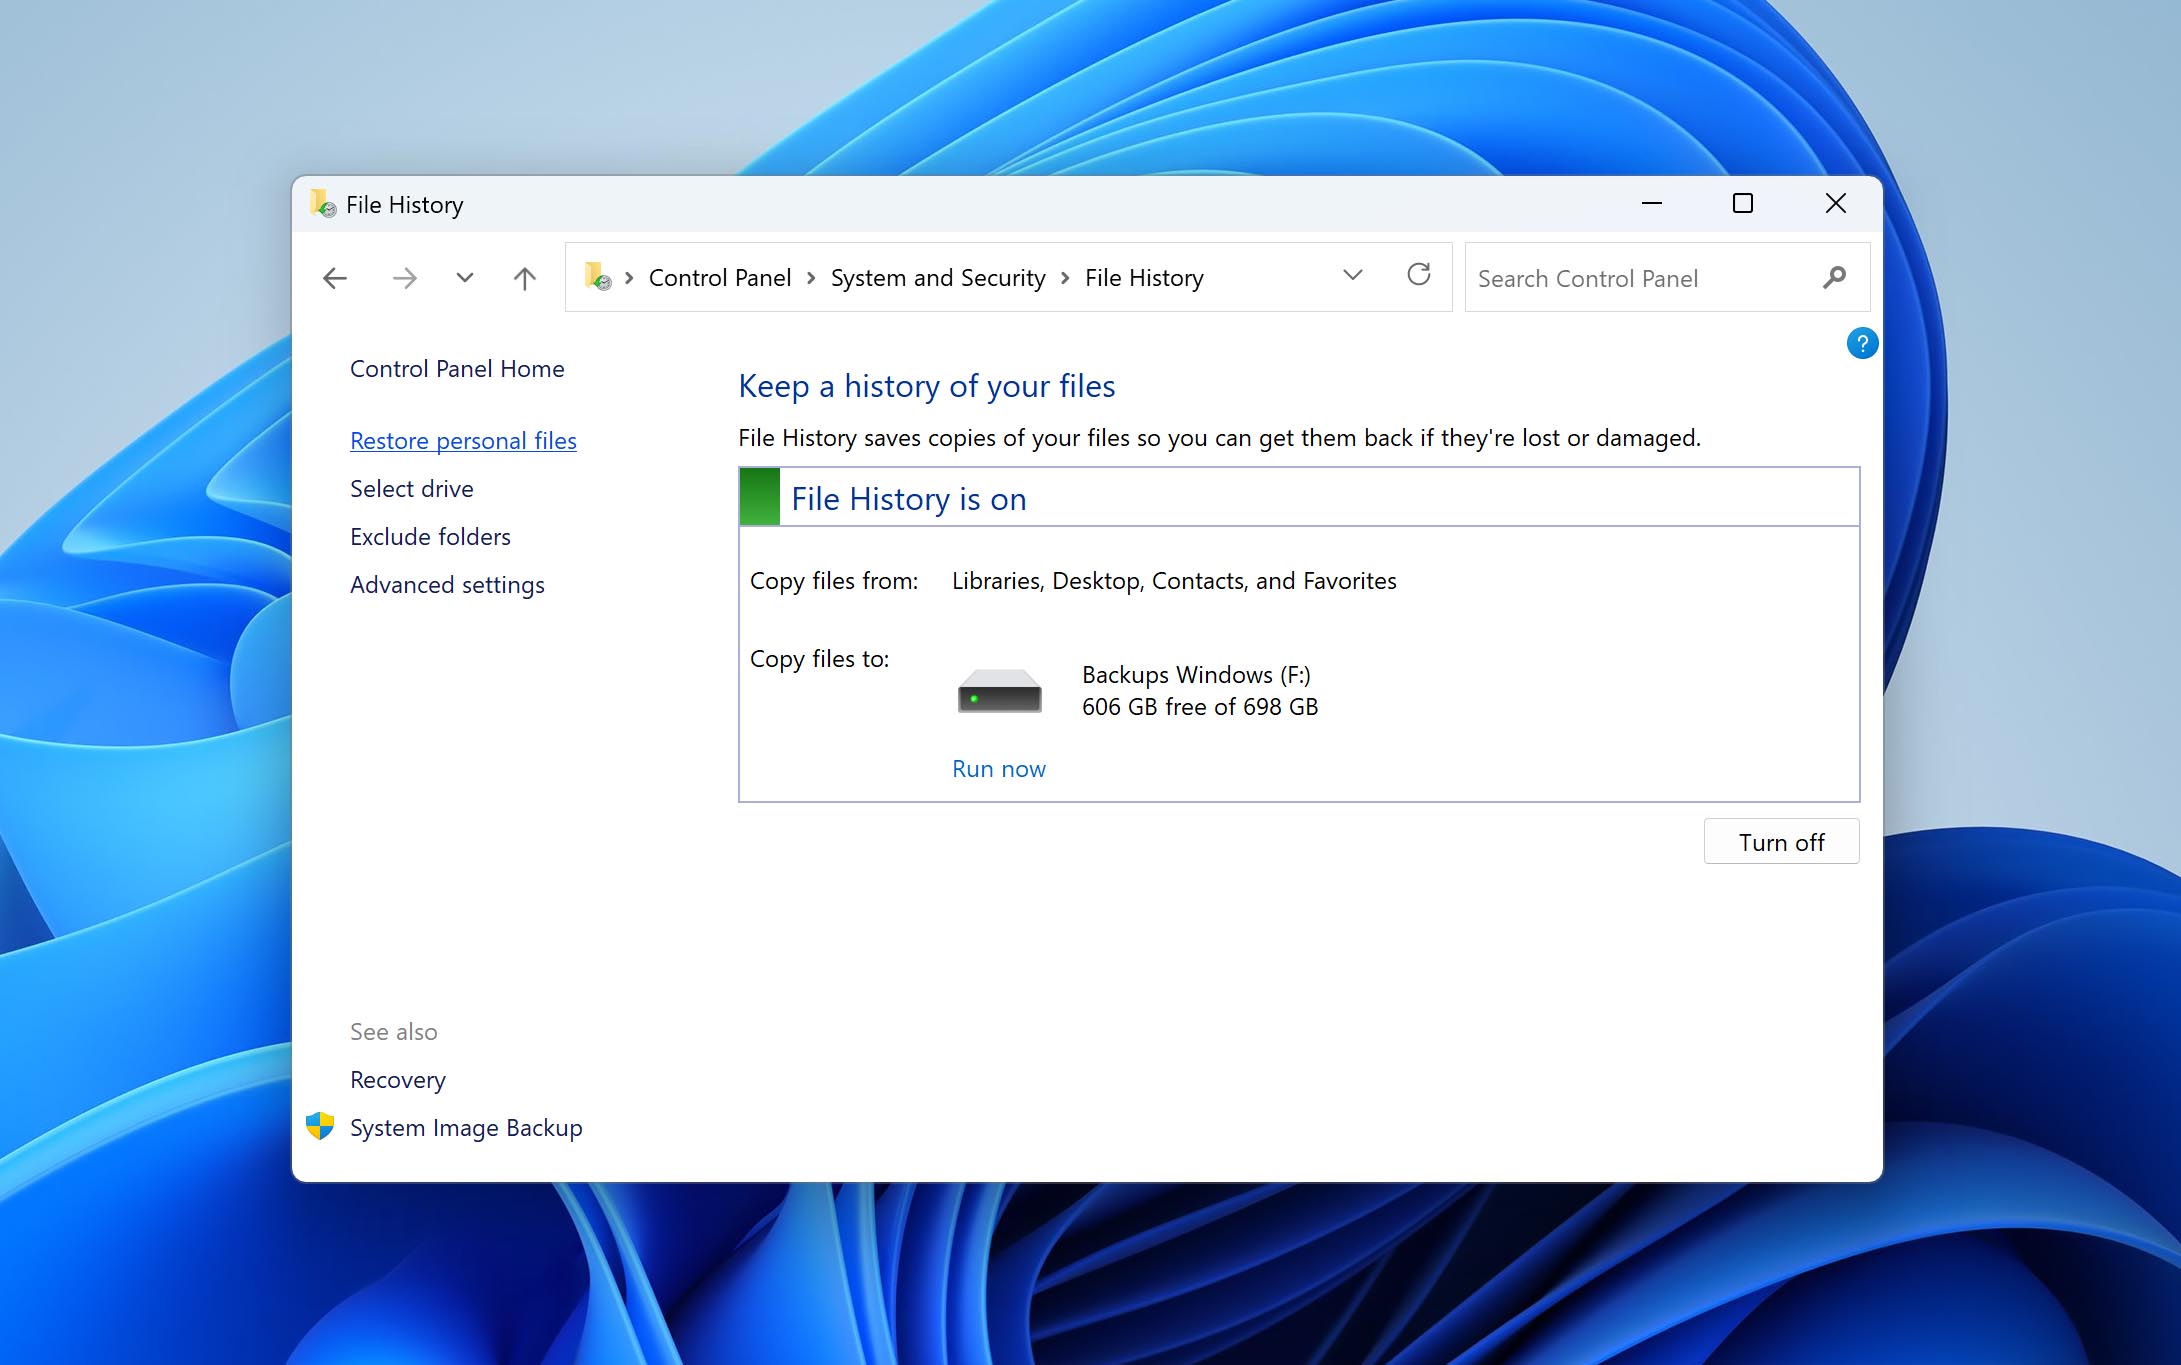
- Open the Control Panel and go to System and Security, then open File History. If File History was enabled before the deletion occurred, you will see its status and the connected backup drive.
- Click Restore personal files in the left panel. A new window will open, showing the available backed-up folders.
- Browse to the folder where the deleted files were originally stored. Use the left and right arrows at the bottom of the window to switch between different backup versions and dates.
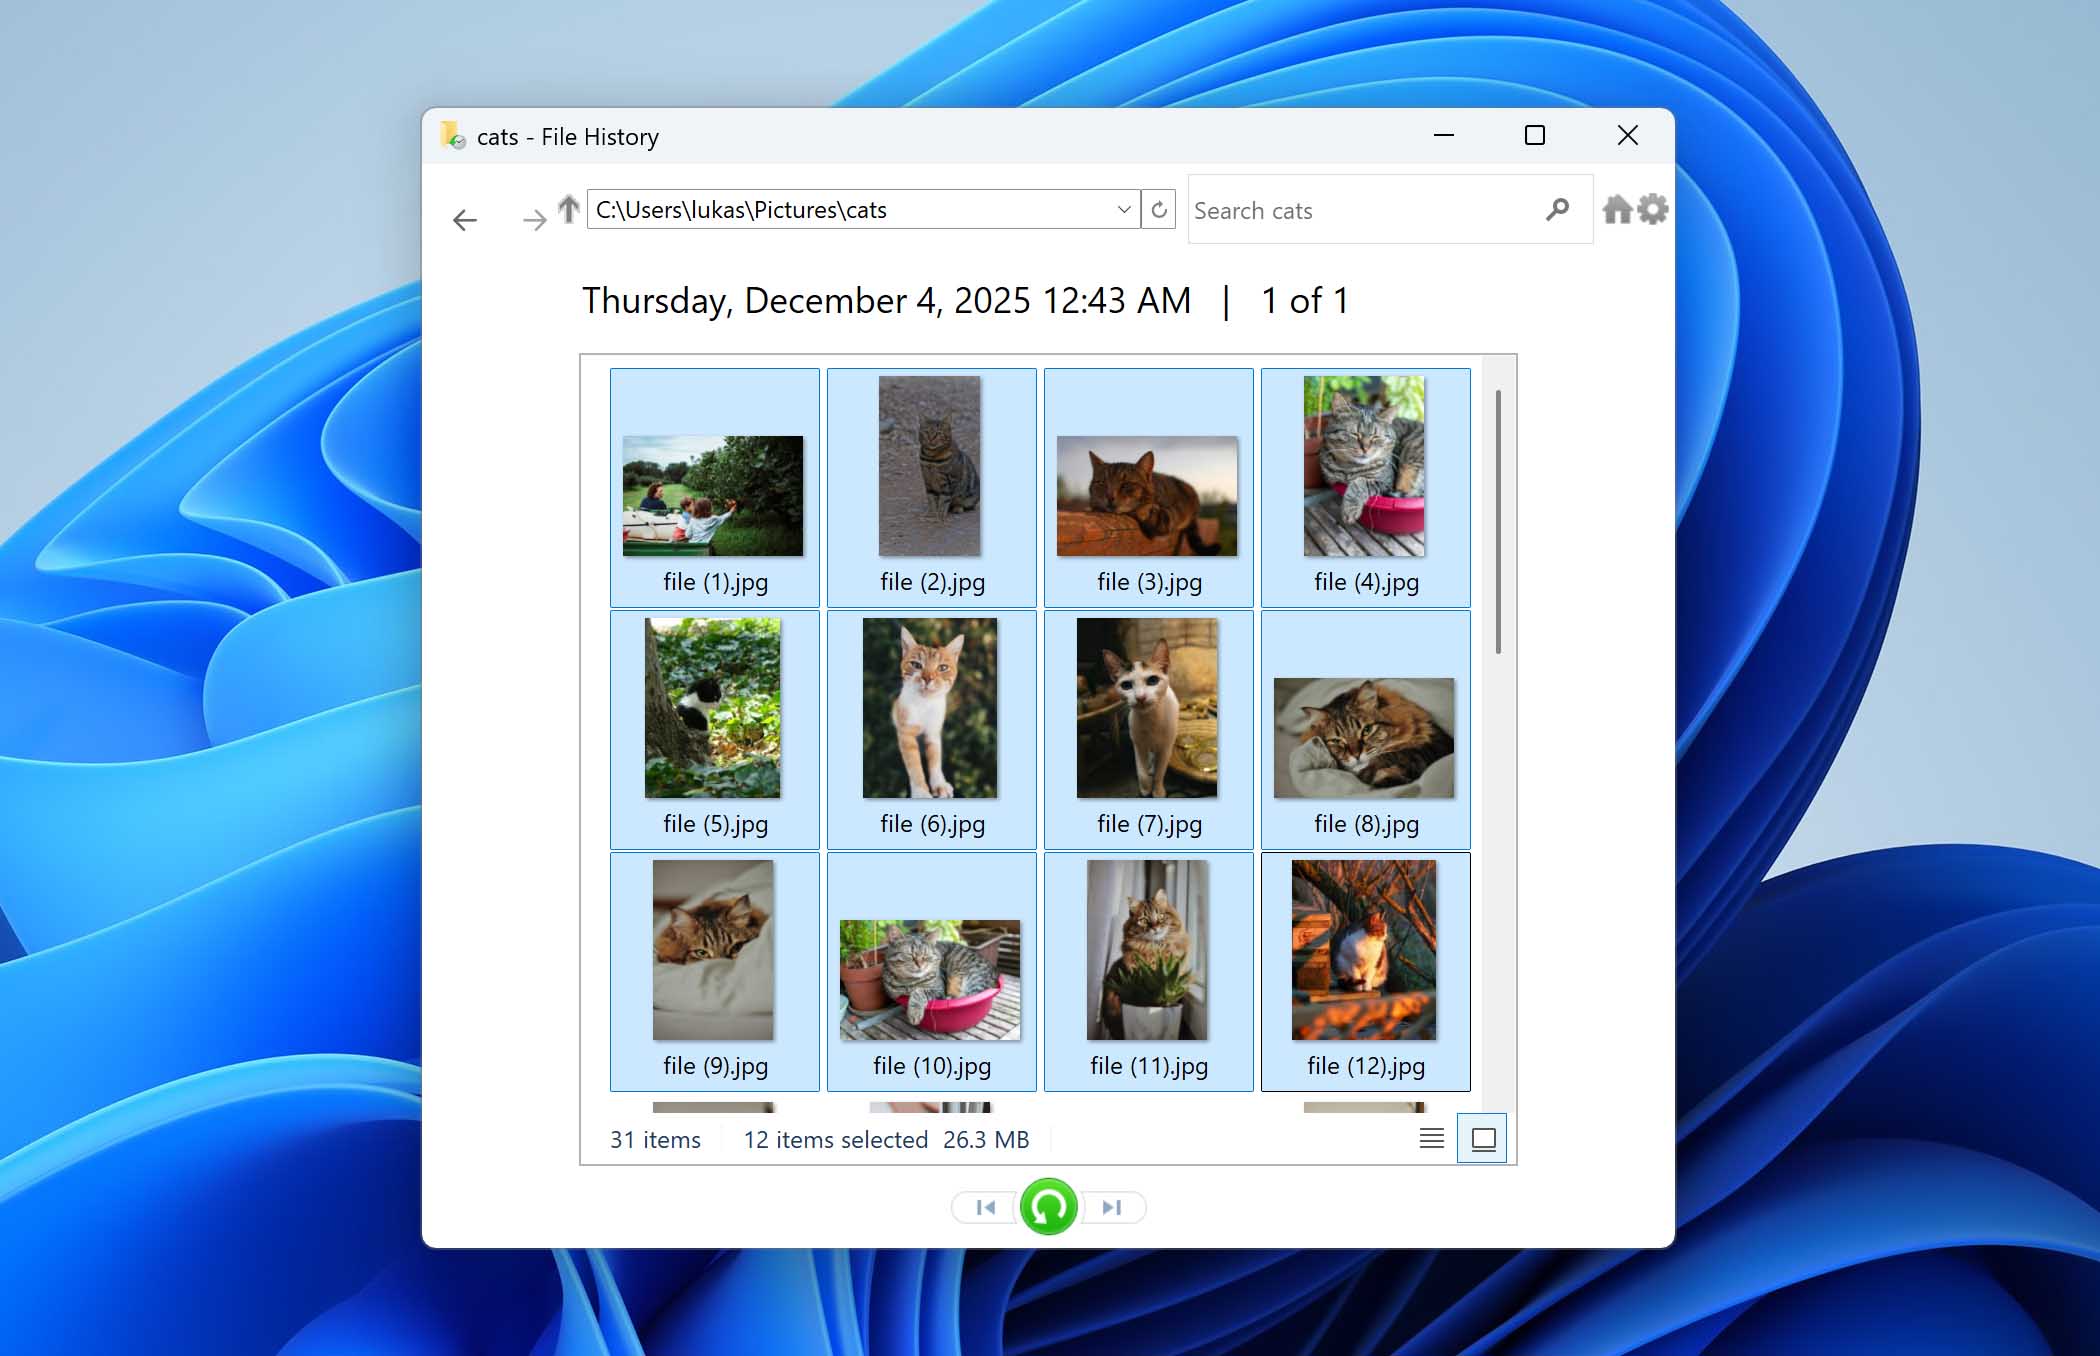
- Select the files or folders you want to recover and click the green Restore button to return them to their original location. If you want to restore them to a different location, right-click the Restore button and choose Restore to.
If File History is enabled, there is another way to recover files deleted from the Recycle Bin — by restoring a previous version of the original folder. This works only if a backup version exists from a date before the deletion. Open File Explorer, navigate to the folder where the deleted file was originally stored, right-click it, and select Restore previous versions. Choose a version dated before the deletion, then click Open to review its contents or Restore to bring it back. If you only need a specific file, open the previous version and copy the file to another location instead of restoring the entire folder.
Why Deleted Files May Not Be in the Recycle Bin
The Recycle Bin can be extremely useful for recovering recently deleted files. There are, however, several conditions that can result in a deleted item not appearing in the Recycle Bin. Here are the factors you need to keep in mind concerning the Windows Recycle Bin and why your deleted file cannot be found.
| Factor | Description |
| 📏 Space limitations | Space is kept available in the Recycle Bins by rolling off the oldest files to make room for newly deleted items. This can result in files being deleted much sooner than expected if the space allocation is too low. Similarly, a file will not be sent to the Recycle Bin if it exceeds the Bin’s size. This can also lead to files that are not available in the Bin when that is where you expect them to be located. |
| ⌛ Time limitation | Windows can be configured to automatically remove items from the Recycle Bin after a designated number of days. For example, if Storage Sense is enabled, files may be deleted after 30 days. This number can be modified as you wish and you can opt for files to never be automatically deleted from the Bin. In this case, you need to manually empty the Bin periodically or risk running out of space for newly deleted items. |
| ✂️ Permanent File Deletion | Using the Shift-Delete keystroke combination bypasses the Recycle Bin and essentially permanently deletes the item. Data recovery software may be able to restore files and folders that have been deleted in this way. |
| 🚯 Disabled Recycle Bin | The Recycle Bin can also be disabled by accessing Settings for selected location in the Recycle Bin Properties. If the Recycle Bin is turned off for any reason, any file deleted from your system will not be stored in the folder and will be permanently deleted immediately. |
Common Recycle Bin Problems and How to Fix Them
Different Recycle Bin problems might cause data loss or any sort of error that can affect your overall experience while using your device. Fixing these issues will enable the folder to effectively store your deleted files again.
Here are some of the common Recycle Bin problems and the simple solutions you can use to fix them on your own:
1. Missing Recycle Bin Icon
Solution: You can get the Recycle Bin icon on your desktop by following these steps.
- Right-click the desktop and select Personalize.
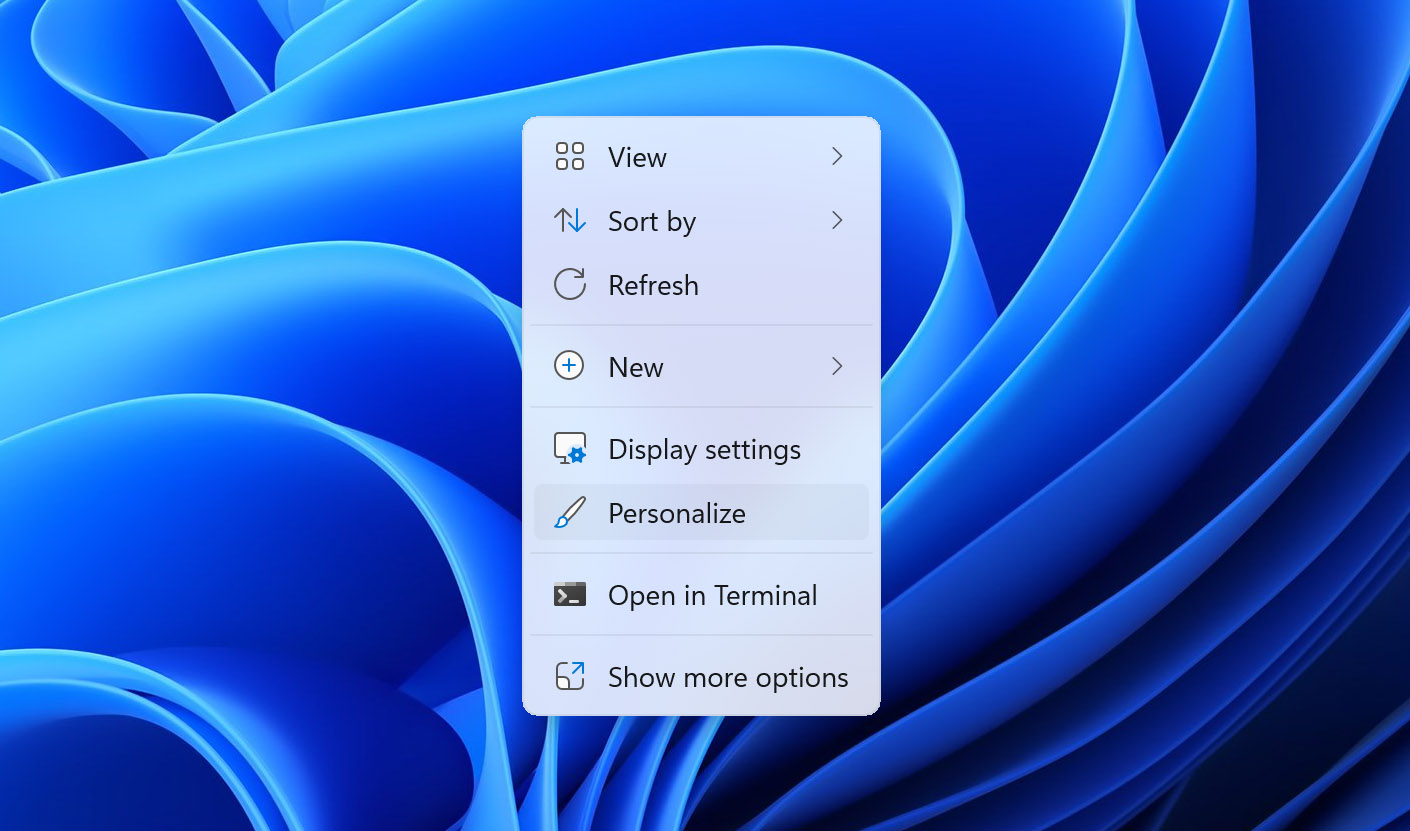
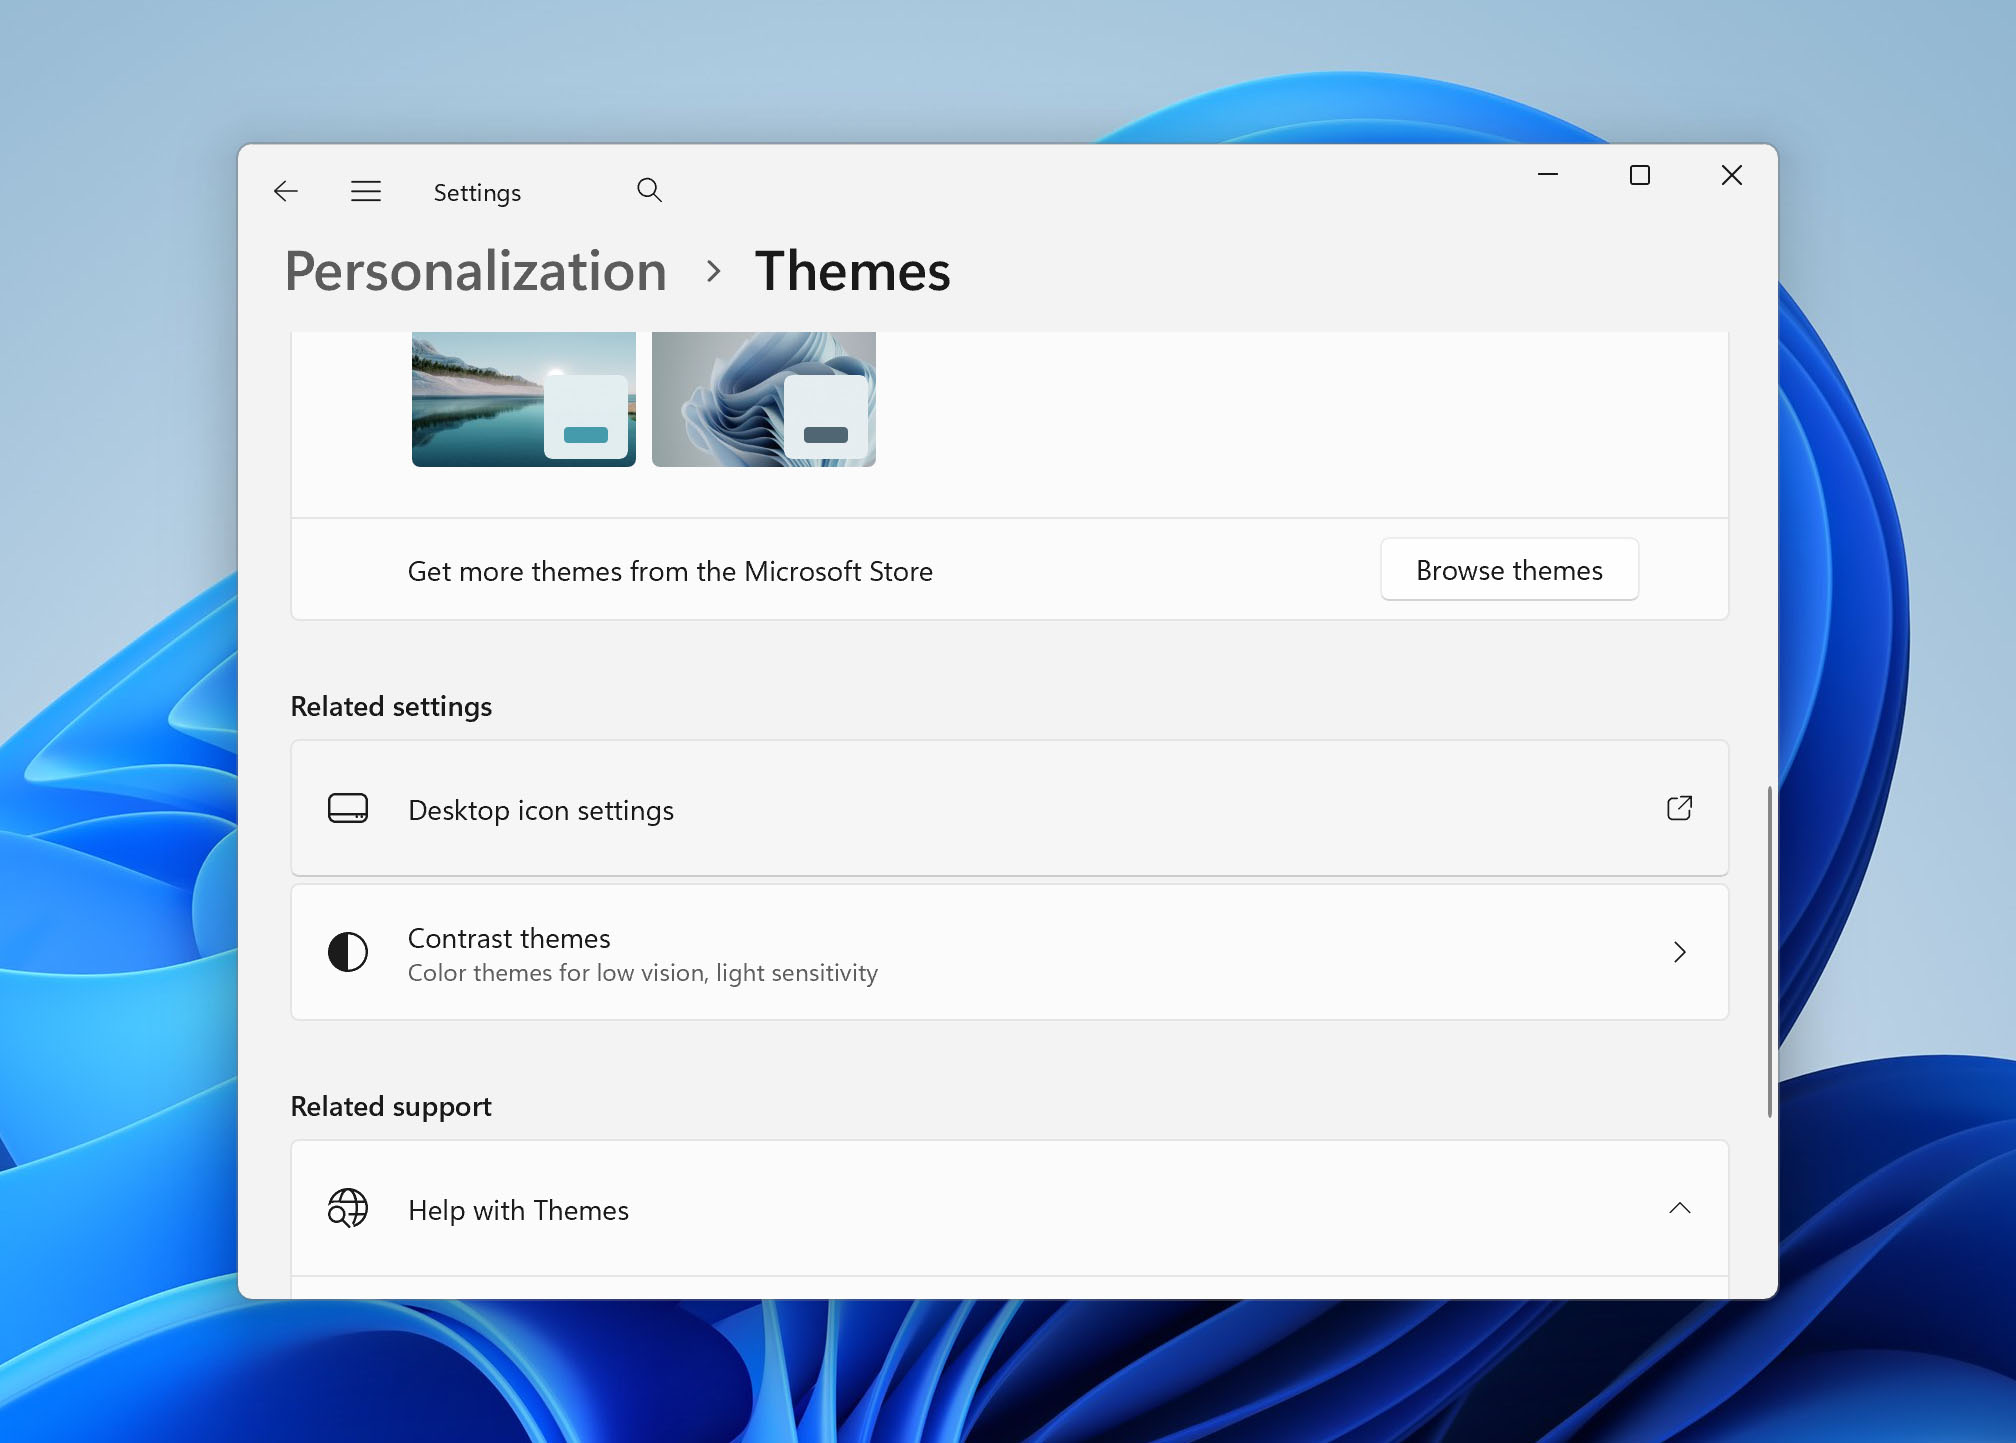
- Switch to the Themes tab.
- Click the Desktop icons settings link.
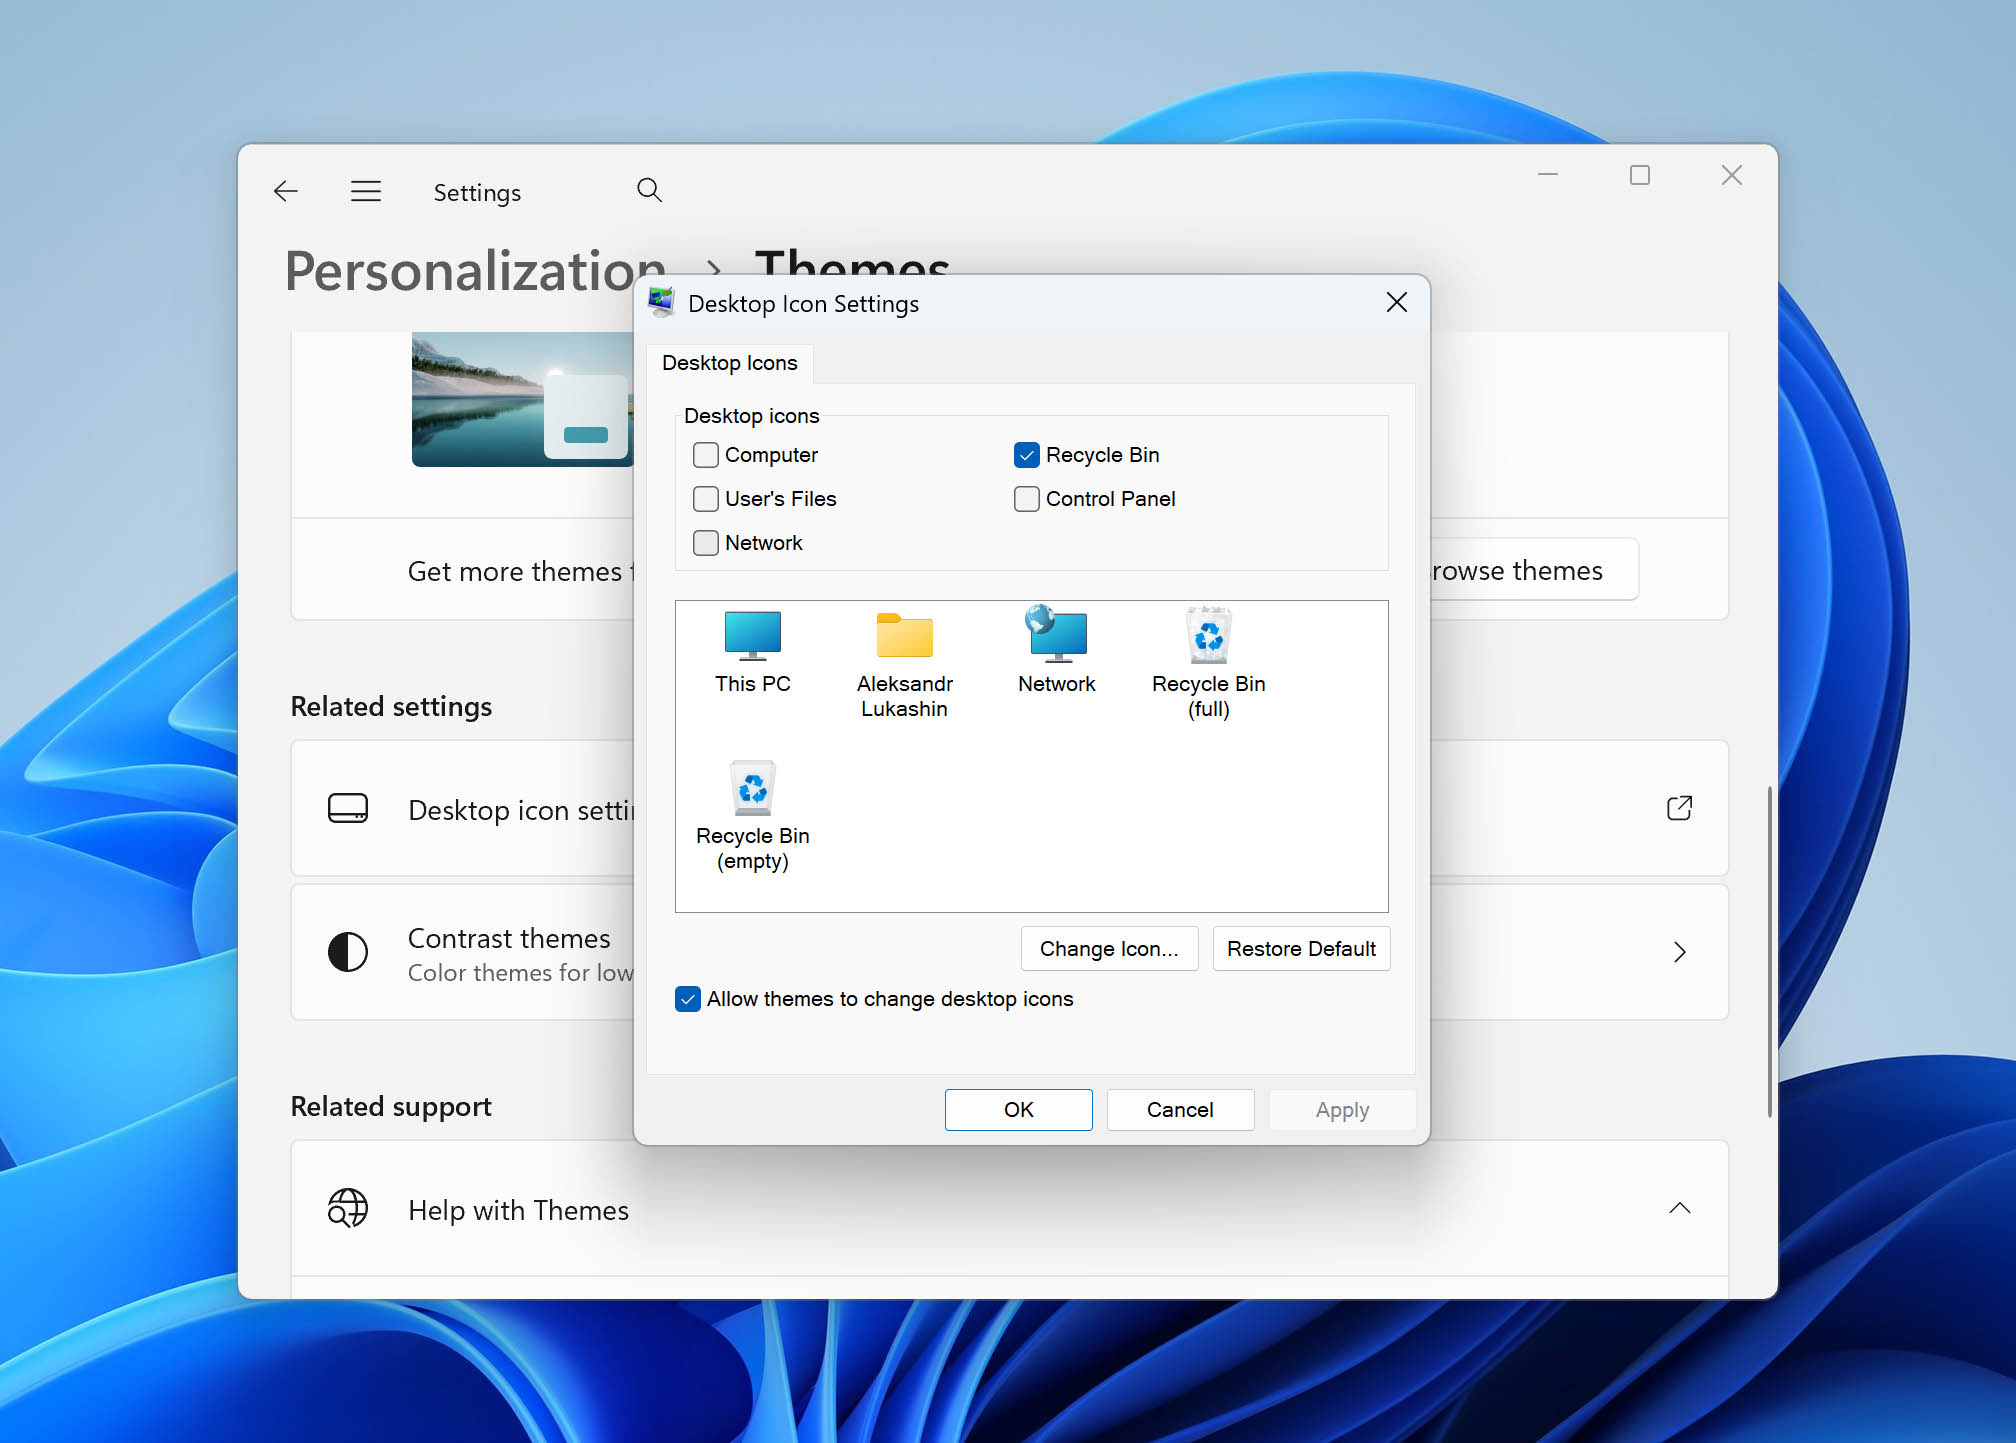
- Check the box for the Recycle Bin icon.
- Click OK.
2. Recycle Bin is Corrupt Error
Solution: Resolve a Recycle Bin is corrupted message by performing this procedure.
- Open a Command Prompt window as administrator.
- Paste the following command and hit Enter: rd /s /q C:\$Recycle.bin.
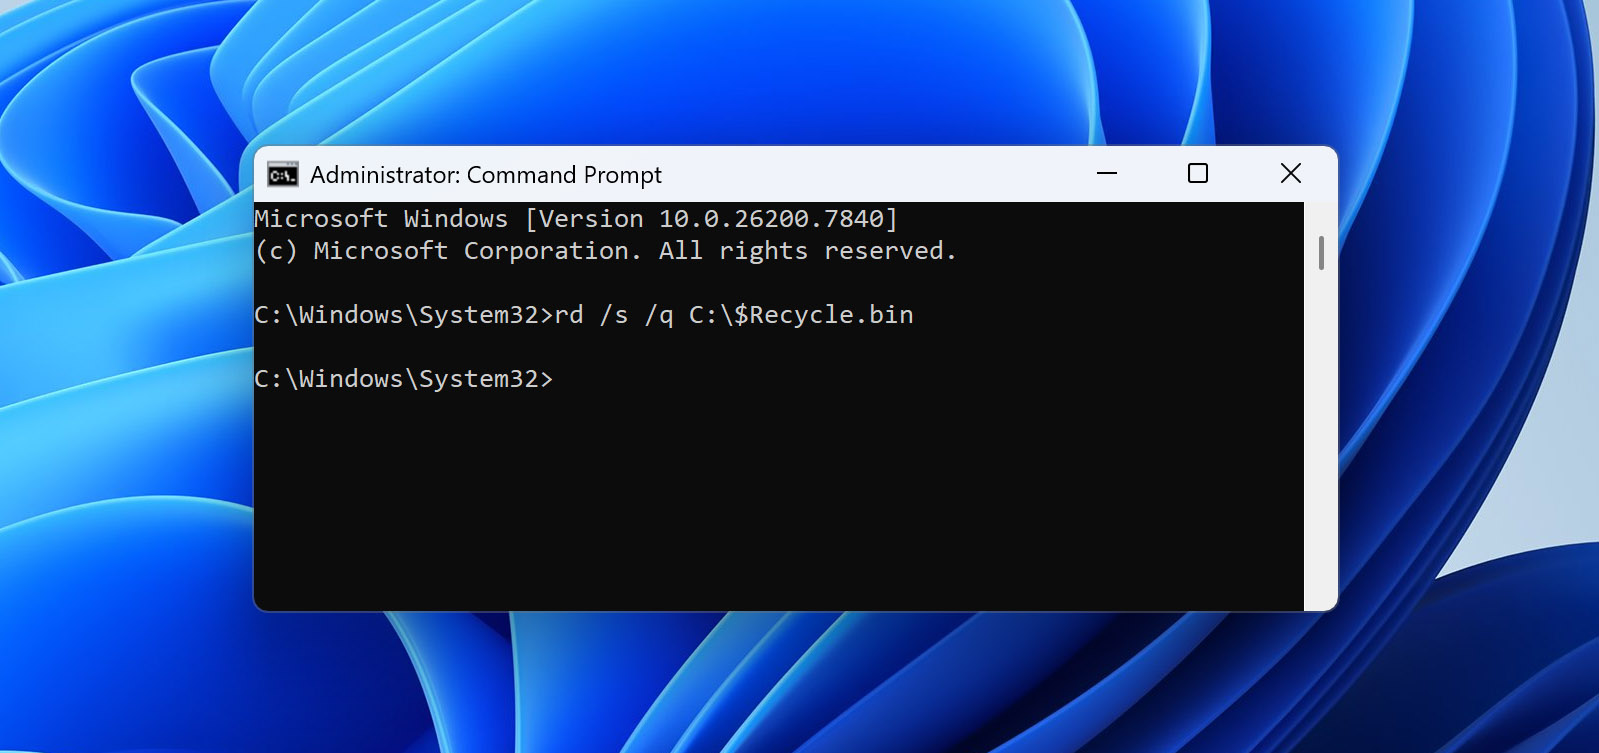
- Close the Command Prompt window and restart your computer.
If your Recycle Bin is not on the C drive, modify the command with the correct letter.
3. Recycle Bin File Association Error
Solution: The best way to handle this error is to manually remove all of the items from the Recycle Bin. Open the Recycle Bin and verify that you really want to permanently delete the files it contains before performing the operation.
Conclusion
Let’s summarize. Recovering files deleted from the Recycle Bin is possible in two main ways:
- The first option is restoring them from existing backups, provided those backups contain the deleted files.
- The second option is using data recovery software, such as Disk Drill. This is the more commonly used approach, mainly because many users do not configure backups in advance. In cases where the deleted data has not been overwritten, recovery software can often retrieve the files successfully.
If neither of these options works for you, the only remaining solution is to take your computer to a professional data recovery lab, where specialists can handle the recovery process using dedicated tools and equipment.
If you still have questions about this topic, feel free to leave them in the comments below. You can also visit our forum, where other users and our experts will be ready to help.
FAQ:
- Right-click your desktop screen and click Personalize.
- Select Change desktop icons.
- Tick the checkbox for Recycle Bin. Click OK.

")


