Hard drives are quite reliable as storage, but they still have a limited lifespan. Over time, hardware wear, bad sectors, file system errors, or firmware issues can cause a drive to fail and become inaccessible in Windows. If you find yourself in such a situation, our article is for you.
Can files be recovered from a failed hard drive? Fortunately, the data often remains on the drive even after failure and there are a number of ways to recover it. We will explain how to recover files from a failed hard drive on Windows and what steps can help protect your data during the process.
If you suspect a drive failure, stop using the disk immediately. Continued activity can overwrite recoverable data or worsen physical damage. Power off the system, avoid unnecessary reconnects, and handle the drive carefully to prevent additional harm.
What Can Cause a Hard Drive to Fail
Before we move on to actual methods, it’s important to talk about different types of hard drive failure. The recovery path heavily depends on the cause. Some cases are relatively easy to resolve with DIY methods, while others may require professional assistance.
Here is a table that summarizes the most common types of hard drive failures and the symptoms that usually accompany them:
| Failure Type | What Causes It | Symptoms |
| Logical failures | File system or data corruption caused by improper shutdown, malware, software errors, or accidental formatting. | Missing files, corrupted folders, boot errors, frequent BSOD, or messages such as “Disk not formatted.” The drive usually spins normally and appears in Windows, but the data cannot be accessed. |
| Physical (mechanical or electronic) failures | Hardware damage such as head crashes, motor failure, PCB/electronics damage, or severe incidents like water or fire exposure. Electrical surges can also damage the drive’s controller board. | Clicking, grinding, or buzzing noises, a drive that does not spin, or a drive that is not detected in BIOS or Disk Management. In some cases the system shows repeated I/O errors or cannot access the disk at all. |
| Firmware or controller faults | Corruption in the drive’s internal firmware or controller code. | The drive becomes invisible to the system or causes boot loops without mechanical noise. BIOS may fail to detect the disk, or messages like “Drive 0 not found. Replace and press F1 to resume” may appear. |
| Bad sectors or wear | Storage sectors degrade over time on both HDDs and SSDs. This usually happens due to aging hardware or heavy usage. | SMART warnings such as Reallocated Sector Count or Pending Sectors. Tools like CrystalDiskInfo may show a Caution or Bad health status. Windows commands like wmic diskdrive get status may return Pred Fail. |
Logical failures and most bad-sector issues can usually be resolved with data recovery software. Physical damage and firmware problems are a different story. Those often need a professional, since they involve actual hardware repair, reprogramming, or even working in a cleanroom.
How to Recover Data from a Failed Hard Drive
There are several methods to recover your data, but before you try any of them, check if you have a backup somewhere: an external drive, anything. It sounds obvious, but it is easy to forget about that old backup you set up months ago. If one exists, you can restore from it much faster and more safely than through any recovery process.
If you have no backup, select one of the methods we present below:
Method 1:Use Data Recovery Software
There are a lot of data recovery tools out there, but we recommend Disk Drill. It comes with S.M.A.R.T. monitoring and a byte-to-byte backup feature, which makes it a great choice for failing drives specifically. You can check the condition of the drive and create a full sector-level copy before you do anything else. which protects you from further data loss during the recovery process.
Here how to use Disk Drill for data recovery from failed hard drive:
- Download and install Disk Drill on another disk, not on the failed hard drive. This prevents overwriting any recoverable data.
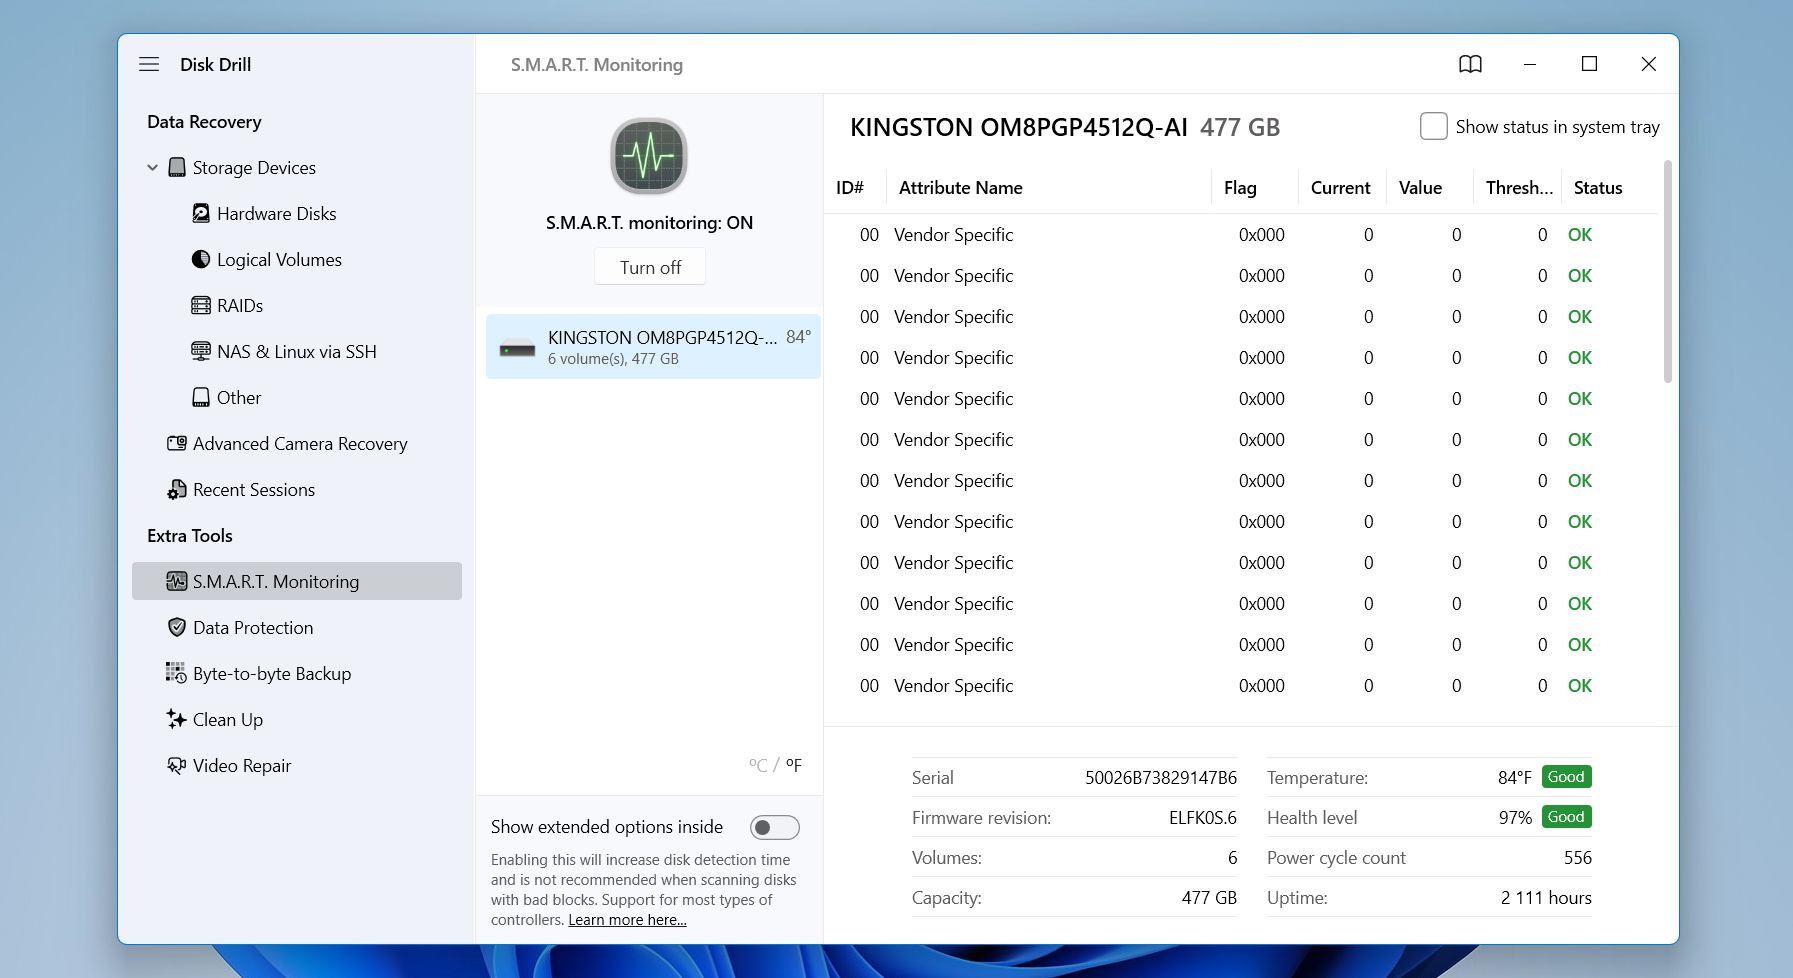
- Go to the S.M.A.R.T. Monitoring section on the left and enable monitoring to view real-time health indicators and warnings. This quick check can help you decide whether the drive is stable enough for software recovery or whether it is safer to consult professionals before the condition worsens.
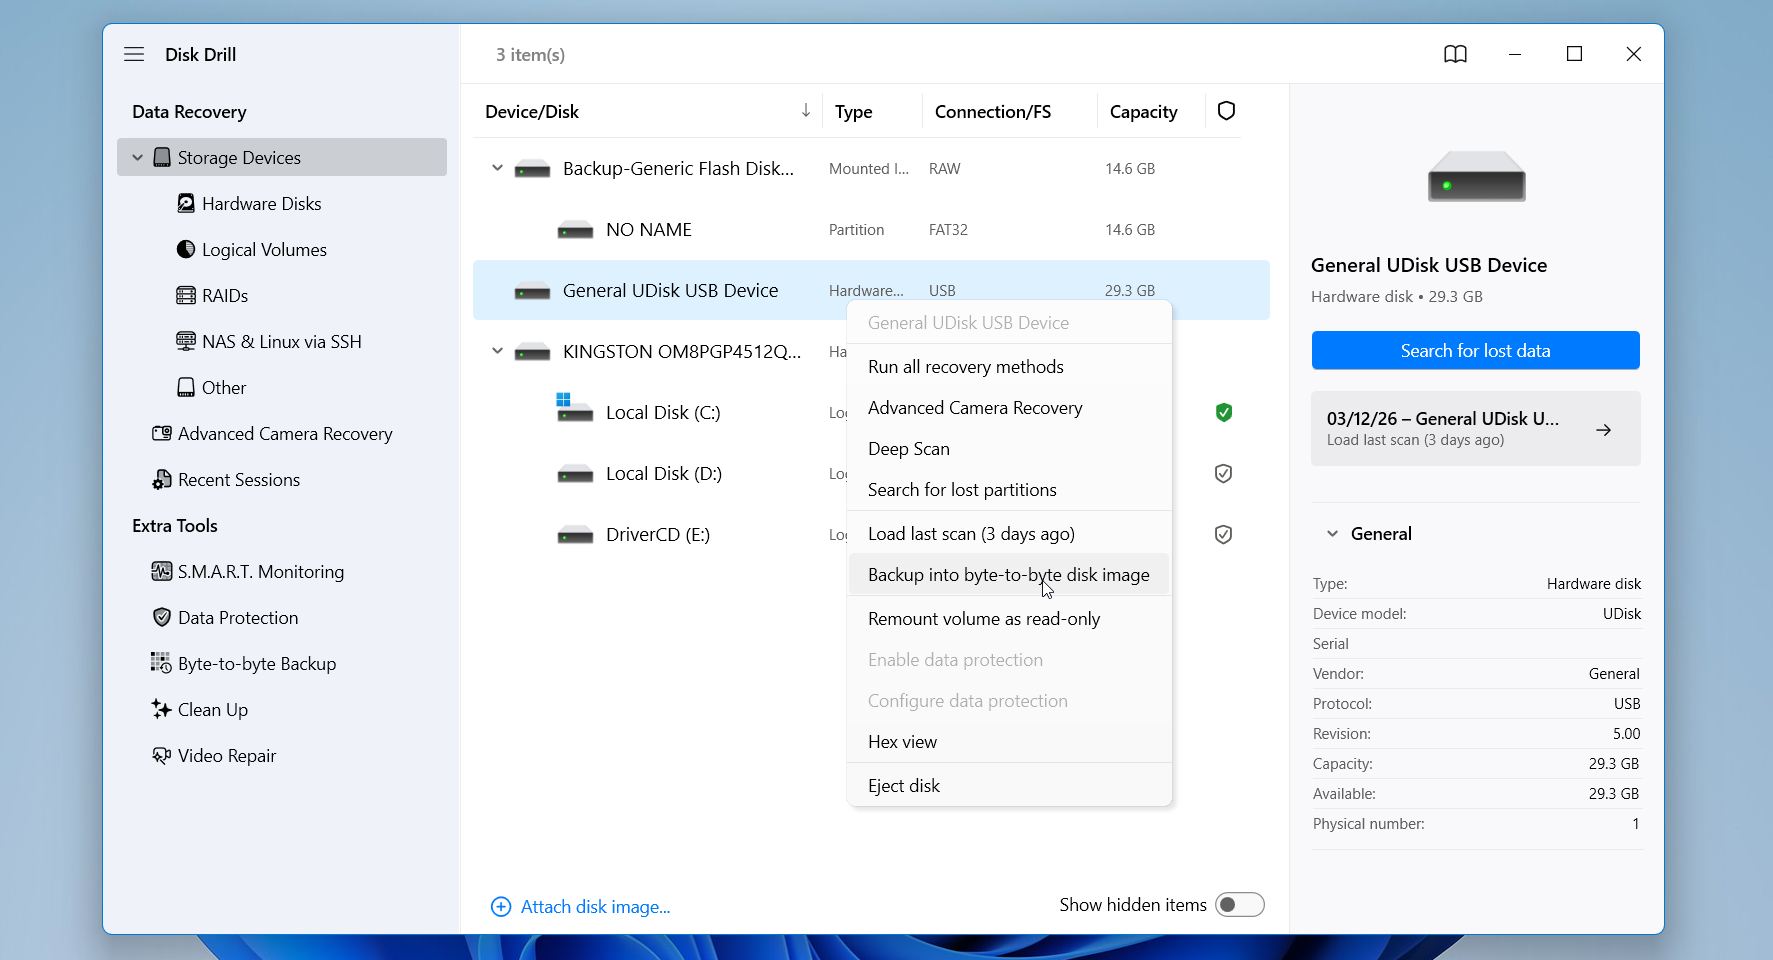
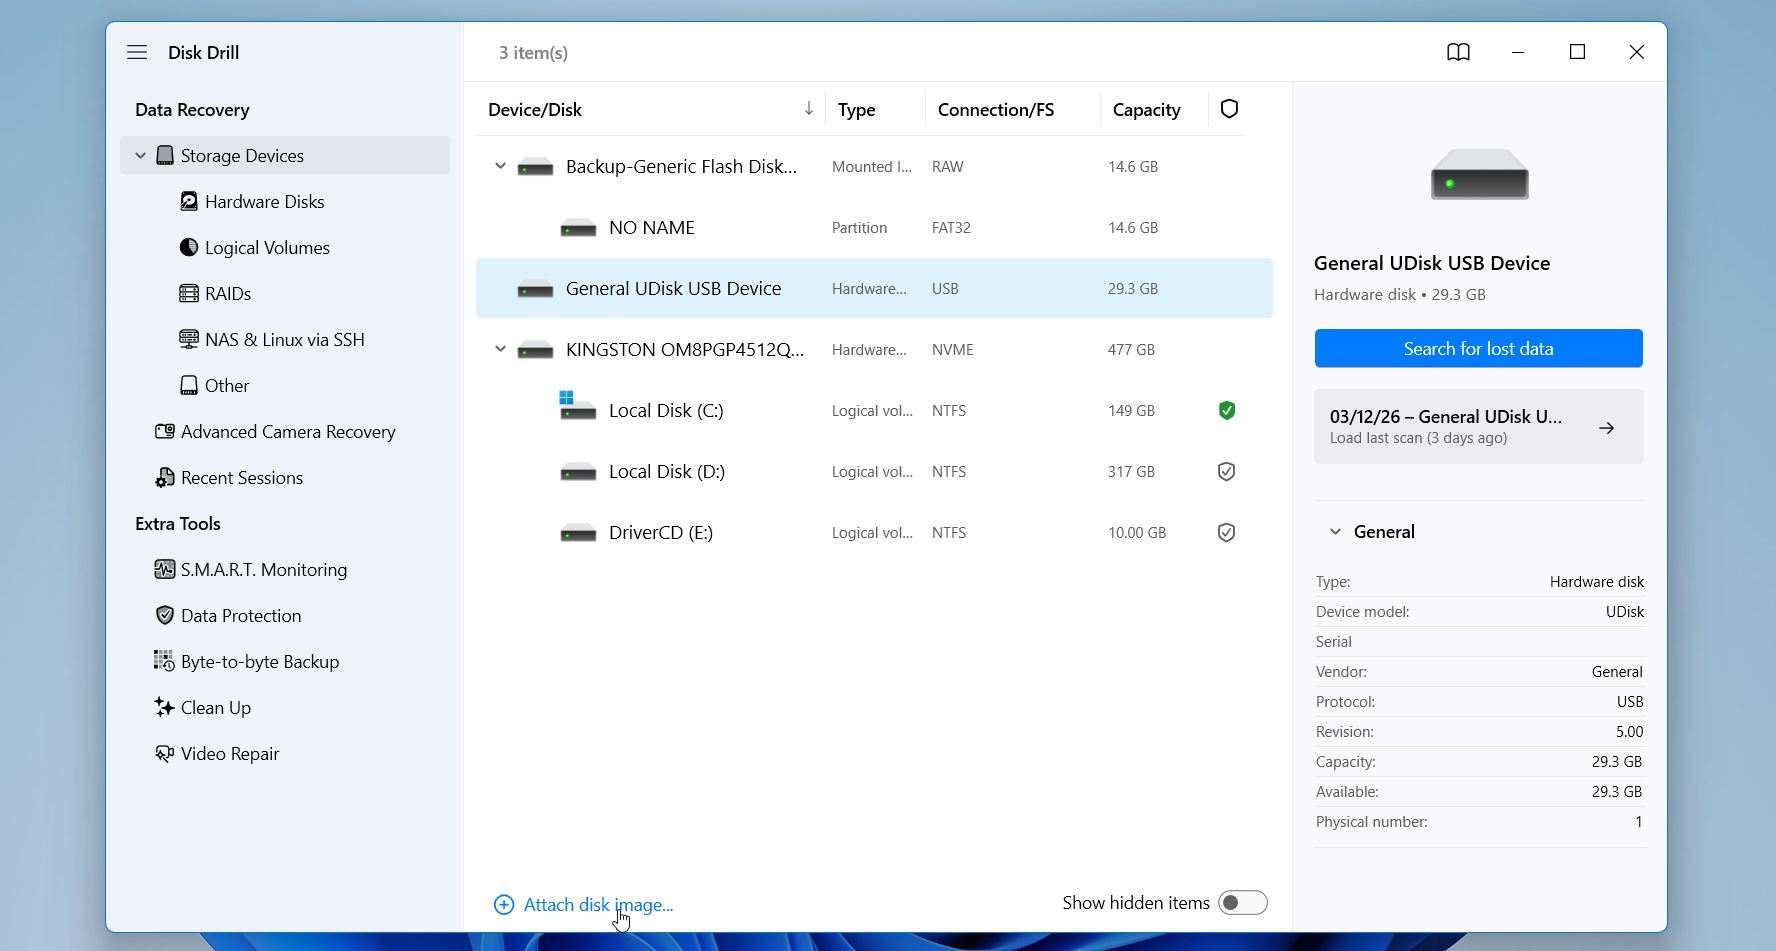
- Select the failing drive and use the Byte-to-Byte Backup feature. Then click Create Backup.
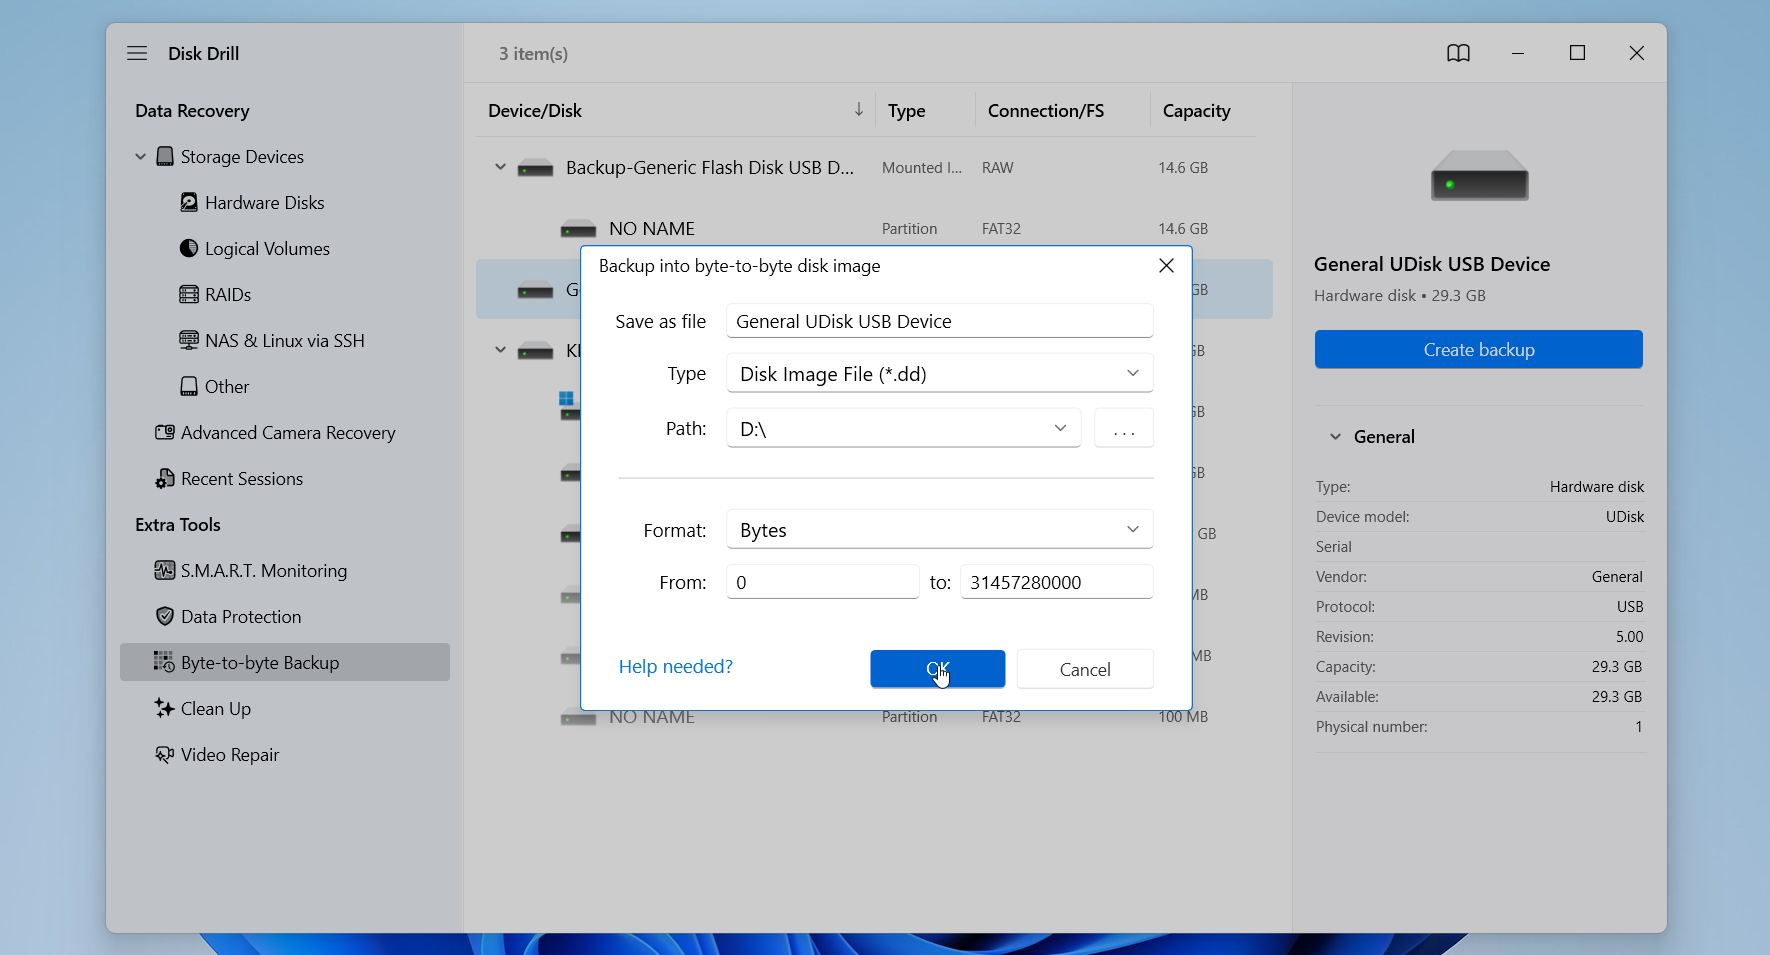
- Once everything is set, click OK to start the imaging process. Depending on the drive size and condition, this step may take some time. When the process finishes, you will have a full copy of the drive stored as an image file.
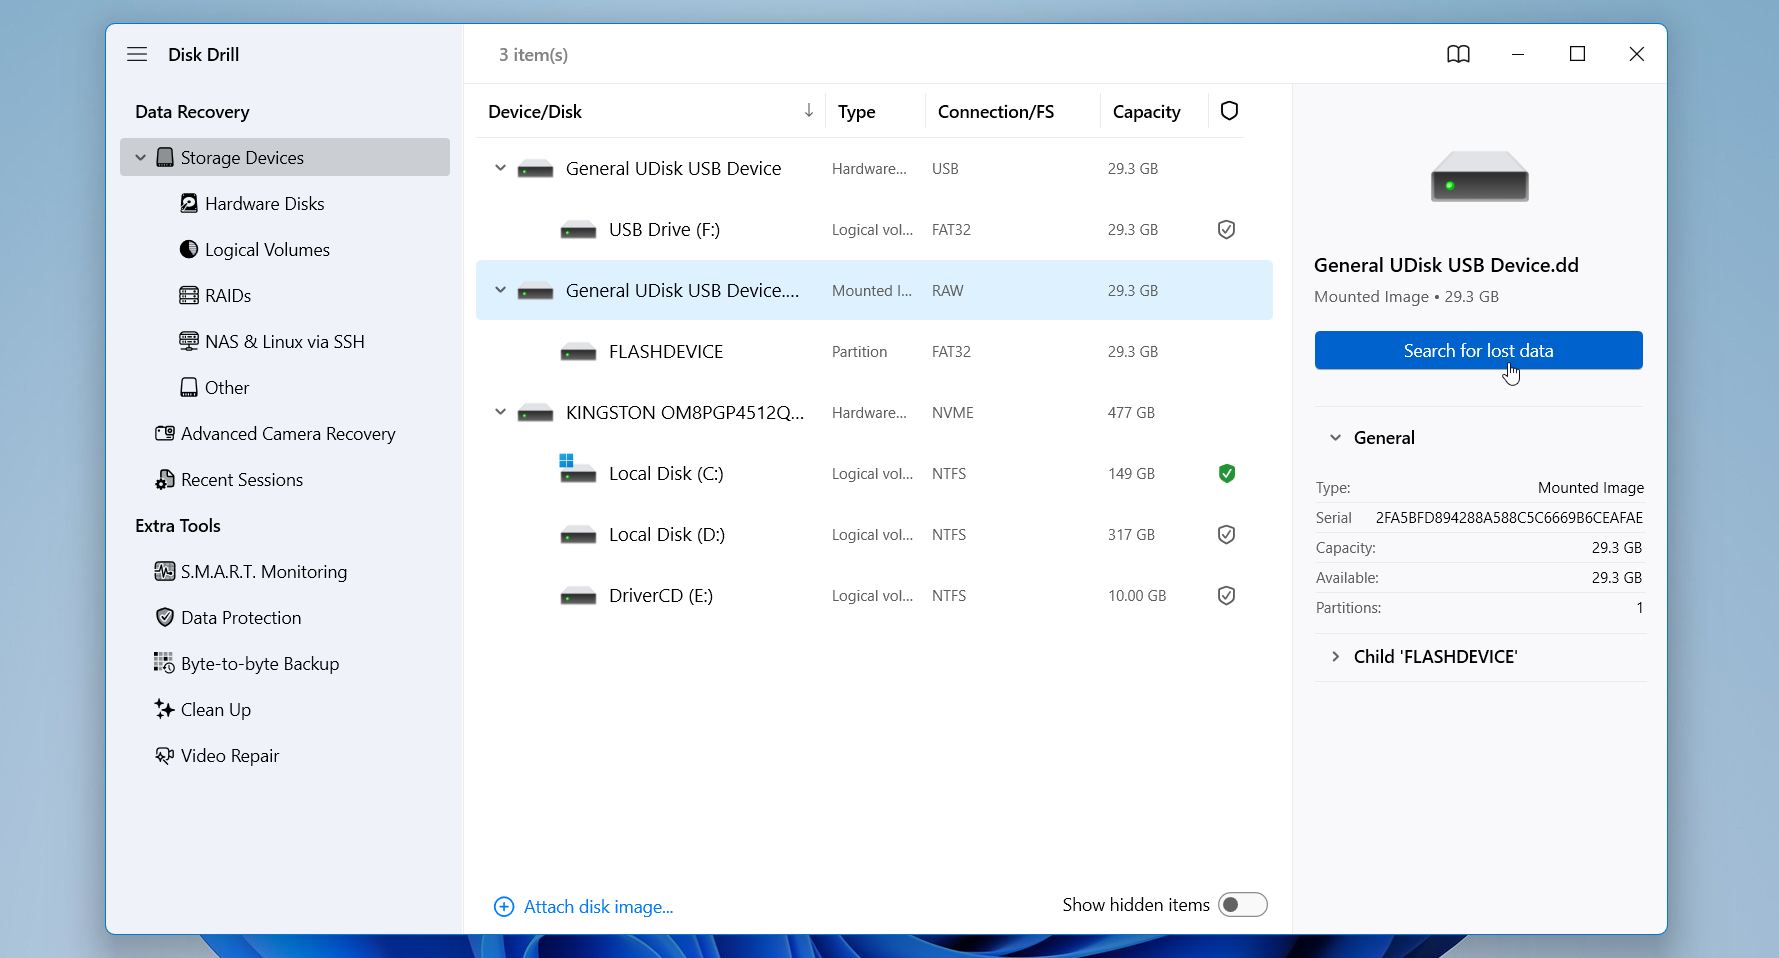
- After the image is created, safely disconnect the damaged drive and put it aside. Then, go back to the Storage devices tab in the left sidebar. Click Attach disk image, browse to the location where the backup file is stored, and select it using File Explorer. Disk Drill will load the image and display it in the list of available disks.
- Select the attached image and click Search for lost data to start the scan.
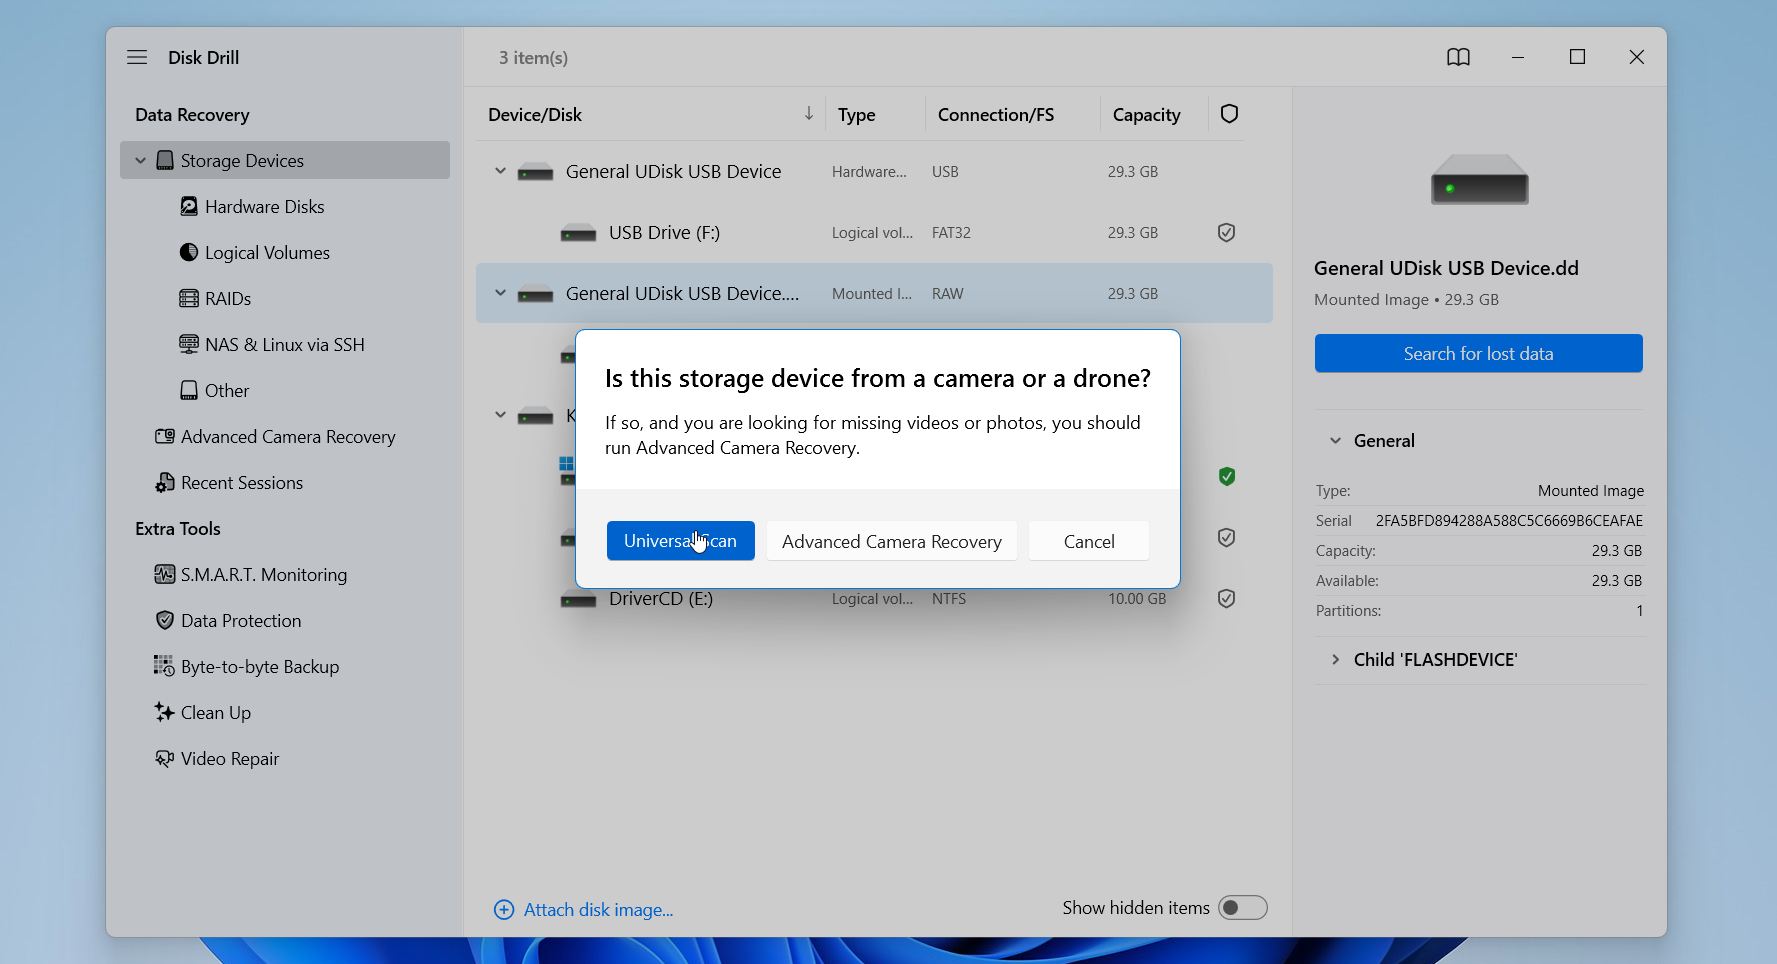
- Select a recovery mode if prompted. Advanced Camera Recovery works best for video recovery from cameras and drones, so choose the Universal scan.
- Once the scan finishes, Disk Drill will display the files it found during the process. You can browse through categories such as pictures, videos, documents, and archives, or use the search feature to locate specific files.
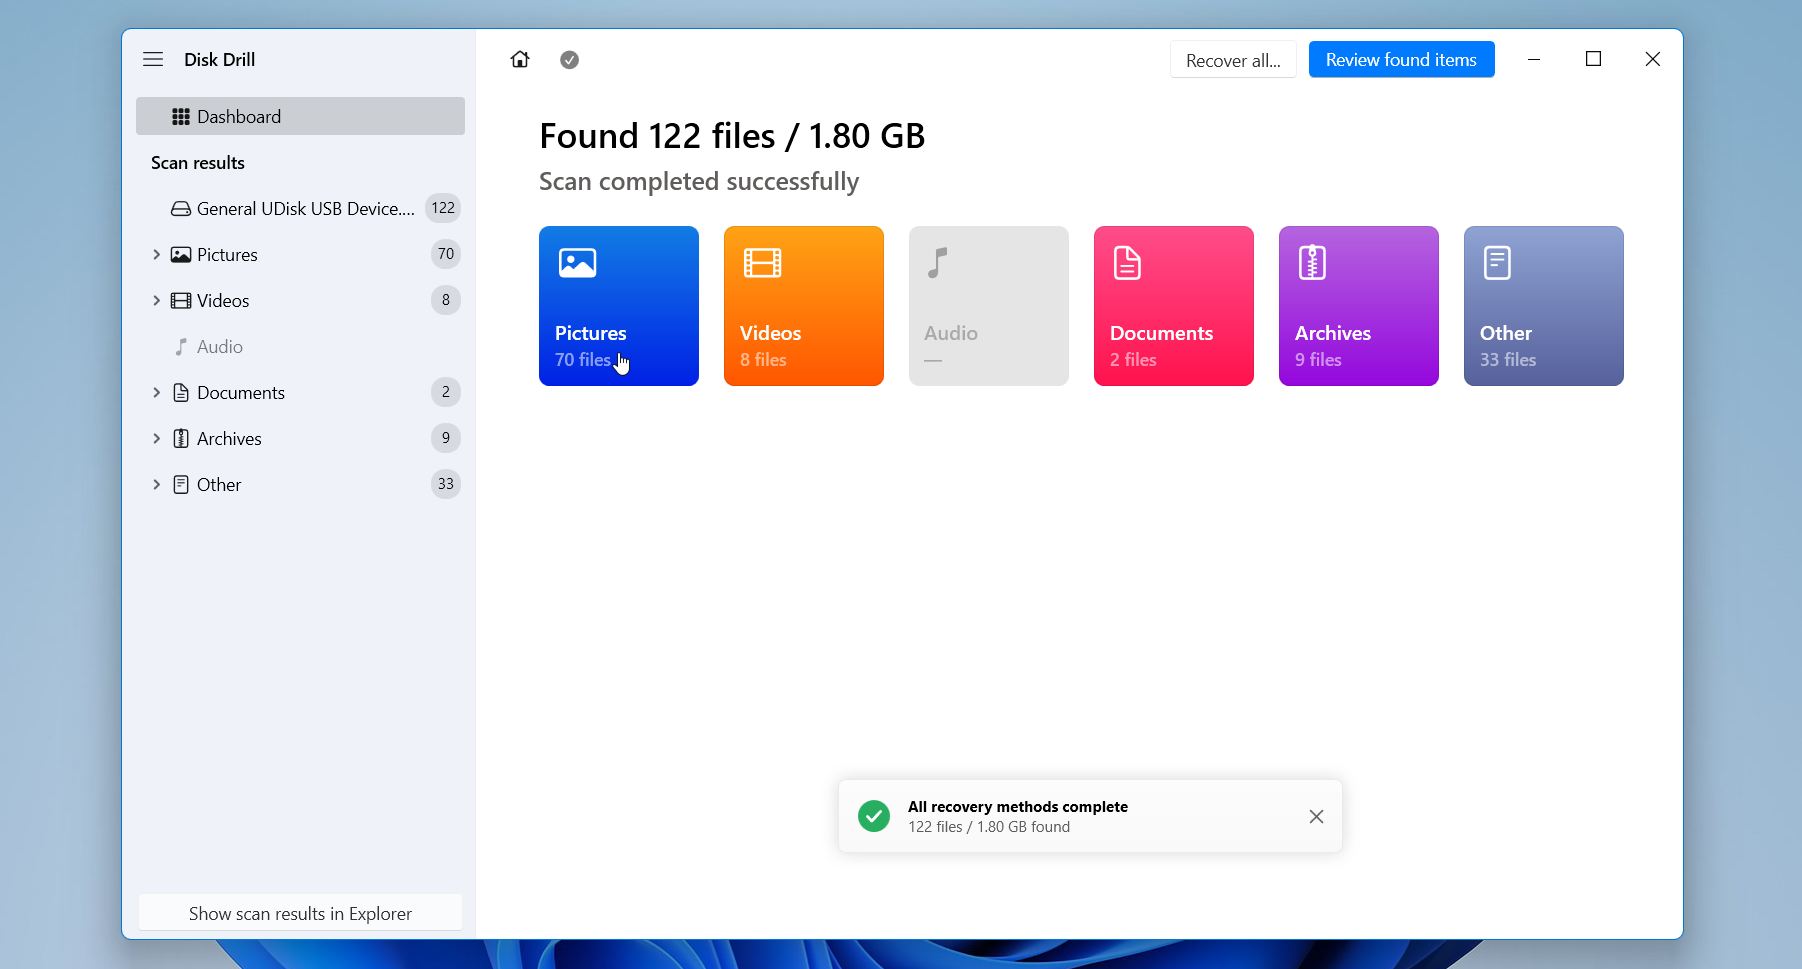
- Use a preview to check if the data is recoverable. Select the files you want to recover and click the Recover button at the bottom of the window.
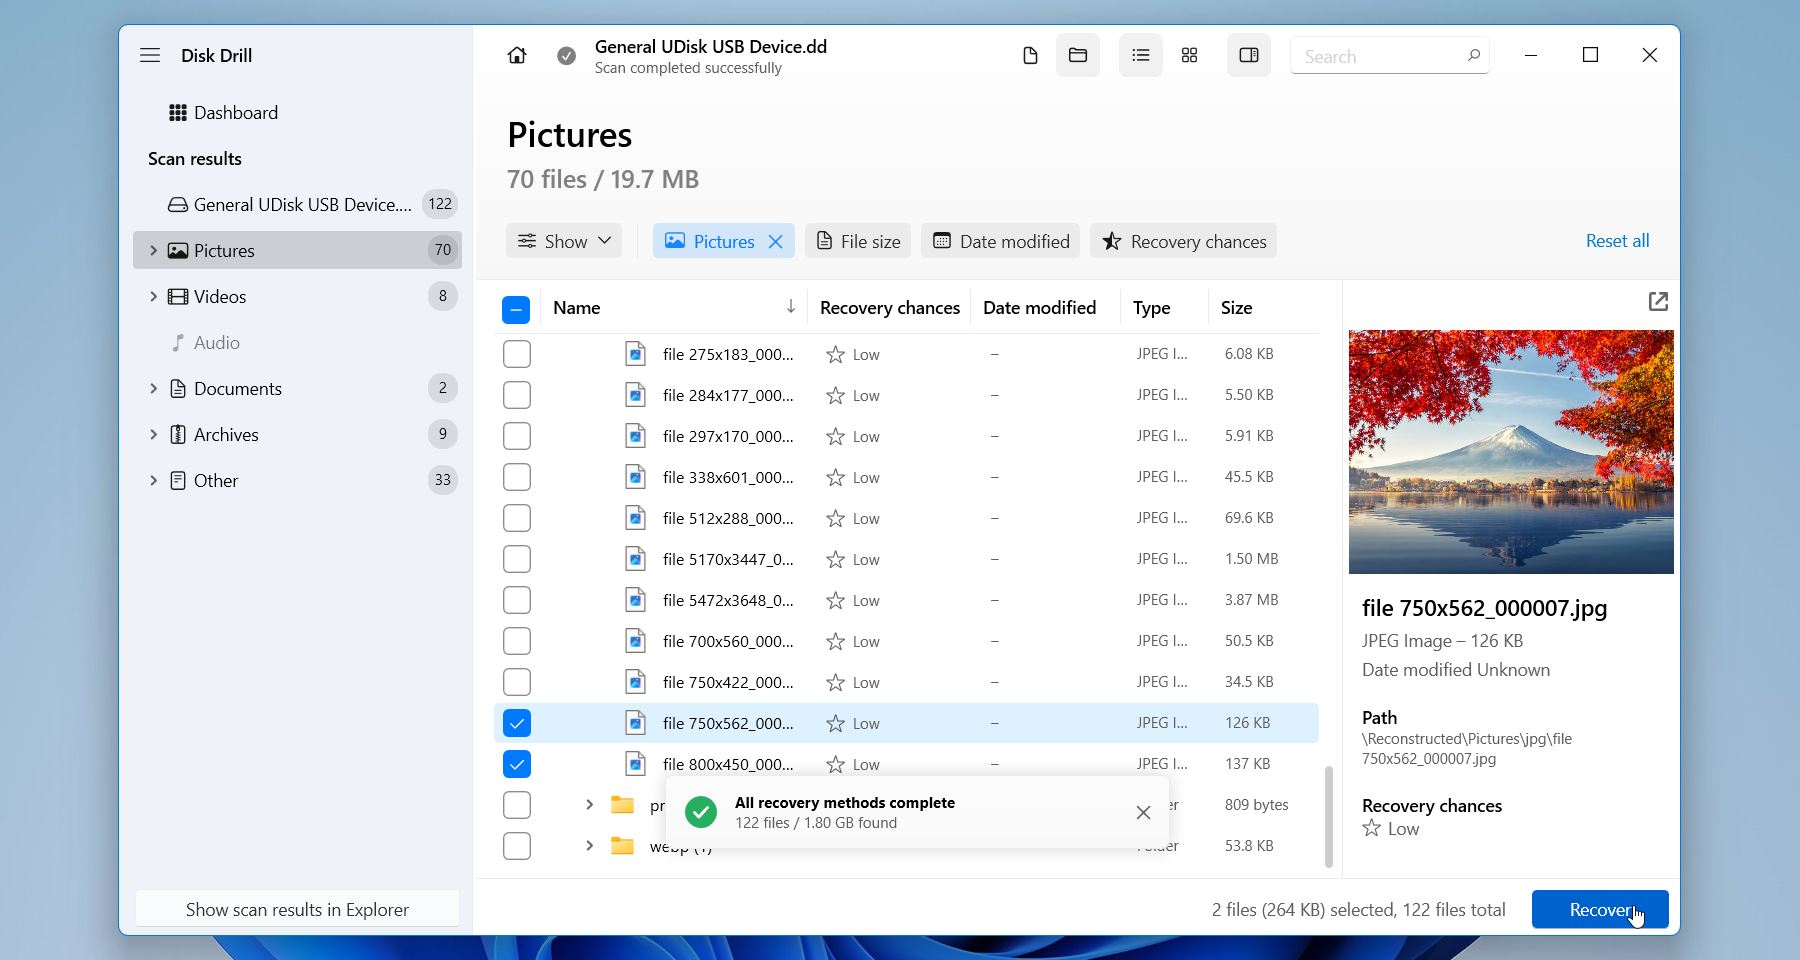
- The program will ask you to choose a destination folder. Choose a different drive as the recovery destination. Avoid saving files to the source drive, since this could overwrite existing data and reduce the chances of recovering additional files. After you click Next, Disk Drill will copy the selected files to the chosen location.
The free Windows version of Disk Drill lets you recover up to 100 MB, which is plenty to check whether your files are actually recoverable. It has also built up a solid reputation in the data recovery community over the years, and for good reason: it works reliably across a wide range of file systems and tends to deliver consistent results no matter what caused the data loss.
Method 2:Data Recovery Service/h3>
Software recovery works well when the drive still functions at the hardware level, but some failures need specialized equipment and professional help. If your drive is making clicking or grinding noises, not spinning, disappearing from BIOS, or showing obvious signs of electrical or mechanical damage, it is safer to contact a data recovery service rather than trying to fix it yourself.
Professional data recovery companies run cleanroom labs where engineers can safely open hard drives and work on the internals. They can replace damaged heads, fix the PCB, rebuild firmware modules, or stabilize a failing drive just long enough to pull the data off. This kind of work requires specialized tools and is simply not something you can do at home.
Here is how the process usually goes:
- Send in the drive. Most labs will run a diagnostic to figure out what kind of failure you are dealing with and how likely a recovery is.
- Get a quote. Once the diagnostics are done, the company will give you a price estimate and walk you through what to expect.
- Give the green light. After you approve, technicians work on repairing the drive and extracting the data with professional imaging equipment.
- Get your files back. Recovered data is usually sent back on a new external drive or made available to download.
Professional recovery can get pricey, especially for mechanical failures, but most reputable services operate on a no recovery, no fee basis, so you only pay if they actually get your data back. When the damage is serious or the data is important, it is often worth every penny.
How to Fix a Hard Drive Failure
After you recover your important files, you can try to repair the hard drive itself. In many cases the failure is caused by file system corruption, partition problems, or minor disk errors that Windows can fix. However, remember that repairs should only happen after data recovery, especially if the drive shows signs of instability.
These fixes only work for logical failures such as file system corruption, partition damage, or malware interference.
If the drive clicks, does not spin, disappears from BIOS, or produces repeated I/O errors, the problem is likely hardware-related. In those cases, repair attempts can make the situation worse, and professional data recovery services are usually the safer option.
Here are several common approaches you can try on Windows:
Method 1: Use Check Disk (CHKDSK)
CHKDSK is a built-in Windows utility that scans a drive for file system errors and bad sectors. When it detects problems, it attempts to repair the file system and mark damaged sectors so the system avoids using them again.
To run CHKDSK:
-
- Press Win + R, type cmd, then press Ctrl + Shift + Enter to open Command Prompt as Administrator.
- Enter the command “chkdsk F: /r /x” (replace F: with your drive letter) and press Enter.
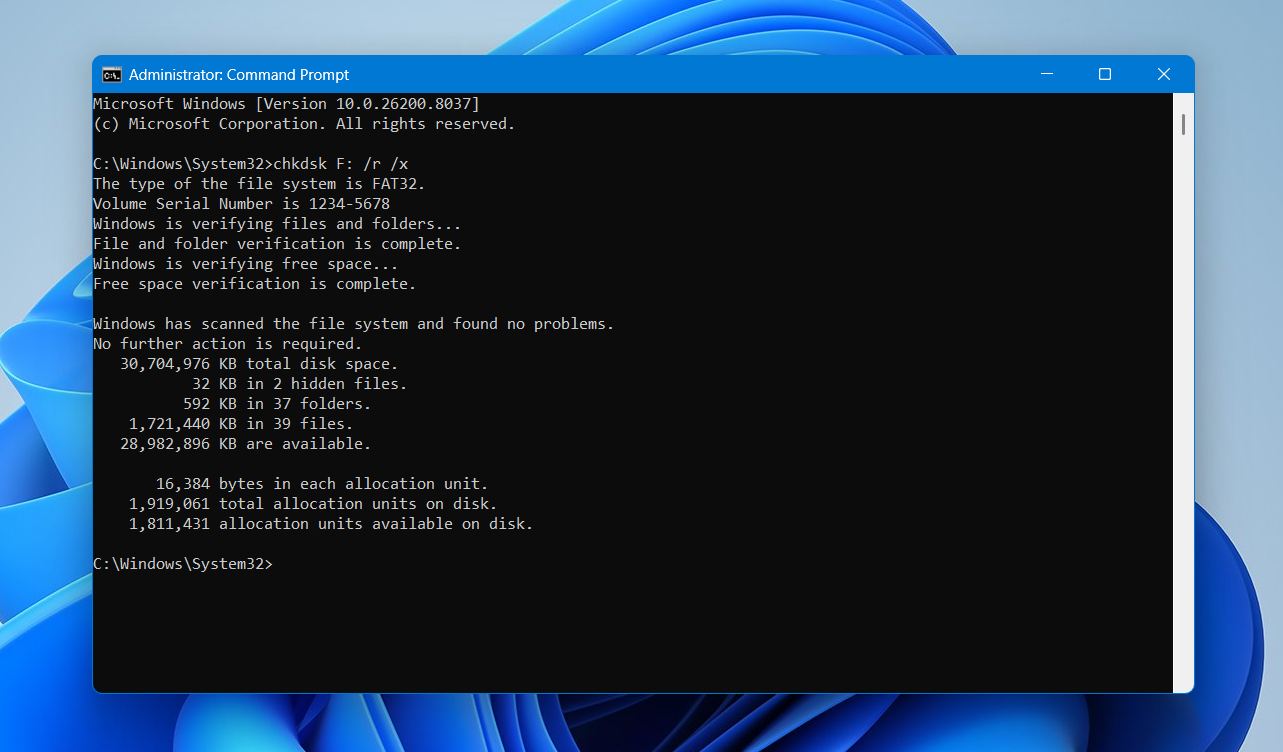
- Wait for the scan to complete, then close Command Prompt.
If the errors were caused by file system corruption or minor sector damage, the drive may become usable again after the scan finishes.
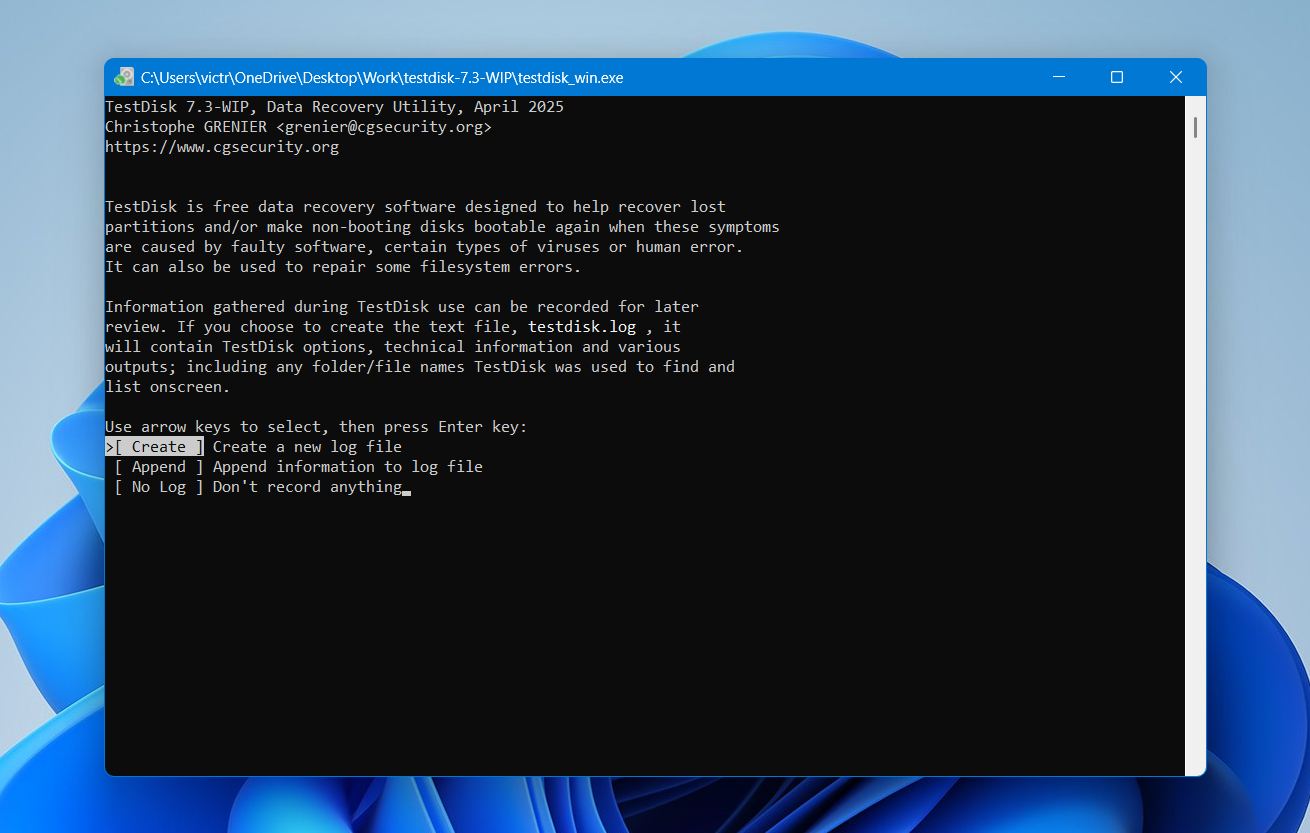
Method 2: Rebuild Corrupted Partition Using TestDisk
A damaged partition table can make a drive appear unallocated or RAW, or prevent Windows from recognizing the file system. In such cases, the free utility TestDisk can scan the disk and rebuild the partition structure or recover a missing partition.
To use TestDisk:
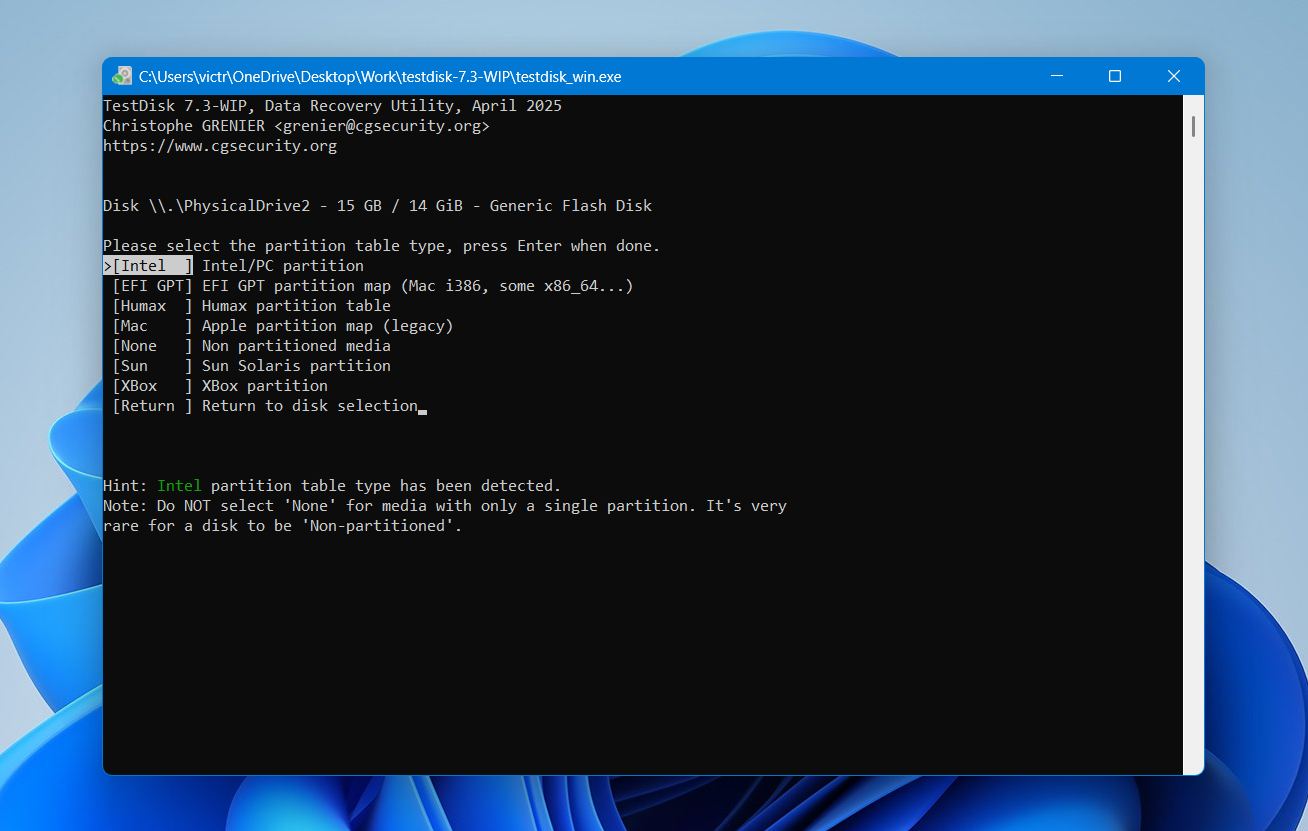
- Download TestDisk and run testdisk_win.exe.
- Select Create to generate a new log file.
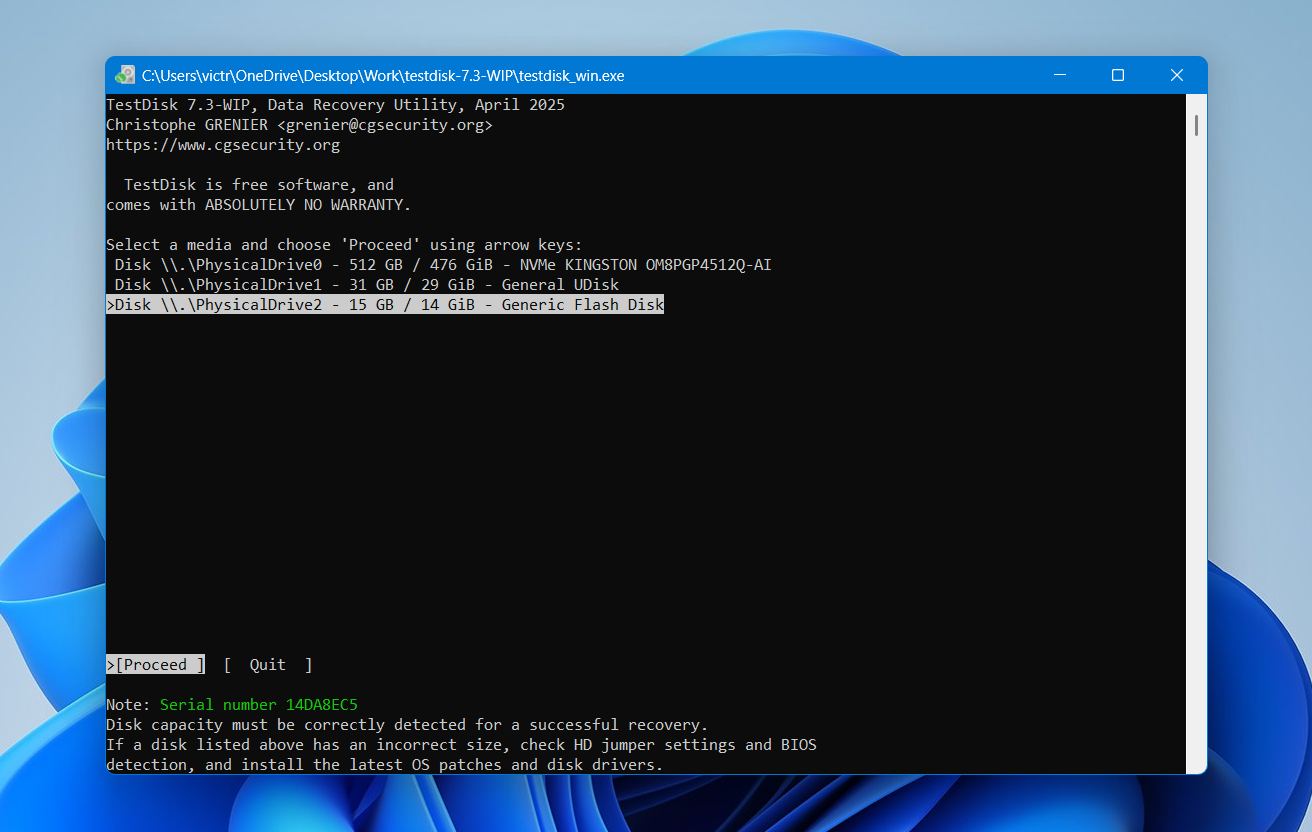
- Choose the disk that contains the corrupted partition.
- Select the correct partition table type.
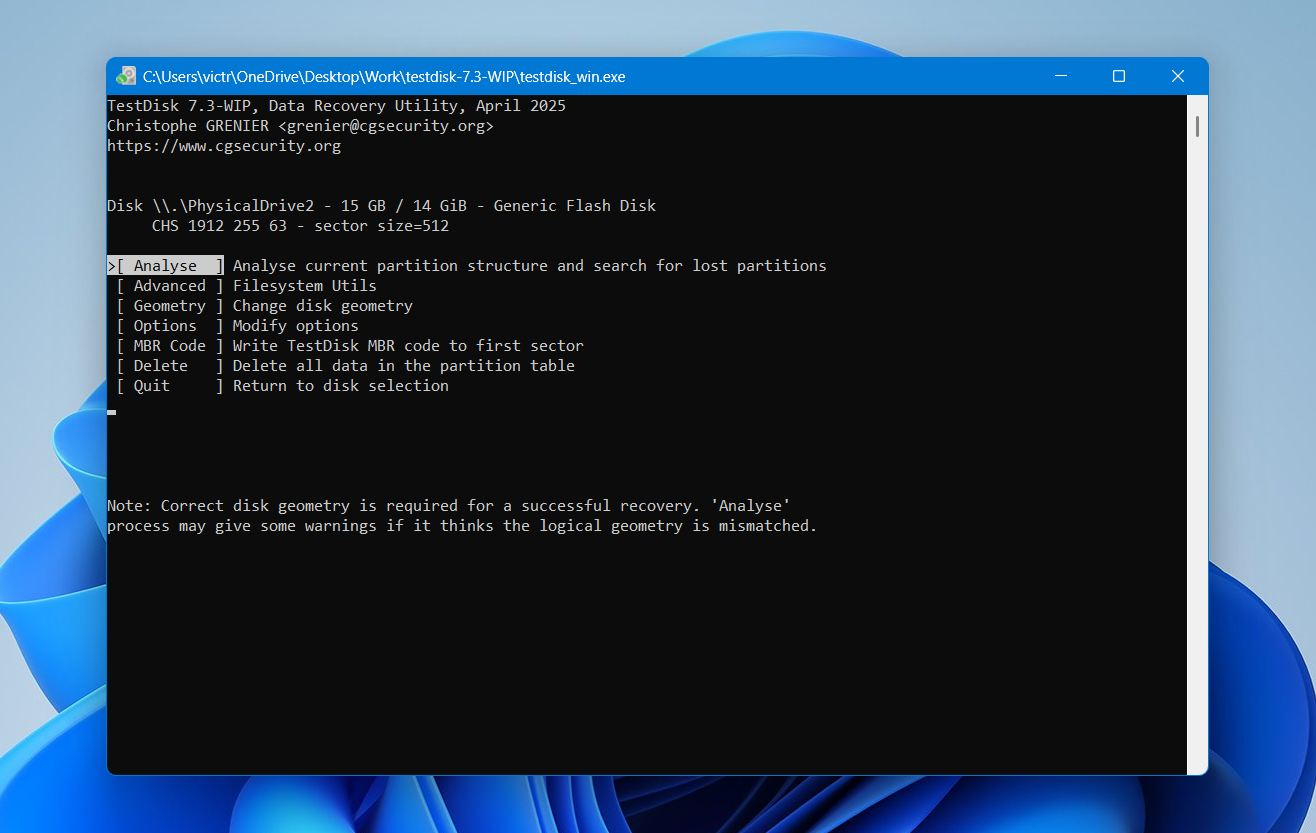
- Choose Analyse to search for lost partitions.
- Run Quick Search to locate existing partitions.
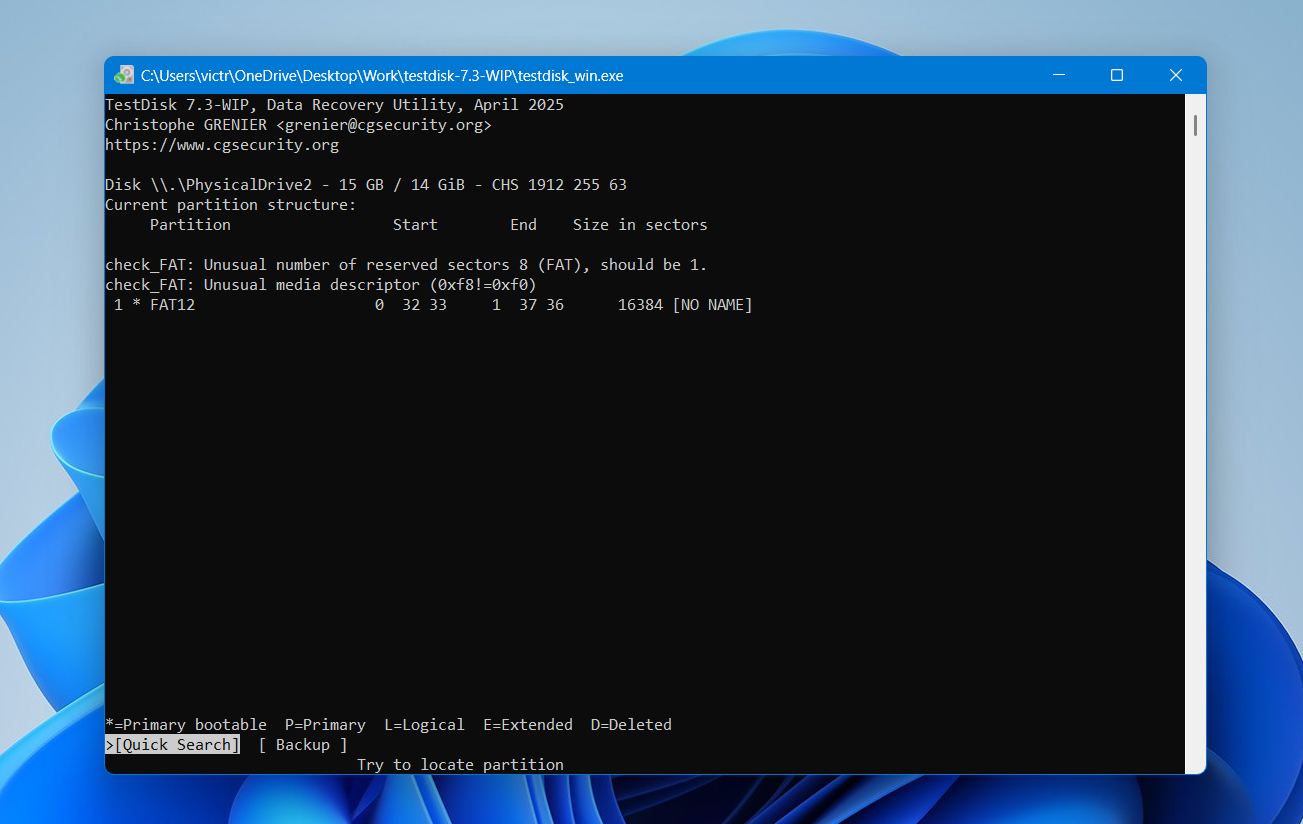
- When the correct partition appears in the results, select it and choose Write to restore it.
- Restart the computer.
After the reboot, Windows should recognize the partition again.
Method 3: Format the Drive
Formatting recreates the file system structure and clears most logical errors. This method can help when the drive appears as RAW or Unallocated, becomes inaccessible, or repeatedly shows file system errors.
To format a hard drive:
- Search for Create and format hard disk partitions in the Start menu.
- Open Disk Management.
- Right-click the drive you want to format and select Format.

- Choose a file system (NTFS is recommended for Windows) and enable Perform a quick format.
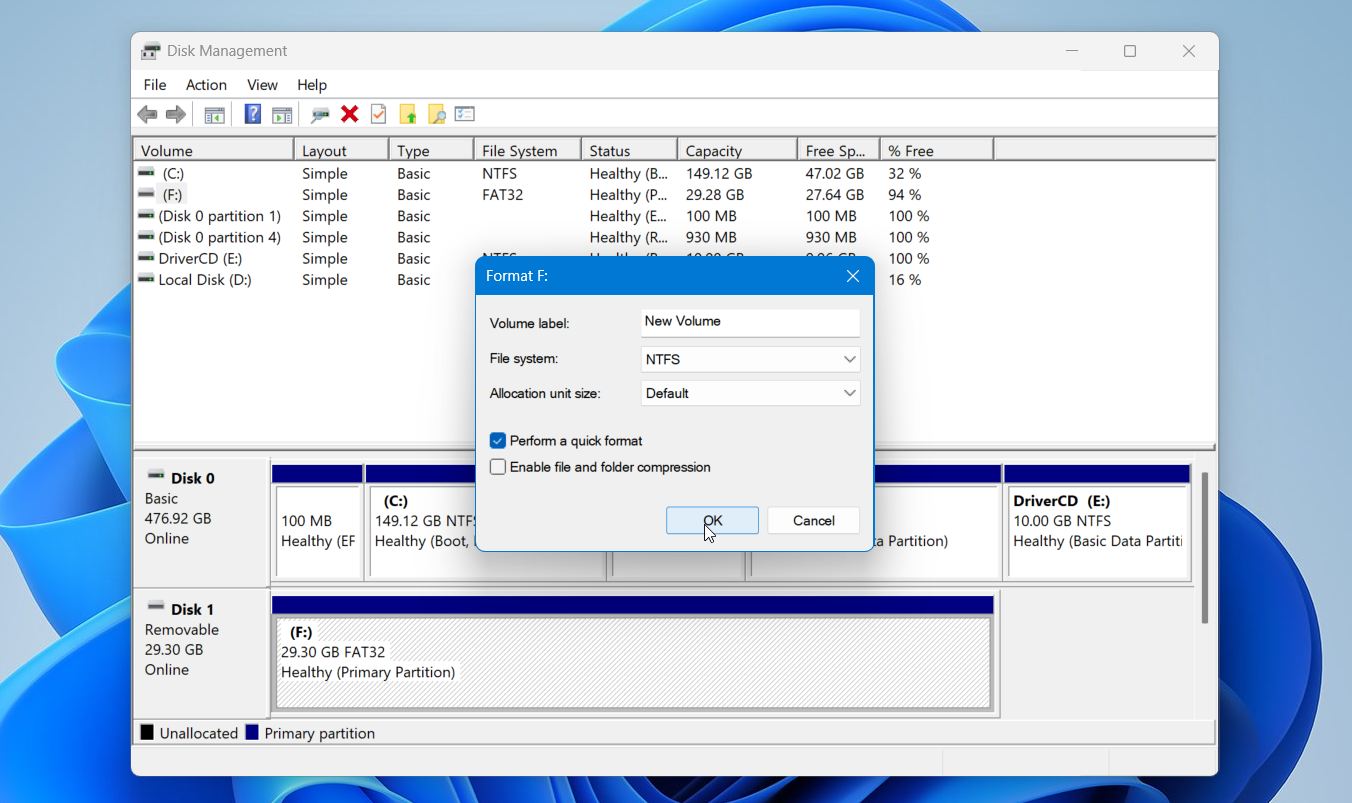
- Click OK to start the process.
Formatting erases all data on the disk, so only perform this step after you recover the files you need.
Closing Words
Data recovery from a failed drive is very much possible, as long as you approach it the right way. Stop using the drive the moment something seems off, figure out what kind of failure you are dealing with, and choose your recovery method accordingly.
Once you get your files back, take it as a reminder to set up a proper backup routine. A simple 3-2-1 strategy, meaning three copies of your data on two different storage types with one kept offsite or in the cloud, can save you from going through this again. Hard drives will always fail eventually, but losing your data because of it does not have to be inevitable.


