
Did you accidentally overwrite a file or folder in Windows? Unlike deleted files, overwritten data does not appear in the Recycle Bin, which means the usual restore option is not available. Fortunately, the original data may still remain on the storage device for some time. We show you several proven methods to recover overwritten files, including recovery software and built-in Windows features.
📝 Note: The steps are shown using Windows 11. The same methods also work on Windows 10, though some menu names or locations may look slightly different.
Is It Possible to Recover Overwritten Files?
Yes, sometimes. Recovery depends on what happened to the data on the drive after the overwrite. When a file gets replaced by another file with the same name, the result looks simple: the old file disappears and the new one takes its place. But the underlying data does not always disappear immediately. In many cases, Windows only changes the file system record that points to the file.
That means the outcome can vary. In some situations the original data remains on the disk for a while. In other cases the storage space gets reused right away and the previous content disappears.
There are actually two types of overwriting, people tend to confuse:
- Logical overwriting, where Windows replaces the file entry but the original data may still remain on the drive. The system simply marks the old storage space as free and writes the new file elsewhere in many cases. Because the original data can still exist in those sectors, recovery software may find and restore it before the space gets reused.
- Physical overwriting, where the storage space that held the original file gets reused and new data is written directly over it, which permanently replaces the previous content and prevents any recovery.
Storage technology also affects the outcome. Traditional hard drives often leave old data intact until the system eventually writes something new over those sectors. Solid-state drives behave differently. SSDs use a feature called TRIM, where the operating system informs the drive which blocks are no longer needed. The drive can then clear those blocks during background maintenance, which shortens the window during which recovery may still work.
💡 Pro Tip: Stop using the affected drive as soon as possible. New files, software installation, or normal system activity can overwrite the original data. The sooner you start recovery, the higher the chance your files are still intact.
How to Recover Overwritten Data
There are two main options to recover overwritten files and folders. You can use data recovery software that searches the drive for traces of files that still exist on the storage device. Or you can restore the files from a backup if one exists.
Now, we will explain both approaches. We will start with data recovery software because it can work even when no backup is available.
Method 1:Use Software to Recover Overwritten Files
Our team often suggests Disk Drill for this task because the recovery process is simple. The interface is easy to understand and the scan starts with almost no setup. The preview feature is especially helpful. It lets you open files before recovery and check whether they still work.
From what we see across many cases, Disk Drill usually delivers good recovery results and works with many file types and file systems. It also includes useful features such as clear scan results and the option to create a byte-to-byte backup of the drive before scanning. This lets you work with a backup image instead of the original disk, which helps protect the data during recovery.
Here’s how the actual recovery process looks like:
- Download Disk Drill. Install it on a different drive if possible so you avoid writing new data to the affected disk.
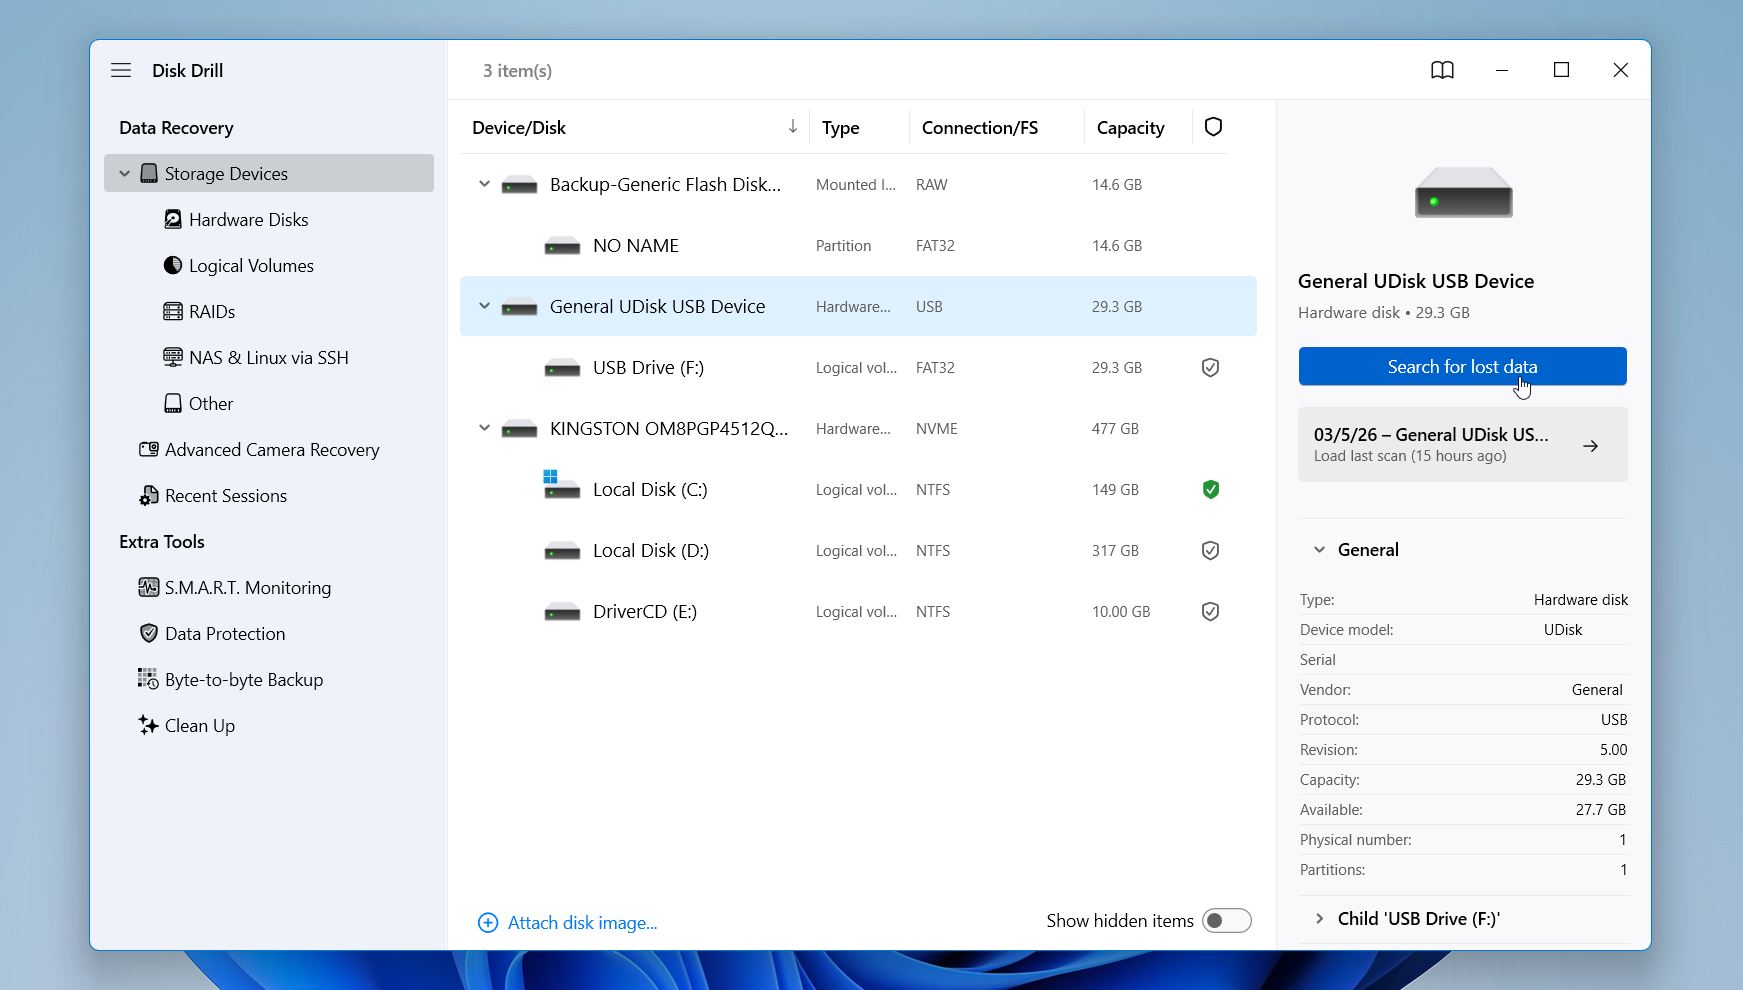
- Launch the program and choose the drive where the overwritten file was originally stored. Click Search for lost data to start the scan.
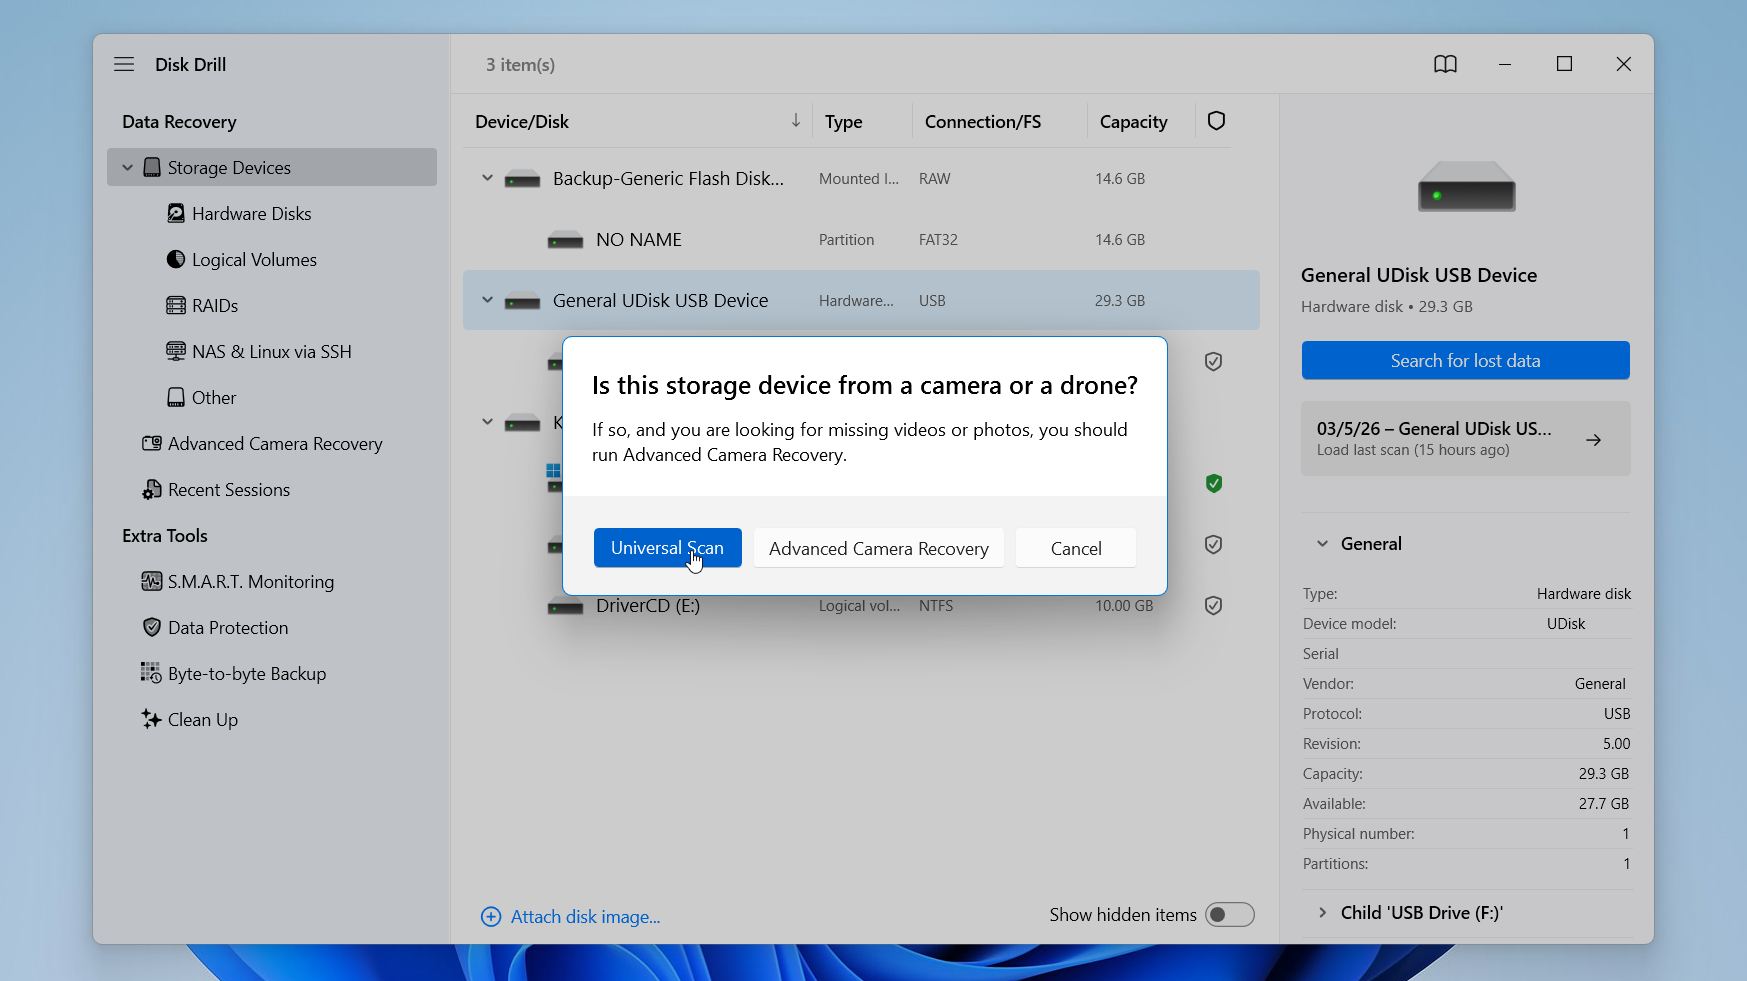
- Disk Drill may ask you to choose a recovery mode. For overwritten files, we recommend Universal Scan, since Advanced Camera Recovery is designed for fragmented video files created by cameras and drones. So it is usually not necessary in this situation. If no prompt appears, the scan will start automatically.
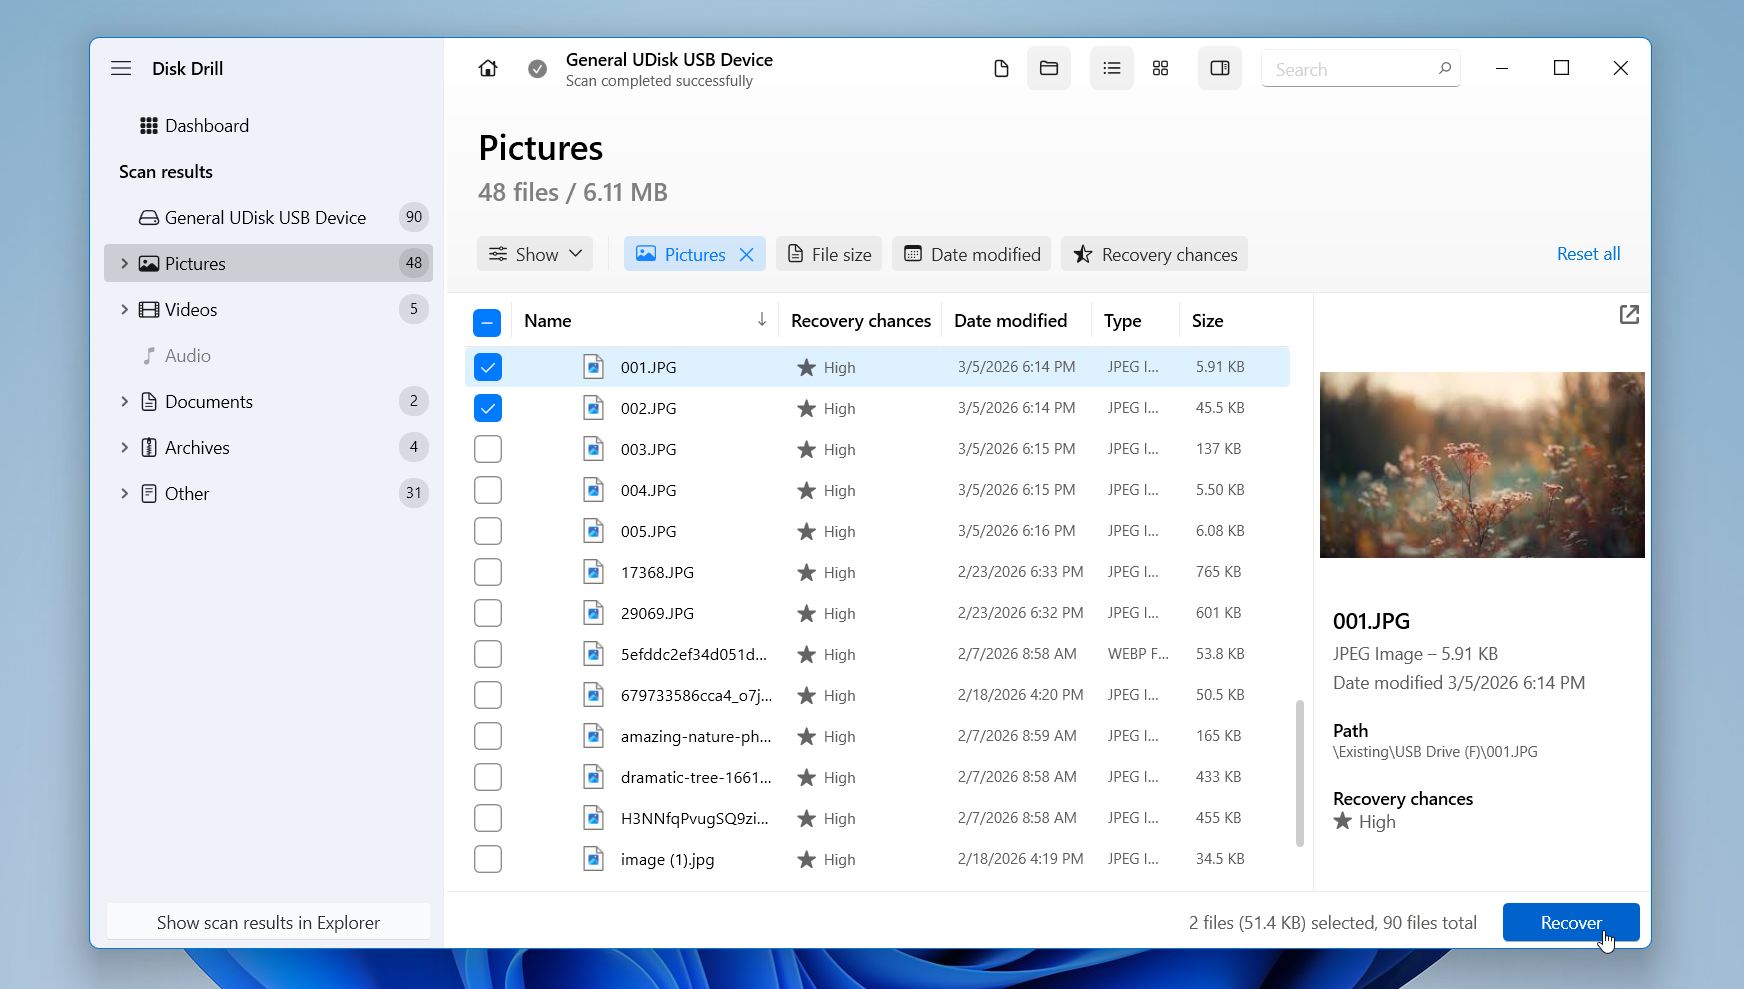
- Disk Drill will analyze the drive and display its progress at the top of the window. The time depends on the size of the drive. Click Review found items to see the results.
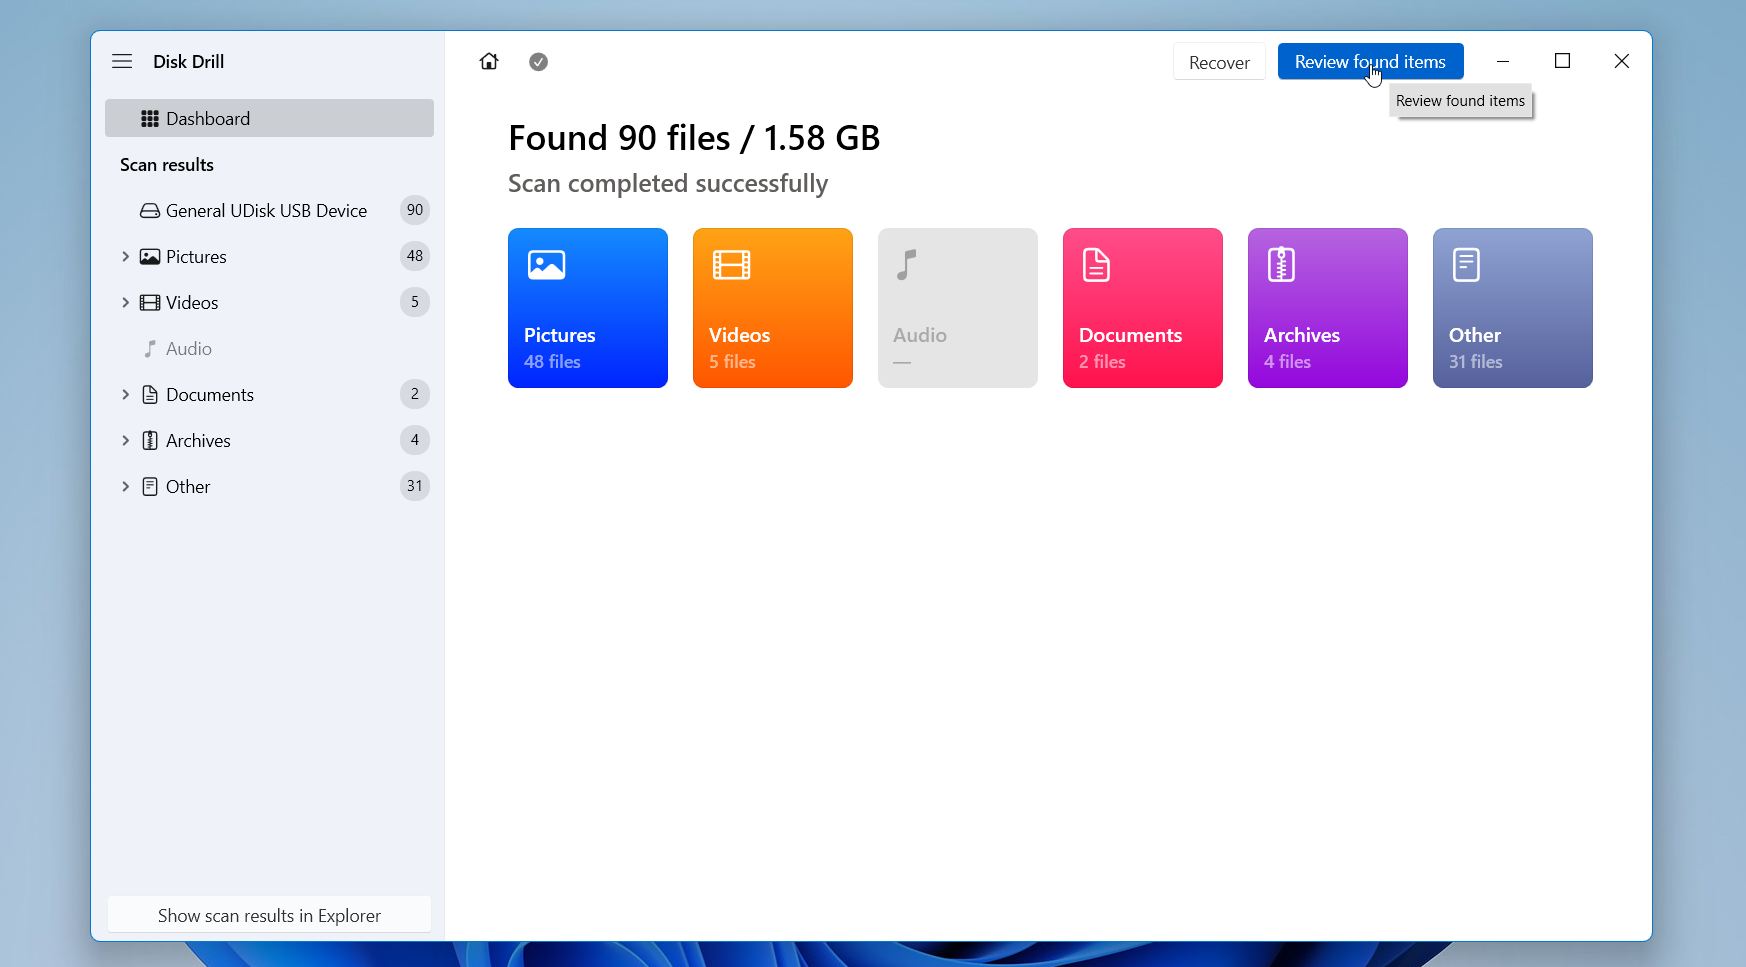
- Disk Drill groups files into categories such as Pictures, Videos, Documents, and others. You can also use filters or the search bar to narrow the list. Select a file to open the preview panel. This helps confirm that the file still opens correctly before recovery.
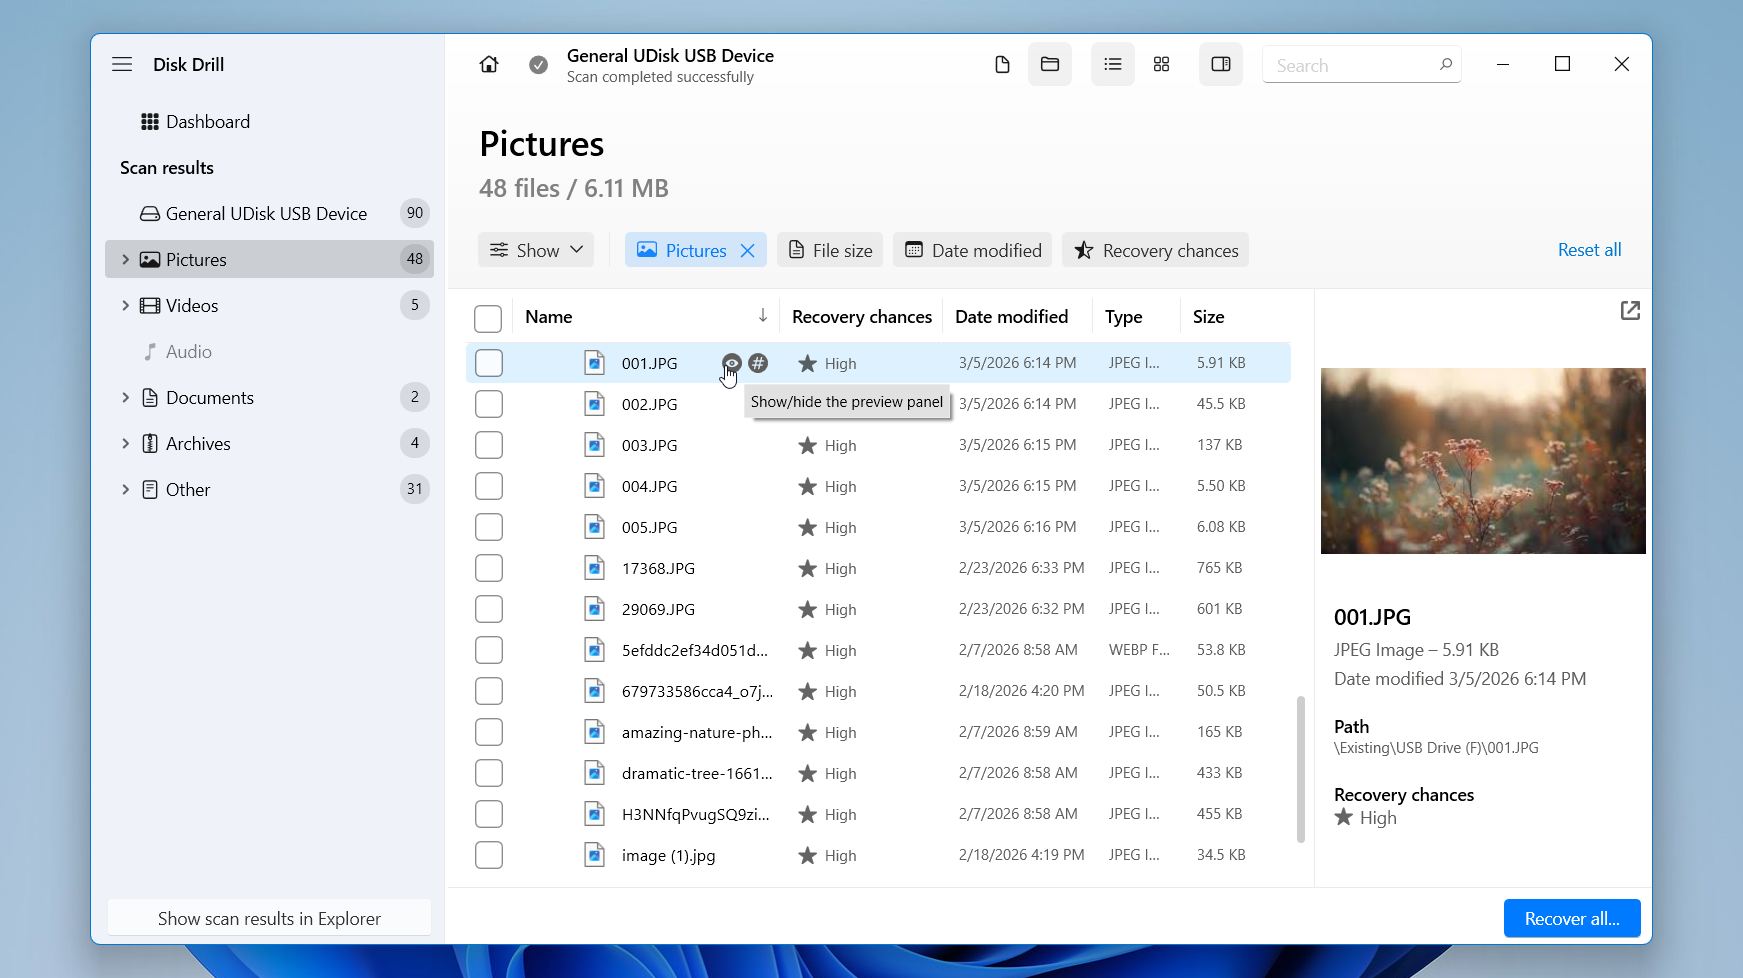
- Check the boxes next to the files or folders you want to restore, then click Recover.
- Select a destination on a different drive or folder. Avoid saving recovered files to the same drive to prevent overwriting other recoverable data.
Disk Drill for Windows currently restores up to 100 MB of data at no cost. The scan and preview remain unlimited, so you can fully examine what the tool finds before recovery. In many everyday situations, especially when a few documents, photos, or small folders were overwritten, that amount is usually more than enough to restore the files you need. If the recovered data exceeds that size, the paid version removes the limit and allows full recovery.
Method 2:Recover Overwritten Files Using Previous Versions
Windows has a built-in feature called Previous Versions that we find incredibly useful for recovering overwritten files. It automatically creates copies of your files either when Windows makes a restore point or at regular intervals when File History is enabled.
If there’s a recent Windows restore point or if you’ve enabled File History in the past, then you can follow these steps to recover your overwritten files:
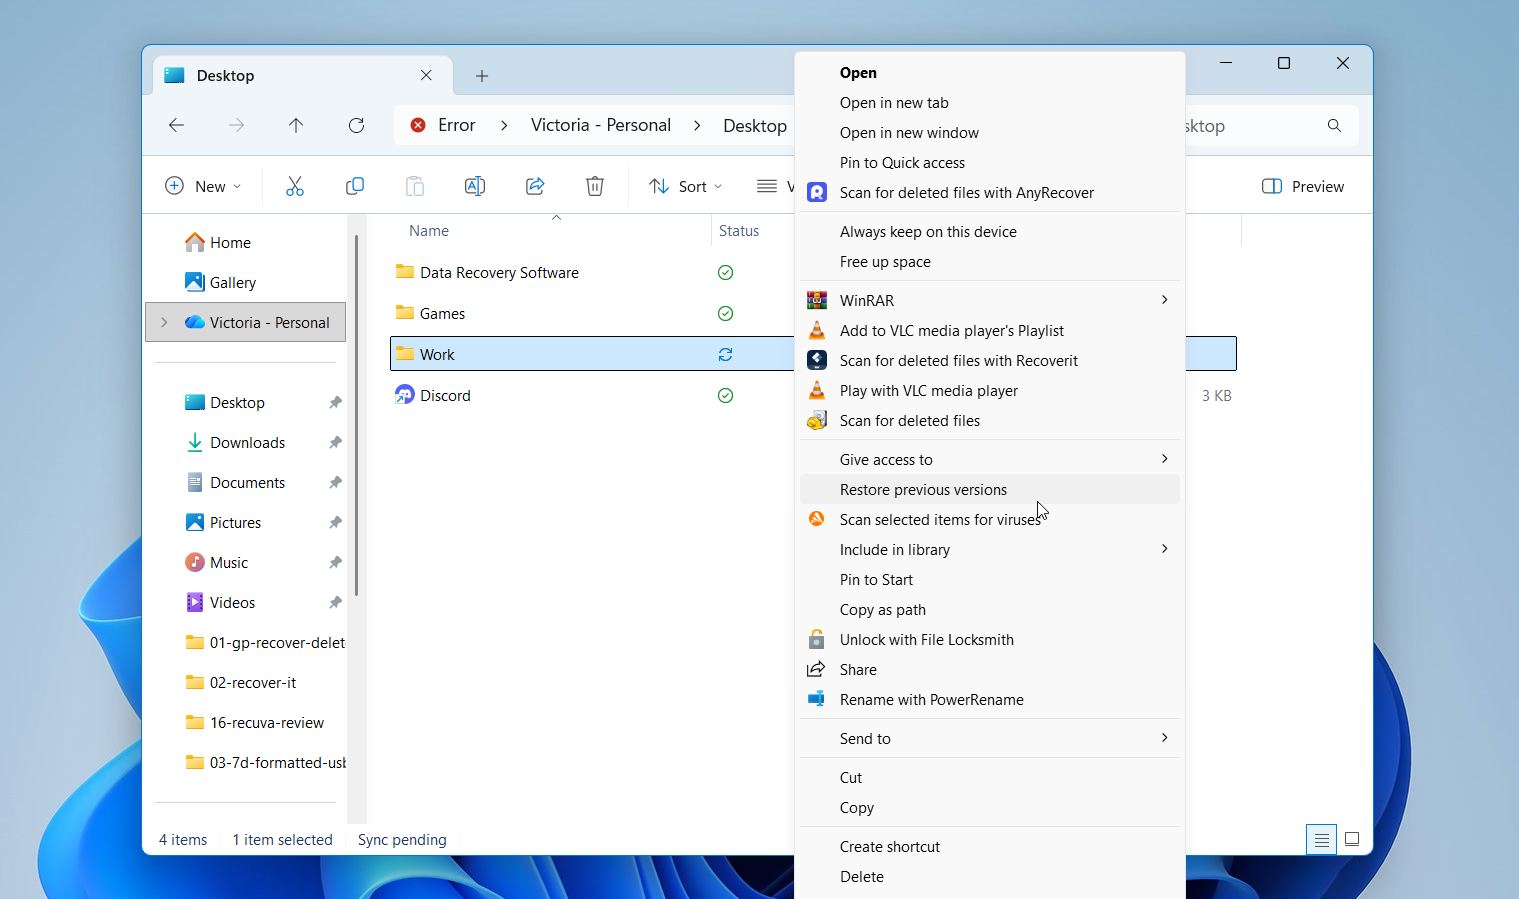
- Locate your overwritten file or folder in File Explorer.
- Right-click it and select Restore previous versions.
- A window will appear showing available previous versions. Always click Open first to preview the version and make sure it’s the one you need.

- Once you’ve found the right version, click Restore To.
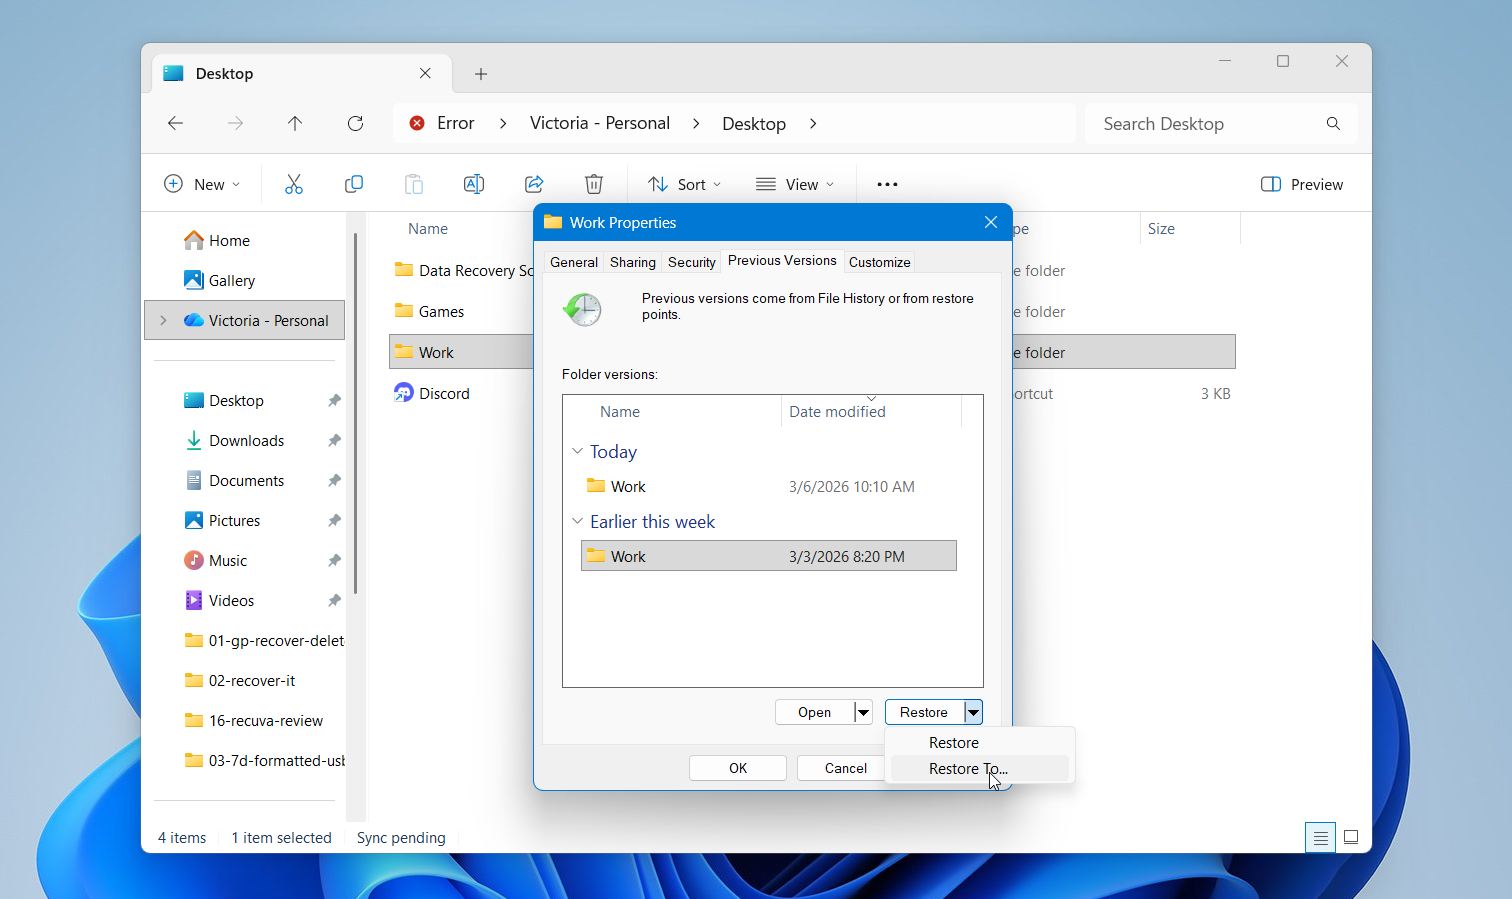
- Finally, choose a new location to save the restored file.

This method works only when File History is enabled on your Windows PC. To check, open Control Panel, go to System and Security, and select File History. There you can see whether the feature is turned on.
Method 3:Recover Overwritten Files from a Cloud Backup
Recent versions of Windows include OneDrive integration by default, and many user folders can automatically sync to the cloud through Windows Backup. As a result, more users now benefit from automatic cloud backups without setting up a separate system.
One useful advantage of this setup is file version history. OneDrive keeps track of changes made to your files, which allows you to restore earlier versions if a file gets overwritten.
To recover an overwritten file from OneDrive:
- Go to OneDrive.com and sign in with your Microsoft account.
- Find the overwritten file.
- Right-click the file and select Version history.
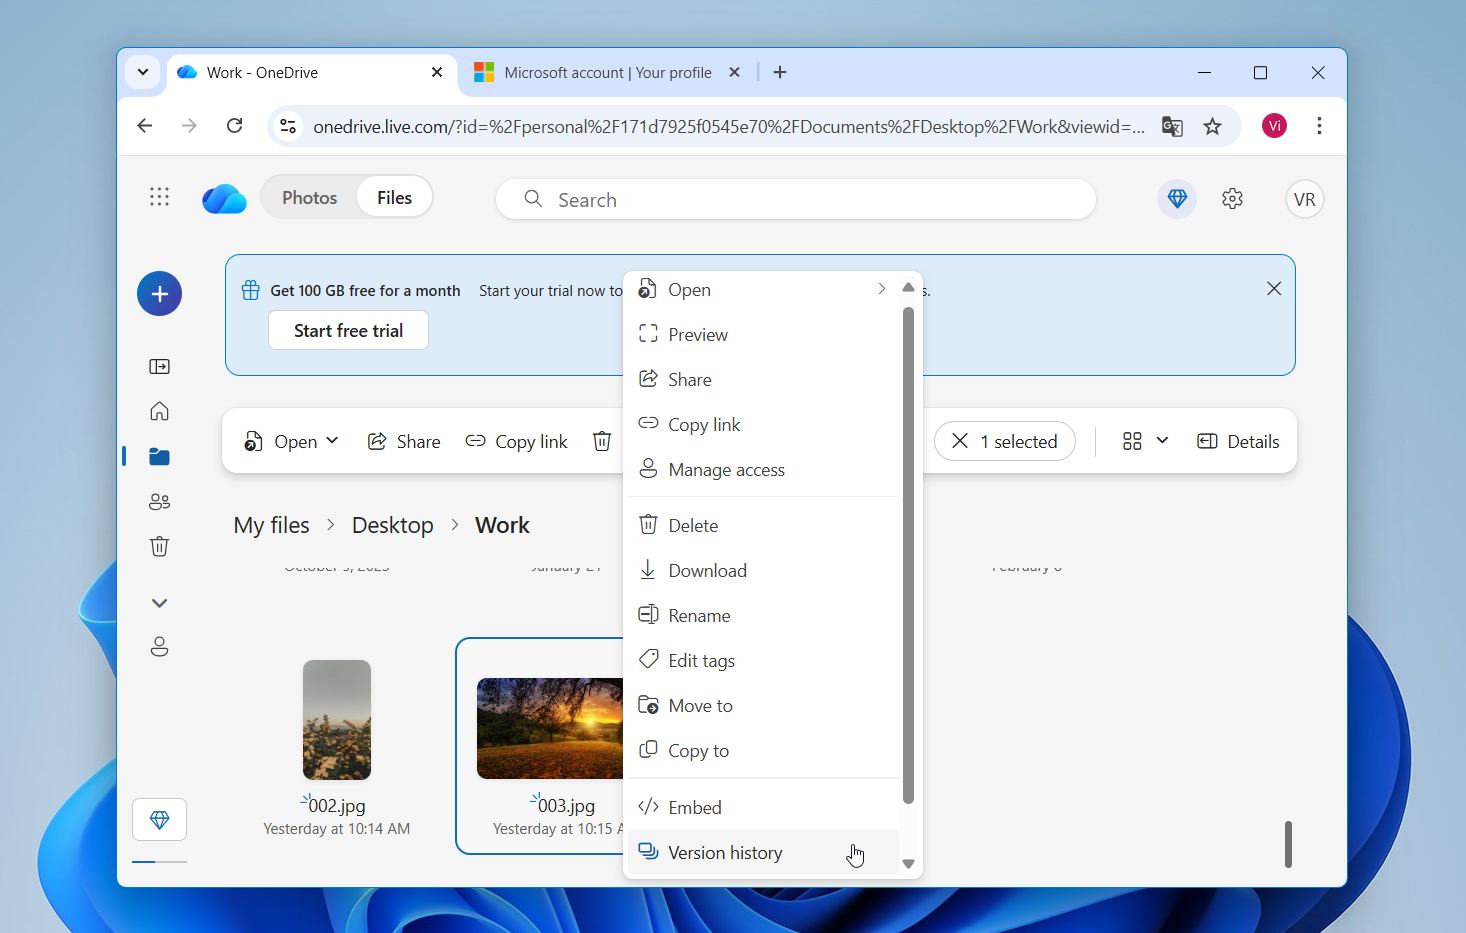
- Choose the version you want to restore.
If the OneDrive sync app is installed, you can also check version history directly in File Explorer. Simply right-click the file and select Version history. If many files were overwritten at once, OneDrive also offers Restore your OneDrive, which can roll your entire OneDrive back to an earlier state within the last 30 days (for Microsoft 365 subscribers).
Method 4: Use Built-In Backup Features in Your Applications
Many modern applications include built-in backup systems that save temporary copies of your work automatically. Programs such as Microsoft Office, Adobe Creative Cloud, and AutoCAD often create these versions in the background while you work. In some situations, those saved copies allow you to restore an earlier state of a file even after it has been overwritten.
Most applications enable these features by default, but we usually suggest checking the settings to confirm they are active. The exact steps vary between programs, but the general idea remains the same. The software keeps short-term backups and lets you reopen them if something goes wrong.
Microsoft Word can create temporary backup files while you work. In some situations, these files may contain an earlier version of a document that was later overwritten.
To check for these files:
- Open Microsoft Word.
- Click Options, and select Save.
- Locate the AutoRecover file location field.
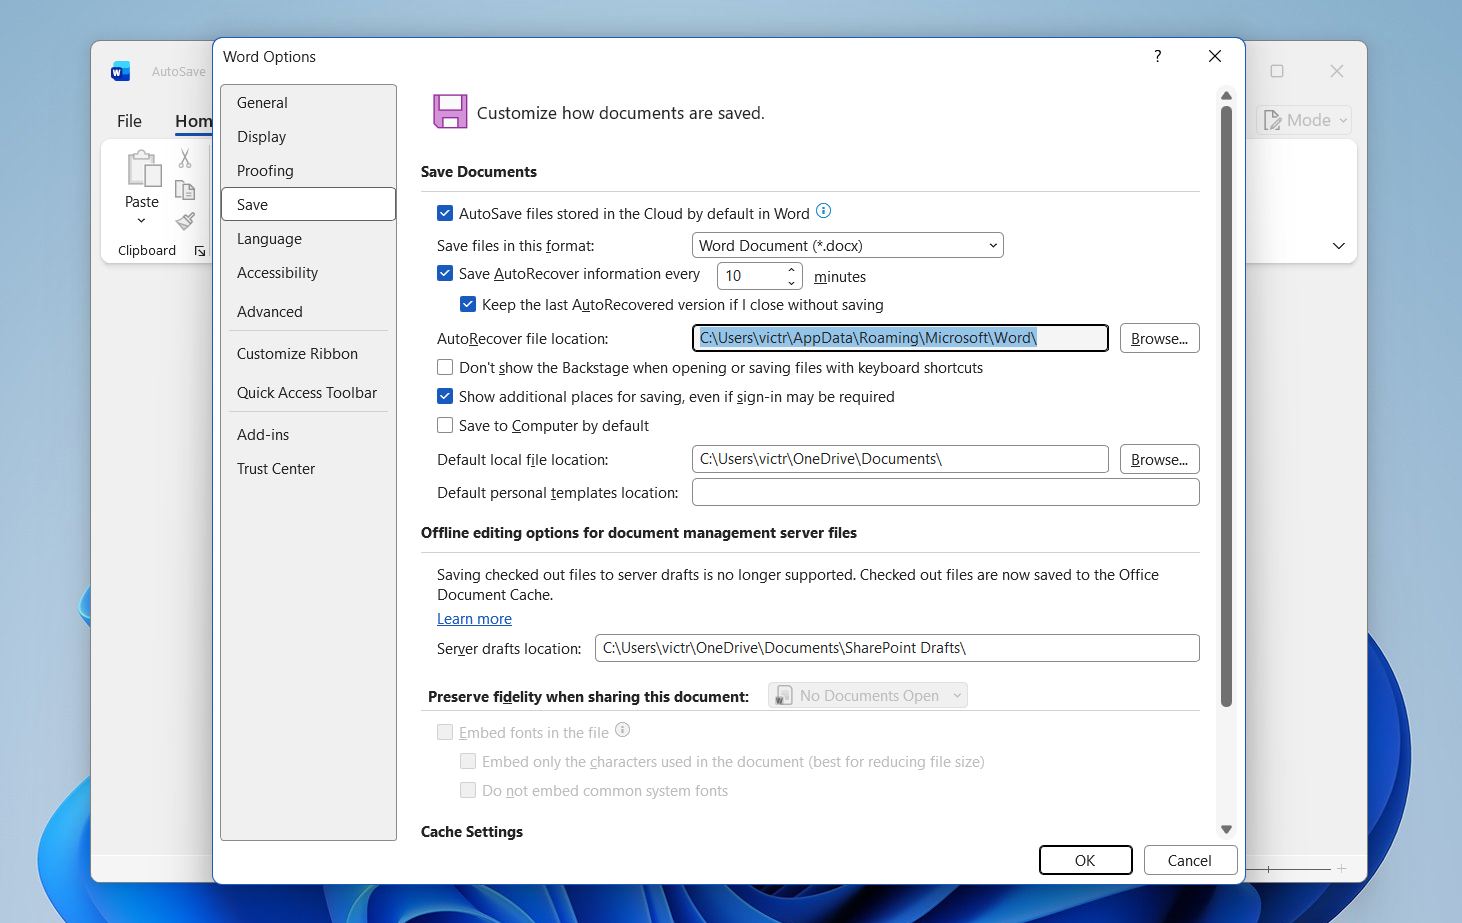
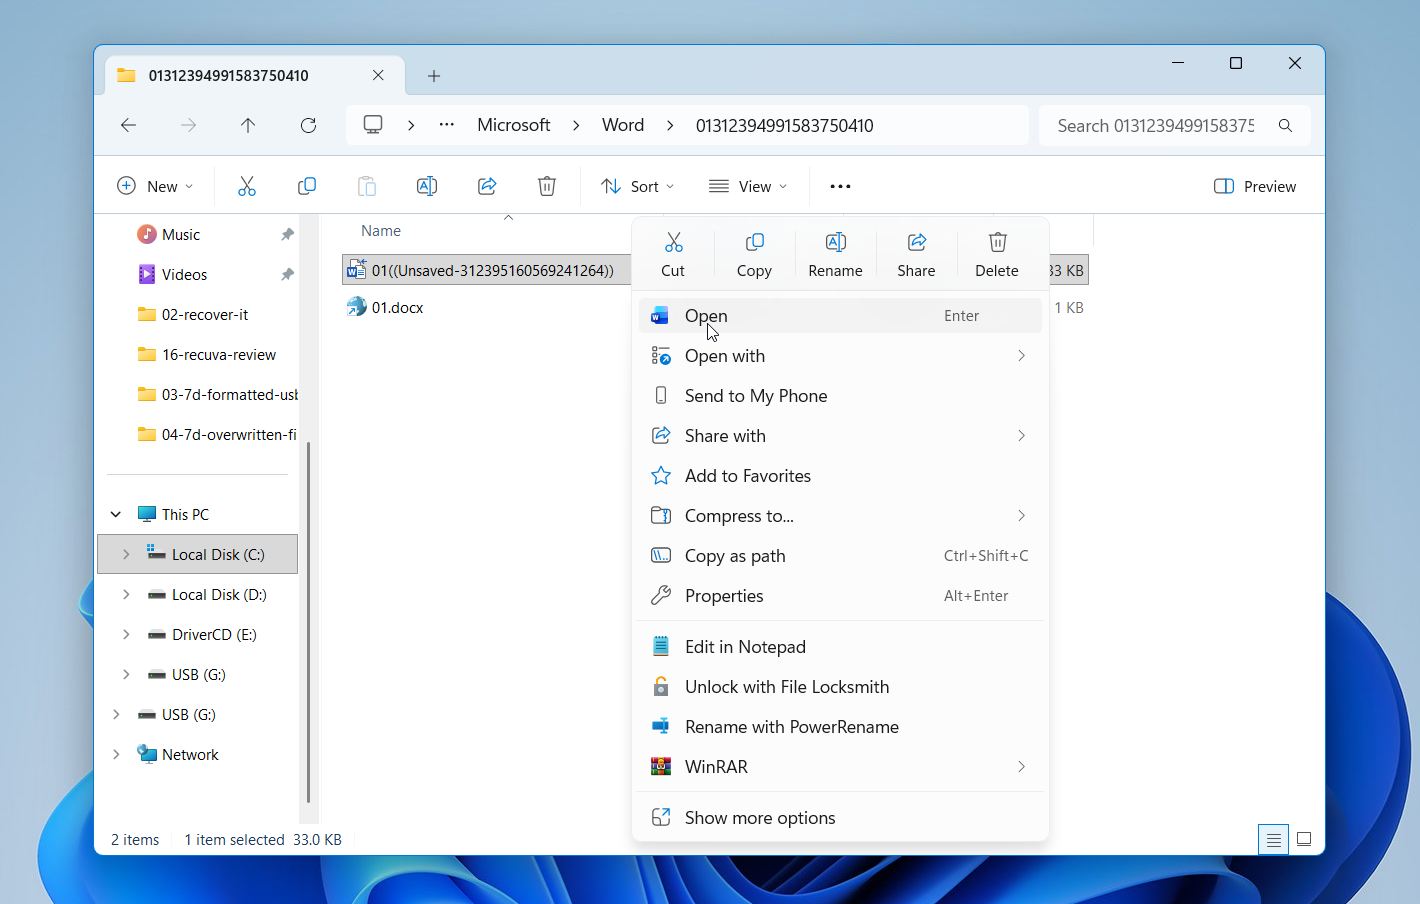
- Open that folder and look for temporary Word files.
- Try opening them in Word to see if any contain an earlier version of your document
💡 Pro Tip: If you use Microsoft 365, enable AutoSave so your work saves continuously to OneDrive.
Final Words
So, can overwritten files be recovered? Yes, your data is not always gone immediately. In many cases, recovery remains possible. This means you can still try to recover it using the methods we advised as long as the storage space has not yet been reused by new data. Even when recovery does not succeed, situations like this highlight the value of regular backups. Features such as Windows Backup, OneDrive synchronization, or File History can turn what looks like permanent data loss into a quick file restore.


