
Two extra keystrokes. That’s all it takes to skip the Recycle Bin and permanently delete a file on Windows. It is great for decluttering, until you accidentally Shift+Delete something you actually needed. Fortunately, permanently deleted doesn’t always mean unrecoverable. We’ll cover the best methods to recover shift deleted files, from built-in Windows features to trusted third-party recovery tools.
Can You Recover Shift Deleted Files?
Yes, you can recover shift-deleted files in many cases, but success depends on how quickly you act and what type of storage you use.
When you use Shift + Delete, Windows removes the file from the file system and skips the Recycle Bin. The file disappears from File Explorer, but the data itself often remains on the drive. The system simply marks that space as available for new data instead of wiping it immediately.
This means recovery is still possible until new data overwrites the original file. Your chances depend on several key factors:
- Storage type matters because HDDs, USBs, and SD cards usually keep data intact longer, while internal SSDs may clear it quickly due to TRIM. On external SSDs, TRIM behavior is less predictable and depends on the file system and connection type used.
- Time since deletion affects recovery since the more time passes, the higher the risk of overwriting.
- Drive activity plays a role because installing programs, copying files, or system updates can overwrite deleted data.
- File size and type also influence results since larger files have a higher chance of partial overwrite, which can affect recovery quality.
- Fragmentation can also impact results. On HDDs, large files may be split across different areas of the disk. Recovery works best when metadata is intact, because it helps reconstruct the file correctly. Signature-based recovery may return a damaged or incomplete file in such cases.
Recovery becomes a race against time. That is why it is important to stop using the affected drive and start recovery as soon as possible.
6 Methods to Recover Shift Deleted Files
Let’s go through five methods that can help you recover shift-deleted files on Windows, even without advanced technical experience. We present the methods in order based on reliability and ease of use, starting with the ones that usually deliver the best results. This approach helps you focus on the most reliable options first and improves your chances of successful recovery without unnecessary steps.
Method 1:Recover Files with Professional Data Recovery Software
This is usually the most reliable approach and, in most cases, the best place to start. It doesn’t require any prior backups or preparation, and it works in a wide range of scenarios, including shift-deleted files
There are many data recovery tools available, but we recommend Disk Drill due to its strong recovery performance, broad file format support (including hundreds of file signatures), and clear workflow that makes it easier to verify files before recovery.
To recover shift-deleted files on Windows using Disk Drill, do the following:
- Download Disk Drill for Windows. Make sure to download and install it on a different drive than the one containing your deleted files.
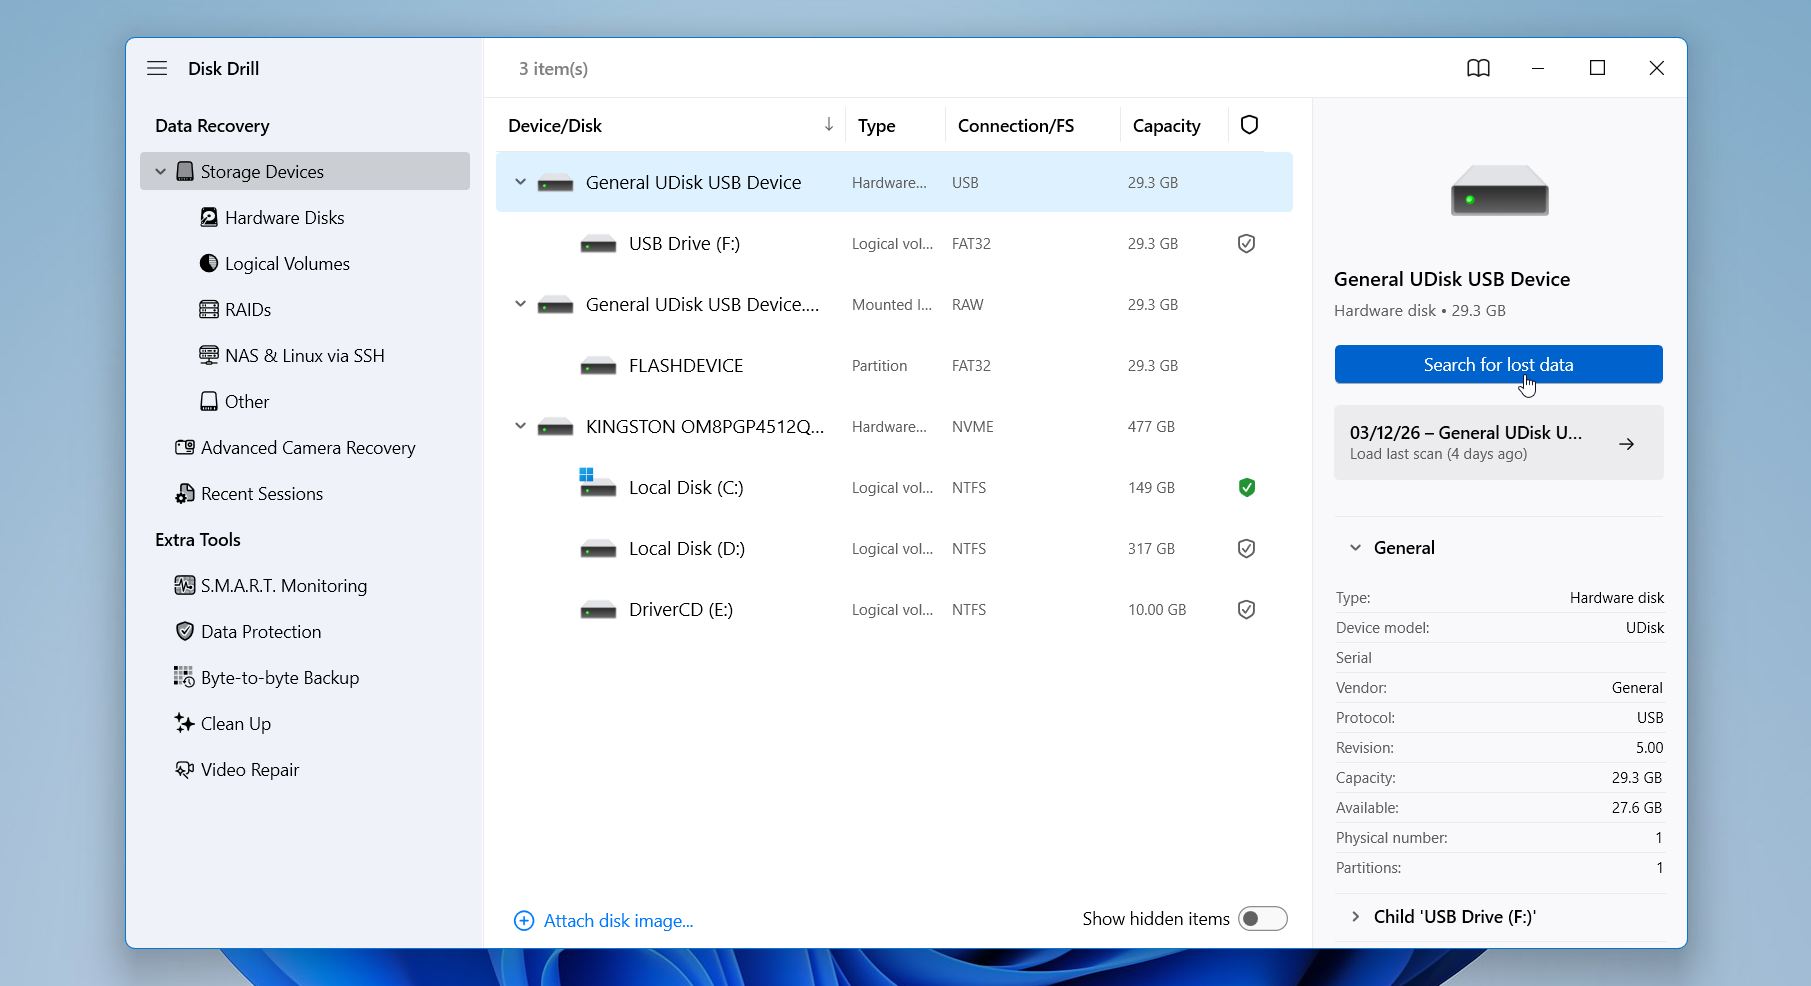
- After the installation, launch Disk Drill. Select the storage device from which you want to recover shift deleted file and click the Search for lost data option on the right side of the app.
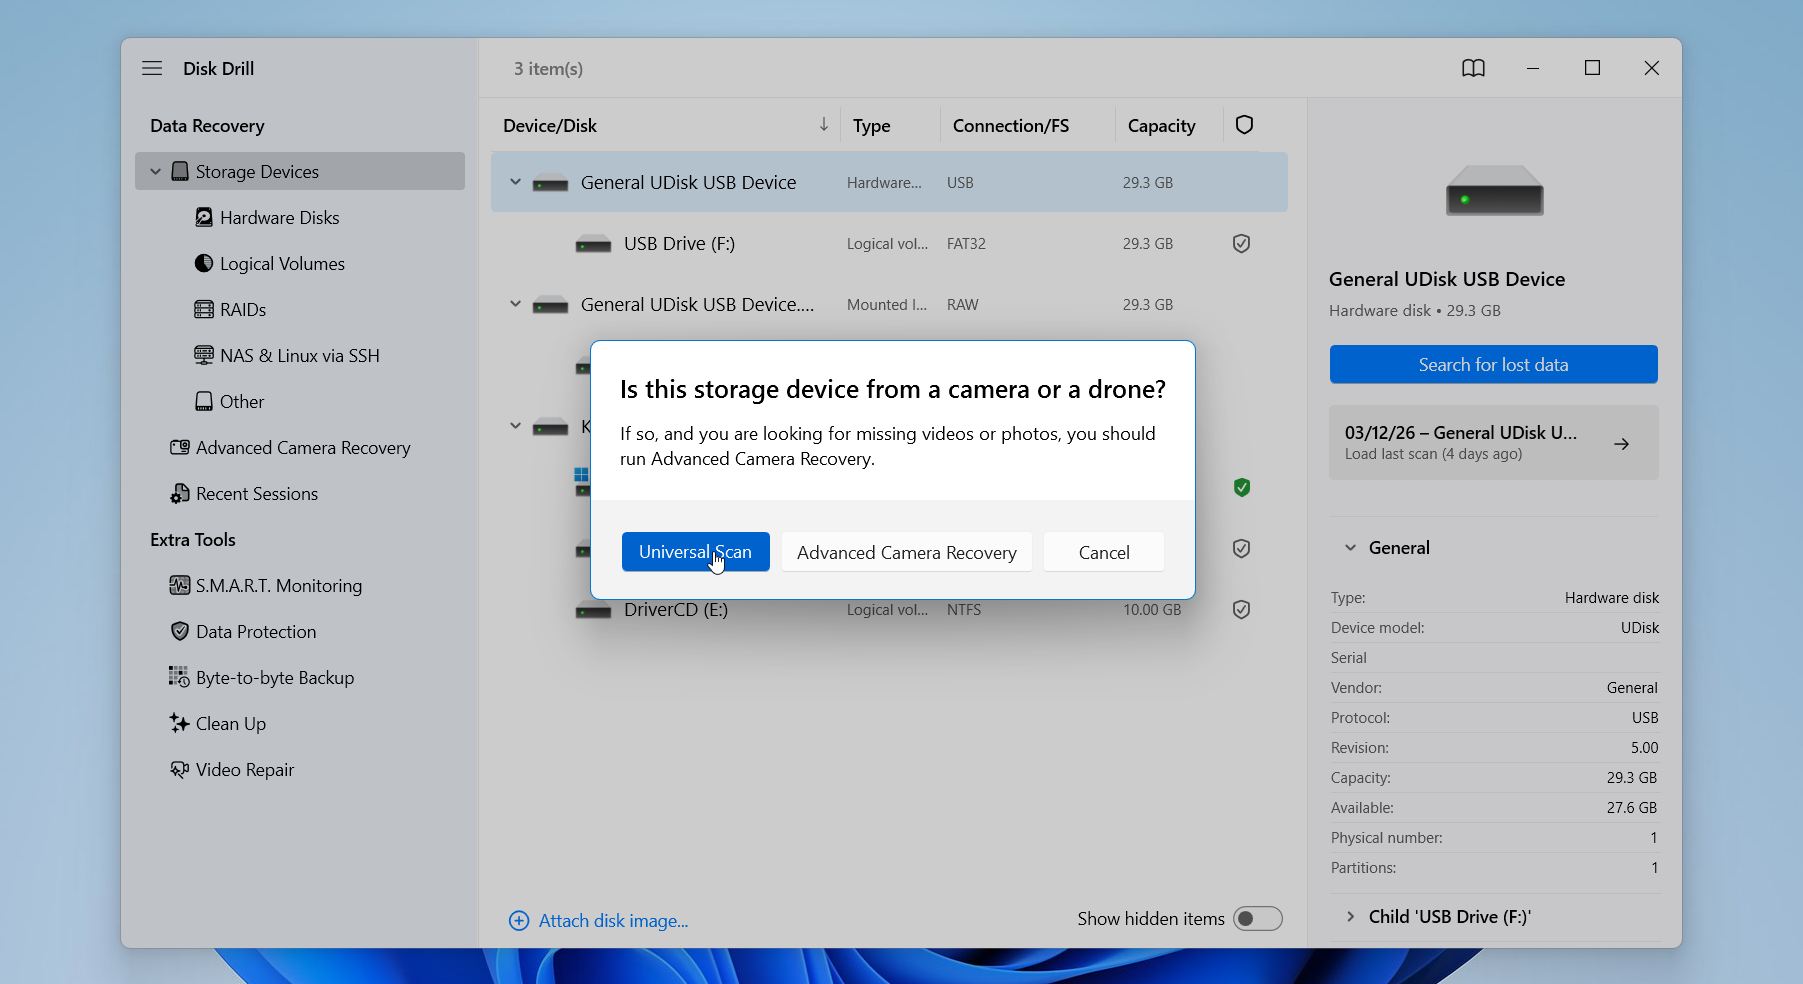
- Disk Drill may ask you to choose the recovery mode. Disk Drill may ask you to choose the recovery mode. Select the Universal scan. If the video files in the results appear damaged or incomplete, try Advanced Camera Recovery instead.”
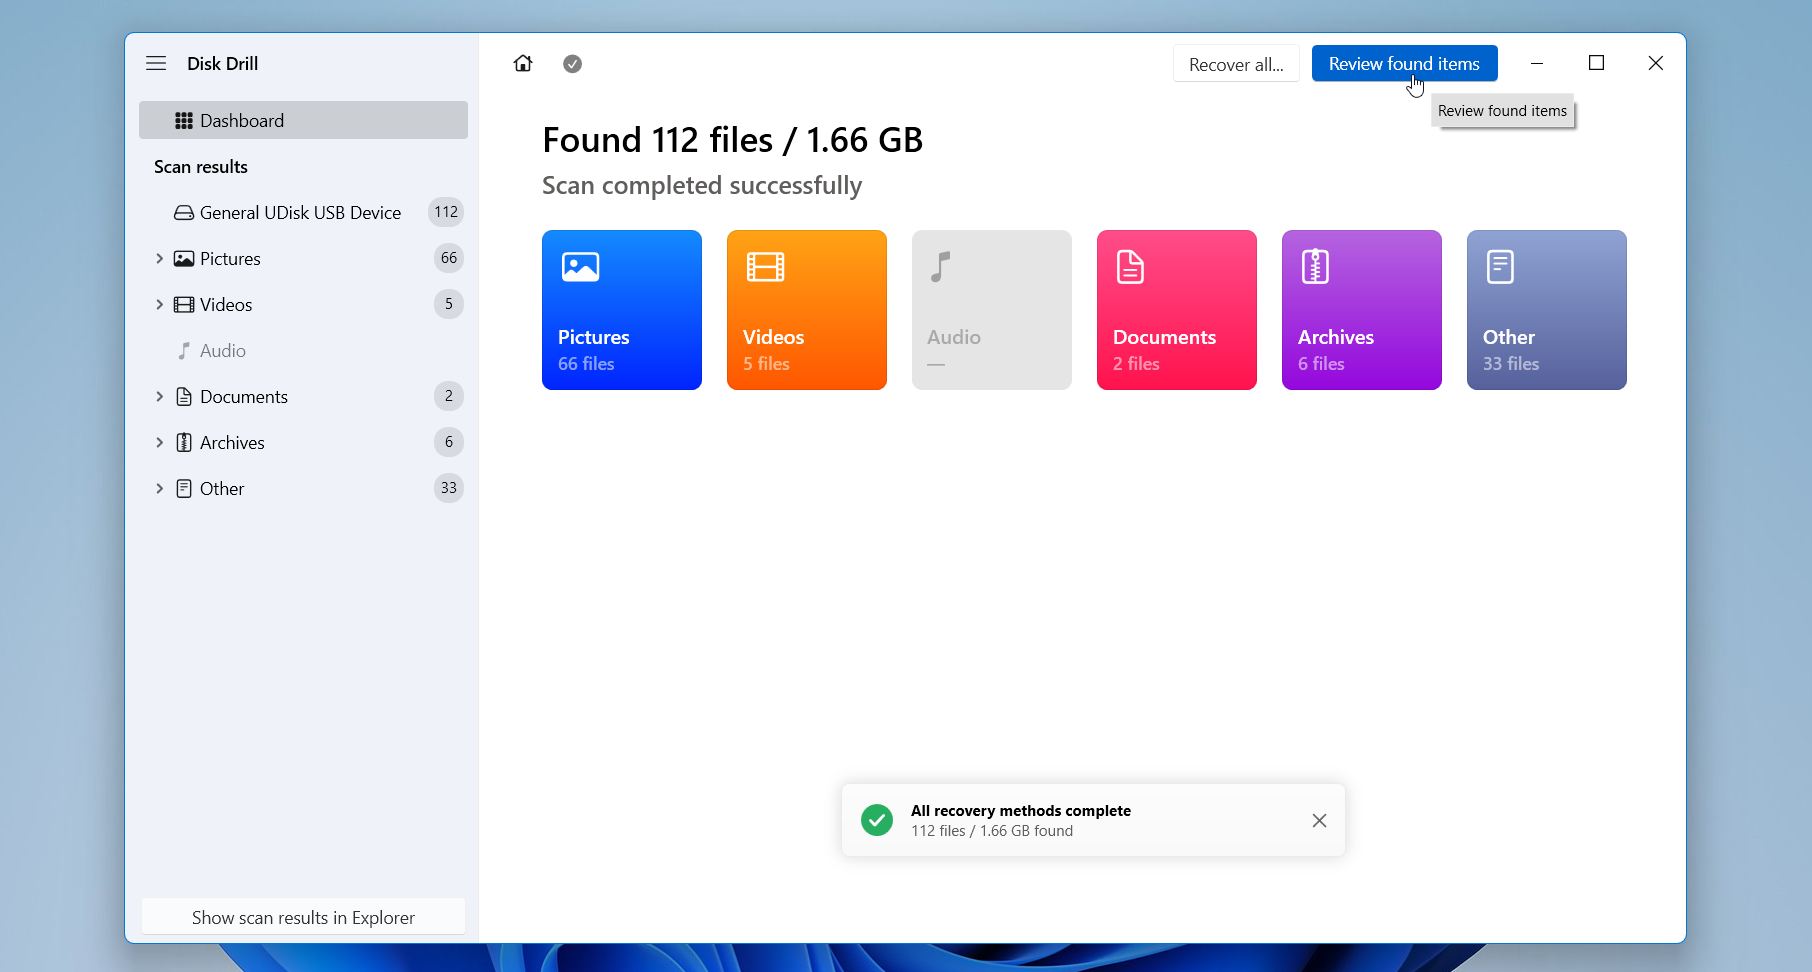
- Wait a few moments until Disk Drill finishes a full scan of the storage device. Select Review found items.
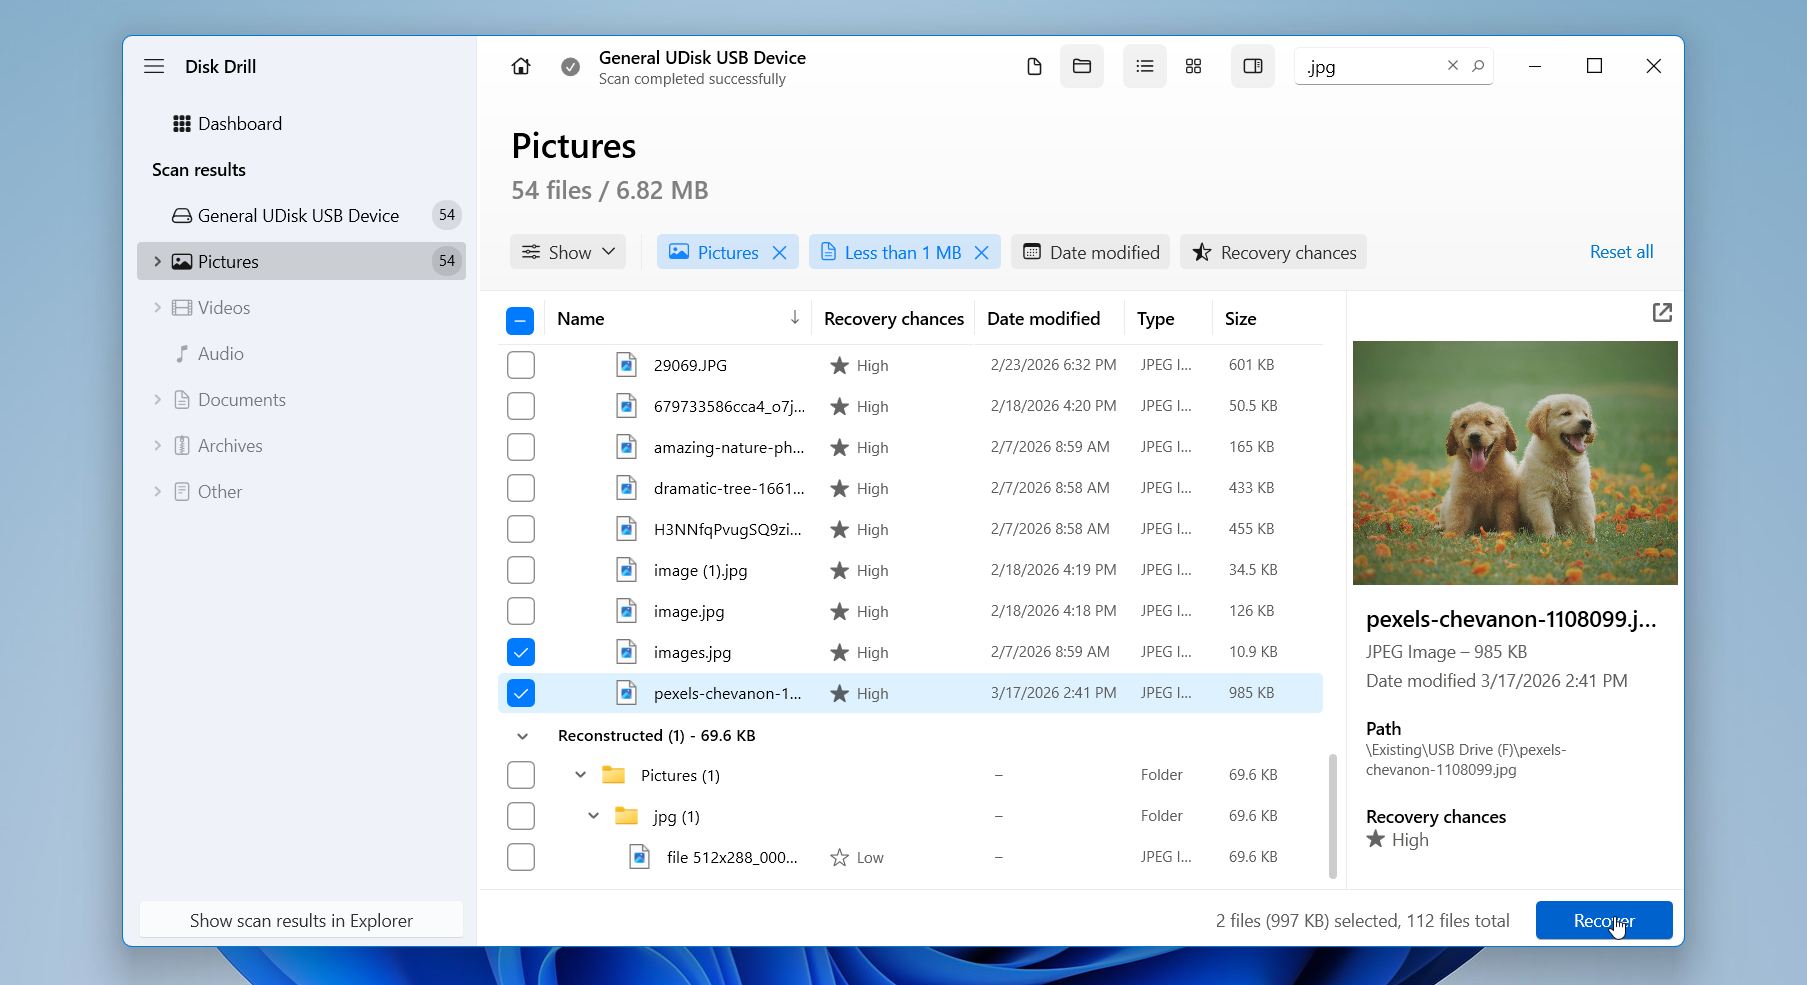
- Use filters and the search bar to locate missing files if needed. Disk Drill also lets you preview files before recovery. If a file opens and displays correctly in preview, it is a strong indication that the data can be successfully recovered.
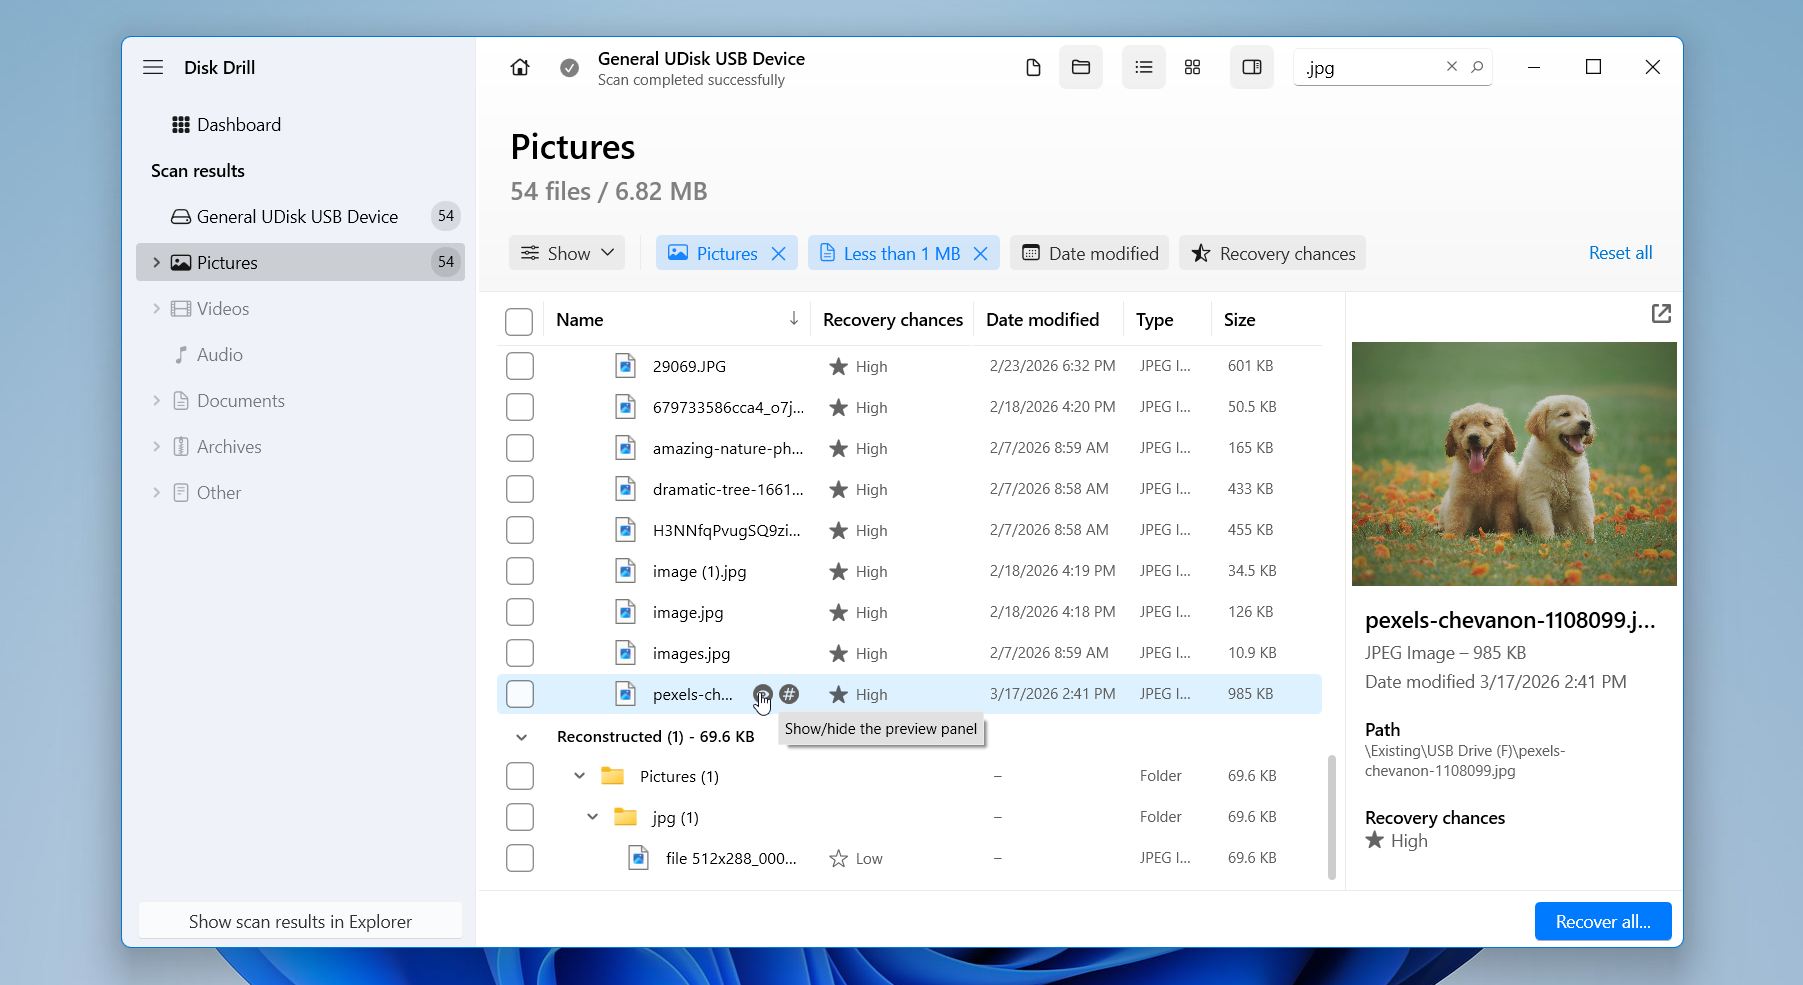
- Select the files you need and click Recover.
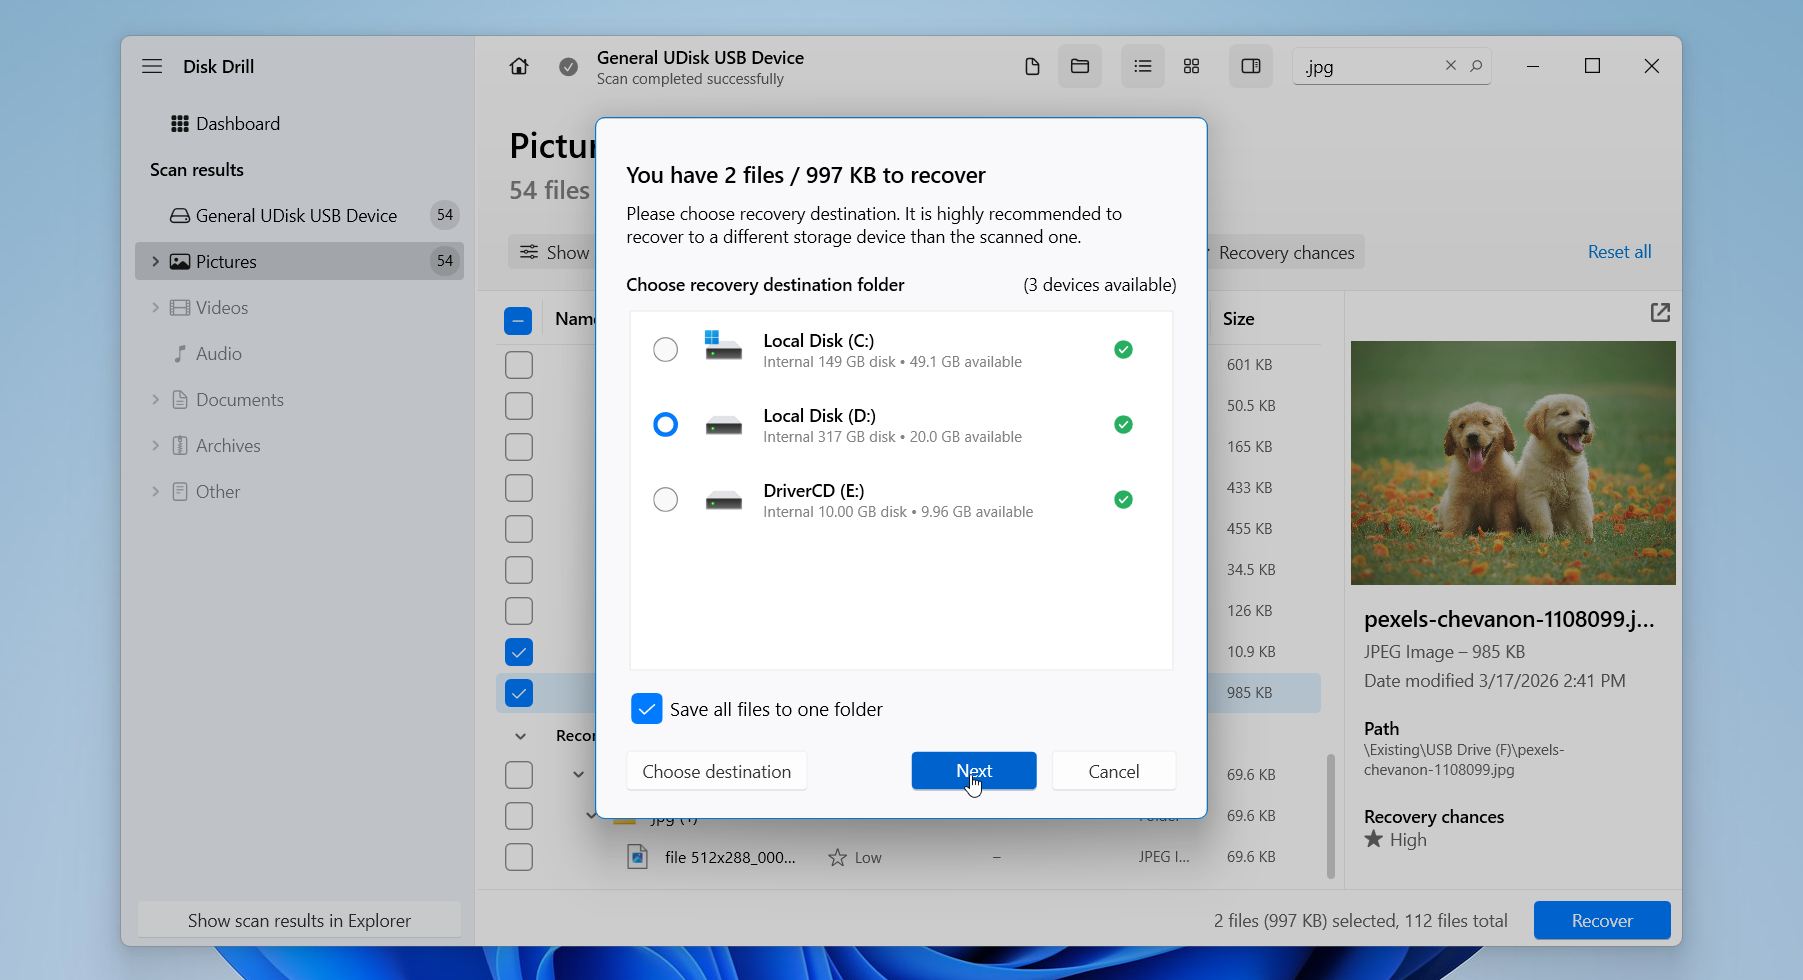
- Choose a recovery destination on a different drive to avoid overwriting and click Next.
Disk Drill offers up to 100 MB of free recovery on Windows, which is enough to test the software and even recover a decent number of smaller files such as documents or photos. Beyond that, it includes useful features like byte-to-byte backups, SMART monitoring, a data protection module to help prevent future data loss, and support for hundreds of file formats, which makes it a strong option for more complex recovery cases as well.
Method 2: Use OneDrive Recycle Bin
Do your files sync with OneDrive? In that case, a shift-deleted file may still exist in the cloud, even though it disappeared instantly from your computer.
When you use Shift + Delete on a synced folder, Windows removes the file locally, but OneDrive processes this action as a deletion event and moves the file to its own online Recycle Bin instead of erasing it permanently. This creates an additional recovery solution that many users overlook.
Here is how to check One Drive and recover files:
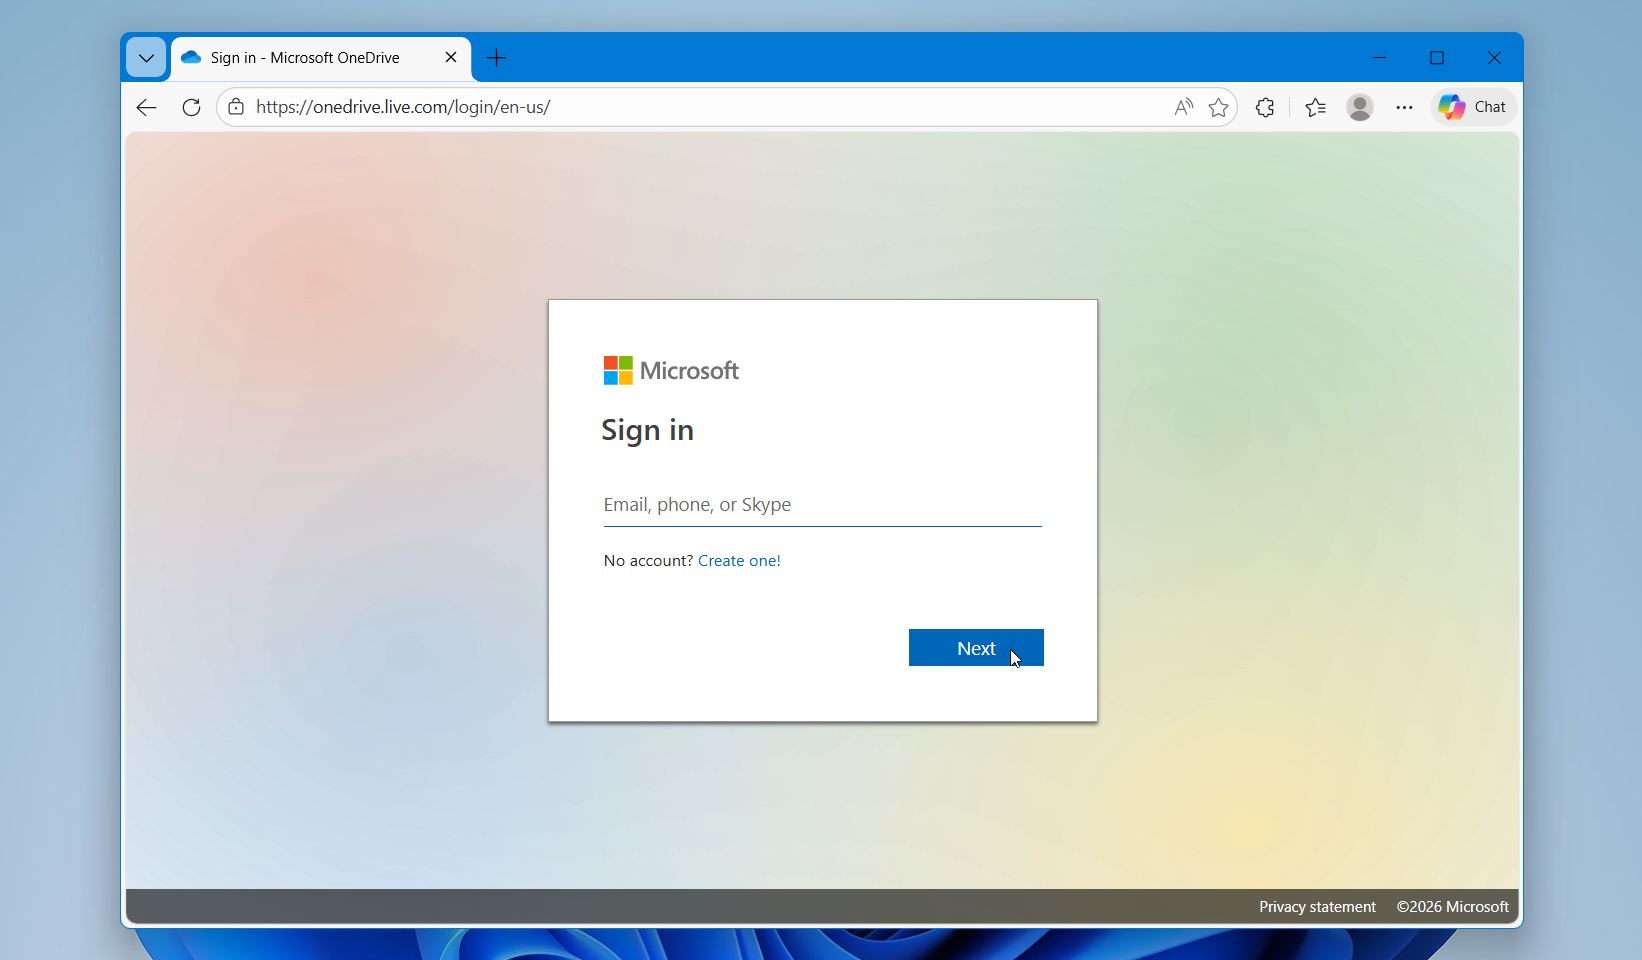
- Open the OneDrive website and sign in with the same Microsoft account you use on your Windows PC.
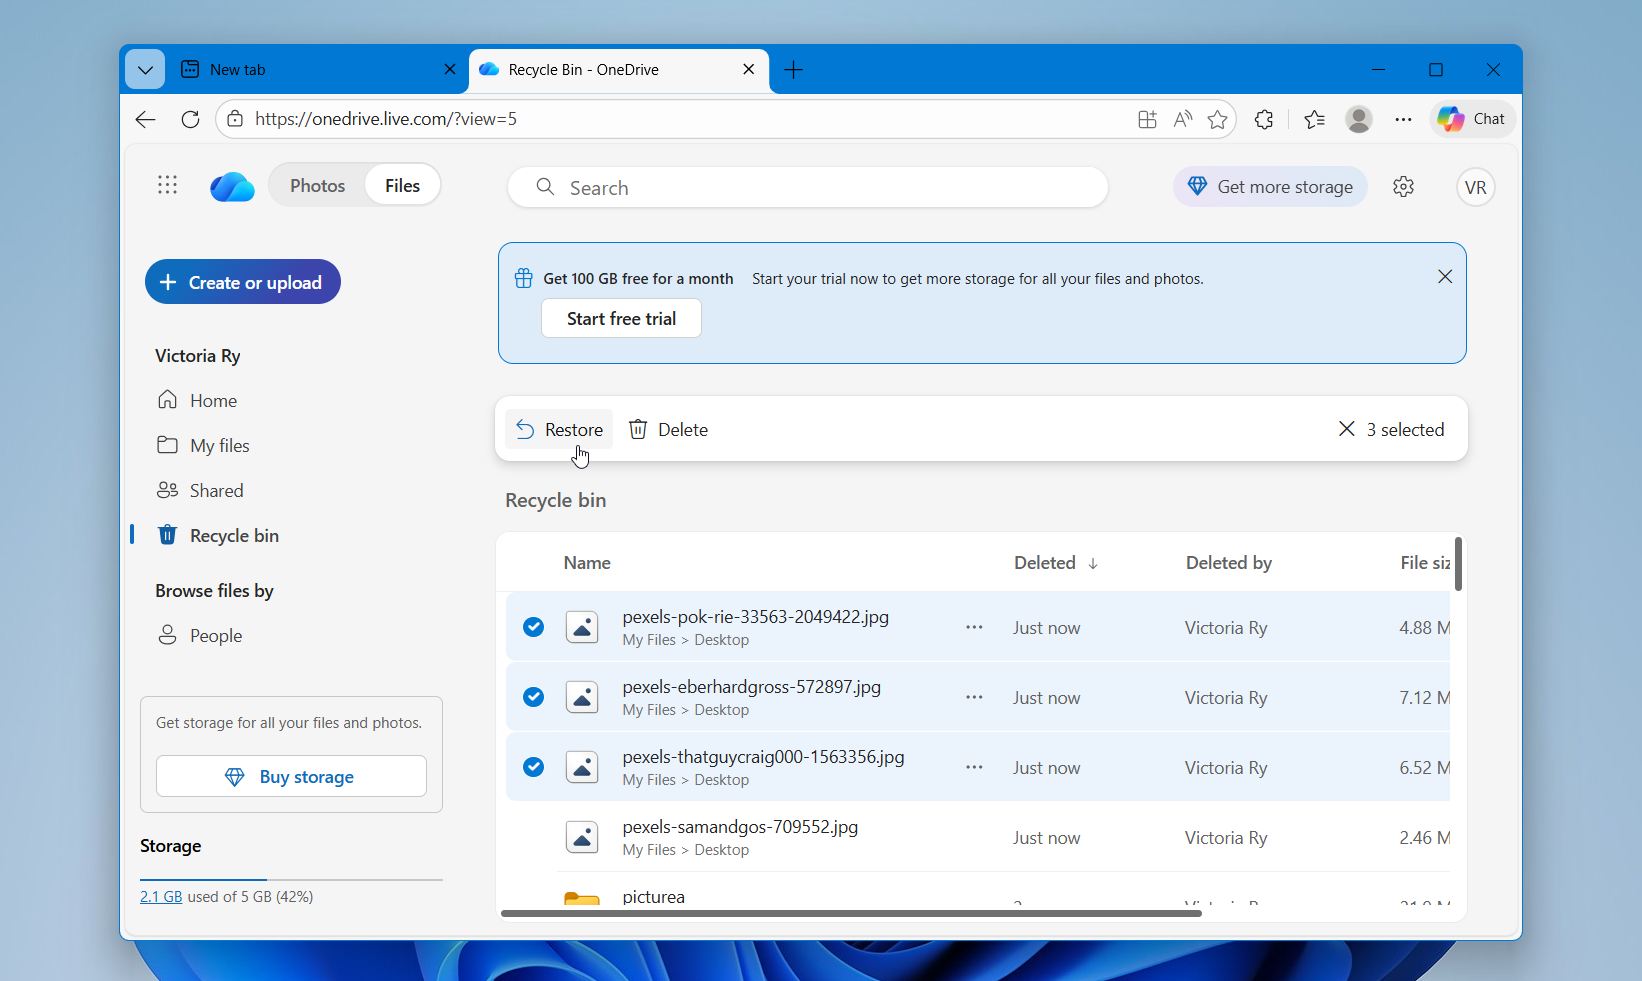
- In the left-hand menu, click Recycle bin.
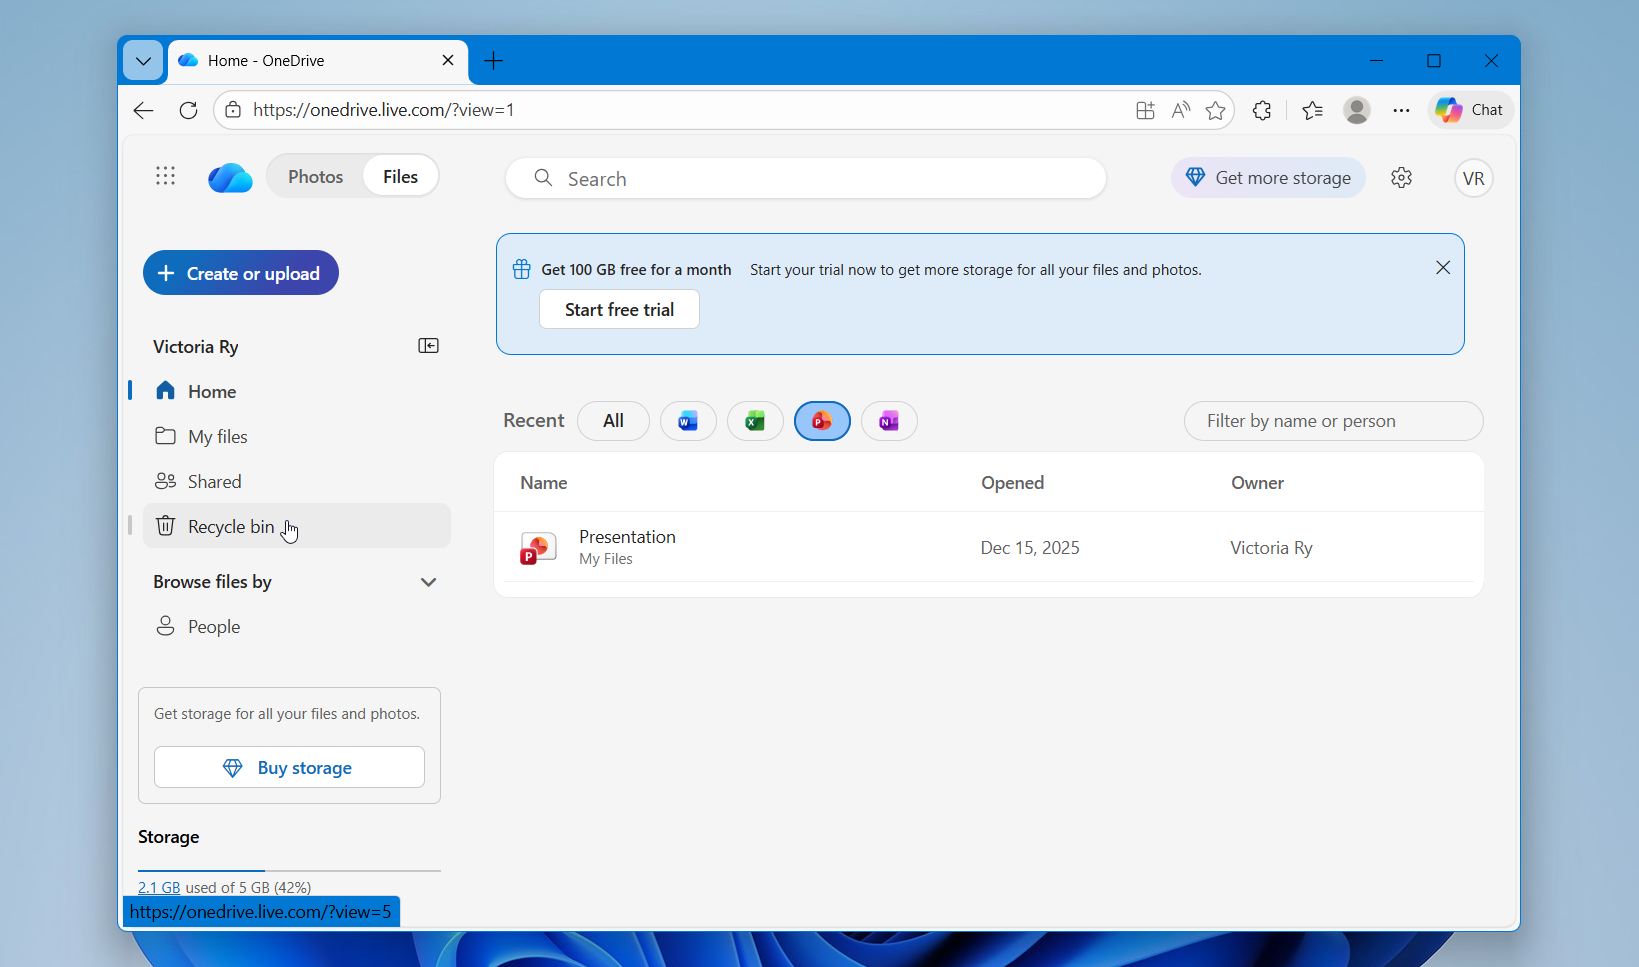
- Look through the deleted items and locate the file or folder you removed with Shift + Delete. Select the item you want to recover and click Restore. OneDrive returns it to its original location.
- Open your synced OneDrive folder in File Explorer and confirm that the restored file appears again on your PC.
Personal OneDrive accounts keep deleted files for about 30 days, or until the bin reaches its storage limit. Older items may be removed earlier if space runs out. Work or school accounts may follow different retention policies based on organization settings.
Method 3: Restore Data Using File History
The next method we recommend is File History. This is a built-in Windows backup feature that automatically saves copies of your personal files to another drive at regular intervals. It tracks changes in folders like Desktop, Documents, Pictures, and others, which allows you to restore earlier versions of files even after permanent deletion.
It works when this feature was enabled before the files were deleted. In that case, Windows keeps multiple versions of your data, so you can go back to a point in time when the files still existed.
To recover shift-deleted files directly through File History:
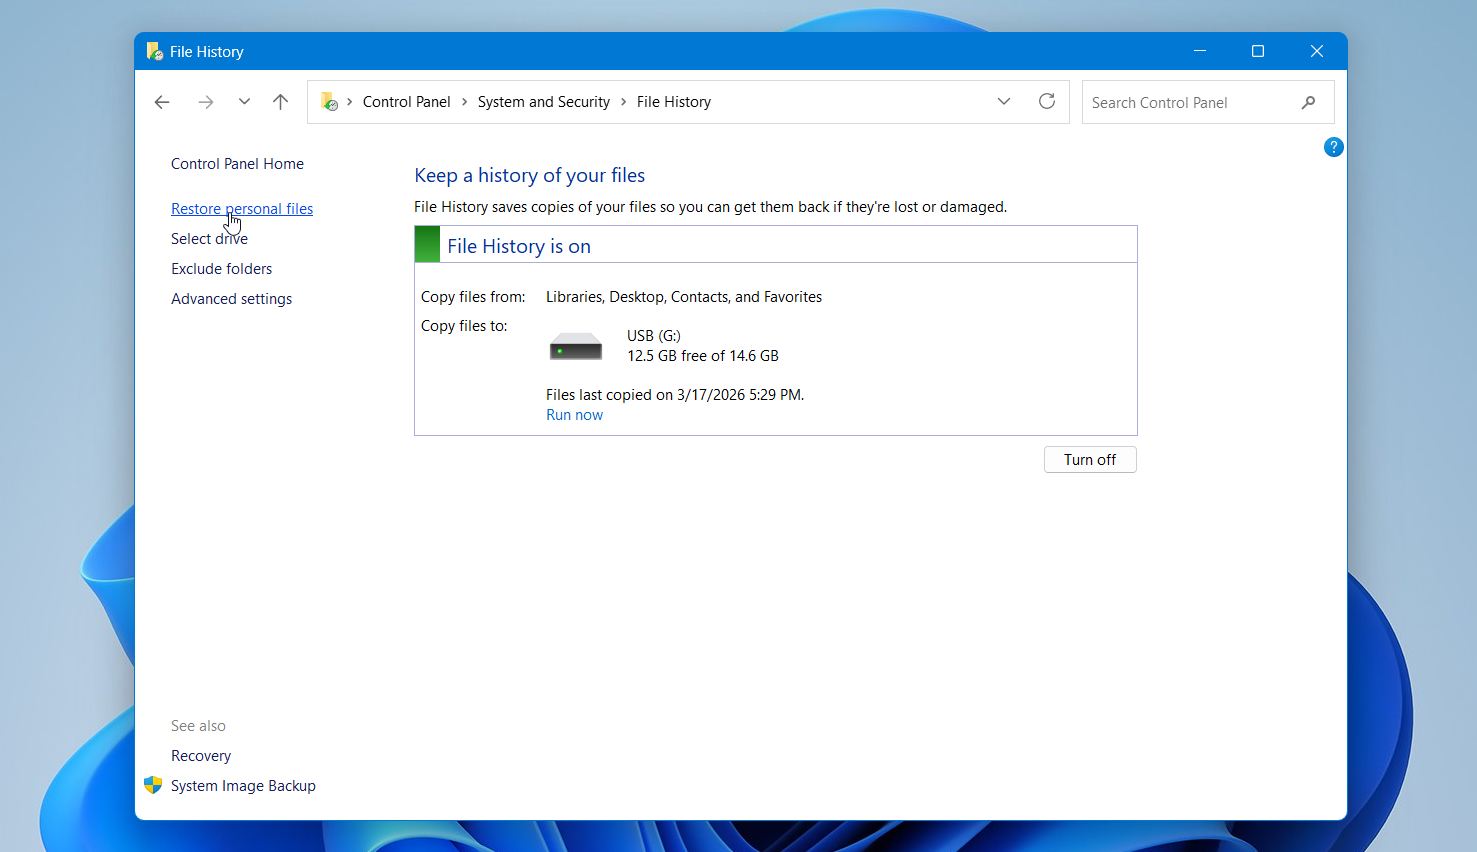
- Open the Control Panel and go to File History.
- Click Restore personal files on the left side.
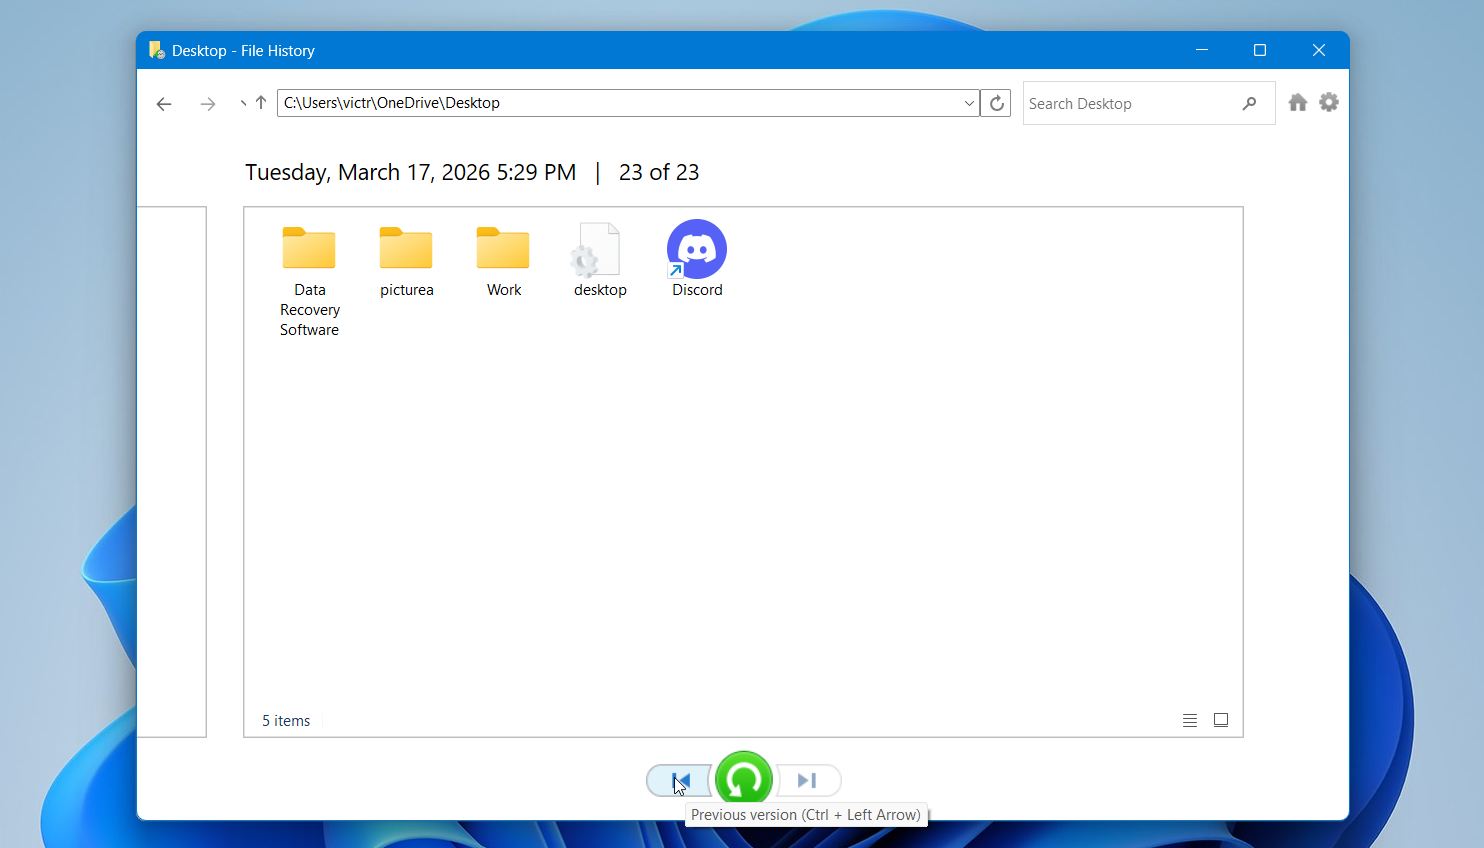
- Browse through the available folders using the arrows at the bottom to move between different backup dates. Locate the folder where your deleted files were originally stored (for example, Desktop or Documents).
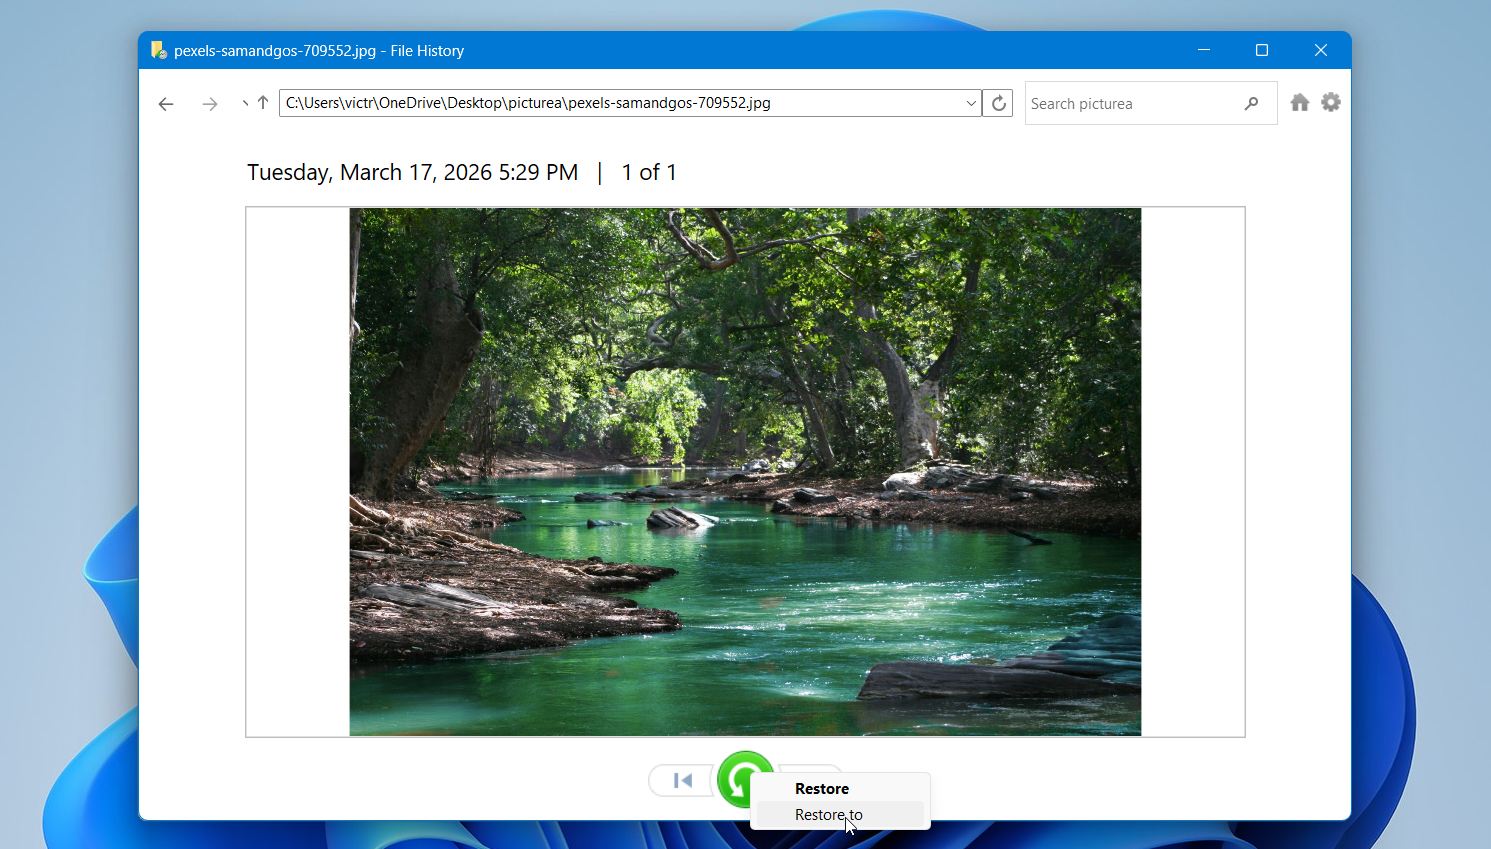
- Select the files you want to recover. Click the green Restore button to return them to their original location, or right-click and choose Restore to to save them somewhere else.
You can also recover files through Previous Versions. Right-click the folder where the files were stored, open Properties, go to the Previous Versions tab, and restore an earlier version if one is available. If you do not see your files or no backups appear, File History was likely not set up, and this method will not help in that case.
Method 4: Restore Files Using Backup and Restore
While File History is Microsoft’s newer backup solution, many users still rely on the classic Backup and Restore (Windows 7) feature. It allows you to create full backups of your files and restore them later, which makes it a valid option for recovering shift-deleted data if backups exist.
This method works only when you previously created a backup using this tool. If that is the case, you can restore files from a saved backup point.
To recover shift-deleted files using Backup and Restore:
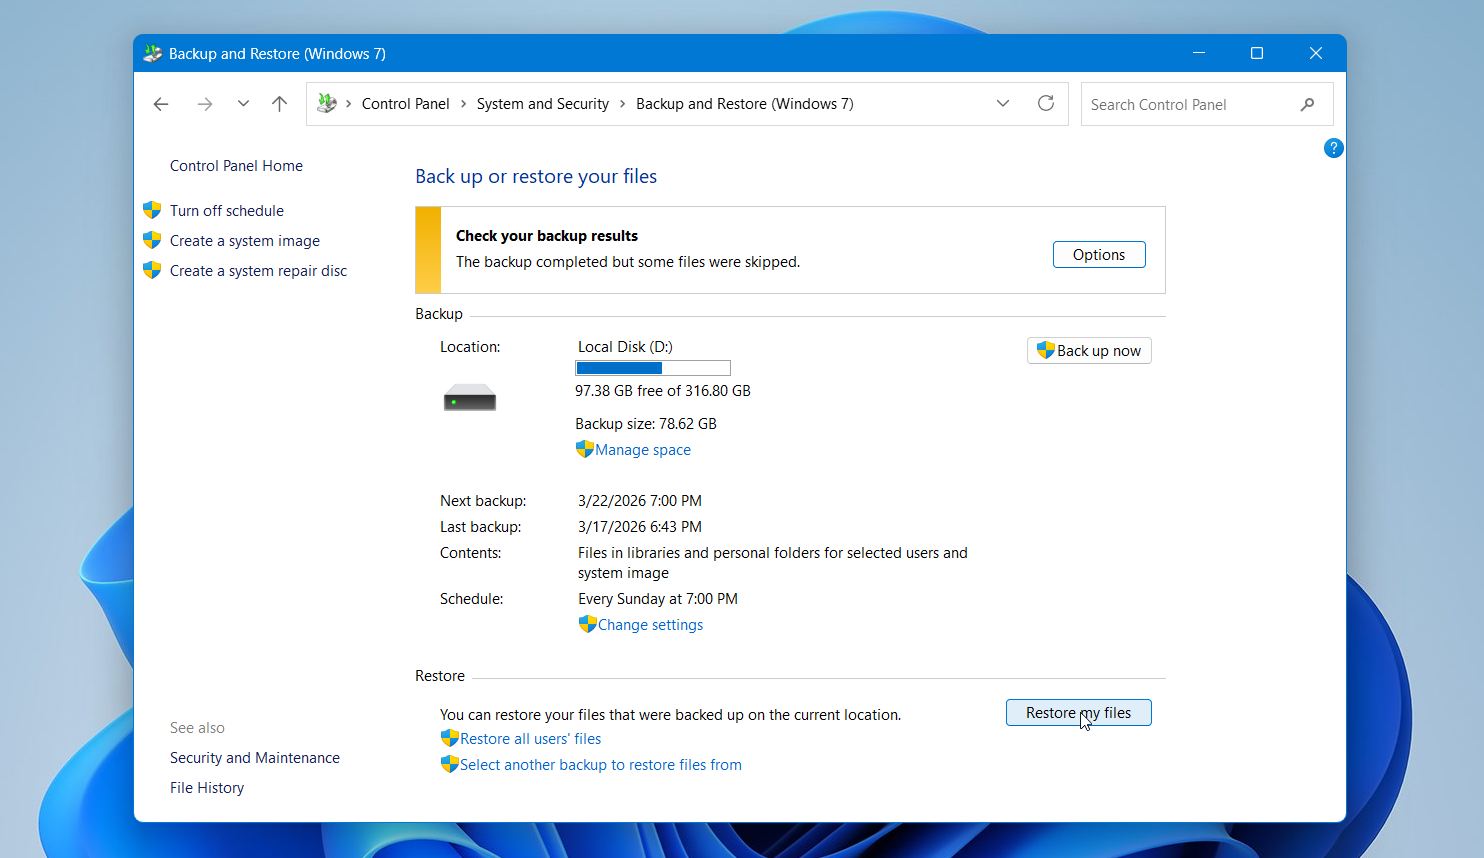
- Open the Control Panel and go to Backup and Restore (Windows 7).
- Click Restore my files.
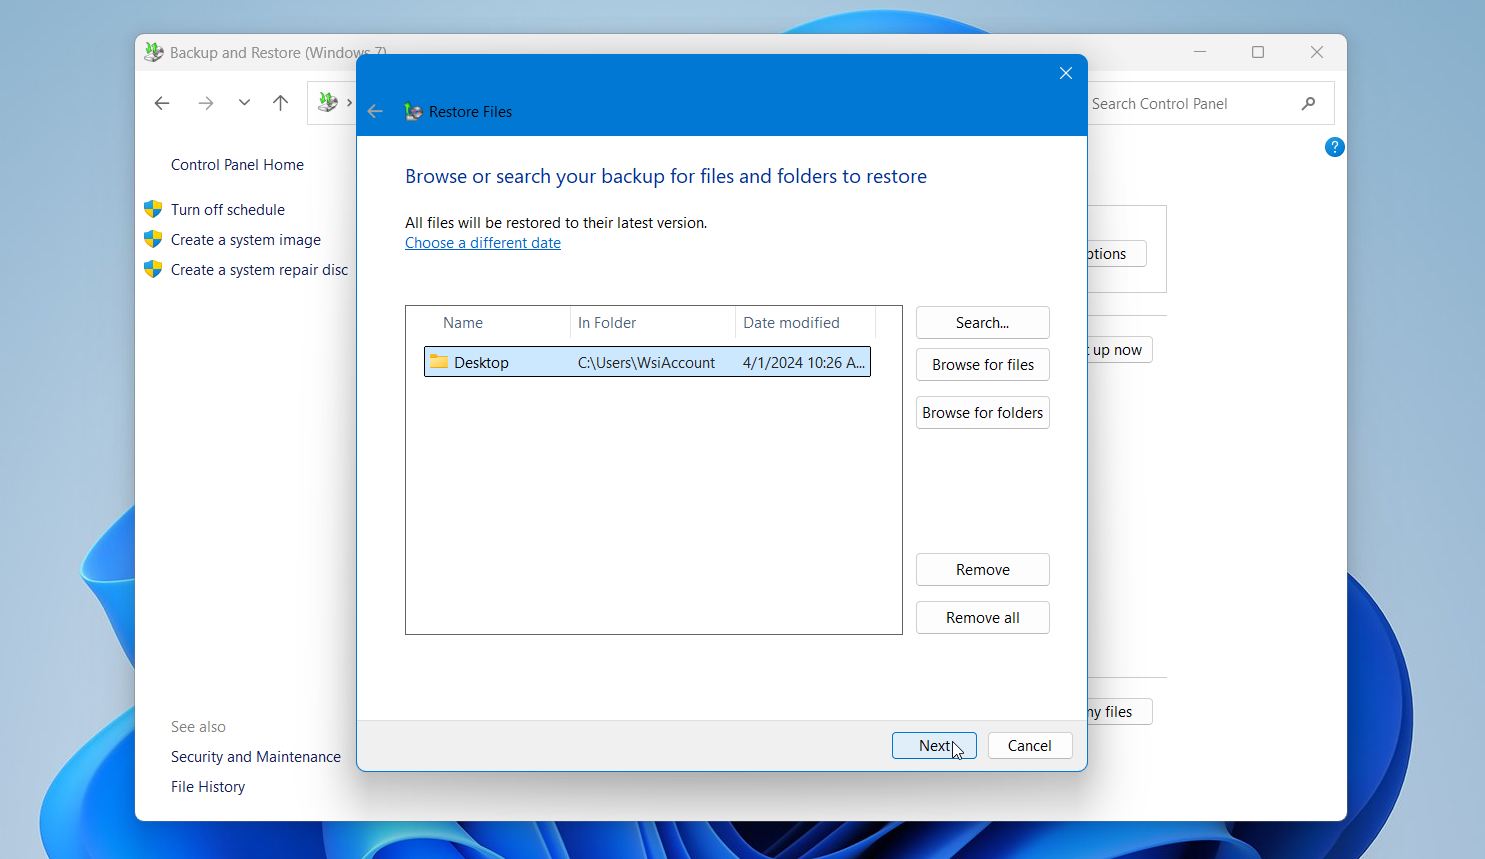
- Use Search, Browse for files, or Browse for folders to locate the files you want to recover.
- Select the files and click Next.
- Choose to restore them to the original location or to a different location. Click Restore to complete the process.
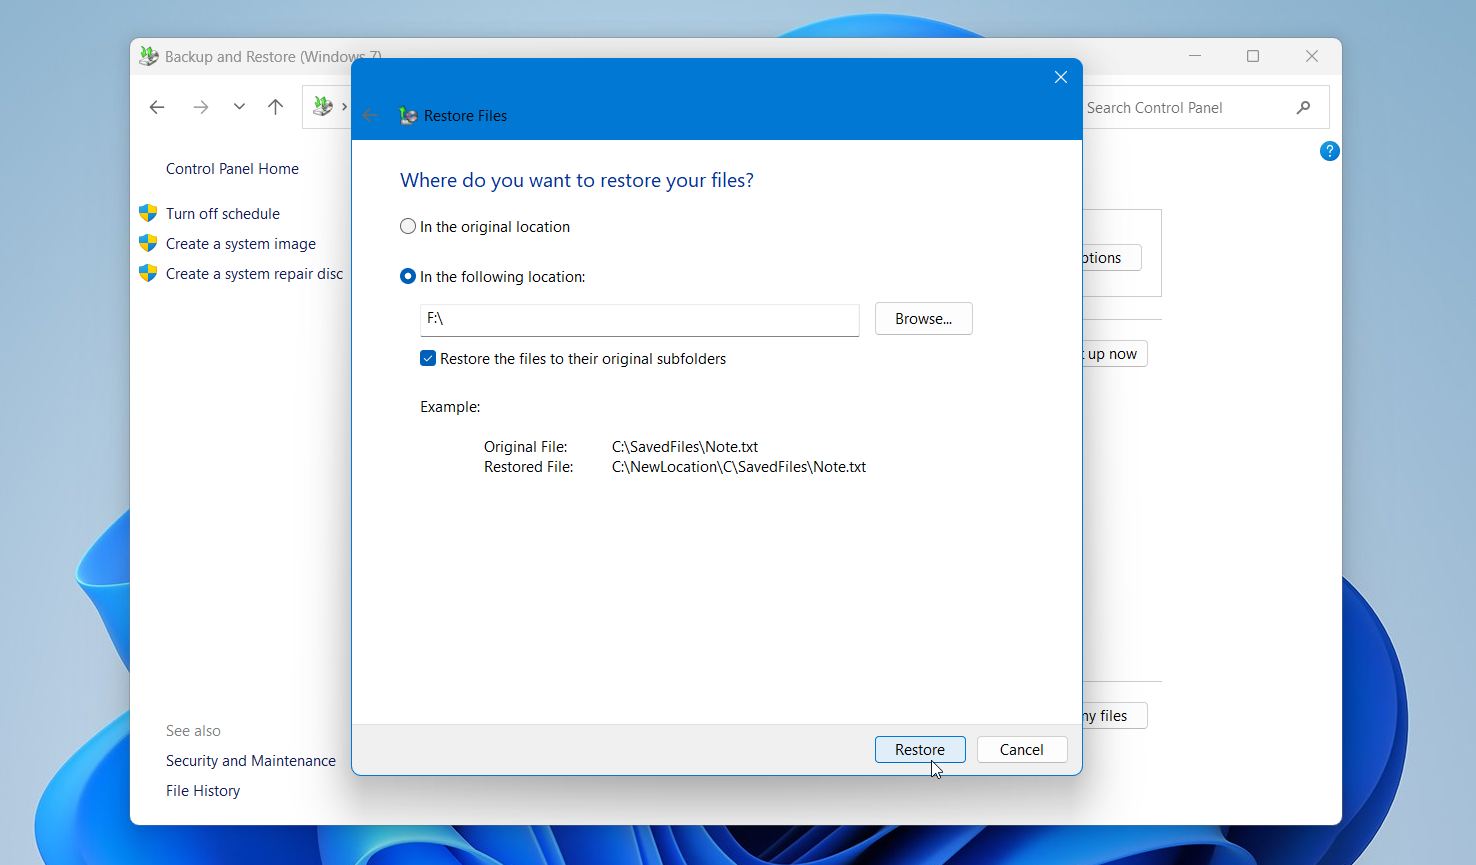
This method restores files from a backup exactly as they were at the time it was created, including their original names and structure. It works well for larger recoveries since you can restore entire folders or sets of files in one go. If no backups are available in this section, this feature was likely not configured, and you will need to use another recovery method.
Method 5: Use Windows File Recovery Tool
While Disk Drill is our primary recommendation, Microsoft also offers a free tool called Windows File Recovery. It can help recover shift-deleted files from NTFS file systems, especially common formats such as DOCX, PDF, and JPG.
We placed it lower on this list because it runs through the Command Prompt and supports fewer file signatures compared to more advanced tools. Still, it remains a solid option when you want a free solution and are comfortable with basic commands.
To recover shift-deleted files using Windows File Recovery:
- Install Windows File Recovery from the Microsoft Store.
- Launch the tool.
- In the opened window, enter a command using this format: winfr source-drive: destination-drive: /mode /switch. For example: winfr C: D: /regular /n \Users\YourName\Desktop\*.jpg.
- Press Enter and wait for the scan to complete.

- Open the destination drive to check the recovered files.
Besides the regular recovery mode, which I used above, Windows File Recovery offers two additional modes that might work better in specific situations. The extensive mode works well for older deletions and non-NTFS drives (like USB sticks), while signature mode is great for finding specific file types even when file system information is gone.
Example of extensive mode scan:
winfr C: E:\DataRecovery /extensive /n *.jpg
Example of signature mode scan:
winfr C: E:\DataRecovery /regular /n \Users\YourName\Documents\*.pdf /n *.docx
For more information about the available scanning modes and their usage, you can visit the official support page. This tool does not provide a graphical interface or file preview, so you may need to run multiple commands to locate specific files. Still, it can deliver good results in simple recovery cases, especially when used soon after deletion.
Method 6: Turn to Professional Assistance
If you haven’t succeeded with the methods above, or their implementation seems too complex, there’s one more option you should know about.
Professional data recovery services employ trained technicians who use professional-grade equipment to address all kinds of data loss, including files deleted using the shift-delete keyboard shortcut. These experts can often recover files in situations where software solutions fail, like when dealing with damaged drives.
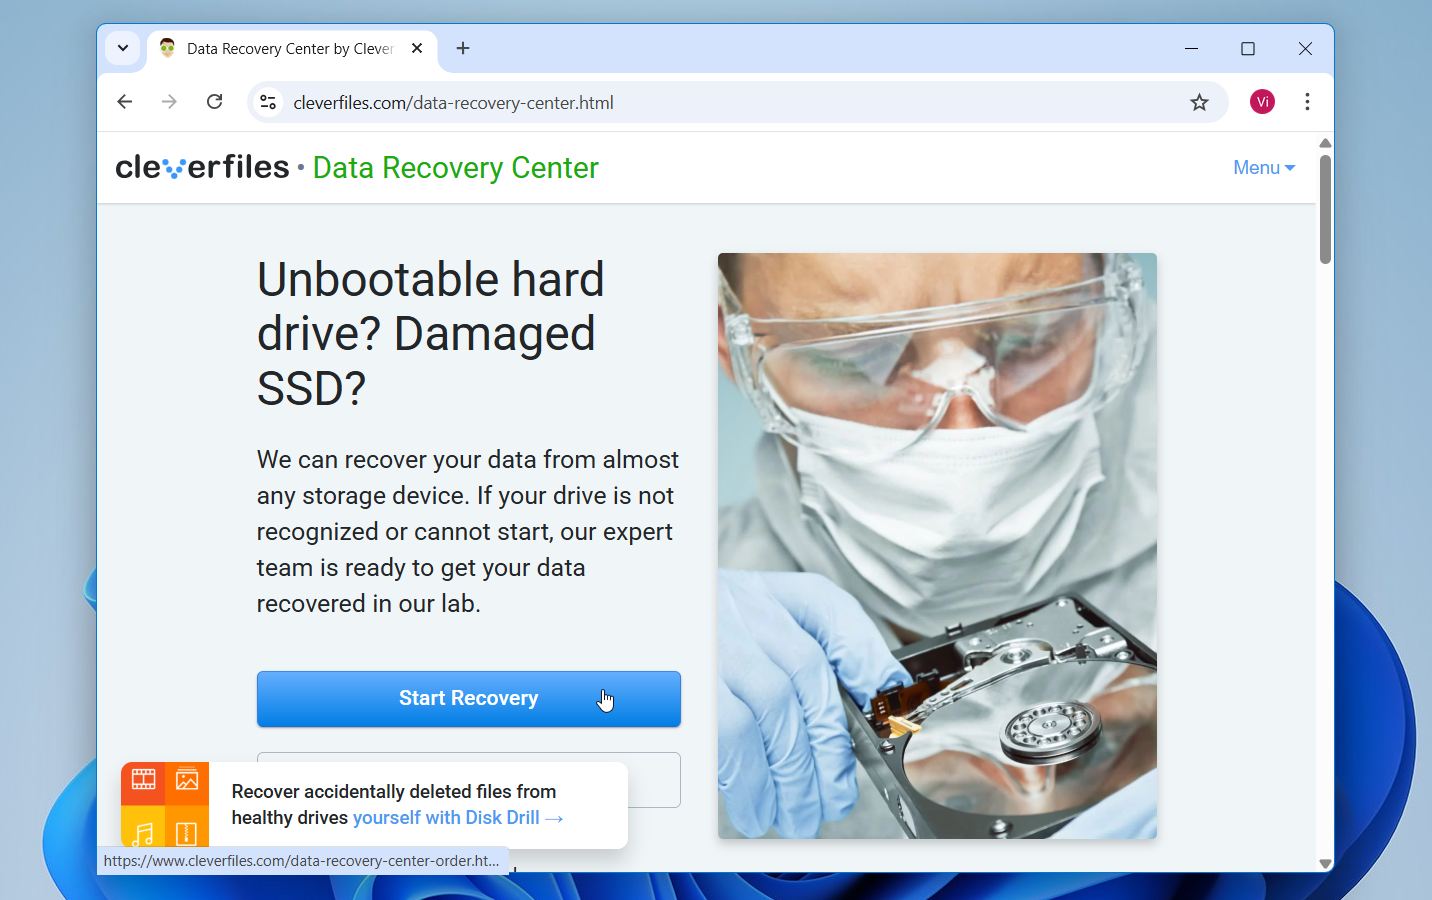
While this is our last recommended method due to its cost, it’s also the one with the highest success rate, especially if you choose the right service. One option we recommend is the Data Recovery Center by CleverFiles.
Here’s what you need to do use their service:
- Go to the Data Recovery Center and click Start Recovery.
- Complete the work order with all the necessary information. This will include your information, the level of service, as well as information pertaining to the device and what issues you’re facing.
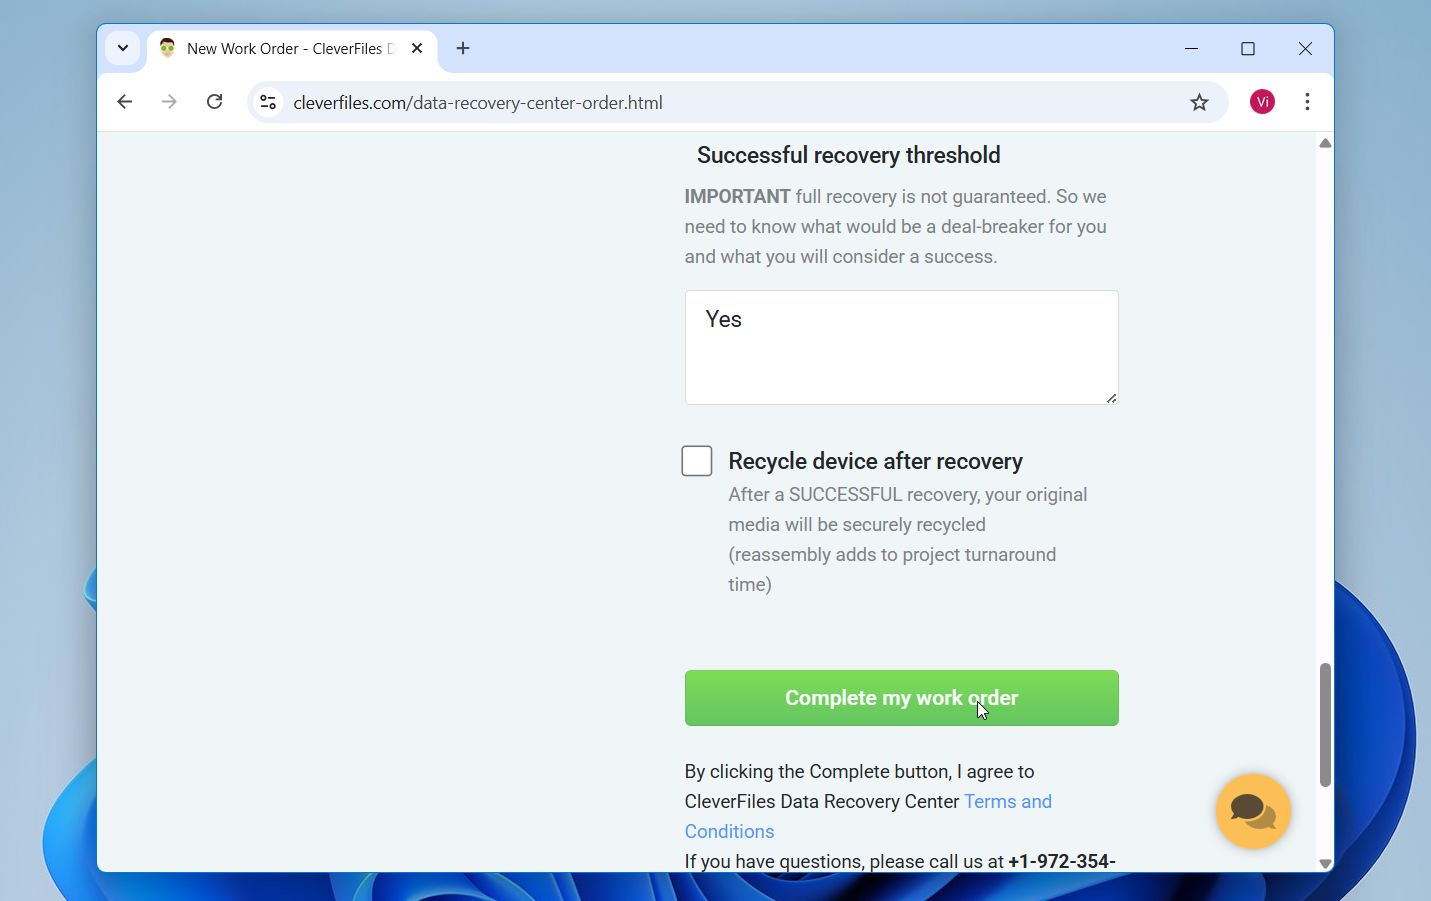
- When the form is complete and you’ve reviewed the Terms and Conditions, click Complete my work order.
What we really like about the Data Recovery Center by CleverFiles is that they don’t charge any money until they actually recover your files. They’ll first evaluate your device for free, let you know exactly what can be recovered, and only then will you need to decide if you want to proceed with the full recovery service.
Key Takeaways
Here’s a quick recap of everything we covered:
- Shift+Delete skips the Recycle Bin, but the data stays on your drive until it gets overwritten, so act fast.
- Internal SSDs with TRIM clear deleted data faster than HDDs, USB flash drives, memory cards, so time is especially important on solid-state drives.
- Data recovery software like Disk Drill is the best starting point and requires no prior backup.
- File History and Backup and Restore only work if they were configured before the deletion.
- Windows File Recovery is a free alternative but requires Command Prompt and offers no file preview.
- If software fails, a professional recovery service is your most reliable last resort.
The best thing you can do after recovering your files is make sure you never have to go through this again. Set up File History or a regular backup routine so that next time your files are already protected.


