
Do you use an SD card to expand your Android phone’s storage, but end up deleting files you actually need? Yeah, that happens. The good news is that if you noticed the deletion early and acted fast, there’s still a solid chance to get those files back.
We tested several real-world methods to recover deleted files from an SD card on Android, and in this article, we break them down step by step. All you need to do is go through the options in order and pick the one that fits your setup.
As soon as you realize the file deletion was a mistake, stop using your Android phone immediately. Do not take new photos, install apps, or copy any data to the SD card. Writing new data increases the risk of overwriting the deleted files and once that happens, SD card recovery on Android becomes completely impossible. A good way to make sure that you don’t accidentally download files in the background is to put your phone on airplane mode. If you can stand not using your phone right now, you could turn your device off.
How to Restore Deleted Files From Android SD Card
If you followed the precautions above and avoided overwriting the SD card, we can start outlining ways to restore data from an Android SD card. Recovery can be done either directly on the Android device or by removing the SD card and connecting it to a computer. Each method applies to different situations, and recovery results can vary significantly.
Method 1: Recover SD Card Data on Android via App-Specific Trash Folders
Unlike desktop operating systems, Android does not have a system-wide Recycle Bin where all deleted files are stored. However, many apps that work with media or documents maintain their own app-specific trash or recycle folders. Files deleted from these areas remain available for a limited time, usually between 10 and 30 days, before they are permanently removed.
If your deleted files are still located in one of these app-specific trash folders, SD card data recovery on Android can take less than a minute and does not require any recovery software.
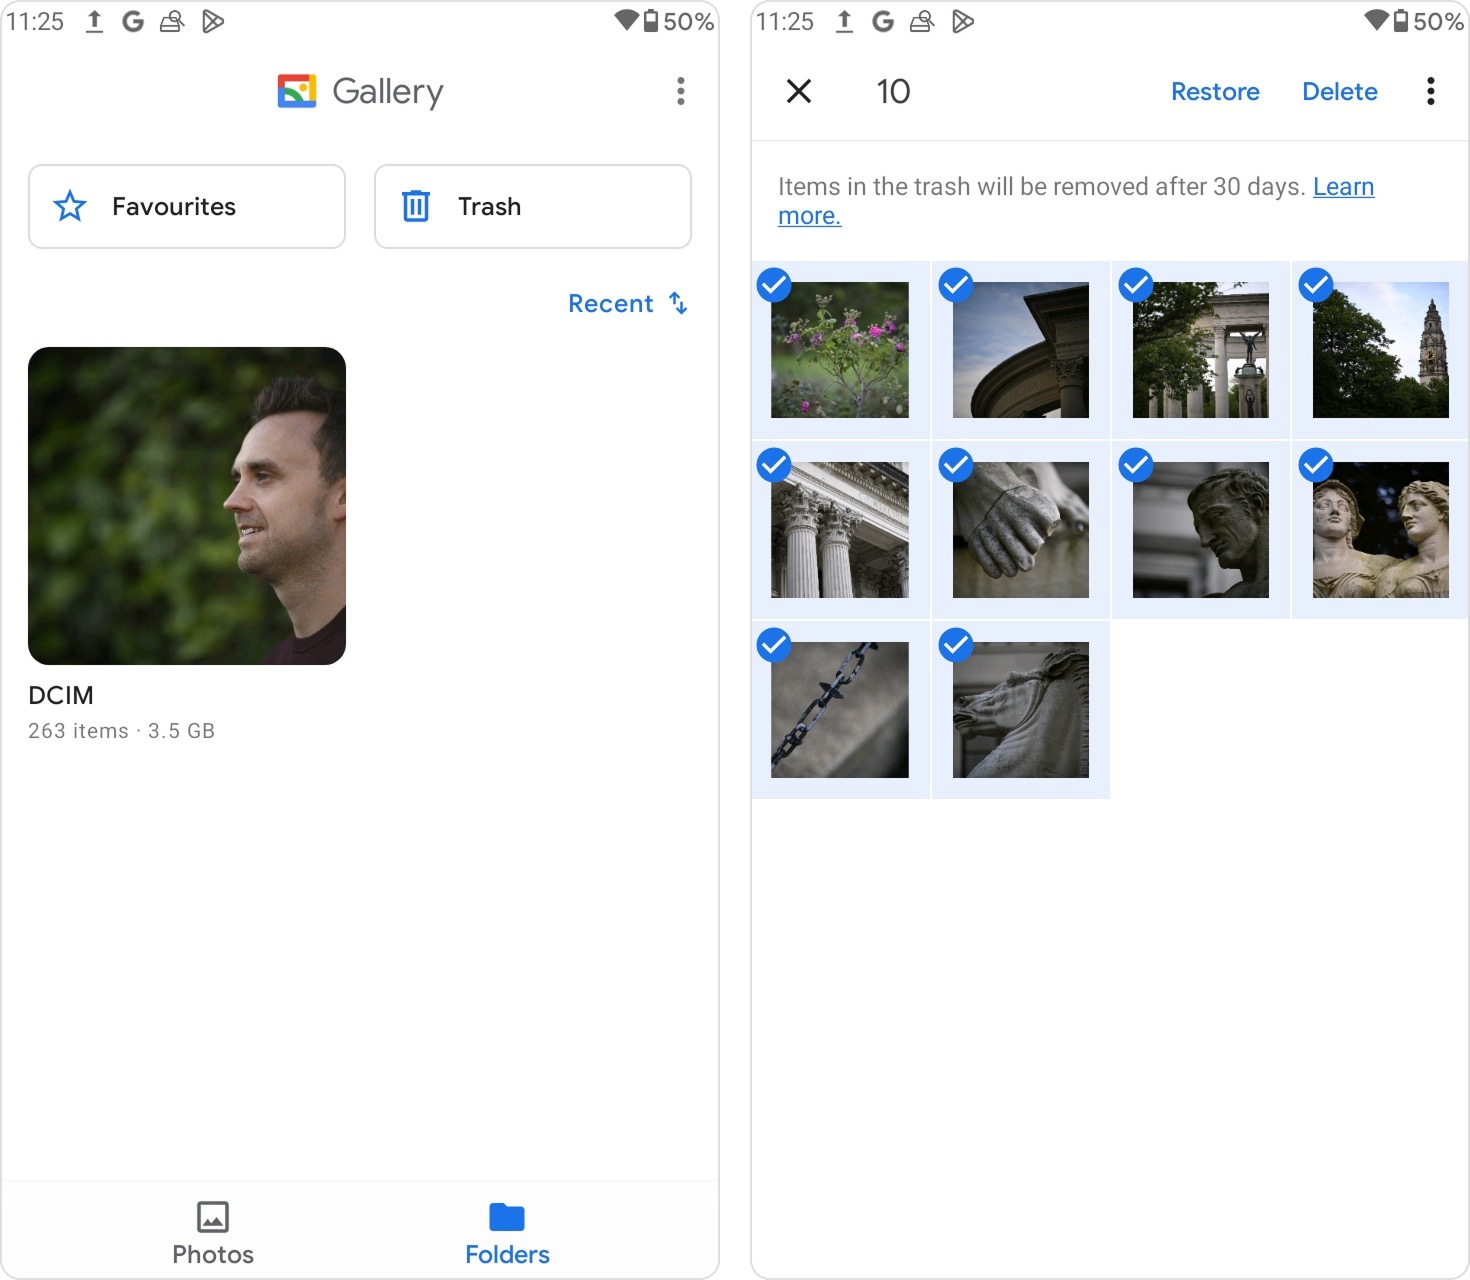
Here’s how this works using a standard Gallery or Photos app as an example:
- Open the Photos or Galleryapp on your Android device.
- Navigate to the Library/Albums/Menu section, depending on your device.
- Open the Trash/Bin/Recently Deleted folder.
- Select the photos or videos you want to restore.
- Tap Restore to return the files to their original location on the SD card.
The same principle applies to other commonly used apps. Google Photos stores deleted media in its Bin for a limited period. File management apps, such as My Files or similar built-in file managers, often include a Trash or Recycle folder as well (the exact name and location of this feature may vary depending on the Android manufacturer and OS version).
If the files are no longer present in these app-specific trash folders, it means they were either deleted permanently or the retention period has expired. In that case, you’ll need to move on to more advanced SD card data recovery methods below.
Method 2: Restore Data from SD Card Android by Scanning the Card on a Computer
Recovering deleted data from an Android SD card by scanning the card directly is usually the simplest and most effective approach. All you need to do is remove the SD card from the Android device, connect it to your computer using a card reader or adapter, and scan it with a data recovery tool.
Among the available options, we often recommend Disk Drill. It is a reliable data recovery solution for both Windows and macOS and works well with removable storage. Disk Drill supports file systems commonly used on SD cards, including FAT32 and exFAT, and can also handle cases where the SD card shows up as RAW due to file system damage or corruption. We describe its capabilities and additional features in more detail in our full Disk Drill review, which is worth reading if you want to learn more.
If the SD card behaves unpredictably, for example, it mounts intermittently or appears as unformatted, it’s best to create a byte-to-byte backup first. This minimizes further damage during recovery. Fortunately, Disk Drill includes a built-in byte-to-byte backup feature, so no additional software is required. If you suspect corruption, follow the steps in this guide before starting recovery.
- Download Disk Drill from the official website and install it on your computer.
- Remove the SD card from your Android device and connect it to your PC using a quality card reader or adapter.
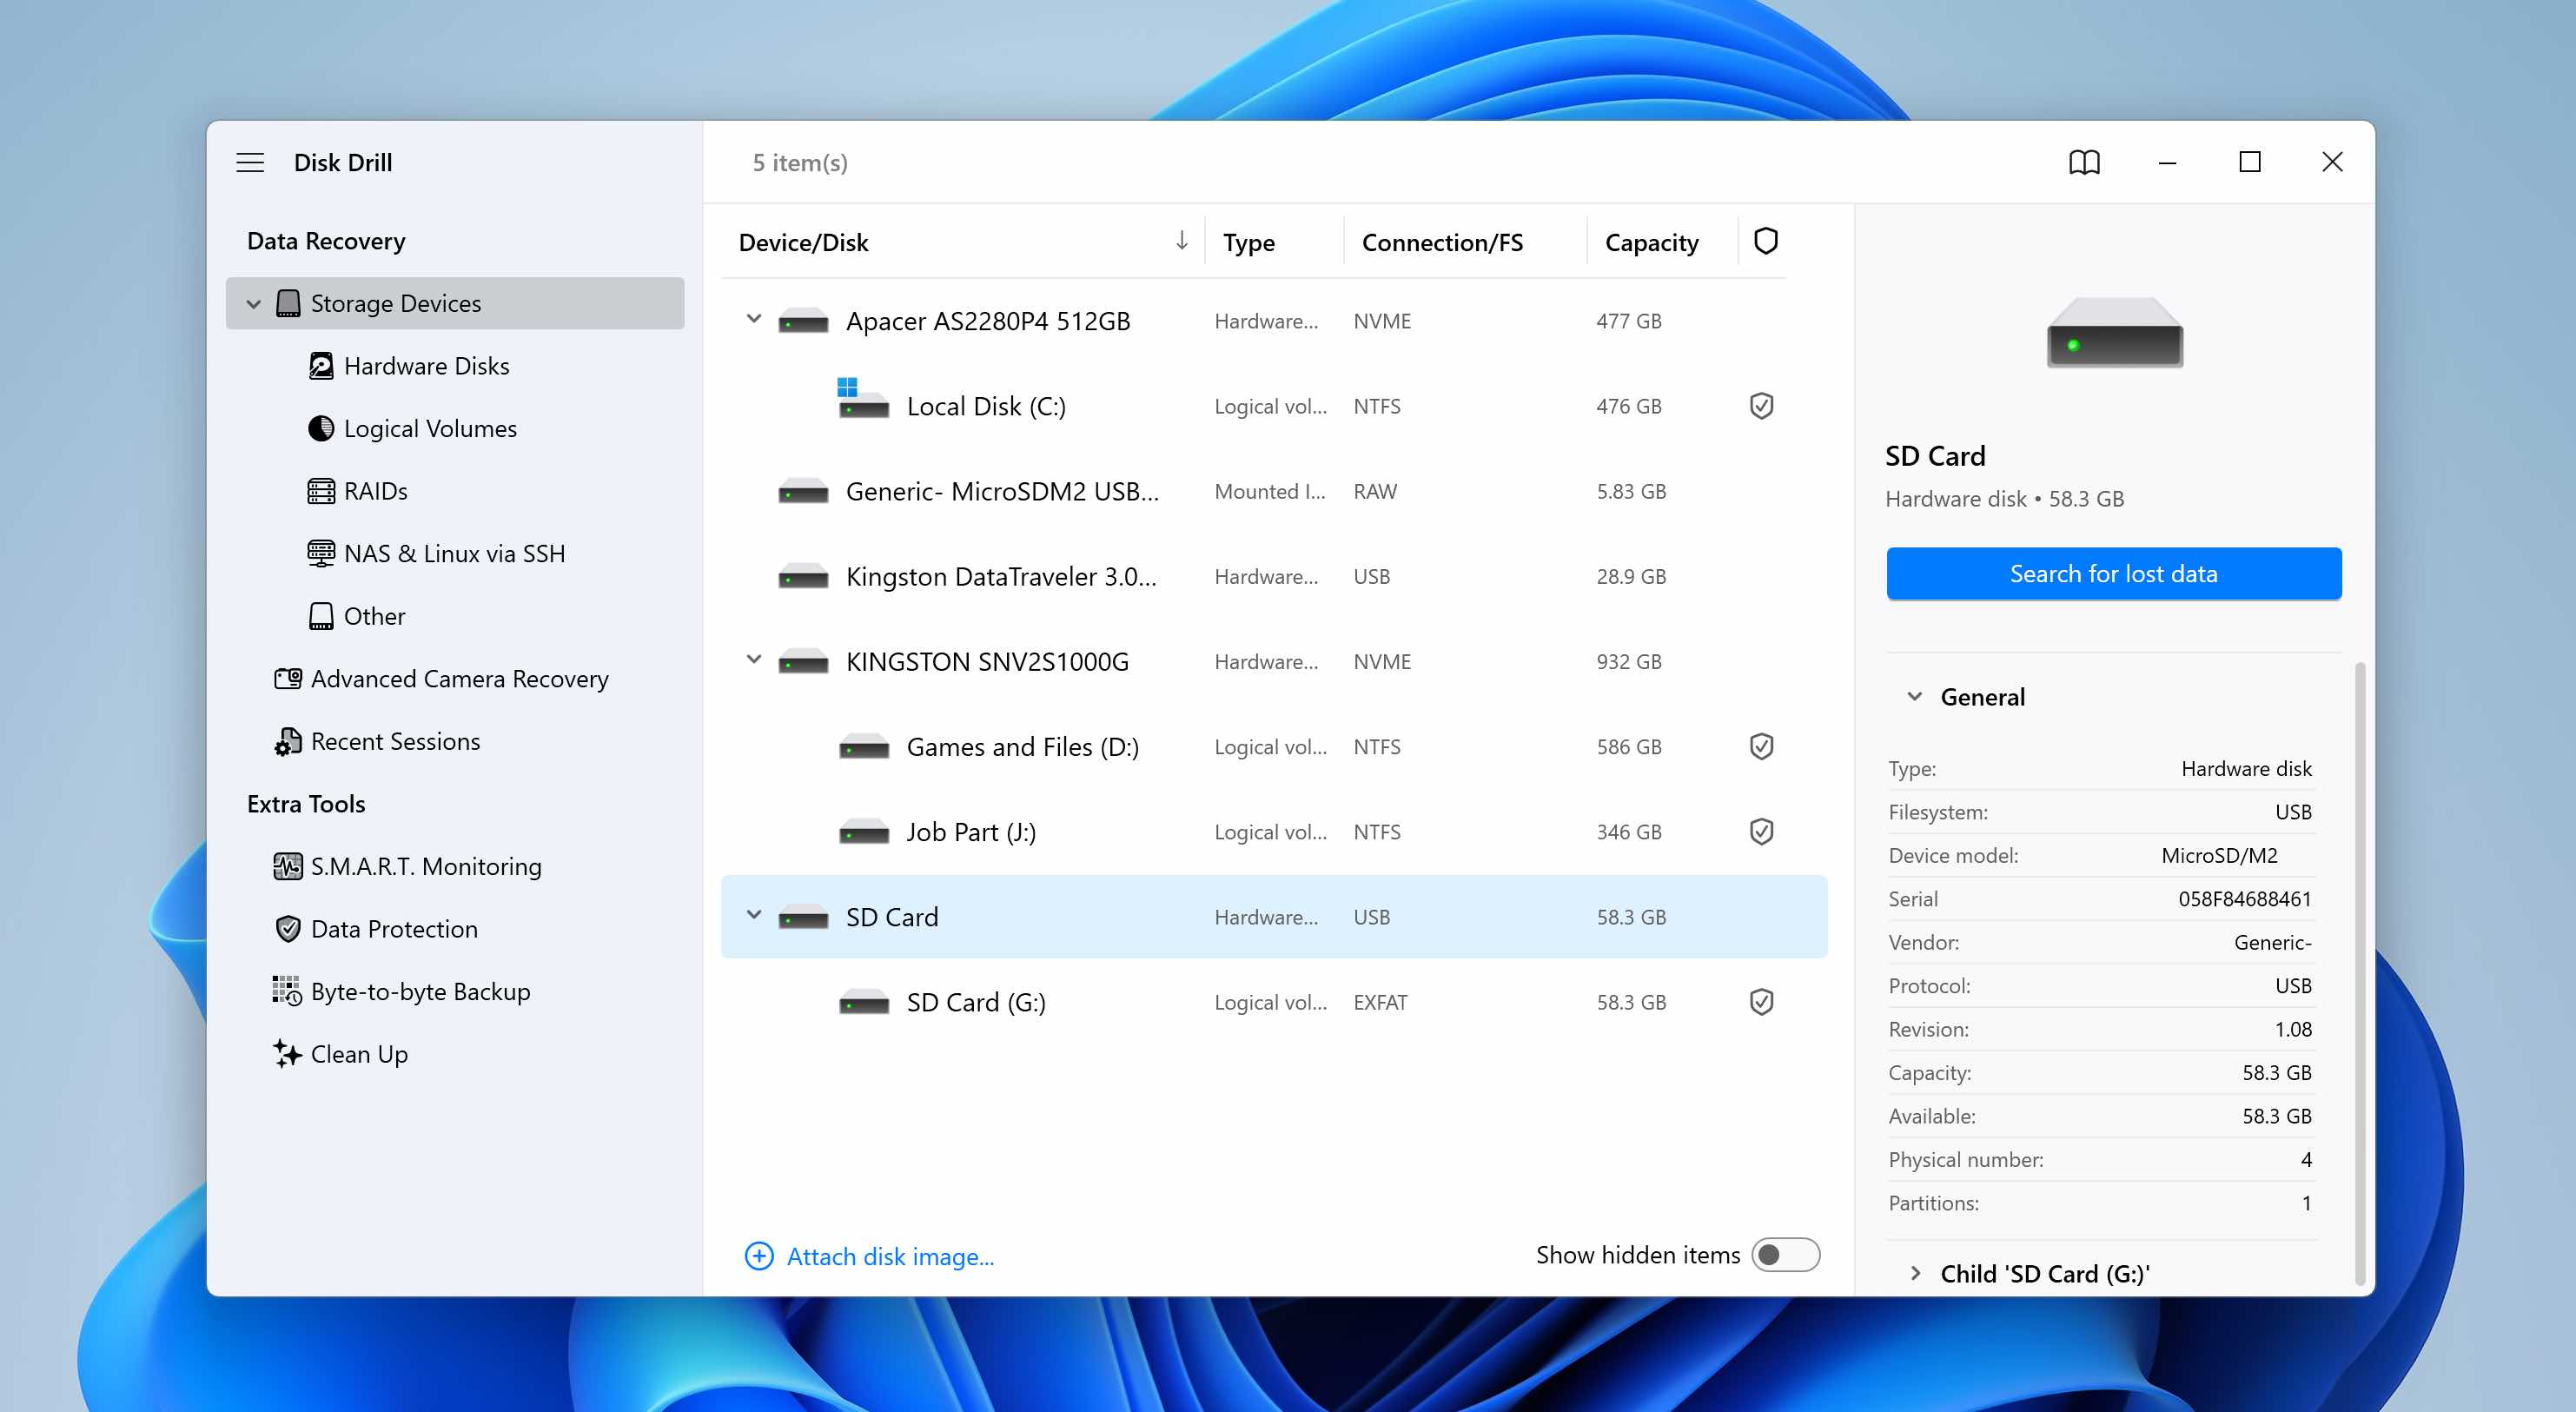
- Open Disk Drill, select the SD card from the list of available devices, and click Search for lost data to start the scan.
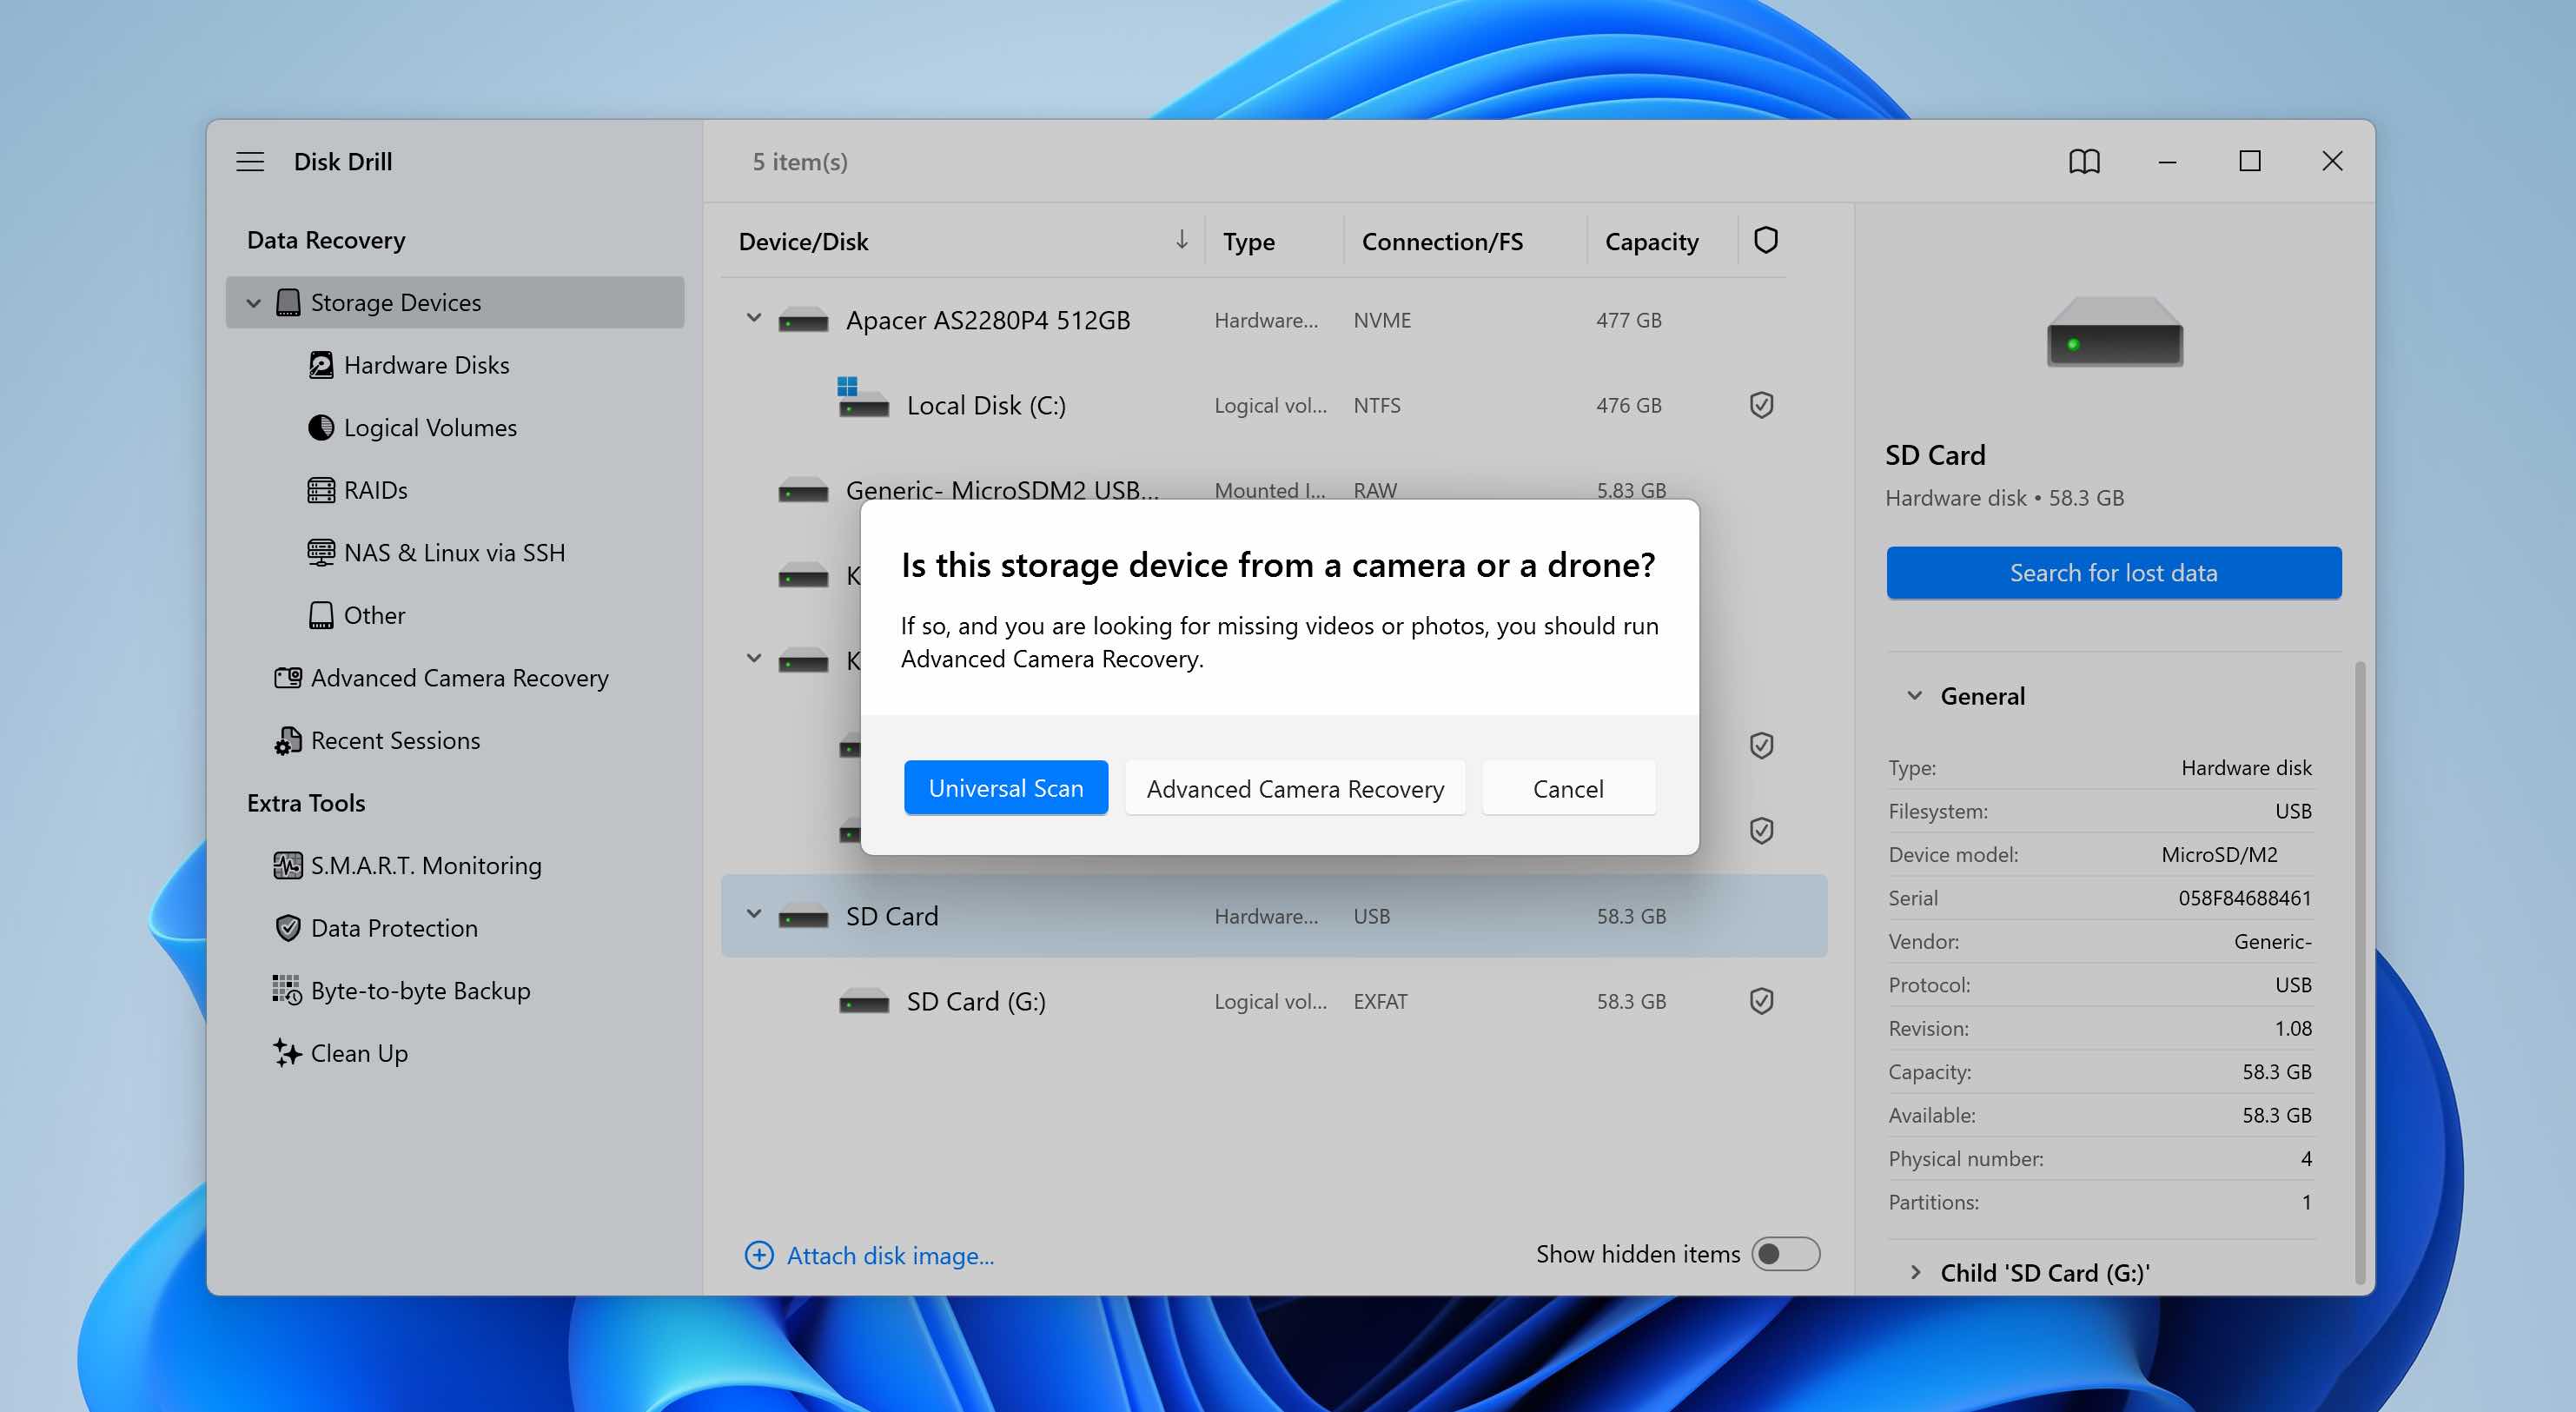
- When prompted to choose a scan type, select Universal Scan. The Advanced Camera Recovery option is intended for fragmented video files from cameras or drones and is not required for standard Android SD card recovery.
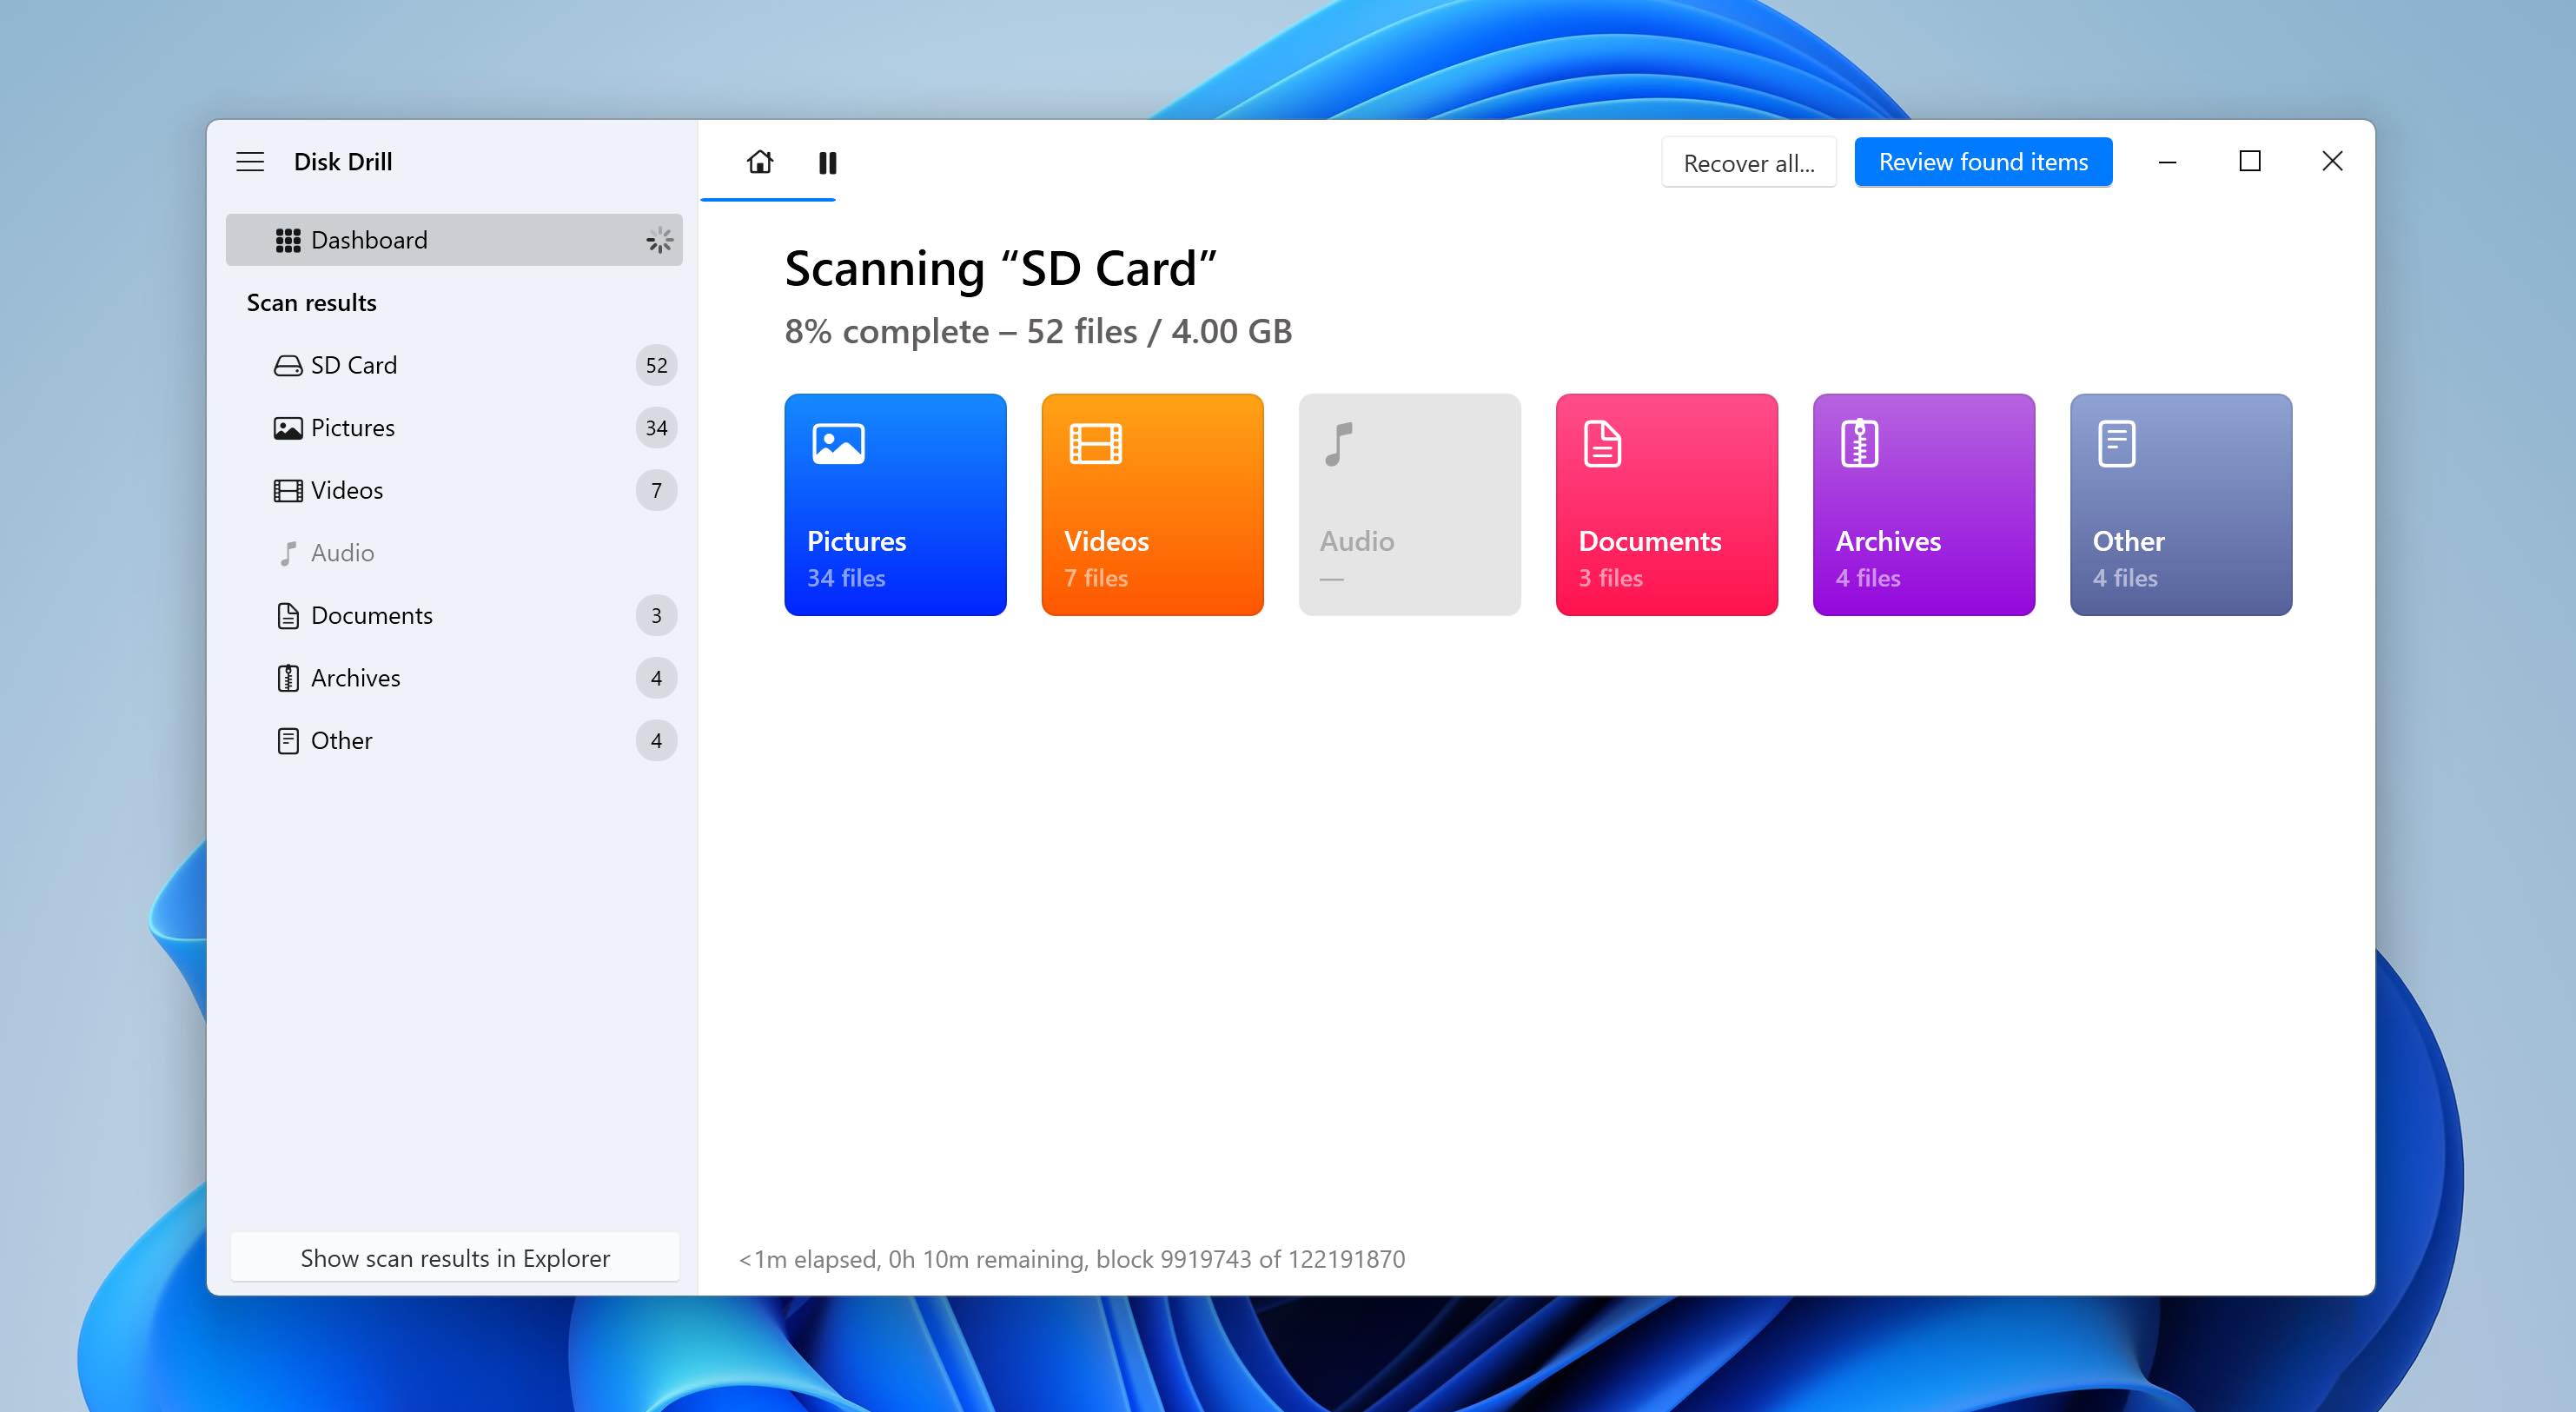
- Disk Drill will begin scanning the SD card. We recommend waiting until the scan completes to get the best possible results.
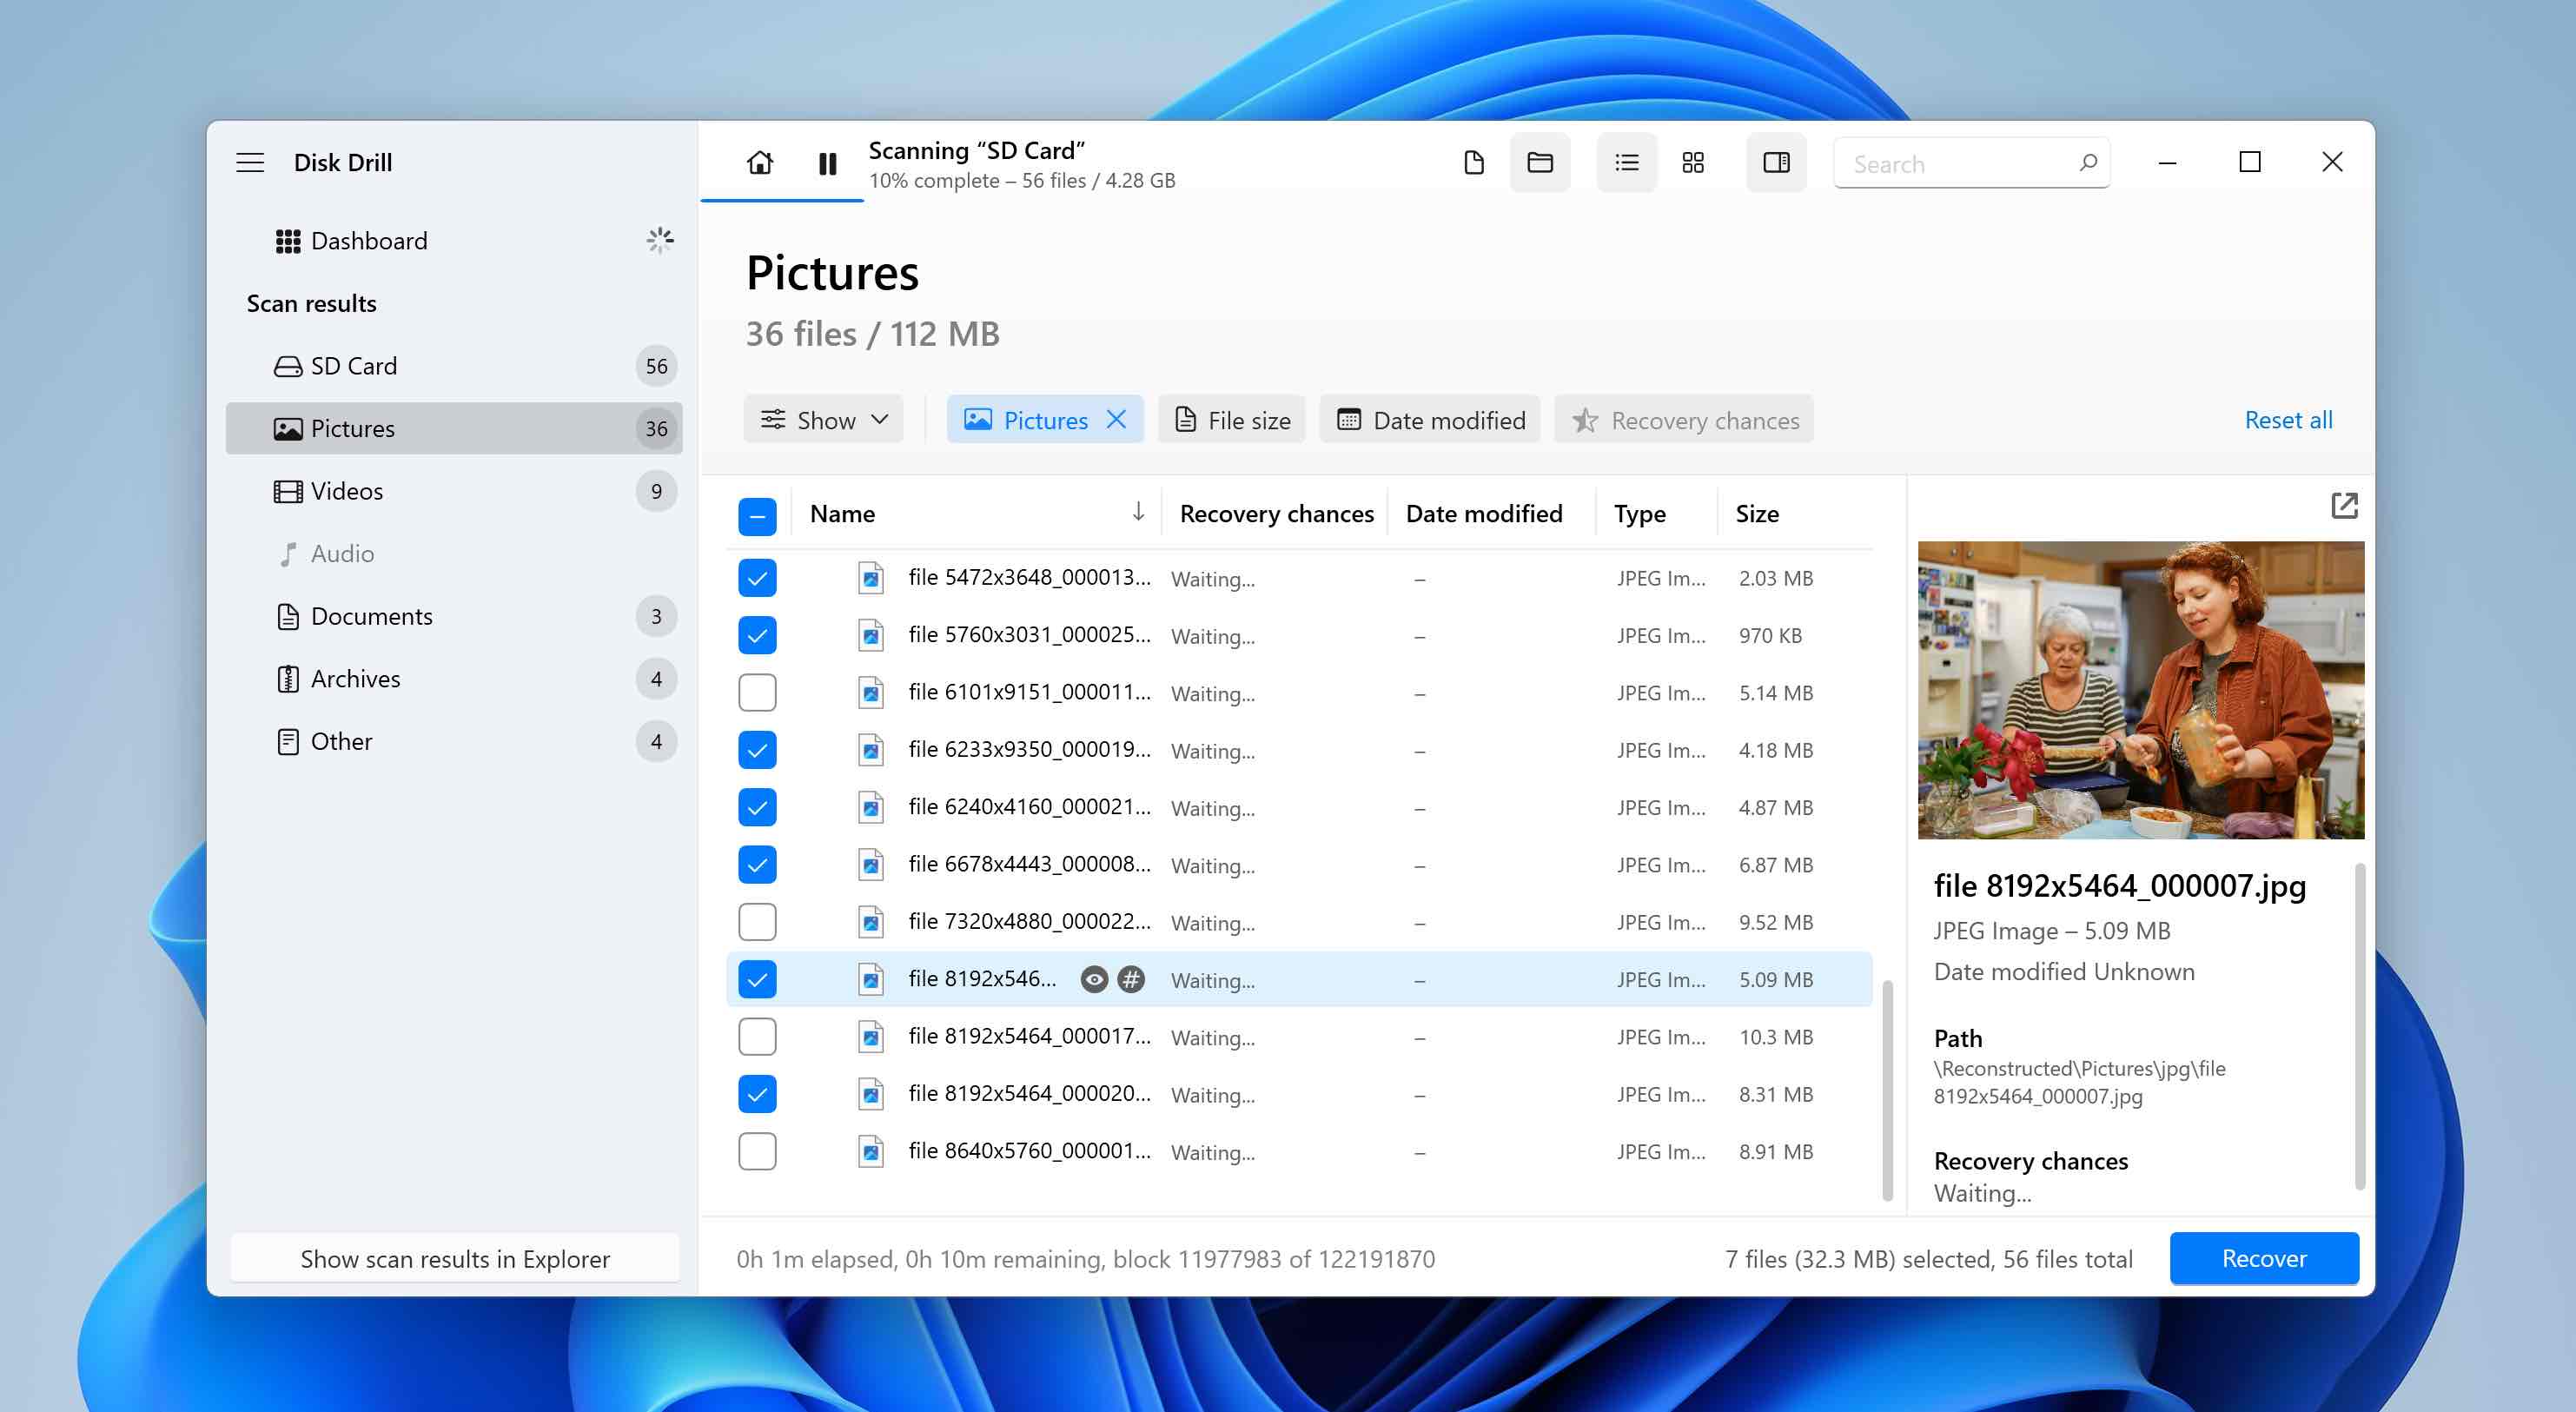
- Once the scan finishes, click Review found items. If you only want to see specific file types, use the category tiles instead (Pictures, Video, Documents, Archives, and Other).
- Expand the Deleted or lost and Reconstructed sections to view recoverable files.
- Select the files you want to recover. Disk Drill shows a preview of the selected file, and you can manually preview any item by clicking the eye icon next to its name. Click Recover.
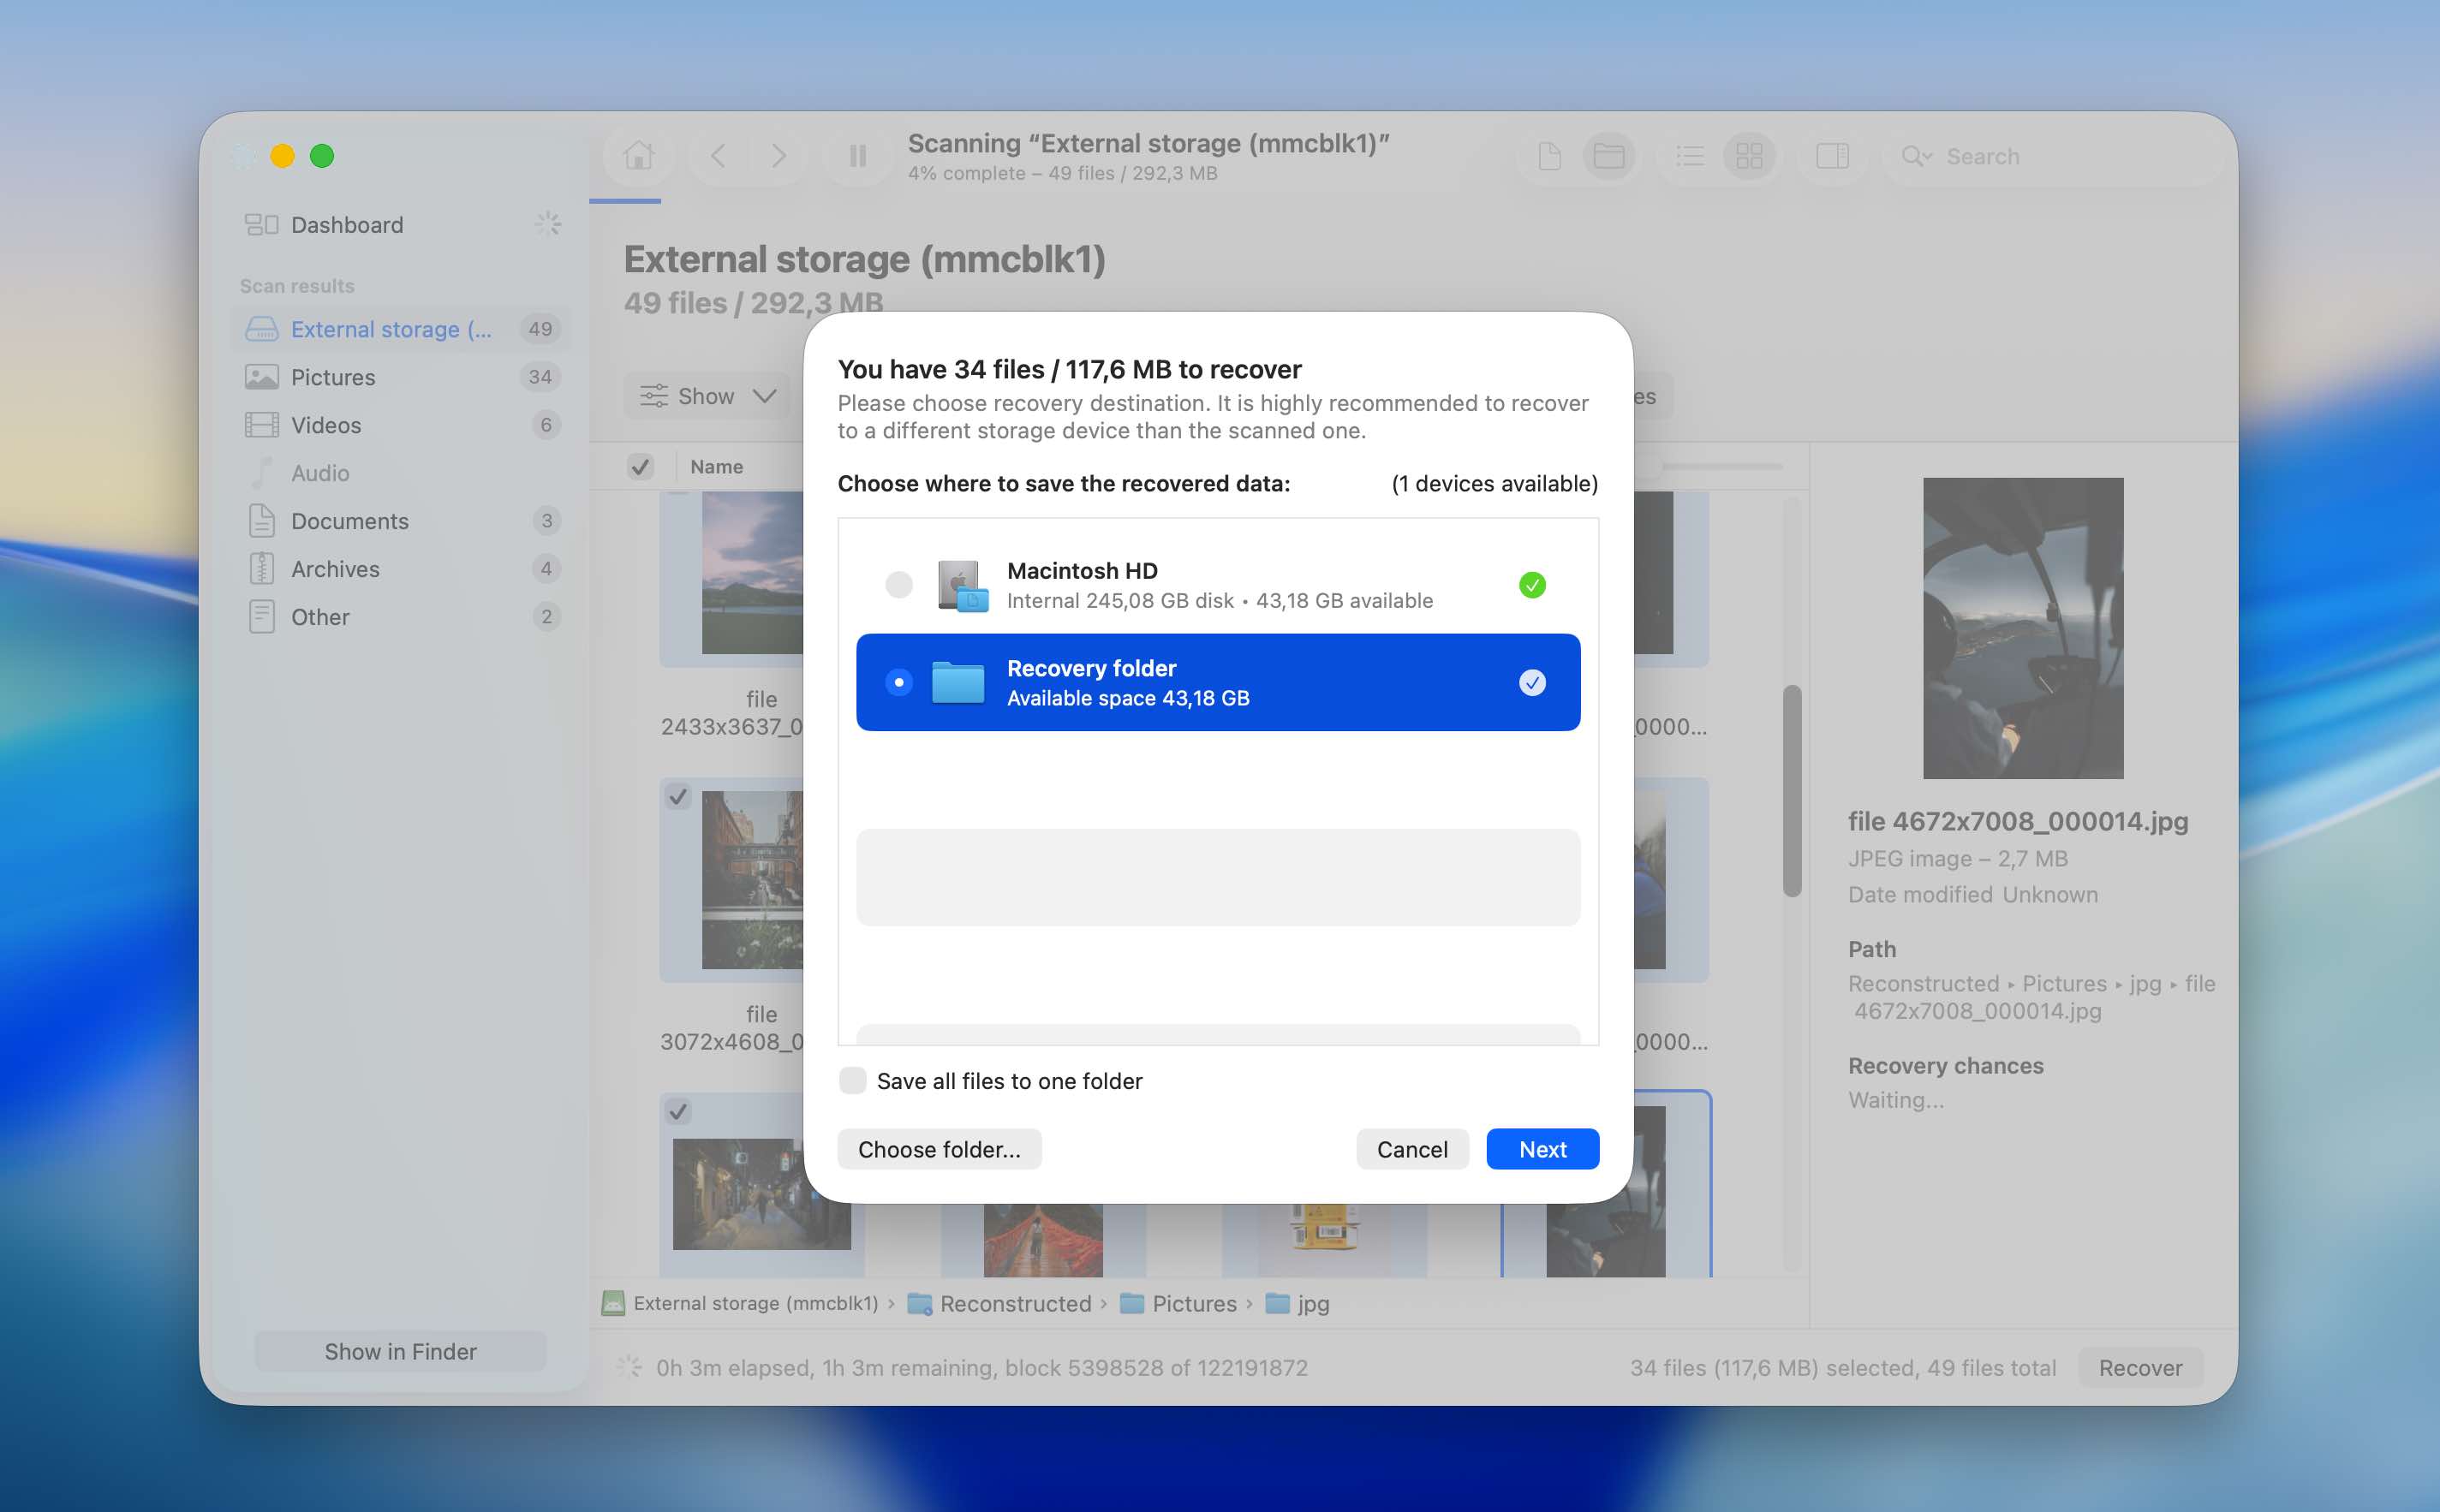
- Choose a recovery destination and click Next. Avoid recovering files directly to the same SD card to prevent overwriting data that has not yet been restored.
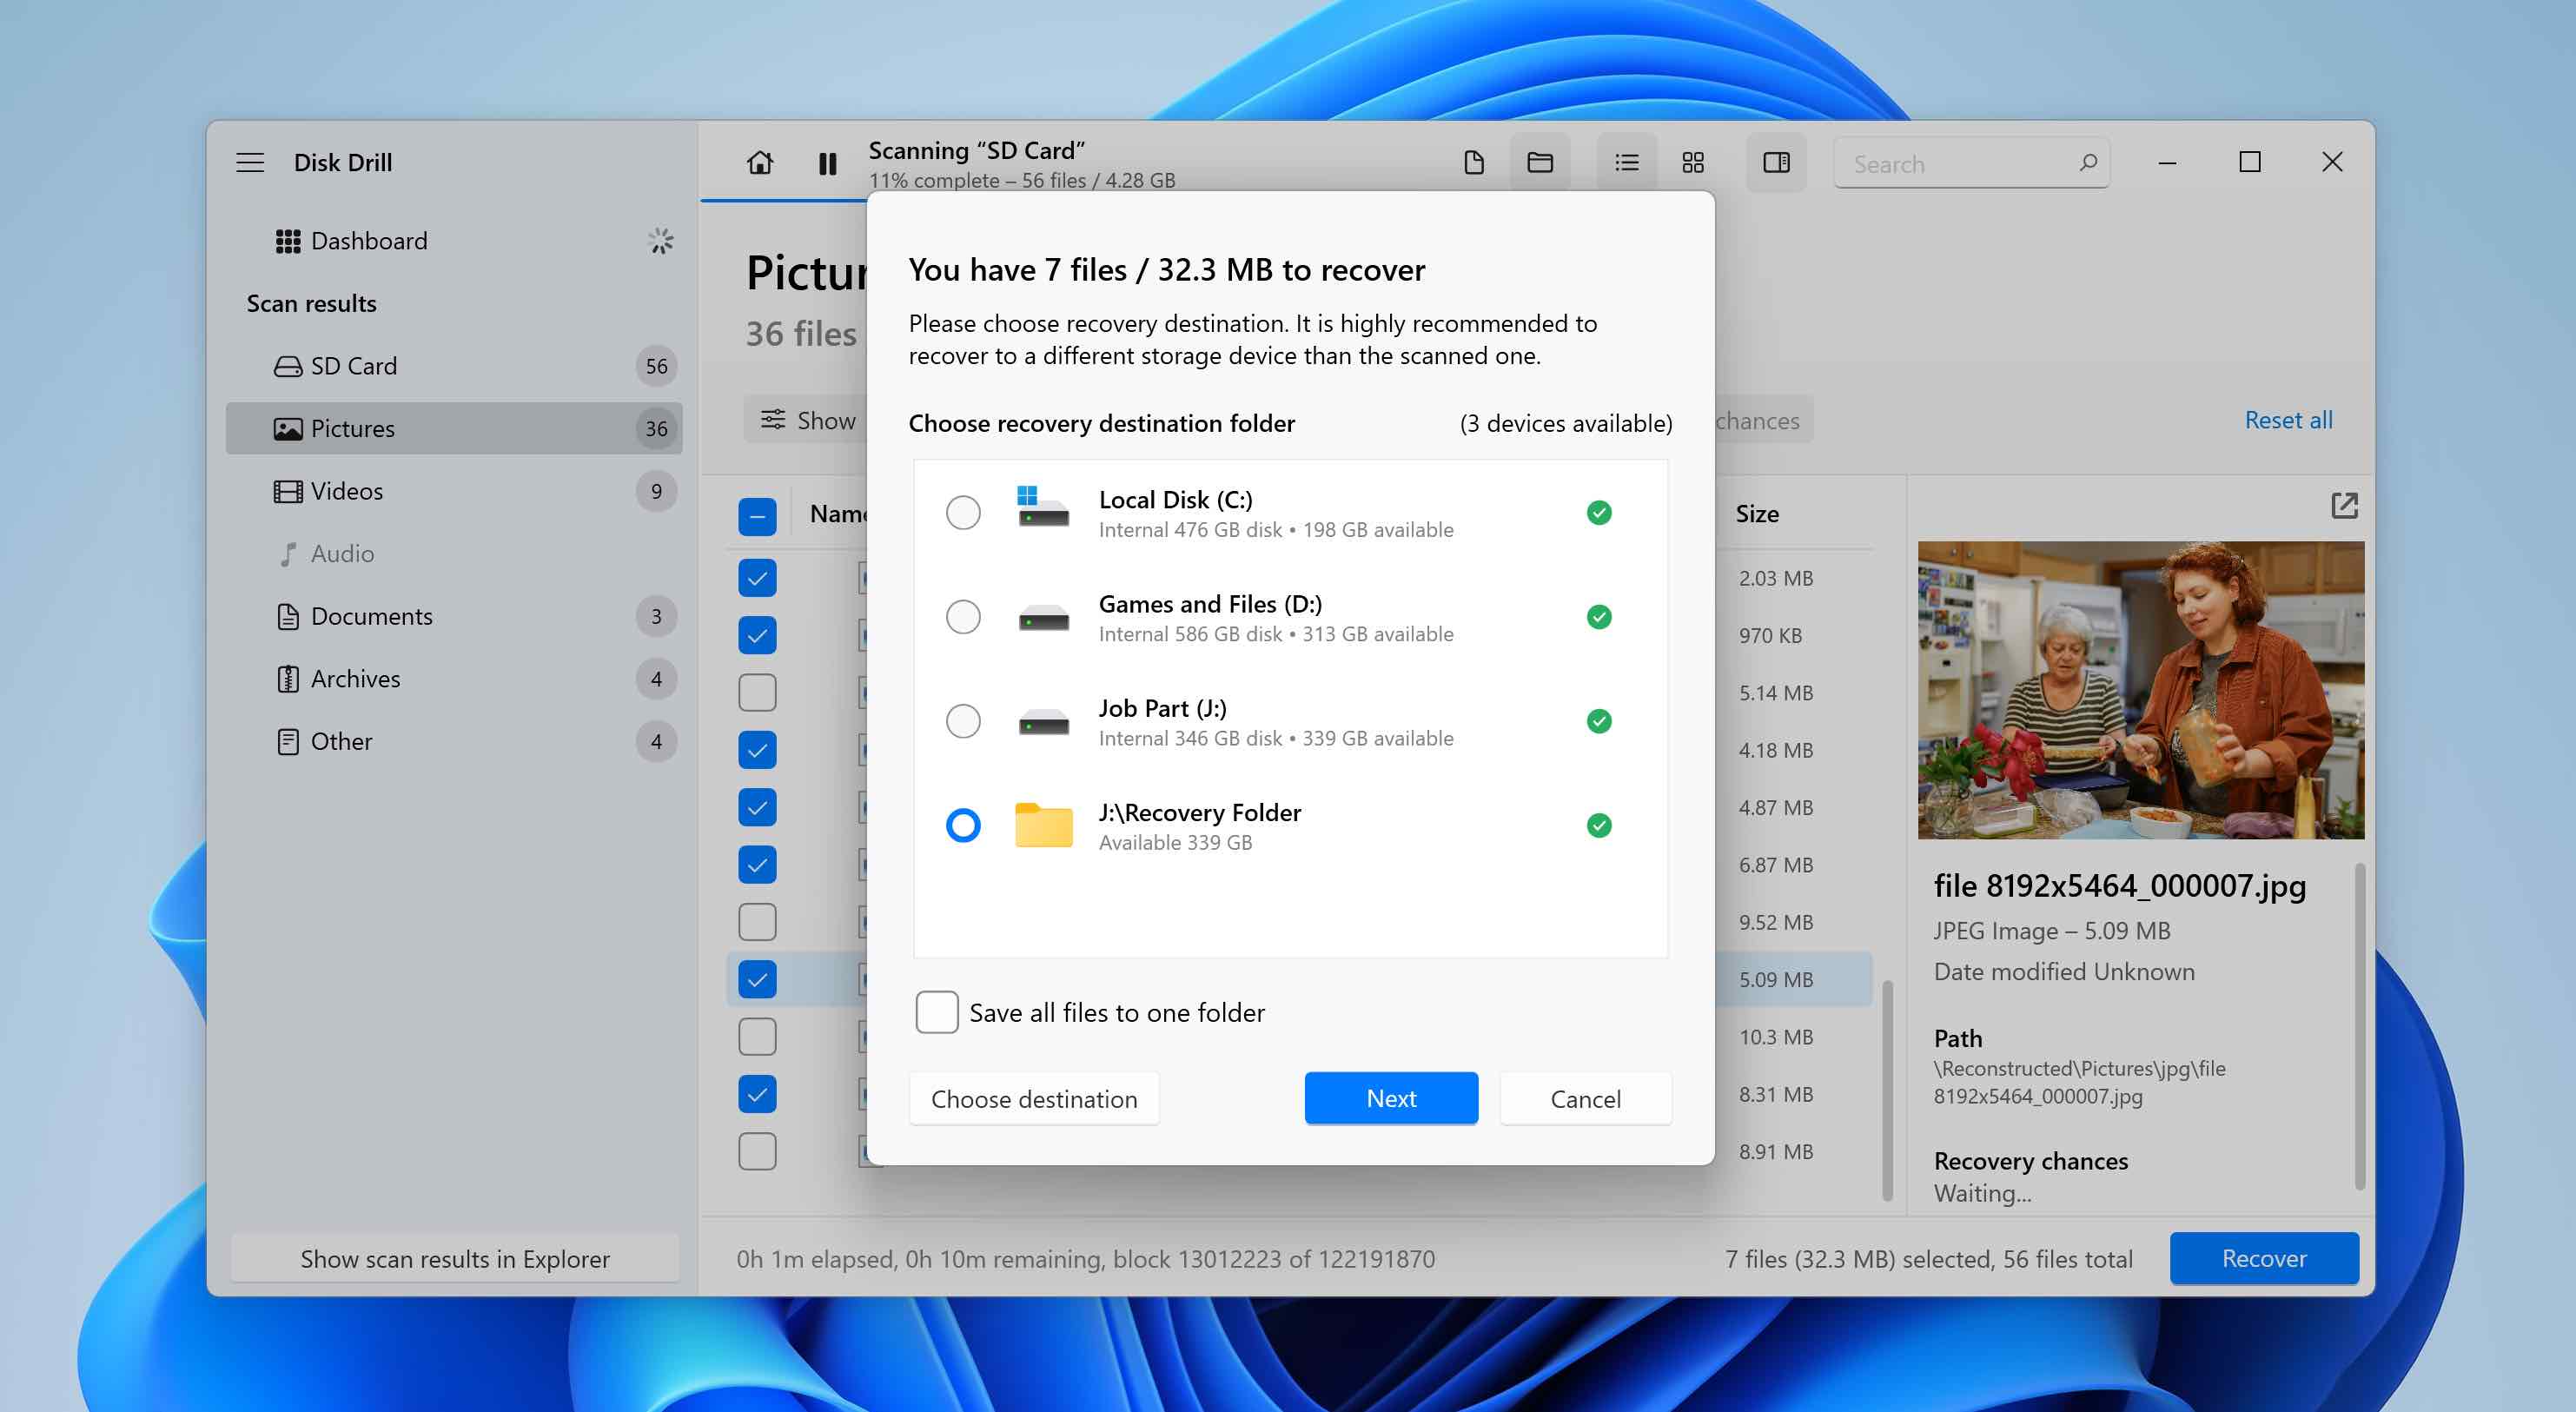
- Disk Drill will recover the selected files. After recovery, you can manually copy them back to the SD card, reinsert it into your Android phone, and continue using it as usual.
Note: Scanning an Android SD card with Disk Drill is free on both Windows and macOS. On Windows, you can recover up to 100 MB of data for free, which is usually enough to fully test the software and verify that your files are recoverable. On macOS, there is no free recovery limit, so upgrading to the Pro version is required to actually recover deleted files.
Method 3: Recover Data from the SD Card by Connecting the Smartphone to Your PC
If you’re unable to get a microSD card adapter, or prefer to connect the smartphone directly to your computer, you can use an Android SD card data recovery approach that scans the device over a USB connection. In this case, the recovery software communicates with the phone itself rather than accessing the SD card as a separate storage device. The process typically involves connecting the smartphone to a computer with a cable, enabling the required access permissions, and then scanning the storage for deleted files.
We’ll demonstrate this method using Disk Drill as an example. Specifically, we’ll refer to the macOS version, as it supports Android data recovery via a wired connection. If you’re using Windows, this option is not available, and you’ll need to look for alternative Android data recovery tools instead. We maintain a list of Android data recovery software, where you can choose a suitable option.
This recovery method requires your Android device to be rooted. Root access gives recovery software low-level access to the device’s storage, allowing it to scan areas that are normally restricted by Android.
- Download Disk Drill for macOS from the official website and install it.
- On your Android device, enable USB Debugging. To do this, open Settings, go to About phone, tap Build number several times to unlock Developer Options, then open Developer Options and turn on USB Debugging.
- Connect the rooted Android device to your Mac using a USB cable. Use a reliable cable to avoid connection issues during the scan.
- Launch Disk Drill on your Mac. When prompted, grant the app the necessary permissions to access connected devices.
- On the Android phone, confirm any permission requests that appear on the screen. Disk Drill needs these permissions to communicate with the device and read its storage.
- In Disk Drill, open the Android Devices section and select your connected smartphone from the list, and click Search for lost data.
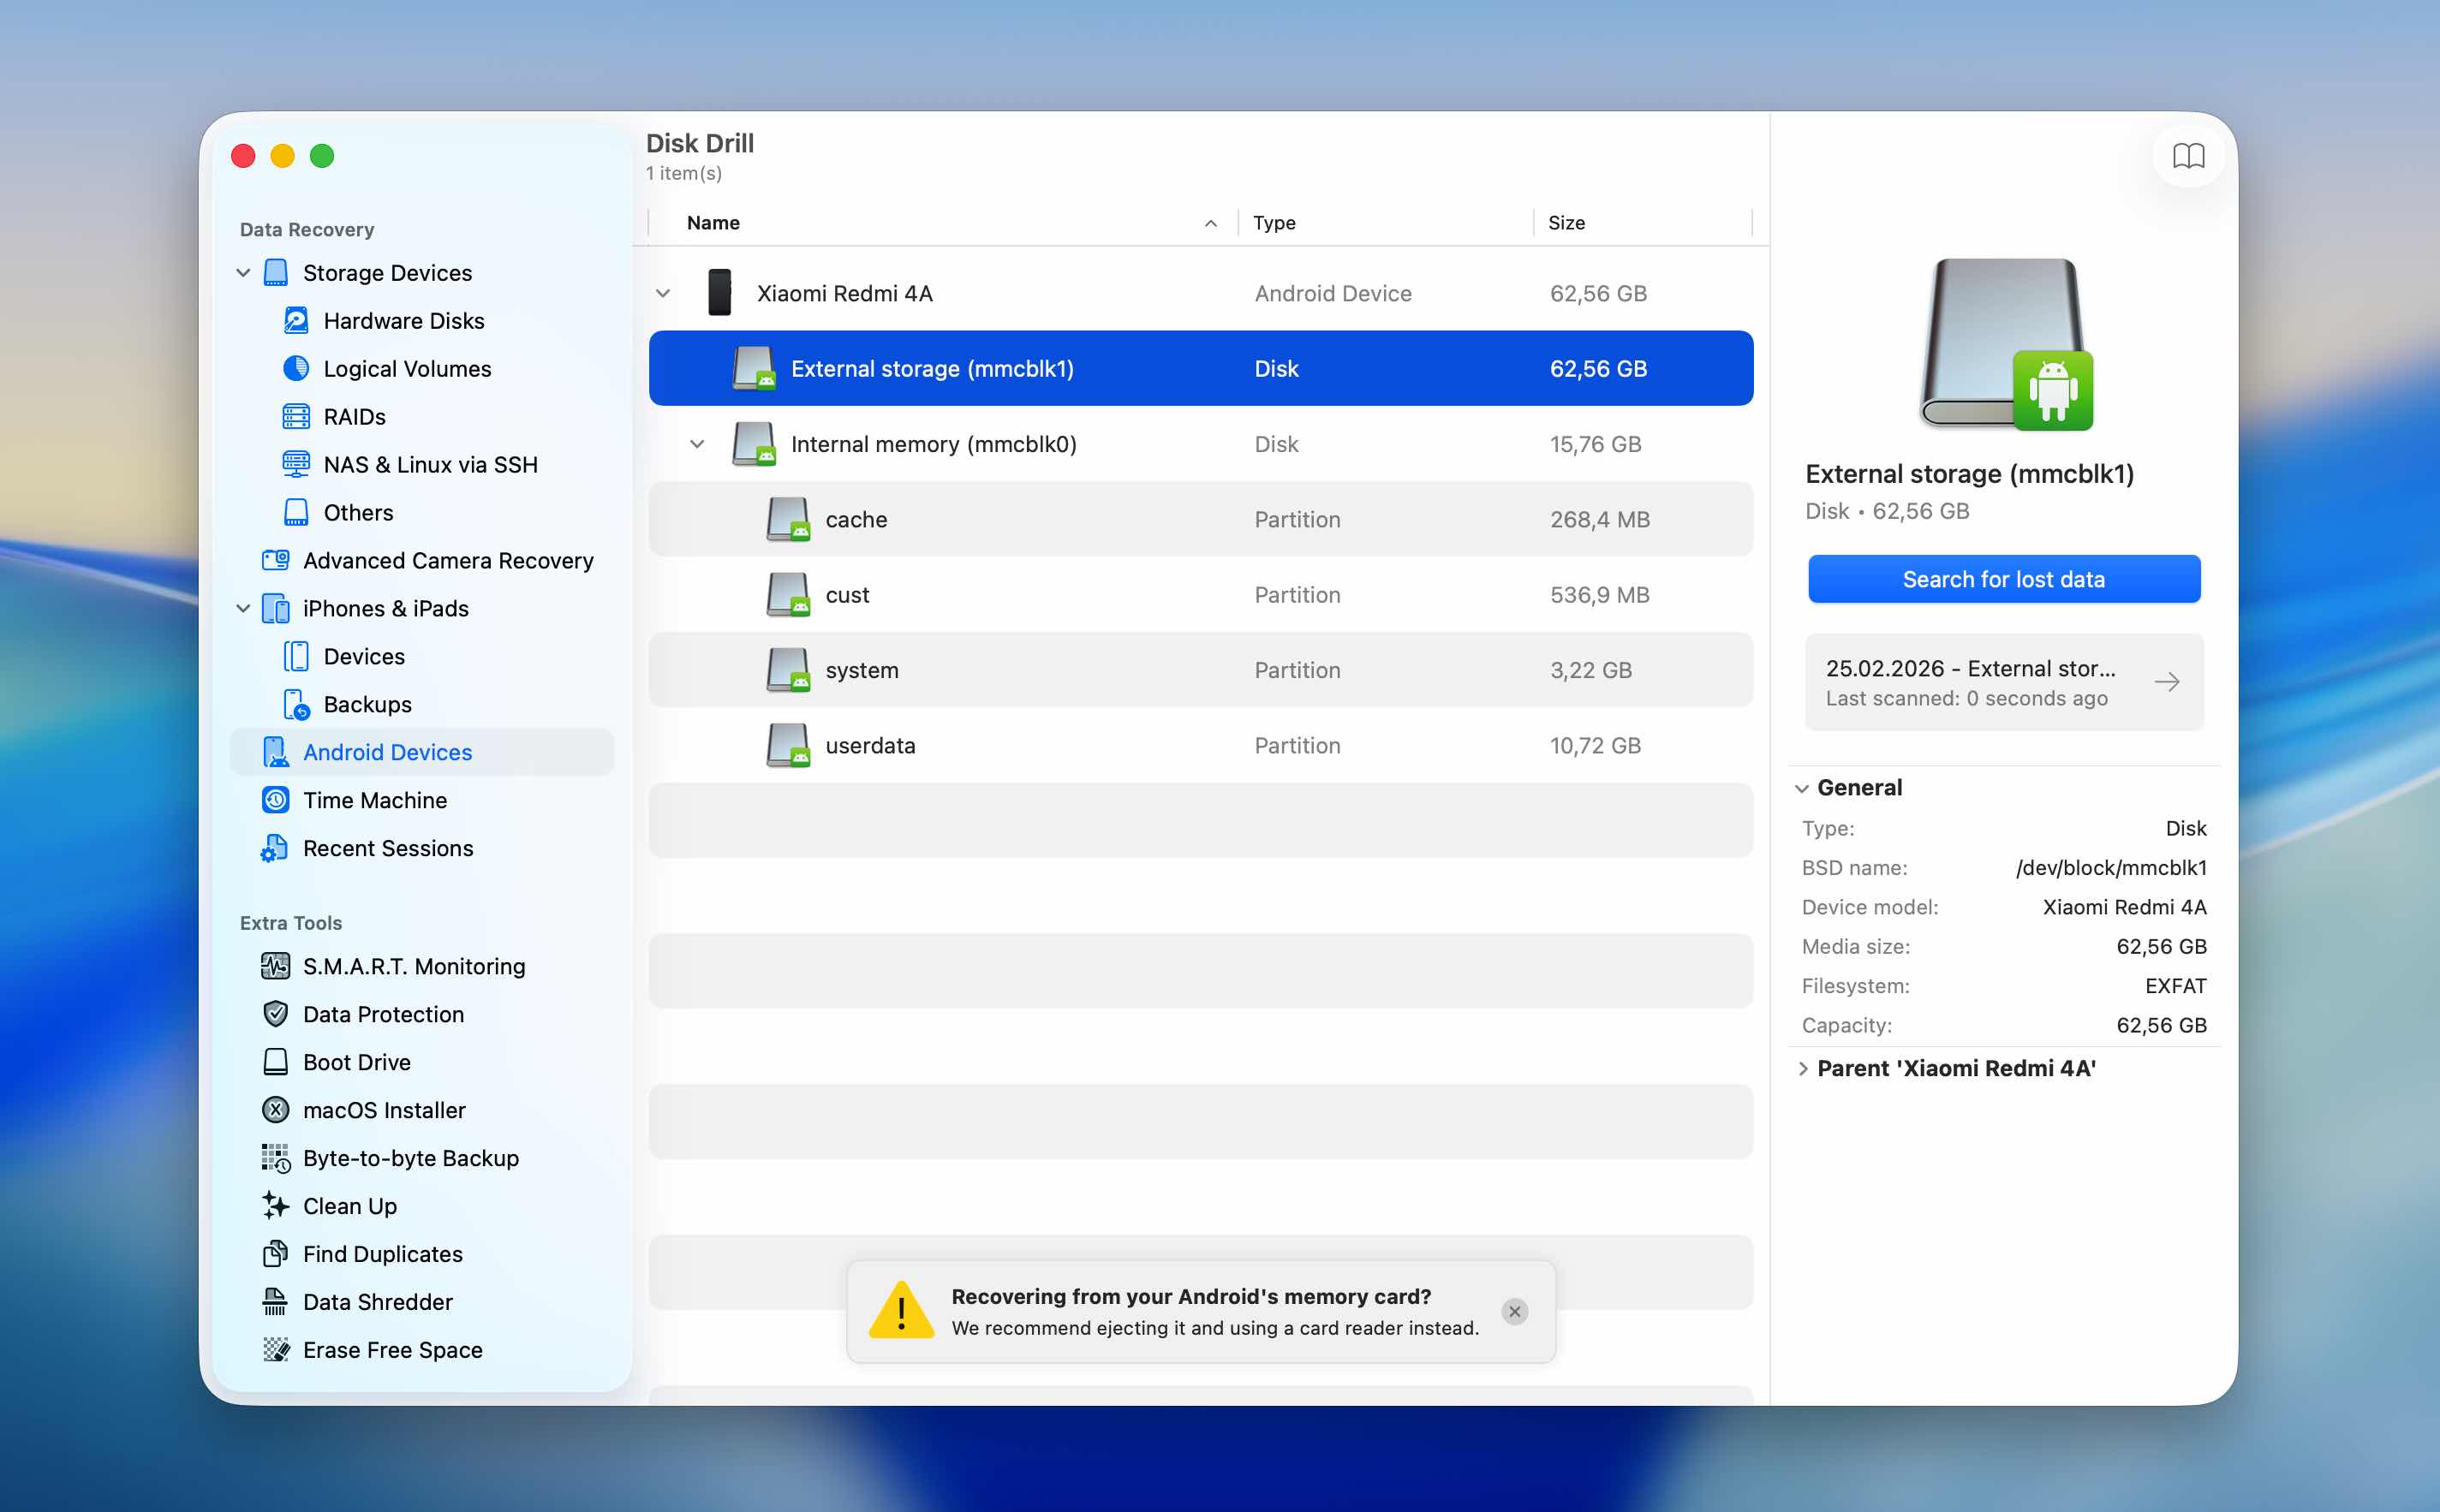
- Start the scan and wait for it to complete. Depending on the device storage size and condition, this may take some time.
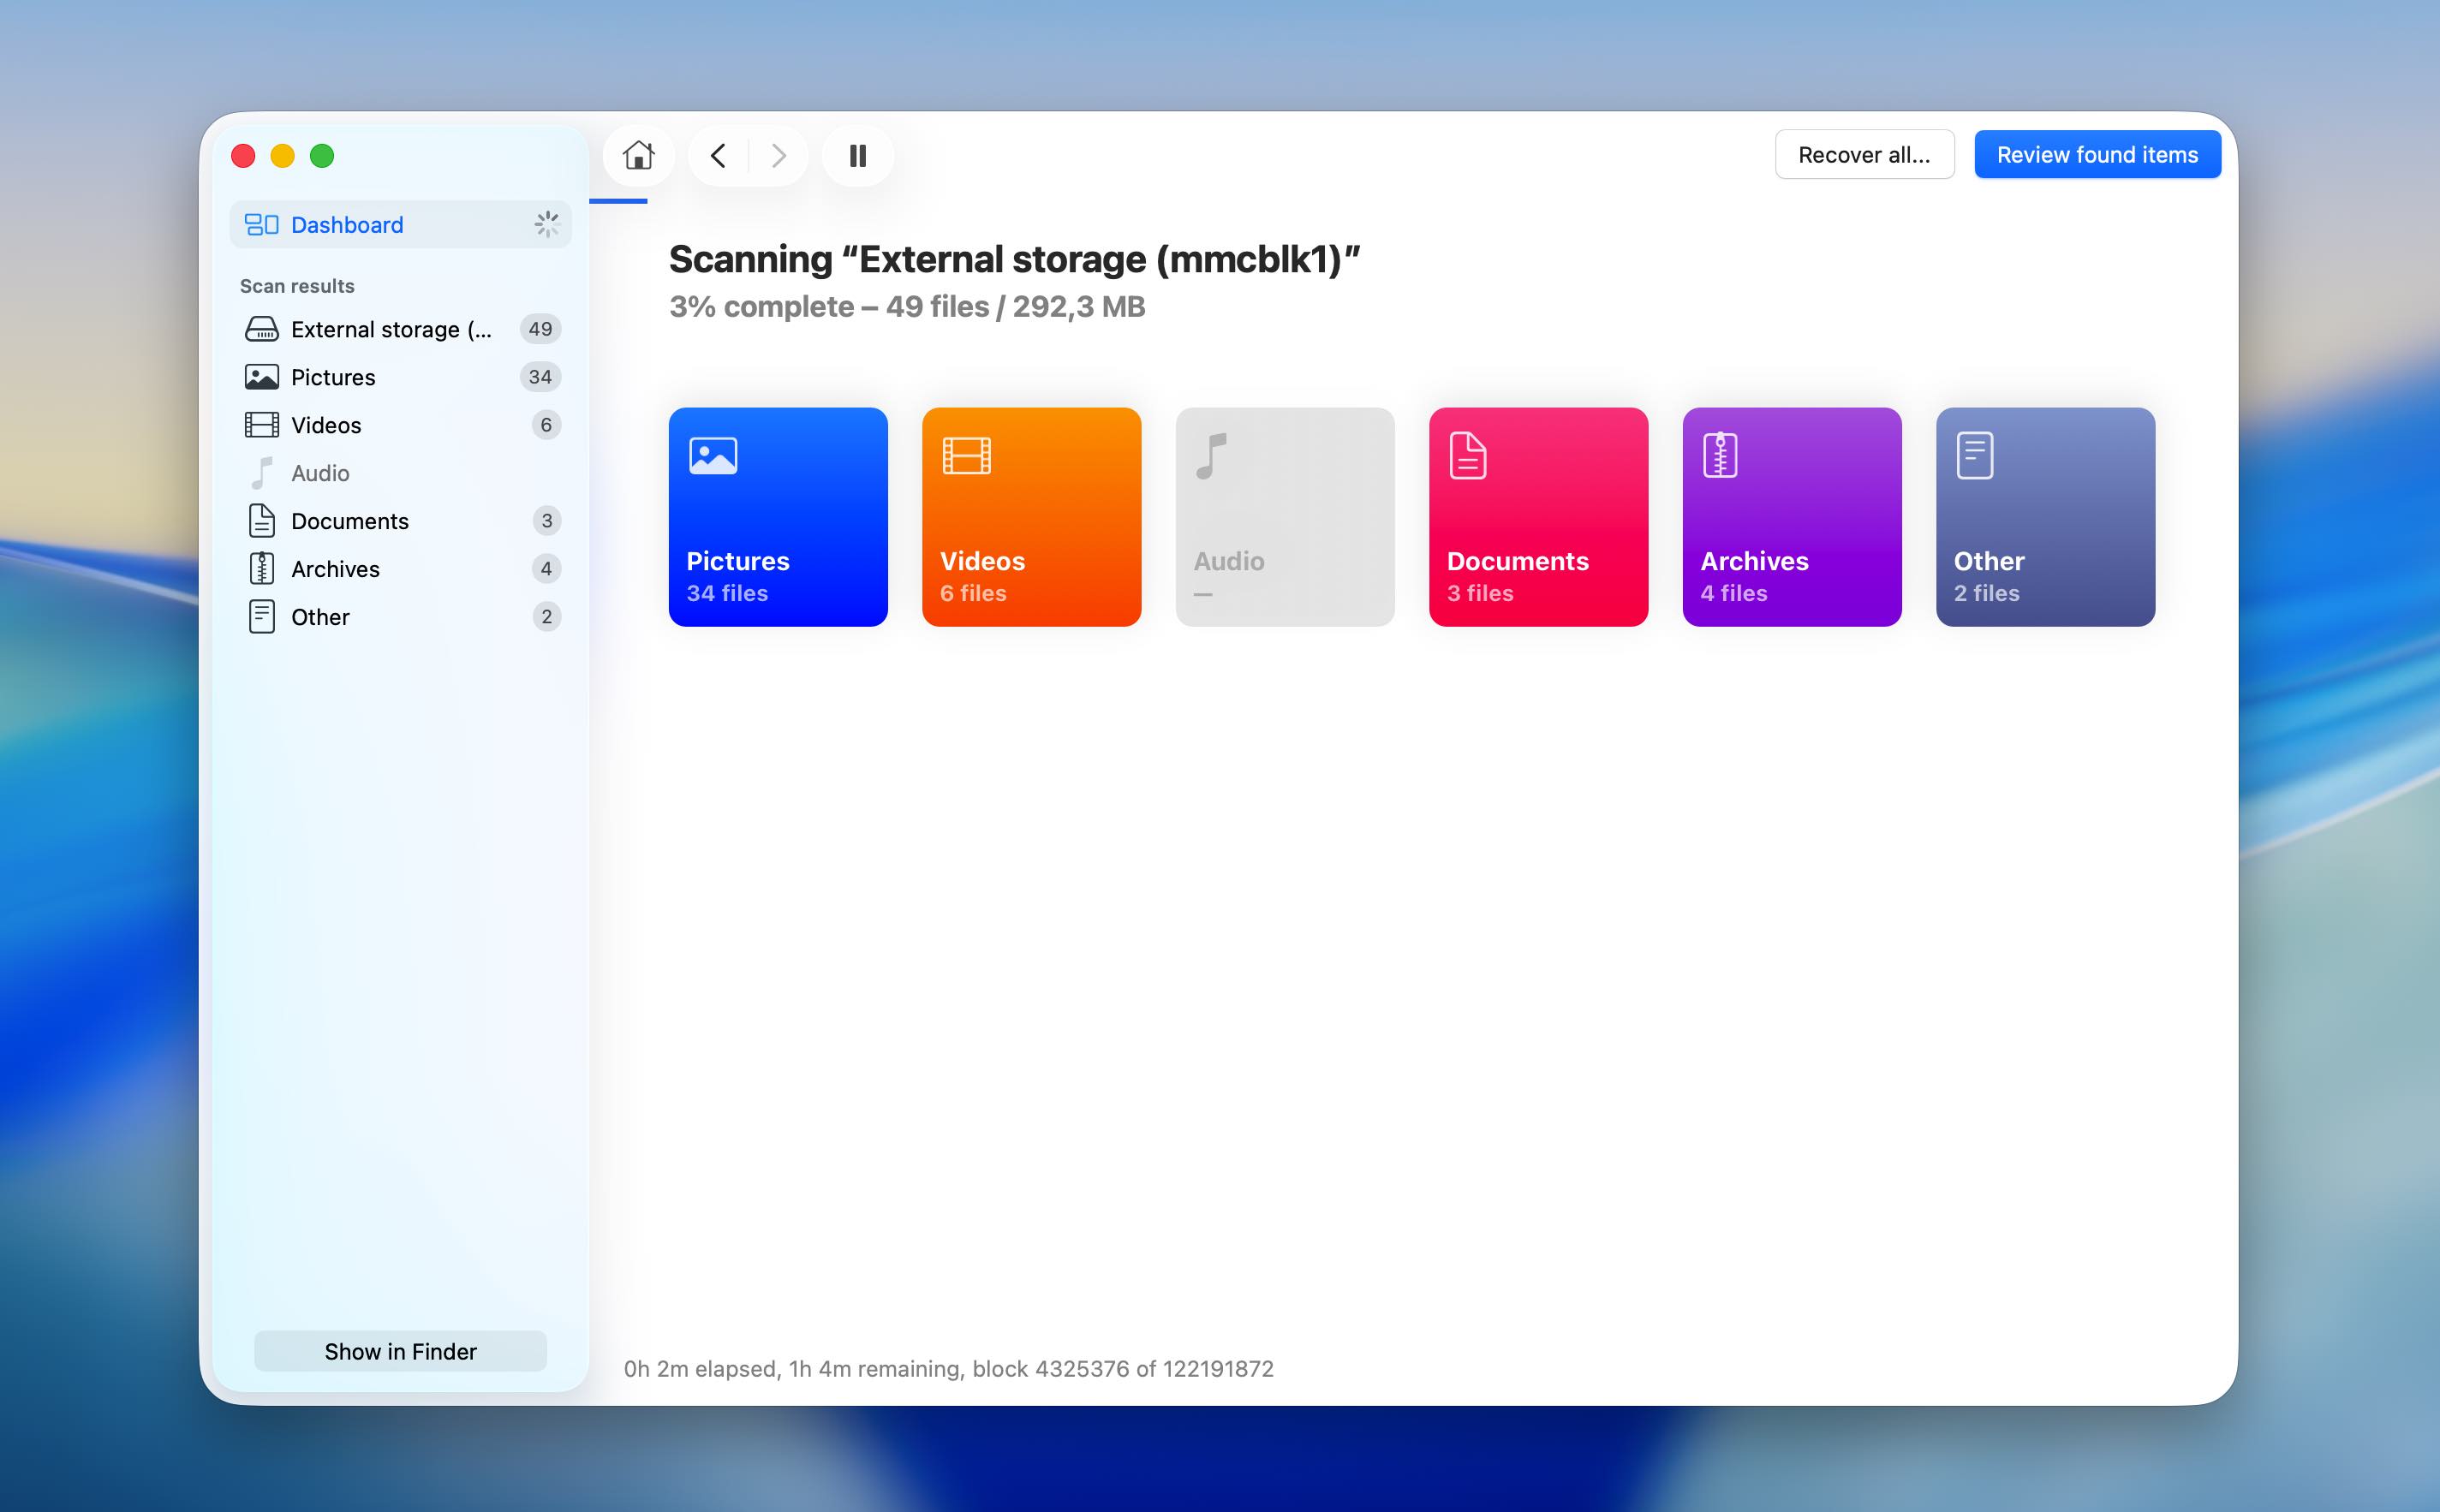
- After the scan finishes, review the found items and select the deleted files you want to recover.

- Click Recover, choose a recovery destination on your Mac, and confirm the process. Avoid saving recovered files back to the Android device during recovery to prevent overwriting data.
Method 4: Recover Data Using SD Card Recovery App for Android
Don’t have access to a PC? You can still perform a limited data recovery procedure using an Android data recovery app. In practice, the selection of mobile recovery tools is much smaller compared to desktop software, which is why DiskDigger remains one of the more stable and commonly used options.
The app offers a free version that lets you recover images and videos. Photos can be recovered without rooting the device, but video recovery requires root access. The paid version supports recovery of additional file types, but it also requires your Android phone to be rooted.
That said, this method should be used with caution. Installing a new app on the same Android device may lead to overwriting the very files you’re trying to recover.
- Install DiskDigger from the Google Play on your Android device.
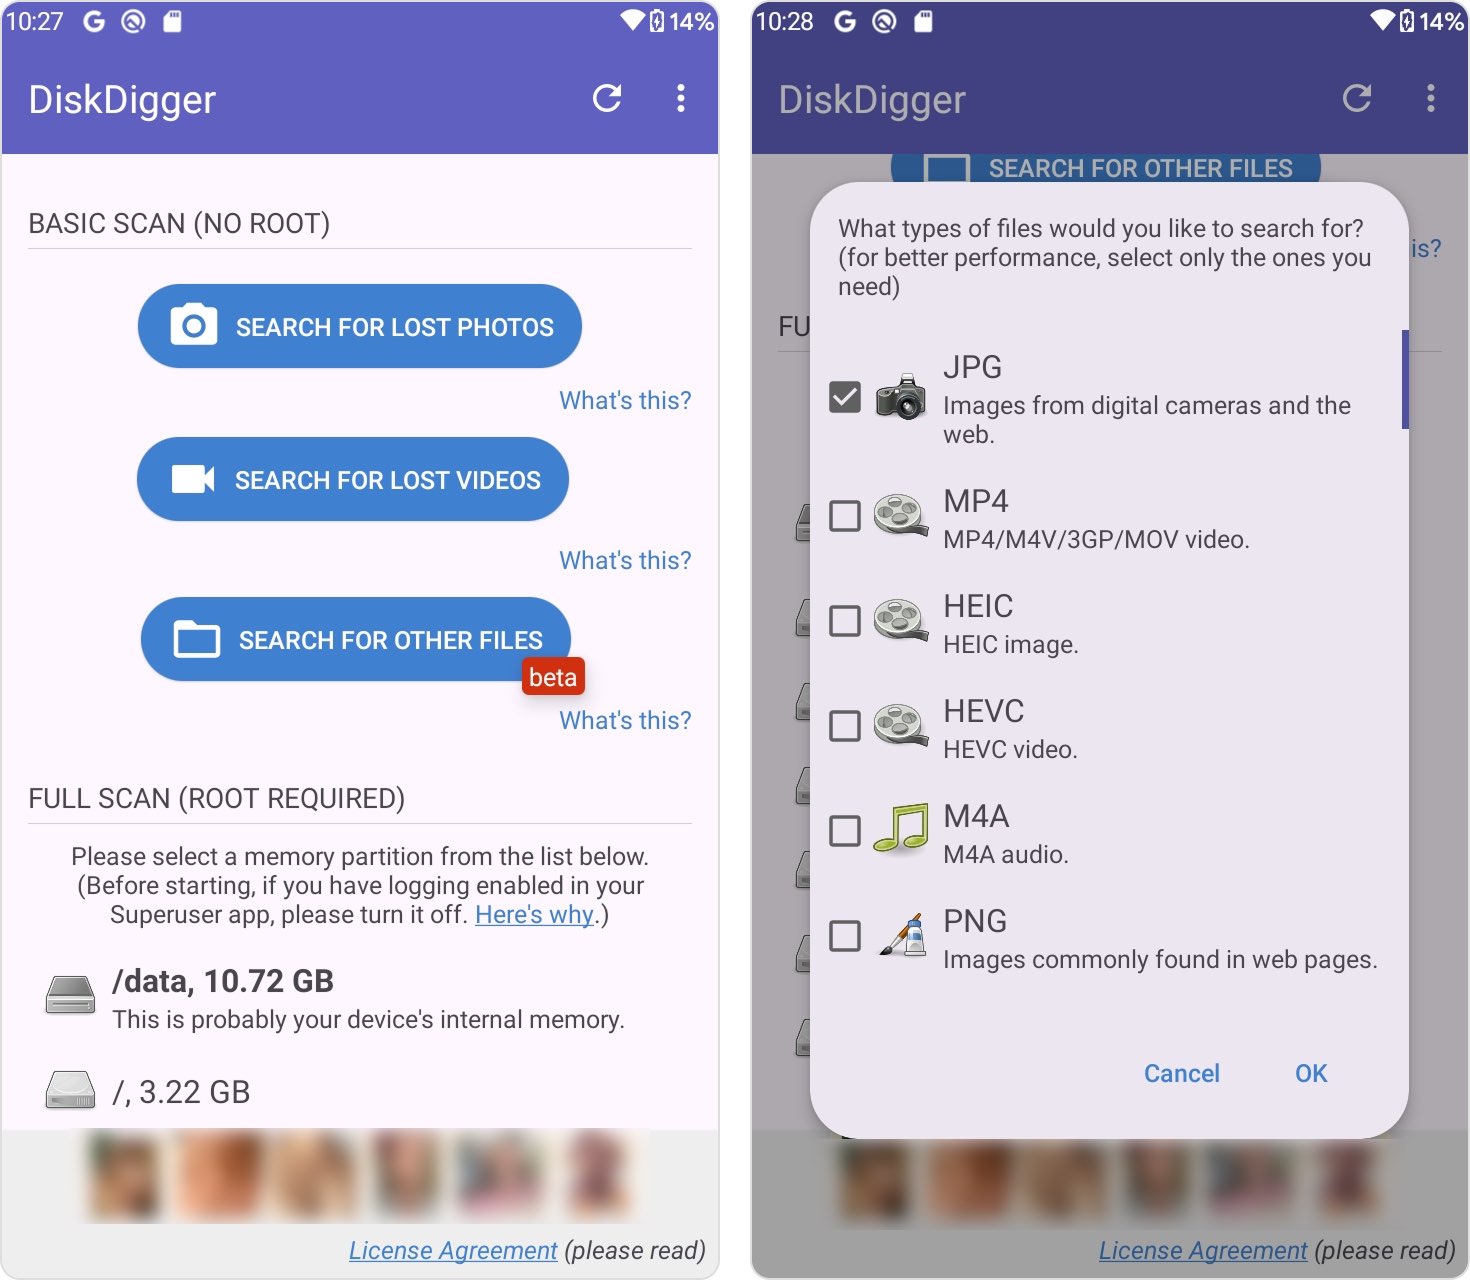
- Launch the app. You’ll see two scan options: Basic Scan and Deep Scan. Use Basic Scan if your device is not rooted (this option allows recovery of deleted images only). Use Deep Scan if your device is rooted (this mode supports recovery of multiple file types).
- Choose the file types you want to recover and tap OK to start the scan.
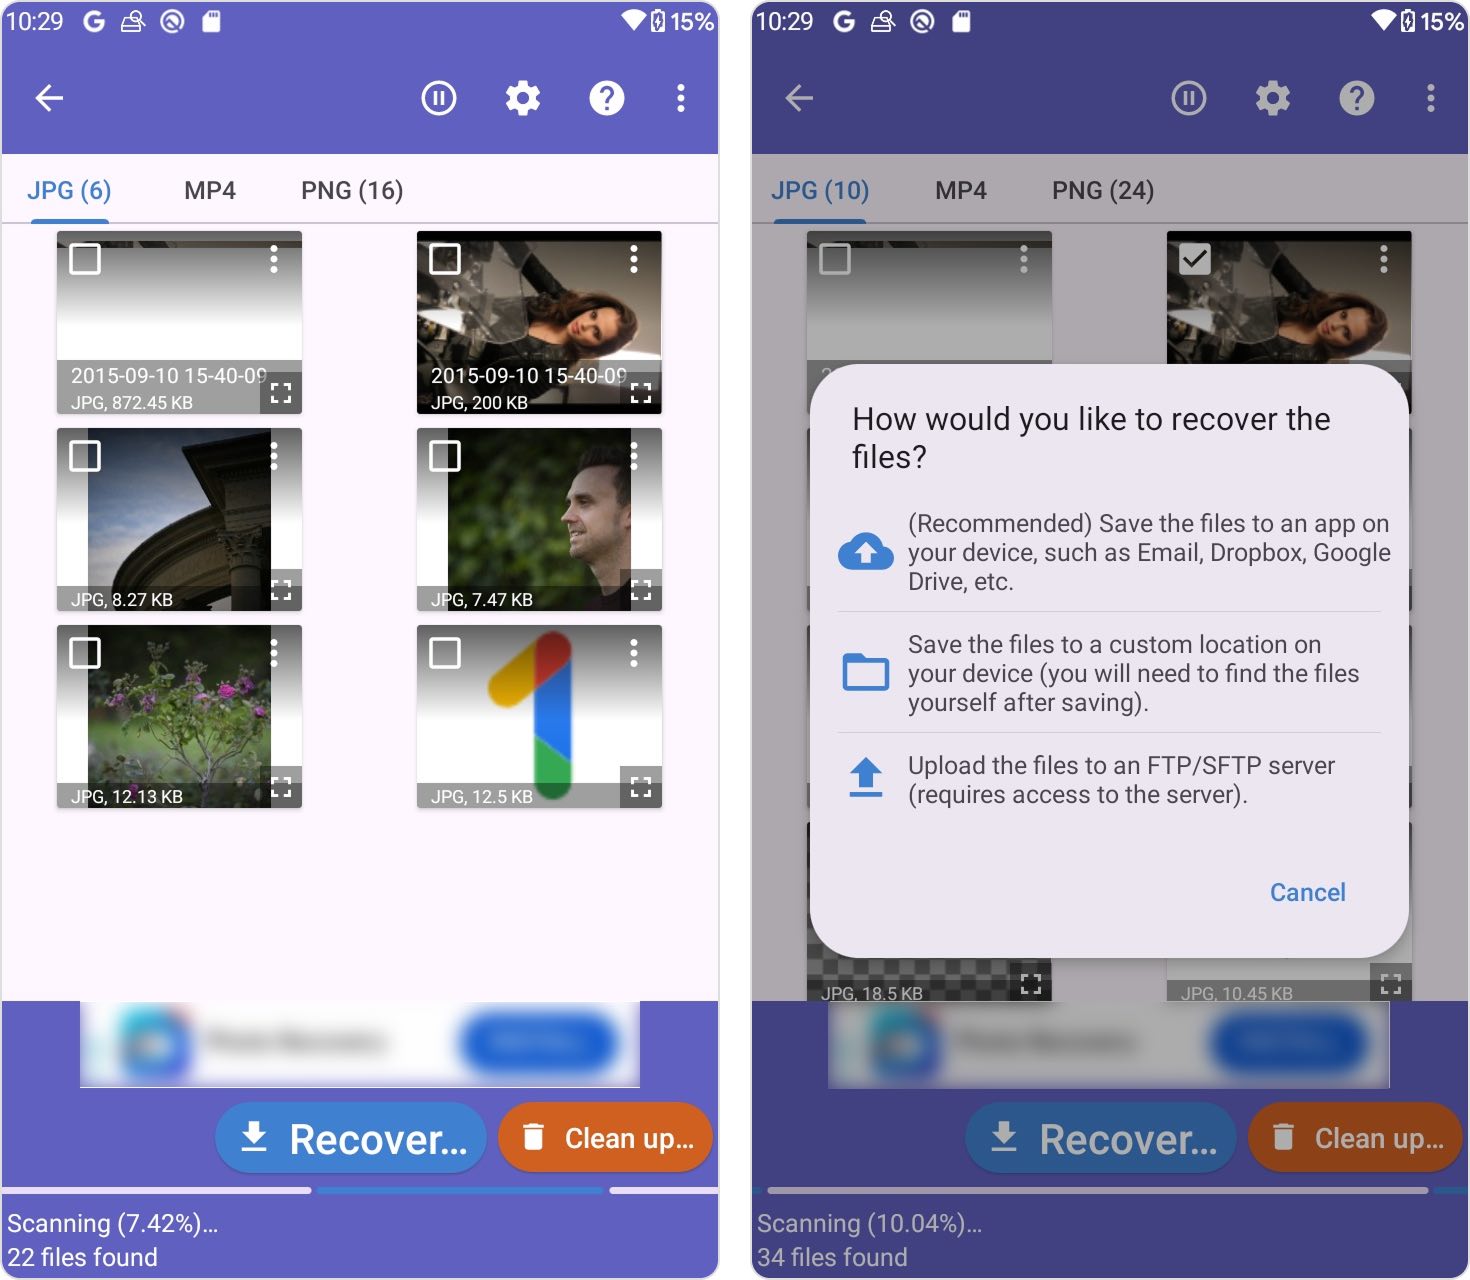
- Wait for the scan to complete, then select the files you want to restore.
- Tap Recover and choose a recovery destination, such as cloud storage, a local folder, or an FTP server.
If this method doesn’t produce the desired results, the safest next step is to remove the SD card and perform recovery using a desktop data recovery tool instead.
Don’t Want to Perform SD Card Data Recovery on Android Anymore? Consider These Tips
There are a few things you can do to prevent data loss in the future, though the method will vary from app to app and file to file.
📷 Use Google Photos on your Android device. Google Photos automatically backs your photos up to the cloud, meaning that if you lose your device or it malfunctions, you’ll still have access.
☁️ Other apps have similar cloud storage solutions. If you use Photoshop, for example, you can automatically back up your images to your Adobe Creative Cloud. And, if you use Microsoft Office apps, you may have backed files up to Microsoft OneDrive.
📲 Make sure that full backups of your phone are enabled. To enable backups, open Settings, tap “System,” then tap “Backup” and toggle the switch to on.
Conclusion
As you’ve seen, there are several ways to perform SD card data recovery on Android, and the right option depends on your situation. That said, if you have the ability to remove the SD card from your device and connect it directly to a computer, this is usually the preferred approach. It allows recovery tools to access the storage more reliably and avoids the limitations and risks associated with rooting an Android device, which can affect system stability and data integrity.
Mobile-based recovery methods can still be useful in certain cases, but they often require enabling root access. Rooting modifies the Android system at a low level, which can trigger background changes to the file system, invalidate existing security protections, and increase the risk of overwriting deleted data. Ultimately, the most effective strategy is to avoid situations where Android SD card data recovery becomes necessary in the first place.
FAQ
- Download Disk Drill and install it on your PC.
- Connect the SD card to your PC.
- Open Disk Drill, select the SD card, and click Search for lost data.
- Click on Review found items.
- Select the files you wish to recover and click Recover.
- Choose a recovery destination for the files and click Next.


")

