
Need to recover deleted photos from a Canon camera but don’t know how to do it? It doesn’t matter whether you’re a professional photographer or just someone who uses a Canon camera for everyday shots – you can recover deleted photos on your own if you act quickly, and we can help you with that. In this article, we’ll show you how to recover photos from your Canon camera and protect your photos from data loss going forward.
What to Do If Photos Become Lost or Deleted From a Canon Camera
When photos are deleted, they don’t immediately disappear from your SD card. Instead, they become invisible to the user, while the actual data remains in the file system structure until new data overwrites it. This principle applies to all storage devices, including SD cards used in Canon cameras.
Because of this, if you don’t have a backup, your main option for Canon photo recovery is to use photo recovery software (we’ll cover this in more detail in the next section). However, for recovery to be successful, you need to follow a few simple rules:
- Stop using the camera immediately, which means don’t take new photos or videos.
- Carefully remove the SD card from the camera and switch it to read-only mode (if your card has a lock switch).
- Do not format the SD card if your computer prompts you to do so after connecting it. Close the window and refer to our guide on recovering data from such a device instead.
For this guide, we used photos deleted from an SD card in a Canon camera, but the same rules apply if your photos were deleted from another device or lost due to quick formatting, interrupted file transfers, or other common data loss scenarios.
How to Recover Deleted Photos From a Canon Camera
The easiest, and often the only way to recover deleted photos from a Canon camera is by using data recovery software, which we briefly mentioned earlier. These tools scan your camera’s SD card and attempt to restore any data they find and haven’t yet been overwritten.
It’s worth noting that there are many Canon recovery software options available, so you can choose one based on your preferred interface or budget. In this article, however, we’ll focus on Disk Drill.
It’s available on both Windows and macOS and is favored by many, including us, for its reliability and ease of use. One of its most valuable features for Canon photo recovery is its signature scanner, which supports around 400 file types, including RAW photos. Another strength is how it handles scan results. You can use the preview panel, along with built-in filters, to quickly organize files by type and easily select the photos you want to recover.
If you want a closer look at its features, performance, and real-world test results, check out our full Disk Drill review.
The instructions below will show you how to retrieve deleted photos from a Canon camera.
- Download and install Disk Drill. Open it once ready.

- Remove your SD card from your Canon camera and connect it to your computer.
If your photos were lost due to SD card corruption, Disk Drill allows you to create a byte-to-byte image of the card and work with that instead. You can follow the detailed steps in our guide on recovering corrupted SD cards.
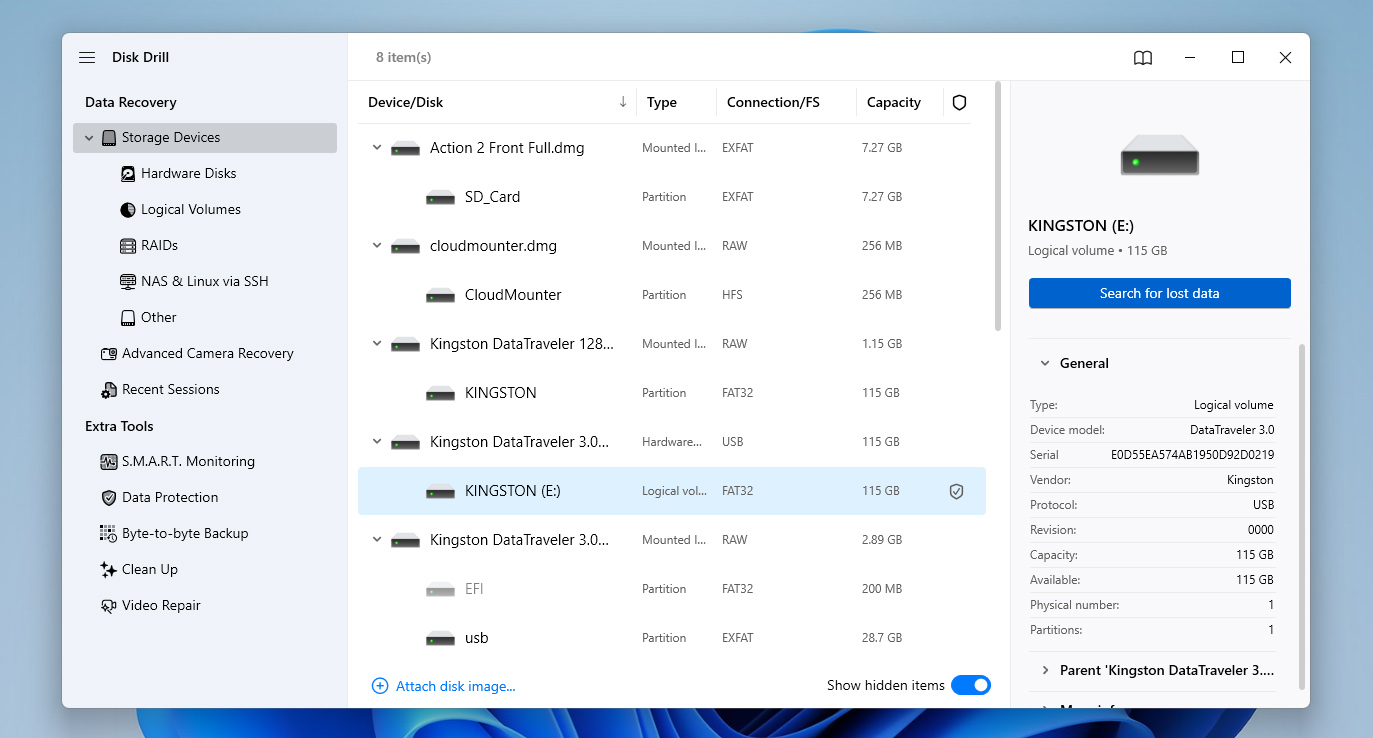
- Select your camera or SD card from the list of devices and click Search for lost data.
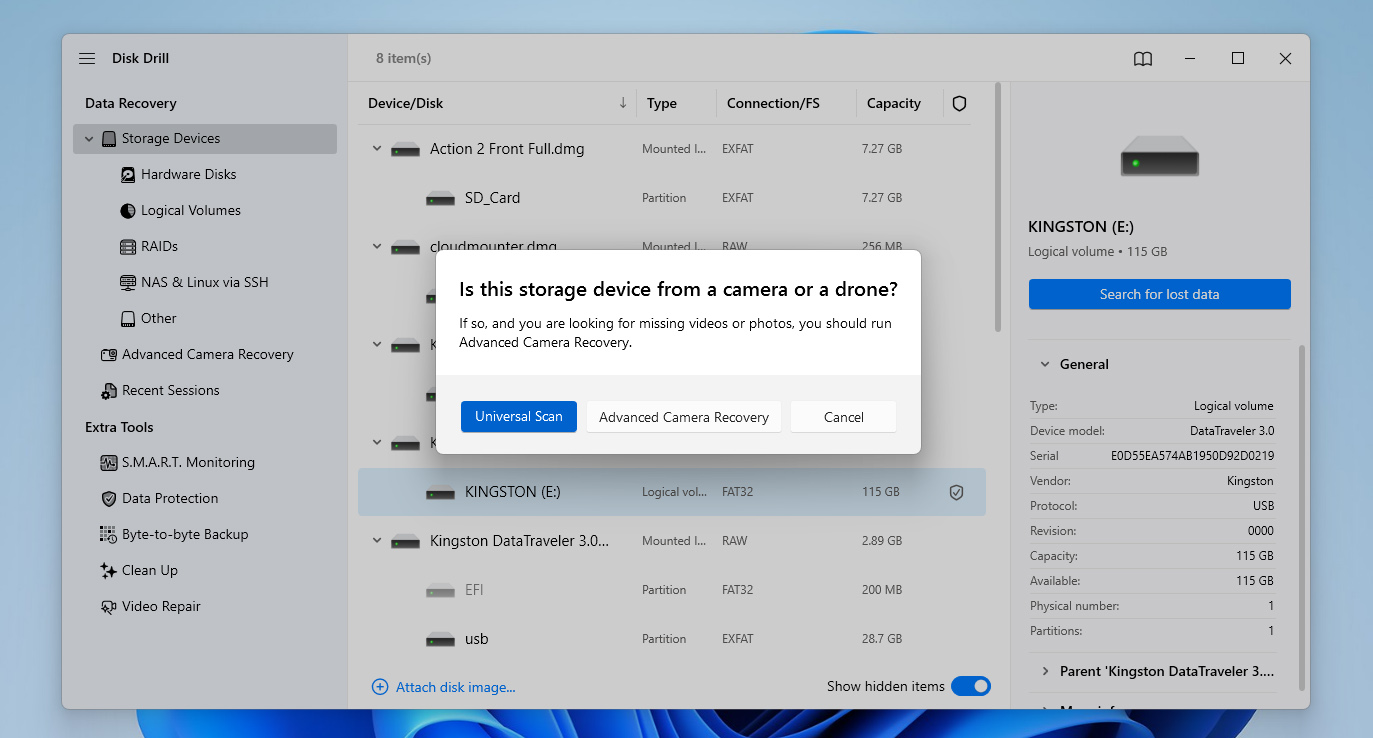
- Disk Drill will ask you to choose a scan mode. Select Universal Scan (Advanced Camera Recovery is designed specifically for recovering fragmented video, so if you need it, you can run it as a second scan after the Universal Scan completes.)
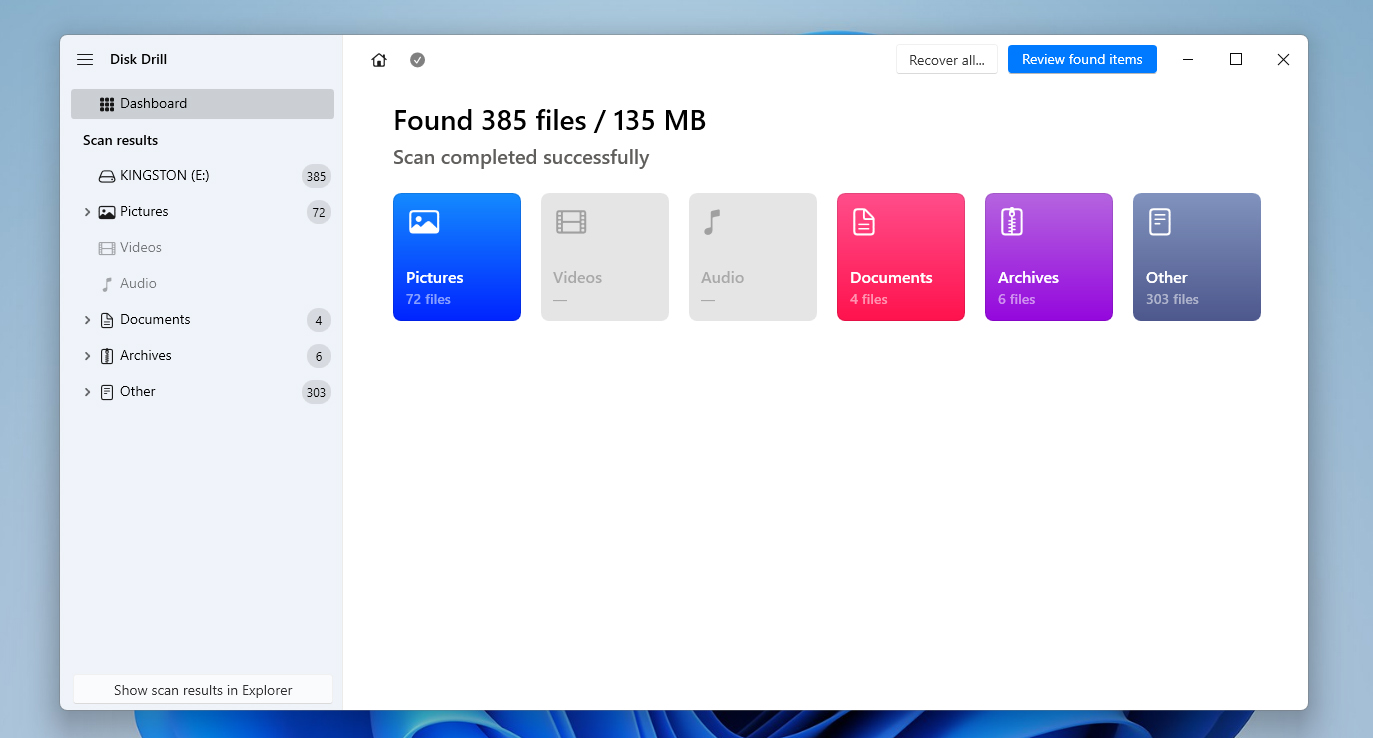
- Click Review found items when the scan finishes, then navigate to the Deleted or lost section.
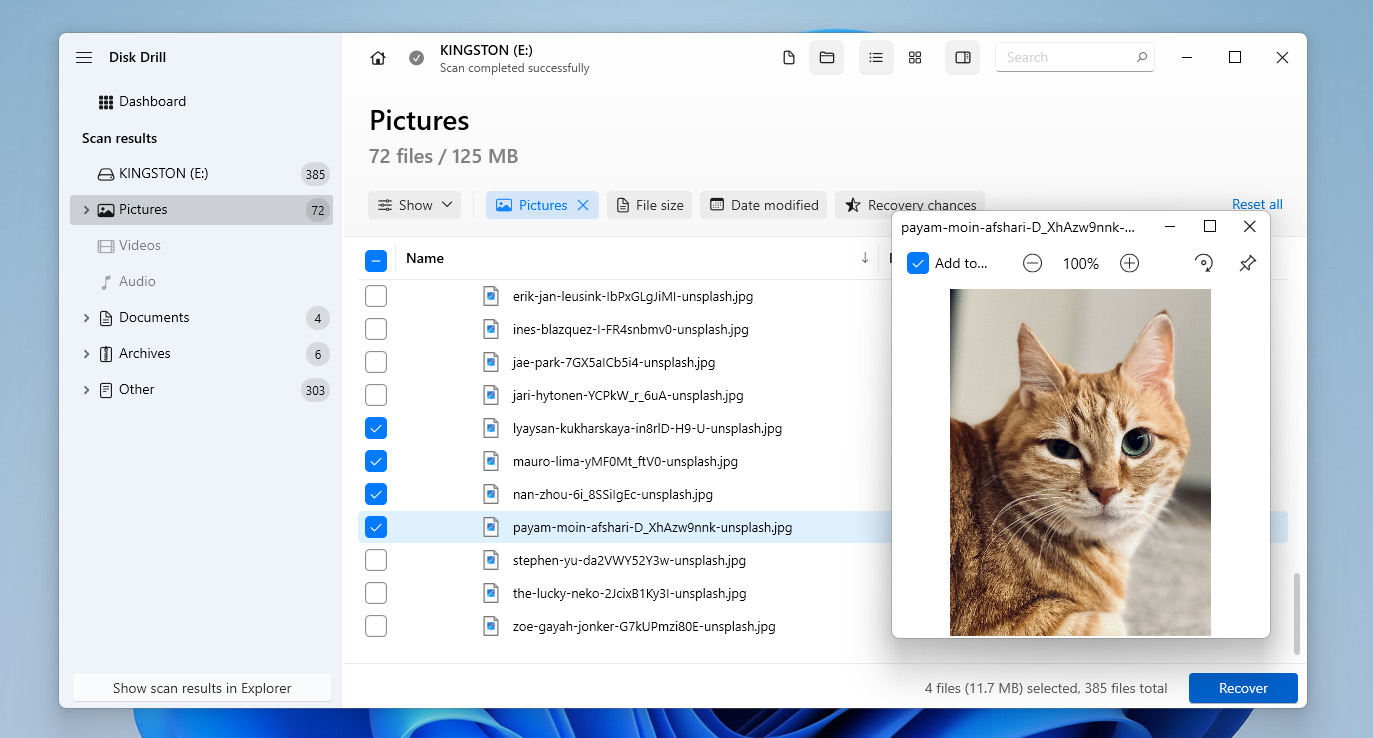
- Mark the photos you’d like to recover. Clicking Pictures in the left panel will make it easier by only displaying photo file types. Double-clicking a file will open the preview panel so you can check if it’s intact before recovery. When ready, click Recover.
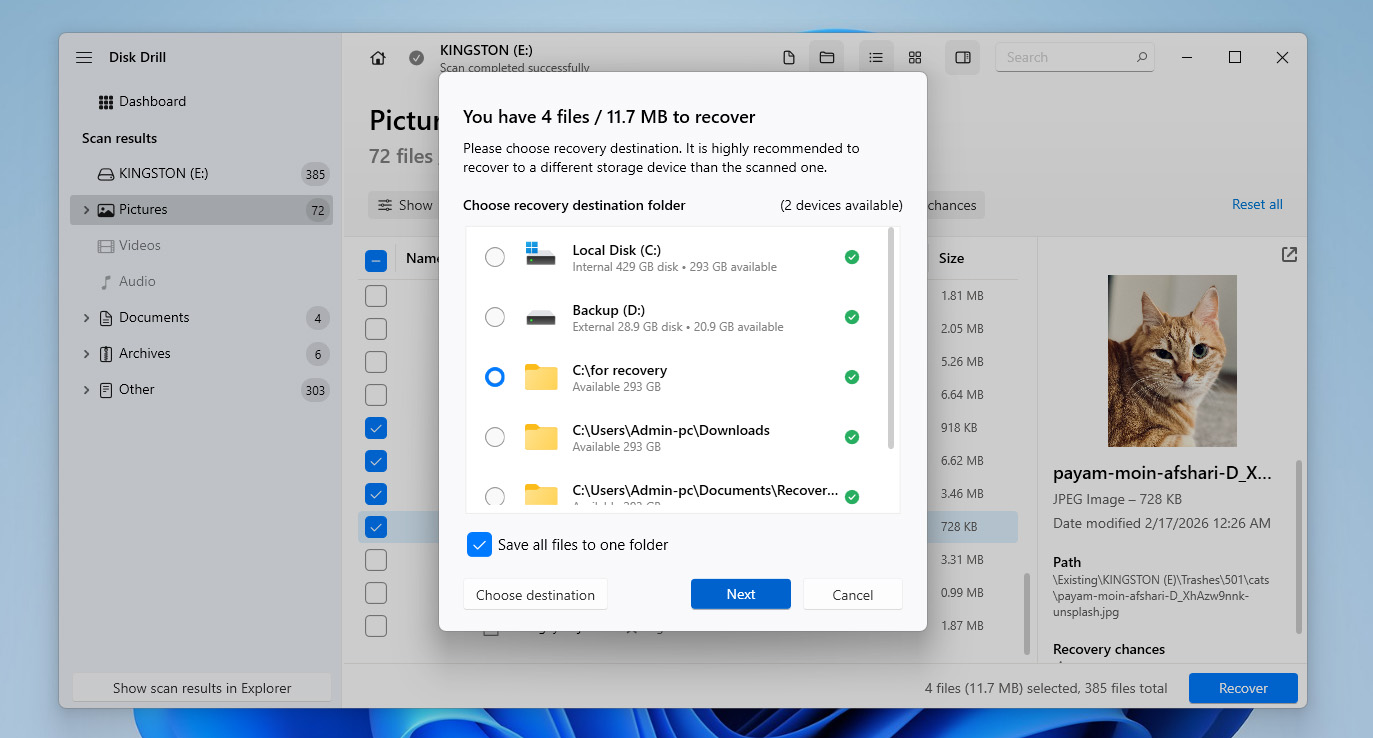
- Select a separate physical storage location for recovery. Click Next to complete the process. Once finished, you’ll find your recovered photos in the output folder you selected.
[Keep in mind that on Windows, Disk Drill allows you to recover up to 100 MB of data for free, which is usually enough for a few photos. On macOS, the free version only lets you preview recoverable files. In both cases, if you want to fully recover deleted photos from a Canon camera, you’ll need to consider upgrading to the Pro version.
Are There Other Ways to Recover Photos From a Canon Camera?
You might be wondering if you can recover deleted photos from a Canon camera without using data recovery software. In some cases, the answer is yes, but only if those photos exist somewhere else. In that case, you can try the following options:
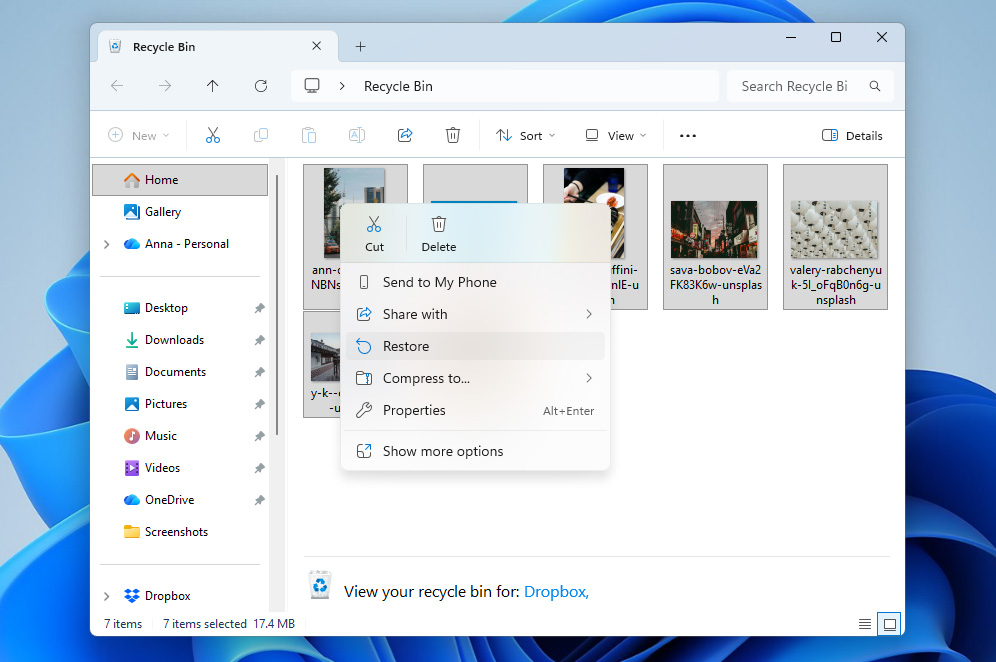
- If your Canon photos were transferred to your computer or stored on a hard drive and then deleted there, the first place to check is the Recycle Bin (Windows) or Trash (macOS). If the files are still there, you can simply select them and click Restore to recover them.
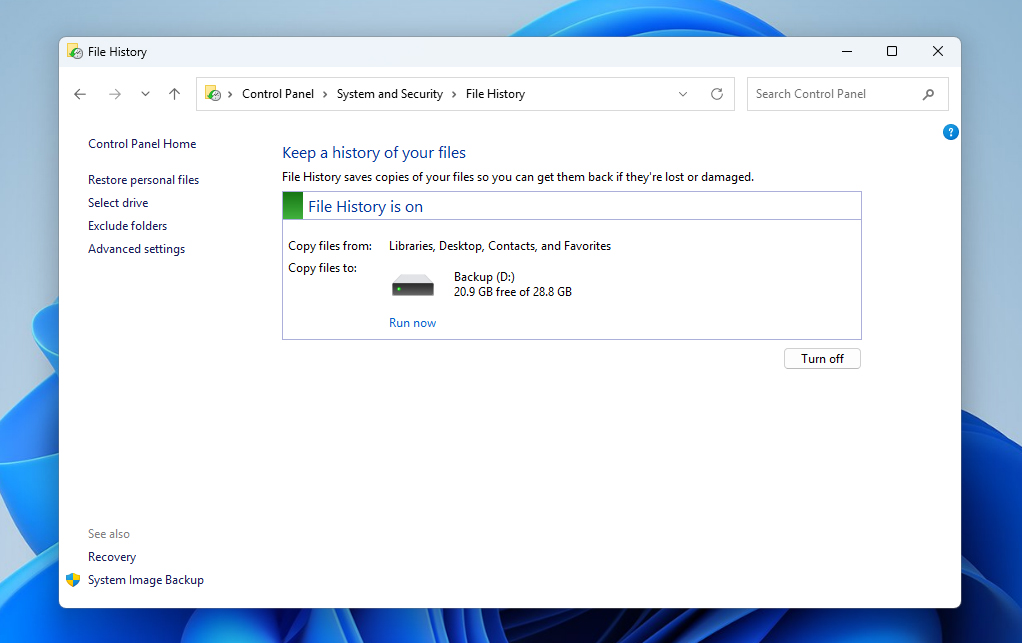
- If the photos were stored on your computer and you had built-in backup tools enabled, like File History on Windows or Time Machine on macOS, you may be able to recover them from a backup. This will only work if a backup containing those photos exists. Connect the backup drive and use the corresponding tool to restore your files.
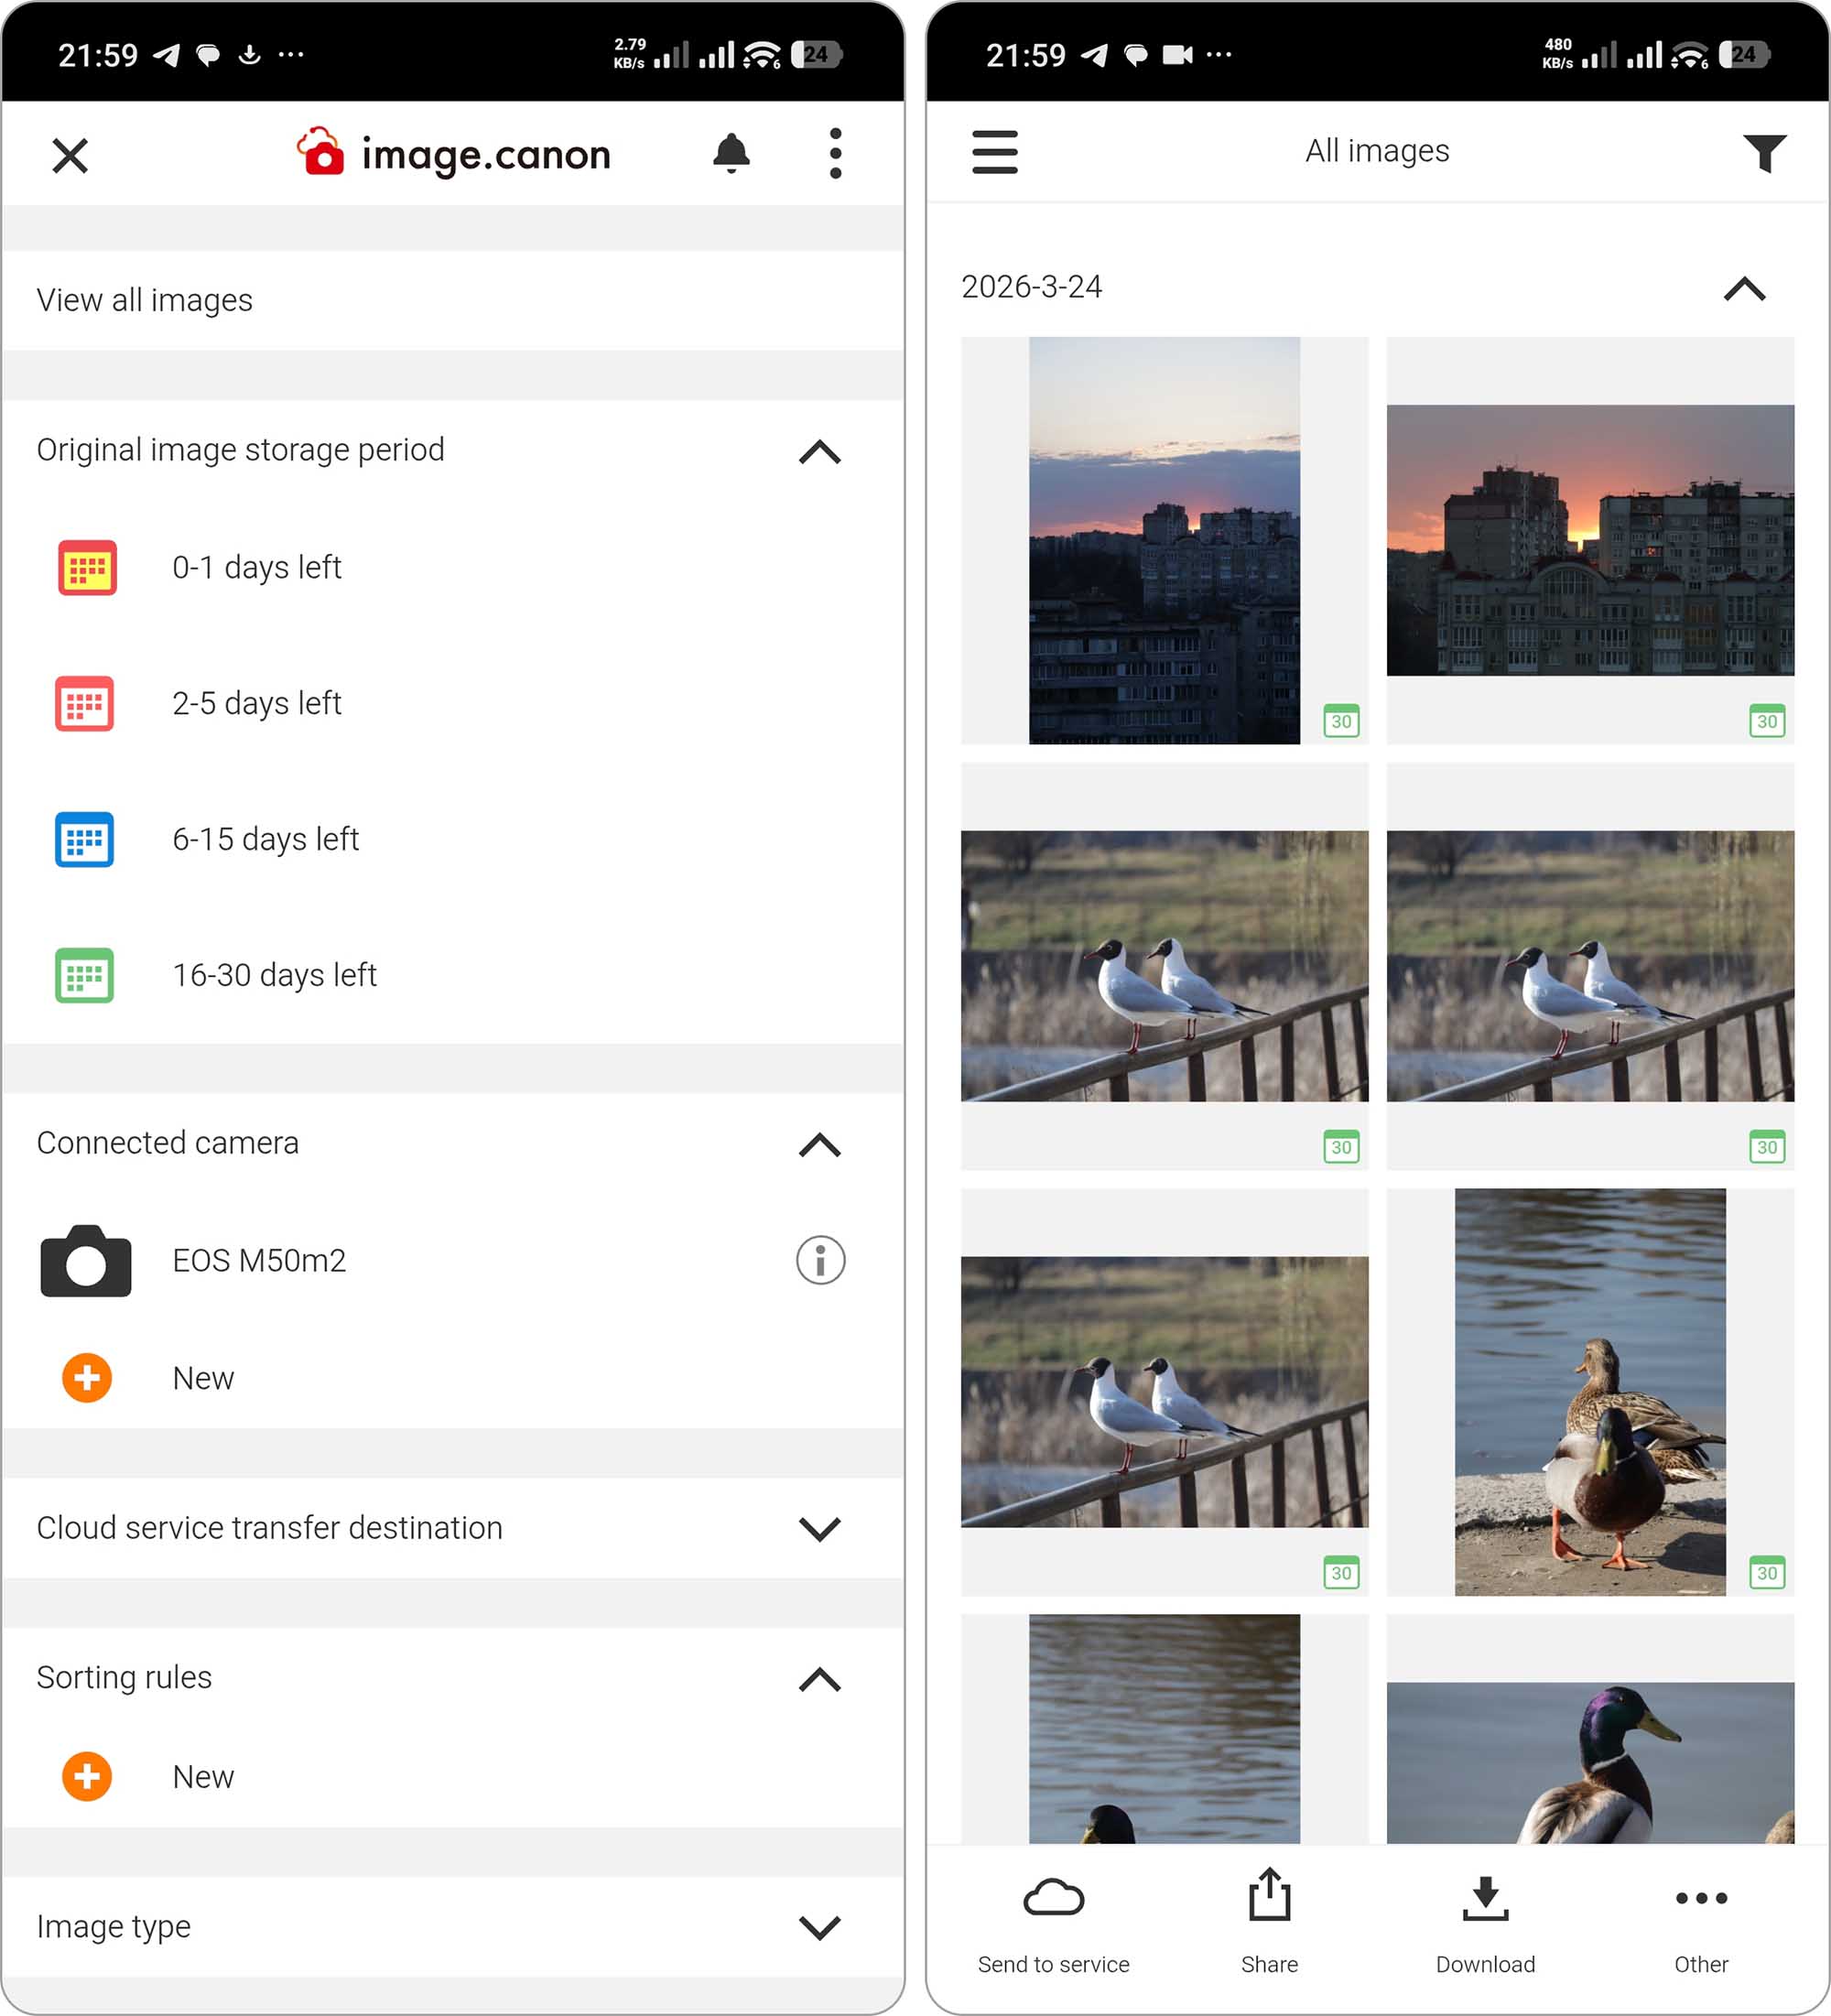
- If you use your camera alongside a phone, there’s a good chance you have the image.canon app, which can store your photos in the cloud. Even if they’re deleted from the SD card, they may remain there for up to 30 days. The same applies to other cloud storage services like Google Drive, so check your account and download the files if they’re still available.
Conclusion
Now you know how to recover deleted photos from a Canon camera SD card, as well as from other devices where they may have been stored. Don’t want to go through the same situation again? Here are a few tips that can help you avoid data loss in the future:
- Make regular backups. Keeping copies of your data ensures you always have something to restore from if things go wrong. Consider following the 3-2-1 backup rule.
- Store your SD cards properly. Using a protective case helps prevent physical damage, extends their lifespan, and makes it easier to keep track of them.
- If you notice disappearing files or slower performance, move your data to a new card before the old one fails completely.
- Always eject your SD card before removing it from your computer. Otherwise, you risk interrupting write processes and corrupting your data or file system.
FAQ:
- Download and install Disk Drill.
- Select your camera or SD card from the list of devices and click Search for lost data.
- Click Review found items.
- Mark the photos you’d like to recover. When ready, click Recover.
- Select an output folder and click OK to complete recovery.
- Disk Drill is the best overall choice for most users. It offers strong recovery performance, supports RAW photo formats, and provides an easy-to-use interface with preview and filtering options.
- PhotoRec is a completely free, open-source tool that delivers powerful recovery through signature-based scanning, but it doesn’t restore file names or folder structure and lacks a graphical interface. Learn more about how it works in our PhotoRec review.
- Stellar Data Recovery is solid middle-ground option with a clean interface and good recovery results for photos. It’s suitable for users who want something straightforward but still capable. You can find more details in our dedicated Stellar Data Recovery review.


")