Can you format an SD card without losing data? Yes, you can. Most people associate formatting with permanent data loss, and in many cases, that assumption is correct, as formatting removes the file system structure and marks stored data for deletion. However, if you don’t press the Format button immediately and instead prepare in advance, you can format an SD card without losing data.
Curious how this works? Keep reading, and below you’ll find step-by-step instructions for formatting an SD card without data loss on Windows. Do NOT format your SD card until you review the section relevant to your device.
How to Format an SD Card Without Losing Data on Windows
Formatting an SD card on a Windows computer is a common task, especially when users rely on a PC for troubleshooting storage issues, managing files, or preparing a card for reuse. Because SD cards are frequently connected directly to a Windows system, formatting is often handled there first.
Below, you’ll find a clear three-step way designed to help you achieve the best possible outcome.
Step 1: Create a Backup of the SD Card
This is the most important step in the entire process. By creating a backup, you secure an exact copy of the data stored on your SD card. Once that copy exists on a separate storage device, formatting the SD card no longer puts your files at risk. So you can format the SD card as many times as necessary without worrying about permanent data loss.
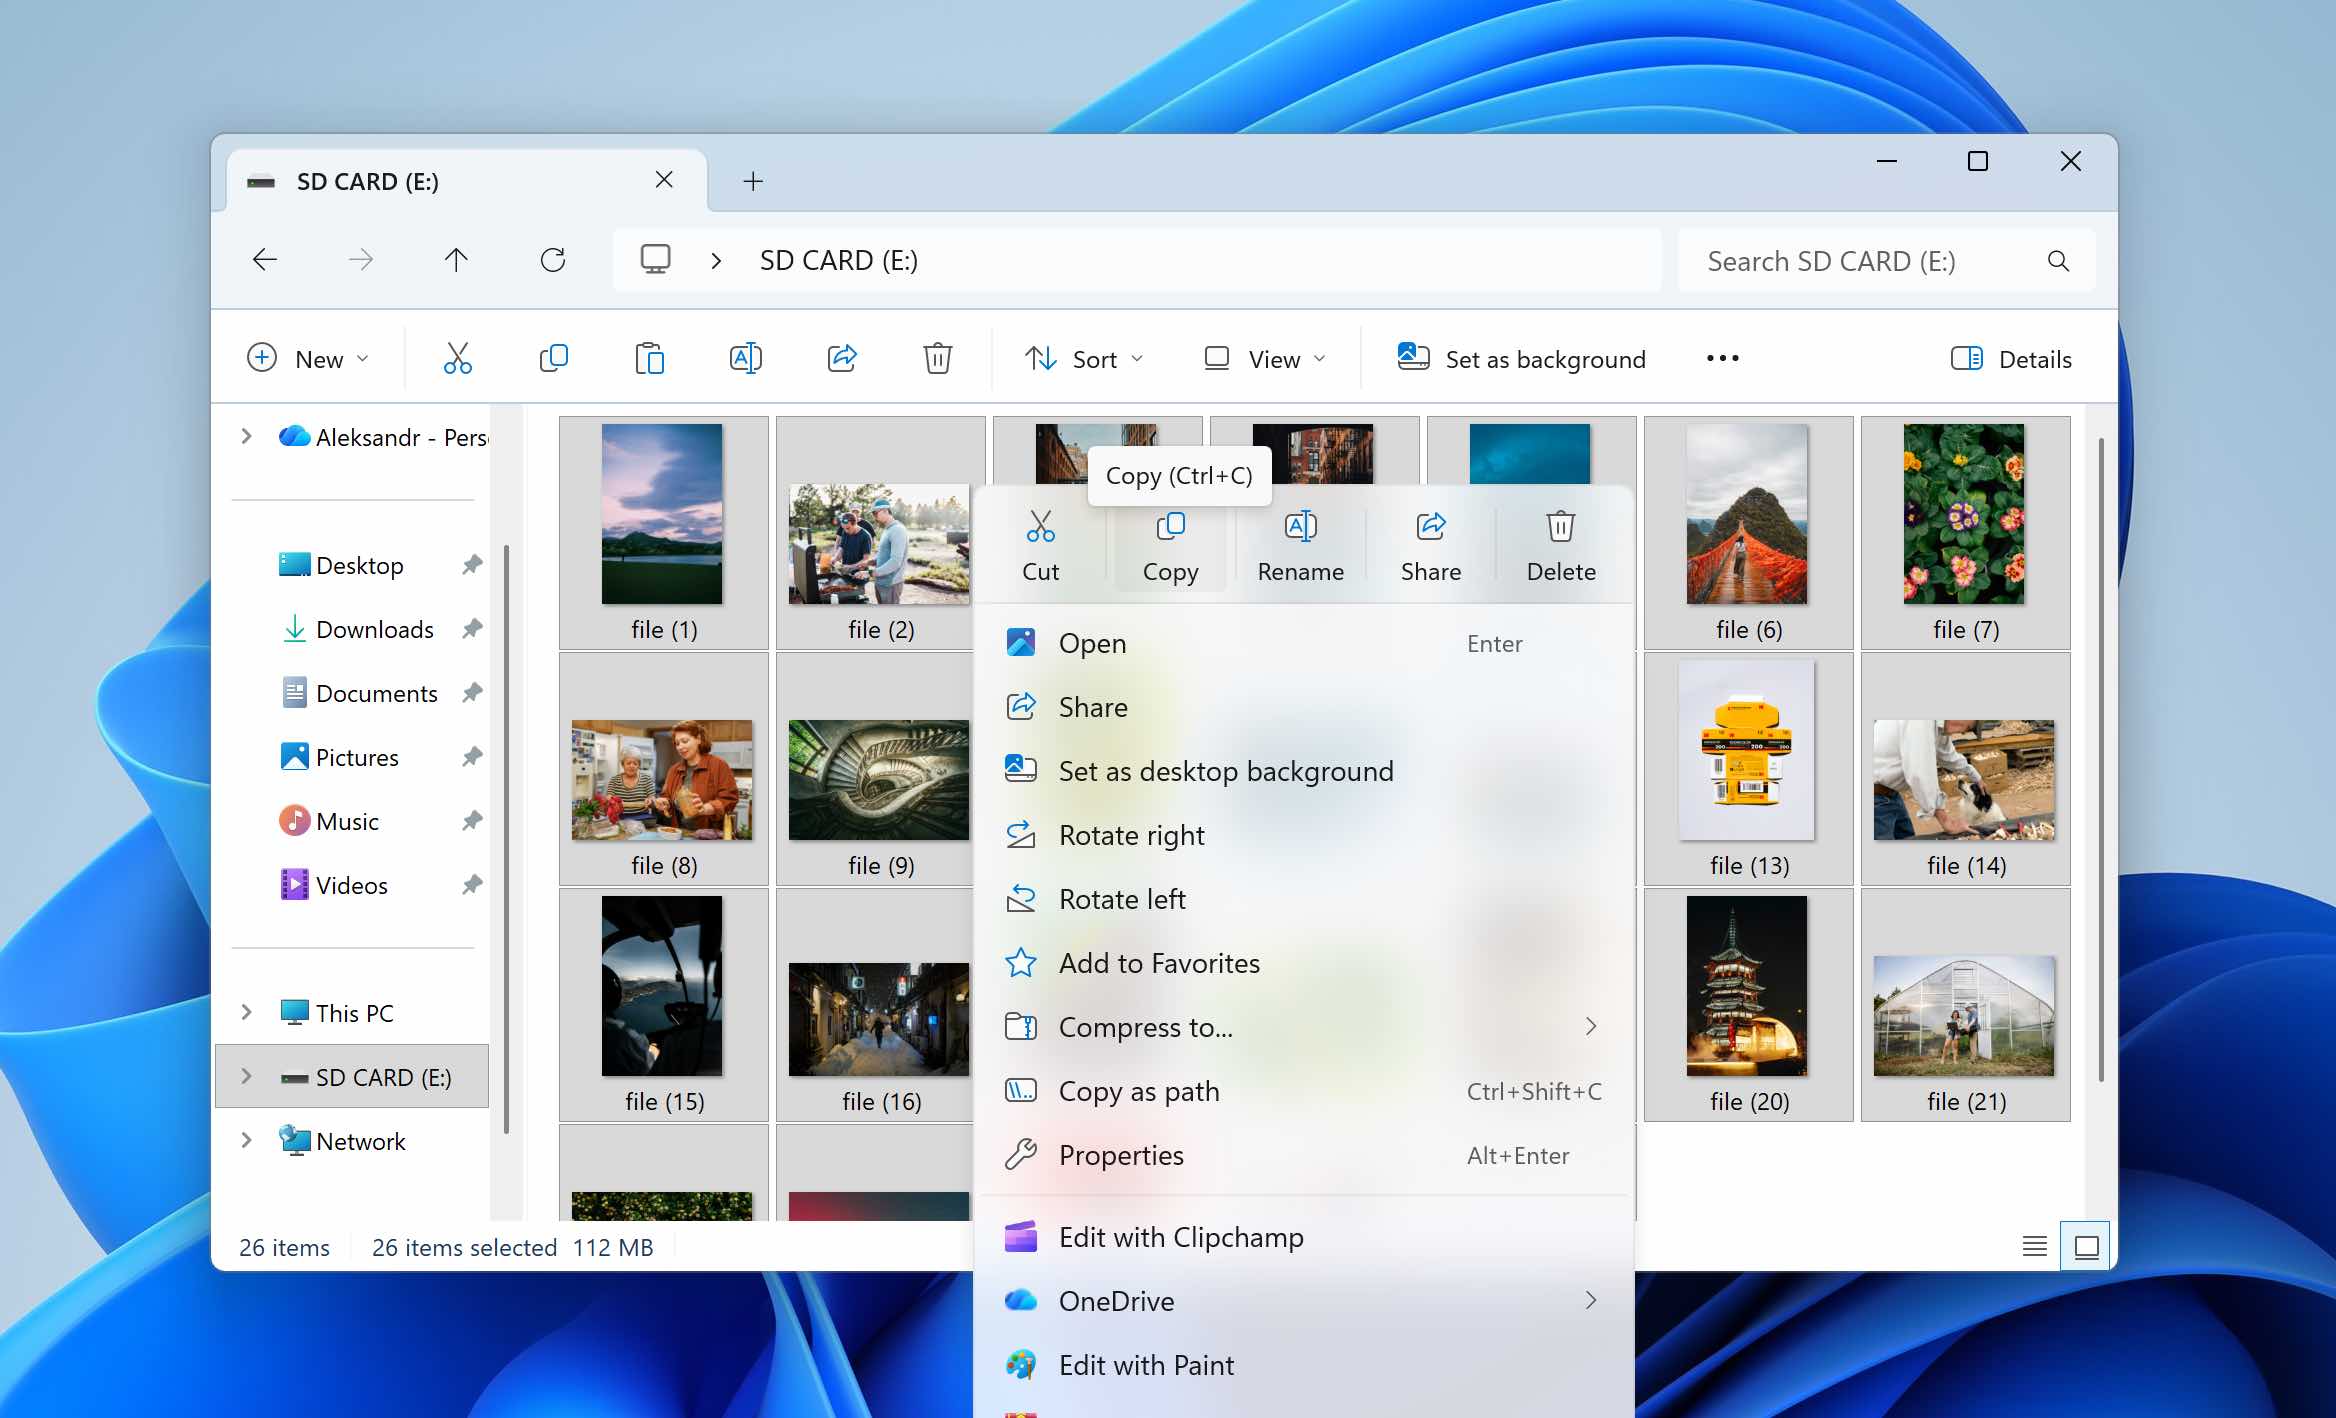
If you’re planning a routine format and your SD card opens normally, creating a backup only takes a few minutes and another storage device (this can be your computer’s internal drive or an external storage device). Simply open the SD card in File Explorer, press Ctrl + A to select all files, then copy the contents to a safe location. Once the transfer completes, your backup is ready.
However, if you need to format the SD card to fix an issue, for example, when Windows asks to format the card, when the file system becomes corrupted, or when the SD card shows as RAW, access through File Explorer may be limited or completely unavailable. In such cases, creating a backup requires specialized software that can access the SD card at a system level.
We recommend Disk Drill for this purpose. While primarily known as data recovery software, it also includes a byte-to-byte backup feature that allows you to create a full image of the SD card. This image acts as an exact copy of the entire storage device. After formatting the SD card, you can load the image file back into Disk Drill and recover your data through the same interface.
Since Disk Drill is a recovery tool, the created image may also contain previously deleted files that have not yet been overwritten. This means you may later recover deleted data as well, provided it has not been replaced by new information.
- Connect your SD card to your Windows computer, open Disk Management (right-click Start > Disk Management) and verify that the SD card appears with the correct capacity. If the displayed size matches the actual size of the card, you can proceed
- Download and install Disk Drill for Windows. Run the installer and allow the necessary system permissions.

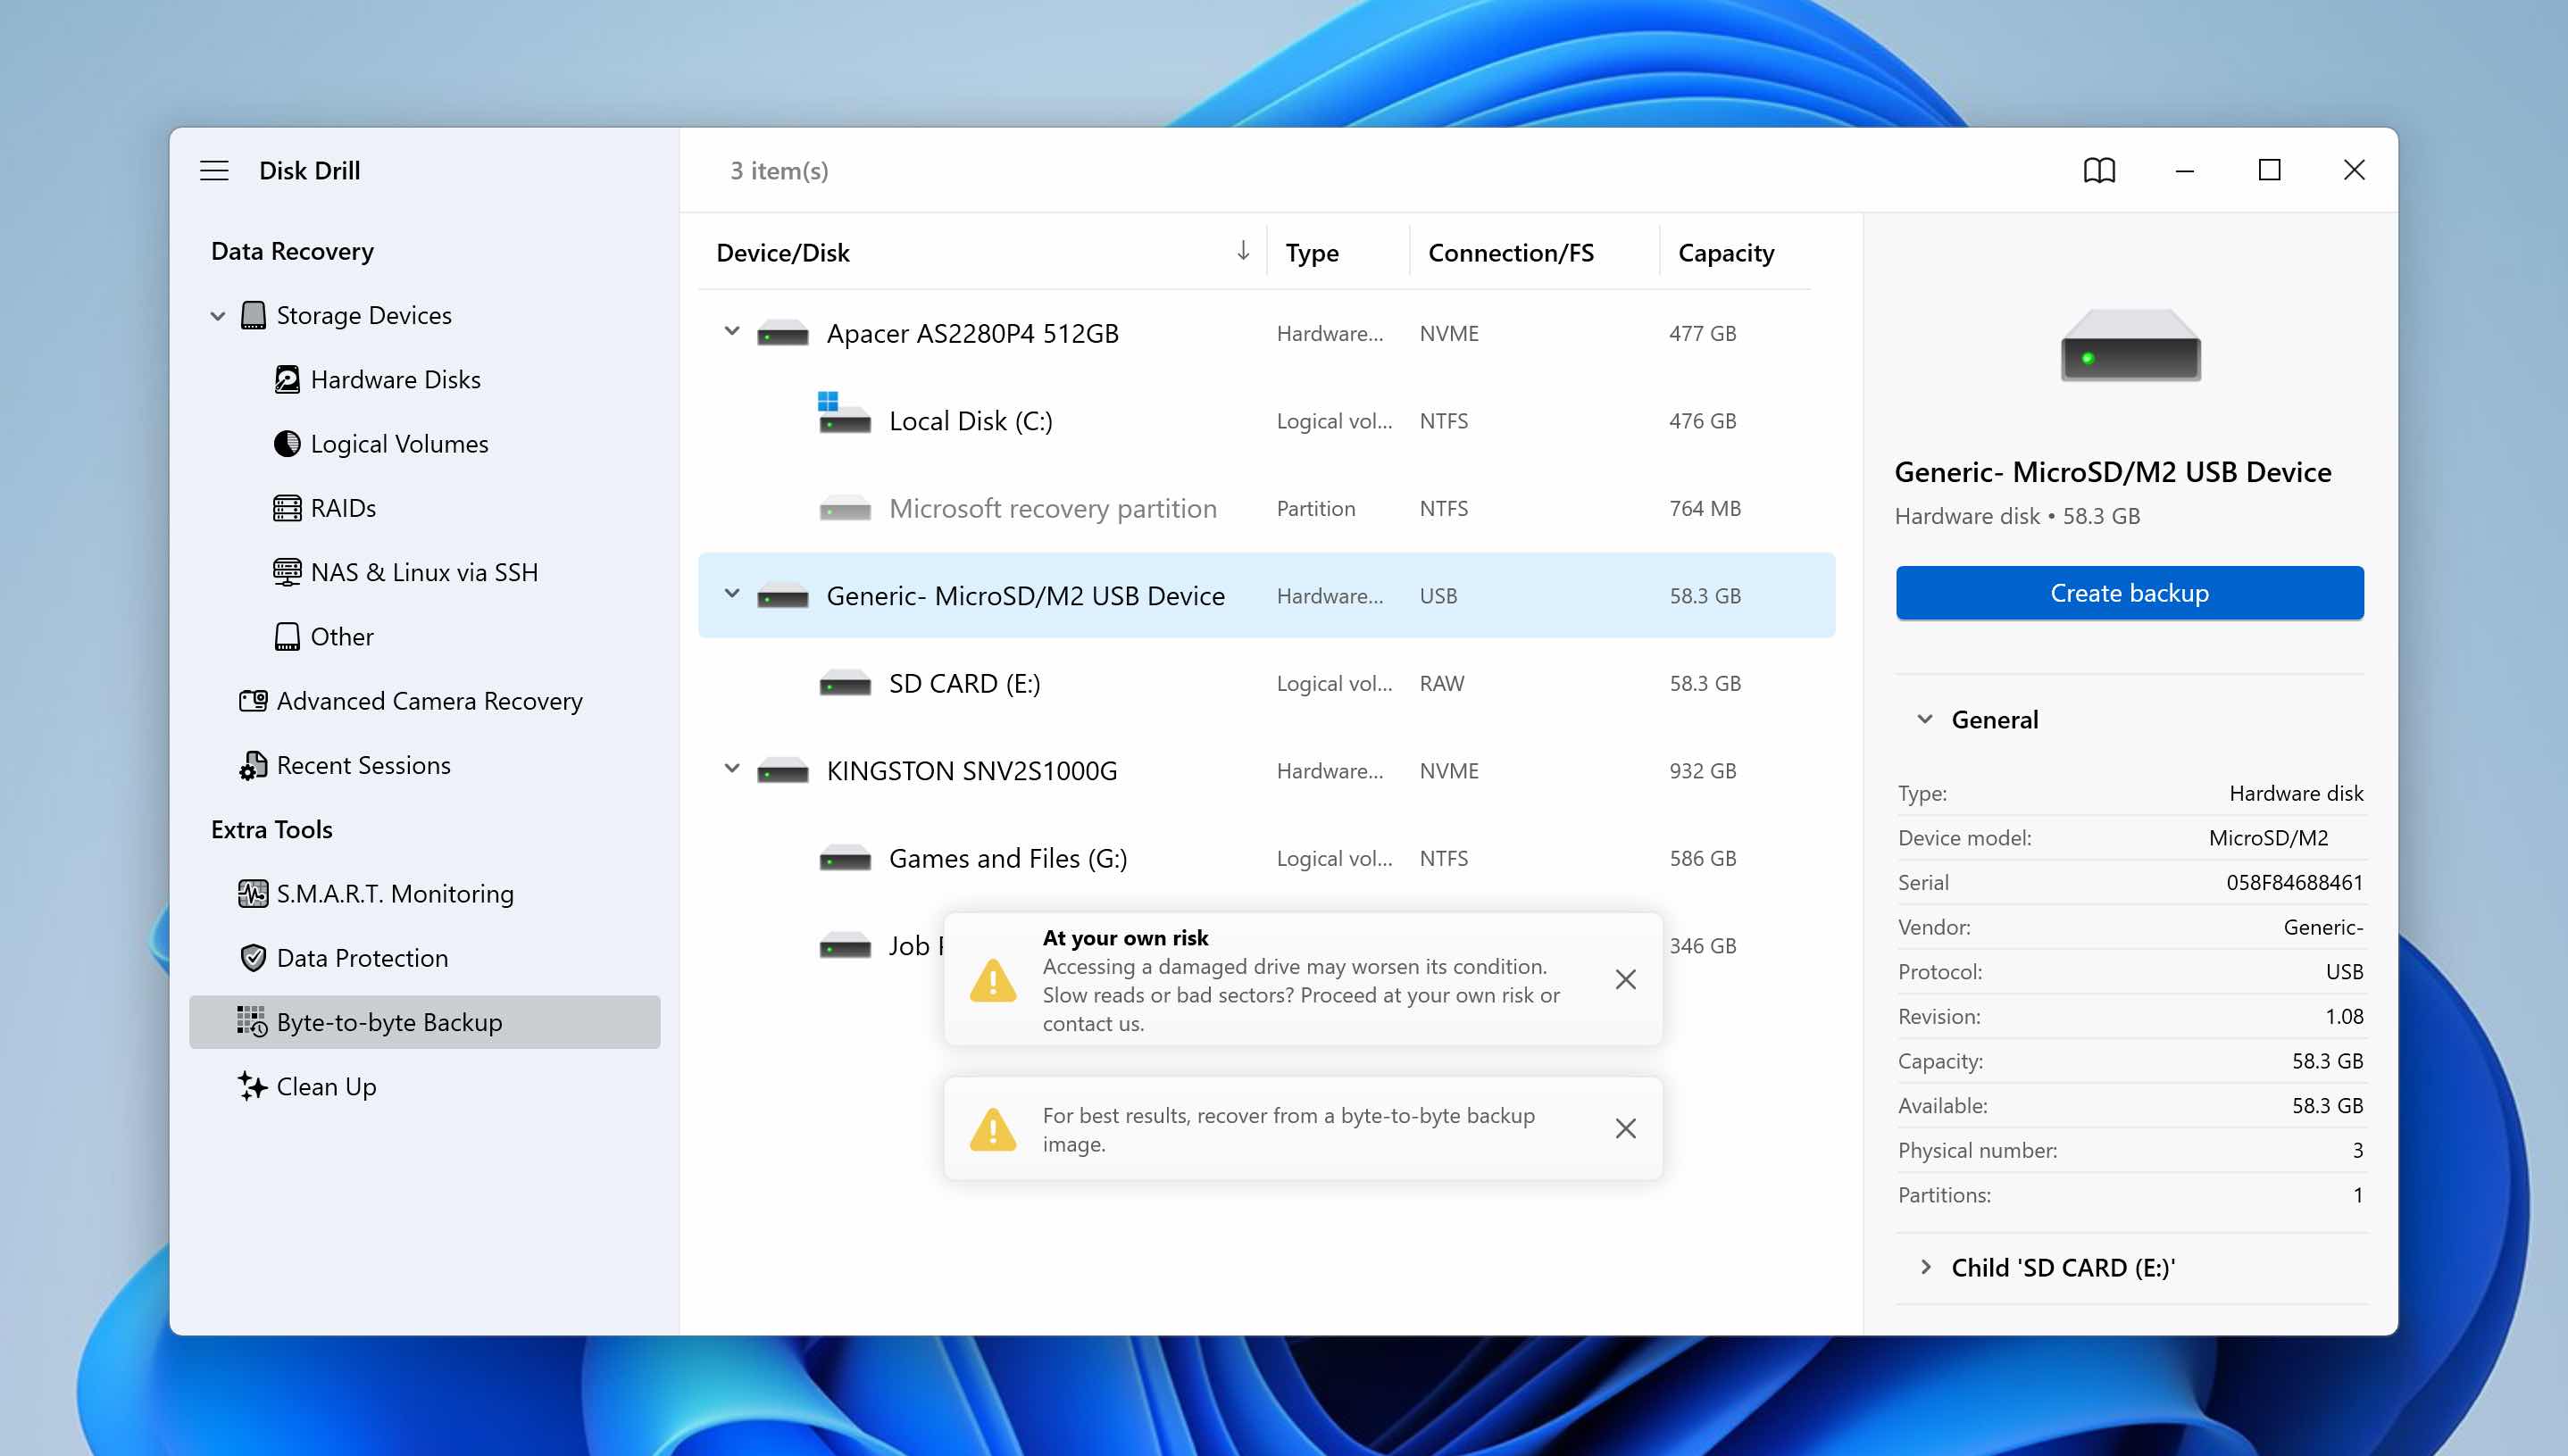
- Open Disk Drill, go to the Byte-to-byte Backup section, select your SD card from the list of available storage devices, and click Create backup.
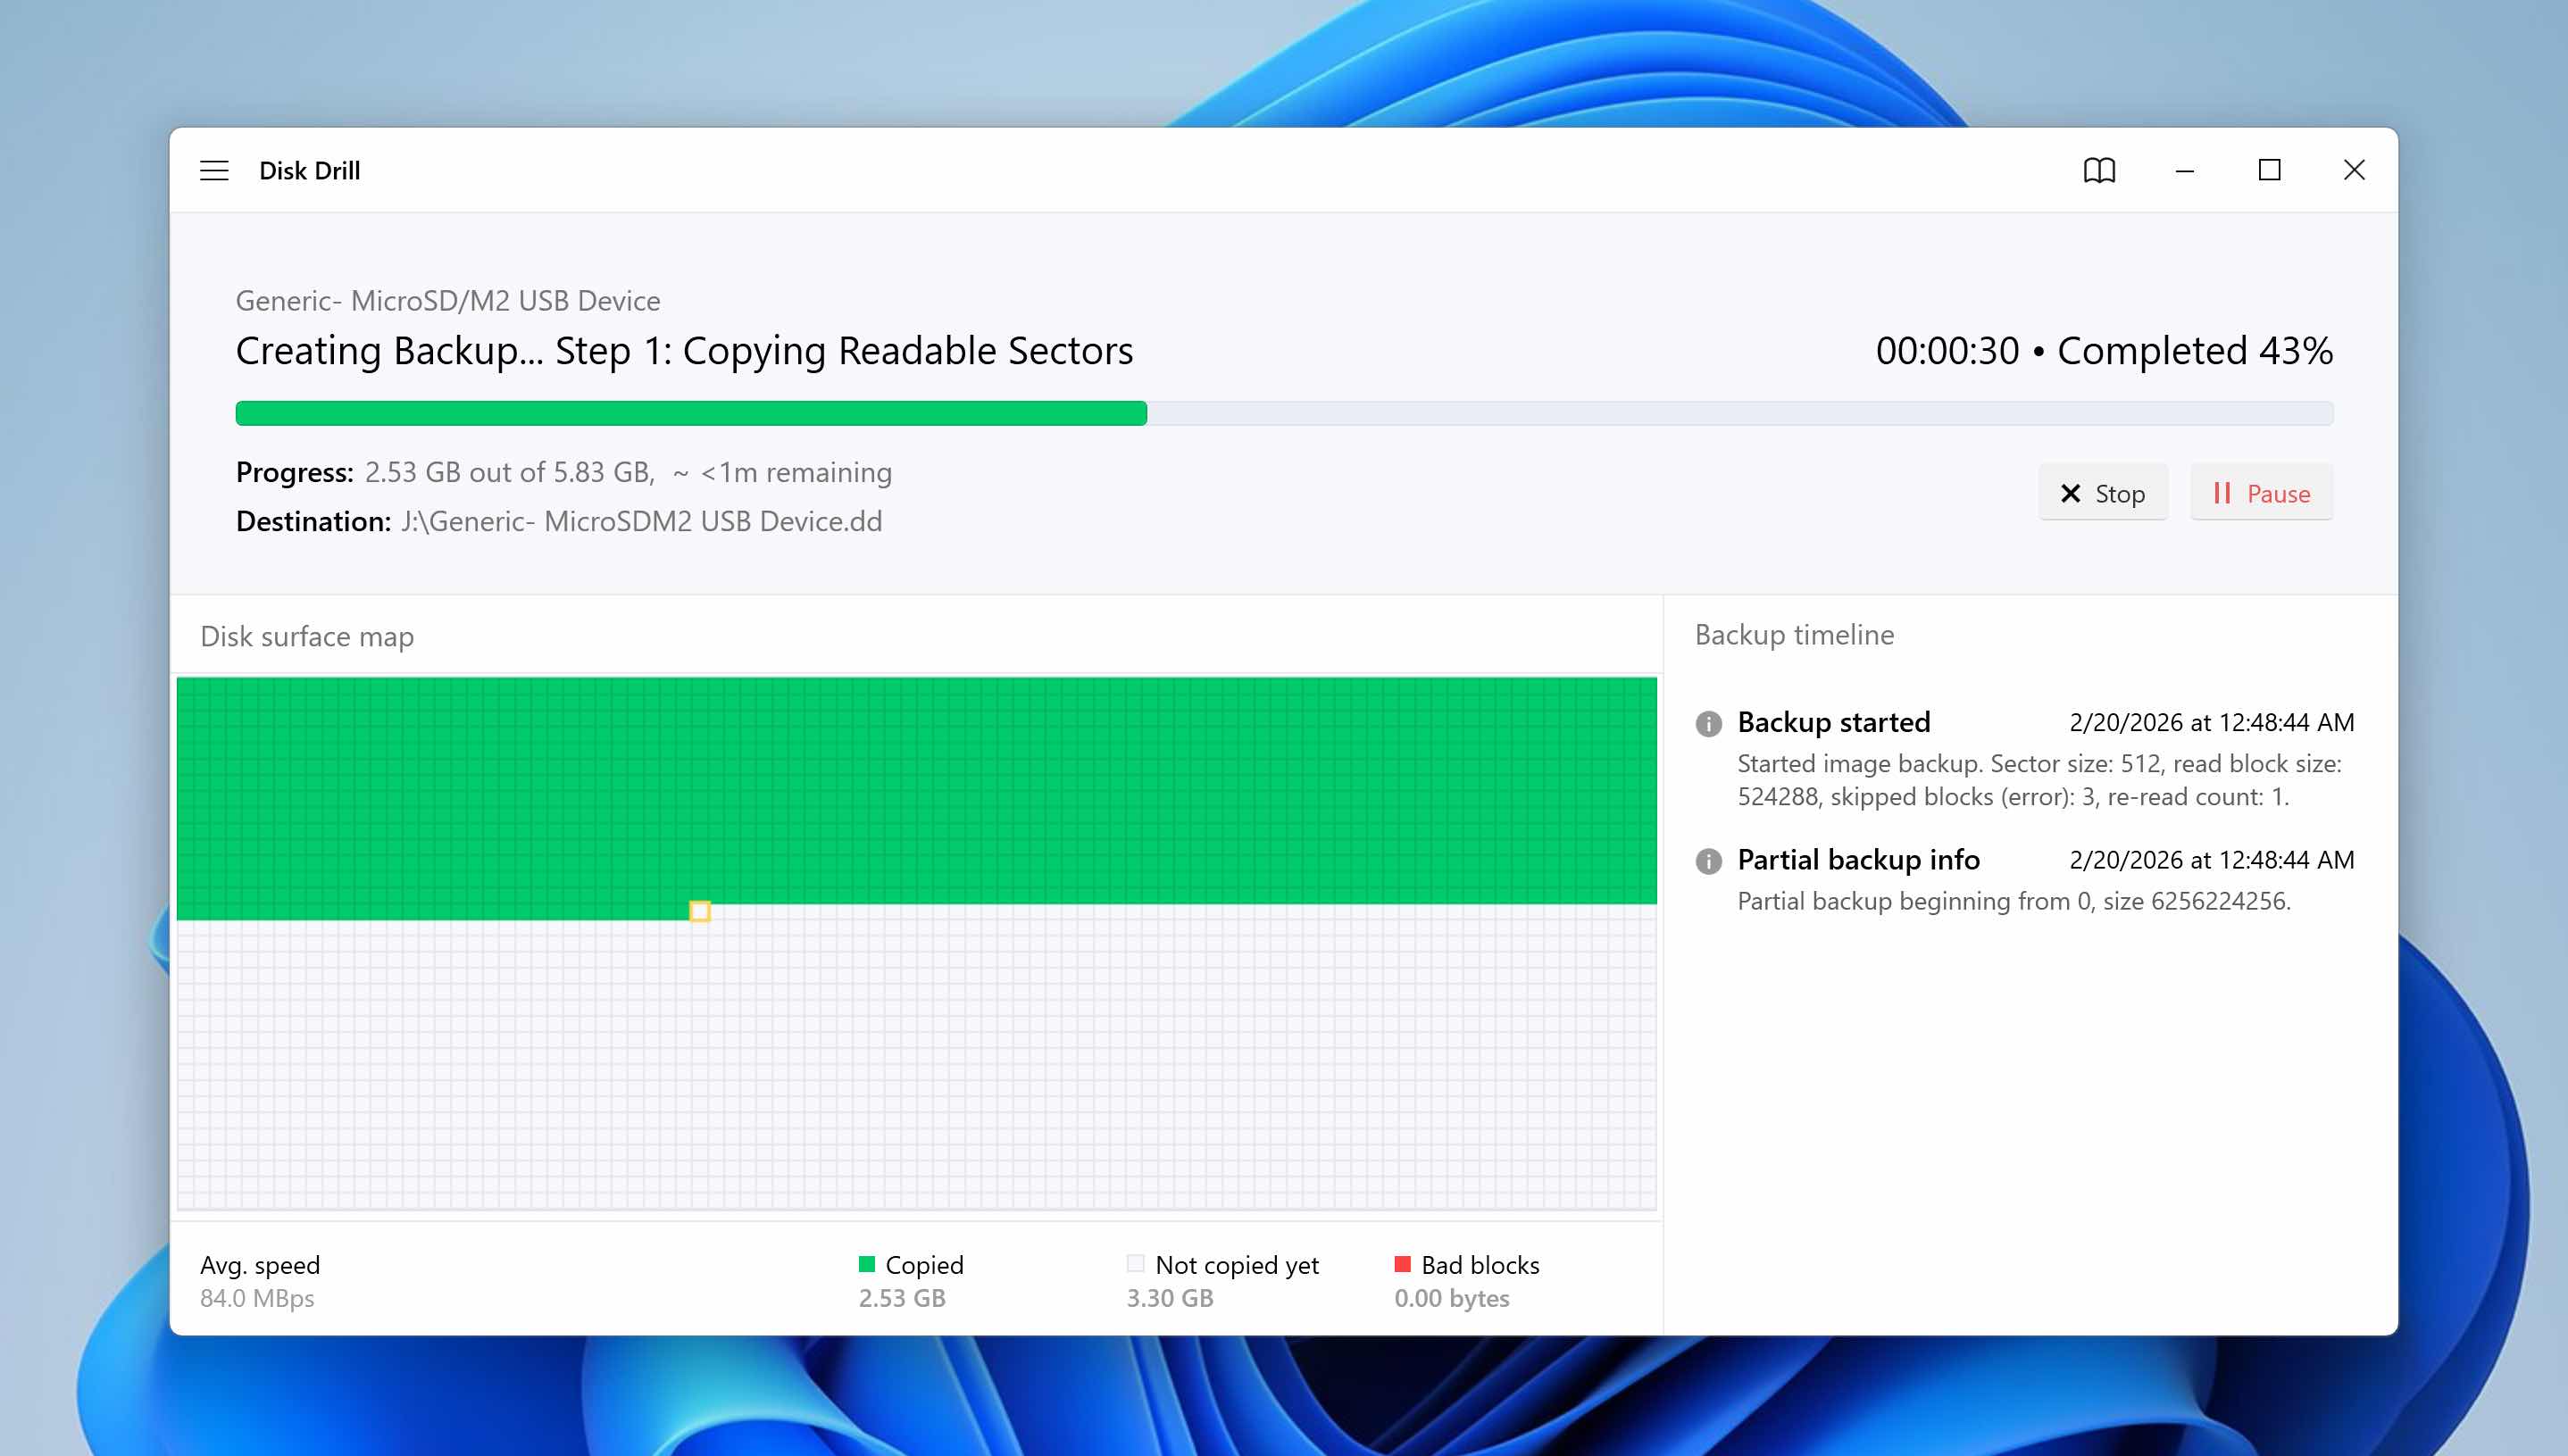
- Select a location on a different storage device where the image file will be saved. Click OK to create the backup and allow the process to complete. The duration depends on the size and condition of the SD card. If the card contains damaged sectors, the process may take longer.
- Disk Drill creates a full disk image file, which represents an exact copy of the SD card at the sector level. After this, you can safely format the SD card.
Downloading Disk Drill is free. Creating a byte-to-byte backup of your SD card is also free, as is scanning the created image after the SD card has been formatted. However, the free version includes a recovery limit of 100 MB. If the total amount of data you need to restore exceeds this limit, you will need to consider upgrading to the Pro version.
Step 2: Format the SD Card
Now that you have created a full backup of your data, you can proceed with formatting the SD card without losing data.
Windows offers several ways to format a storage device. In this guide, we’ll use Disk Management, as it provides better visibility into partitions and file system status compared to File Explorer. This makes it a more reliable option, especially if the SD card previously showed errors or corruption.
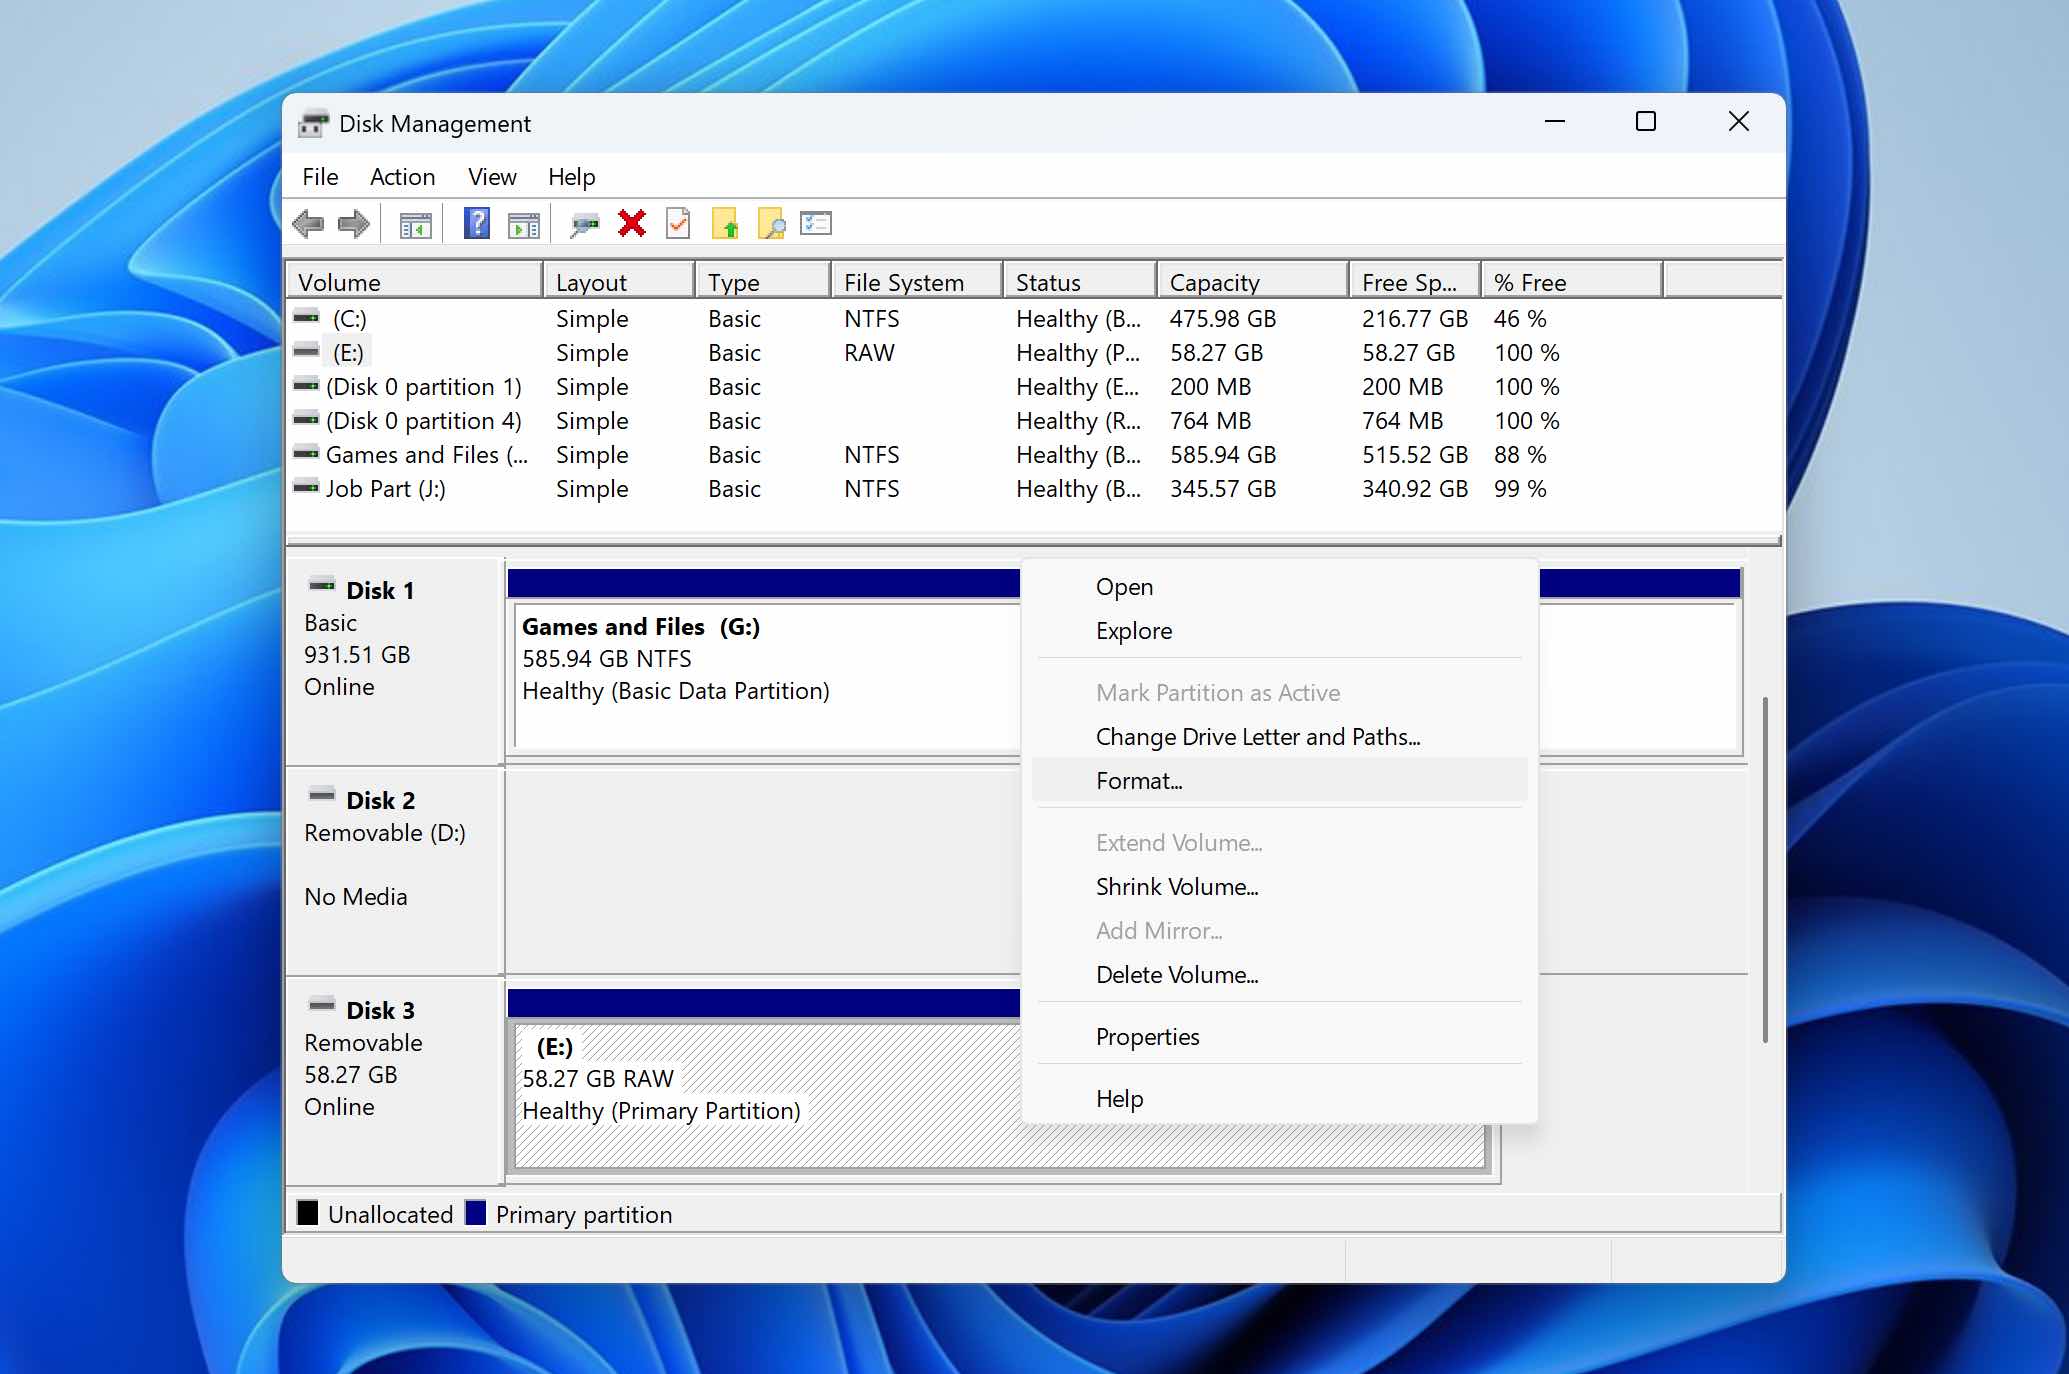
- Right-click Start and select Disk Management.
- Locate your SD card in the list of available drives. Right-click the SD card volume and select Format.
- Choose a file system (FAT32 or exFAT are the most common options for SD cards).
- Make sure a quick format is enabled.
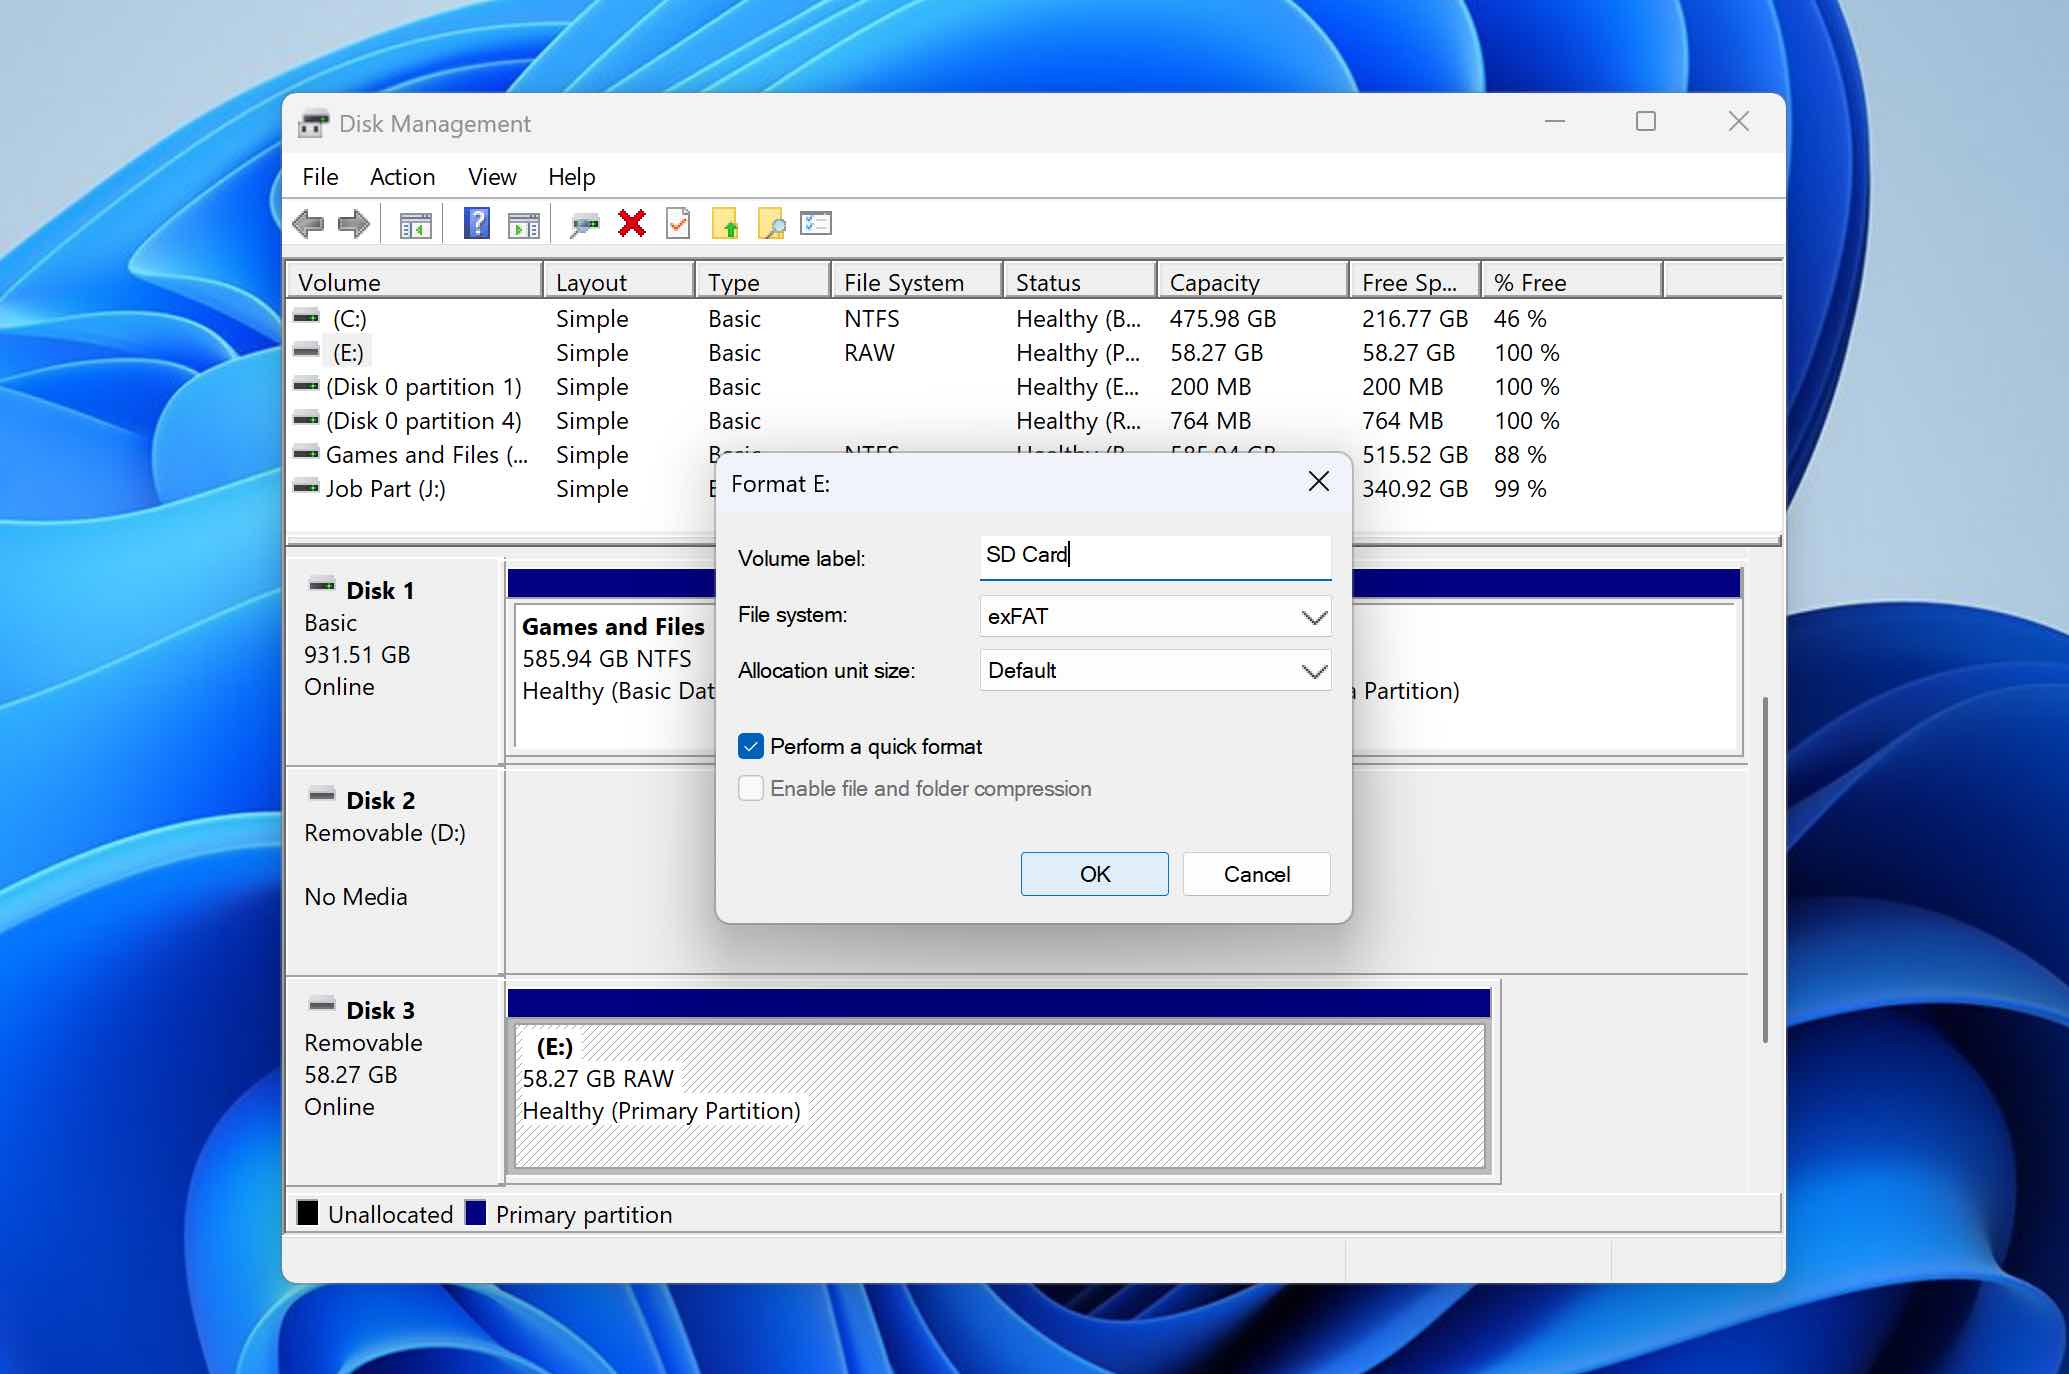
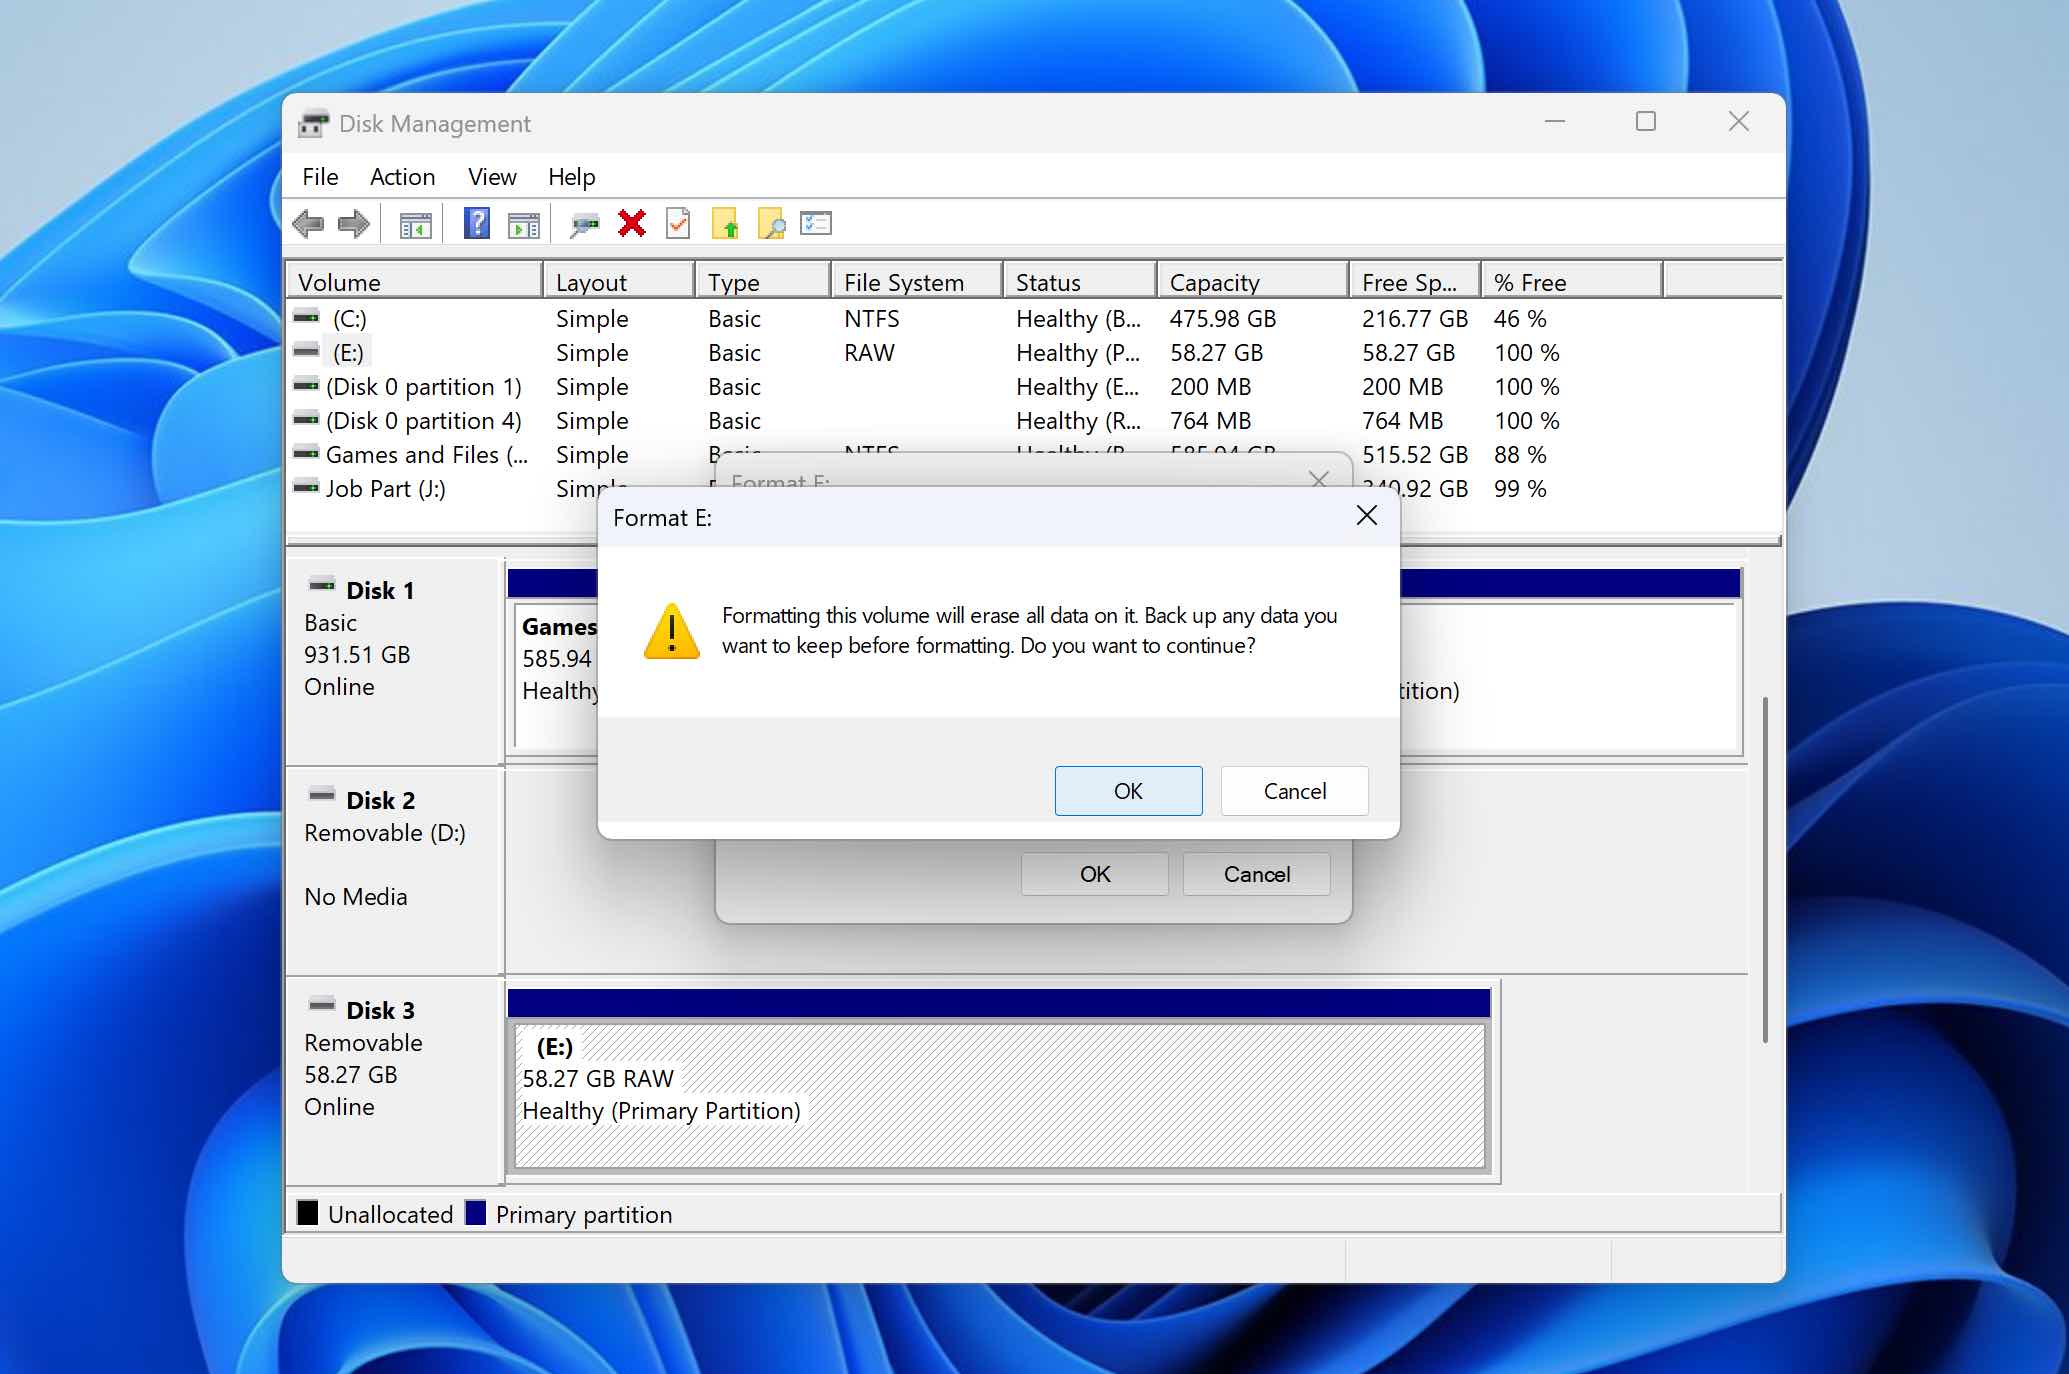
- Click OK, then confirm to begin the process. Once the format completes, the SD card will be reset and ready for use.
If you are comfortable working with the command line or want to practice using it, you can also format an SD card using Command Prompt (CMD). For detailed instructions, refer to our guide.
Step 3: Restore the Data to the SD Card After Formatting
The final step is to return your data to the newly formatted SD card. The exact process depends on how you created the backup.
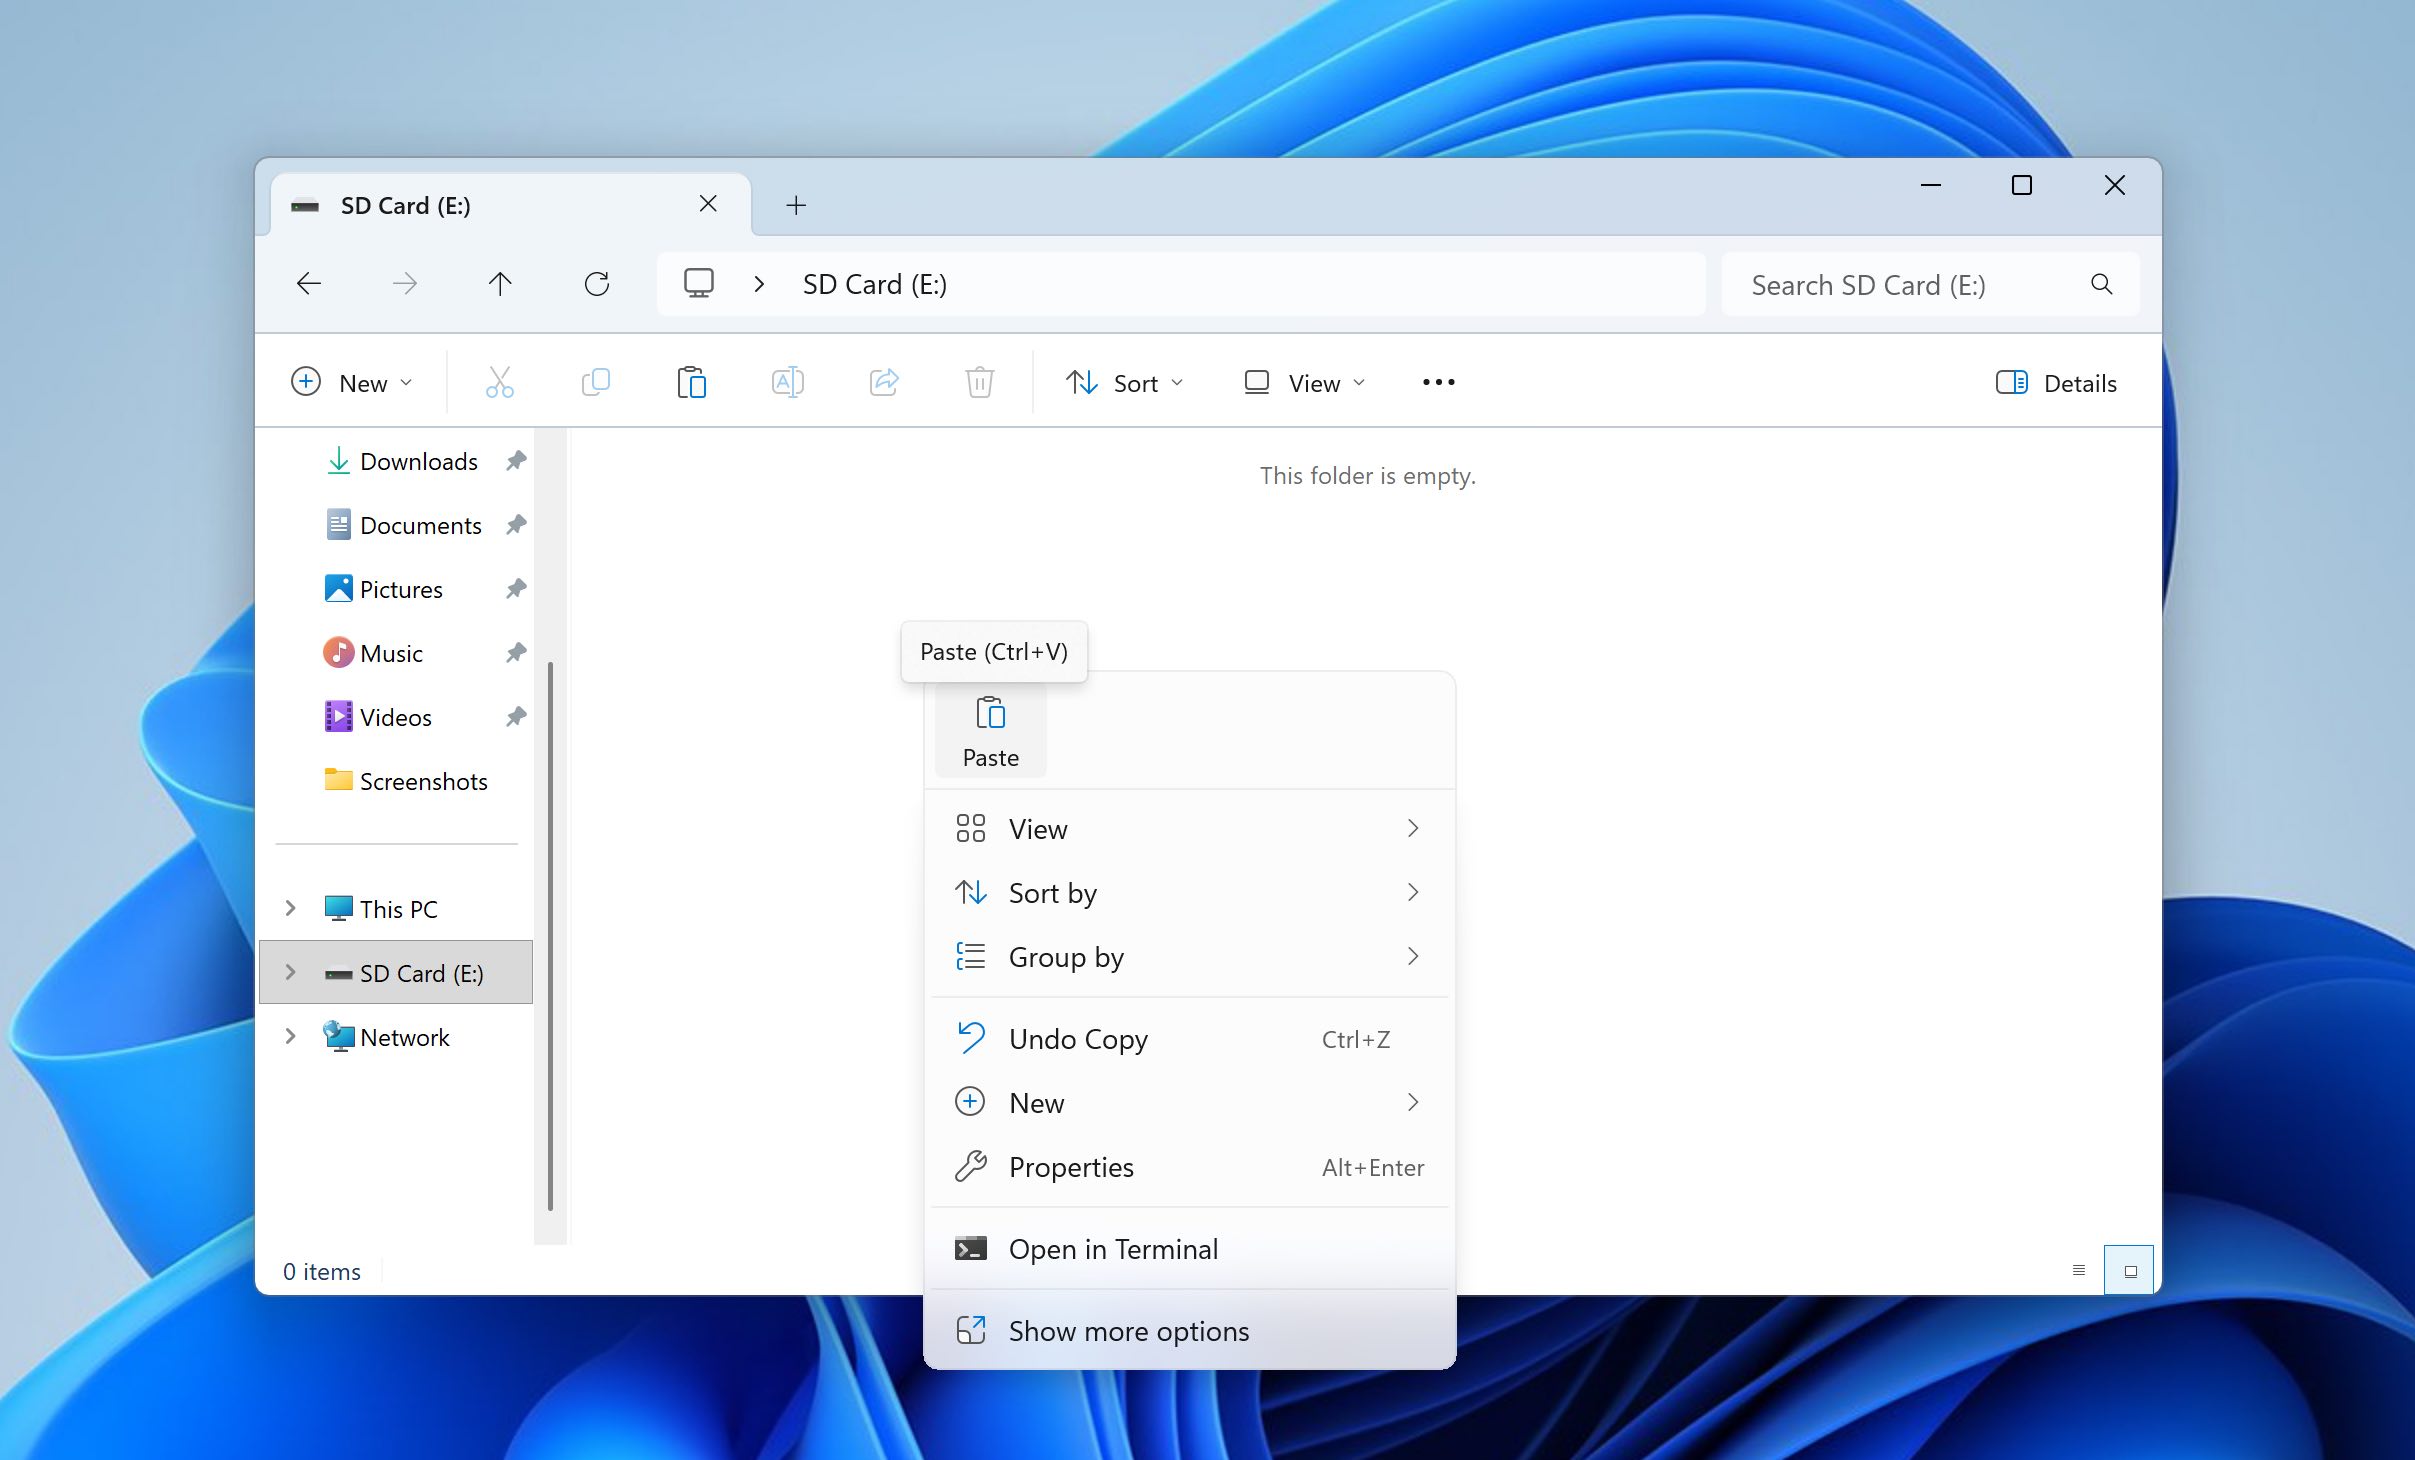
If you simply copied the files to another storage device, the process is straightforward. Open the folder where the backup is stored, select the files, and copy them back to the SD card using File Explorer.
If you created a byte-to-byte image using Disk Drill, the process involves a few additional steps, but it remains simple and does not take long.
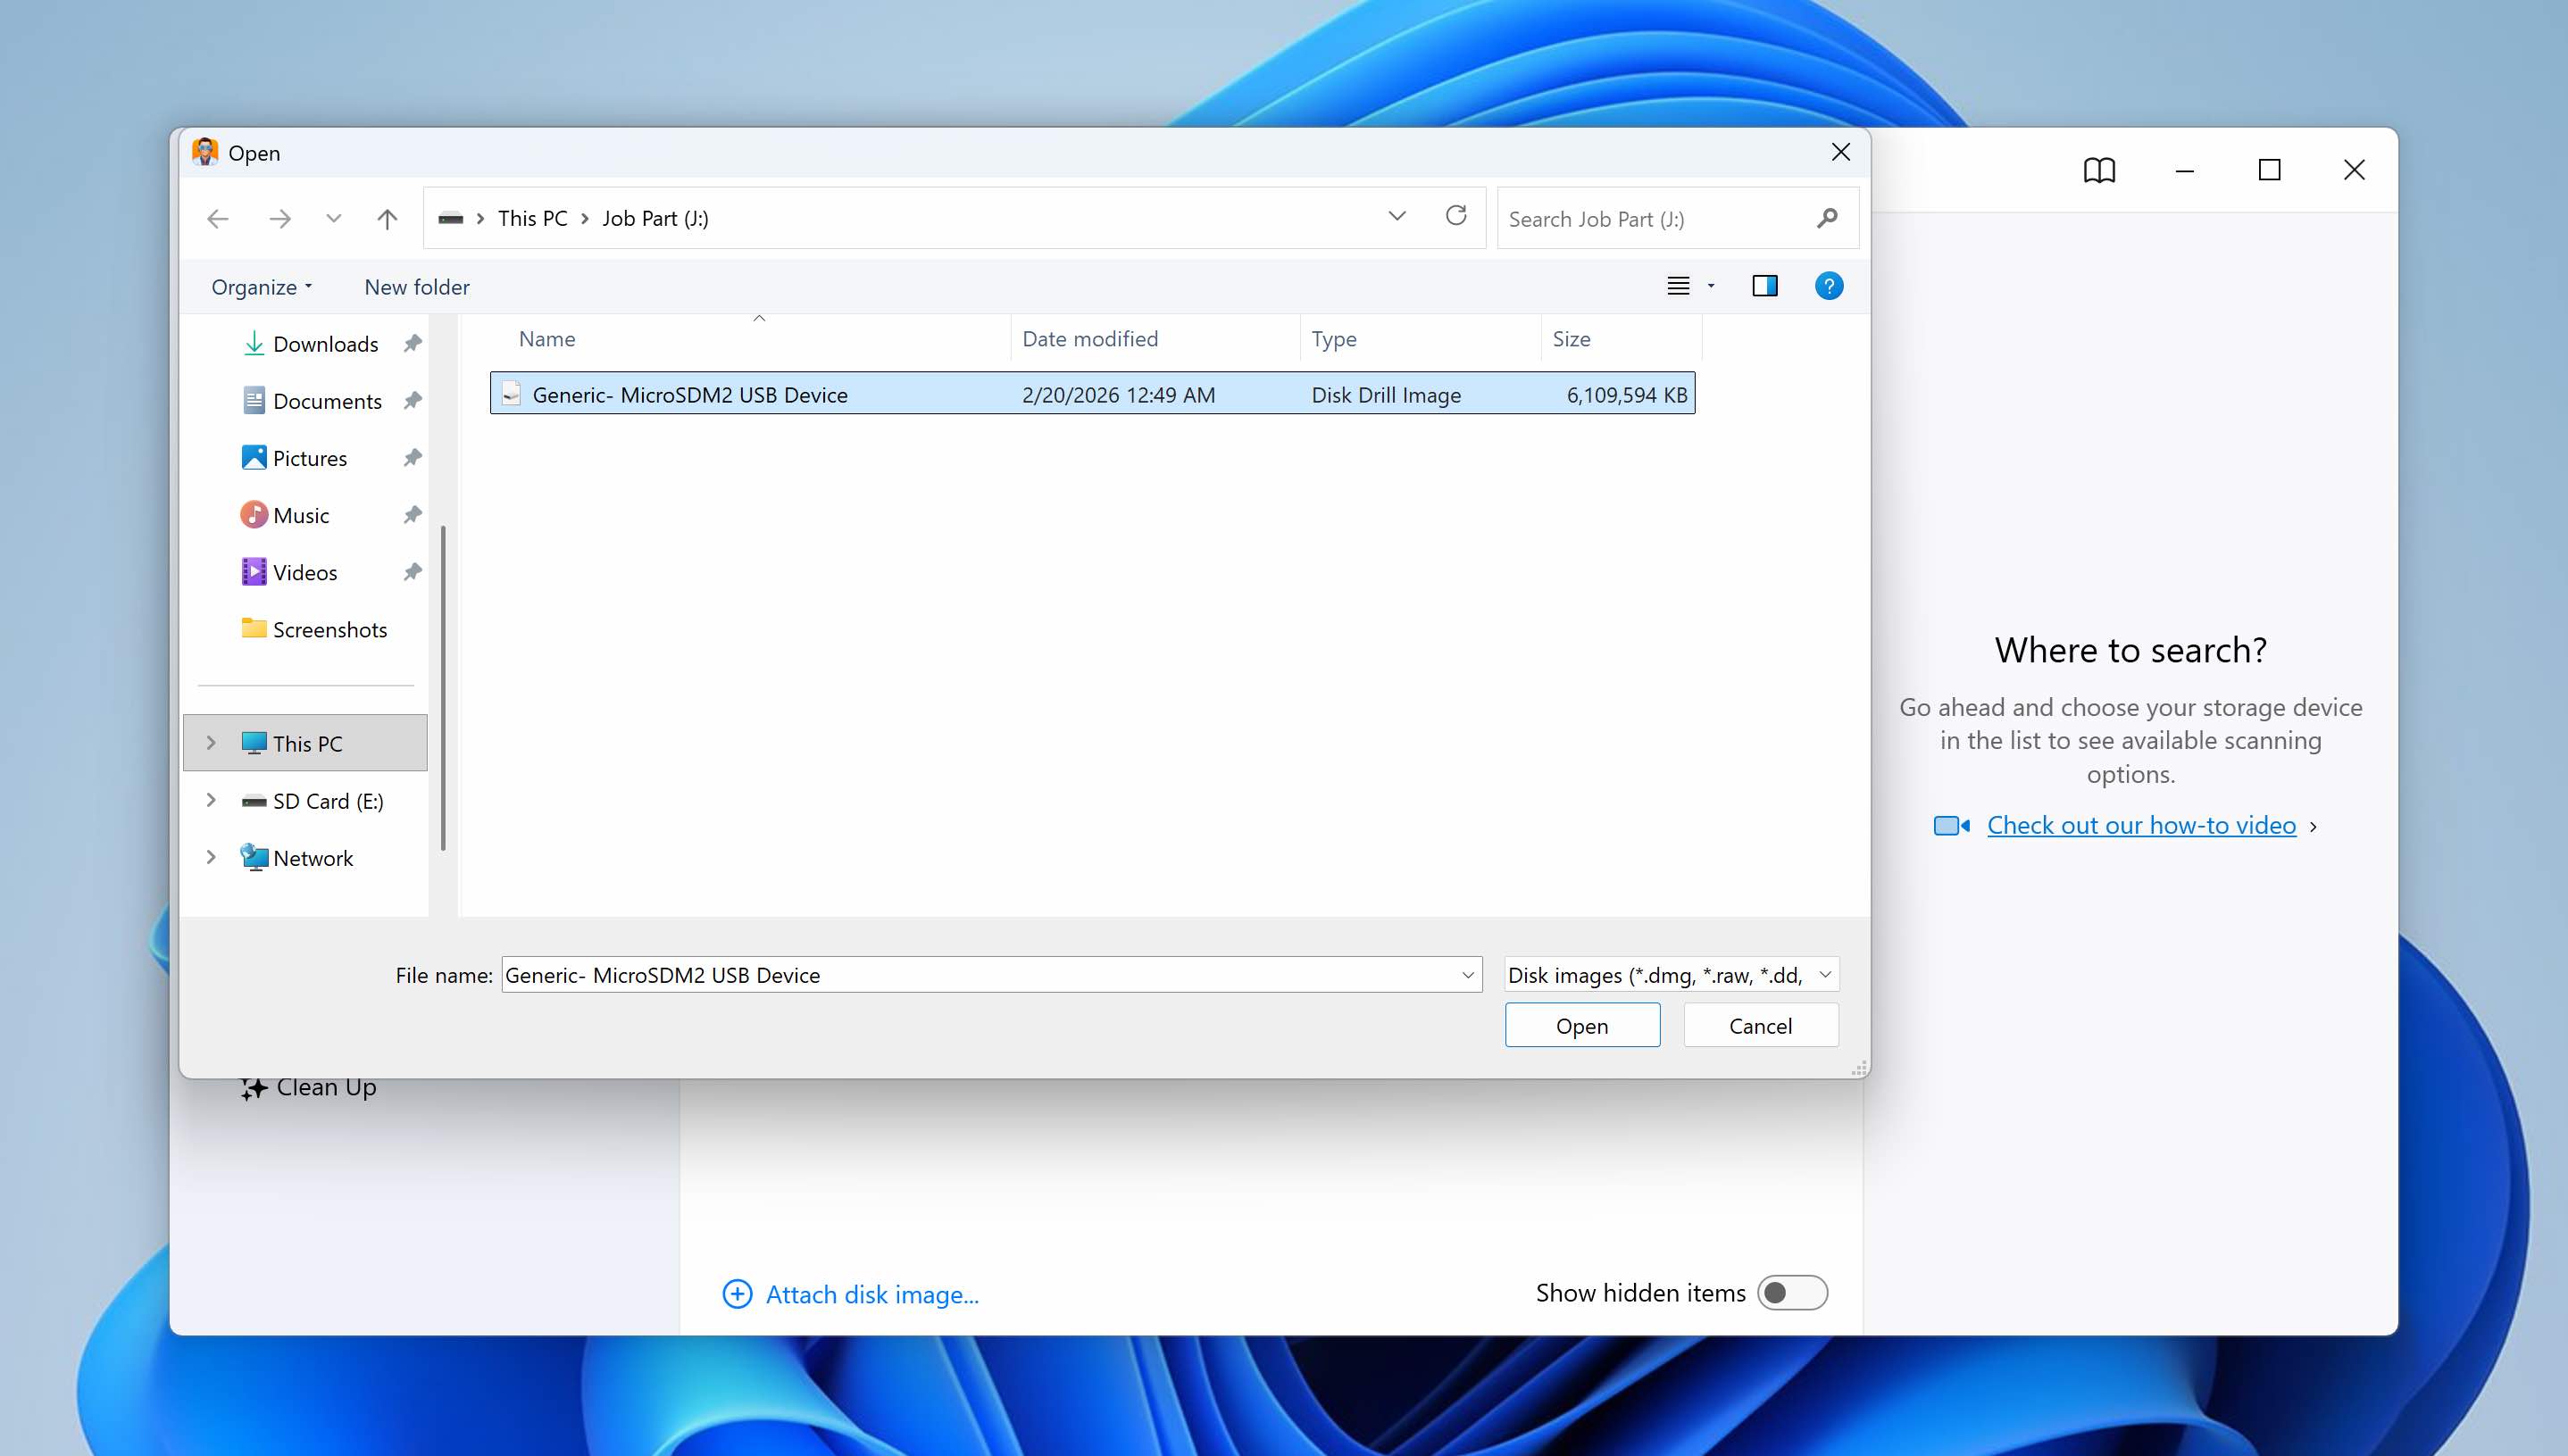
- Open Disk Drill. Click Attach disk image… and browse to the image file you created earlier (typically with a .dd or .iso extension).
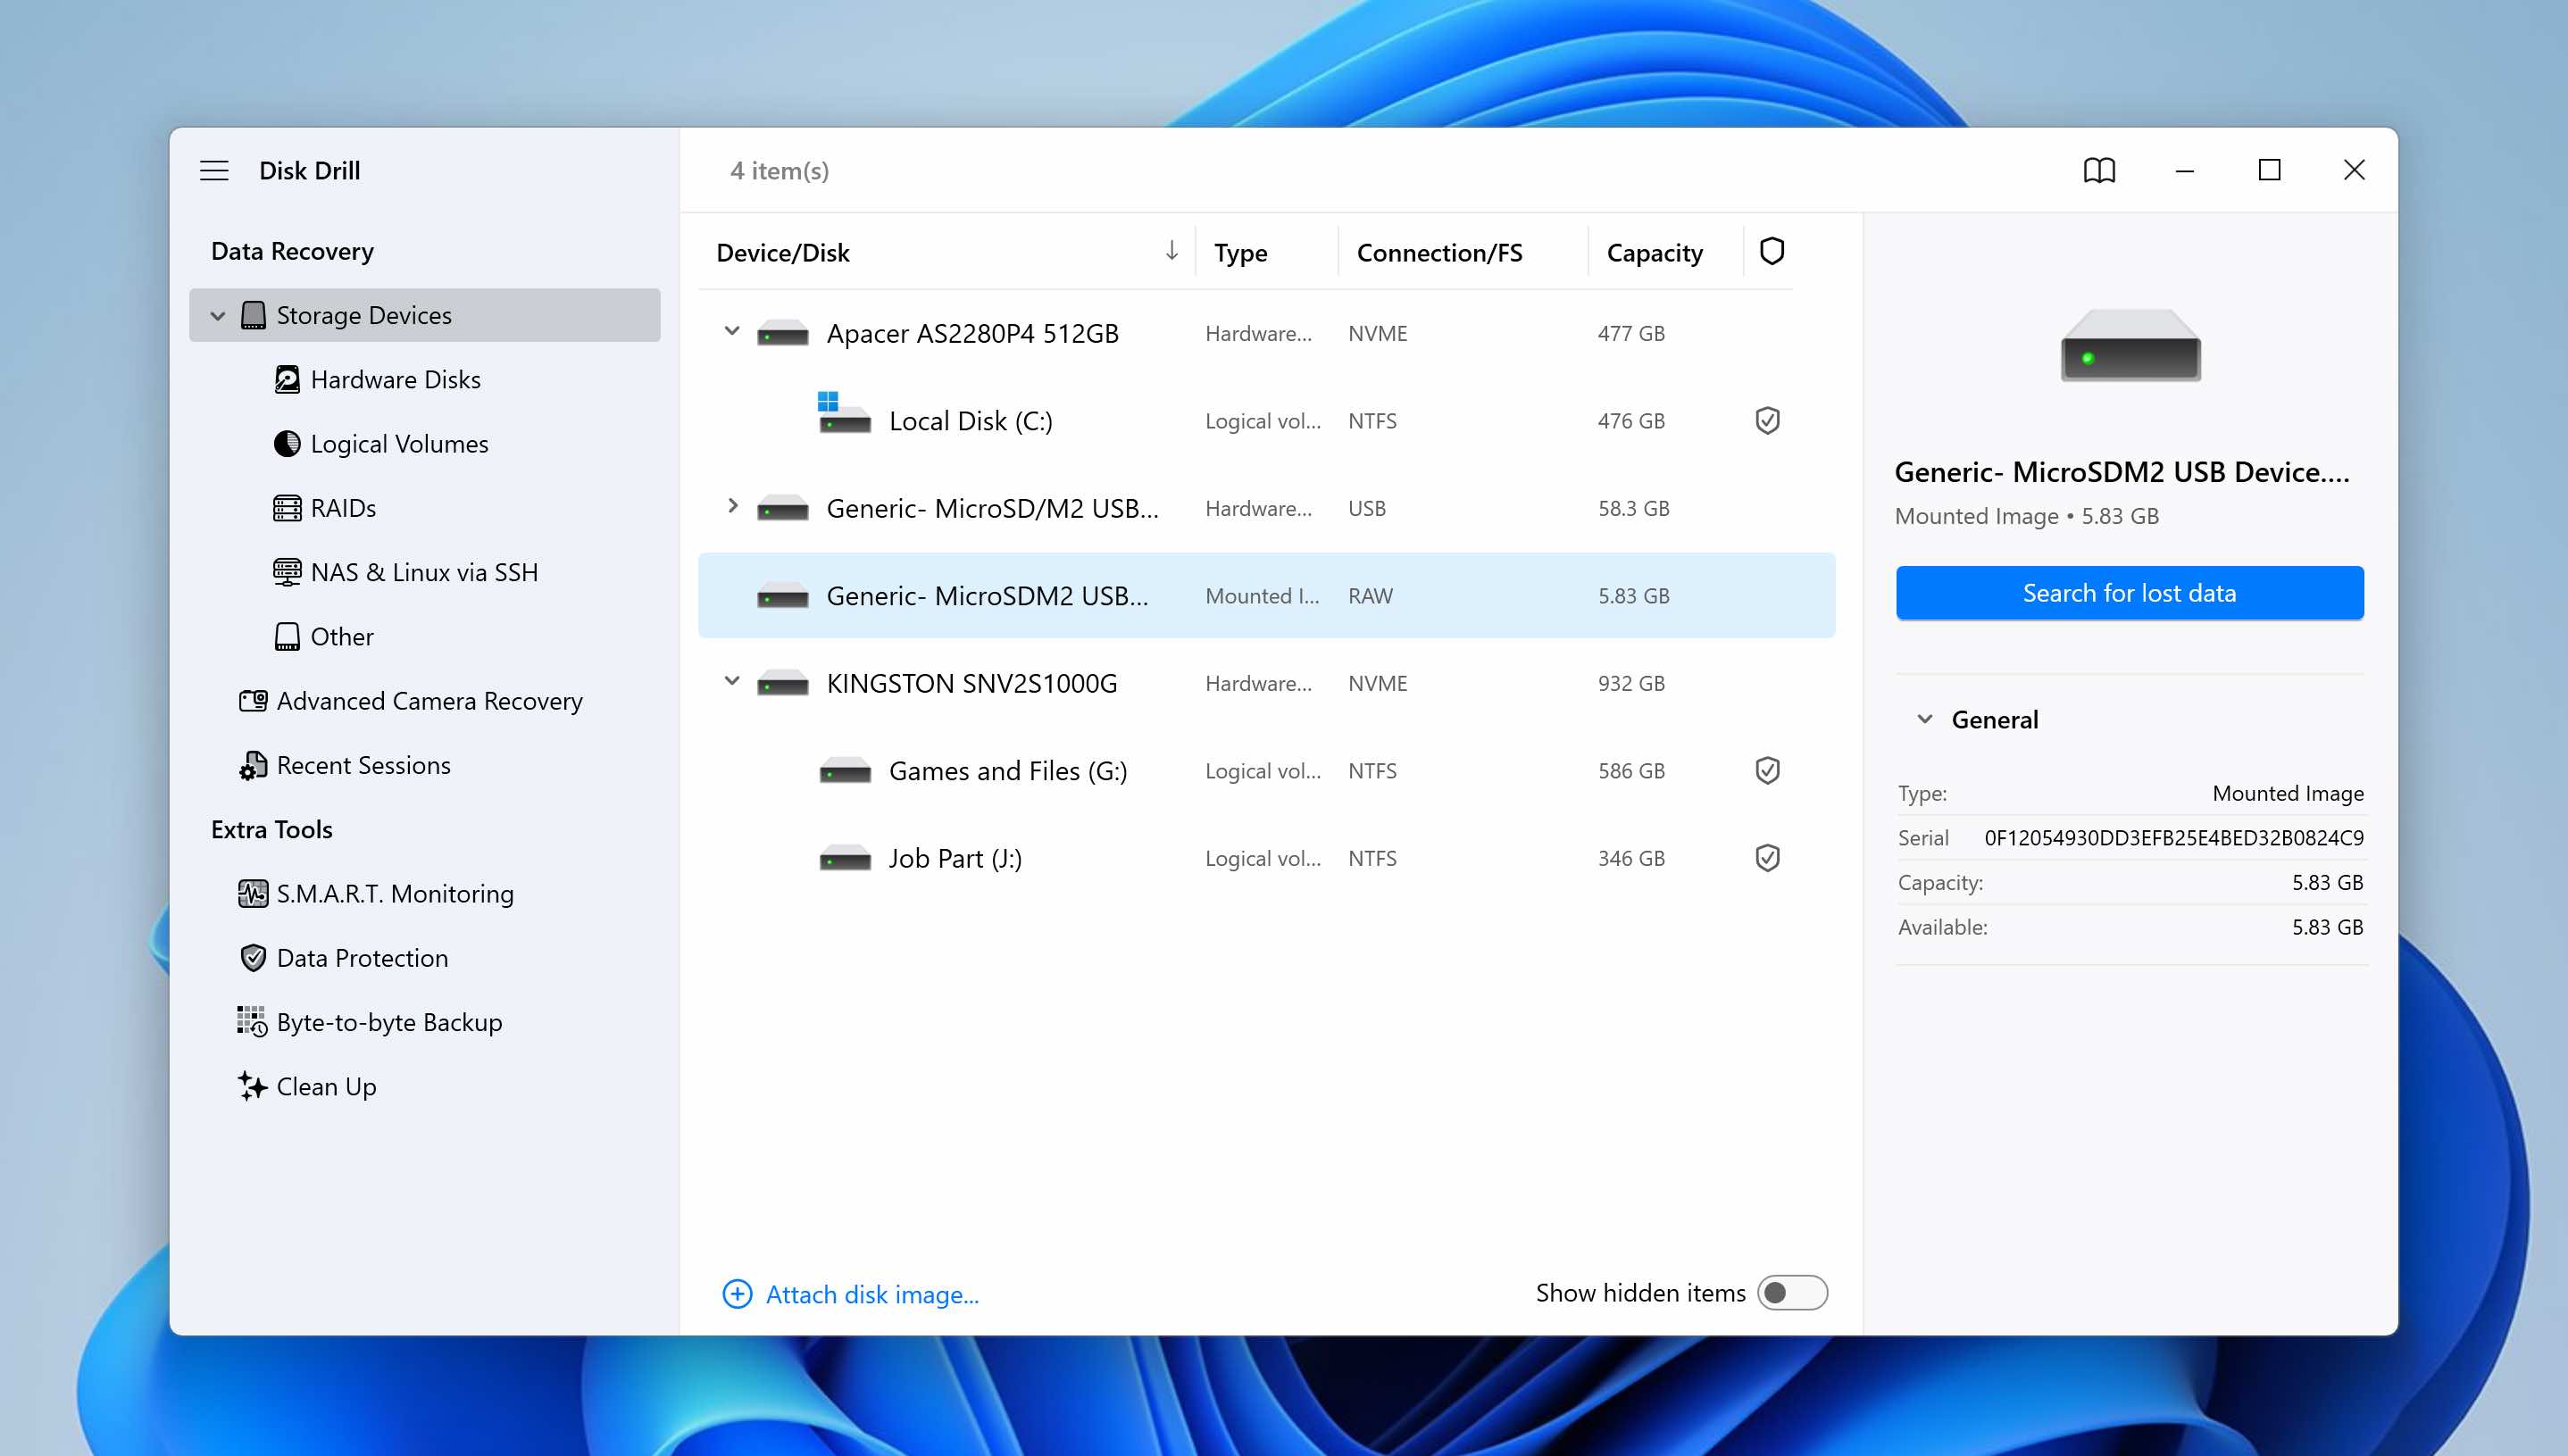
- Once attached, the image will appear in the list of available drives as a virtual device. Select the image and click Search for lost data.
- Choose the appropriate scan type (Universal Scan is recommended in most cases). As the scan runs, Disk Drill automatically categorizes recoverable files into groups such as Pictures, Video, Audio, Documents, Archives, and Others.
- You can either wait for the scan to complete and recover everything at once, or open Review found items to browse specific categories and select only the files you need.
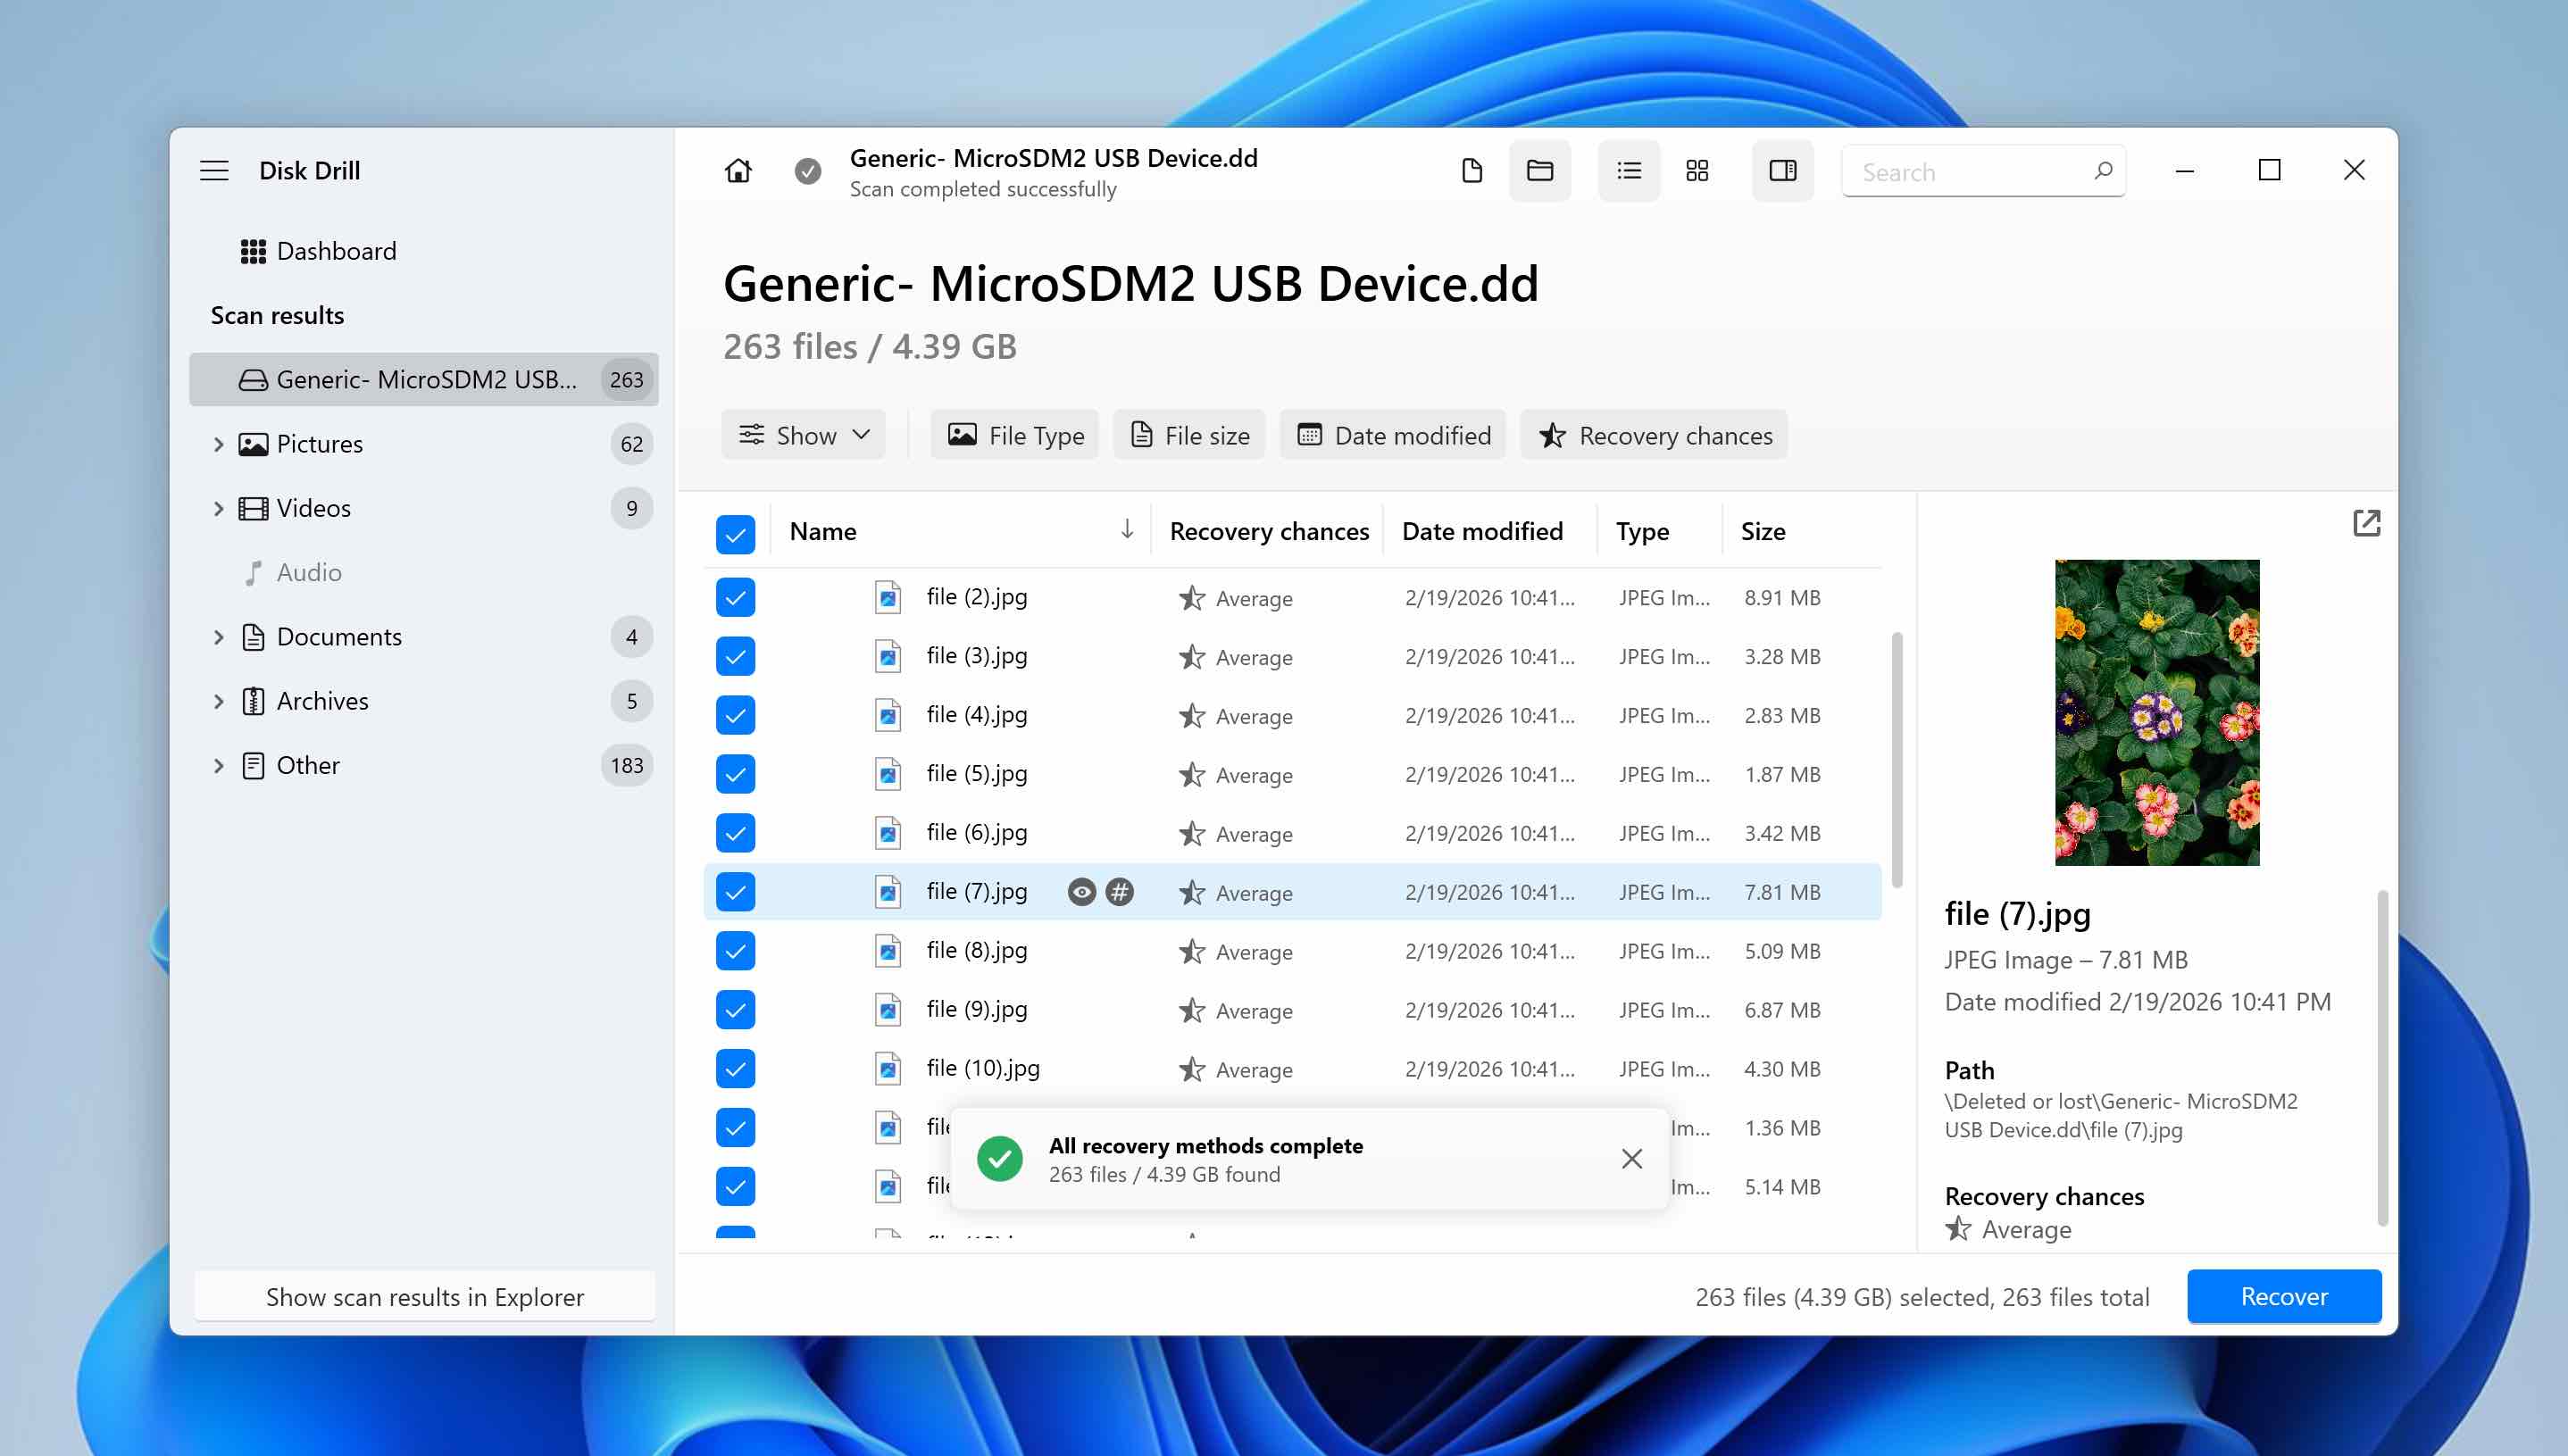
- Once you select the files you want to restore, click Recover.
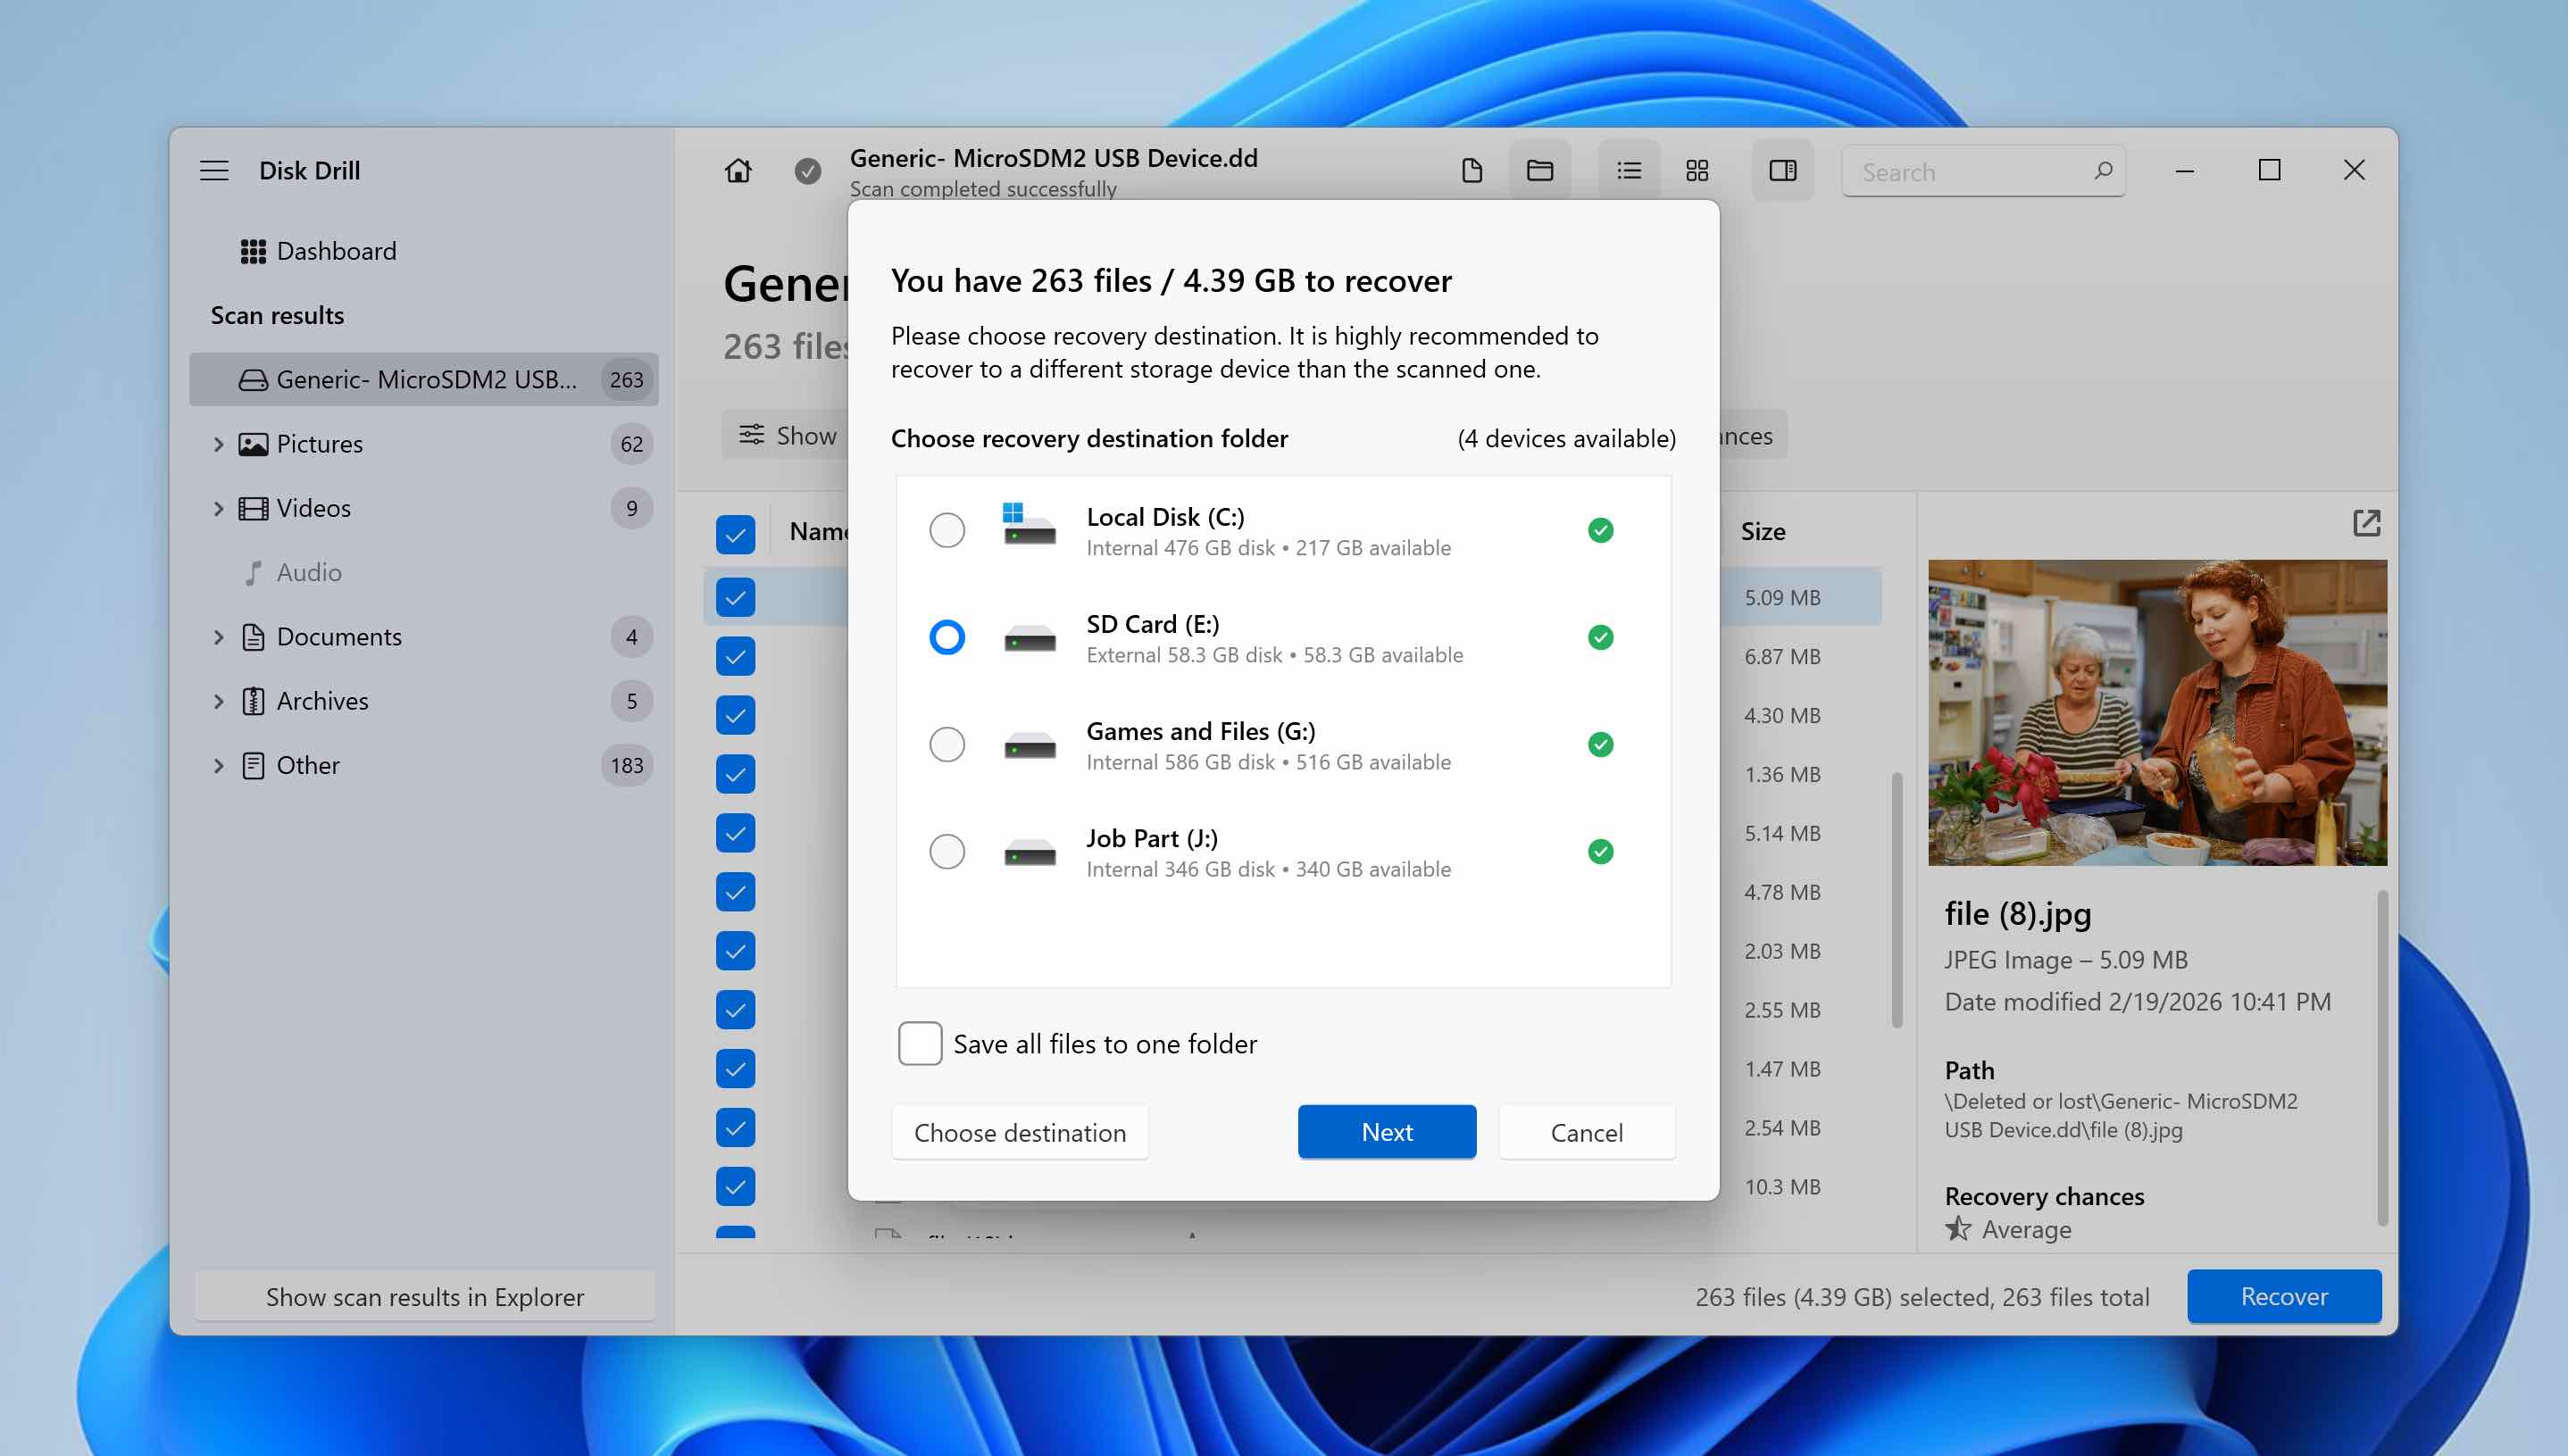
- Select your formatted SD card as the destination, then click Next. The selected data will then be written back onto the card.
Over time, we have tested multiple SD card recovery tools. Disk Drill consistently stands out due to its recovery performance and additional functionality. In this guide, we focused only on the byte-to-byte backup feature, but the software includes several other advanced capabilities. If you’re interested in what else it offers, you can read our detailed Disk Drill review to explore its full feature set.
Conclusion
As you’ve seen, formatting an SD card without losing files is entirely possible if you approach the process carefully. The key is preparation: (1)secure your data, (2)perform the format, (3) return the files to the SD card. If you take these steps before pressing the Format button, you significantly reduce the risk of permanent data loss.
But what if you started researching how to format an SD card without losing data after the format was already completed and your files disappeared? If the format was quick (not full) and you haven’t written new data to the SD card since then, recovery is still possible. In such cases, you may be able to restore the lost files using data recovery software. We have a guide on recovering data from a formatted SD card, as well as a separate Android recovery guide, which you can consult if needed.
We hope this guide helped clarify the process. If you still have questions, leave them in the comments below or visit our forum, where other users and our experts can assist you with SD card and data recovery issues.


")