 There are lots of reasons you might want to get data from old hard drives. Perhaps you were rummaging through your storage and came across an ancient drive that might have some nostalgic photos. Or perhaps your previous PC finally died on you before you could extract data from the old hard drive.
Either way, in this guide, we’ll show you how to get data from an old computer hard drive, depending on what shape the storage device is in. Before putting this guide together, we gathered several old hard drives from members of our team and performed real recovery tests on them. So, we know exactly how to recover data from an old hard drive, and we’re going to show you how to do it too.
Can Data Be Recovered from an Old Hard Drive?
Getting files off old hard drives mostly depends on the overall state of the device. After all, with age, hard drives become more likely to become afflicted with various issues, such as corruption or malfunction. However, some problems can stay hidden until you actually connect the drive and try working with it. Physical damage is a different story though, since it’s often possible to spot it right away.
That’s why the first thing you should do is carefully inspect the hard drive for anything unusual. Look for dents, chipped parts, strong contamination, strange noises coming from inside the drive, and similar signs of damage. If you notice anything like this, we strongly advise against trying to recover files from an old hard drive at home. Instead, it’s much safer to contact a professional data recovery service.
If the drive looks fine at first glance, you can continue with the recovery process. The next steps are described below.
How to Get Files Off an Old Hard Drive
If you’re reading this now, it likely means your old hard drive doesn’t show obvious signs of severe physical damage. That’s good news, because it means there’s a solid chance you’ll be able to get your data back. The recovery process may take some time, but if you carefully follow the instructions, you should be able to recover the files you need. Let’s get started.
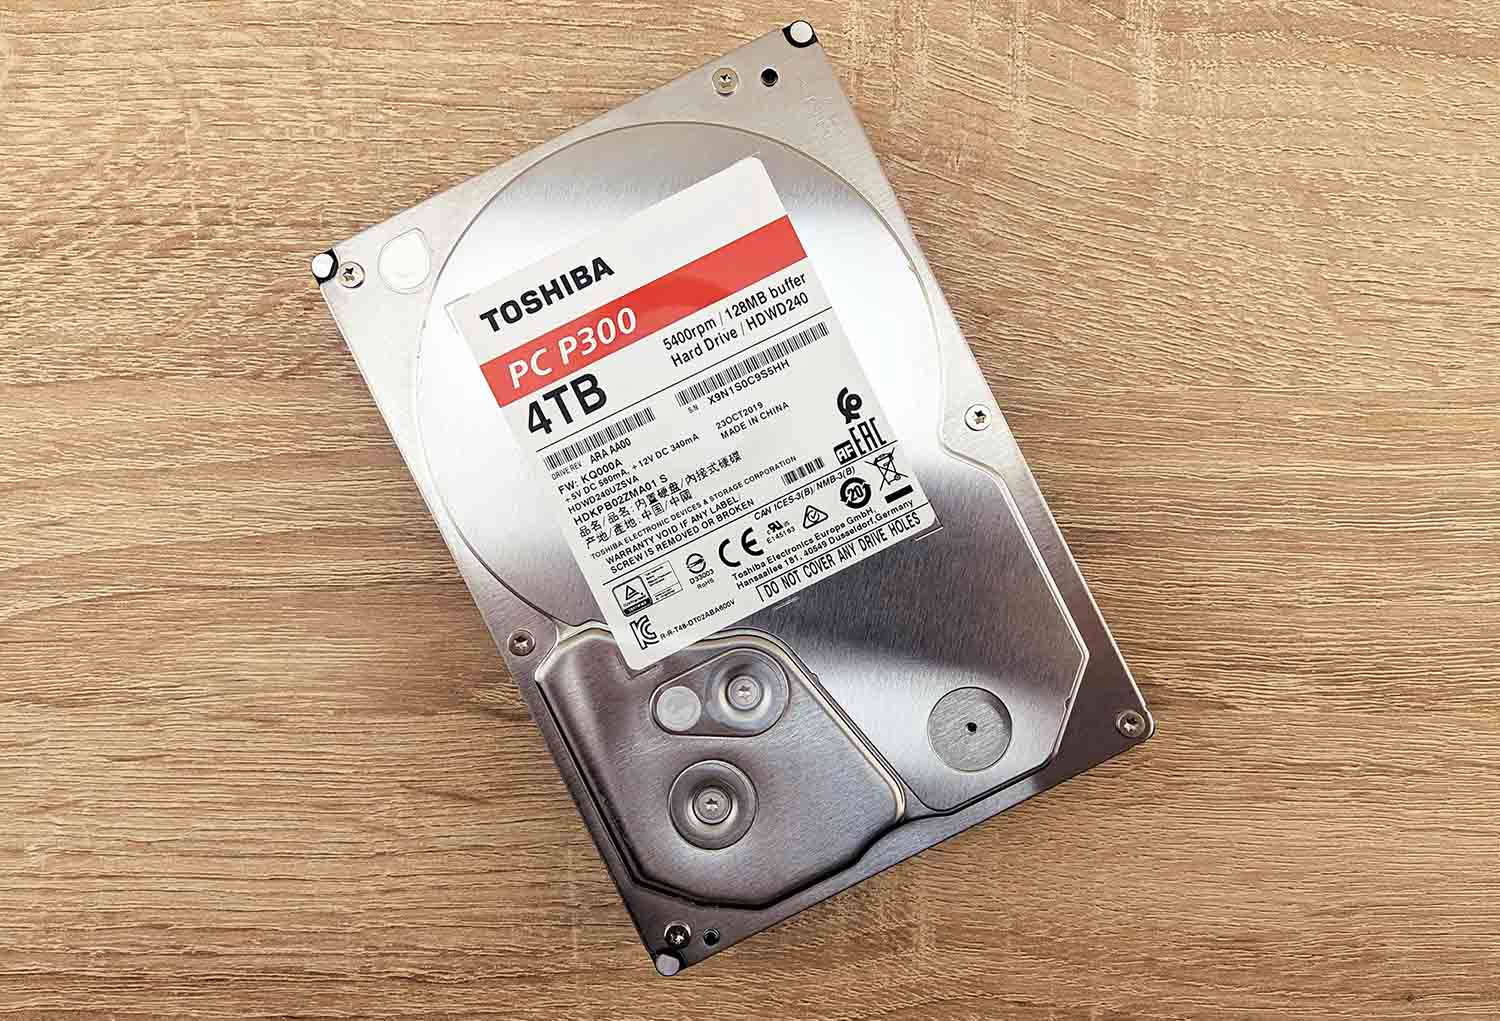
Step 1:Identify Your Old Hard Drive Type and Connection Method
Before you can recover data from your old hard drive, you first need to figure out what type of drive you’re dealing with and how it can be connected to another computer.
Older hard drives may use different interfaces, such as IDE/PATA, SATA, SCSI, or SAS. Since modern PCs and laptops often don’t support these connections directly, you may need a compatible adapter, enclosure, docking station, or special cable.
The easiest way to identify your drive is to look up its model number on Google along with keywords like interface type or how to connect. This should quickly show you what kind of drive you have and what options are available for connecting it to a newer computer.
Step 2:Connect the Old Drive to Your Working Computer
Once you identify the type of your hard drive, its connection method, and get all the necessary adapters or cables, connect the drive to your PC and power it on. After that, open File Explorer and check if your old hard drive appears there. If you can see it and access the files, then you’ve basically won this battle already. Open the drive and copy all important files to another storage device as soon as possible.
Don’t see the drive in File Explorer? That can already point to file system corruption or other logical problems. However, File Explorer alone is not a reliable indicator of a dead drive because Windows only shows drives there if it can properly read their partitions and file systems. Instead, you should check Disk Management:
- Right-click the Start button and choose Disk Management.
- Look for your old hard drive in the list of connected devices.
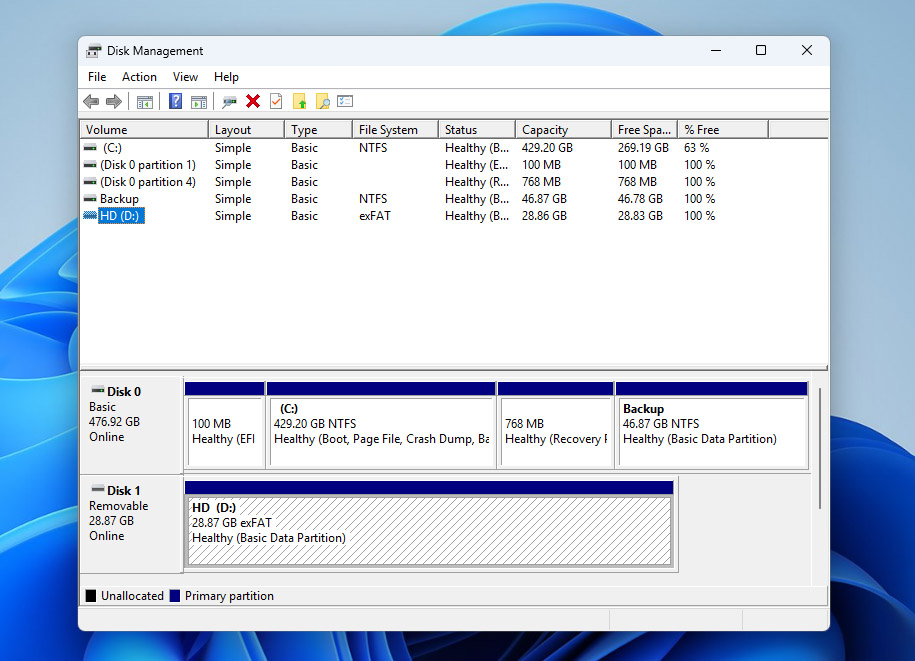
If the drive does not appear there at all, shows 0 capacity, or displays random incorrect numbers instead of the real storage size, then the problem is likely physical. At that point, your safest option is to contact a professional data recovery service. However, if you can see the old hard drive in Disk Management and it shows the correct capacity, you can move on to Step 3.
Step 3:Use a Data Recovery Program to Get Data Off an Old Hard Drive
If your old hard drive appears normally in Disk Management, it means your computer can still communicate with the drive, but Windows can’t properly access its contents. This is where data recovery software becomes handy—it can bypass normal Windows access methods and scan the drive directly to recover files.
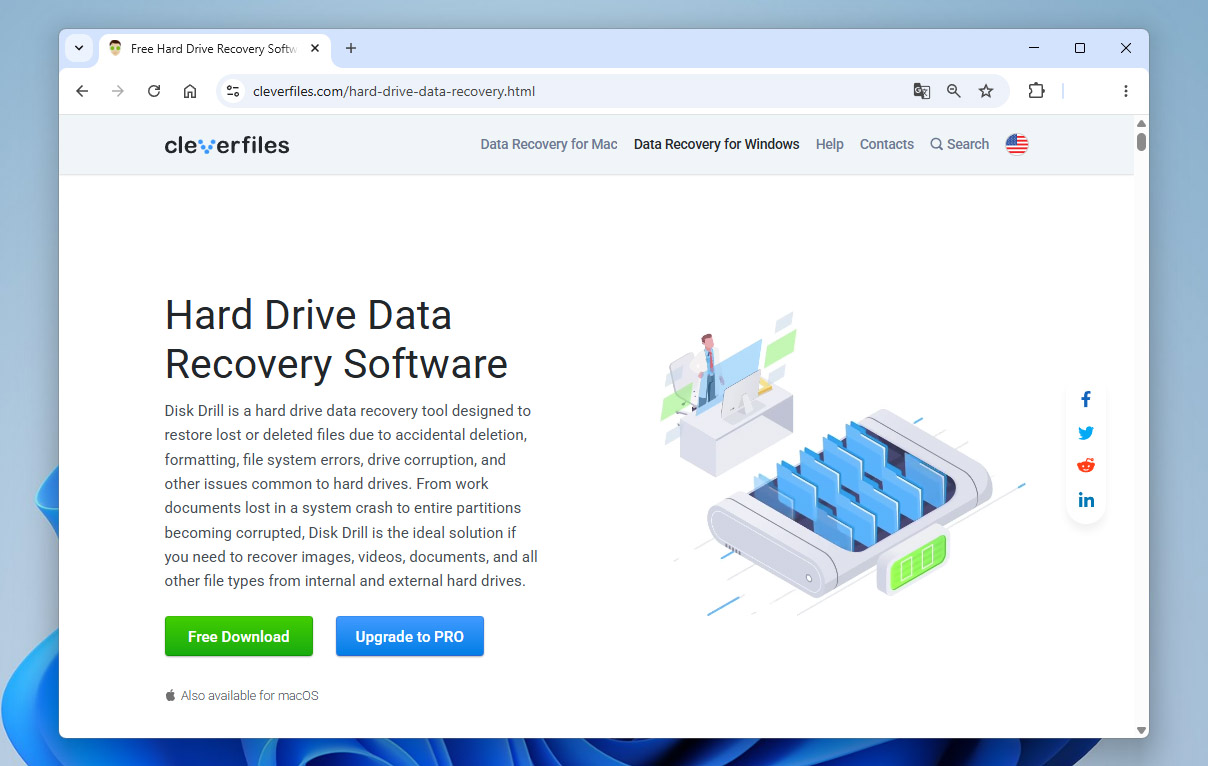
Out of all the recovery tools we tested, Disk Drill stood out the most. It comes highly recommended thanks to its strong recovery capabilities, fast scan speeds, and beginner-friendly interface. It supports nearly all major file systems commonly found on old hard drives, including FAT16, FAT32, exFAT, NTFS, HFS, and more. Most importantly, it can recover data from problematic drives, including RAW disks, uninitialized drives, corrupted file systems, and drives that ask to be formatted before use.
Scanning an old hard drive directly is not the best idea, if the last thing you want is for it to completely fail in the middle of the recovery process. That’s why it’s much safer to first create a full image of the old hard drive and then scan the image instead of the original device. Thankfully, Disk Drill can handle both tasks in the same program:
- To get started, head to the Cleverfiles website and download the latest version of Disk Drill.
- Launch the downloaded setup file and follow the instructions on the screen until successfully installed.
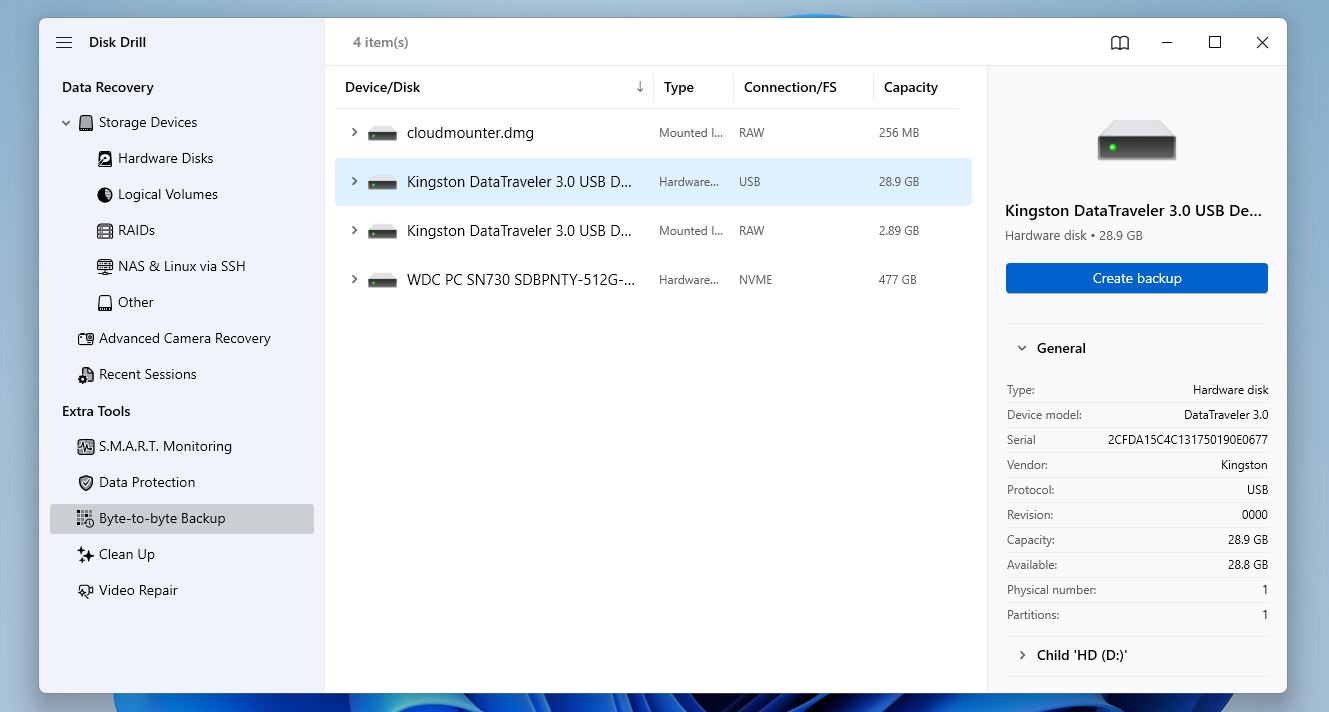
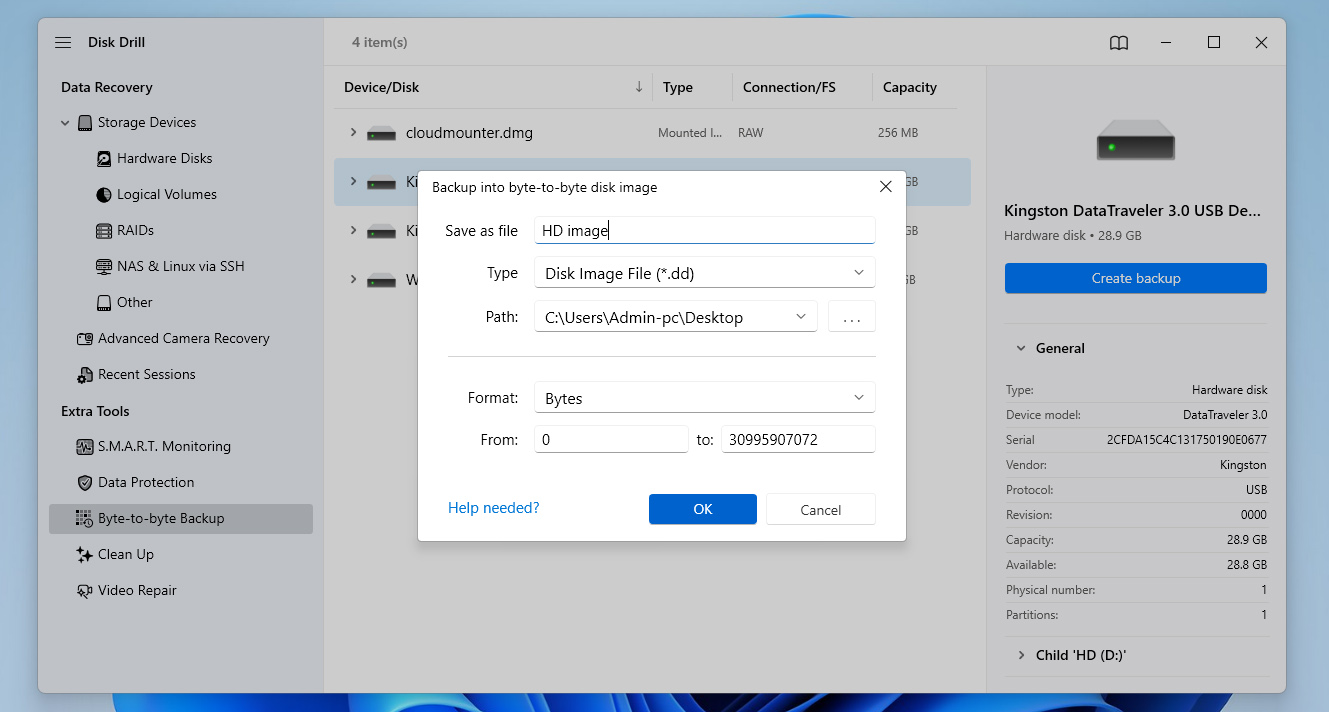
- Next, make sure that your old hard drive is properly connected to your PC, then run Disk Drill. From there, click Byte-to-Byte-Backup in the bottom-left corner of the window and select your hard drive from the list of available storage devices. Once you’re ready to move to the next step, click the Create Backup button in the top-right corner.
- Upon clicking, a pop-up will appear where you can configure the backup details. This includes the file name, format, path, and more. Click OK to proceed.
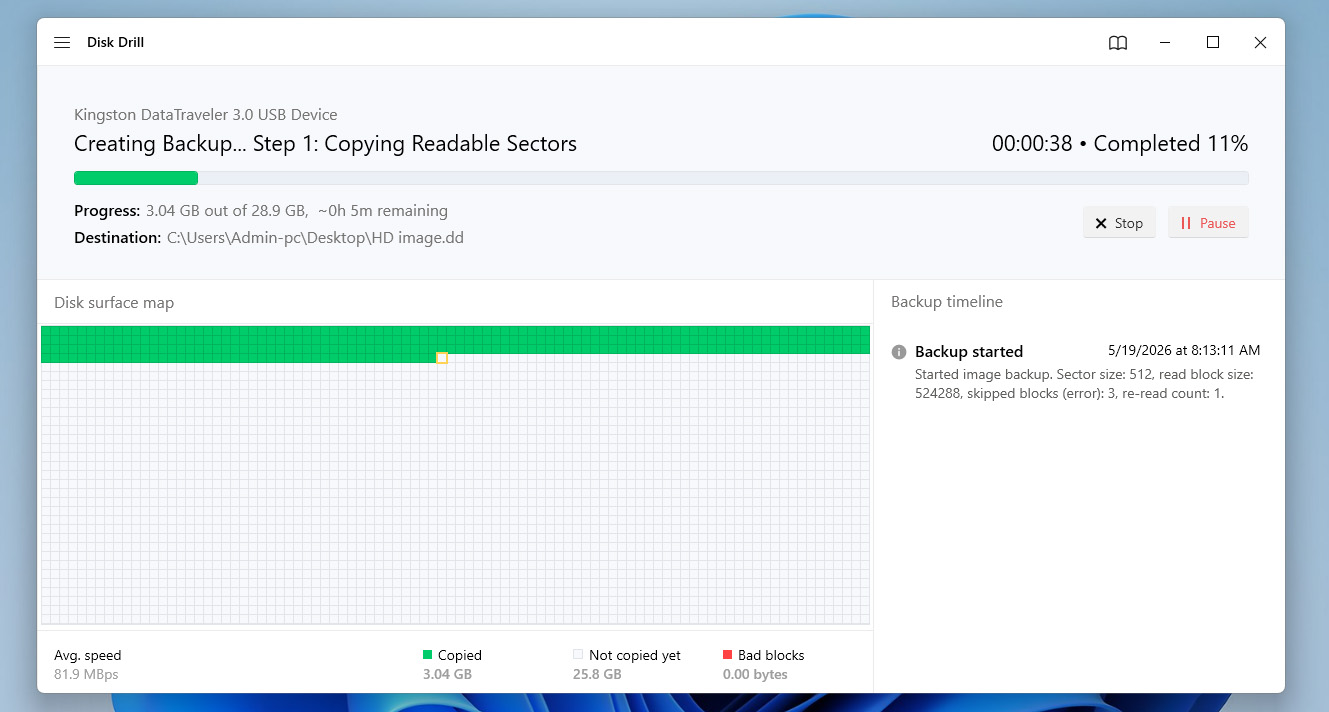
- After that, Disk Drill will now begin creating the backup. The overall duration of this process depends mostly on the capacity of your hard drive. When it’s done, you’ll be greeted by a completion screen. Then, you can click the home icon to return to the program’s home screen.
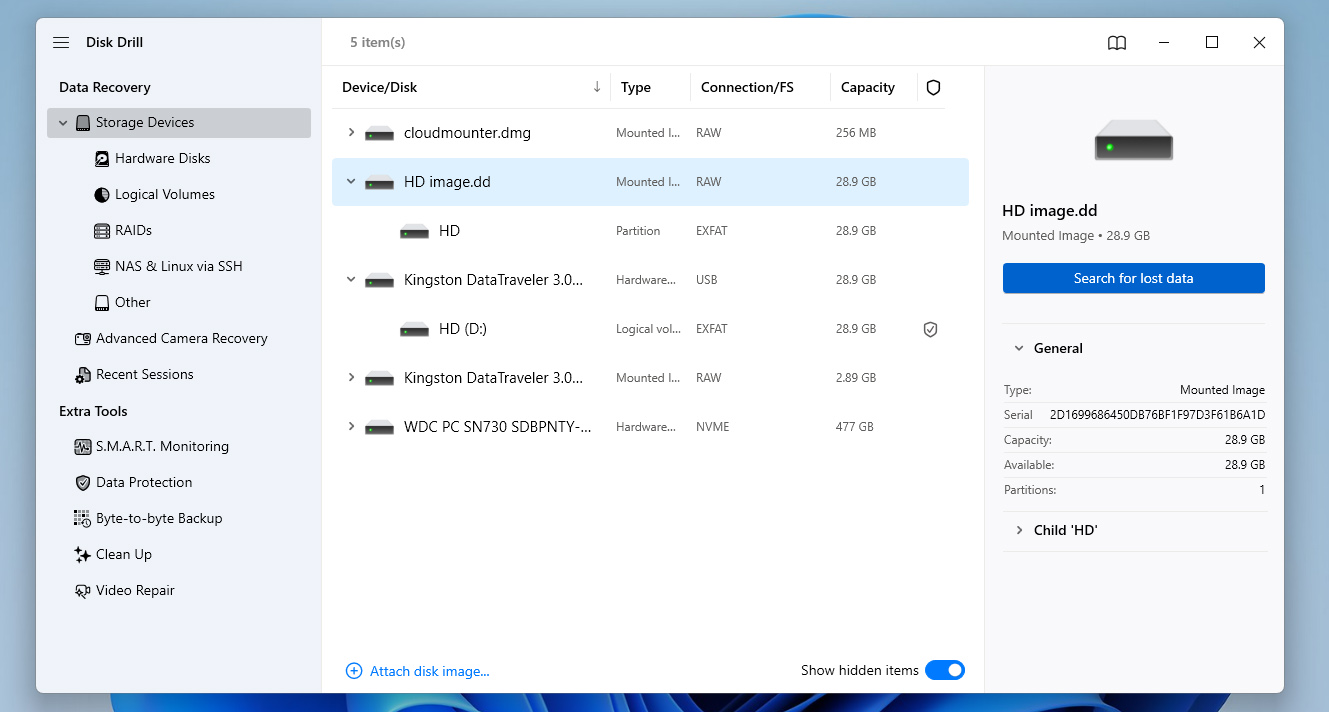
- From the Disk Drill homepage, make sure you’re on the Storage Devices section in the left-side panel and then click Attach disk image near the bottom of the window.
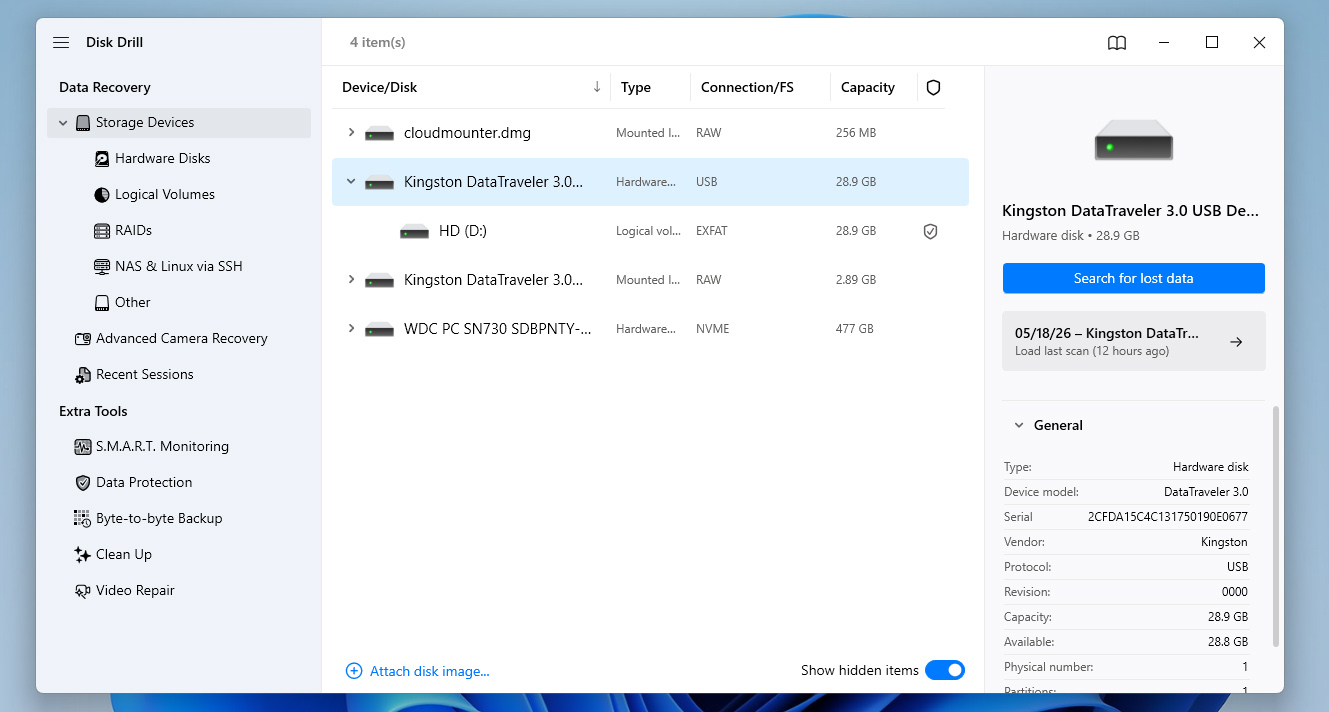
- Next, a pop-up file explorer will appear where you’ll need to open the byte-to-byte backup you created in the previous section. Once done, the backup will appear in the list of available storage devices. Select the backup from the list and click Search for lost data.
- If Disk Drill asks you to choose between the Universal Scan and Advanced Camera Recovery methods, select Universal Scan. It’s the best option for recovering general data from old hard drives.
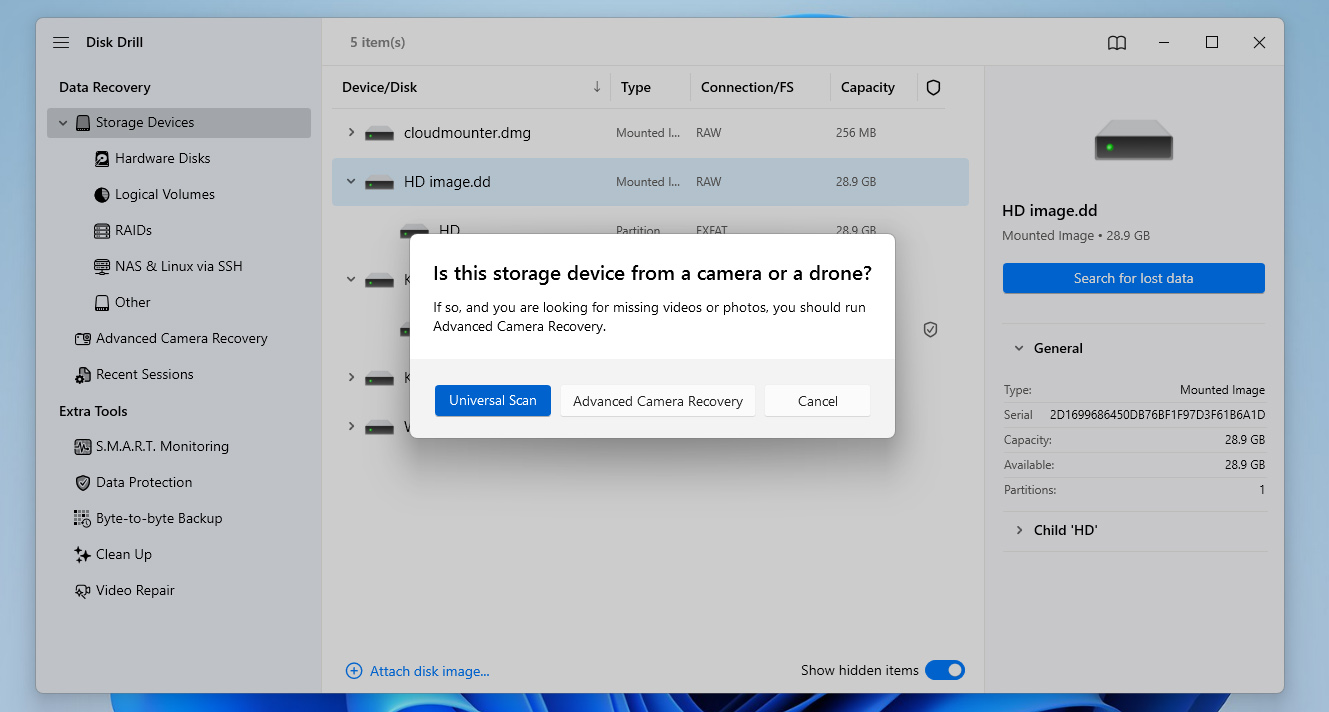
Advanced Camera Recovery is actually one of the standout Disk Drill features that sets it apart from many other recovery tools. It was specifically designed to recover fragmented videos from SD cards used in cameras, drones, GoPros, and similar devices. If you’re curious about Disk Drill’s other features, you can also check out a Disk Drill review.
- Upon clicking, Disk Drill will start scanning the hard drive backup for any files it can recover. While waiting for the scan to finalize, you can click the Review found items button at the top-right corner to switch over to the results screen. That way, you can sift through the found files while the scan progresses. You can also opt just to wait for the scan to end first before clicking the same button to continue.
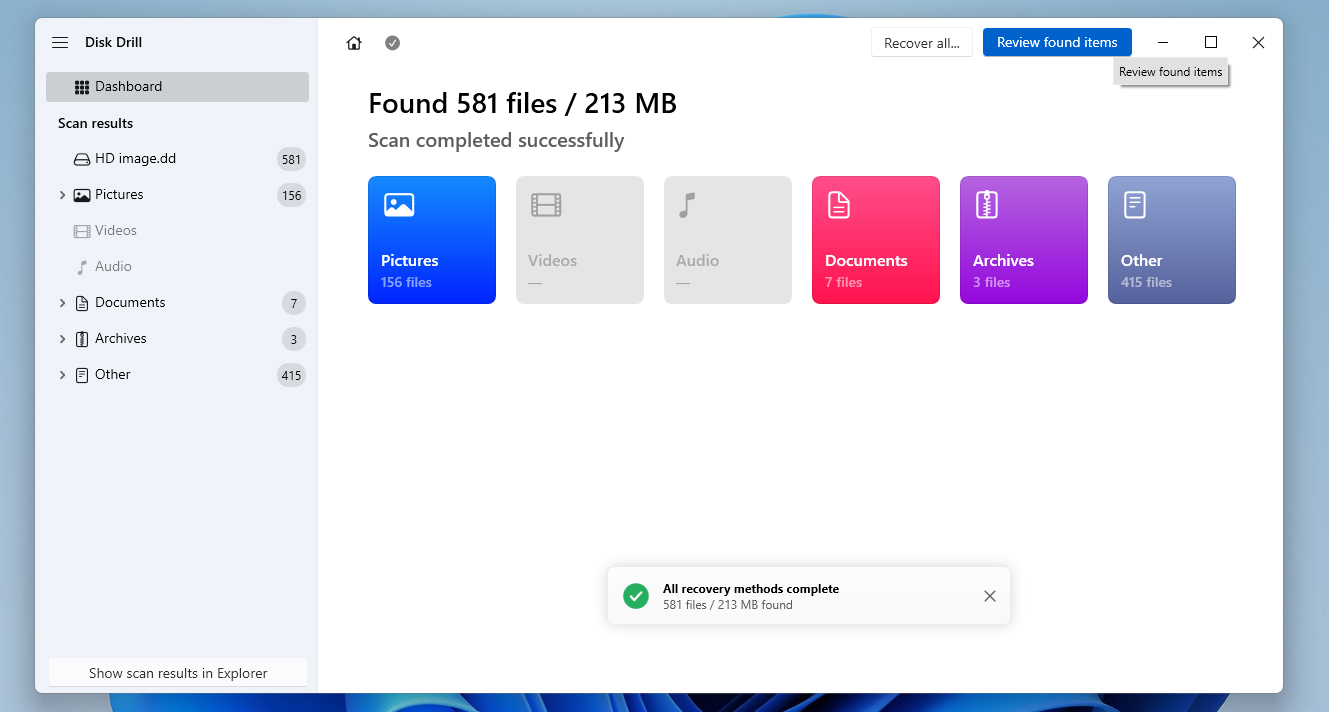
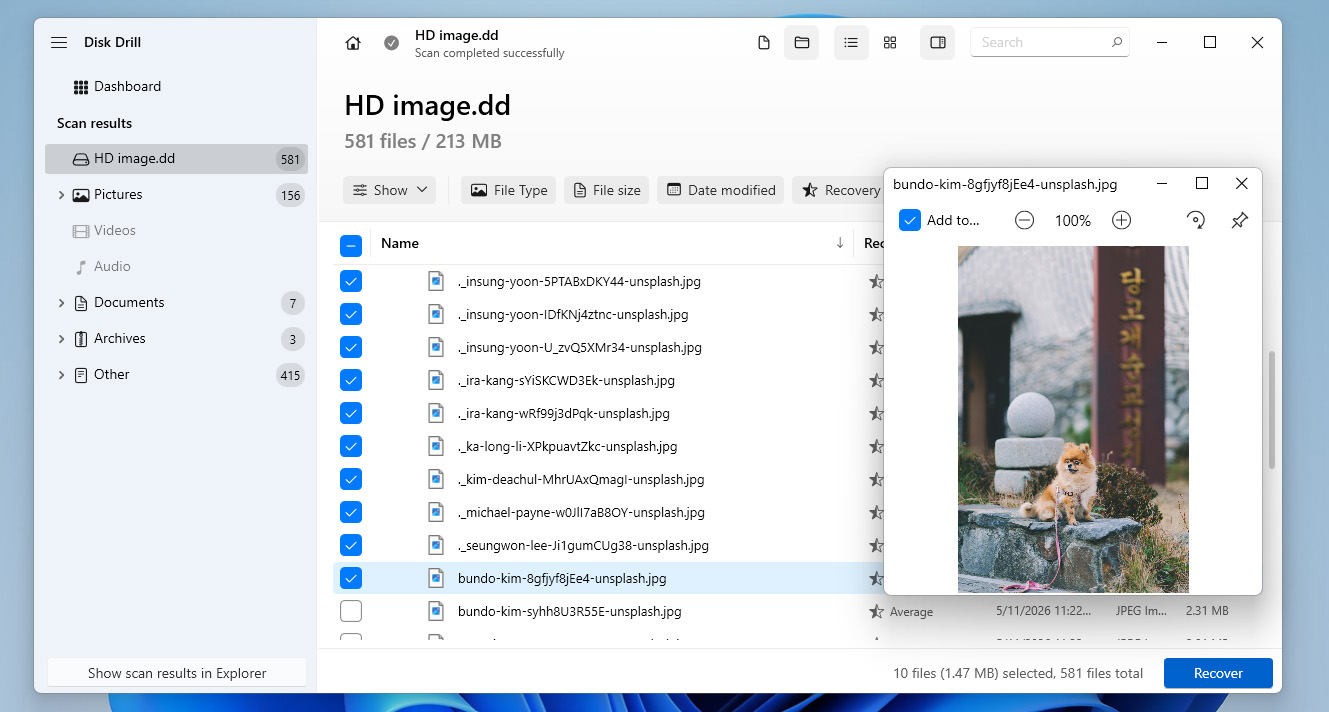
- Once done, you can now browse through the files shown in the results section until you find the ones you want to recover. You can make the search easier by using the category filters on the left or the search bar in the top-right corner. Keep in mind that the search bar accepts both file names and file extensions. Once you locate the files, select them by ticking the checkboxes on the side of the filenames. When you’re ready, click the Recover button.
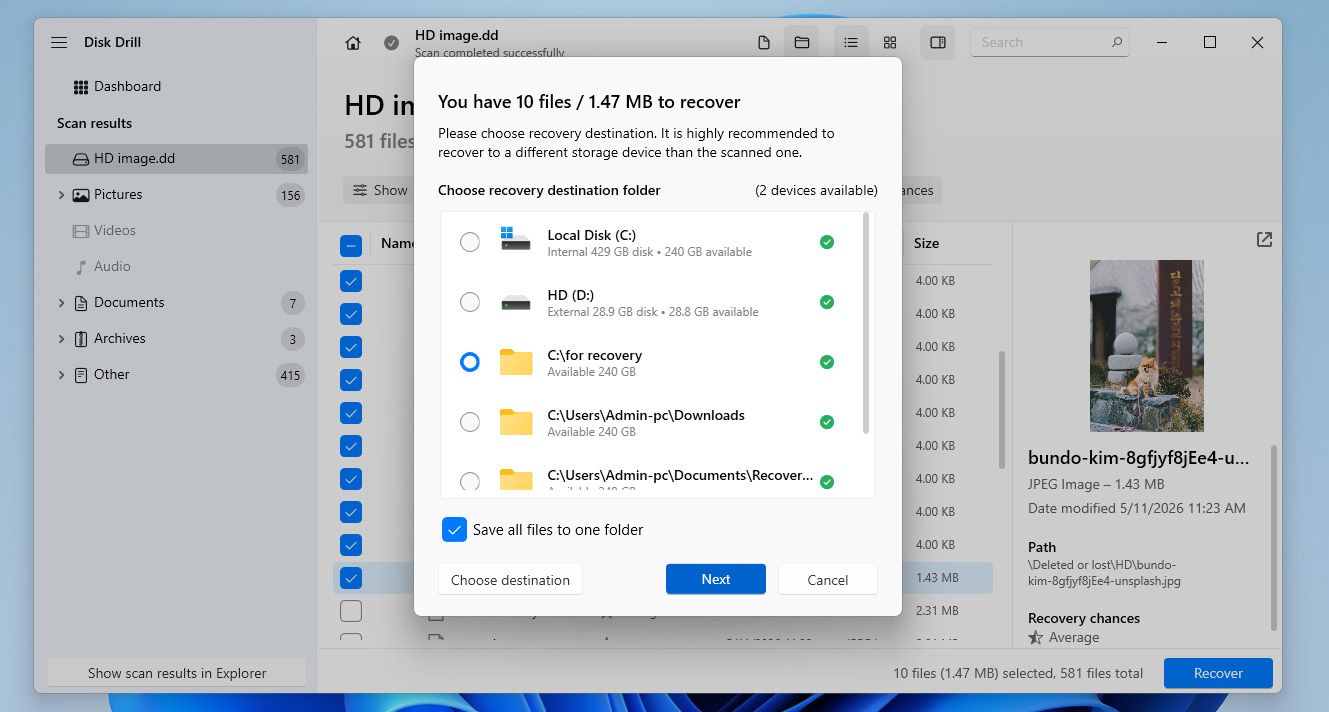
- Next, a small window will appear where you’ll need to set the destination of your retrieved files. After you’ve decided, click the Next button to start the recovery process.
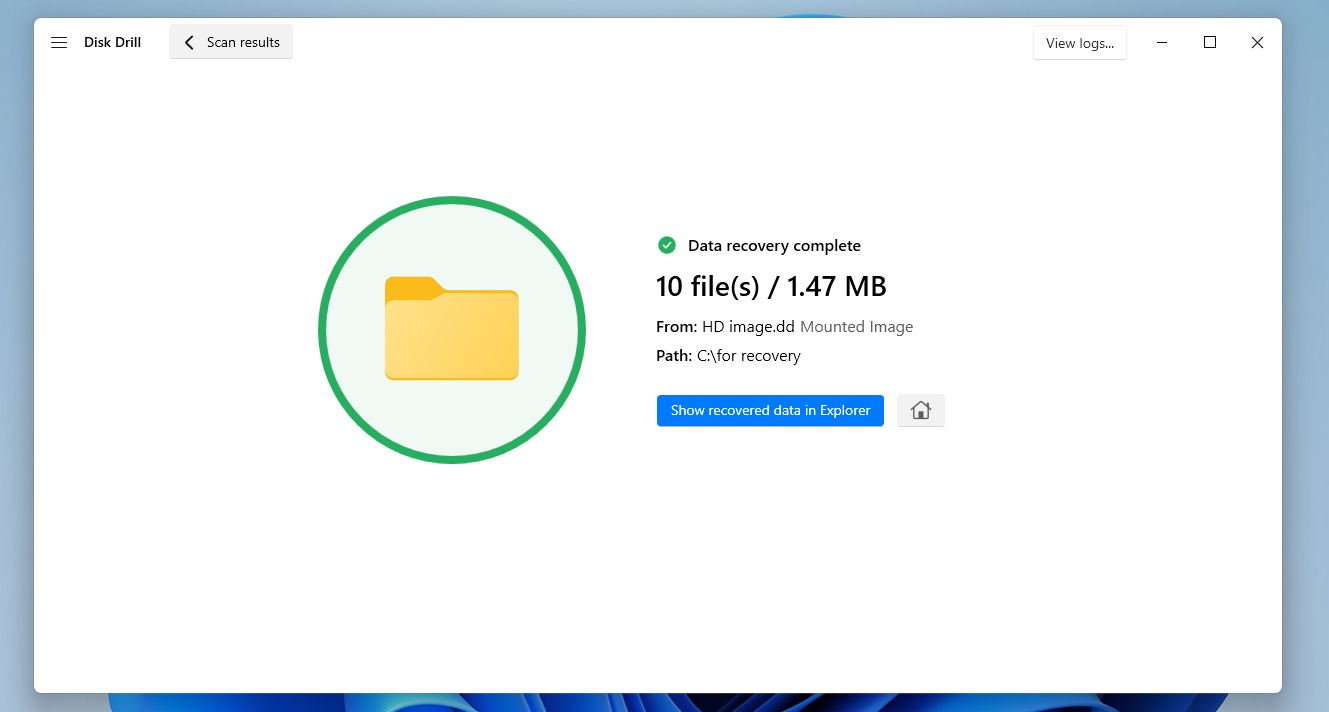
- Upon the success of the data recovery process, you’ll be greeted with a completion screen. You’ll also see a button labeled Show recovered data in Explorer that you can click to immediately open the folder where your rescued files are located.
If recovering the data from your old hard drive isn’t enough and you also want to experiment with fixing the device itself, you can try some of the methods from our corrupted hard drive repair guide. Since you already managed to save data from the hard drive, you can now safely run different repair procedures, scans, and fixes directly on the device without risking your important files.
Step 4:Find a New Location for the Recovered Files
Even if your experiments with the corrupted hard drive are successful and you manage to get it working normally again, we still wouldn’t recommend using it as the primary place to store important files.
Old hard drives that already showed signs of corruption or instability are much more likely to fail again in the future. That’s why your recovered data should be moved to a safer storage location. Some good options are another hard drive, your current PC or laptop, cloud storage.
However, the most reliable approach is to use several storage locations at the same time. That way, if something suddenly happens to your new hard drive, you’ll still have backup copies of your files elsewhere and won’t have to go through the whole hard drive data recovery process again.
Conclusion
There are quite a few ways to recover data from old hard drives, even if they’ve become corrupted or are no longer functional. If the device is still working, you can try performing hard drive data recovery yourself. Just keep in mind that you’ll need a working computer, along with an old hard drive adapter or enclosure to connect it with.
You could also connect the drive directly to the PC if you like. On the other hand, if the drive is dead, then you’ll need to reach out to a data recovery service for help. In some cases, placing the dead hard drive in a freezer may help if you’re willing to take the risk.
[If you still have questions about the topic or run into situations during the process of retrieving files from an old hard drive that weren’t covered in this guide, feel free to visit our forum and look for answers there. And if you can’t find an existing discussion that matches your case, you can always create your own topic and ask the community directly. Also, if you start having problems with another hard drive in the future, we recommend checking out our hard drive recovery section, where you’ll find guides for many different data loss scenarios. Good luck!
FAQ:
- Device corruption
- Significant physical damage
- File system unsupported by your new computer
- Uninitialized disk
- Connector/port trouble
- Driver issues
- Check the connectors to ensure they’re functioning properly. Whether you’re connecting the hard drive internally or externally, a good connection is vital.
- Check if the drive appears in your PC’s BIOS but not in Disk Management or Device Manager. If that’s the case, then there’s a good chance that the cable is no good.
- Uninstall all ATA drivers and force Windows to automatically install and configure them again. This method has proven to be quite successful with a lot of users.
- Find an ATA driver from your motherboard manufacturer’s official website.
- Use the “Import Foreign Disks” option in Disk Management. A hard drive may be marked as “foreign” when a dynamic disk is moved from one computer to another.


