
To recover data from a laptop hard drive, stop using the laptop immediately, then use data recovery software like Disk Drill or remove the drive and connect it to another PC through a USB enclosure. Deleted files, corrupted drives, malware, failed updates, and laptops that no longer boot can all lead to data loss, but recovery is often still possible. We’ll cover the most reliable recovery methods for different situations, including deleted files, formatted drives, corrupted partitions, and laptops that no longer start properly.
What Causes Data Loss on a Laptop?
But first, let’s talk about what actually causes files to disappear from a laptop. This is important, because the reason behind the data loss often determines which recovery method gives the best results. For example, accidentally deleted files usually have much higher recovery chances than files lost after severe SSD damage or physical failure.
The cause also affects how urgently you need to act. In some situations, continued laptop use can overwrite recoverable data and reduce recovery chances significantly. A proper diagnosis helps avoid unnecessary fixes and points you toward the safest recovery approach from the start.
Here are the most common causes of laptop data loss and how each one typically affects your recovery options:
| Cause | What Happens | Methods | Recovery Chances |
| 🗑️ Accidental deletion | Files are removed from the file system, but the actual data often remains on the drive until overwritten | Check the Recycle Bin, restore from File History backups (Method 2), recover files with data recovery software like Disk Drill (Method 1), check cloud backups like OneDrive or Google Drive (Method 3) | Usually high |
| ♻️ Emptied Recycle Bin | Windows removes file references completely | Scan the drive with recovery software (Method 1), restore from File History (Method 2), recover from Backup and Restore archives (Method 4), check cloud recycle bins (Method 3) | Often good if the laptop saw little use afterward |
| 🦠 Malware or ransomware | Files become encrypted, hidden, corrupted, or deleted | Boot into Windows Recovery Environment (Method 2), recover clean copies from cloud backups (Method 3), restore previous backups with Backup and Restore (Method 4), use recovery software after malware removal (Method 1) | Depends on the type of attack |
| 🔄 Failed Windows update | User folders or partitions may disappear after installation problems | Use Windows Recovery Environment (Method 2), restore previous backups (Method 4), connect the drive to another PC (Method 1), scan the drive with recovery software (Method 1) | Usually moderate to high |
| 💽 SSD or HDD corruption | File system damage prevents normal access to files | Create a byte-to-byte backup first, then scan with recovery software (Method 1), connect the drive to another computer (Method 1), use a bootable recovery USB (Method 3) | Often recoverable with software |
| ⚠️ Formatting | Quick formats usually remove file records instead of wiping data completely | Stop using the laptop immediately, recover data with recovery software (Method 1), restore from backups (Method 2, Method 3, Method 4), contact professionals for severe cases | Depends on SSD/HDD type, formatting type, and usage after formatting |
| 🔨 Physical drive damage | The laptop drive develops hardware problems | Stop using the drive immediately, contact professional recovery services, avoid repeated scans or DIY repair attempts, connect the drive externally only if it remains stable (Method 1) | Lower recovery chances without professional help |
| 💥 Sudden shutdowns or crashes | Open files and file system structures become corrupted | Use Windows Recovery Environment (Method 2), run recovery software scans (Method 1), restore previous file versions from backups (Method 2 or Method 4) | Often recoverable |
| 📂 Partition loss | The laptop can no longer locate the partition properly | Connect the drive to another PC (Method 1), use recovery software that supports partition recovery (Method 1), boot from a recovery USB (Method 3) | Frequently recoverable |
| 🔌 Overheating or power issues | The drive may disconnect during read/write operations | Stop using the laptop until the hardware issue is resolved, create a backup image if the drive still appears, recover files with software afterward (Method 1), consider professional help for unstable drives | Recovery chances vary depending on damage severity |
The type of storage device also plays a major role. Traditional HDDs usually offer better recovery chances after deletion because deleted data often remains intact longer. SSDs are more complicated because of a feature called TRIM, which can permanently clear deleted data automatically. External SSDs connected through USB sometimes behave differently, so recovery may remain possible even after deletion or formatting.
Before You Proceed with the Recovery
Before you try any recovery method, stop using the laptop as much as possible. Avoid downloads, software installations, Windows updates, or copying new files onto the drive. Continued activity can overwrite deleted data and make recovery much harder, especially on SSDs.
If your laptop uses an SSD, many data recovery specialists recommend disabling TRIM as soon as possible after the data loss occurs. This does not guarantee recovery, since TRIM may have already activated, but it can help prevent additional deleted data cleanup operations.
Here’s how to disable TRIM on Windows:
- Open the Start menu and search for Command Prompt.
- Right-click Command Prompt and choose Run as administrator.
- Type:
fsutil behavior set DisableDeleteNotify 1 - Press Enter.
- Restart the laptop if possible.
You can later verify the TRIM status with: fsutil behavior query DisableDeleteNotify. If the result shows DisableDeleteNotify = 1, TRIM is disabled.
How to Recover Deleted Files from the Working Laptop
There are several methods that can help recover deleted or missing files from a laptop, but before you move to advanced recovery methods, it’s worth checking a few obvious places first. Often, the files were not permanently deleted at all. They may still sit in the Recycle Bin, a cloud backup folder, or simply appear hidden because of system settings or malware activity.
If the files still don’t appear, the methods below will help you recover them from your laptop drive safely and improve your chances of successful recovery.
Method 1: How Do I Recover Files from a Laptop Hard Drive Using Software?
If you’ve lost files and have no backup to fall back on, data recovery software might still be able to help. These tools scan your laptop’s storage and search for data that Windows no longer displays but has not yet overwritten.
This works because deleting a file usually removes its file system record rather than immediately erasing the actual data. Until new information occupies the same storage space, recovery software can often locate and restore those files. This approach can help with accidental deletion, formatted drives, partition loss, file system corruption, and some types of data loss caused by failed Windows updates.
There are many data recovery tools available, but for this guide we’ll use Disk Drill. It supports all major Windows file systems, can recover hundreds of file types, and includes useful features such as file previews, recovery chance indicators, and byte-to-byte backups for unstable drives.
Here is how to recover data from a laptop hard drive:
- Download Disk Drill from the official website and install it. If possible, install it on a different drive than the one that contains the lost files.
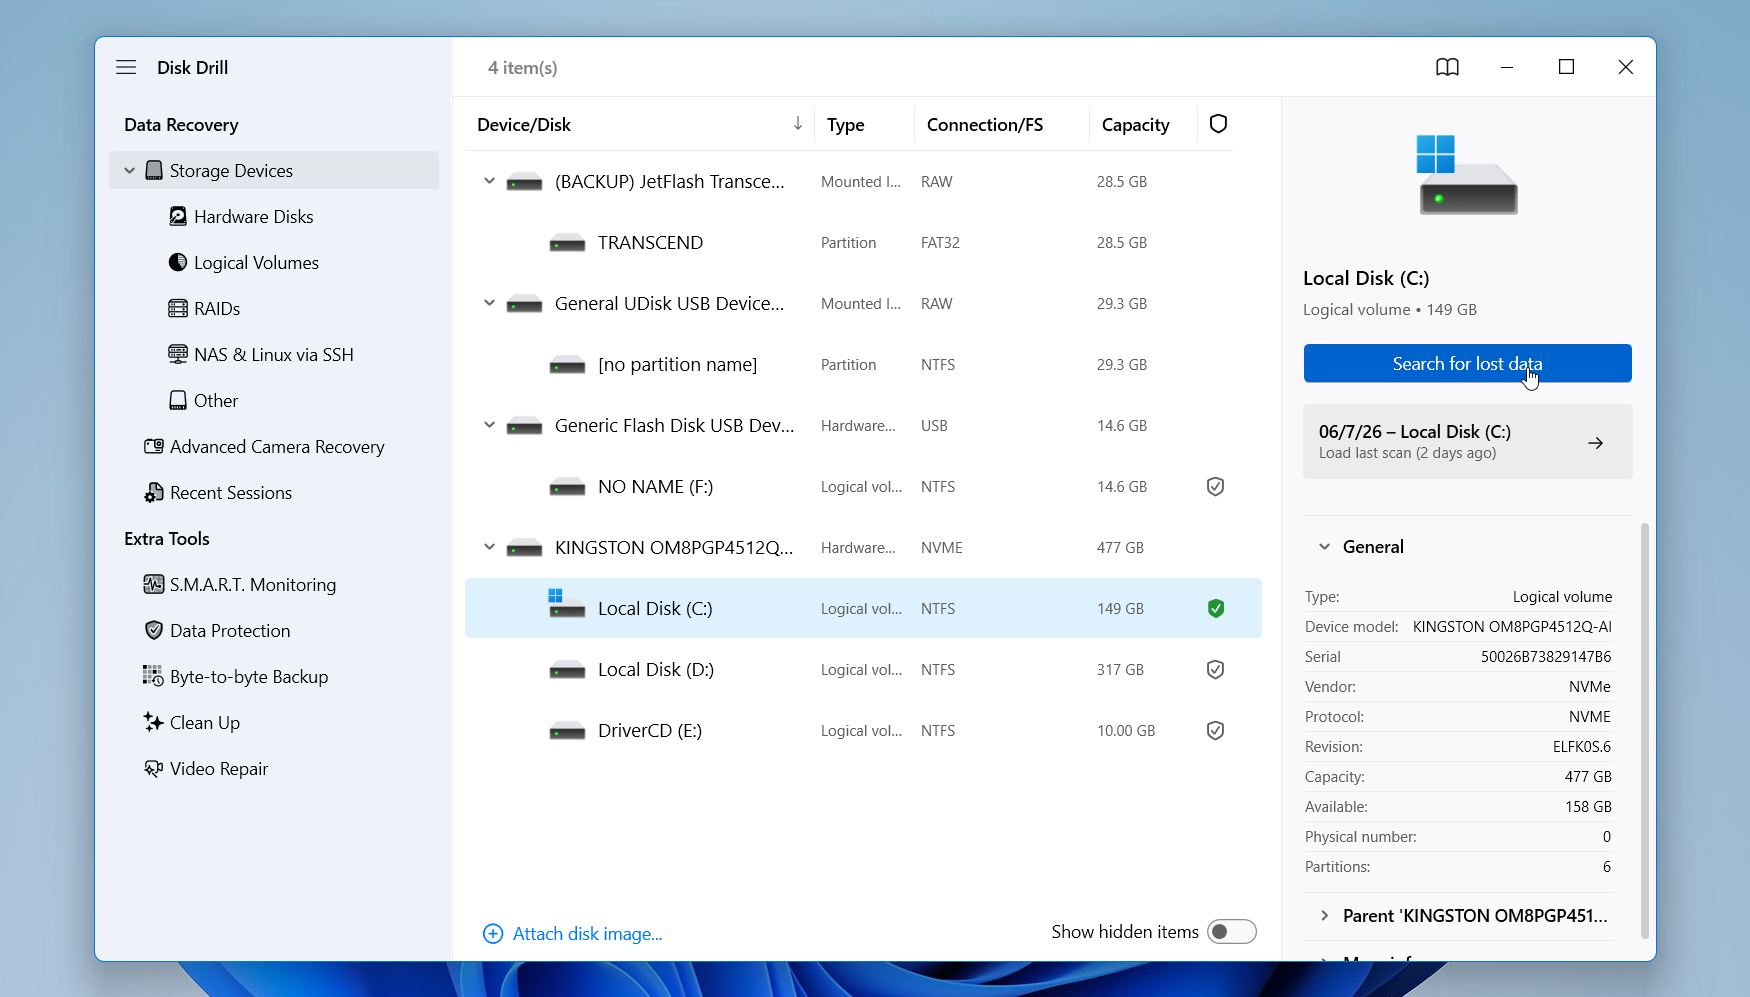
- Launch Disk Drill, select your laptop’s internal drive, and click Search for lost data.
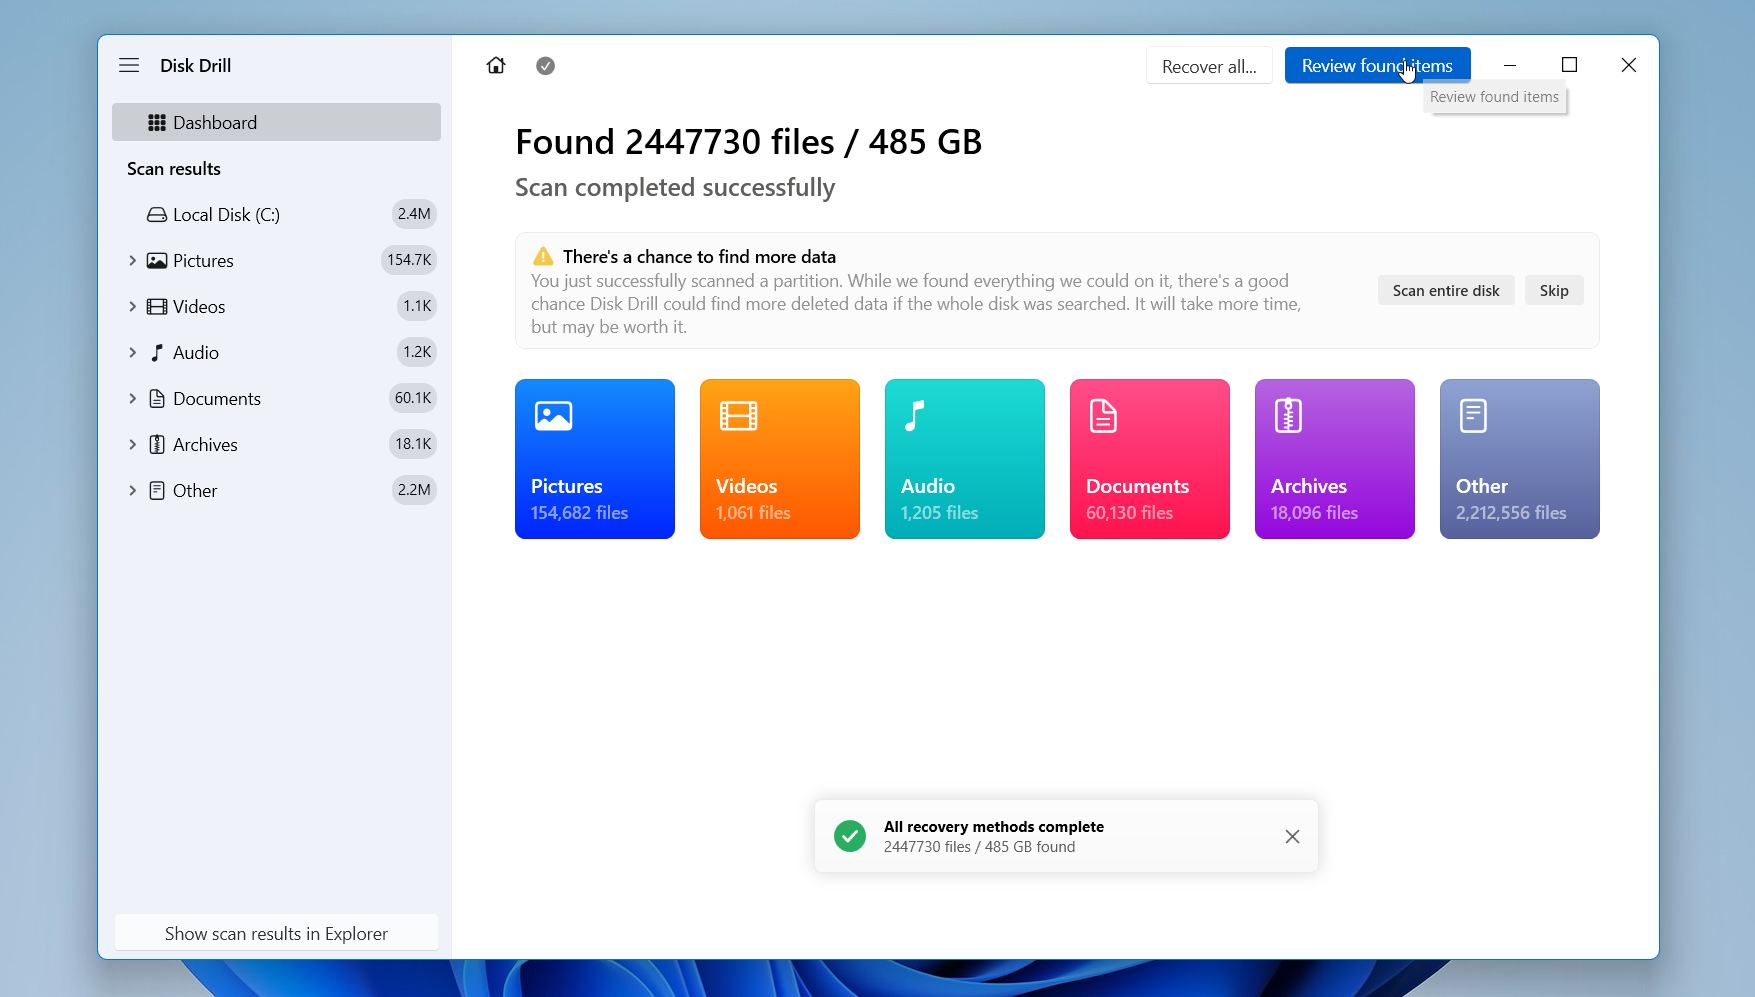
- Wait for the scan to finish, then click Review found items.
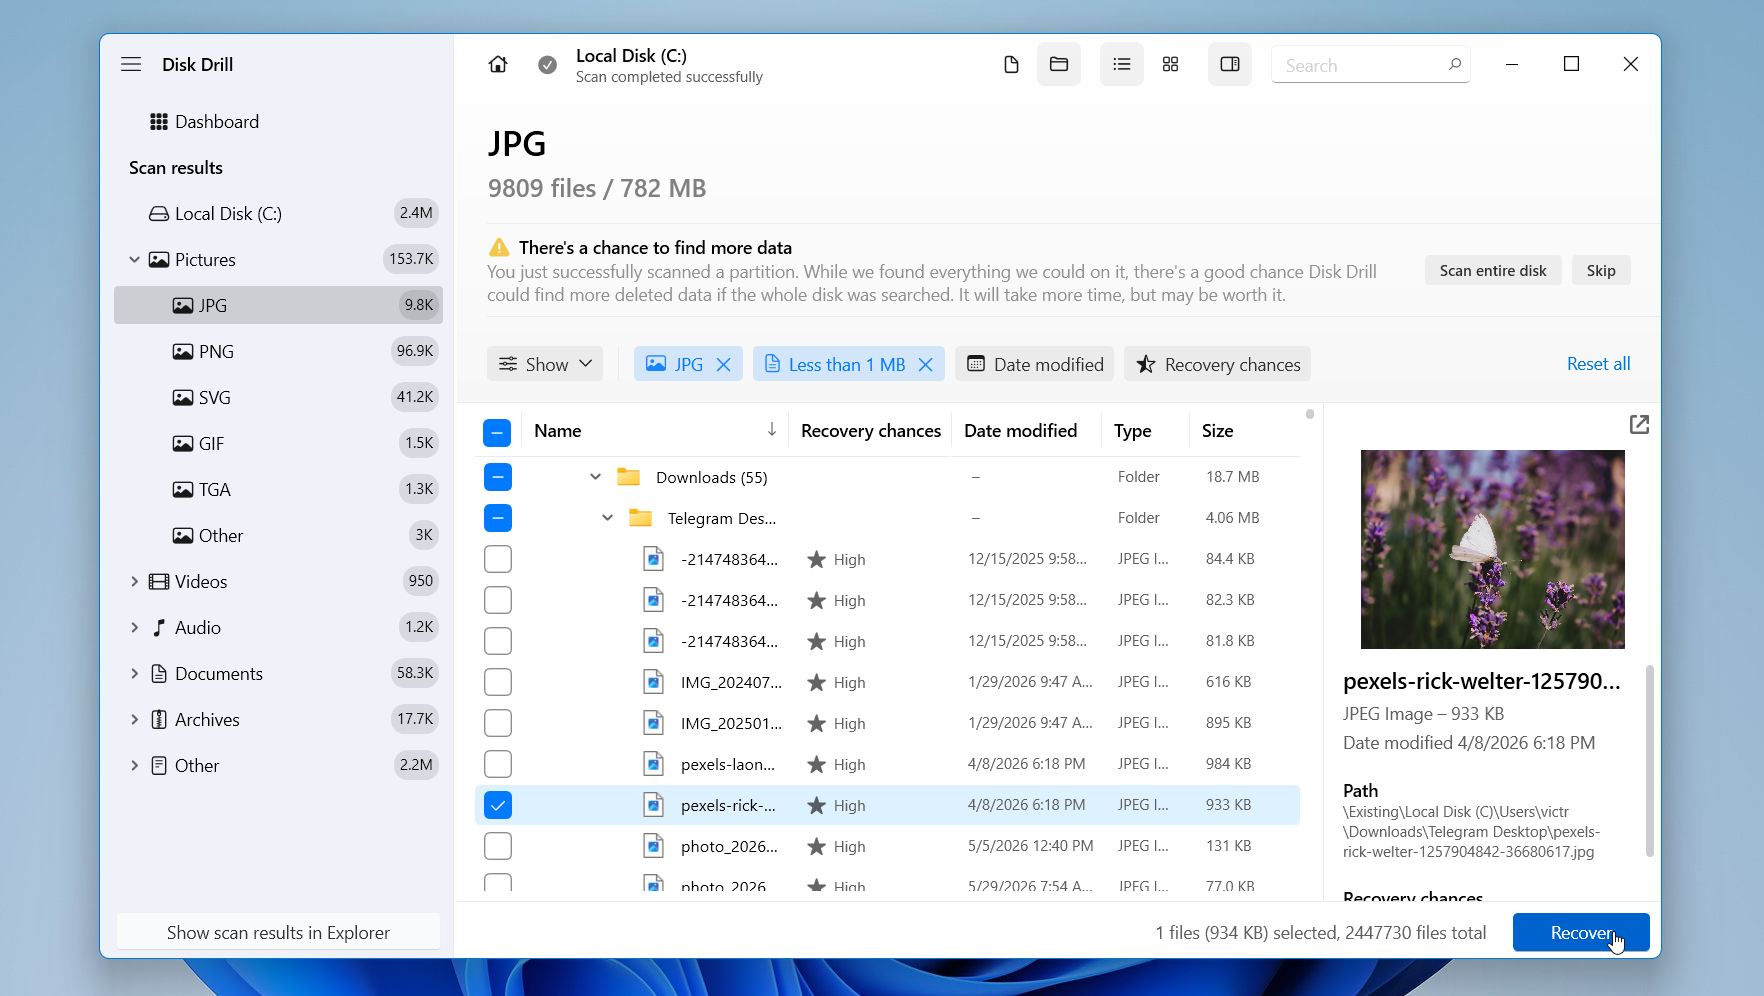
- Use filters, categories, or the search bar to locate the files you need. Preview recoverable files when available. A successful preview is usually a good sign that the file can be recovered correctly.
- Select the files you want to restore and click Recover.
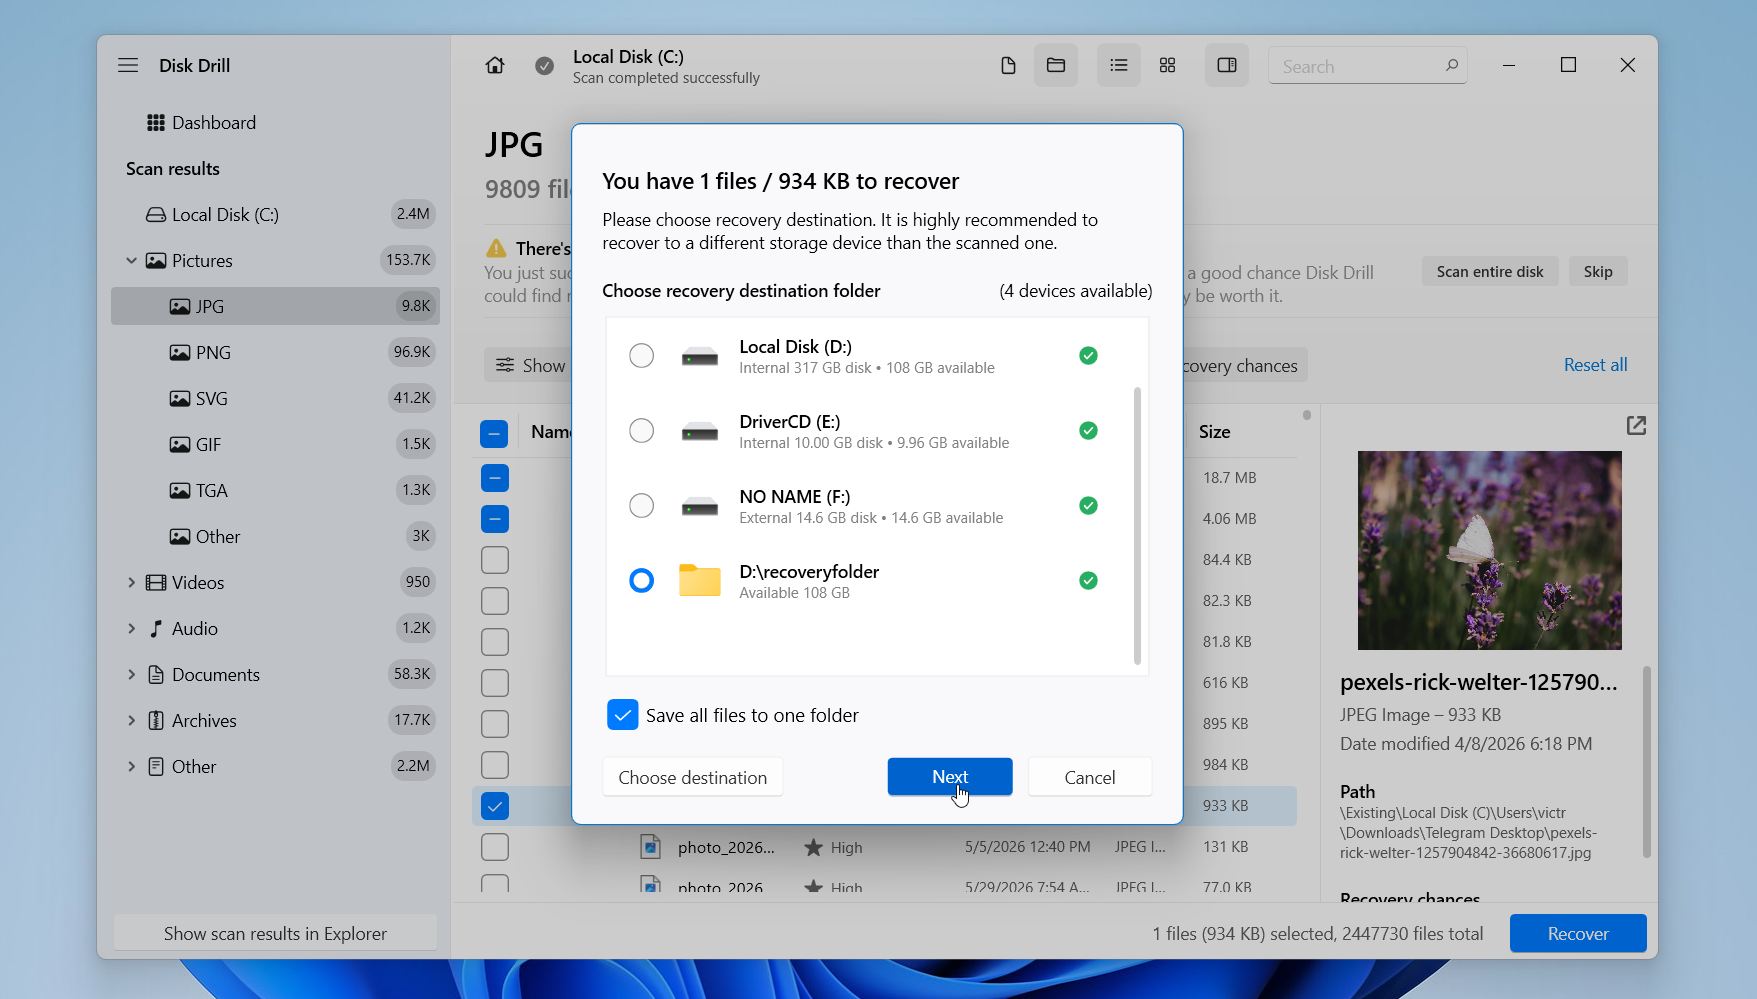
- Choose a recovery destination on a different drive or external storage device. Avoid saving recovered files back to the same drive you scanned.
- After the recovery process finishes, click Show recovered data in Explorer to view the restored files.
Disk Drill for Windows lets you scan drives, preview recoverable files, assess recovery chances, and recover up to 100 MB of data for free.
Method 2: Restore Files from File History
File History is a built-in Windows tool that quietly backs up your important folders (Desktop, Documents, Pictures, Videos, and Music) to an external drive or network location. If File History was enabled before the files disappeared, you may be able to restore an older version of the folder or recover deleted files directly.
This method only works if File History was configured and active before the data loss happened. Windows does not enable it automatically on most systems, so users who never set it up usually won’t find any available backups.
💻 This tutorial features a Windows 11 MSI laptop. On Windows 10, you can find the File History option in Settings > Update & Security > Backup.
Here’s how you can recover data from your laptop hard drive using File History:
- Press the Windows key and search for Restore your files with File History.
- Open the File History recovery window.
- Browse through the available folders and backup versions.
- Locate the file or folder you want to restore.
- Use the arrows at the bottom of the window to move between backup dates.
- Select the file or folder.
- Click the green Restore button to return it to its original location.
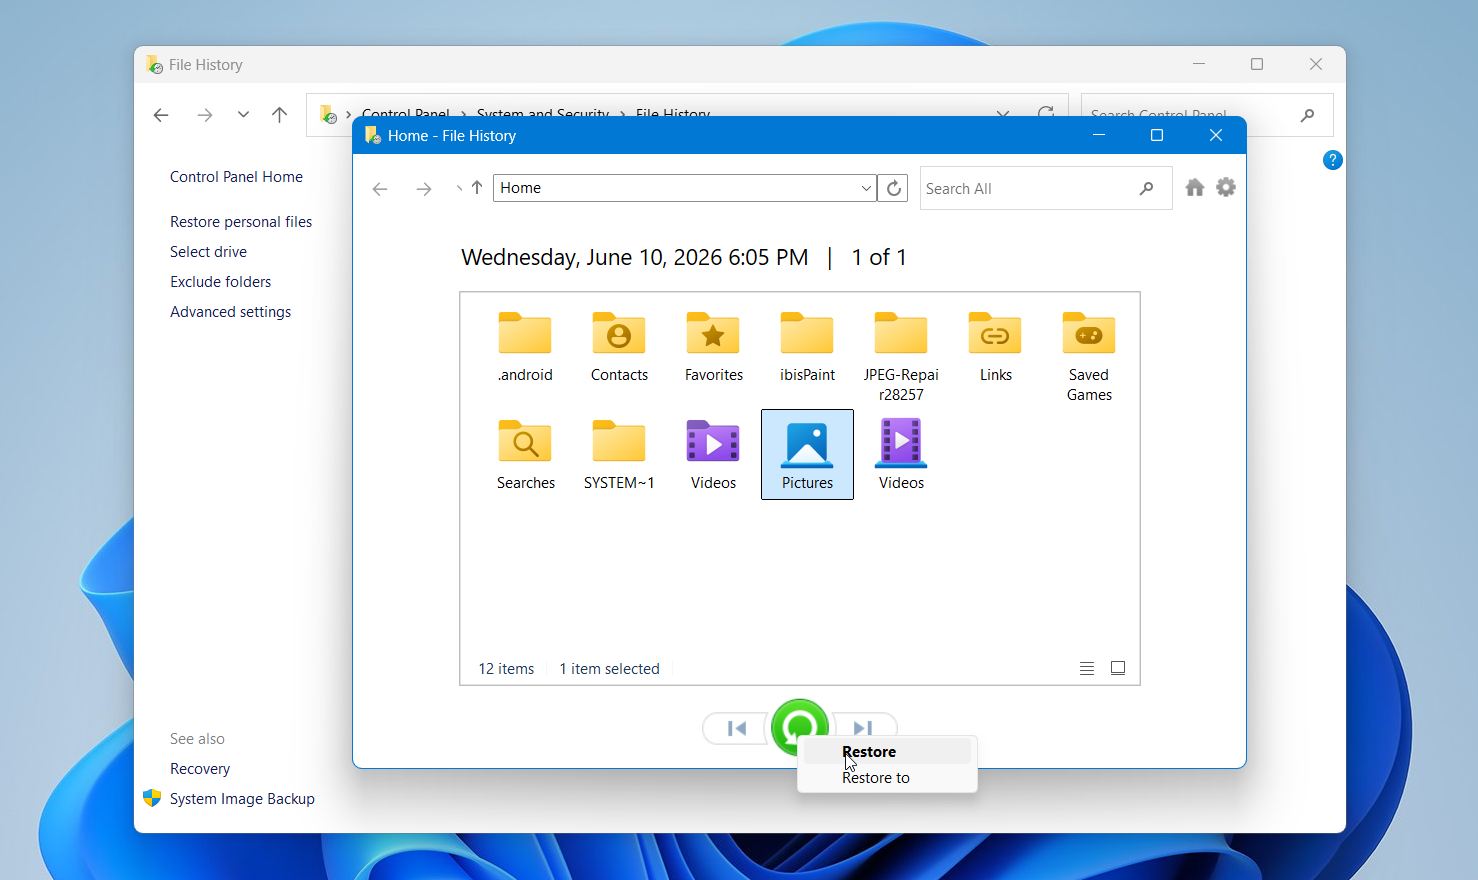
If you don’t want to overwrite an existing file, right-click the Restore button and select Restore to. This lets you save the recovered file to a different location.
Keep in mind that File History only restores files that were included in previous backups. Files stored outside protected folders won’t be available unless they were added to File History before the data loss occurred.
Method 3: Recover Files from Cloud Backups
Cloud storage services can also help recover deleted laptop files, especially when the files were synchronized before the data loss occurred. Services such as Google Drive, OneDrive, and Dropbox often keep deleted files in a cloud recycle bin for a limited time, which can make recovery much easier than scanning a drive for lost data.
This method only works if the files were uploaded or synced before they disappeared from the laptop. It can be particularly useful after accidental deletion, Windows reinstallation, laptop theft, or SSD failure because the files are stored separately from the affected device.
For example, here’s how to recover deleted files from Google Drive:
- Open Google Drive in your web browser and sign in to your account.
- Select Trash from the left sidebar.
- Browse the deleted files and folders.
- Right-click the file you want to recover.
- Click Restore.
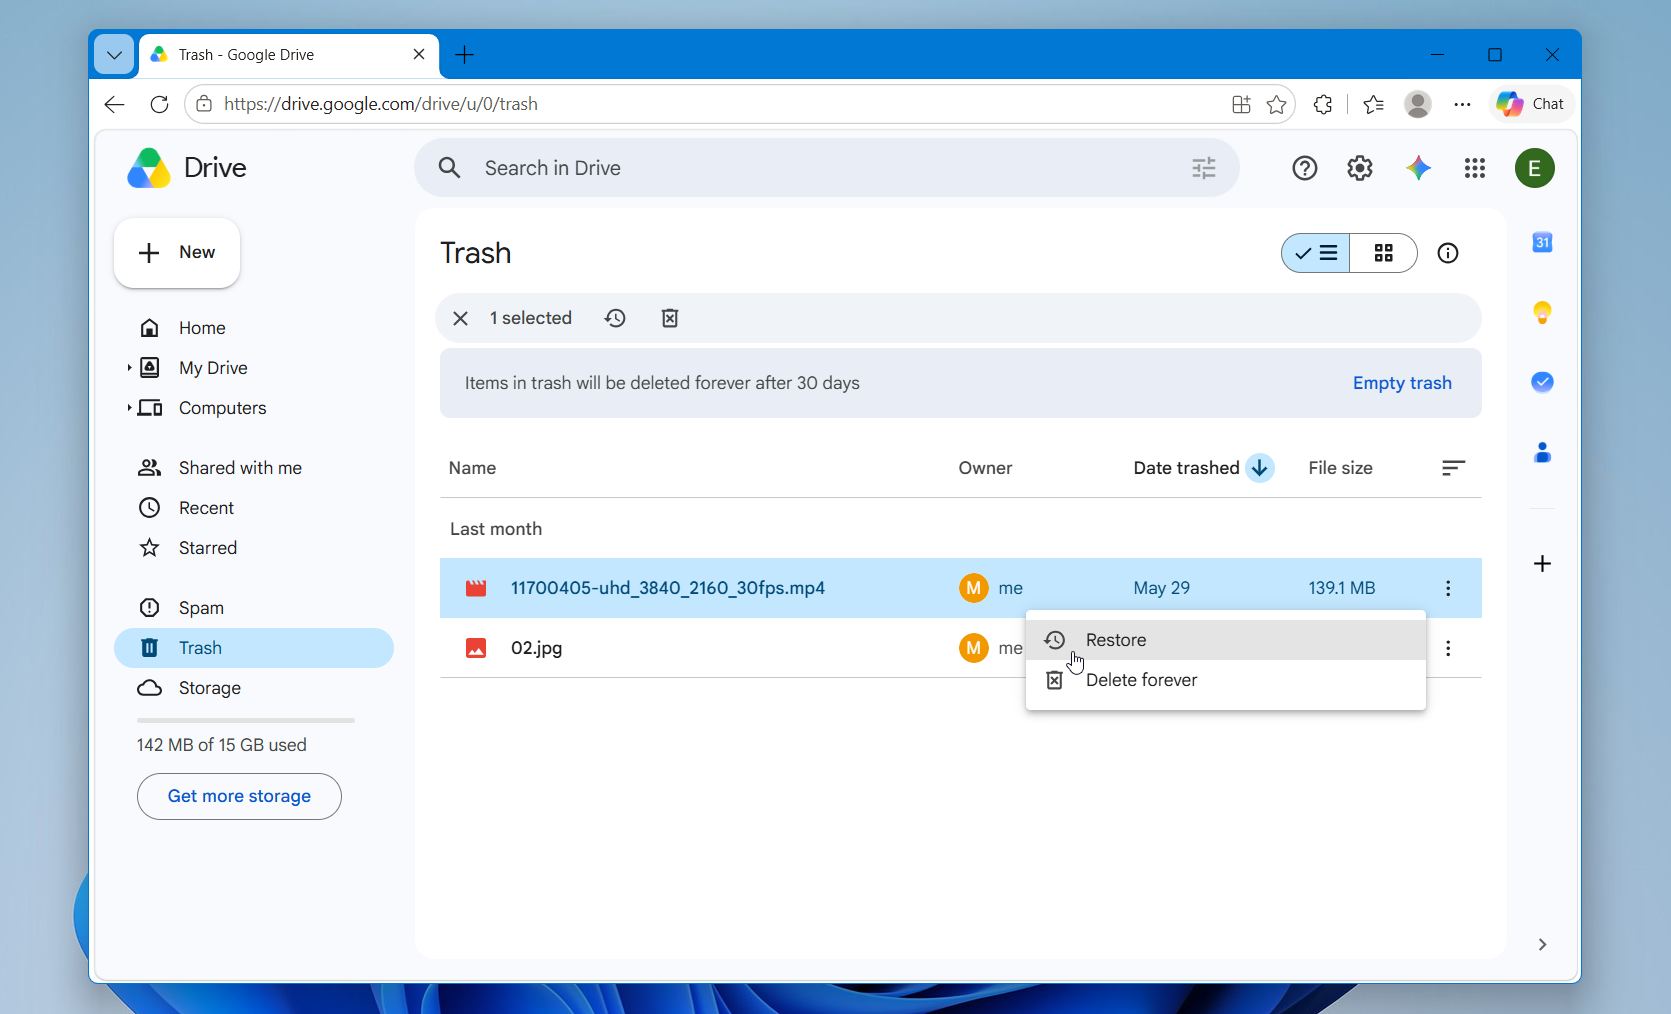
The restored files will return to their original Google Drive location and may automatically sync back to your laptop if synchronization remains enabled.
Google Drive can also store previous versions of certain files, which may help after accidental edits or overwrites. To check available versions:
- Locate the file in Google Drive.
- Right-click it and select File information > Manage versions.
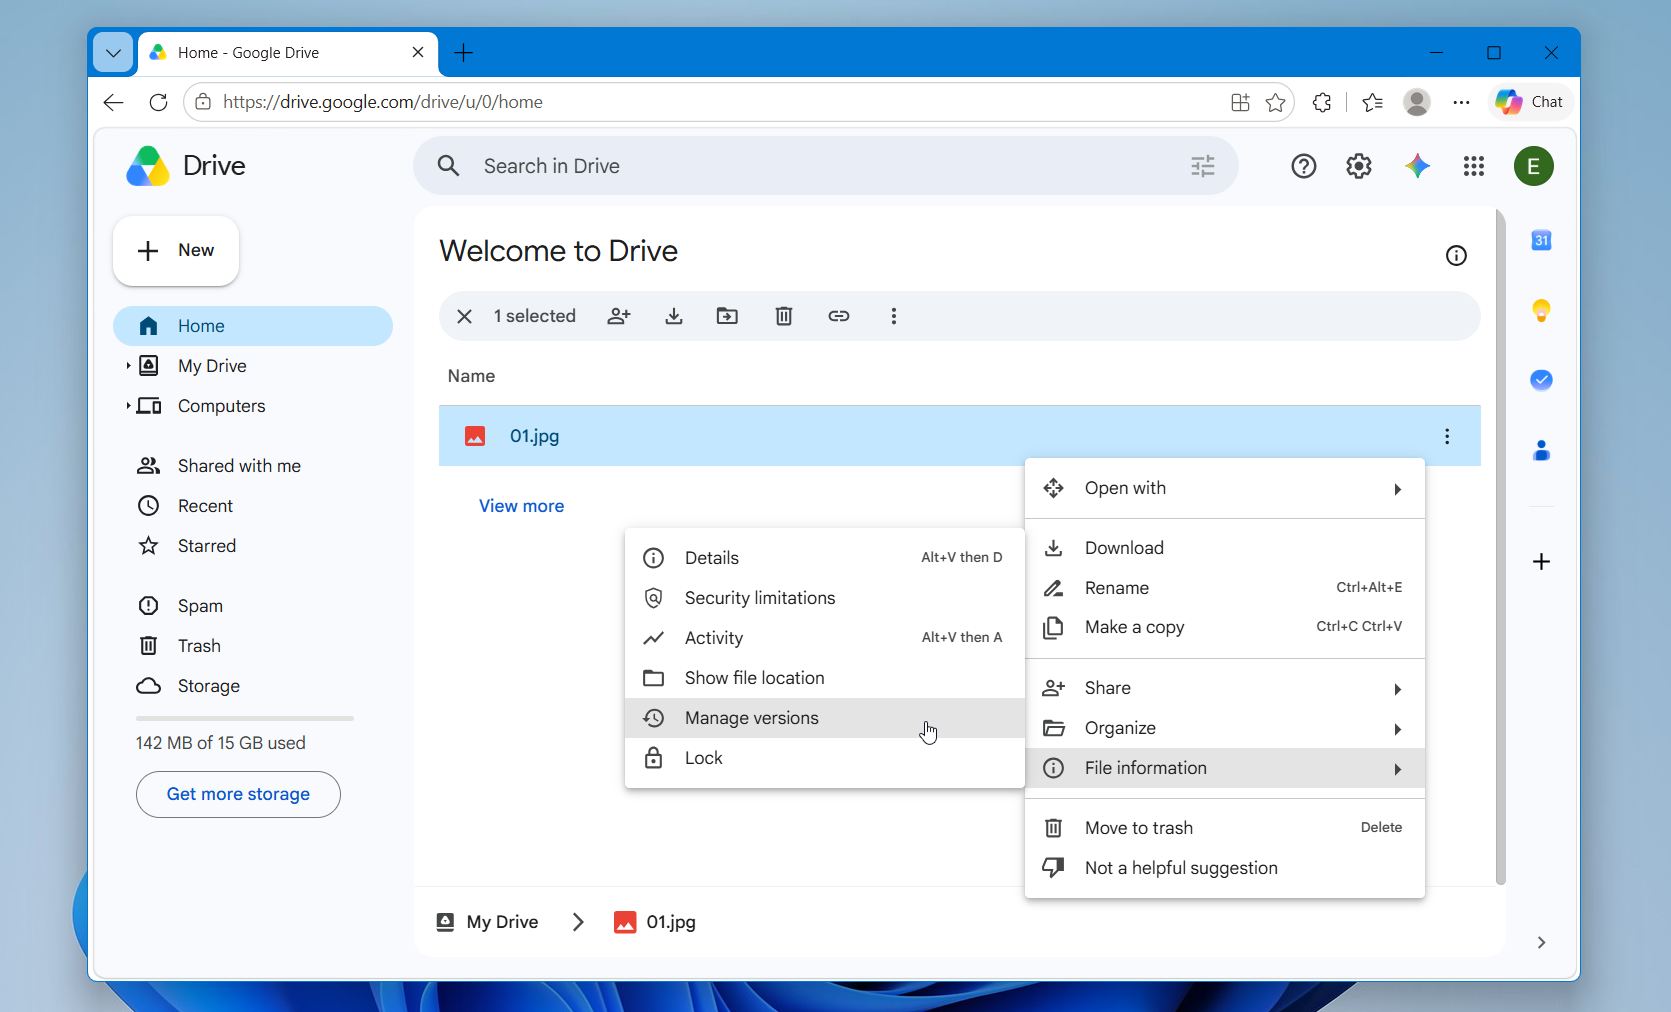
- Download or restore an older version if one is available.
Keep in mind that cloud providers typically retain deleted files for a limited time before permanent removal. Google Drive Trash, for example, generally keeps deleted files for about 30 days.
Method 4: Restore from Backup and Restore
Backup and Restore is another built-in Windows feature that can help recover lost files. Unlike File History, which primarily protects personal folders, Backup and Restore can restore files from larger backups and, in some cases, from complete system images.
The same condition applies, though; it only helps if it was configured before the data loss happened. If no backup was ever created, there’s simply nothing for Windows to restore from.
Here is how to restore files using Backup and Restore:
- Open the Start menu and search for Control Panel.
- Navigate to System and Security > Backup and Restore (Windows 7).
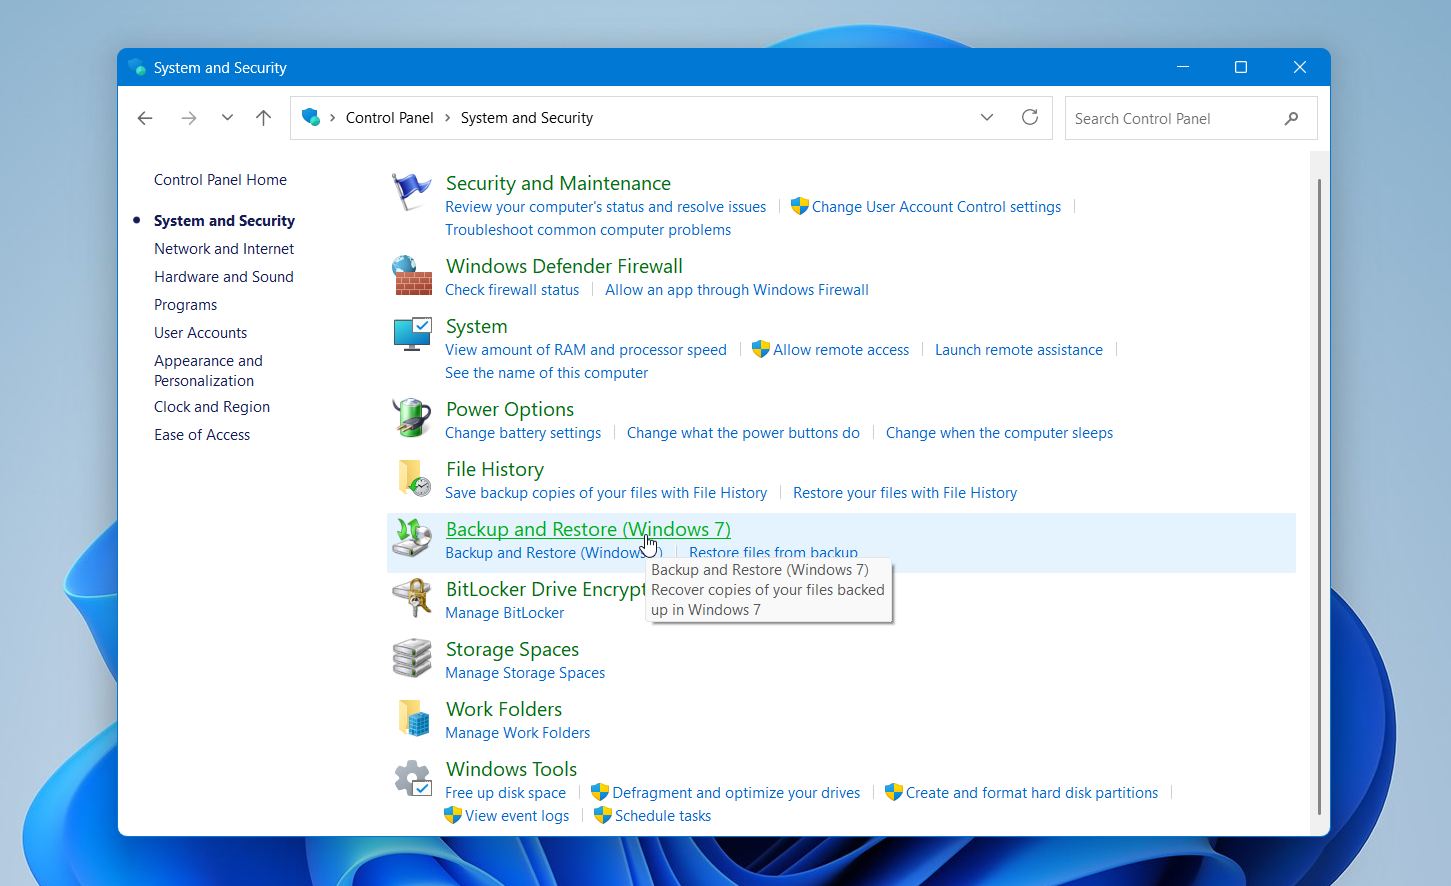
- Click Restore my files.
- Browse or search for the files and folders you want to recover.
- Select the items you want to restore.
- Choose the original location or specify a different destination.
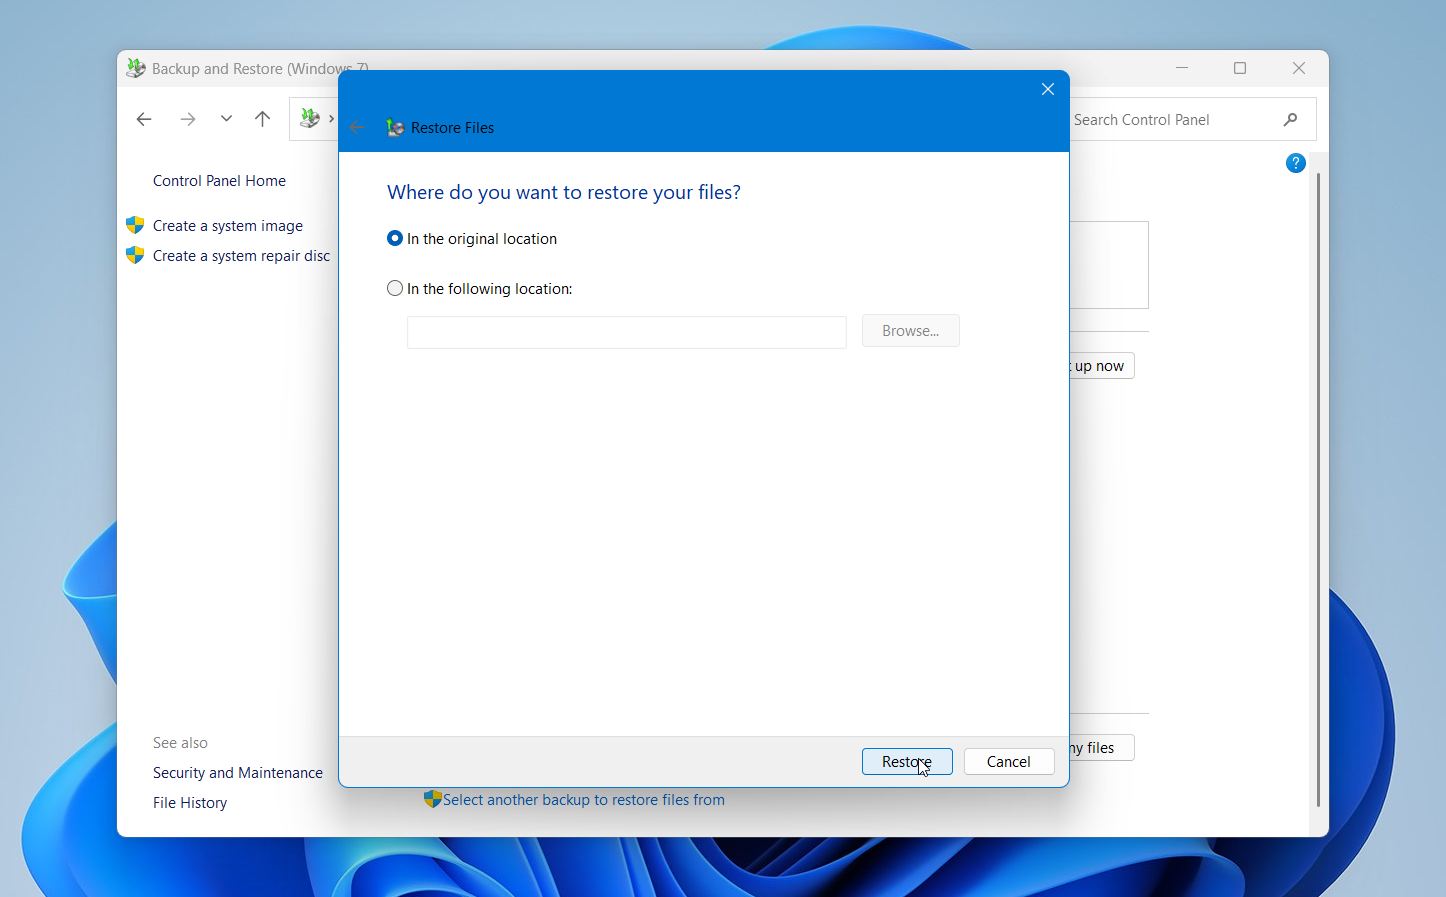
- Click Restore to recover the files.
If a full system image backup was created previously, Windows may also provide options to restore entire folders or recover the system from that backup.
How to Recover Data from a Laptop That Won’t Boot
Even if your laptop refuses to start or gets stuck during boot, your files may still be recoverable. In many situations, the issue affects Windows itself while the internal SSD or HDD continues to store the data normally.
Startup problems can appear after failed updates, corrupted system files, malware infections, sudden shutdowns, partition issues, or hardware malfunctions. The exact recovery method depends on the condition of the storage drive and whether the laptop can still detect it correctly.
Method 1: Remove the Drive and Connect It to Another Computer
One of the most reliable ways to recover data from a non-booting laptop is to access the internal SSD or HDD from another computer. This bypasses the damaged Windows installation and allows you to work directly with the storage device.
Many laptops use removable SATA or NVMe drives that can be connected externally through a USB enclosure or adapter. Once connected, the drive may appear in File Explorer like any other external storage device. If the files are accessible, copy them immediately. If they are missing or the drive appears damaged, you can scan it with data recovery software.
Some drives can also be connected directly inside another computer. SATA HDDs and SATA SSDs can often be installed temporarily in a desktop system, while NVMe SSDs can be connected to a free M.2 slot on a compatible motherboard.
Here’s how to do it:
- Turn off the laptop completely.
- Disconnect the charger and any connected devices.
- Remove the back panel according to the manufacturer’s instructions.
- Locate the internal SSD or HDD.
- Carefully remove the drive.
- Connect the drive to another computer using an enclosure, adapter, or internal connection.
- Start the working computer.
- Open File Explorer and check whether the drive appears.
- If the files are accessible, copy important data to another storage device immediately.
- If files are missing, corrupted, or inaccessible, scan the drive with Disk Drill or another data recovery tool.
This method is particularly useful when the laptop itself has failed due to motherboard, power, or operating system issues while the storage device remains functional. Keep in mind that many modern ultrabooks and some Apple Silicon laptops use soldered storage that cannot be removed or connected externally.
We’ve also seen users discuss similar boot failure situations in community threads, including cases like HP’s “Boot Device Not Found (3F0)” laptop error and different approaches that helped identify whether the problem came from Windows itself or the drive hardware.
Method 2: Use Windows Recovery Environment
Windows Recovery Environment (WinRE) includes several built-in recovery and troubleshooting tools that can help you access files when Windows no longer starts normally. In many cases, the internal drive remains accessible through the recovery environment even when the operating system cannot boot.
This method can be useful after failed Windows updates, corrupted system files, startup loops, Blue Screen of Death (BSOD) errors, or bootloader problems.
Here’s how to access it:
- Turn on the laptop.
- Interrupt the startup process three times by holding the power button when Windows begins loading.
- Wait for the Automatic Repair screen to appear.
- Select Advanced options.
- Navigate to Troubleshoot > Advanced options.
- Open Command Prompt.
- Connect an external hard drive or USB flash drive.
- Use Command Prompt to access the laptop’s storage and copy important files to the external device.
- After securing your data, you can also try tools such as Startup Repair, System Restore, Uninstall Updates, or Safe Mode.
Windows Recovery Environment does not always help when the drive has severe file system corruption or physical damage, but it is often one of the quickest recovery options to try before moving on to more advanced methods.
Method 3: Boot from a Recovery USB
A bootable recovery USB allows the laptop to start from external media instead of the damaged Windows installation. This is one of the most useful approaches for severe startup corruption, endless boot loops, blue screen crashes, or situations where Windows Recovery Environment no longer loads properly.
Many data recovery tools support bootable recovery environments. These tools load independently from Windows and allow direct access to the laptop SSD or HDD without using the damaged operating system. This also reduces additional stress on unstable drives.
Here’s how to use a recovery USB:
- Create a bootable recovery USB on another working computer.
- Connect the USB drive to the non booting laptop.
- Turn on the laptop.
- Open the boot menu or BIOS settings.
- Select the USB drive as the boot device.
- Wait for the recovery environment to load.
- Open the recovery software included on the USB.
- Select the internal laptop drive.
- Start a scan for lost or inaccessible files.
- Preview recoverable files if previews are available.
- Recover the files to another external drive instead of the same laptop SSD or HDD.
This method often provides the best recovery chances when Windows itself no longer functions but the storage device still responds normally.
If your laptop no longer boots or the SSD appears dead, community discussions and recovery case examples can also help you diagnose the situation before attempting risky DIY fixes.
When to Contact Professional Recovery Services
Not every laptop data loss situation can be solved with software. Some cases involve physical SSD or HDD damage, firmware failures, electrical faults, or severe corruption that requires specialized equipment and expertise.
A simple rule applies in most situations: if the drive shows signs of hardware failure, stop using it immediately. Continued use can worsen the damage and reduce the chances of a successful recovery.
You should consider professional recovery services in situations like these:
| Warning Sign | What It Usually Means |
| Clicking, grinding, or buzzing noises | Possible HDD head or platter damage |
| SSD shows 0 bytes or incorrect capacity | Possible controller or firmware failure |
| Laptop cannot detect the drive | Severe hardware or electrical issue |
| Burning smell or excessive heat | Electrical component damage |
| Water or liquid exposure | Corrosion or internal short circuits |
| Recovery software freezes during scans | The drive may be unstable or physically failing |
| The drive disconnects repeatedly | Hardware instability or power-related damage |
| The laptop suffered a drop or physical impact | Possible internal SSD or HDD damage |
Professional recovery labs use specialized hardware and cleanroom environments to work directly with damaged drives. Depending on the problem, they may be able to repair failed components temporarily, bypass firmware issues, rebuild damaged storage structures, and extract data that software alone cannot access.
Many recovery companies offer free evaluations and “No Data, No Charge” policies, meaning you only pay if the recovery succeeds. While professional services can be expensive, they often provide the best chance of recovering data from physically damaged or severely degraded drives.
Key Takeaways
Laptop data recovery is often possible, especially when you act quickly and choose the right recovery approach:
- Act quickly. Stop using the laptop as soon as you notice data loss. New data may overwrite files that are still recoverable.
- The cause matters. Deleted files and quick formats usually offer better recovery prospects than physical hardware failures.
- SSDs and HDDs behave differently. SSDs with TRIM enabled may permanently remove deleted data much sooner than traditional hard drives.
- Check backups first. The Recycle Bin, File History, Backup and Restore, OneDrive, Google Drive, and other cloud services are often the fastest recovery options.
- Use recovery software when backups are unavailable. Tools such as Disk Drill can help recover deleted files, formatted partitions, and data lost due to file system corruption.
- A non-booting laptop doesn’t always mean lost data. Recovery Environment, external adapters, and connecting the drive to another computer can often provide access to important files.
- Recognize the warning signs of hardware failure. Clicking noises, disappearing drives, overheating, and repeated disconnections are strong indicators that professional recovery may be necessary.
Once your data is safe, consider improving your backup strategy. File History, cloud synchronization, and regular system backups can dramatically reduce the impact of future data loss incidents.


