

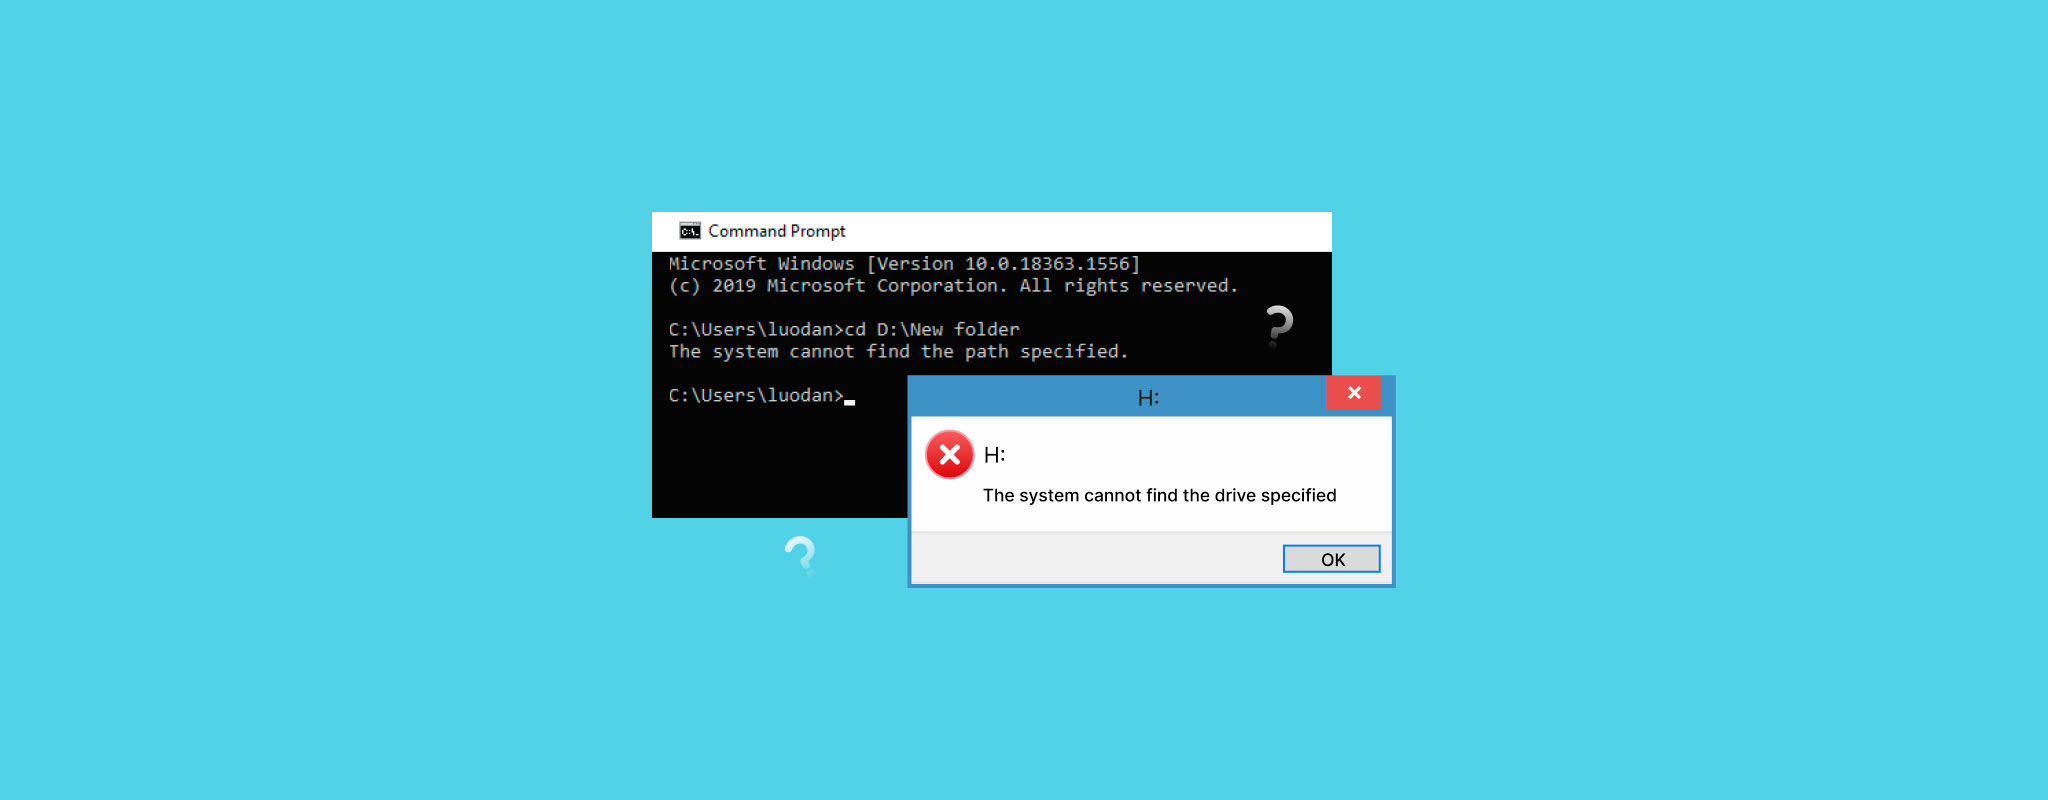
“The system cannot find the drive specified” is a Windows error that appears when the operating system cannot properly access a storage device or drive path. The error itself does not point to one specific cause. The message may appear suddenly after a restart, failed update, unsafe removal, connection problem, or random system error, and it often blocks access to files that remain on the drive.
The table below covers the most common causes of the error and the troubleshooting method that usually helps in each situation.
| Cause | Typical Symptoms | Recommended Method |
| Temporary Windows glitch | Error appears once after startup or after reconnecting the drive | Try a computer restart first (Method 1). Windows may fail to initialize the drive or related services correctly during startup. |
| Missing or corrupted drive letter | The drive appears in Disk Management but does not show up in File Explorer | Assign a new drive letter to the device (Method 2). Windows cannot access the drive properly without a valid mount letter. |
| Broken mapped drive or UAC conflict | Mapped or network drives disappear in administrator mode or after login | Modify the related UAC registry setting (Method 3). This restores mapped drive visibility between Windows sessions. Reconnecting the mapped drive manually may also help. |
| Corrupted system files or file system damage | Windows reports disk errors, crashes, or abnormal drive behavior | Run SFC and CHKDSK commands (Method 4). SFC repairs Windows system files, while CHKDSK checks the drive for file system corruption. Recover important data before you use CHKDSK because it may modify damaged file system structures. |
| Software conflicts | The problem appeared after antivirus installation, virtualization tools, launchers, or disk utilities | Remove recently installed software that may interfere with storage devices or mounted drives (Method 5). A clean Windows boot can also help isolate the conflict. |
| Severely corrupted partition | The drive appears as RAW, unallocated, or inaccessible even though Windows still detects it | Recreate the partition after data recovery is complete (Method 6). This replaces damaged partition information with a new usable file system. |
| Failing HDD or SSD hardware | Clicking noises, extreme slowness, repeated disconnects, freezing during scans, incorrect capacity | Stop regular use immediately and recover important data as soon as possible. In severe cases, professional recovery services may become the safest option because continued use can worsen physical damage. |
| USB power or connection issues | External HDD disconnects randomly, clicks repeatedly, spins up and down, or fails to appear consistently | Connect the drive directly to another USB port, avoid weak USB hubs, or use a powered USB hub or dual-USB cable for external HDDs. Some portable hard drives may not receive enough power through certain USB ports. |
Recover Your Data Before Trying Fixes
Before you attempt any fixes, you should secure your important files first. Some repair methods can alter the file system or overwrite data that recovery software could still restore. For that reason, data recovery should always come before major troubleshooting steps. Once your files are safe, you can continue with repairs without the same risk of permanent data loss.
For this, we recommend Disk Drill. It’s a highly capable data recovery tool that’s trusted by many for its ease of use and excellent recovery performance in many data loss situations, like corrupted hard drive recovery. It’s supported on the latest version of Windows 11, but is also available on Windows 10, as well as older versions like Windows 7 (with Disk Drill 4).
Disk Drill can recover data even from disks that are unrecognized or inaccessible through File Explorer, as long as they’re visible in Disk Management and reading the correct size.
Follow these steps to recover data from your drive that is experiencing “The system can’t find the drive specified” error:
- Download and install Disk Drill to a working drive.
- Launch the app and select the drive that shows the error message. Click Search for lost data to begin the scan.
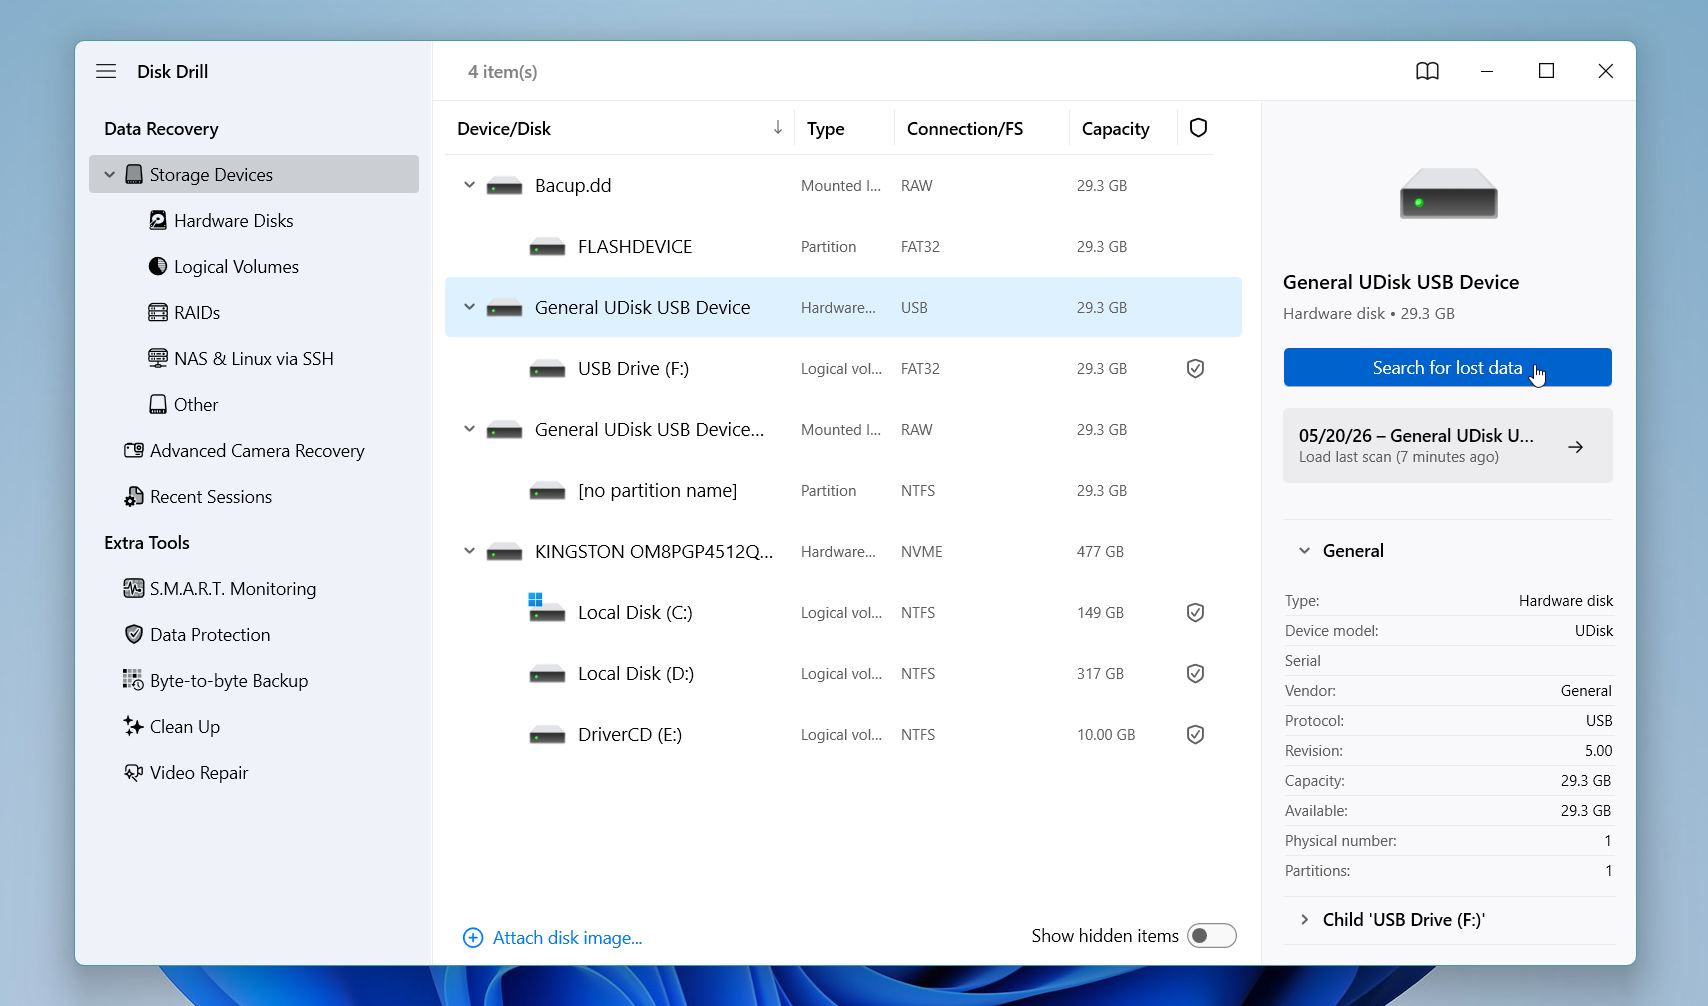
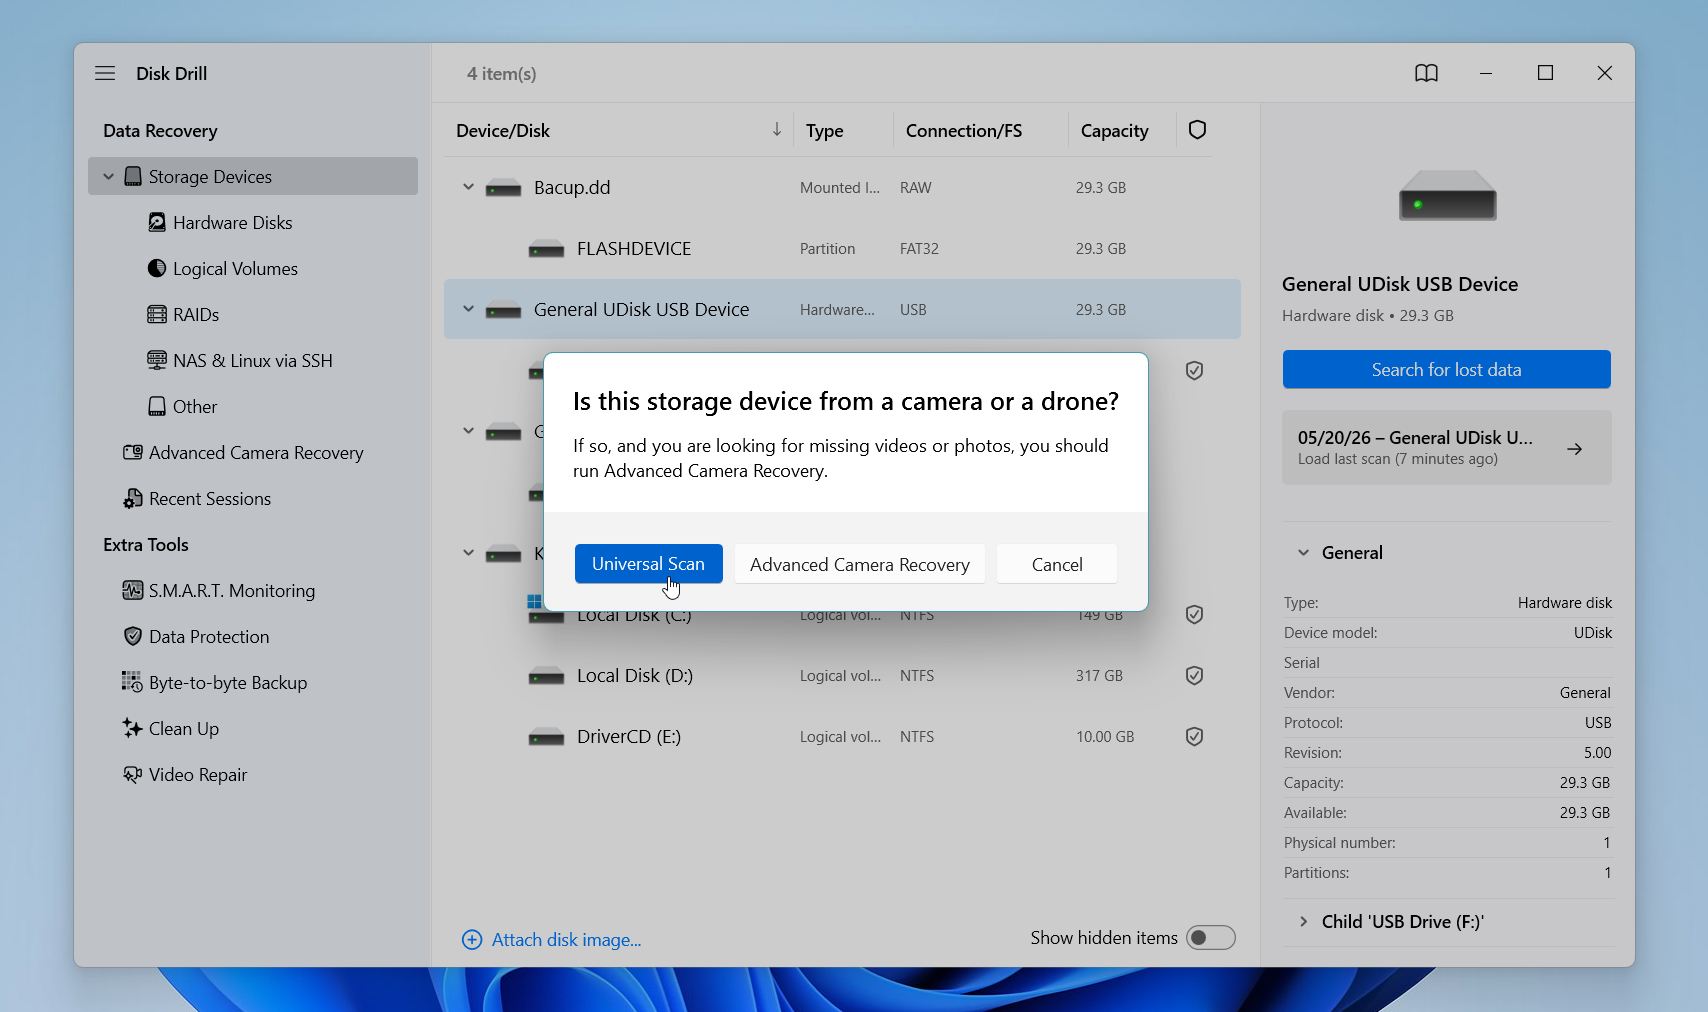
- If you’re dealing with the external drive, Disk Drill will ask you to select the recovery mode. Select the Universal Scan, since Advanced Camera Mode is a special mode for video recovery from camera/drones.
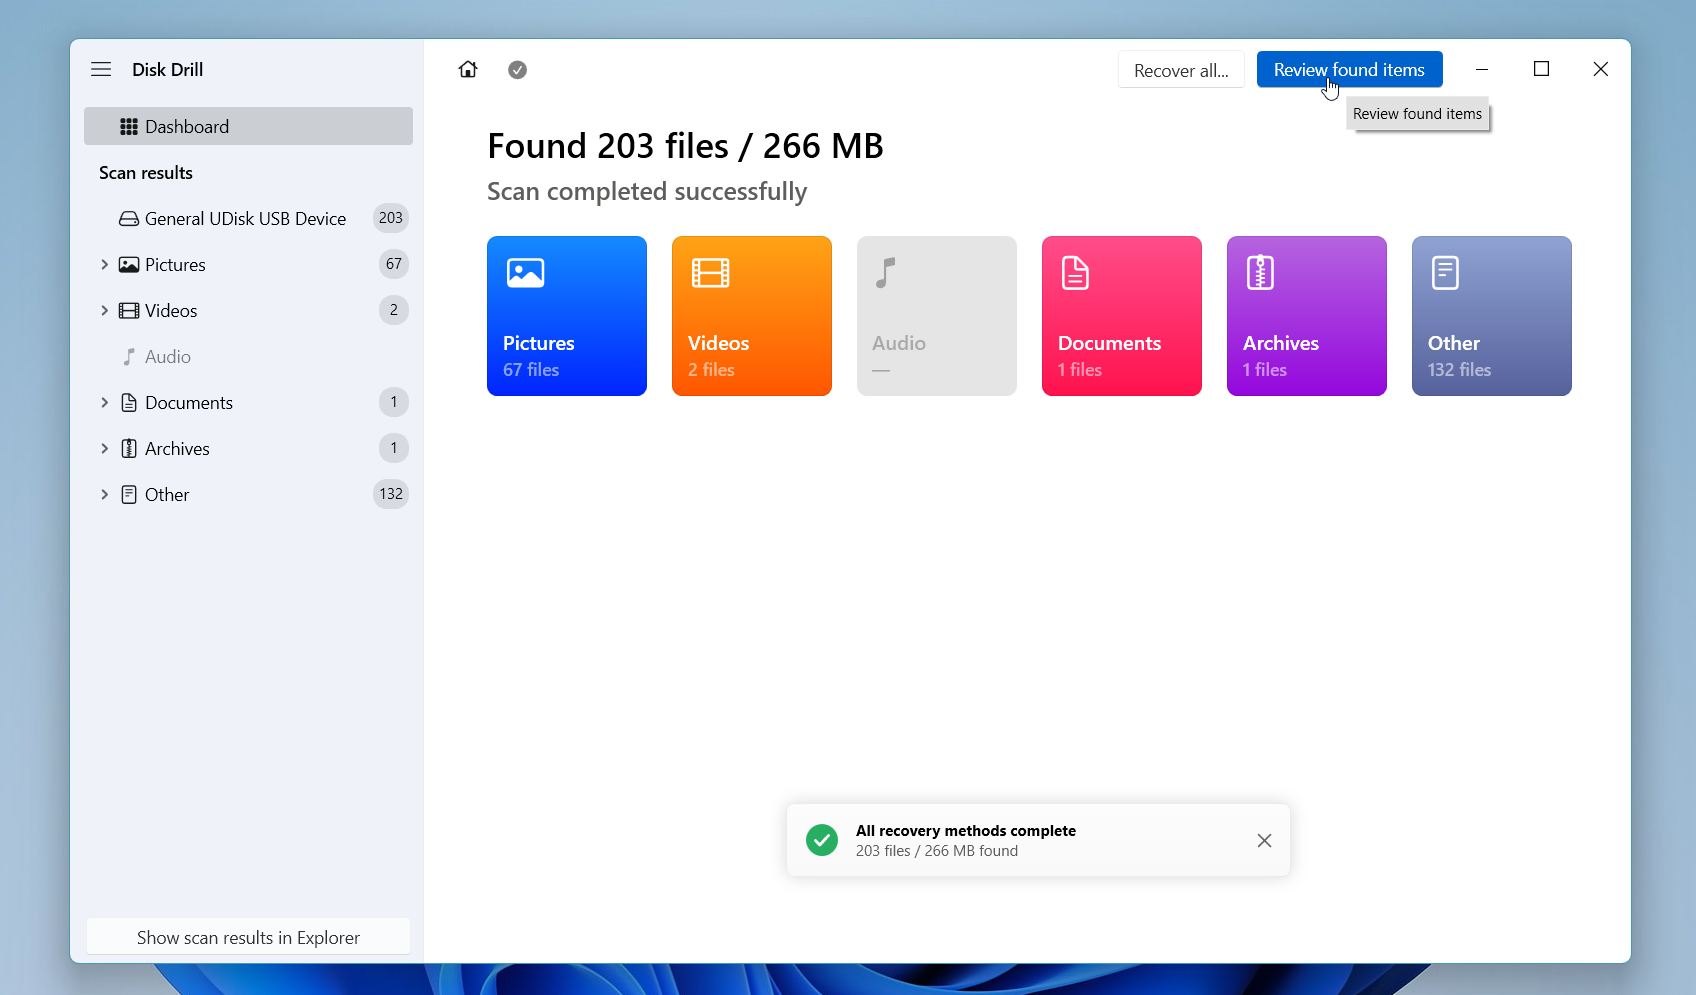
- Disk Drill will scan the drive for deleted, lost, and existing recoverable files. The process may take some time on larger drives or heavily corrupted storage devices. Once the scan finishes, click Review Found Items.
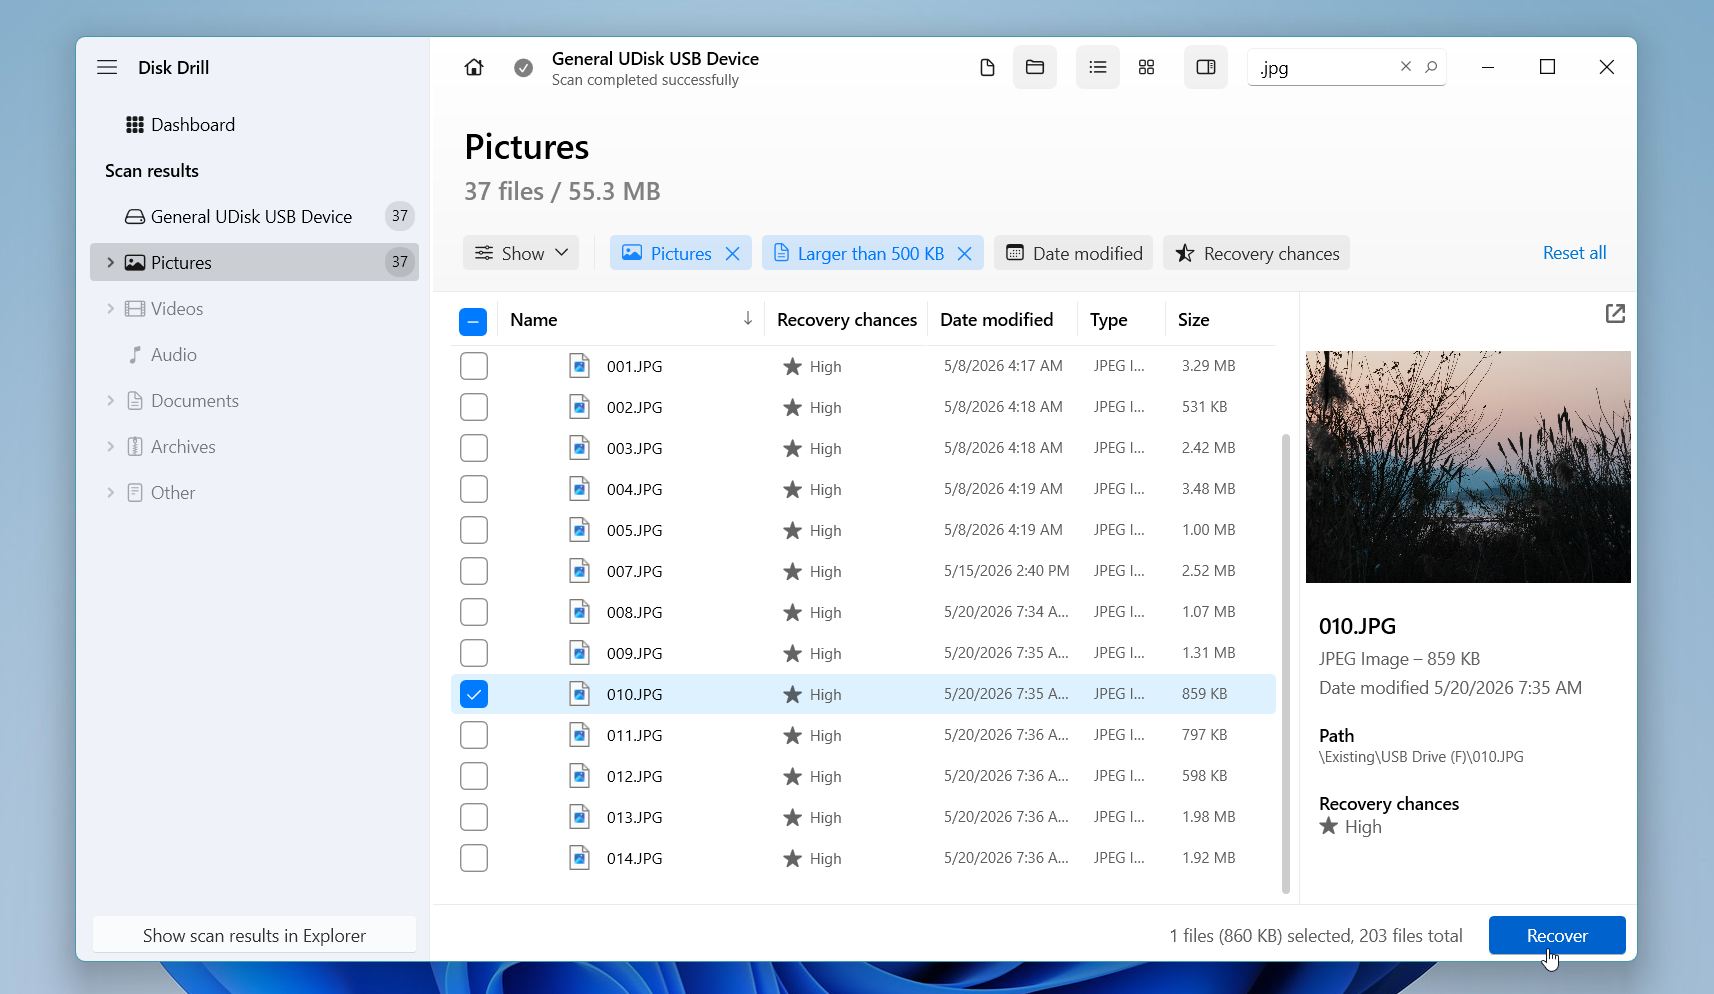
- You can browse files by category or use the search bar and filters to locate important data faster. Disk Drill also allows you to preview many file types before recovery, which helps confirm that the files are still intact.
- Select the files you want to restore, then click Recover.
- Save the recovered files to another physical drive or external storage device, not back to the problematic drive itself.
If the drive disconnects randomly, makes unusual noises, freezes during scans, or responds extremely slowly, consider creating a byte-to-byte backup first and scan the backup instead of the original drive. This reduces additional stress on unstable storage devices.
On Windows, Disk Drill allows you to recover up to 100 MB of data for free. In many situations, that’s enough to restore important documents, smaller photo collections, or confirm that your files are still recoverable before you decide to purchase a license.
If you aren’t sure Disk Drill is the right tool for your situation, check our full review first. It covers recovery performance, supported file systems, pricing, limitations, and how it compares to other popular recovery tools.
How to Fix “The System Can’t Find the Drive Specified” Error
Once your important files are safe, you can start troubleshooting the drive itself. The fixes below cover the most common causes of “The system cannot find the drive specified,” from simple Windows glitches and missing drive letters to corrupted drivers, file system damage, and partition problems. Start with the simpler methods first, then move to the more advanced solutions only if the issue remains unresolved.
Method 1: Restart the Computer
Like many Windows problems, this error sometimes disappears after a simple restart. If you only saw “The system cannot find the drive specified” once, especially after startup, login, or reconnecting the drive, a temporary system glitch may have caused it.
A restart allows Windows to reload important system services, storage drivers, and background processes that control how drives connect and appear in the system. Sometimes one of these services fails to start correctly, which prevents Windows from accessing the drive properly.
Before you move on to more advanced fixes, restart the computer completely and check whether the drive appears normally afterward.
Method 2: Assign or Change the Drive Letter
Windows uses drive letters like C:, D:, or E: to identify and access storage devices. If the drive letter becomes missing, corrupted, or conflicts with another connected device, Windows may fail to open the drive and show “The system cannot find the drive specified” instead. In this situation, the drive still appears normally in Disk Management even though it does not show up in File Explorer. Assigning a new drive letter often restores access immediately.
Here is how to do it:
- Right-click the Start button and select Disk Management.
- Find the problematic drive in the list of connected storage devices.
- Right-click the affected partition and select Change Drive Letter and Paths.
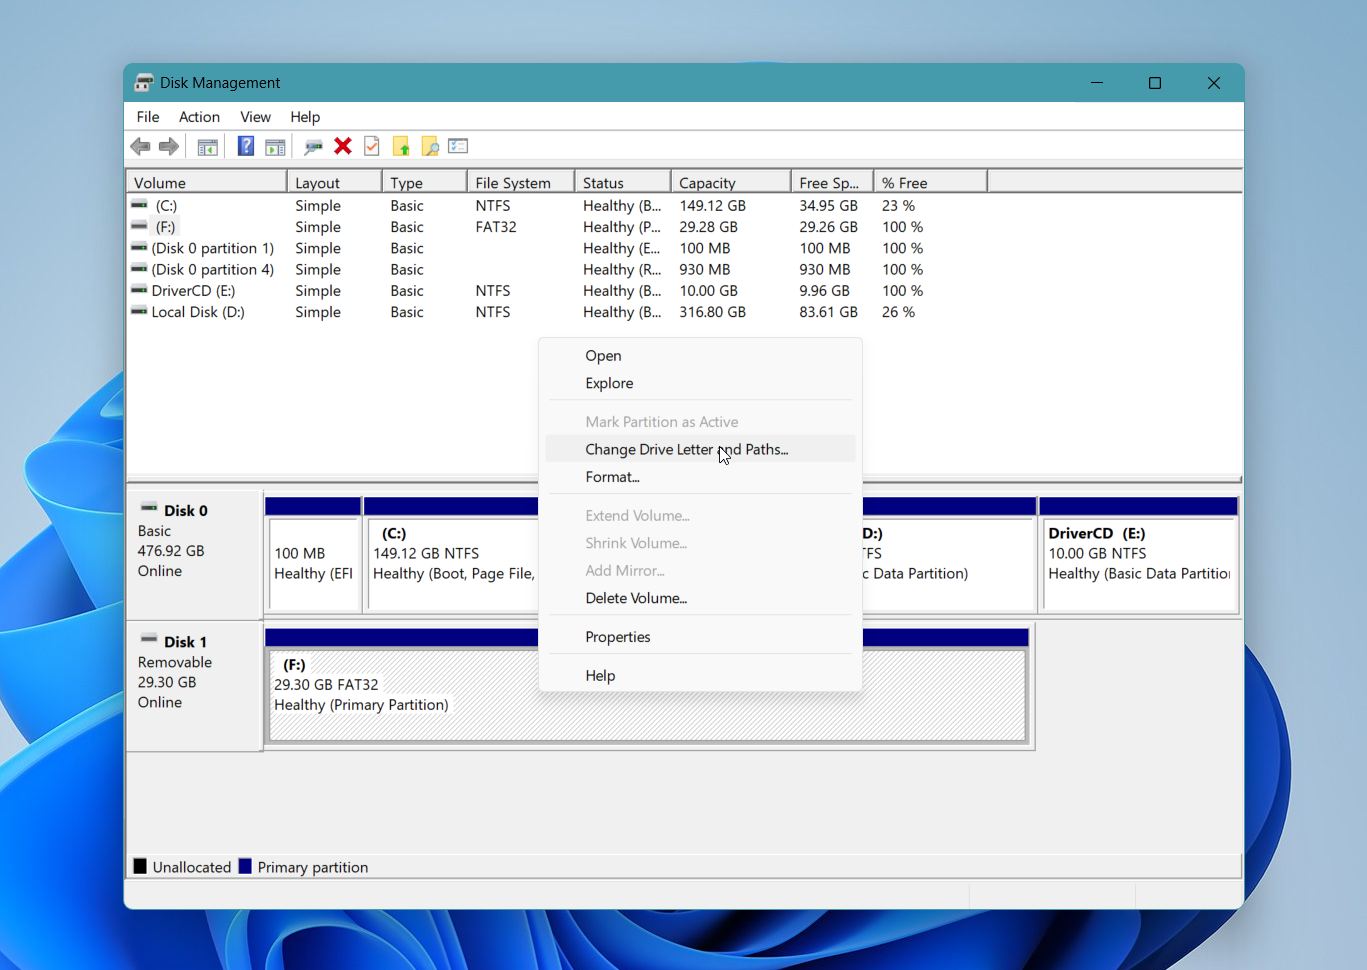
- If the drive already has a letter, click Change. If the drive has no letter at all, click Add.
- Select a new drive letter from the dropdown menu.
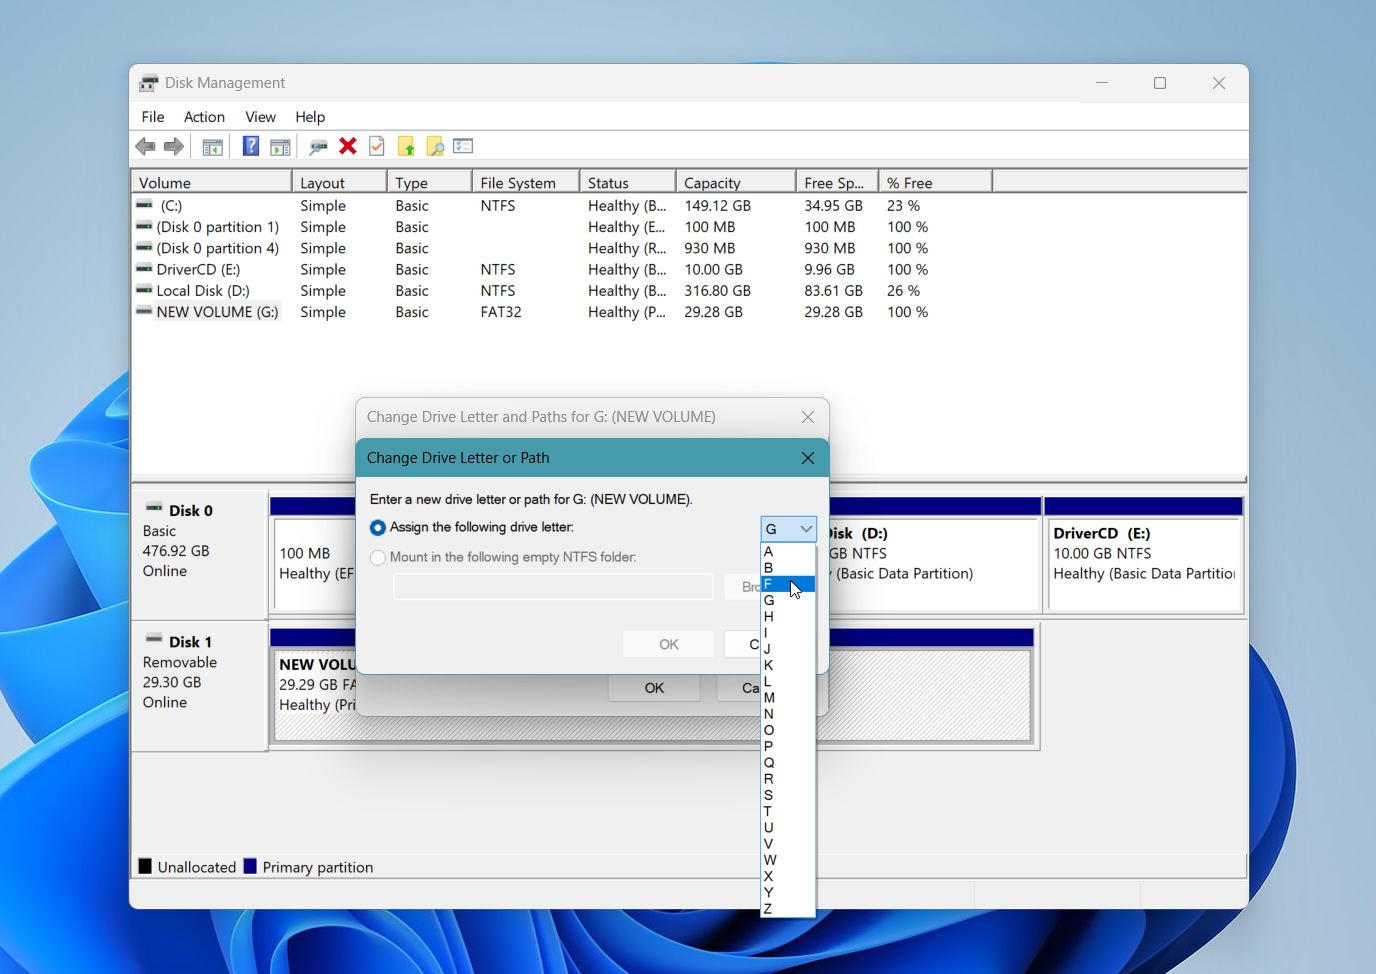
- Click OK and confirm the change.
After Windows applies the new drive letter, open File Explorer and check whether the drive appears normally again.
Method 3: Fix Mapped Drive / UAC Registry Problems
Mapped network drives sometimes disappear or become inaccessible because of a conflict between User Account Control (UAC) and administrator sessions in Windows. In this situation, Windows may show “The system cannot find the drive specified” even though the mapped drive still exists.
This issue appears most often when:
- you run programs as administrator
- Windows uses separate user and administrator sessions
- mapped drives disappear after login or restart
A small registry change can restore proper visibility for mapped drives between these Windows sessions.
Here’s how to apply the fix:
- Press Windows + R to open the Run window.
- Type regedit and press Enter.
- In Registry Editor, click File, then select Export to create a registry backup before you continue.
- Go to the following location: Computer\HKEY_LOCAL_MACHINE\SOFTWARE\Microsoft\Windows\CurrentVersion\Policies\System.
- Right-click an empty area inside the right panel.
- Select New, then choose DWORD (32-bit) Value.
- Name the new value EnableLinkedConnections.
- Double-click the new entry and change the value data to 1.
- Click OK and close Registry Editor.
- Restart the computer.
After Windows loads again, reconnect the mapped drive if necessary and check whether the error disappears.
Method 4: Run SFC and CHKDSK
Corrupted Windows system files or damaged file system structures can prevent the operating system from accessing a drive correctly. In these situations, Windows may show “The system cannot find the drive specified” even though the drive still appears connected.
Windows includes two built-in repair tools that may help. SFC repairs damaged Windows system files, while CHKDSK checks the drive itself for file system errors.
Recover important files before you use CHKDSK. On severely corrupted or unstable drives, CHKDSK may modify damaged file system structures and make some data harder to recover later.
Here’s how to run both commands:
- Right-click the Start button and select Terminal (Admin) or Command Prompt (Admin).
- Type sfc /scannow and press Enter.
- Wait until Windows finishes the system scan and repair process.
- After SFC finishes, type chkdsk X: /f and press Enter. Replace X with the actual drive letter of the problematic drive.
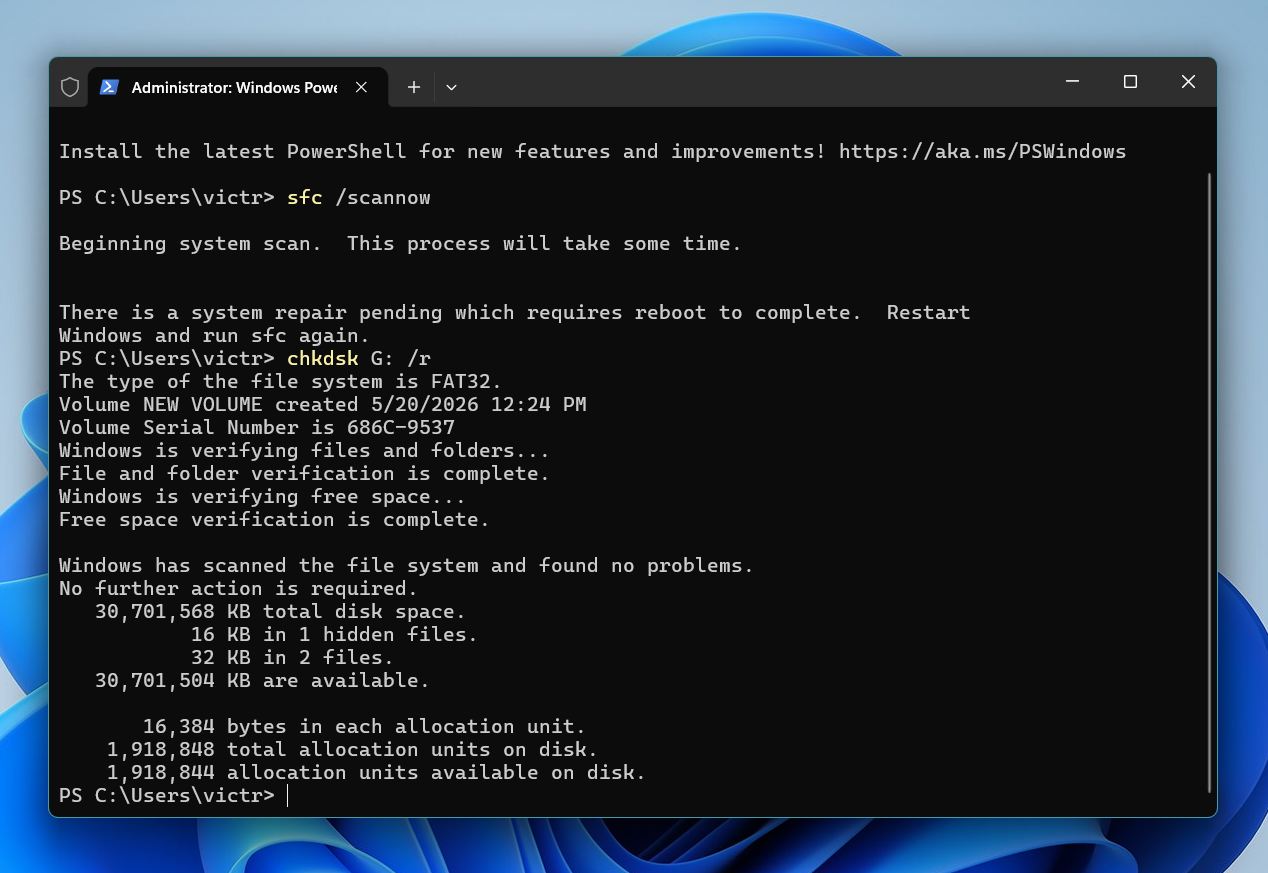
- Allow Windows to complete the scan and repair process. The process may take some time on larger or damaged drives.
Restart the computer after the scan finishes.
Method 5: Remove Recently Installed Software
Some programs can interfere with storage devices, mounted drives, or Windows system services. This issue appears most often after antivirus installation, virtualization software setup, disk management utilities, launchers, backup tools, or low-level system tweaks.
If the error started shortly after you installed new software, that program may have modified storage drivers, permissions, or Windows configuration settings. Removing the recently installed software may restore normal drive access.
Here’s how to uninstall recently installed programs in Windows:
- Right-click the Start button and select Installed apps or Apps and Features, depending on your version of Windows.
- Sort the program list by installation date if the option appears.
- Locate software that you installed shortly before the error started.
- Click the three-dot menu next to the application and select Uninstall.
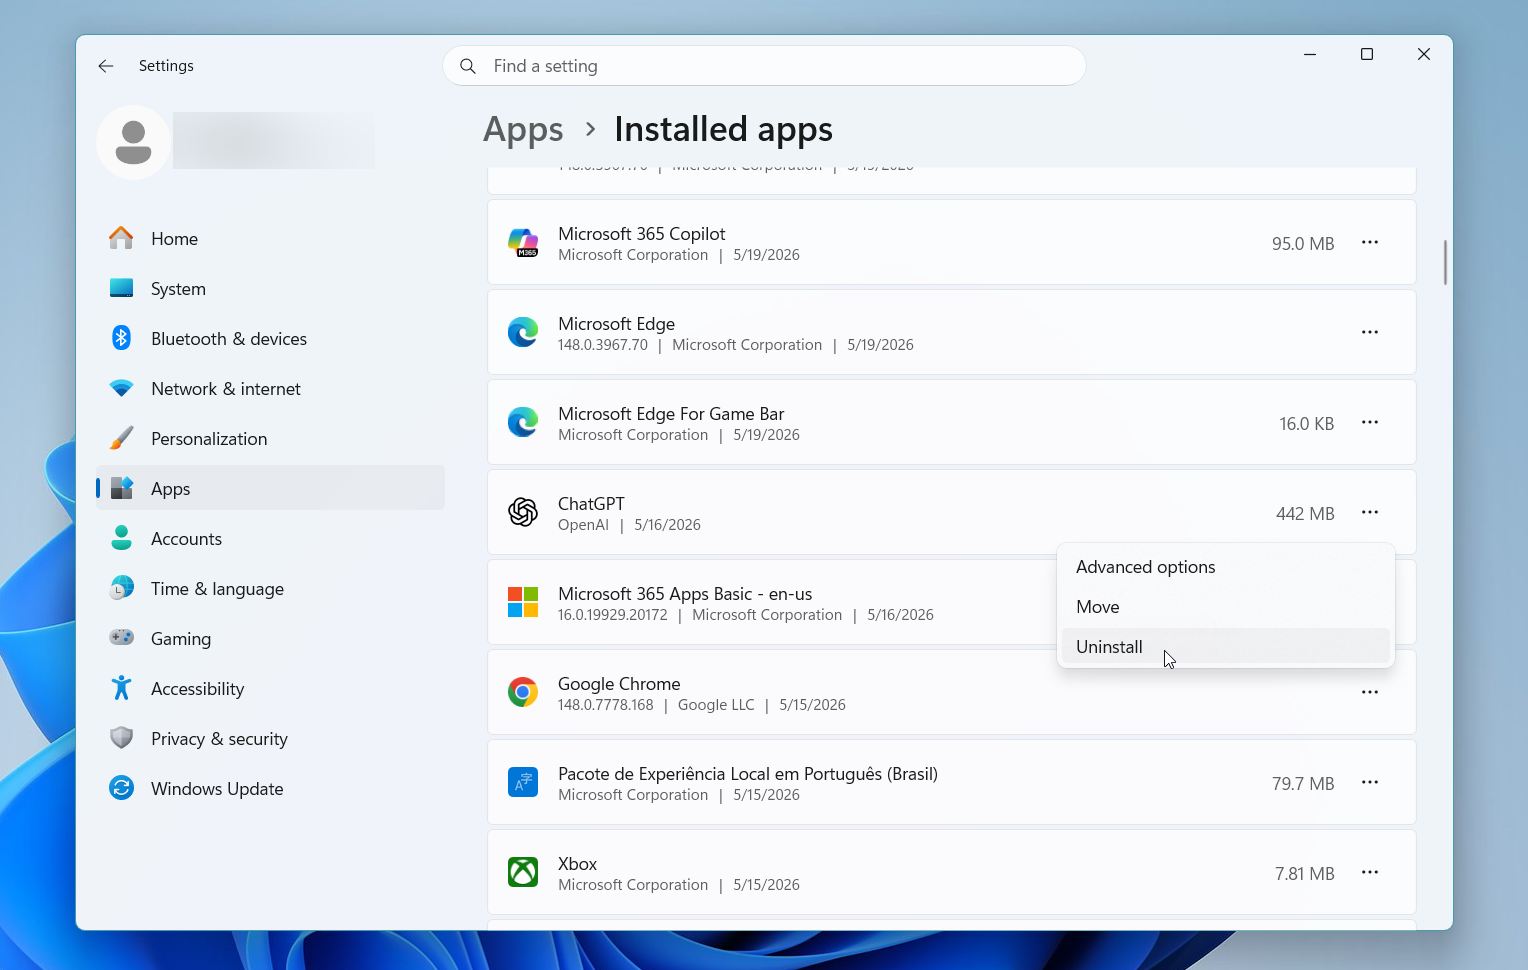
- Follow the removal instructions until Windows completes the uninstall process.
- Restart the computer.
After the restart, reconnect the drive and check whether Windows can access it normally again.
Method 6: Recreate the Partition
If none of the previous fixes work, the partition itself may have severe corruption. Recreating the partition removes the damaged partition structure and creates a new usable file system. This method usually restores normal drive access, but it also erases existing partition information.
Recover important files before you continue. Partition recreation and formatting can permanently overwrite recoverable data.
Here’s how to recreate the partition in Windows:
- Right-click the Start button and select Disk Management.
- Locate the corrupted partition in the storage list.
- Right-click the affected volume and select Delete Volume.
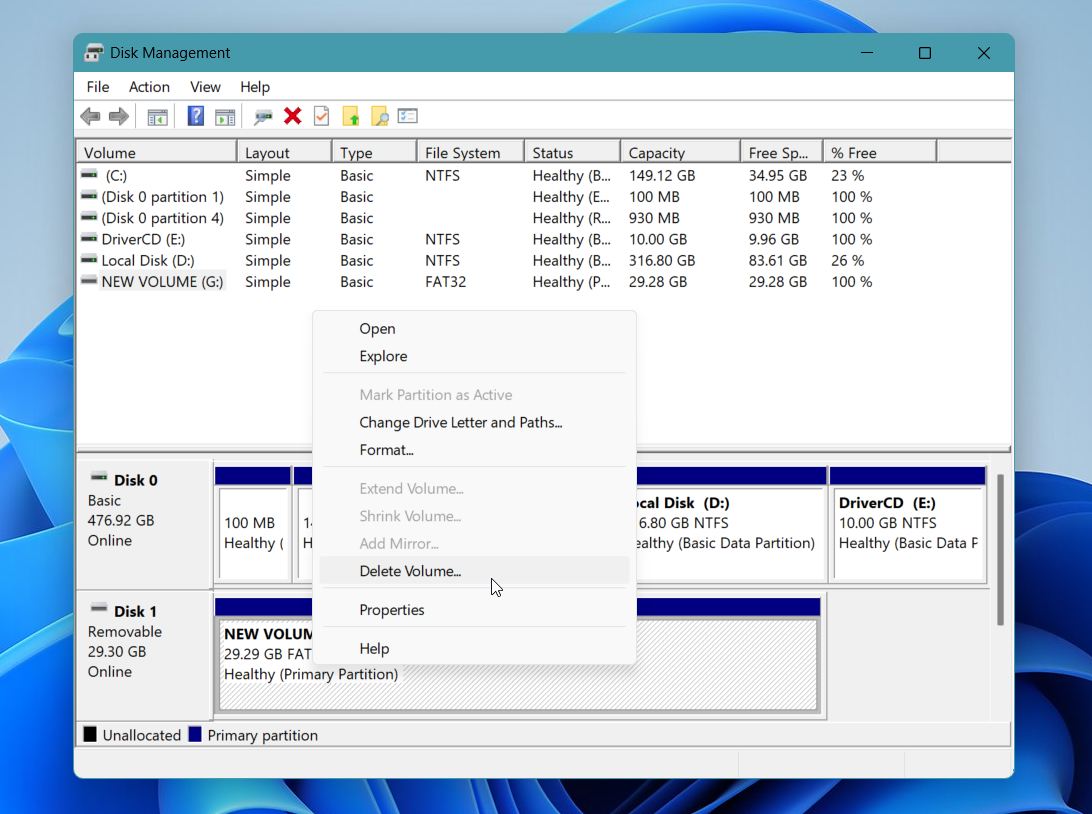
- Click Yes to confirm the deletion.
- Right-click the new unallocated space and select New Simple Volume.
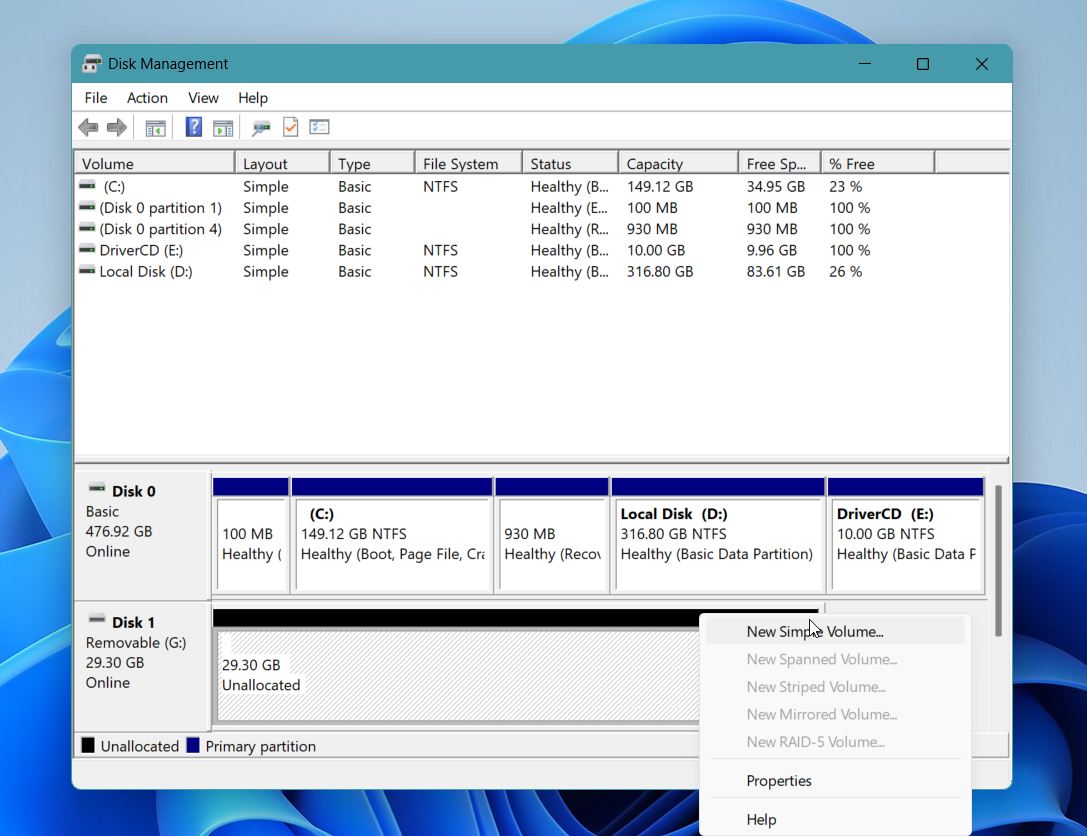
- Click Next.
- Leave the default volume size and click Next again.
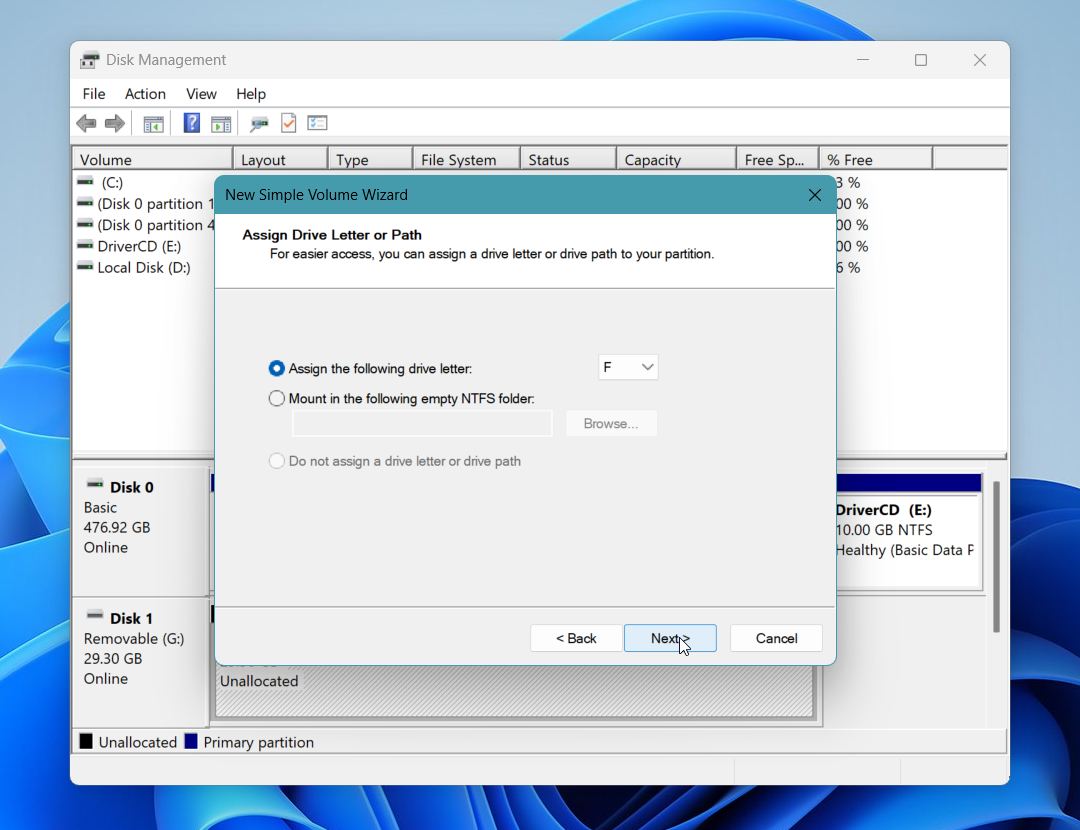
- Select a drive letter and click Next.
- Enter a volume label and choose the desired file system, usually NTFS or exFAT.
- Make sure Perform a quick format remains enabled.
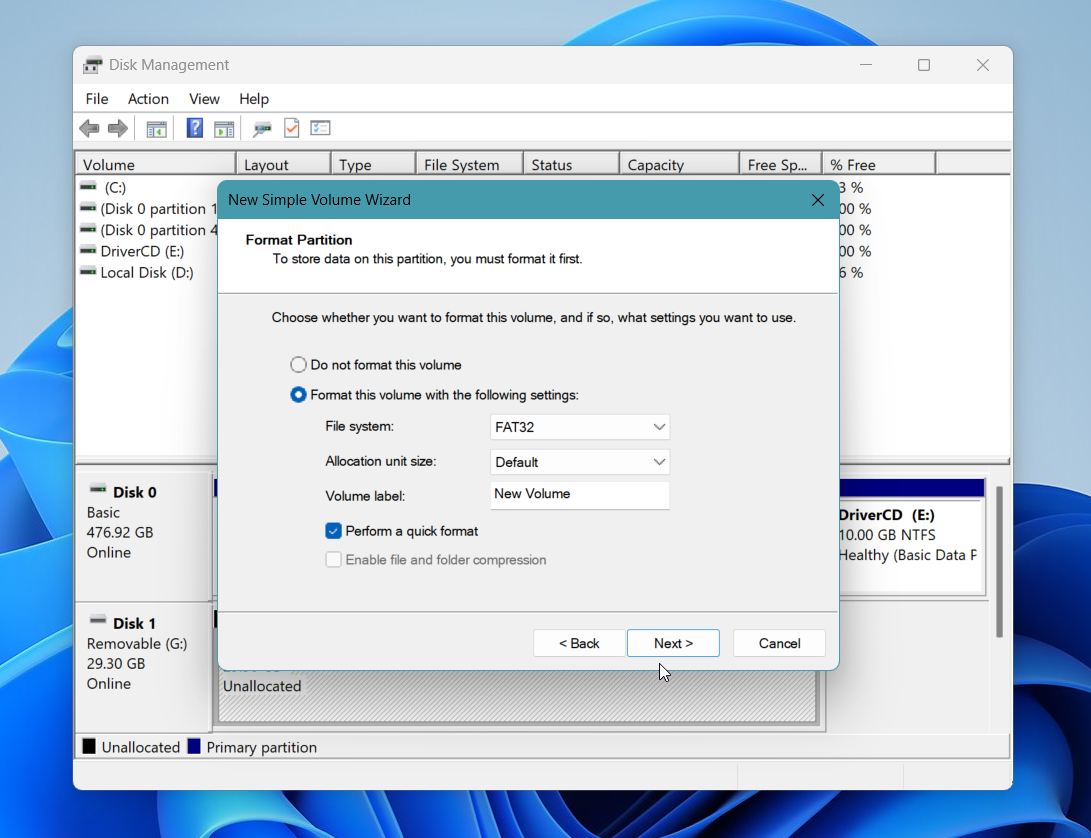
- Click Next, then click Finish.
After Windows completes the process, the drive should appear normally again in File Explorer.
Final Thoughts
“The system cannot find the drive specified” may look serious at first, but in many situations the problem comes from Windows configuration issues:
- damaged drive letters,
- corrupted drivers,
- permission conflicts,
- file system errors
rather than complete drive failure. The most important step is to avoid risky fixes before you secure important data.
If the drive still appears in Disk Management, recovery software like Disk Drill often gives you the best chance to restore files before you attempt repairs. Its ability to scan inaccessible, RAW, or corrupted drives makes it one of the strongest options for situations like this, especially for less experienced users who need a simpler recovery process.
One final piece of advice – pay close attention to warning signs like:
- clicking noises,
- repeated disconnects,
- freezing during scans,
- extremely slow read speeds.
These symptoms may point to physical hardware failure rather than a simple Windows issue. In those situations, avoid repeated repair attempts and recover your data as soon as possible to prevent additional damage.
Still have questions? Head over to our forum discussions to see what other users are saying – you might find practical tips and solutions from people who’ve dealt with the same issue.
FAQ
- Restart the computer
- Assign or change the drive letter
- Fix mapped drive or UAC registry problems
- Run SFC and CHKDSK
- Remove recently installed software
- Recreate the partition