 Have you lost or deleted important notes or documents stored in Microsoft OneNote? Whether due to the reason for their loss, being unable to access your notes can quickly become stressful if they contain work, research, or personal information. On the plus side, there are many ways to recover OneNote files, and we’ll cover all of them in this guide.
But before you start trying different recovery methods, reduce your computer use to a minimum. This can become a decisive factor for some OneNote recovery methods.
If you’re not completely sure that your notes were actually deleted and your OneNote files are simply missing, first try searching for them across your system. On Windows, we recommend using Everything, as it usually returns more accurate results than the standard File Explorer search. On Mac, you can use Spotlight Search to look for missing OneNote files.
If the search doesn’t return any results, the next step depends on how the files disappeared and whether any recovery conditions are still met. If you already know what caused the data loss, you can jump directly to the appropriate OneNote recovery method below:
- Recover from Within the OneNote App
- Recover Deleted Notes Using Data Recovery Software
- Recover OneNote Files from Local System Backups
How to Recover OneNote Files Within the OneNote App
The OneNote app is actually smart enough to include built-in tools for deleted OneNote recovery. In many cases, they’ll be enough if not much time has passed since the files were deleted or if you previously enabled OneNote backups.
Method 1:Recover Files from OneNote Recycle Bin
Pages and sections deleted within the OneNote app can be retrieved through the Notebook Recycle Bin. Bear in mind that any deleted notebooks or pages only remain in this section for a maximum of 60 days unless emptied manually.
Here’s how to restore deleted pages from within OneNote:
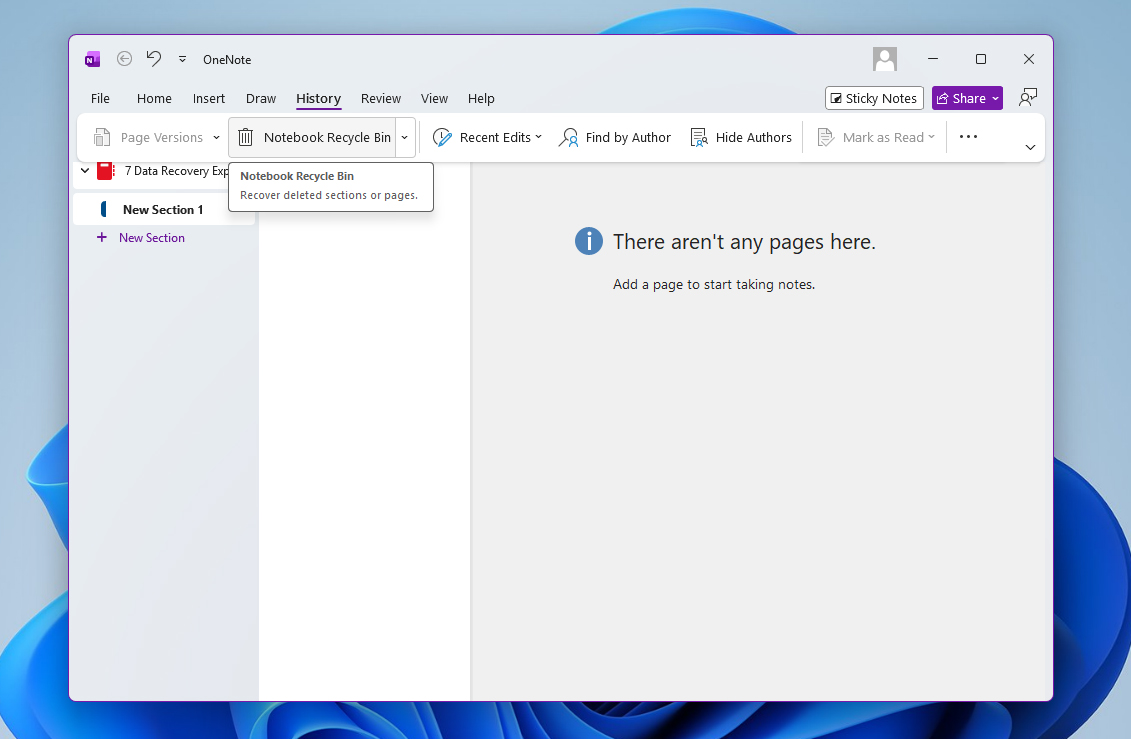
- Run the OneNote app.
- Next, select History near the top of the window, and then click on the NotebookRecycle Bin.
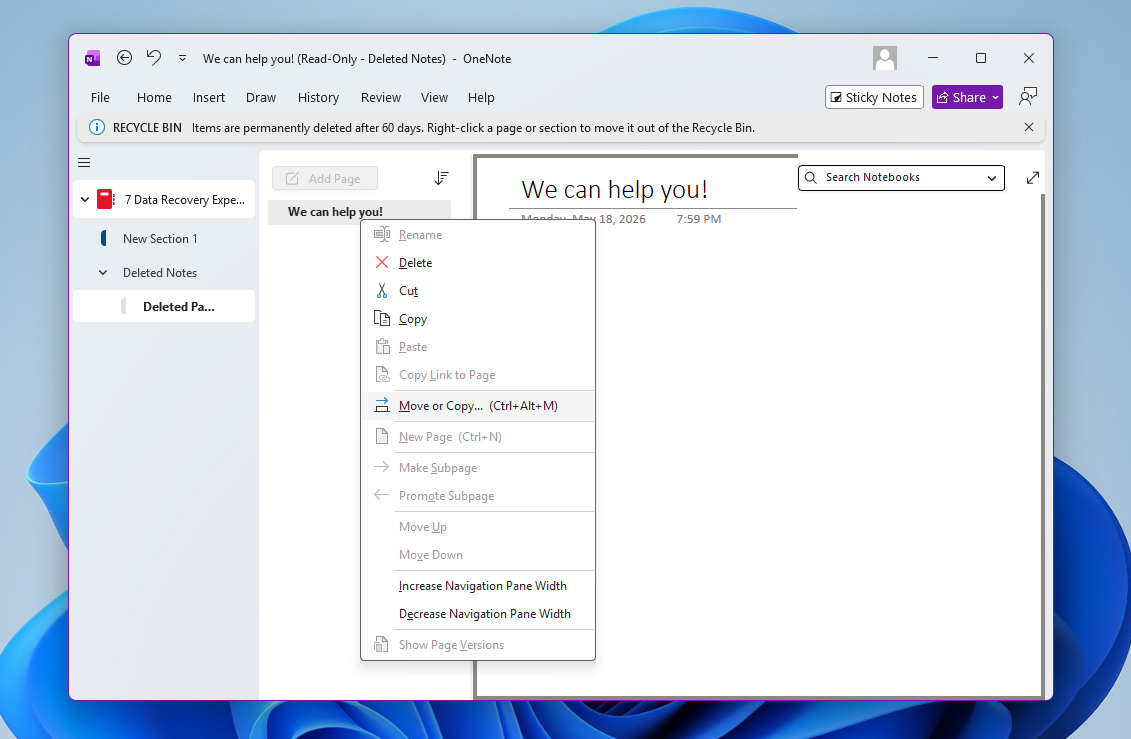
- Locate the page or section you want to restore, then right-click it and select Move or Copy.
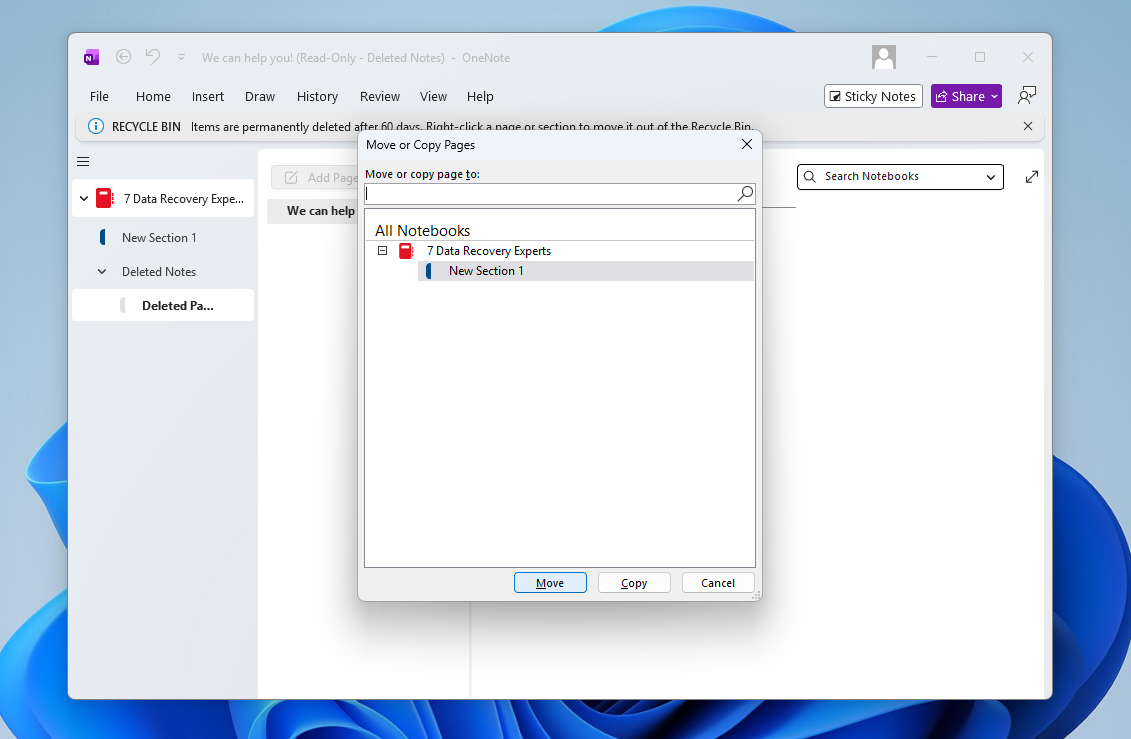
- After that, select the notebook you want to move/copy the page back to and then click the Move or Copy button.
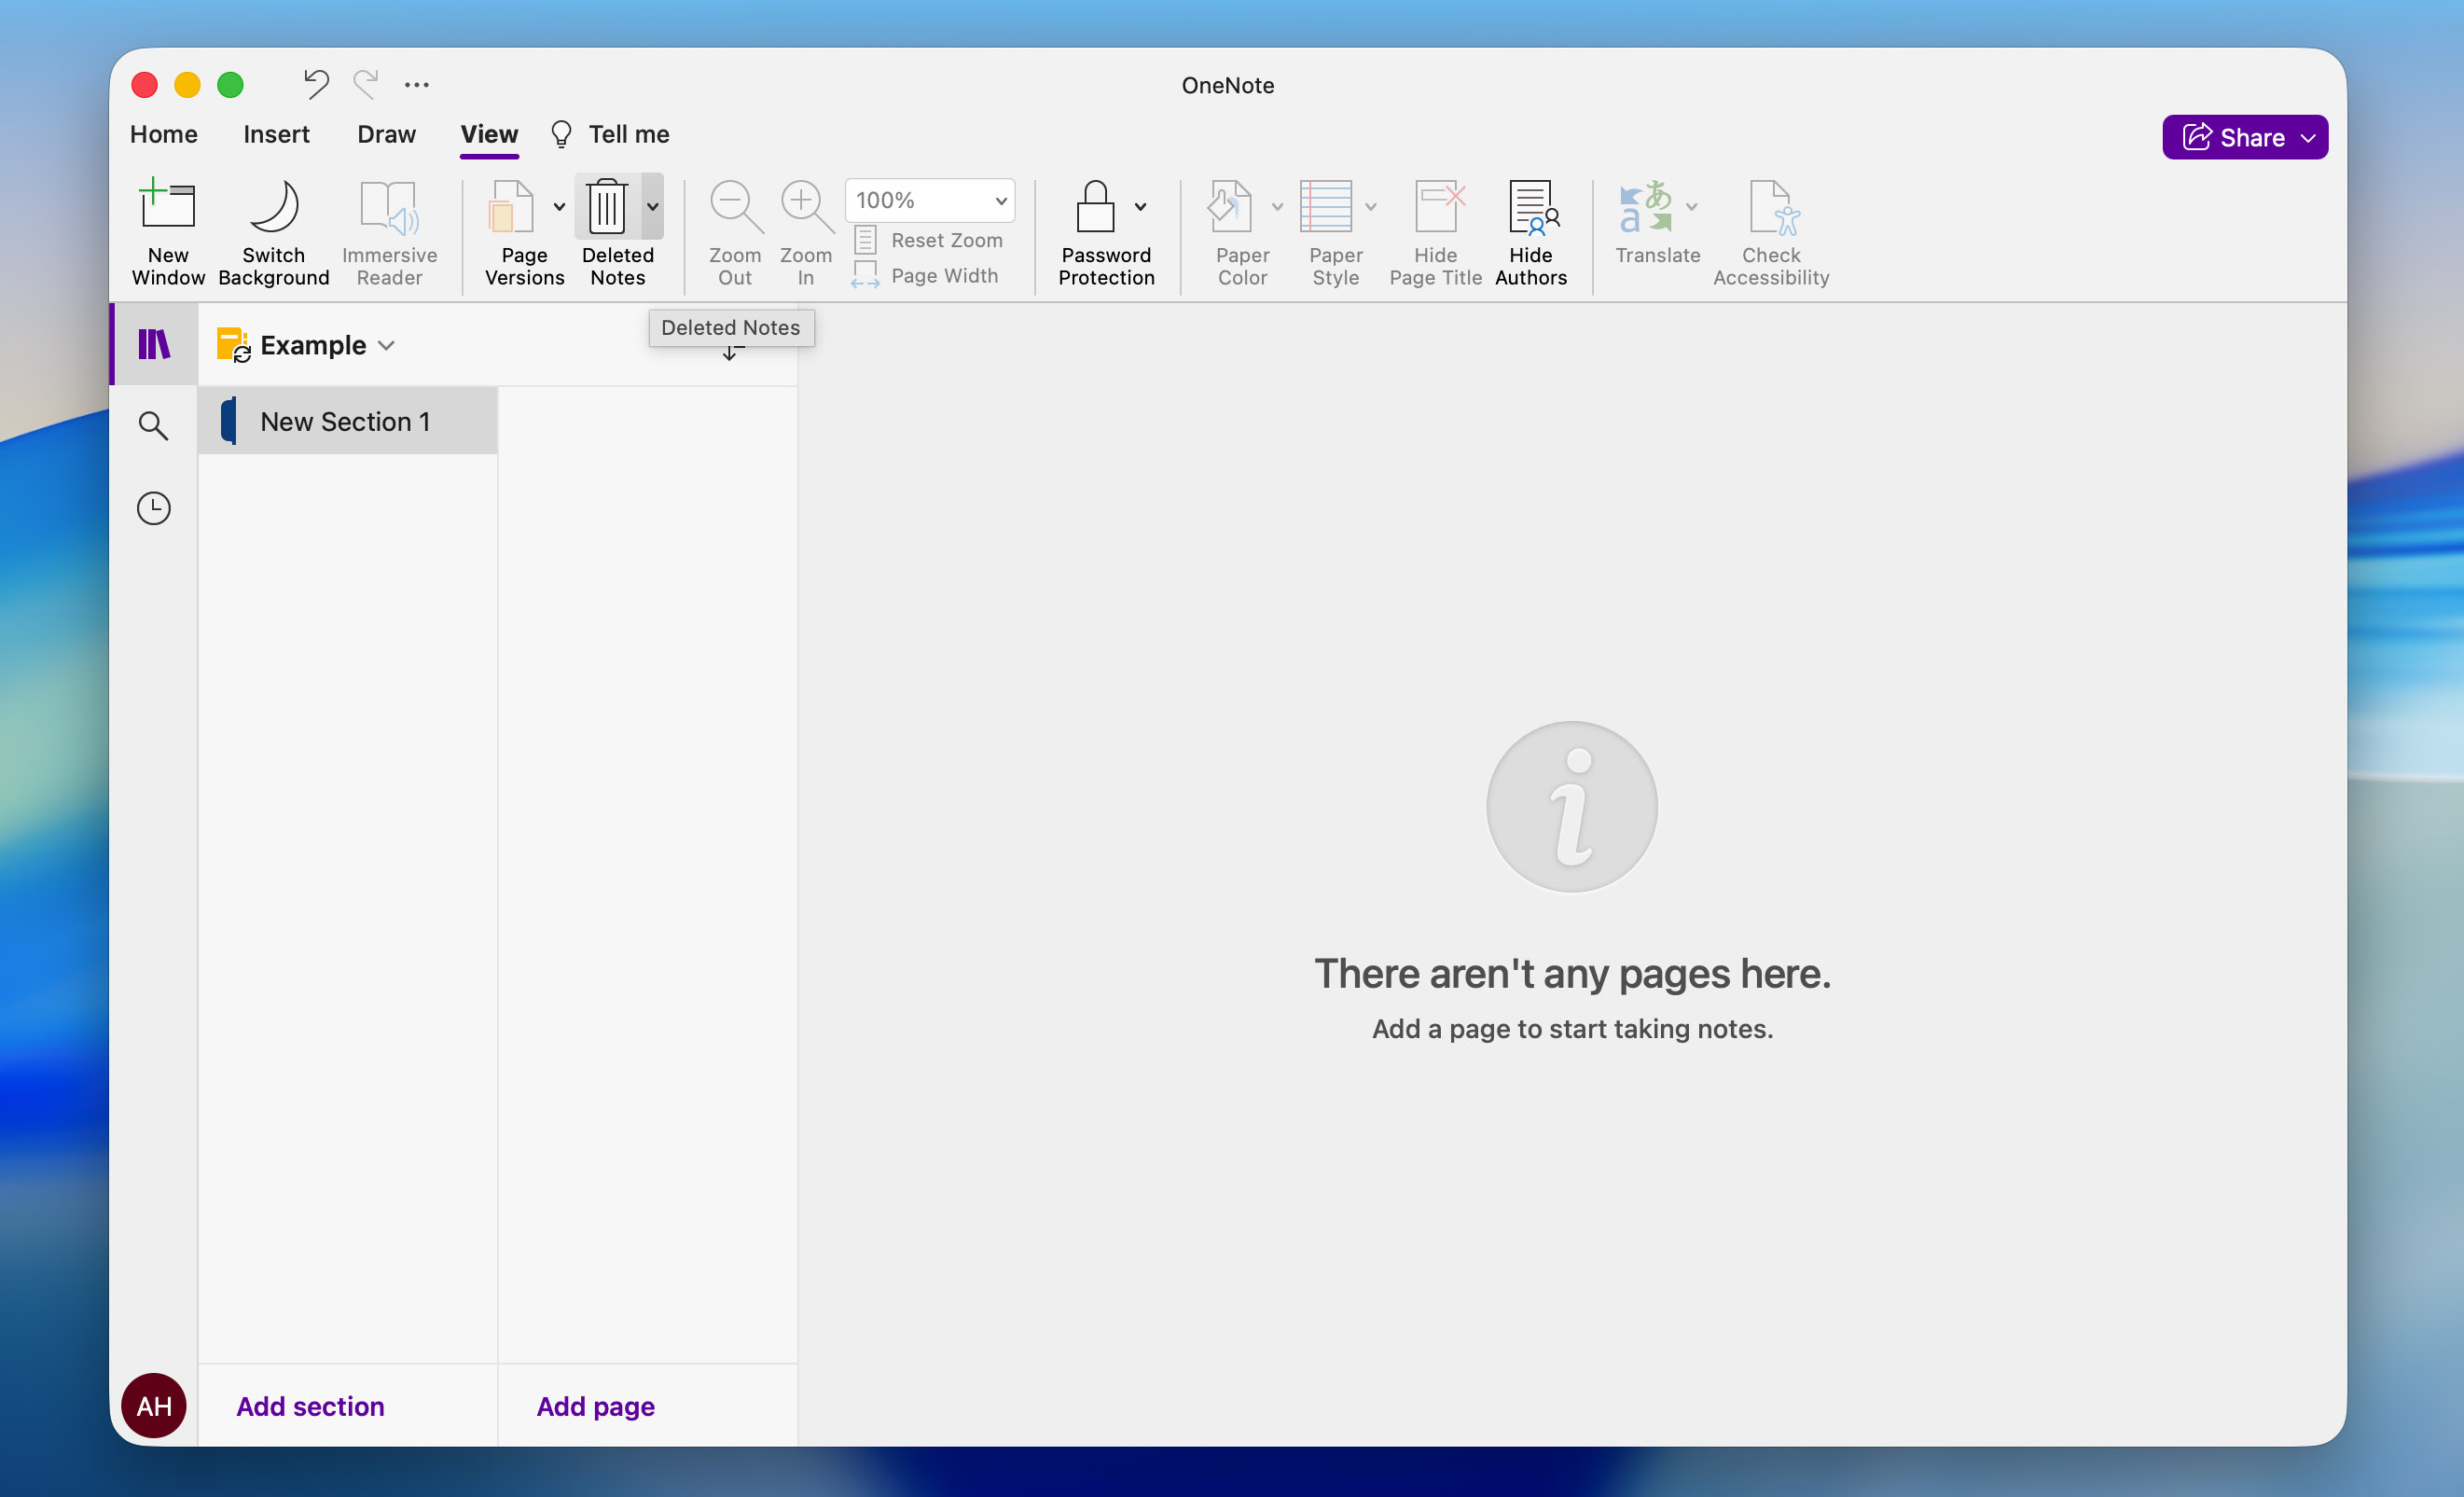
The process is similar on Mac, though there are a few differences. To recover recently deleted OneNote notes through the recycle bin:
- Open the View tab and click Deleted Notes with the trash bin icon.
- From the list of deleted notes, right-click the one you want to restore and choose Restore To.
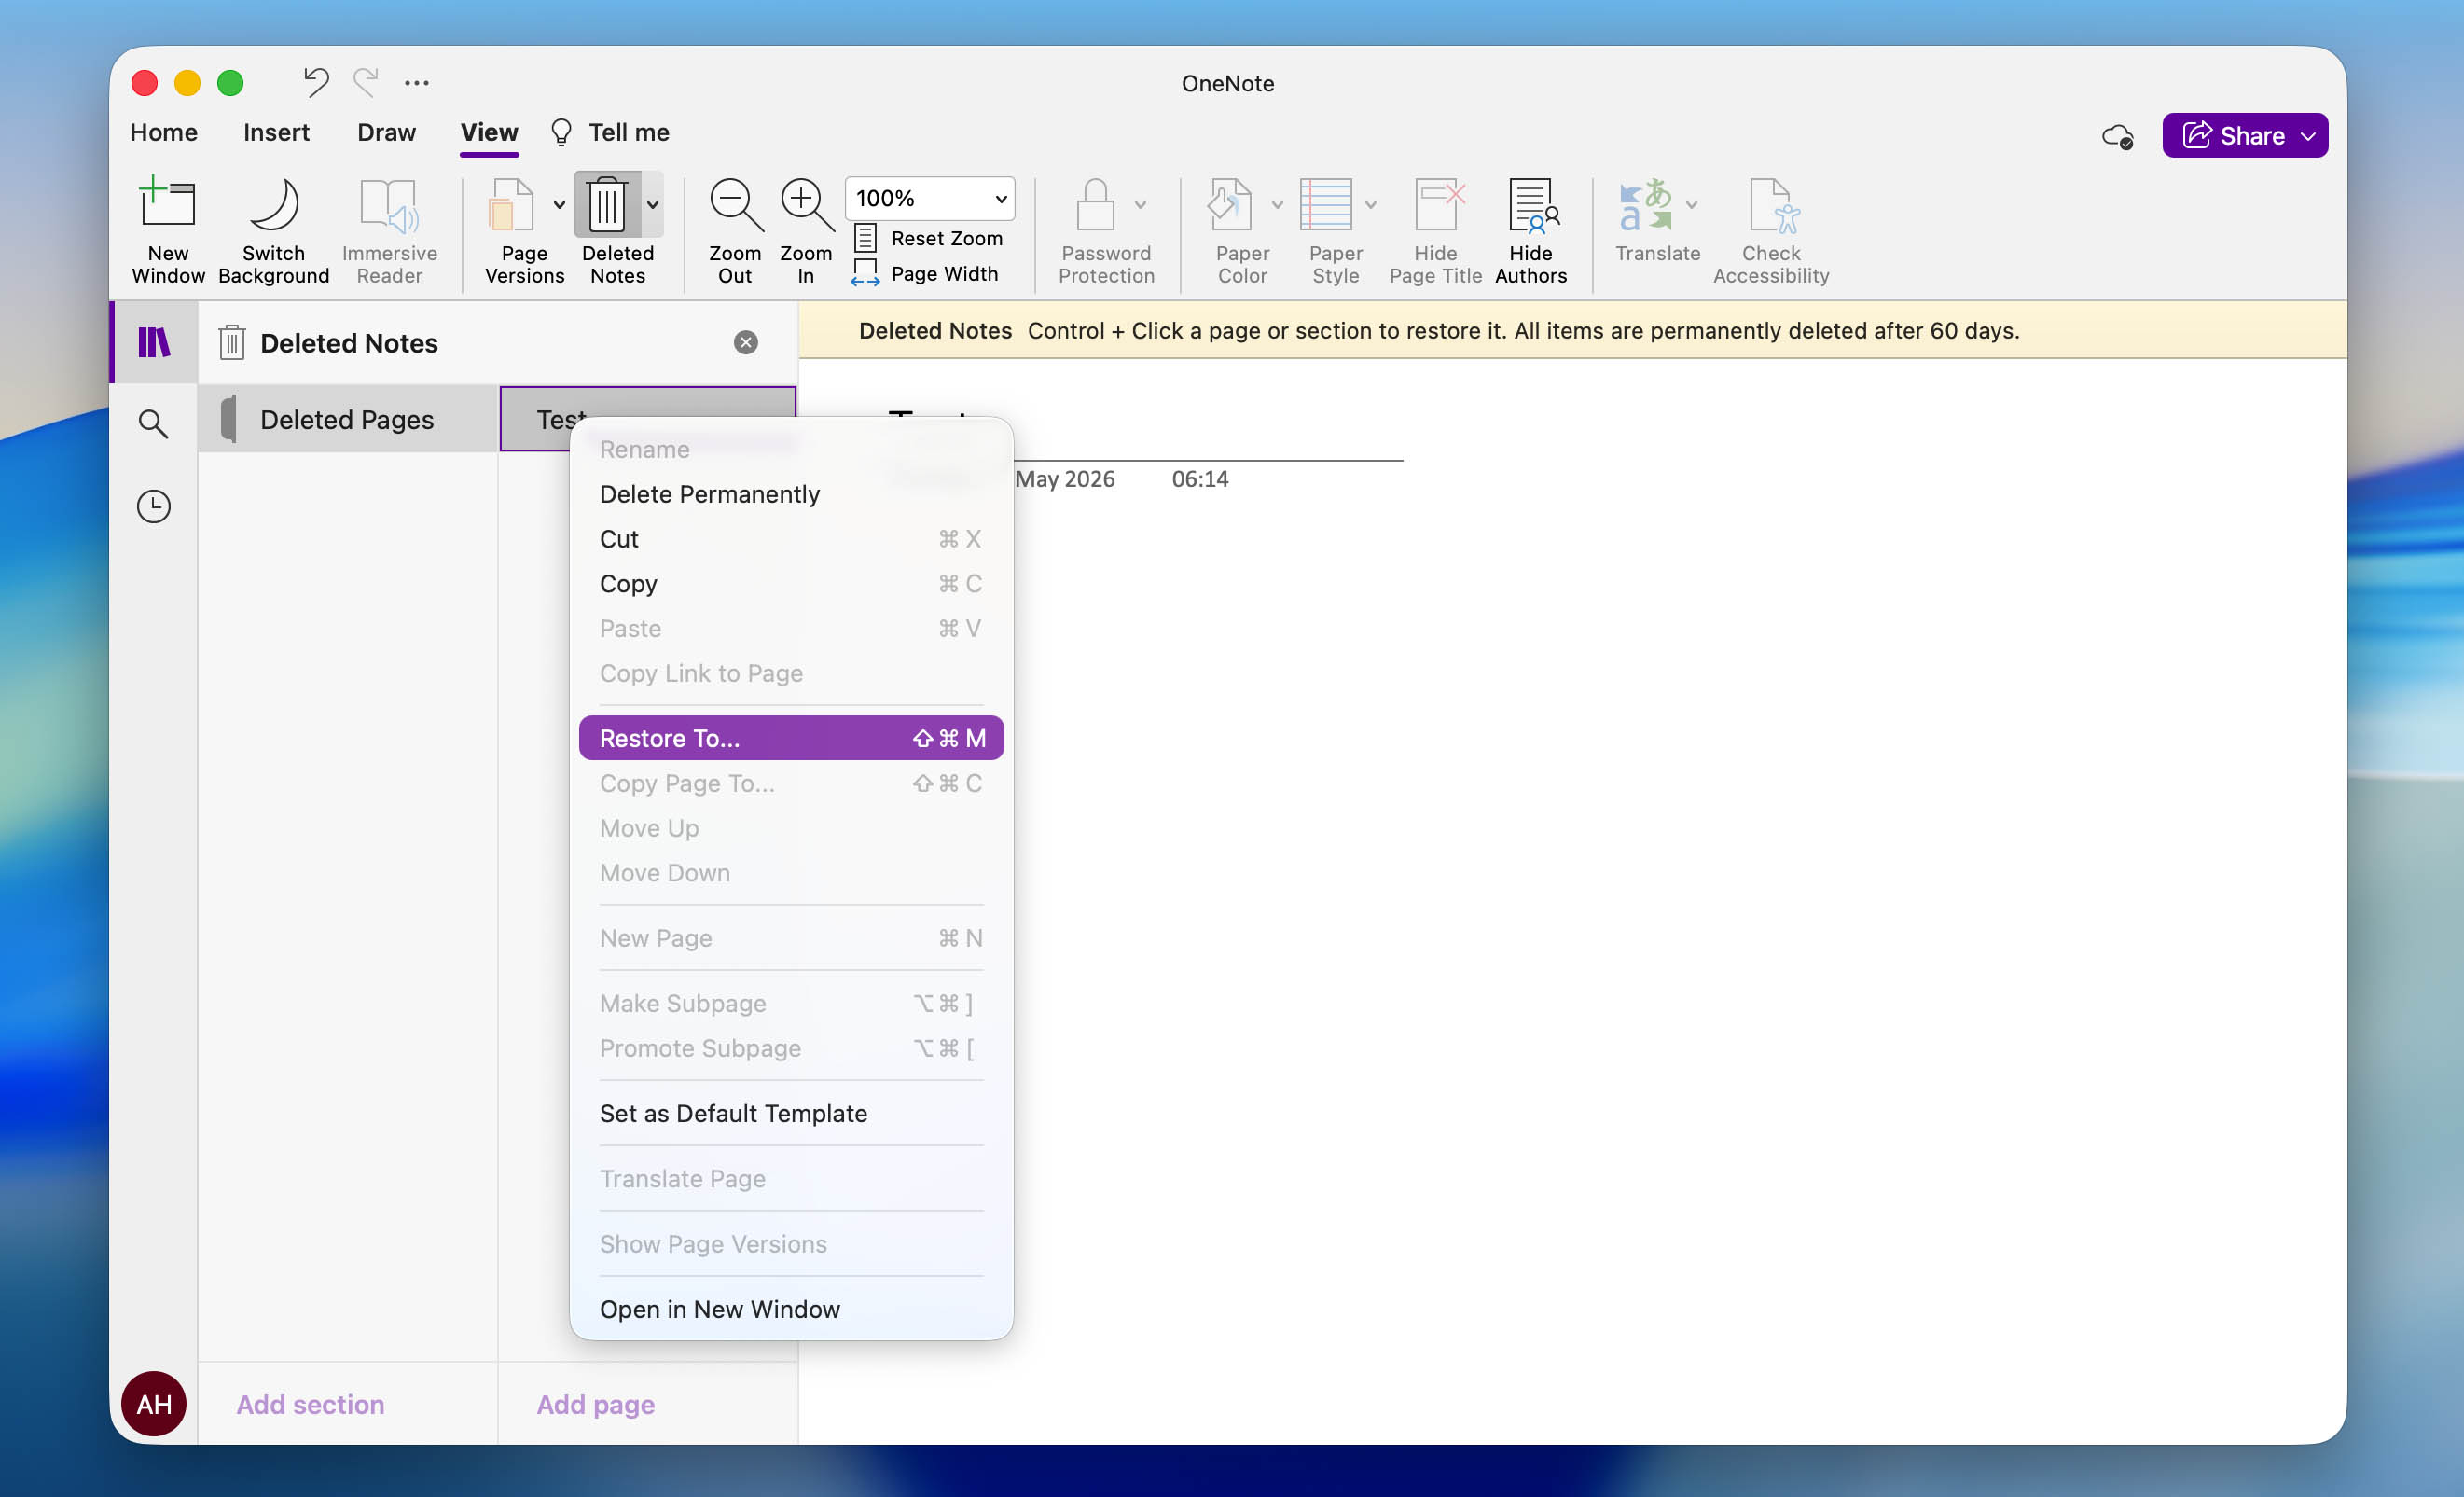
- After that, select the section where you want the note to be recovered and click Restore. Done.
Don’t forget that the same 60-day retention rule also applies to the Mac version of the OneNote app.
Method 2:Use OneNote Backup to Restore Deleted Files
If you’ve explored all corners of the OneNote app and set up backups beforehand, this gives you another option for how to recover notes from OneNote:
- Run the OneNote app.
- Click File from the upper toolbar.
- Next, click Info, then click Open Backups.
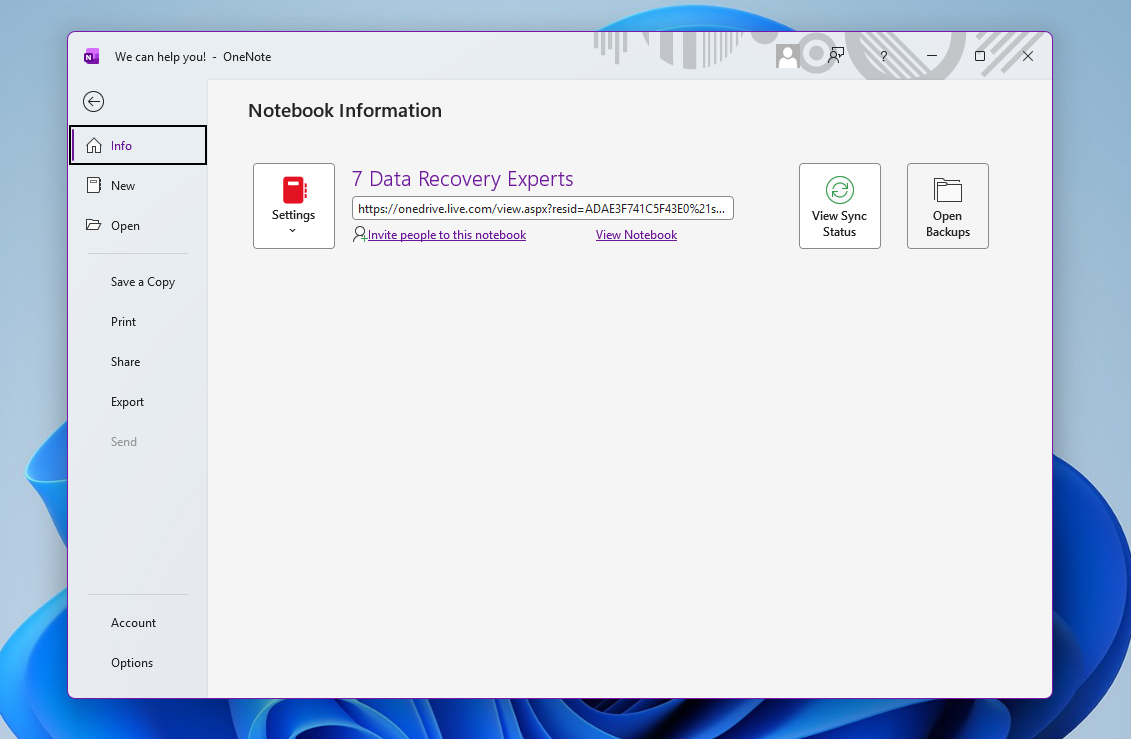
- Look for your deleted note, select it, and click Open.
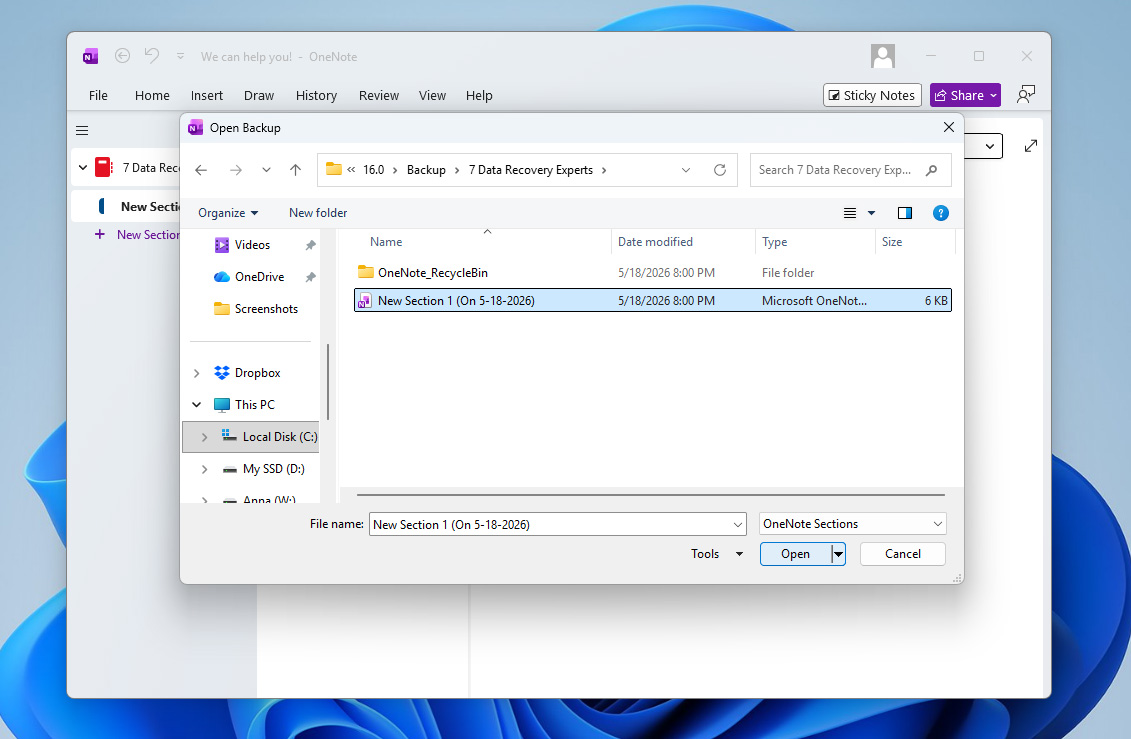
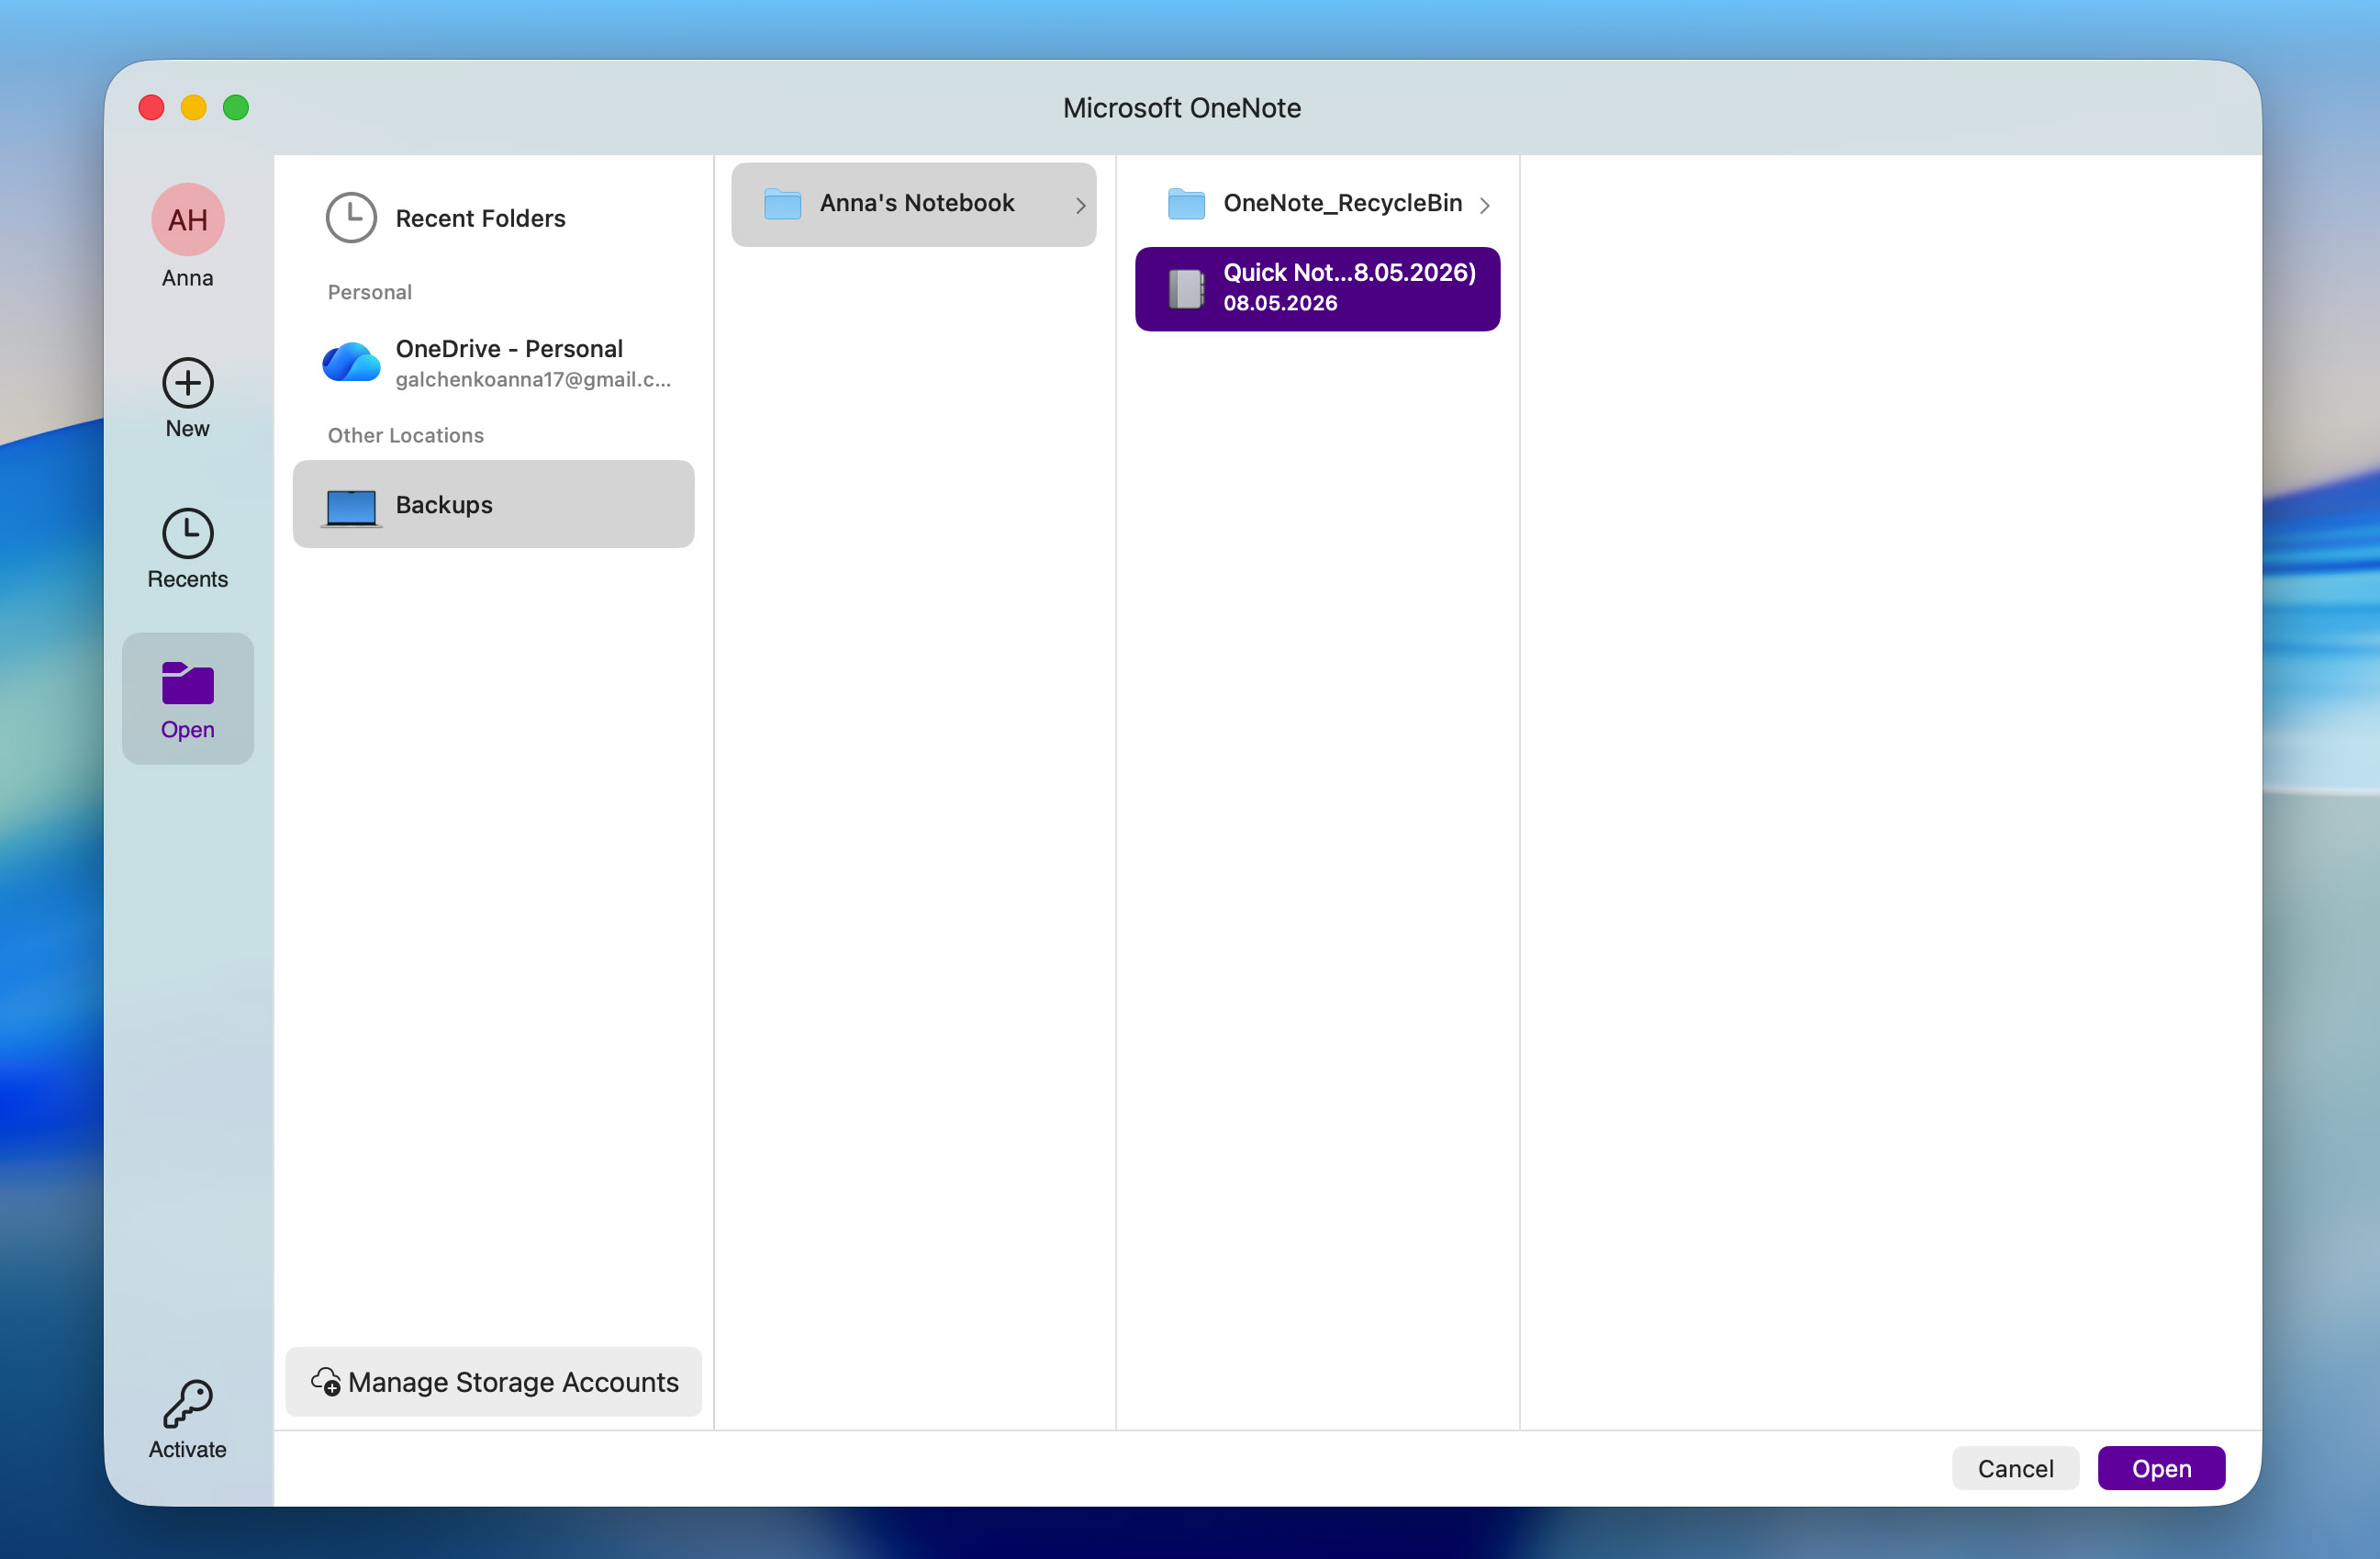
The OneNote backup feature is also available on Mac, and if it was configured before the file was deleted, you can use it to restore your notes. To do this:
- Open the OneNote app, click File at the top of the screen, and choose Open Backups from the pop-up menu.
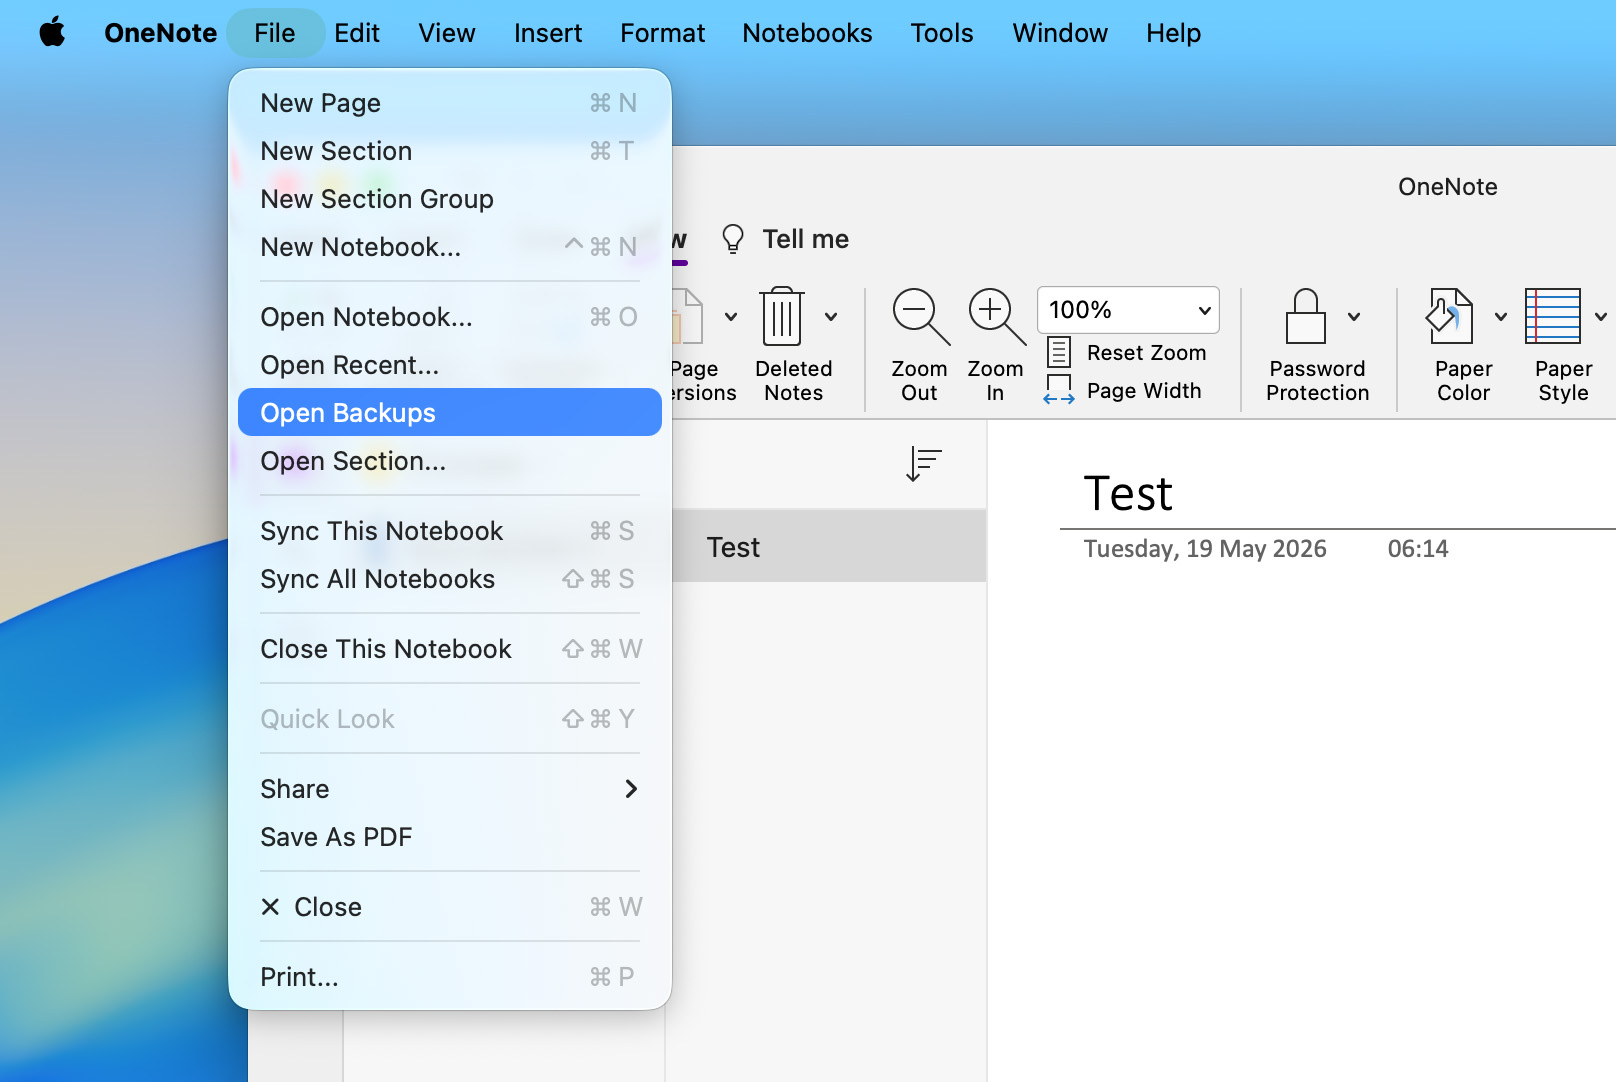
- In the window that opens, navigate to Backups > your backup folder and locate the note you want to restore. Click on it to select it, then press Open.
How to Recover OneNote Files Using Data Recovery Software
If OneNote’s built-in restore features couldn’t recover your files, you can try using data recovery software instead. These programs scan the file system of your storage device and look for deleted data that still physically remains on the drive. If your OneNote files were stored there at some point and haven’t been overwritten or wiped, there’s a chance the software will be able to recover them.
Keep in mind that recovering notes stored on an internal drive is usually harder than recovering them from an external device. Your computer constantly runs background processes that may overwrite the deleted OneNote notes before you get a chance to restore them. It’s also important to consider whether your internal drive is an SSD. Most SSDs use the TRIM command, which can automatically clean free blocks shortly after files are deleted, making recovery impossible. So, before you start scanning your drive with a data recovery tool, realistically evaluate your situation and your chances of recovery.
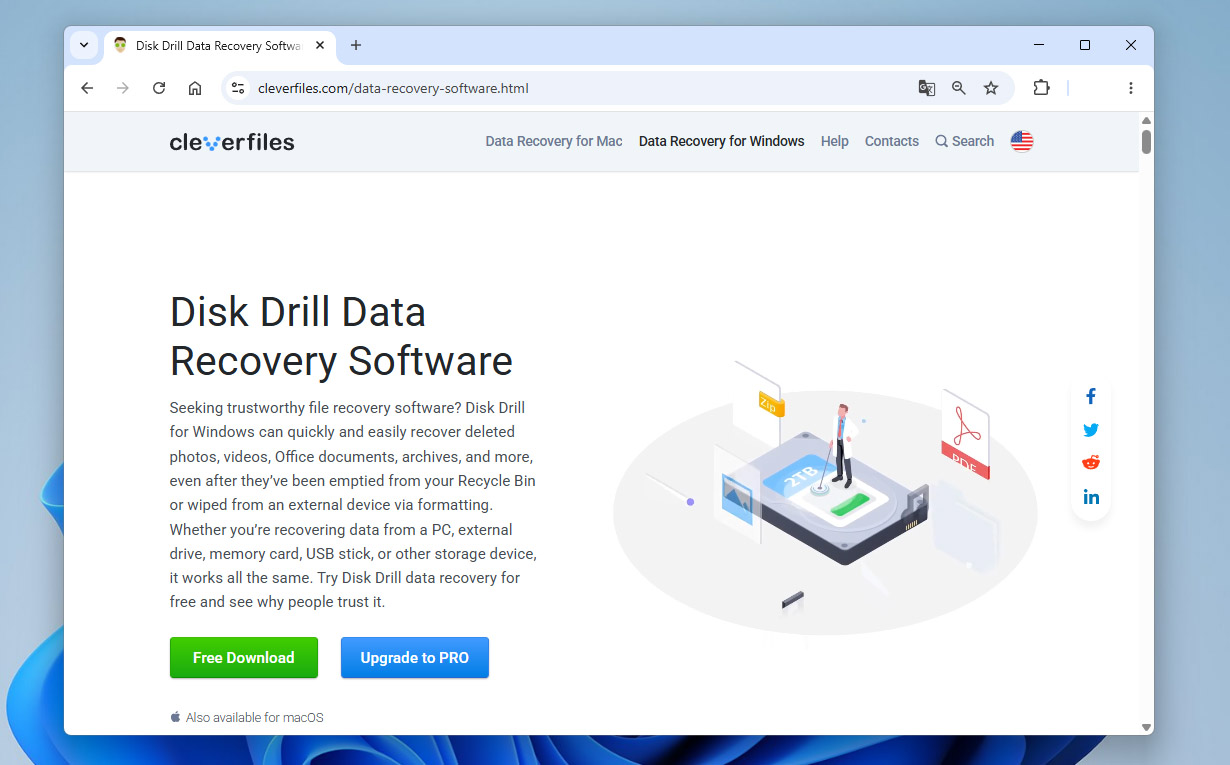
For this guide, we’ll use Disk Drill. It’s a particularly effective choice thanks to its polished interface, fast scans, and high recovery rate. It’s also fully compatible with OneNote files, along with the majority of storage device file systems. Disk Drill is available for both Windows and Mac, and the steps to recover OneNote files are practically identical on both operating systems:
- Download Disk Drill and install it on your computer.Keep in mind that it’s not recommended to install the program on the same storage device where your deleted OneNote files are currently located, since this may overwrite them.
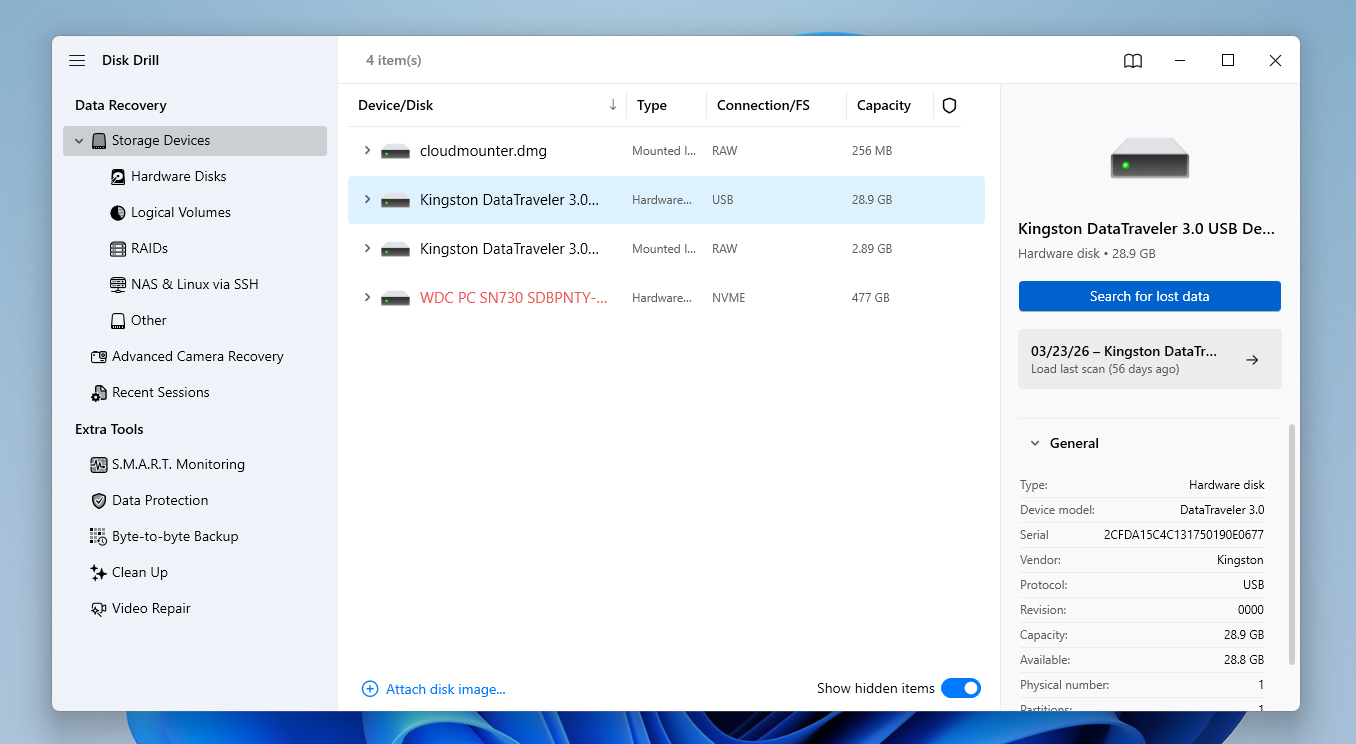
- Launch the app and select the storage device that contains your lost OneNote files. Click Search for lost data on the right side of the window to continue.
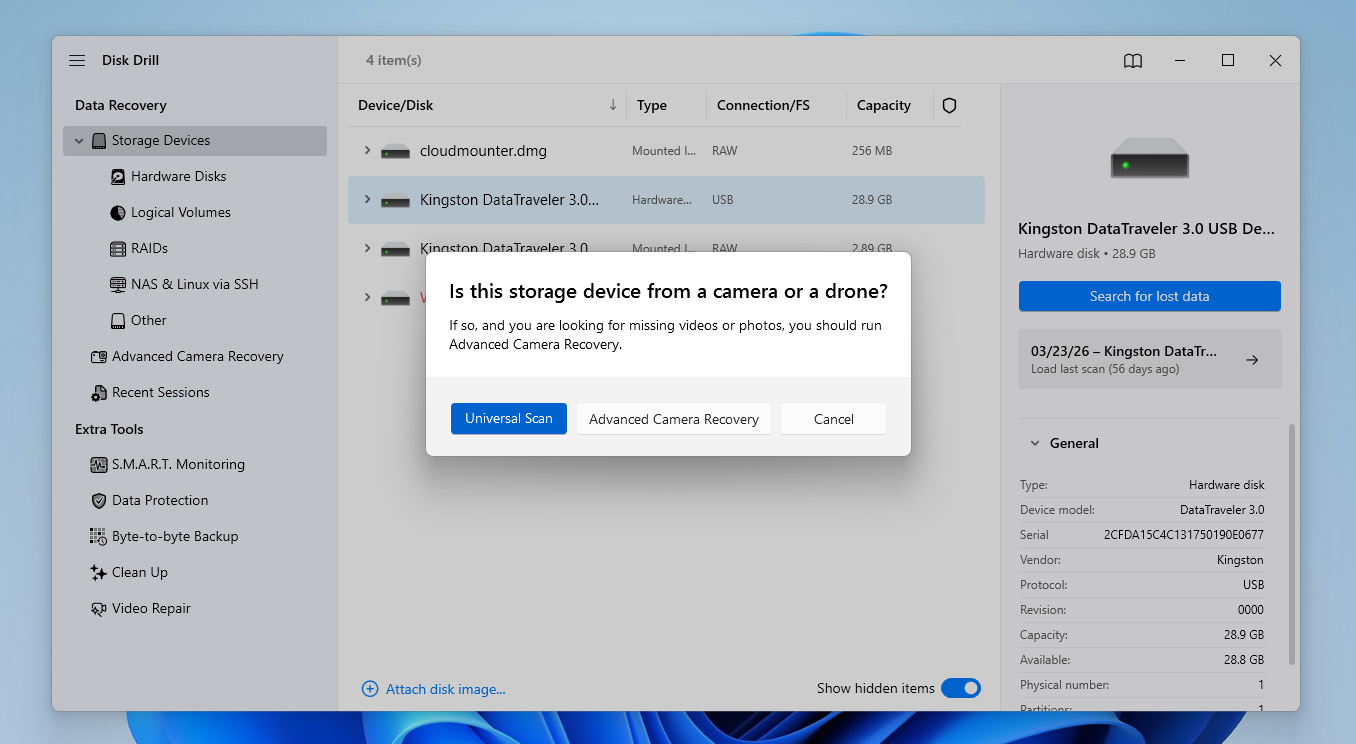
- If Disk Drill asks you to choose a scan type, proceed with the Universal Scan option.
- After that, Disk Drill will start searching your storage device for the missing files. Note that the duration of this process depends primarily on the size and type of your storage device. Click the Review found items button to proceed.

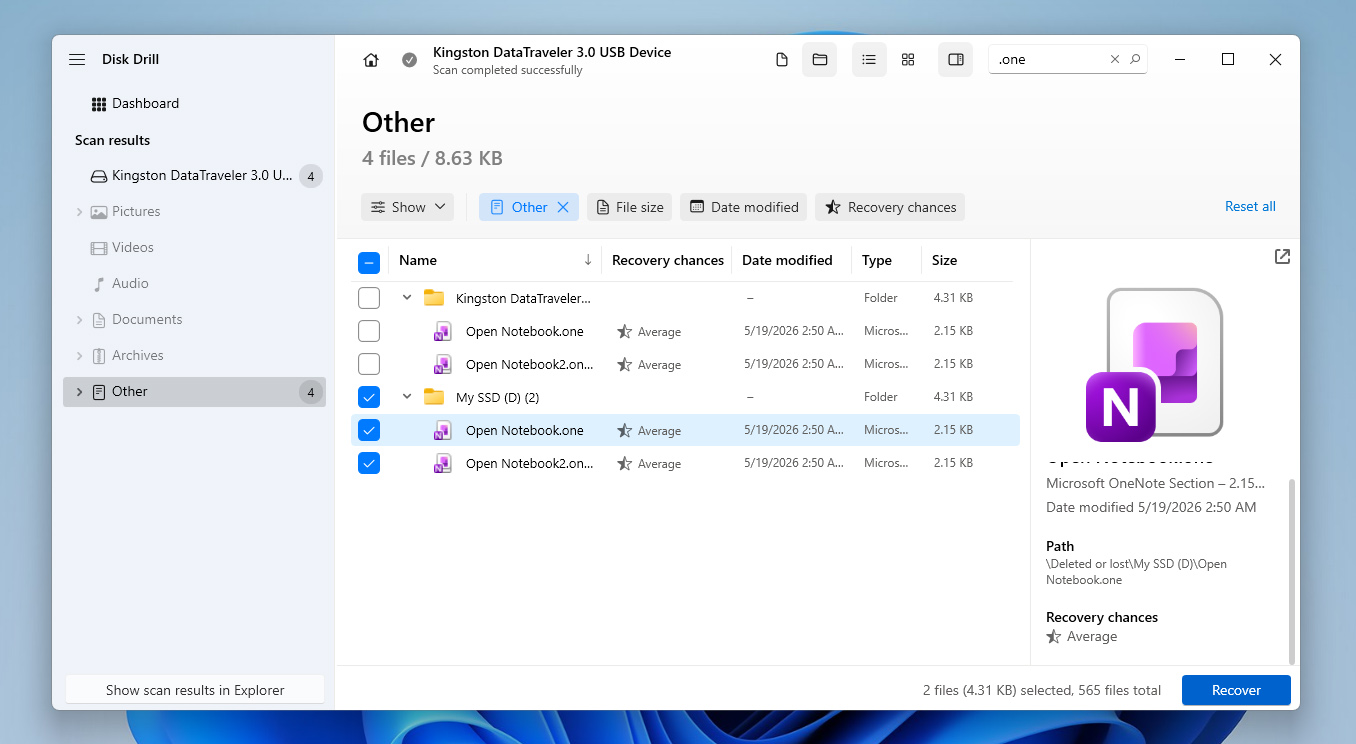
- Once you get to the results screen, you can use the search bar in the top-right corner to look for files using a file name or file format. Keep in mind that OneNote files typically use the .one format, though they can be exported in the form of documents as well, such as .doc and .pdf. When you find the files, select them by ticking the checkbox next to their names and hit Recover to head to the next step.
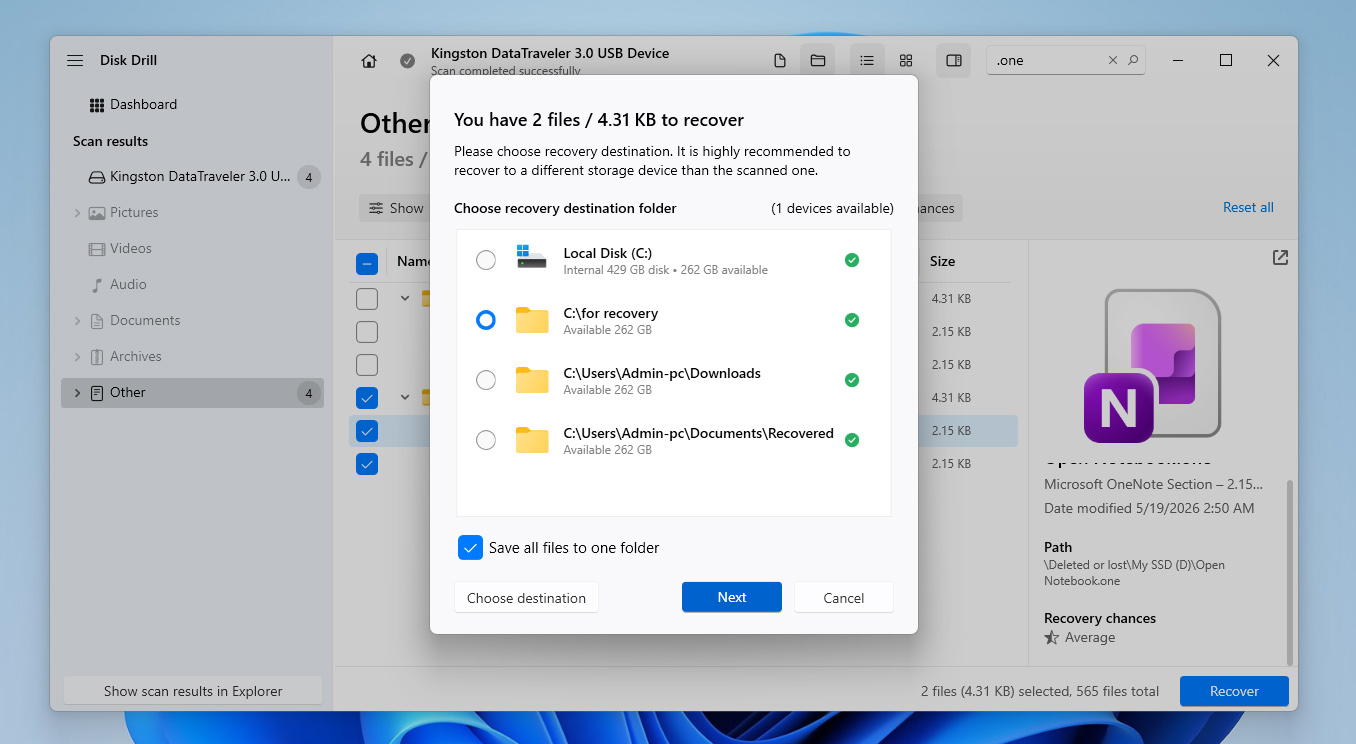
- Next, you’ll need to select the destination of your recovered files in the pop-up that appears. This has to be on a different drive than the one you’re recovering from. Click Next when you’re ready.
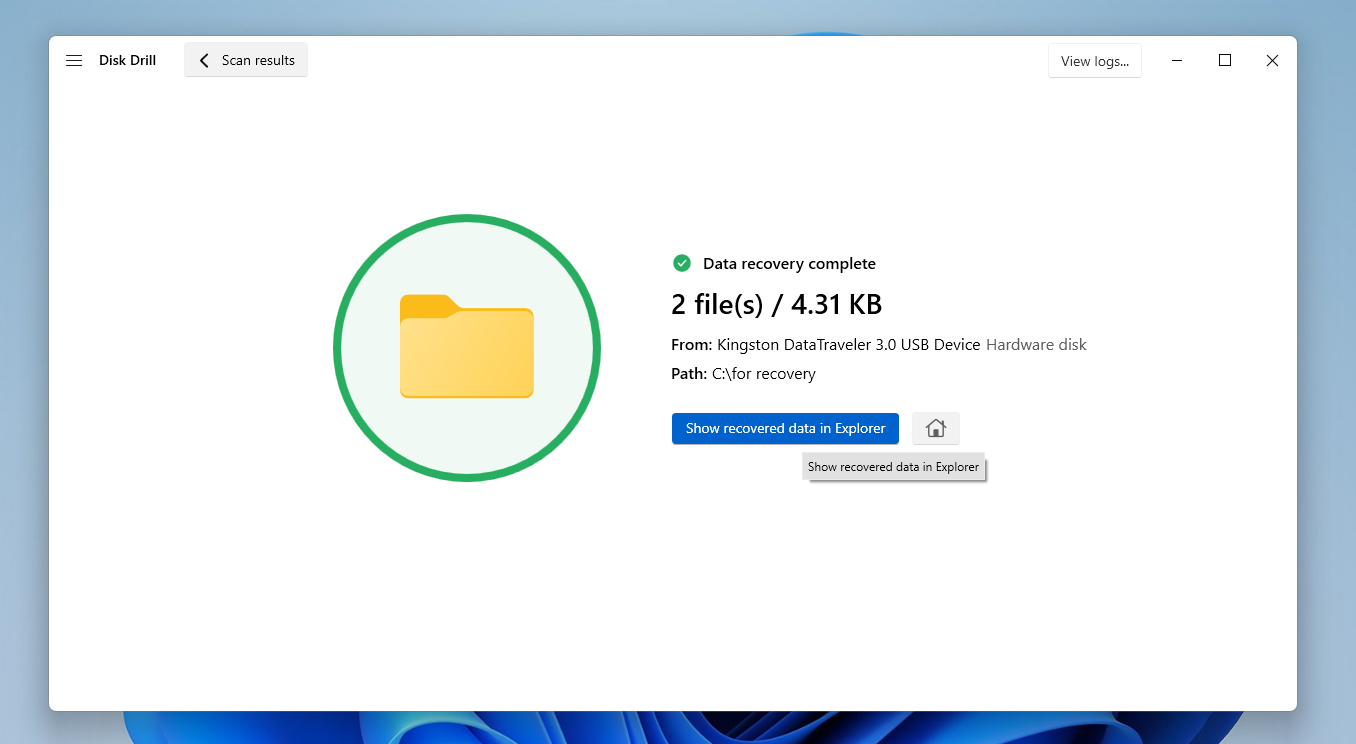
- Upon clicking, Disk Drill will now try to restore your selected OneNote files for you. Finally, if it succeeds, you’ll be met with a completion screen and a button labeled Show recovered data in Explorer.
Disk Drill for Windows lets you recover up to 100 MB of data for free, while the Mac version only includes free scanning. This means Mac users will need to upgrade to the Pro version to actually restore files. That said, the free version still includes access to several extra features, such as disk image creation and other niche tools covered in the full Disk Drill review.
How to Retrieve OneNote Files from OS-Specific Backup Options
The last method we’ll go through is utilizing backup features built into Windows and Mac operating systems, which are File History and Time Machine, respectively. This option is useful for retrieving lost OneNote files that were saved on your computer.
File History is a Windows tool that creates backups on a scheduled basis and allows users to choose from different versions to restore. One thing to consider is that this method requires users to have set up the feature prior to the data loss. To get started, simply follow these steps:
- Connect the external drive or storage device that contains your File History backups to the computer.
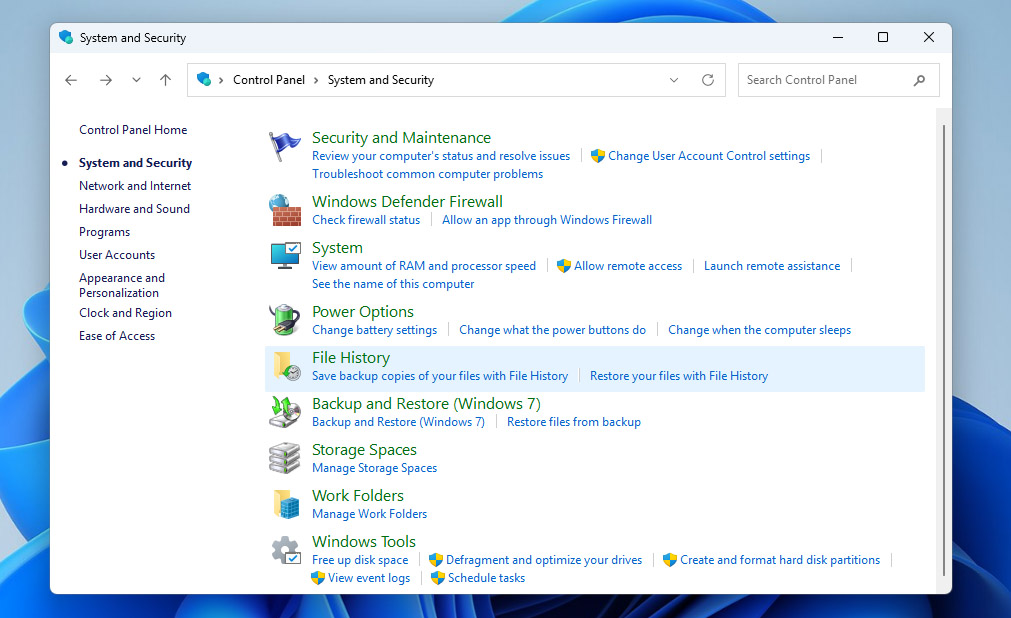
- Open the Control Panel on your Windows computer and head to System and Security. Click File History from the list of available options.
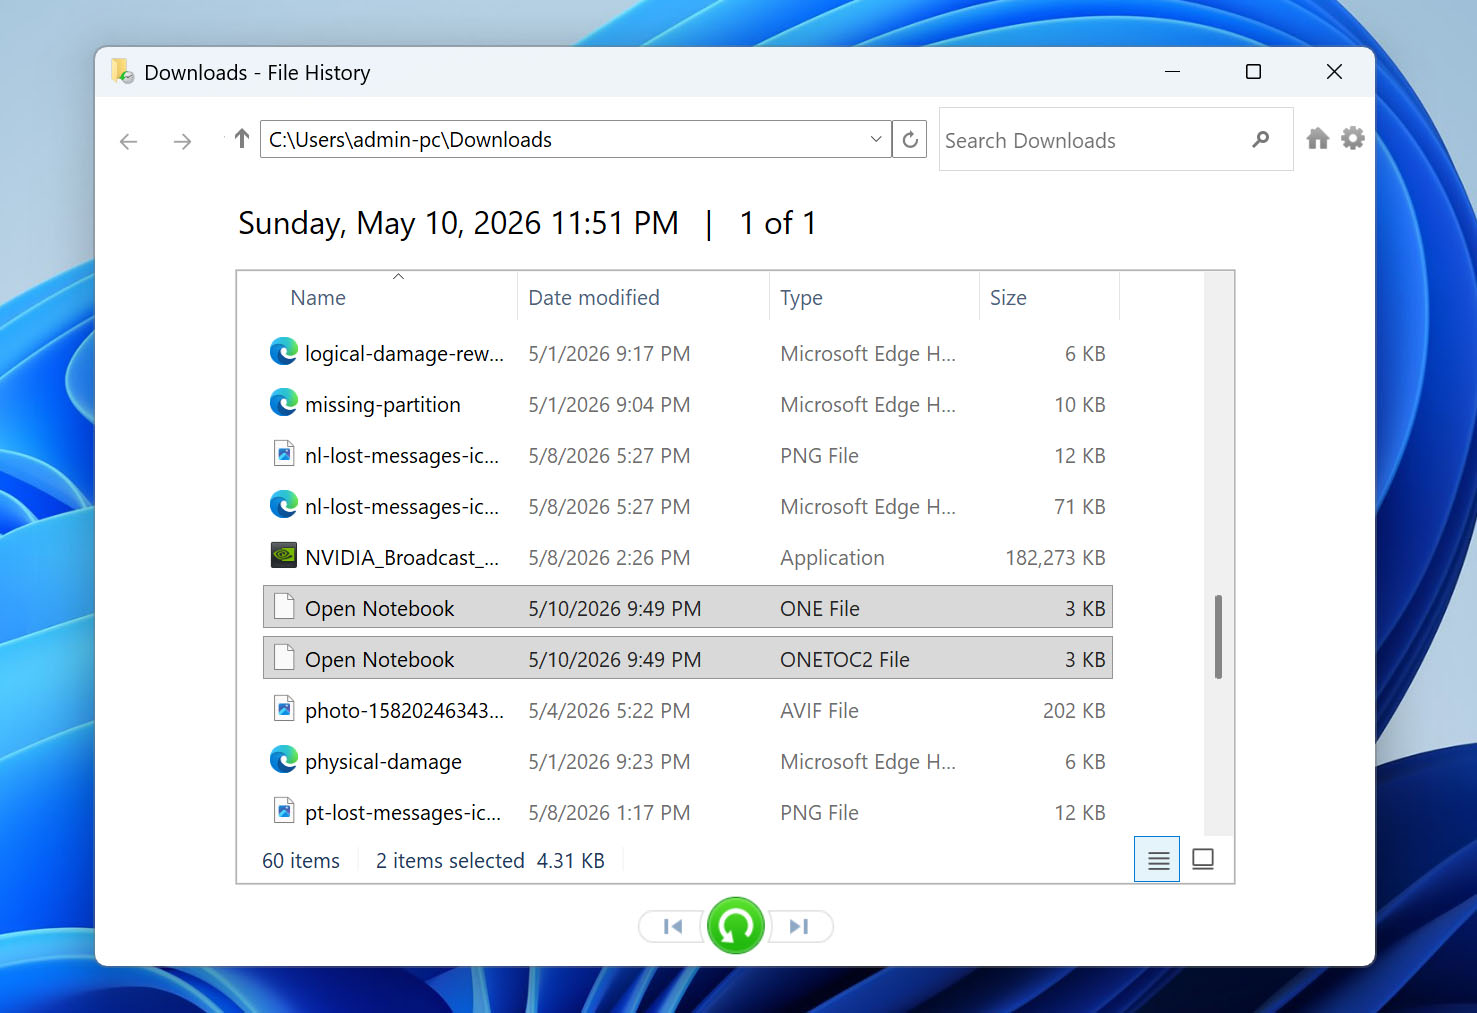
- Click Restore personal files on the left side of the window.
- Navigate through the available backup folders until you locate your OneNote files or notebooks.
- Select the files you want to recover, then click the green Restore button at the bottom of the window. Windows will restore the selected OneNote files back to their original location.
Similar to File History, Time Machine is a built-in Mac utility that automatically creates backups of files, folders, and settings. Here’s what you can do:
- Connect the drive that contains your Time Machine backups to your Mac.
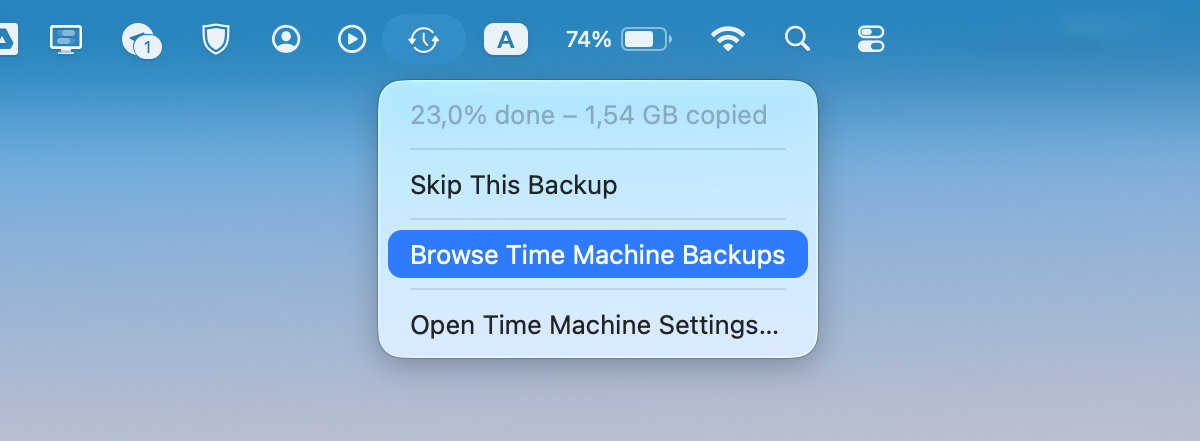
- Click the Time Machine icon in the menu bar and choose Browse Time Machine Backups.
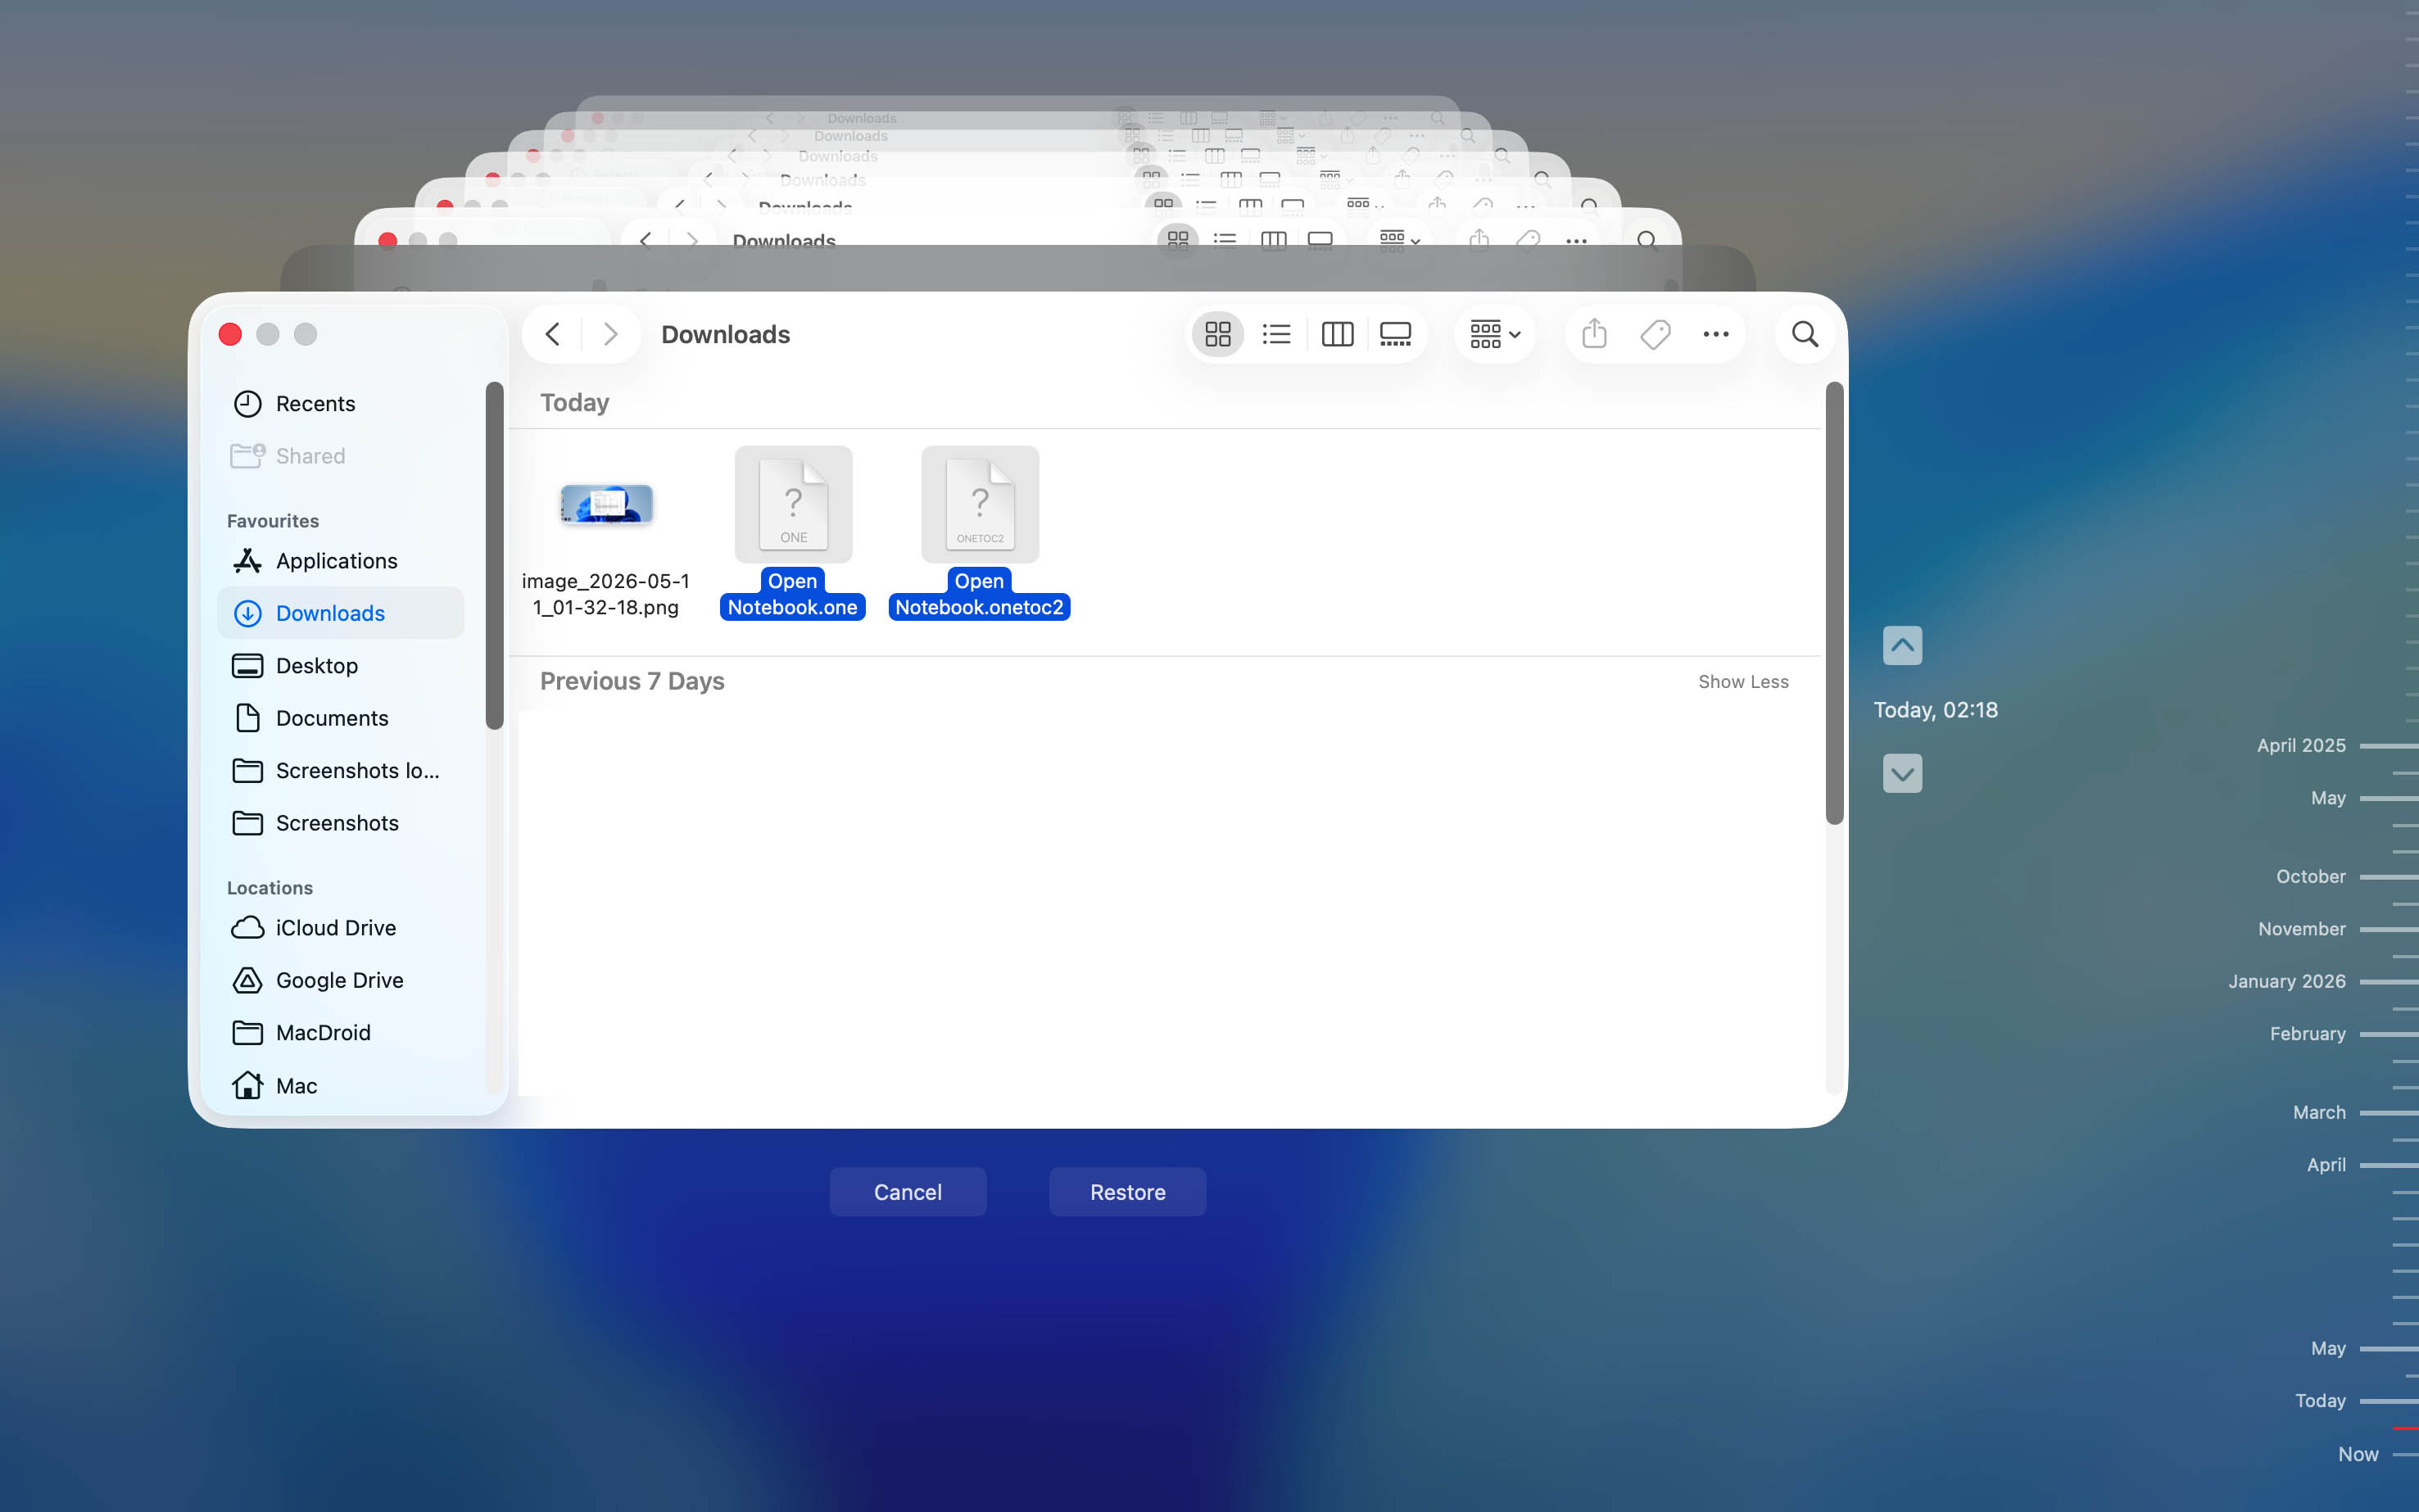
- Use the timeline on the right side of the screen to browse through older backup versions until you find a version that still contains your OneNote files.
- Select the OneNote file, notebook, or backup folder you want to restore and click Restore. Time Machine will return the selected files to their original location on your Mac.
Conclusion
Now you know how to recover OneNote files, but as you’ve probably noticed throughout this guide, without backups, there’s no guarantee that a data recovery program will always be able to help.
That’s why, if you don’t want to risk losing important notes in the future, the safest approach is to enable backups both in OneDrive/OneNote and through your operating system’s backup utilities.
Still have additional questions or ran into a problem that wasn’t covered in this article? Feel free to visit our forum and leave your question there. Our experts and other users will try to help you work through the issue.
FAQ:
- User error – accidental deletion, overwriting files, or formatting the wrong storage device.
- Synchronization issues – OneDrive sync conflicts or failed synchronization between devices.
- Drive failure – corrupted, failing, or physically damaged storage devices where OneNote files were stored locally.
- Malware attacks – viruses or ransomware that delete, corrupt, encrypt, or hide OneNote notes and notebooks.


