
Has your drive suddenly become inaccessible, started showing file system errors, or appeared as RAW in Disk Management? A corrupted Master File Table (MFT) may be the cause.
MFT corruption can happen due to sudden power loss, improper removal of the drive, file system errors, bad sectors, malware, or failing hardware. Depending on the severity of the damage, Windows may report the drive as RAW, display errors, or refuse to open the volume.
Fortunately, MFT corruption is often repairable. The recommended approach is:
- Check the drive’s health.
- Recover important data first.
- Run CHKDSK to repair file system errors or try other Windows error-checking tools.
- Use TestDisk to repair the MFT from the NTFS MFT mirror.
- Format the drive if repairs fail and your data is already safe.
- Replace the drive if hardware issues are responsible for the corruption.
In the sections that follow we describe each method in detail and help you choose the safest way to repair the drive without risking unnecessary data loss.
What Causes a Corrupt Master File Table on Windows
There are several reasons why the Master File Table can become corrupted, from simple software issues to more serious hardware failures. If you know the cause, you can know if a repair is likely to work or if the drive needs to be replaced.
| Cause | Common Symptoms | How It Affects the MFT | Recovery Chances | Recommended Solution |
| Sudden power loss | PC crashes during file transfers, drive requests a scan, files disappear after reboot, Windows reports disk errors | Interrupts write operations and may leave file system metadata in an inconsistent state. | Usually high | Recover data, then run CHKDSK and Windows Error Checking. |
| Blue Screen of Death (BSOD) | Unexpected system restart, Windows crash during disk activity, file system errors after reboot, missing files | A system crash can interrupt write operations while NTFS updates the MFT, which may leave metadata only partially written. | Usually high | Recover important files, run CHKDSK, and check the drive for hardware issues if BSODs occur repeatedly. |
| Improper drive removal | External drive becomes inaccessible, “You need to format the disk” message, missing files or folders | Disconnecting a drive without safely ejecting it can damage NTFS structures, including the MFT. | Usually high | Recover files, then run CHKDSK, repair the MFT, and check the file system for errors. |
| Bad sectors | Slow file access, read errors, files fail to open, CHKDSK reports bad sectors, drive may appear as RAW | Damaged sectors may affect portions of the MFT, making files and folders inaccessible. | Moderate to high | Create a byte-to-byte backup, recover data, then replace the drive if bad sectors continue to appear. |
| File system corruption | “The file or directory is corrupted and unreadable” error, missing folders, failed file operations, CHKDSK errors | Software crashes, failed updates, and unexpected shutdowns can damage NTFS metadata. | Usually high | Use CHKDSK, TestDisk, or Windows Error Checking. |
| Failing HDD or SSD | Unusual noises (HDDs), freezing, repeated disconnects, S.M.A.R.T. warnings, growing bad sector counts | Hardware degradation can cause read/write errors that eventually affect the MFT. | Varies widely | Recover data immediately and replace the drive. Professional recovery may be necessary. |
Corrupt MFT is often caused by a one-off event, but repeated corruption is more likely to be a hardware issue. If a drive repeatedly shows file system errors, verify its SMART status and consider replacing it before it completely fails.
How to Recover Data From a Drive With a Corrupt MFT
Before you attempt any repairs, it’s important to recover your data. Tools such as CHKDSK, TestDisk, and formatting utilities modify file system structures. While these tools can repair a corrupt Master File Table, they can also make data recovery more difficult if something goes wrong during the repair process.
Step 1: Check the Drive Health Before Recovery
Look for S.M.A.R.T. warnings, bad sectors, unusual noises, or extremely slow performance. Tools such as Disk Drill, CrystalDiskInfo, and Hard Disk Sentinel can help you assess the condition of the drive.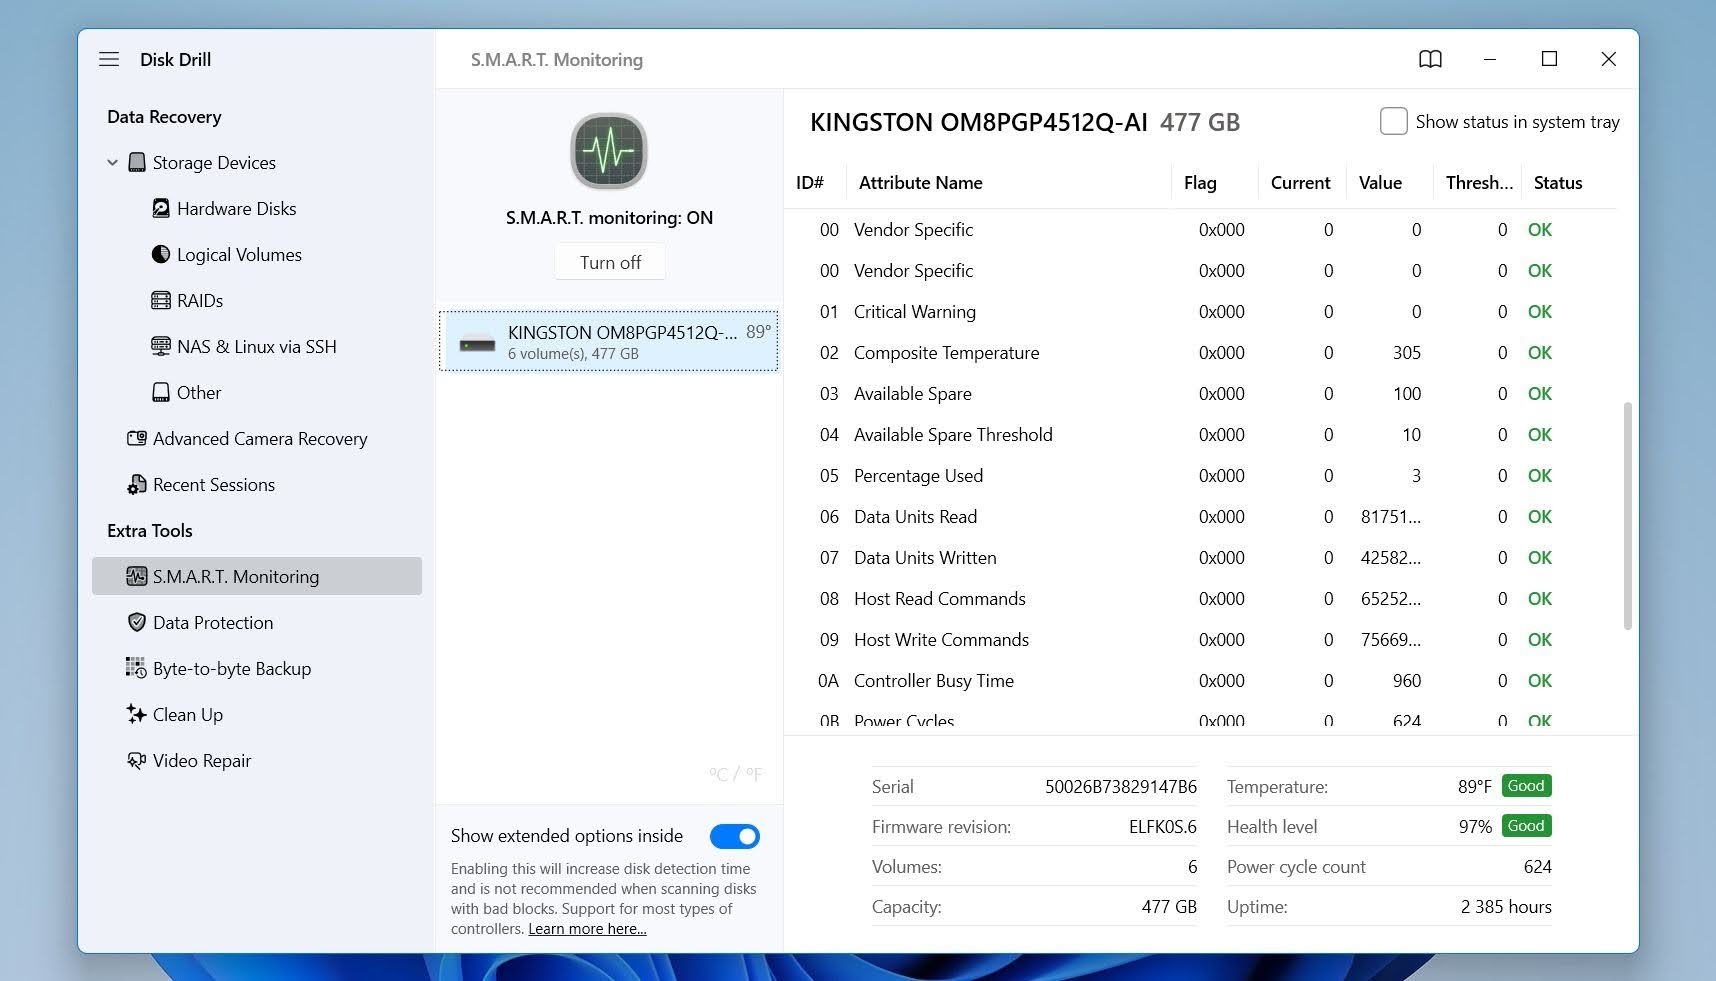
Pay particular attention to these S.M.A.R.T. attributes:
- Reallocated Sectors Count (05) indicates how many bad sectors the drive has already replaced with spare sectors. A growing value often points to physical media degradation.
- Current Pending Sector Count (C5) shows sectors that the drive cannot read reliably. These sectors can contain parts of the Master File Table (MFT), which may lead to file system corruption.
- Offline Uncorrectable Sector Count (C6) counts sectors that remain unreadable even after recovery attempts. Non-zero values often accompany MFT errors, missing files, and RAW partitions.
- Reported Uncorrectable Errors (BB) records read errors that the drive could not correct. An increasing count may indicate that important file system structures, including the MFT, are at risk.
Multiple non-zero values in these attributes often suggest that physical disk issues contributed to the MFT corruption. In that situation, create a backup or disk image as soon as possible and focus on data recovery before attempting repairs.
Step 2: Create a Backup (Optional)
We recommend creating a backup before any recovery or repair attempts, especially if the S.M.A.R.T. values checked in the previous step show warning signs or the drive exhibits symptoms of hardware problems, such as pending sectors, uncorrectable errors, unusual noises, repeated disconnections, or extremely slow read speeds. Every scan, repair attempt, or file copy operation places additional stress on the drive. A backup preserves the current state of the disk, which can be invaluable if the drive’s condition deteriorates during the recovery process.
For this guide, we will use Disk Drill for both backup creation and data recovery. This approach keeps the entire process in one application and eliminates the need to switch between multiple tools. Disk Drill’s byte-to-byte backup feature creates a complete image of the drive, including deleted data, file system metadata, and damaged areas that remain readable. Once the image is created, you can scan the backup instead of the original drive, which reduces wear on the disk and allows you to repeat recovery attempts without risking further damage.
Here is how to use Disk Drill to create a backup:
- Download Disk Drill for Windows from the official website and install it.
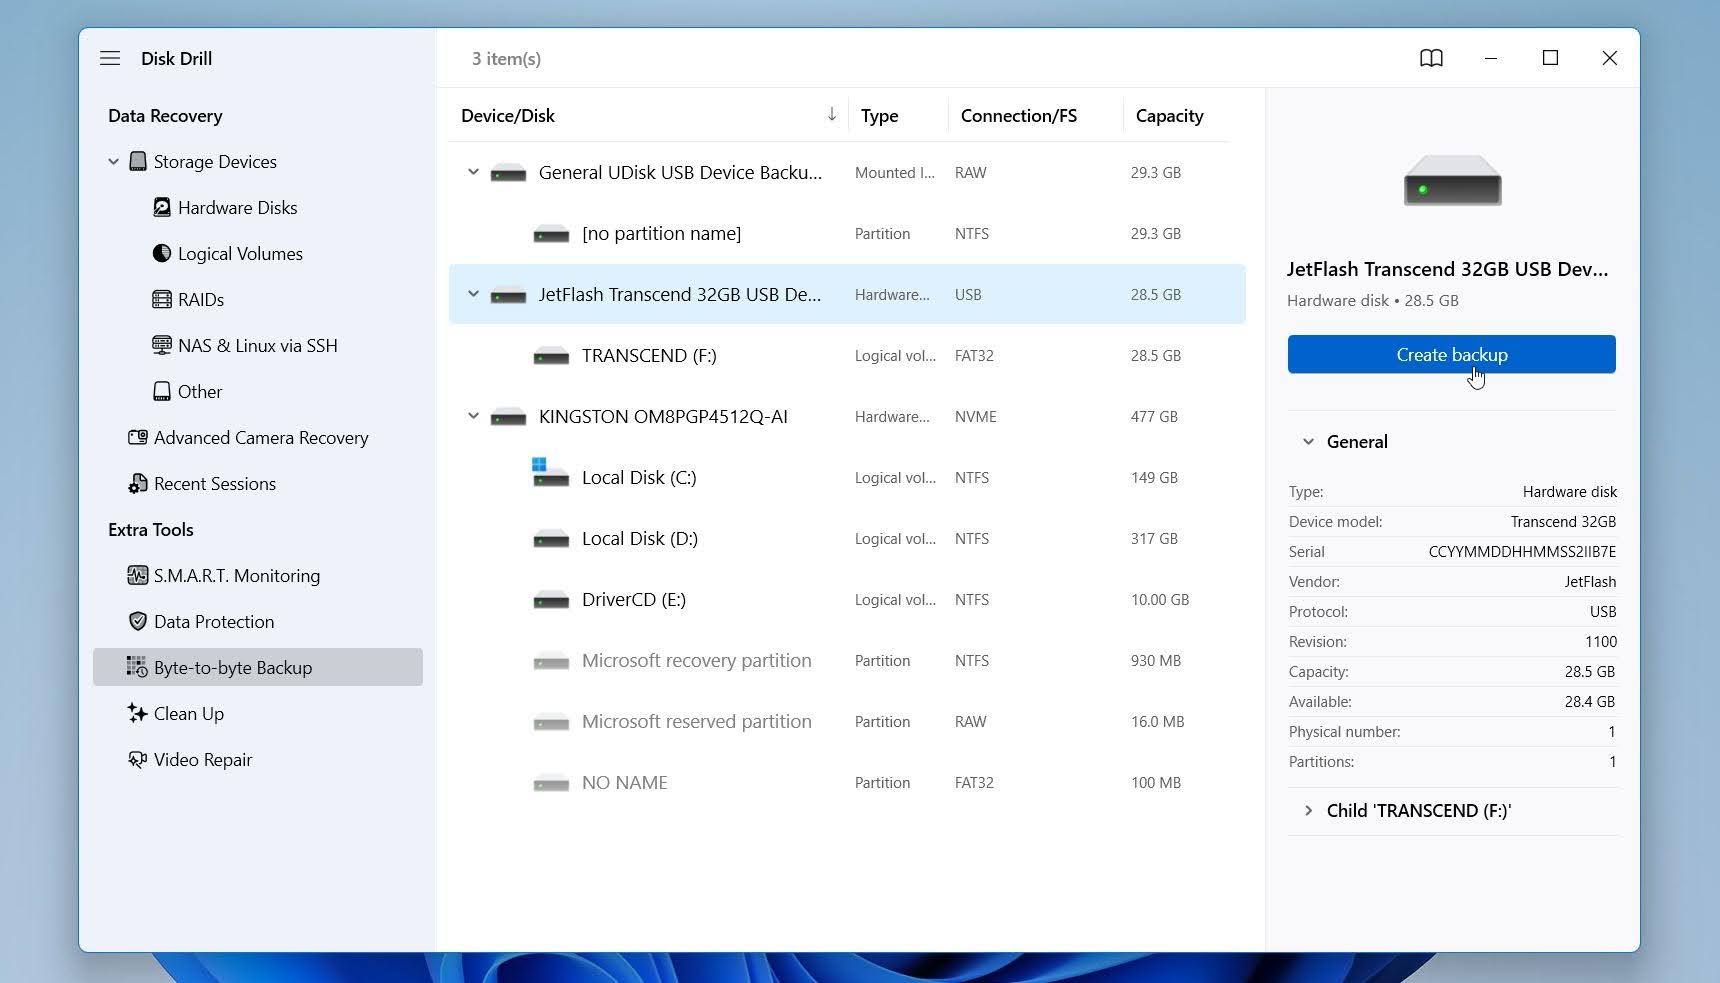
- Launch Disk Drill and open the Byte-to-byte Backup section from the sidebar.
- Select the drive with the corrupt MFT and click Create backup.
- Choose a safe destination for the backup file. Use another internal drive or an external drive with enough free space. Do not save the backup to the same damaged drive.
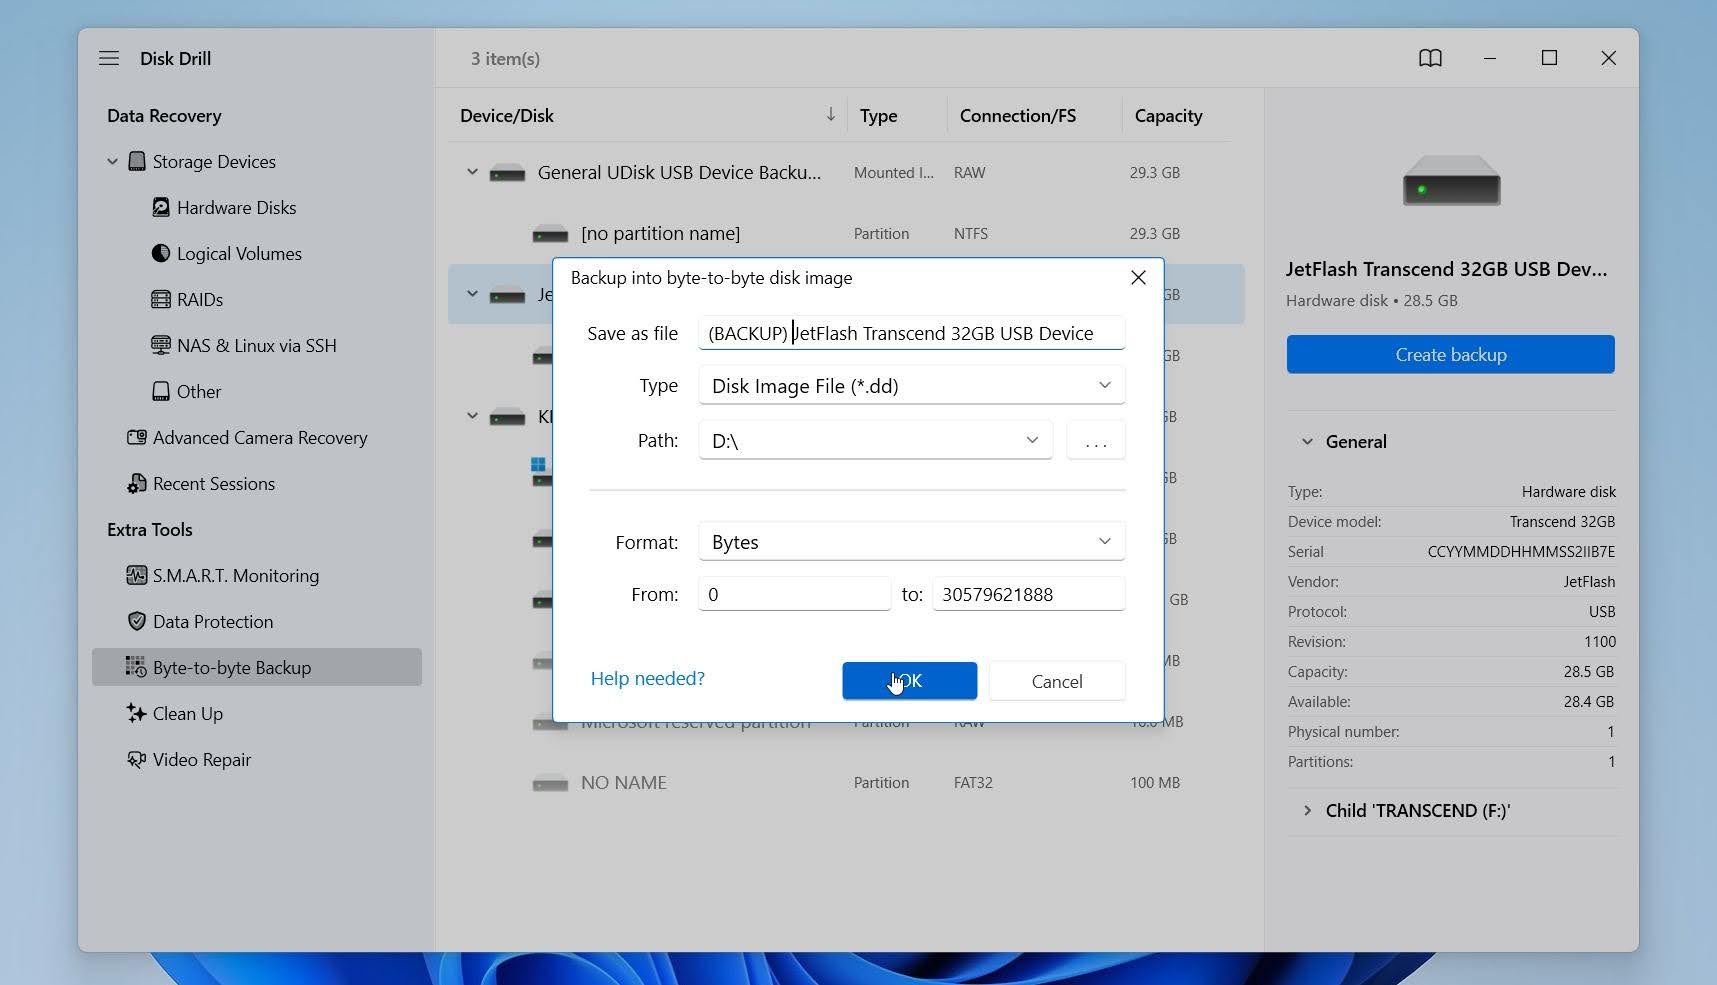
- Click OK and wait for Disk Drill to create the backup. The process may take time depending on the drive size and condition.
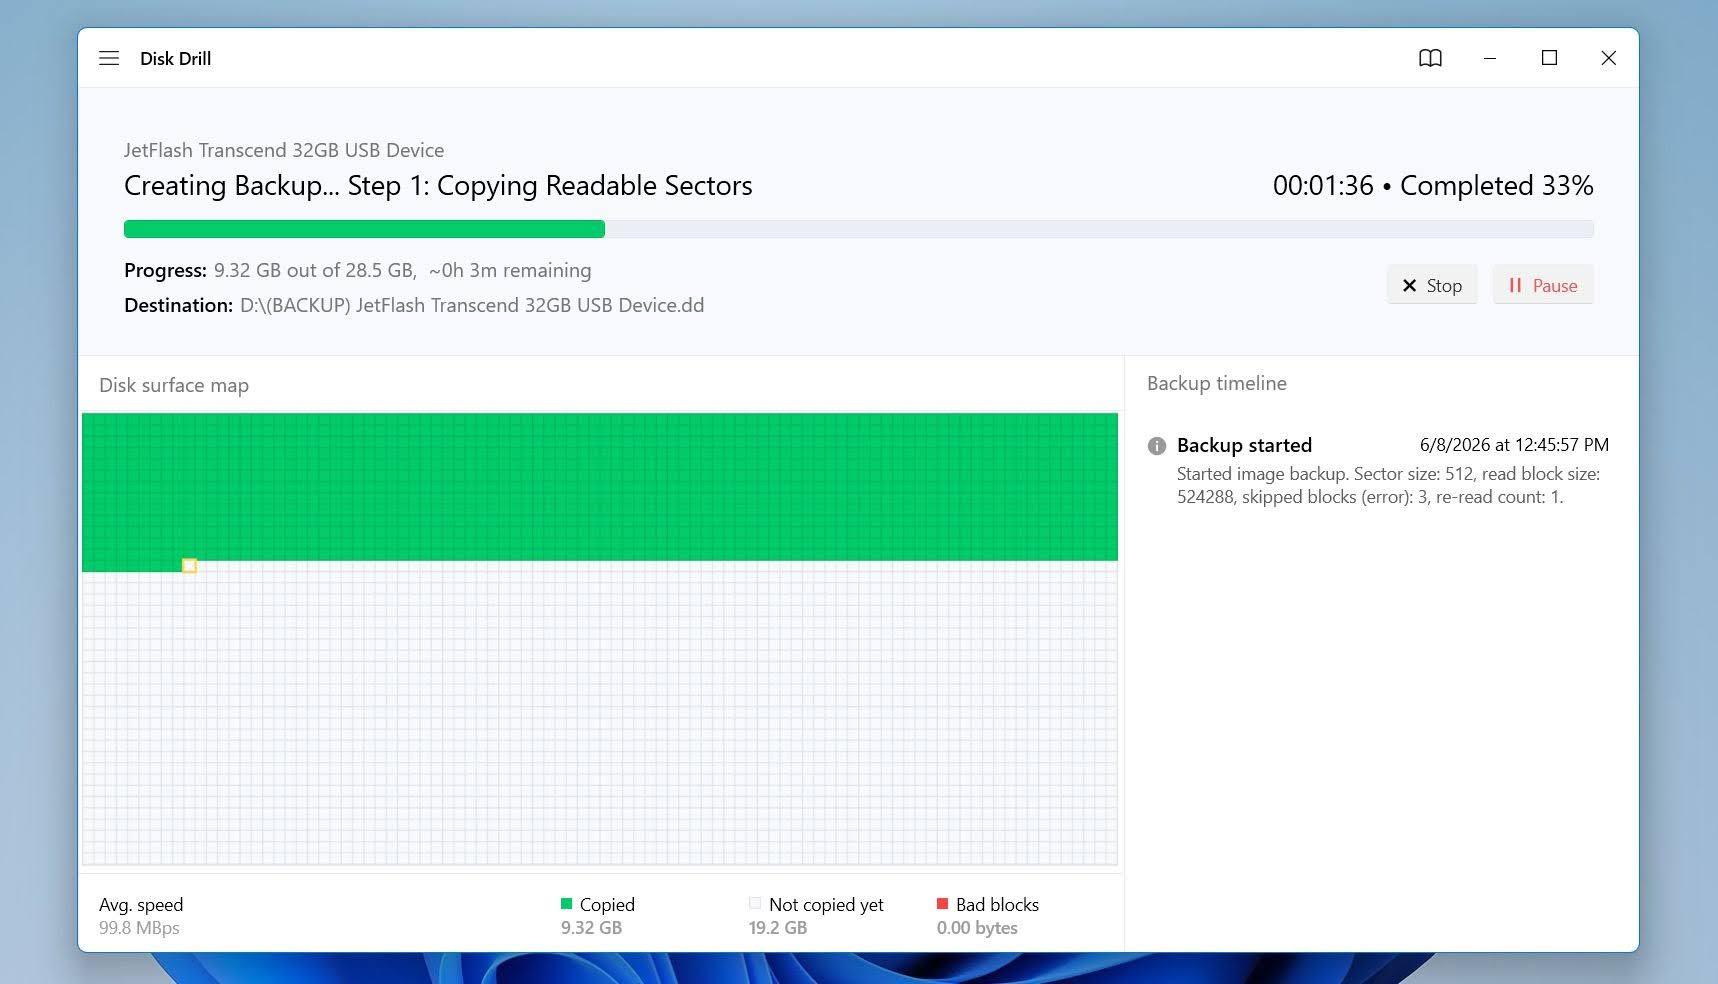
- After the backup is complete, disconnect the original drive if it is external. If it is an internal drive, avoid using it further.
Once the backup is ready, proceed to the recovery stage. If the drive’s condition worsens or it becomes inaccessible later, you will still have a complete copy available for further recovery attempts.
If the backup process becomes extremely slow, repeatedly stalls, or the drive disconnects during imaging, stop immediately. These are common signs of physical failure, and continued attempts may worsen the damage. In such cases, professional data recovery services are usually the safer option.
Step 3: Recover Your Files
With the preparation complete, it’s time to search for recoverable data. Disk Drill can scan both physical drives and disk images, so the recovery steps remain almost identical regardless of whether you created a backup in the previous step.
Here is how to recover files with data recovery software:
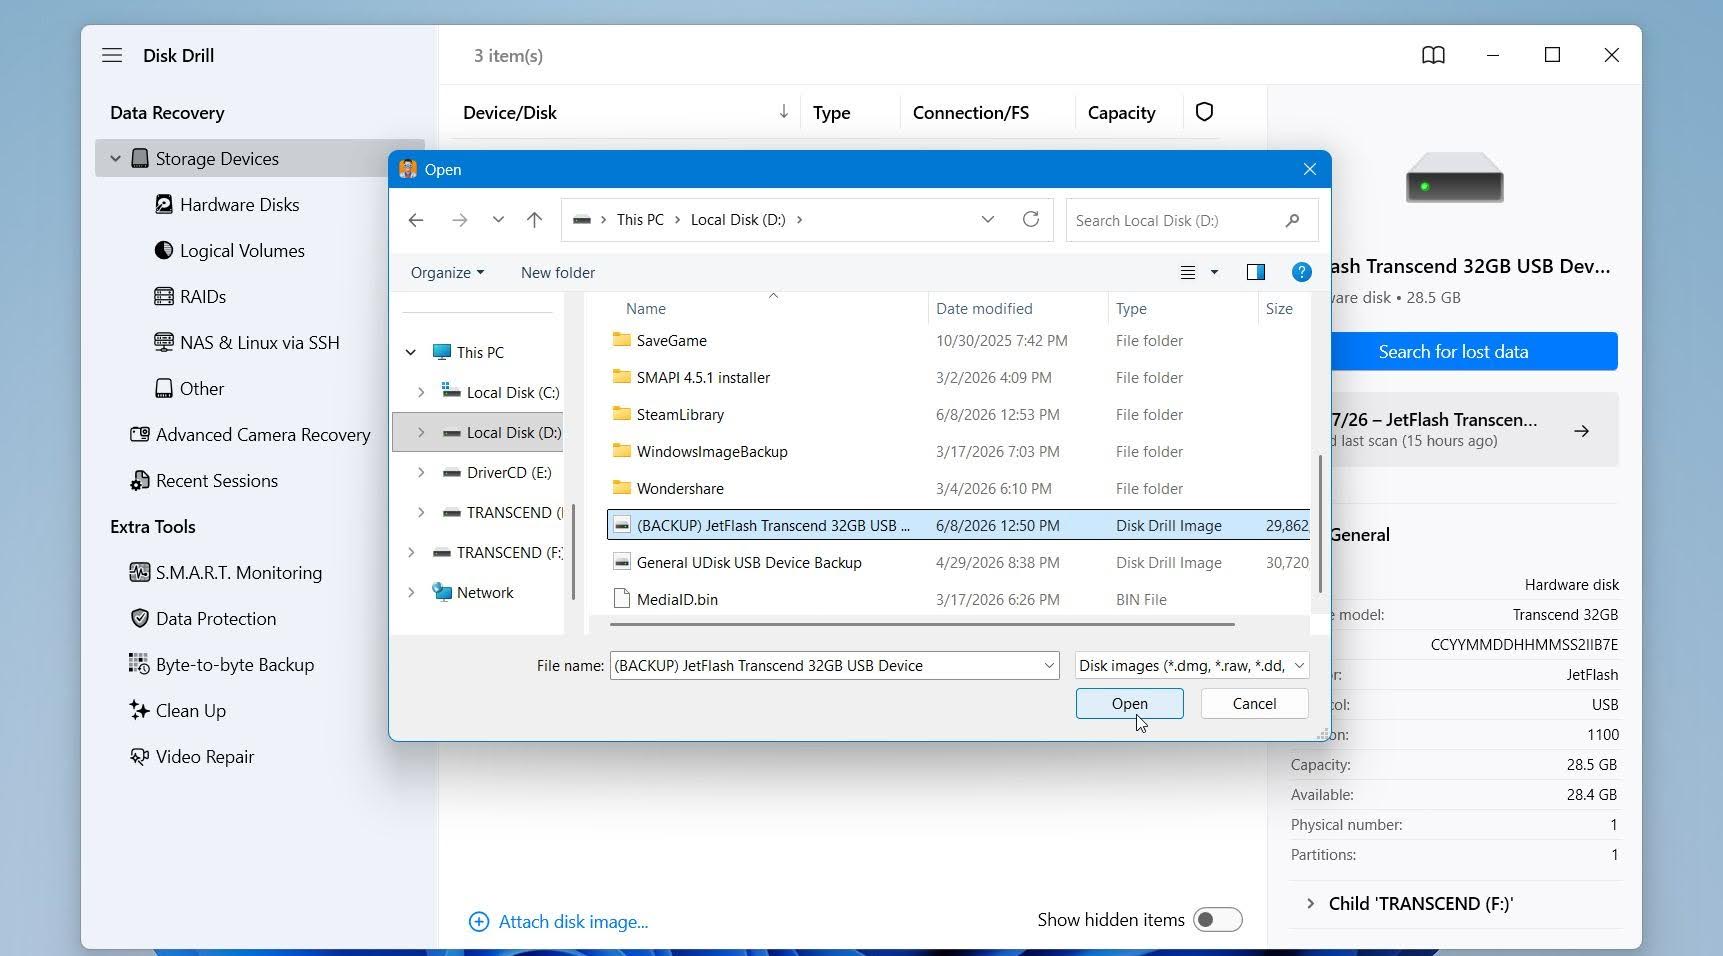
- Return to Disk Drill and click Attach disk image. If you did not create a backup, simply select the affected drive from Disk Drill’s device list instead.
- Select the backup image file you created.
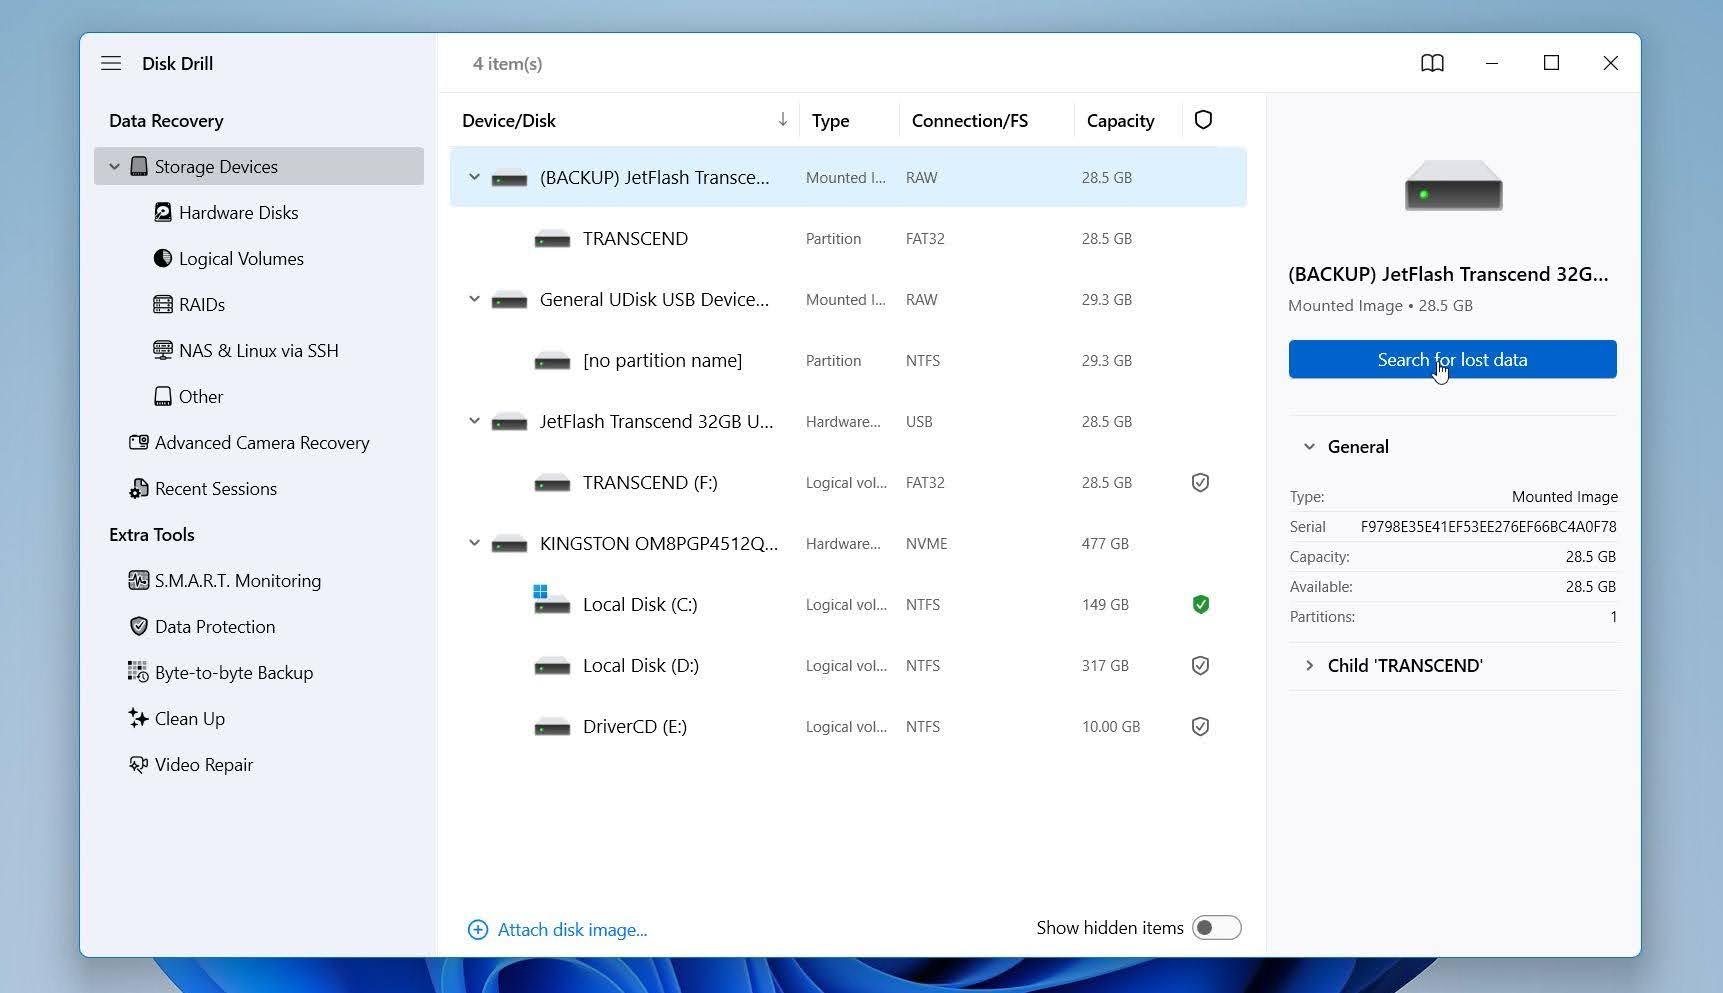
- Choose the attached disk image in Disk Drill and click Search for lost data.
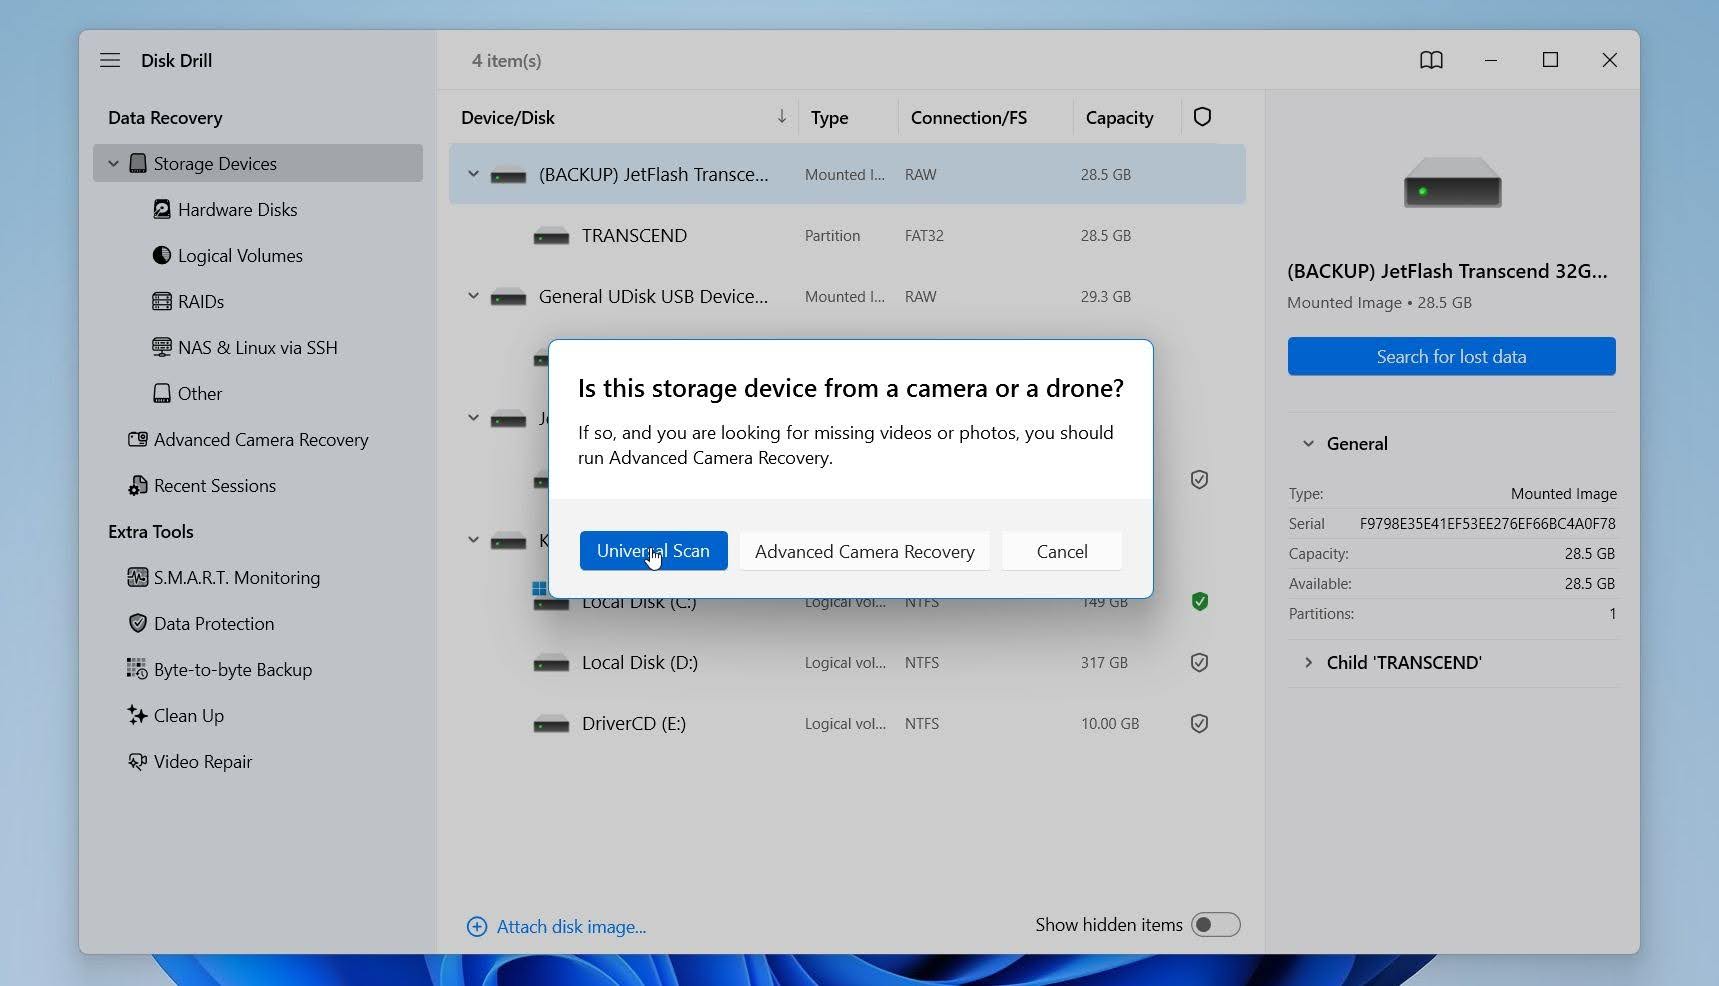
- Disk Drill may prompt you to choose a scan mode. In the case of MFT corruption, select Universal Scan.
- Wait for the scan to finish, then click Review found items.

- Preview the files you want to recover. Select the files and click Recover.
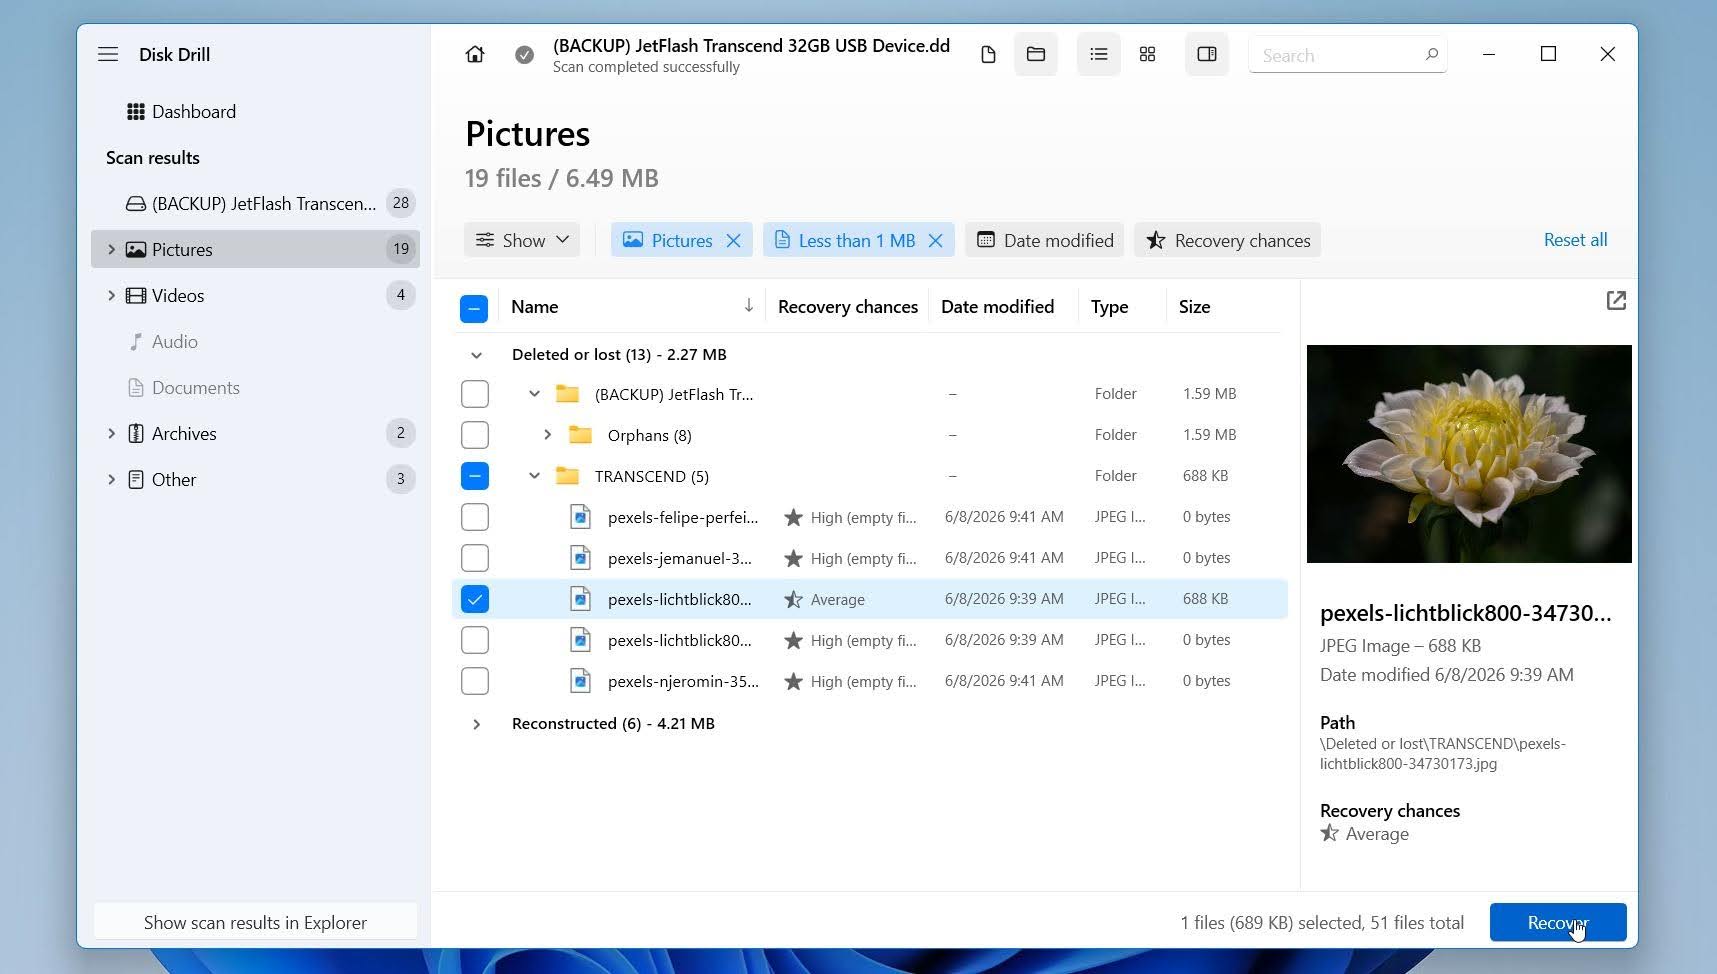
- Choose a safe recovery location on another drive. Never restore recovered files to the same drive with the corrupt MFT.
Disk Drill for Windows lets you scan and preview recoverable files for free. It also allows you to recover up to 100 MB of data without a license, which is useful for testing recovery results before you decide whether to upgrade.
Why Disk Drill? We chose Disk Drill for this guide because it combines backup creation, recovery, and drive health monitoring in a single application. In our testing, it delivered strong recovery results in various scenarios of file system corruption and supports a wide range of storage devices and file systems. If you’d like to learn more about its features, limitations, and test results, check out our full Disk Drill review.
Once your data is recovered or backed up, you can proceed with the repair methods below.
How to Fix a Corrupt MFT
We’ve compiled several methods that can help you repair a corrupted master file table. In case you notice that your hard drive is physically damaged or is not detected by your PC at all (even in Disk Management), we recommend that you stop using the drive and contact a professional data recovery service directly if you want to get back data from the drive.
Some methods may require you to create Windows installation media. Here is a guide on how to do this.
Method 1: Use CHKDSK from Recovery Mode
CHKDSK is Windows’ built-in disk repair utility. It can detect and repair file system errors, recover readable information from damaged sectors, and fix some types of MFT corruption. While you can run CHKDSK from a normal Command Prompt, the Windows Recovery Environment (WinRE) is often worth considering when the affected volume is the system drive or when corruption prevents Windows from accessing the partition properly.
When CHKDSK runs from WinRE, Windows is not actively using the drive, which reduces the chance of interference from running processes and allows the utility to work with system partitions that may be difficult to repair while the operating system is running. This can be particularly helpful when file system damage affects the Windows installation itself.
To run CHKDSK in Recovery Mode:
- Open the Start menu, click Power, hold Shift, and select Restart.
- Select Troubleshoot > Advanced options > Command Prompt.
- In Command Prompt, type:
chkdsk X: /r - Replace X with the drive letter of the affected volume.
- Press Enter and wait for the scan to complete.
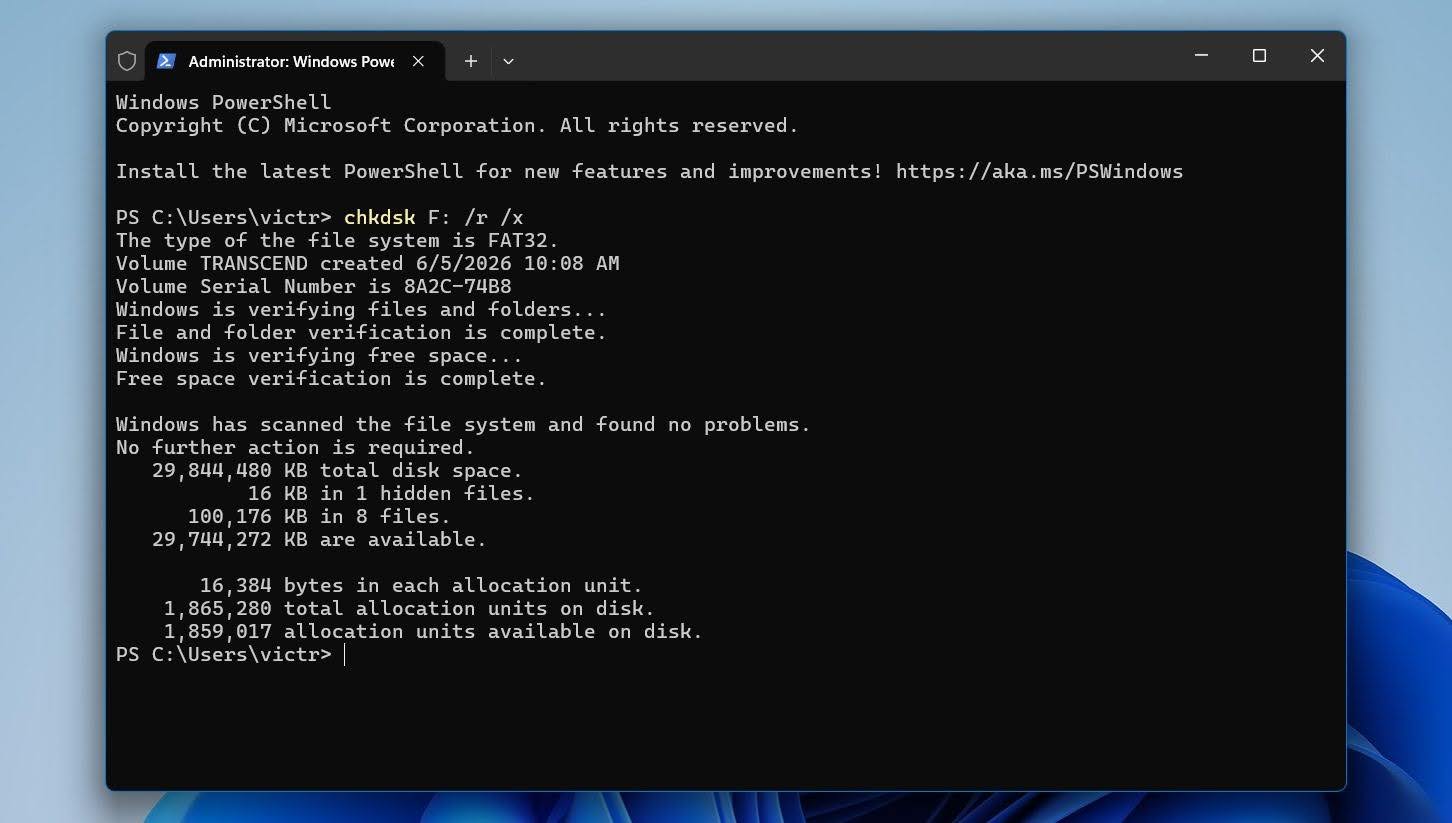
The /r parameter instructs CHKDSK to locate bad sectors and recover readable data.
Method 2: Repair File System Errors Through Windows Tools
Windows includes another built-in tool that can detect and fix certain file system errors. While it uses some of the same repair mechanisms as CHKDSK, it provides a simpler interface and may be easier for less experienced users.
To check the drive for errors using Windows Error Checking:
- Open File Explorer.
- Right-click the affected drive and select Properties.

- Open the Tools tab.
- Under Error checking, click Check.

- Follow the on-screen instructions and allow Windows to scan the drive.
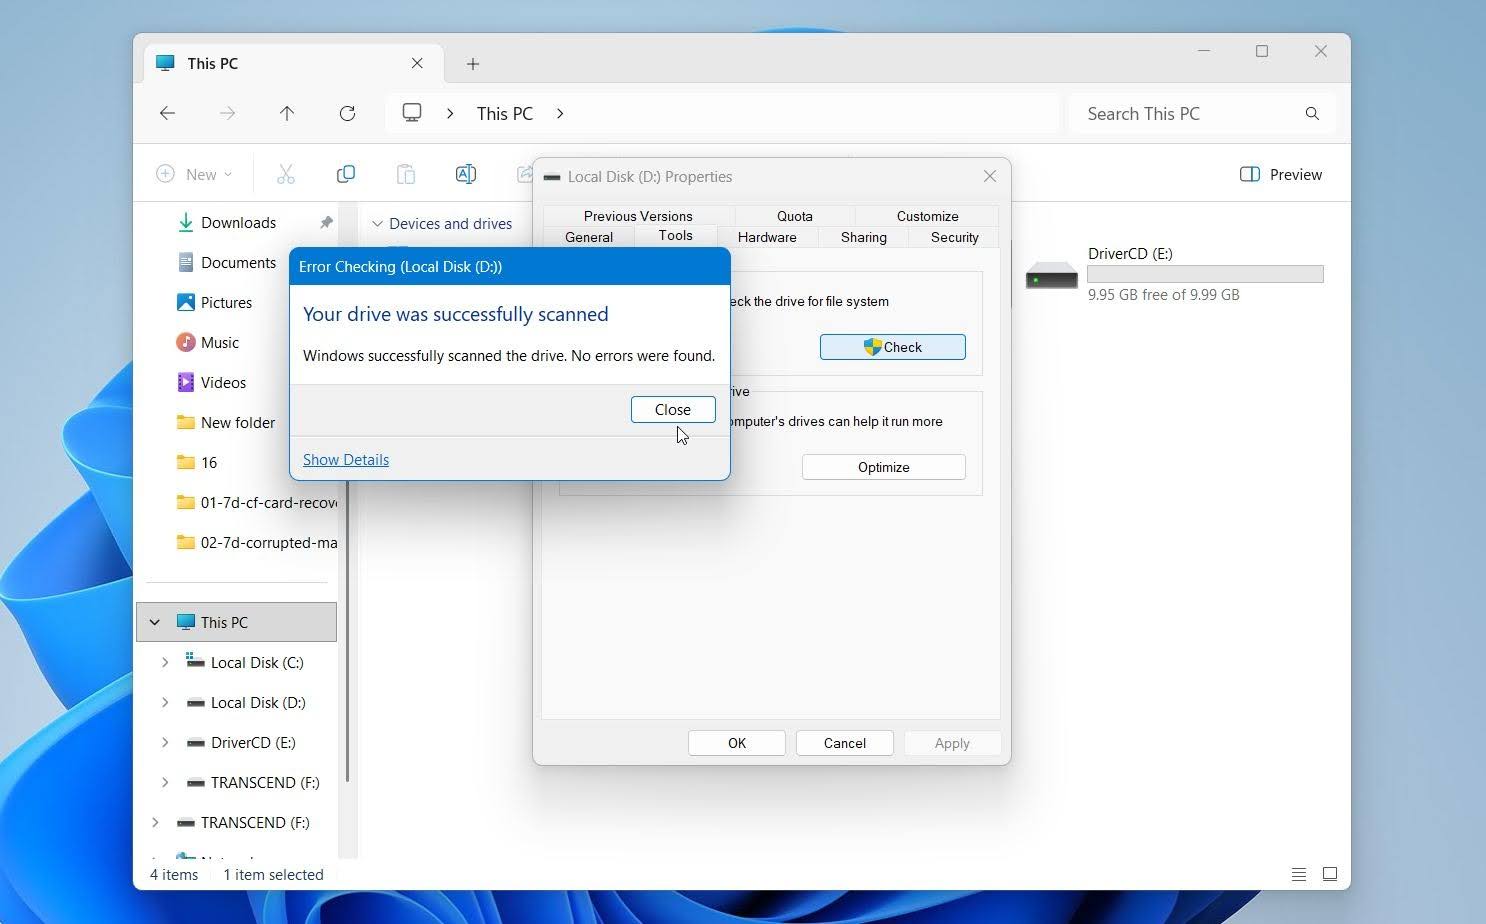
If Windows finds file system problems, it may prompt you to repair the drive. After the process finishes, restart your computer and verify whether the drive is accessible.
This method is most useful for minor file system corruption. If Windows continues to report MFT-related errors after the scan, proceed to the next repair option.
Method 3: Repair the MFT Using TestDisk
If CHKDSK and other methods cannot repair the corrupt MFT, you can try TestDisk, a free partition and file system repair utility. On NTFS volumes, the file system keeps a backup of the Master File Table called MFTMirr. TestDisk can compare the main MFT with this mirror and attempt to rebuild the damaged MFT.
The tool doesn’t have a GUI, so follow these instructions carefully:
- Download TestDisk and extract the contents of the archive.
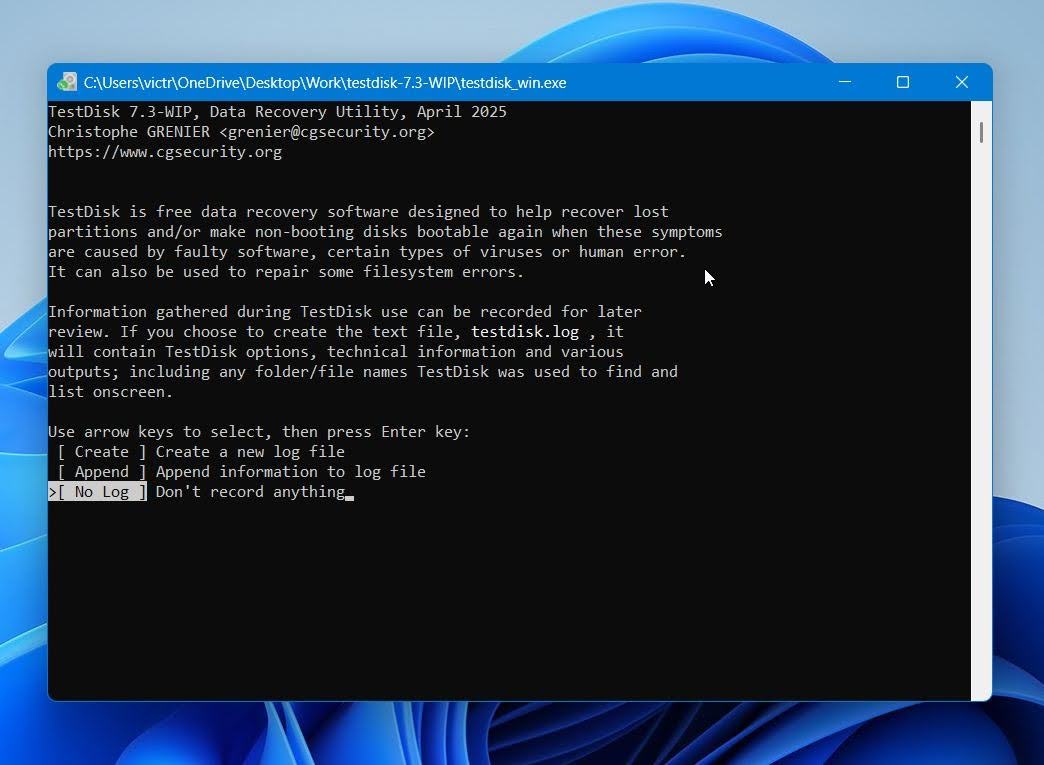
- After extraction, run the testdisk_win.exe file.
- Decide whether you want to create a log file or not. Use the Arrow keys to highlight the relevant option, and press Enter to confirm.
- Select the drive with the NTFS volume and select Proceed.
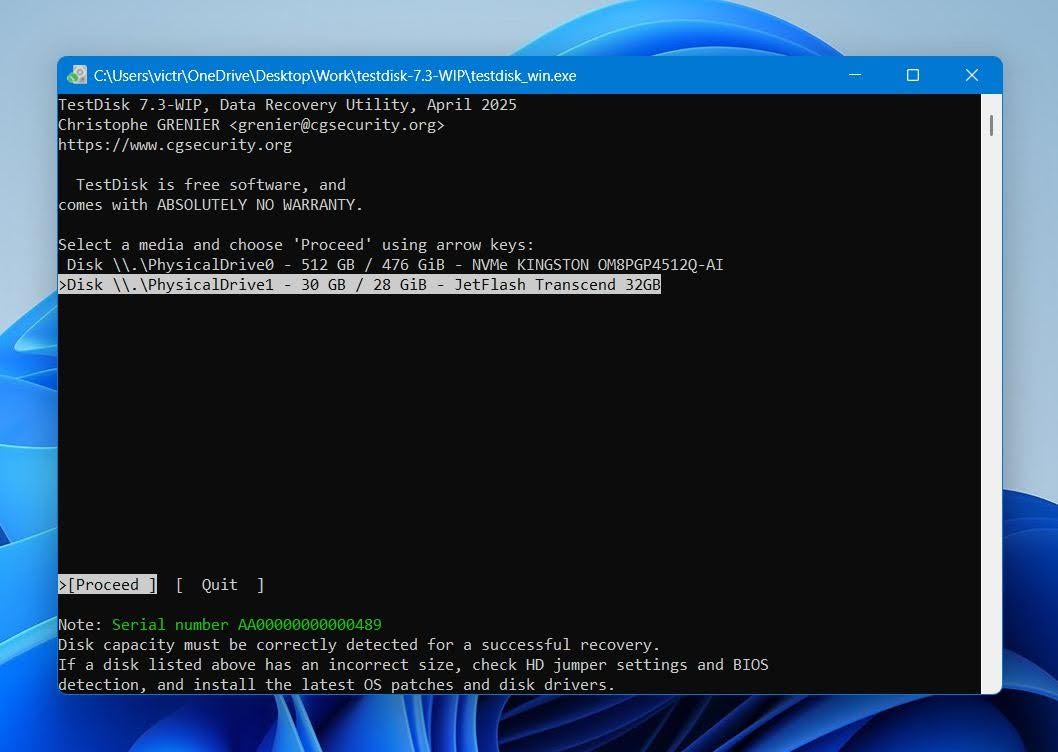
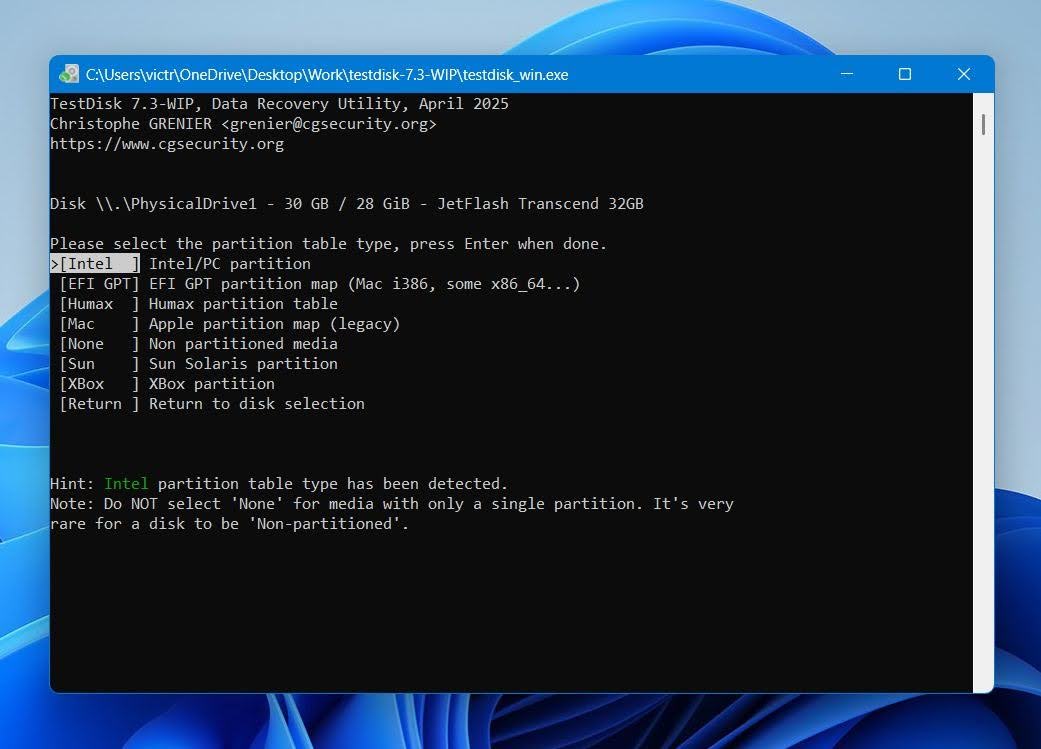
- Select the partition table type. It’s best to simply press Enter on this screen since TestDisk automatically detects the partition table.
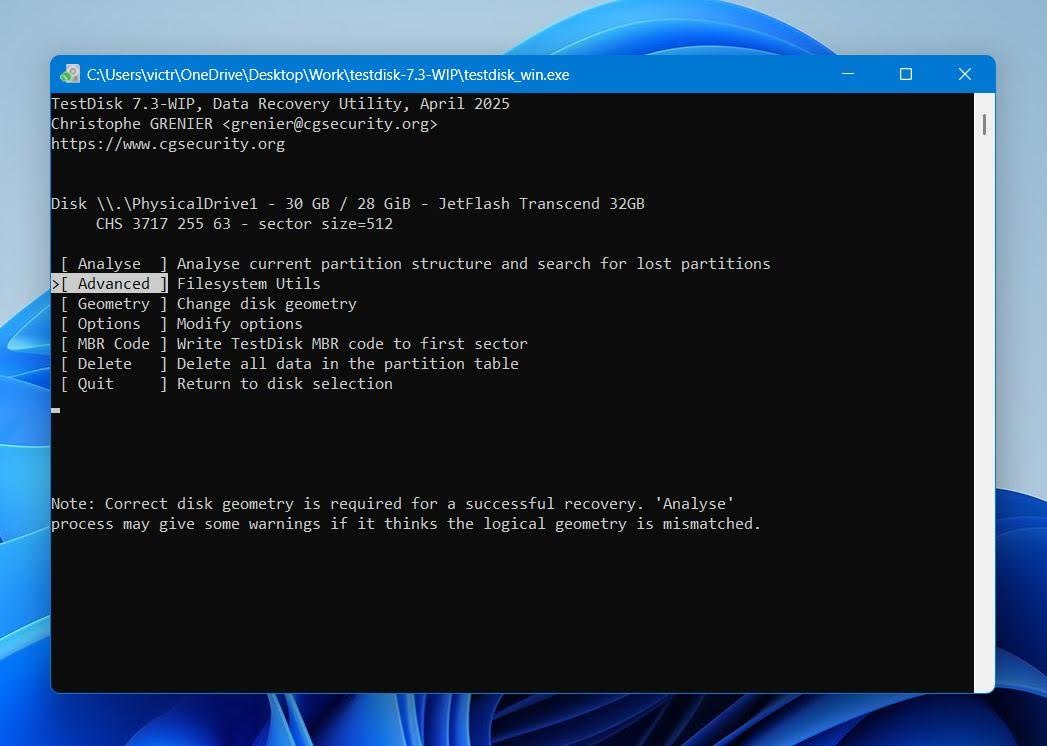
- Highlight Advanced and press Enter.
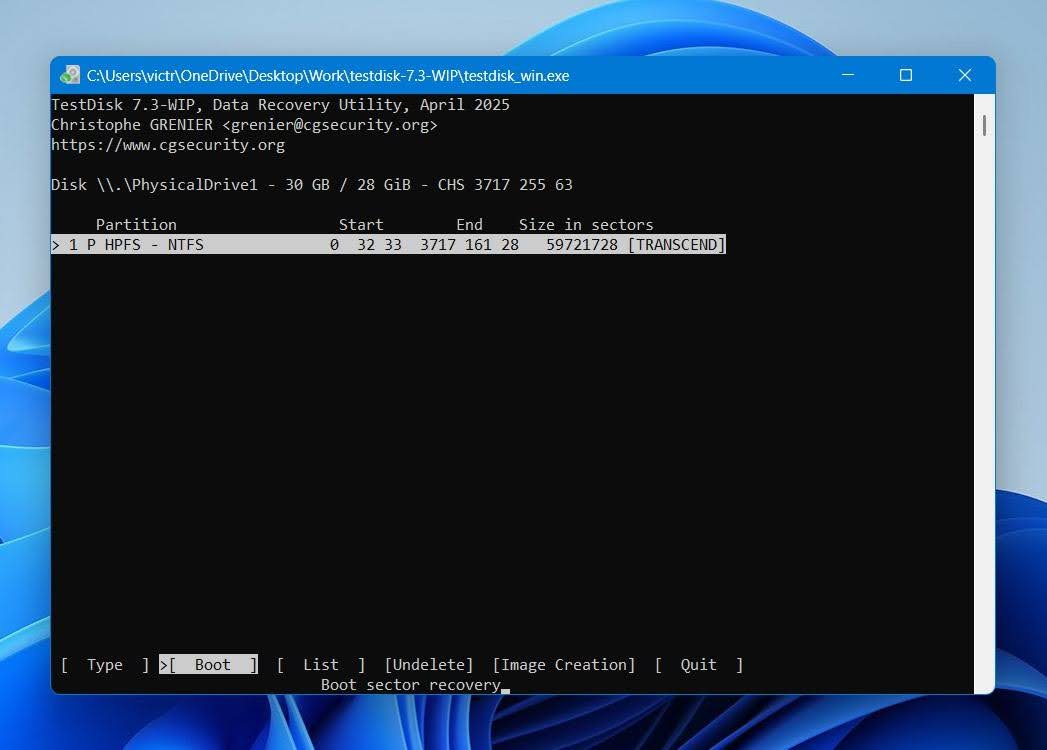
- Choose the NTFS partition using the Up and Down arrow keys, then select the Boot option and press Enter.
- Select the Repair MFT option and press Enter.
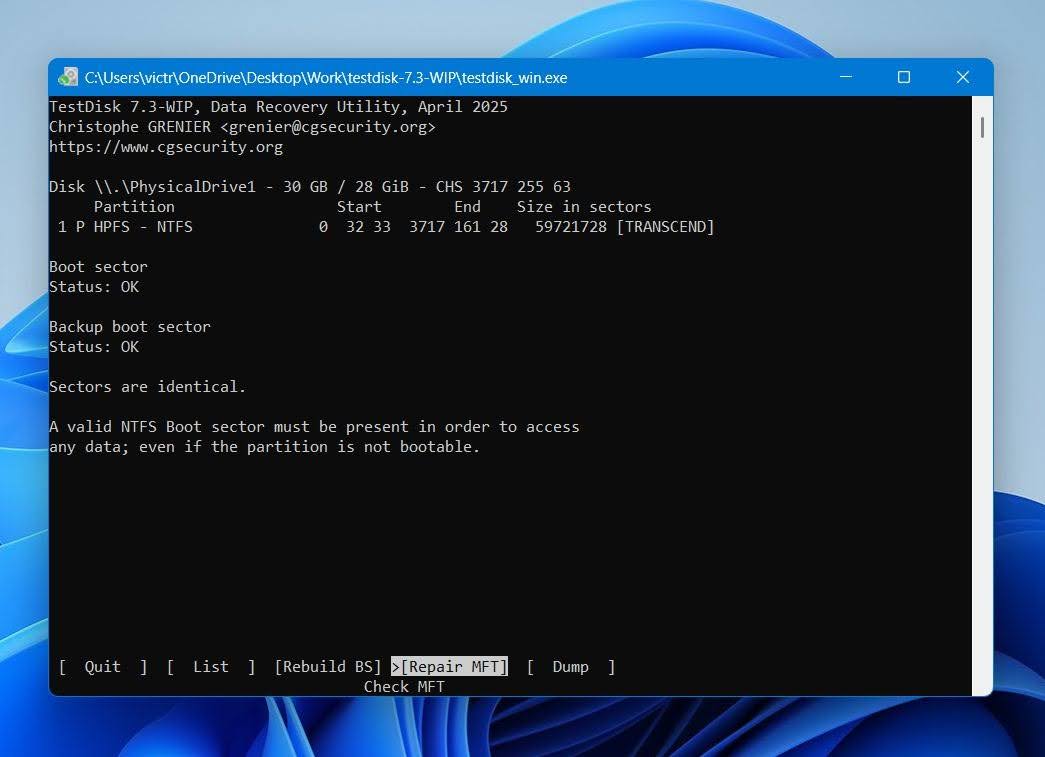
TestDisk will restore the master file table. However, if both the main MFT and MFTMirr are damaged, it won’t be able to fix the issue.
Method 4: Format the Drive After Recovering Data
If your drive is in good physical condition and none of the methods above worked for you, it’s best that you format it. This will repair the corrupt master file table at the cost of erasing all your data. That’s why it’s best to recover your data before proceeding with this fix.
If the MFT issue appears on a system drive, you’ll need to use Windows installation media and choose to format the drive on the Windows installation screen. If it’s an external drive or a non-system internal NTFS drive or volume, you can format it using Disk Management:
- Search for “disk management” in Windows Search (Windows Key + S). Click on Create and format hard disk partitions in the search results.
- Right-click on the volume with the corrupt MFT and click on Format.
- Select the format parameters, such as the file system and label. Click on OK.
If the Perform a quick format option was left checked, you can recover data from the drive even after it was formatted. Just make sure that you don’t write many new files to the drive, as it can reduce the chances of a complete recovery.
Final Recommendations
A corrupt Master File Table can make a drive appear inaccessible, but in many cases the data remains recoverable and the file system can be repaired. The most important step is to avoid making changes to the drive until you recover your files or create a byte-to-byte backup. Repair tools such as CHKDSK and TestDisk can help, but they should come after data recovery whenever possible.
We recommend checking the drive’s SMART health before attempting repairs. Recurring MFT corruption, growing numbers of bad sectors, unusually slow performance, clicking noises from an HDD, or frequent disconnections often indicate an underlying hardware problem rather than a simple file system issue.
For data recovery, Disk Drill is one of the best options available for Windows users. It can recover files from drives with MFT corruption, scan RAW partitions, and create byte-to-byte backups that allow you to work with a copy instead of the original drive. This approach is especially valuable when the drive shows signs of instability.
Finally, don’t ignore the warning signs that led to the corruption in the first place. Keep regular backups, safely eject external drives, monitor drive health periodically, and replace storage devices that continue to develop file system errors. These simple precautions can prevent a future MFT issue from turning into permanent data loss.


