
Does your hard drive say it’s full but isn’t, and you don’t understand where all the space went? In most cases, this happens because of hidden or temporary files, system files, old backups, malware, file system corruption, or drive errors. These causes can apply differently depending on whether the problem affects your system drive, another internal disk, or an external drive.
That’s why, in this guide, we tried to collect methods for different situations – when your C drive is full for no reason, when your other hard disk is full, but no files are visible, or when your external hard drive shows full but empty. This way, you can better understand what caused the problem in your case and what to do next.
Why Hard Drive Says It’s Full When It Is Not
There are several reasons why Windows may show that your hard drive is full even when no obvious files are visible. The best way to find the real cause is to check them one by one. However, if you already suspect what caused the problem, you can use the table below to jump straight to the most relevant method:
| Reason | Where it usually applies | Why it makes the drive look full | What to do |
| 🦠 Malware attack | System drive, internal drives, external drives | Malware can create hidden junk files, change file attributes, or fill the drive with data that is not easy to see in File Explorer. | Run a malware scan with Windows Defender or another antivirus tool |
| 🗂️ Temporary files and cache | Mostly C drive | Temporary files, app cache, update leftovers, and similar system data can accumulate over time and make the C drive full for no reason. | Delete temporary files from the Temp folder and Windows cleanup tools |
| 🗑️ Recycle Bin data | Internal drives, external drives | Deleted files may still take up space until the Recycle Bin is cleared, so the drive may look full even after you removed files manually. | Empty the Recycle Bin |
| 📂 Hidden files or folders | System drive, internal drives, external drives | Files can be hidden by Windows, apps, malware, or the user, which can create the “hard disk full but no files” situation. | Show hidden files and check the drive contents again |
| 🧩 Too many files or large folders | System drive, internal drives, external drives | The drive may actually contain too much data, but it may be spread across many folders and hard to spot without a cleanup map. | Analyze storage usage and remove large unnecessary files |
| 🛠️ System restore points and previous Windows installations | Mostly C drive | Restore points, Windows.old, WinSxS, and update-related system files can occupy a lot of space after updates or system changes. | Remove old restore points and Windows installation files |
| 📄 CBS logs and other system logs | Mostly C drive | Large Windows log files, especially in the CBS folder, can grow unexpectedly and take up disk space without being obvious. | Delete old CBS logs and other oversized system logs |
| 🧭 Hidden recovery partition with a drive letter | Mostly internal drives, sometimes external system disks | A recovery partition can appear as a normal drive if Windows assigns it a letter by mistake. Since recovery partitions are usually small and almost full, they can trigger a low disk space warning. | Remove the drive letter from the recovery partition |
| 💿 File system corruption or logical errors | Internal drives, external drives | Corruption can make Windows calculate used and free space incorrectly, so the drive may appear full even when files are missing or invisible. | Run CHKDSK or format the drive |
Before we show you what to do when your disk says it’s full, you should first open Disk Management and check whether your drive reports the correct storage capacity. If the drive shows the correct capacity, you can usually continue with the methods below. But if you see a random storage size, incorrect capacity, or obviously broken values, it’s better to stop there and contact a repair shop or data recovery lab instead. Problems like these are often related to hardware damage, and we don’t recommend dealing with them at home.
Secure Your Files on a Hard Drive Showing Full When It’s Not
Some methods used to fix a hard drive not showing full capacity can potentially lead to data loss. So instead of dealing with data recovery afterward and risking even more problems, it’s better to take care of your important files beforehand. If possible, simply copy valuable data to another storage device. But if you no longer have direct access to your files, you’ll likely need to turn to data recovery software instead.
While researching this topic, we tested quite a few data recovery tools, but Disk Drill ended up being our top pick. It has remarkable recovery capabilities, quick scans, and an approachable user interface. Plus, it comes with a built-in byte-to-byte backup feature, so you can create a full backup and scan that image instead of scanning the original drive directly. This is generally safer, especially if the drive already suffers from corruption or other logical issues.
You can try Disk Drill through its free trial version, which includes all of the app’s features, along with a recovery cap of 100 MB on Windows.
Here’s a quick, step-by-step guide on how to create a backup and recover data using Disk Drill.
- Connect the hard drive that says it’s full to your computer. If possible, avoid downloading or installing recovery software directly onto the affected drive. It’s safer to use another internal drive or an external storage device instead.
- Download and install Disk Drill, then launch it. You’ll see a list of available storage devices on the main screen.
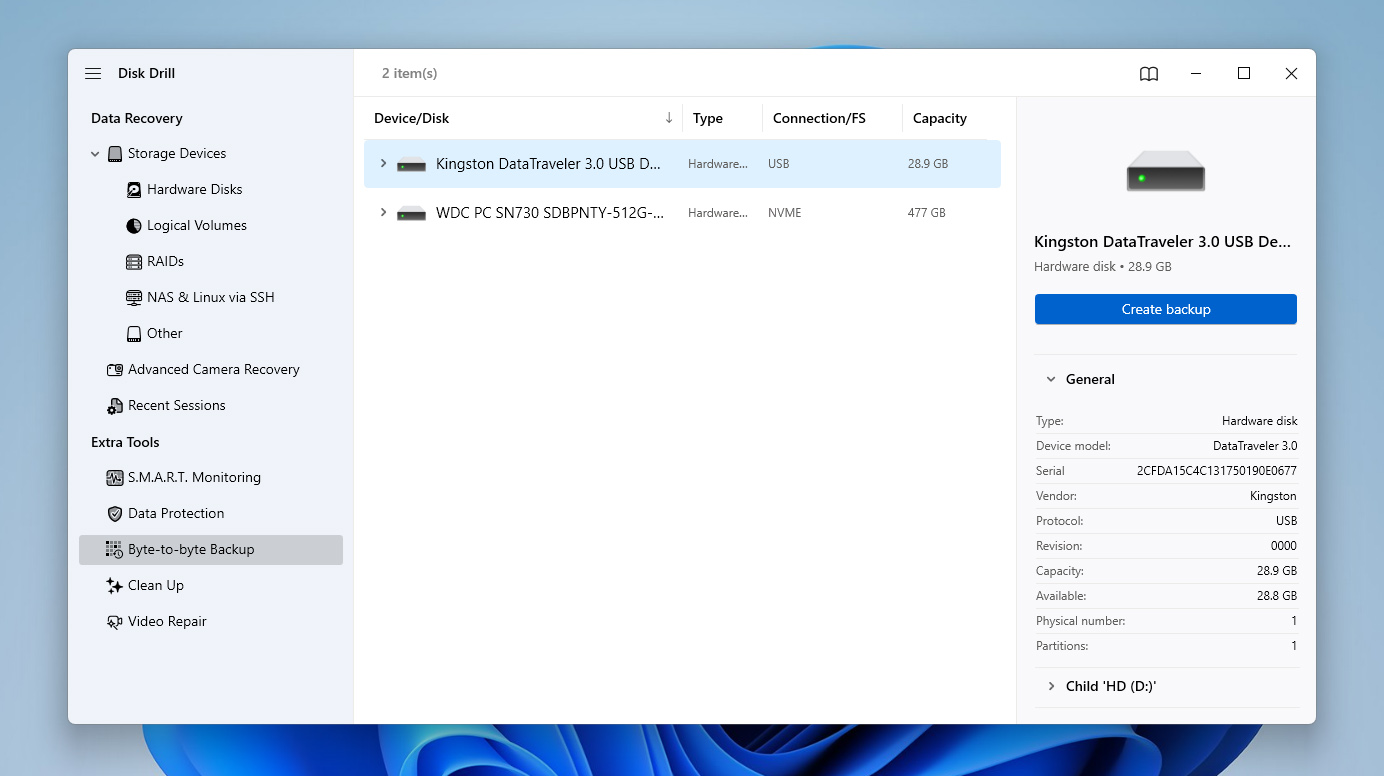
- Open the Byte to Byte Backup feature, select the hard drive from the list, and click Create backup.
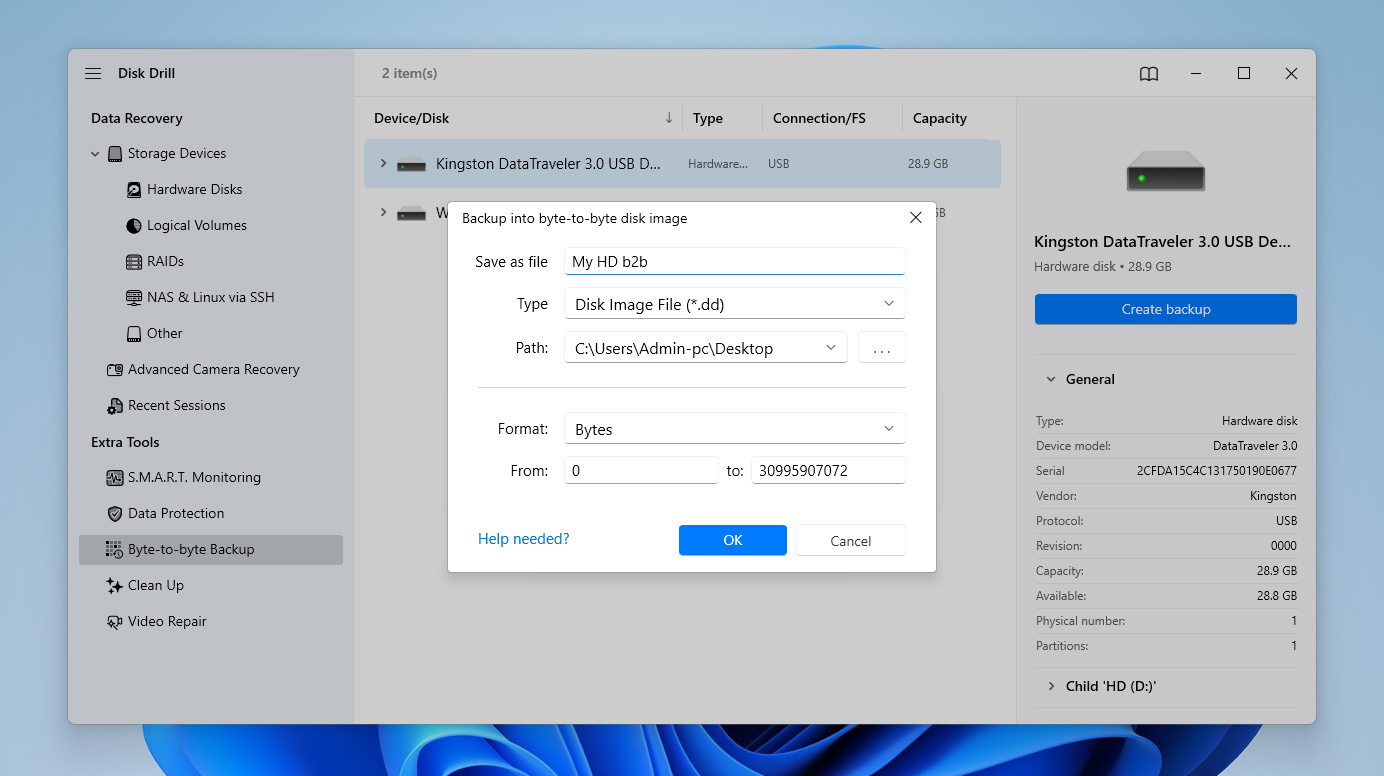
- Choose a name and location for the backup image. It’s best to save it on a different drive with enough free space. Click Ok and wait for the backup process to finish.
At this point, you can stop and start figuring out why your computer says your storage is full when it’s not, then come back to the recovery stage later if something goes wrong during the fixing process. Of course, you can also complete the recovery process right away if you prefer to secure your files in advance.
- Once the backup is ready, return to the main screen and use the option to Attach disk image.
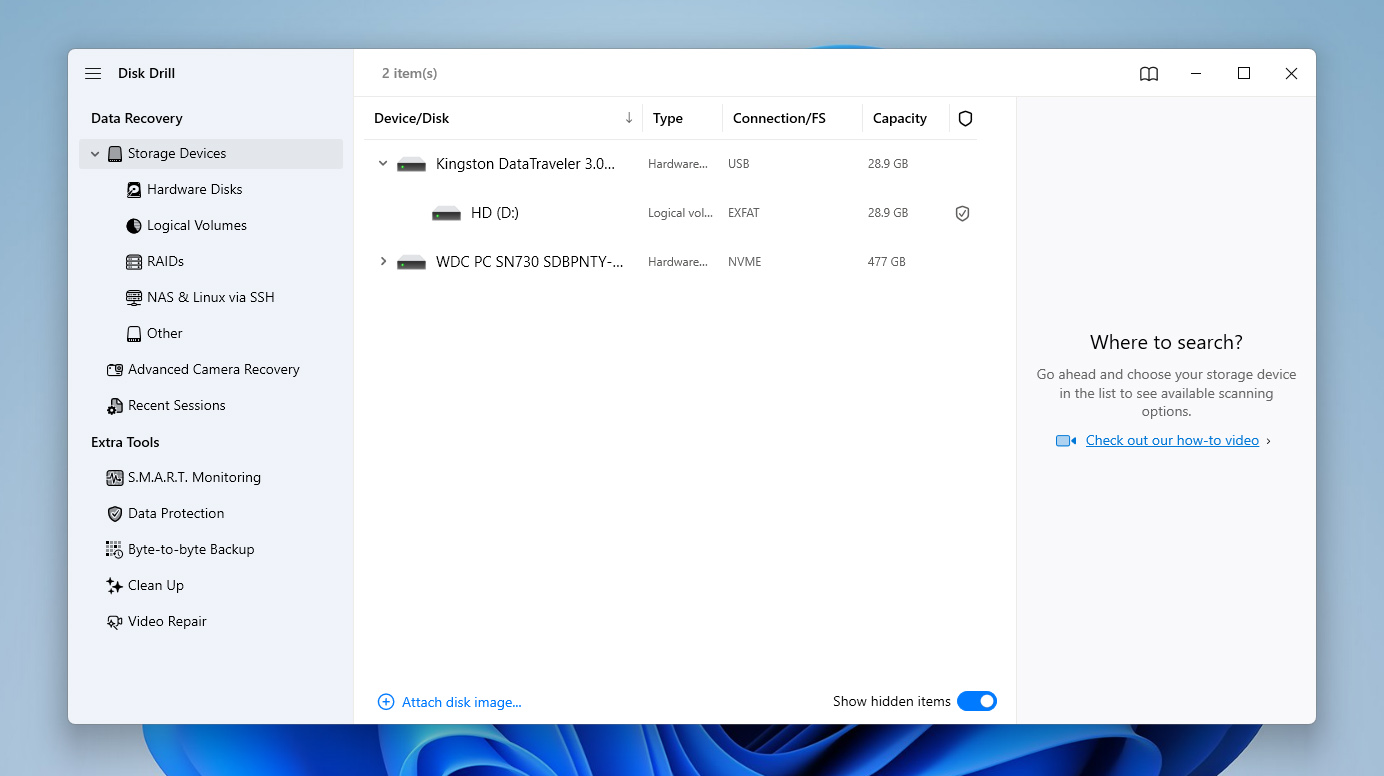
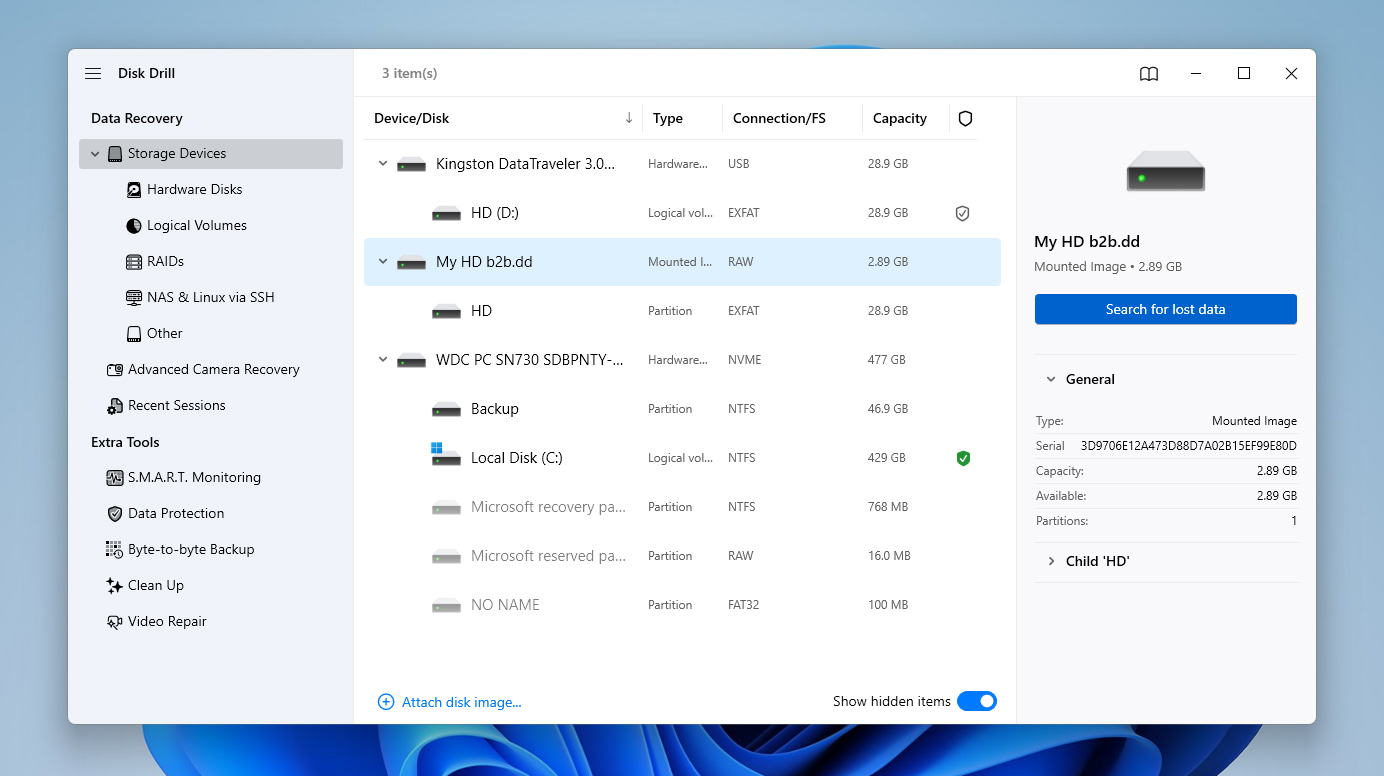
- Select the image file you just created. Select the mounted image from the list and click Search for lost data to begin scanning.
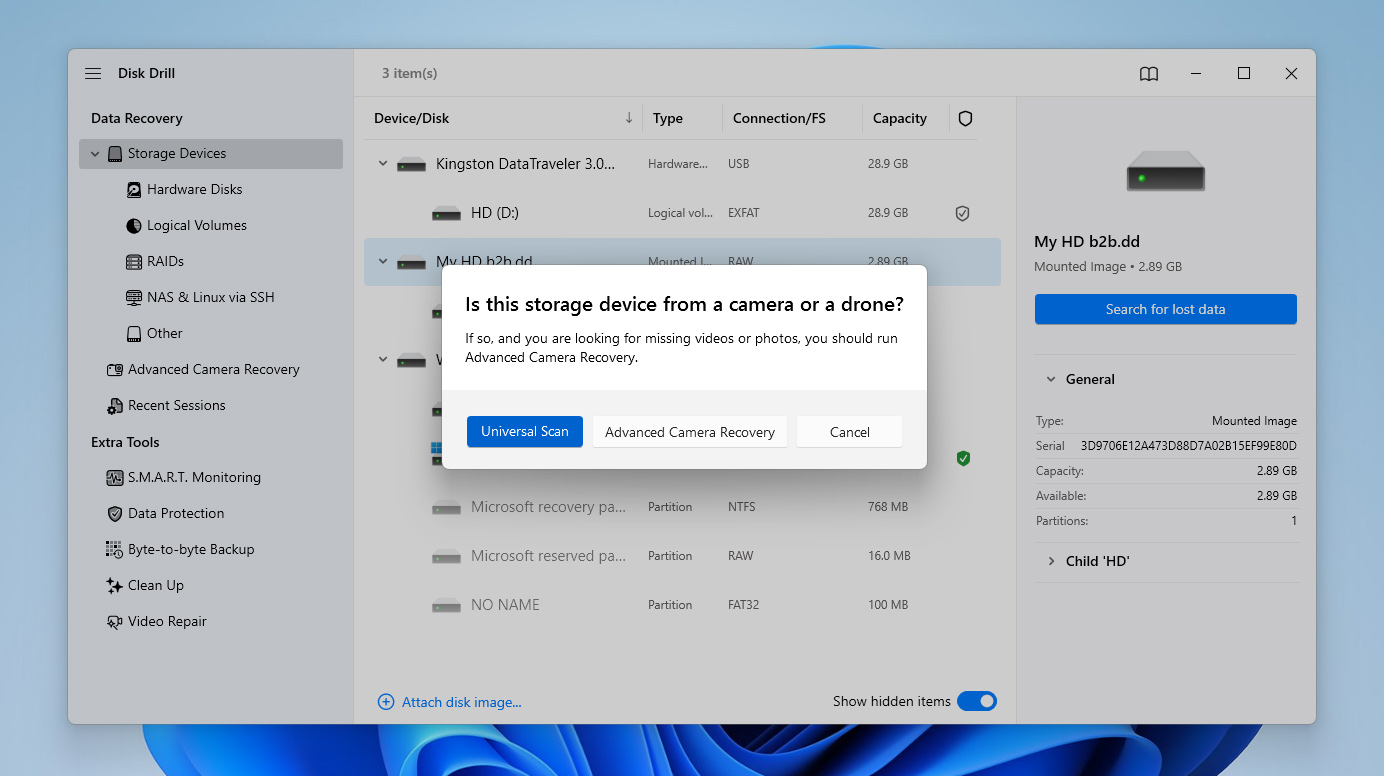
- If prompted, choose Universal Scan. If the hard drive mainly stored footage from a camera or drone, you can later run Advanced Camera Recovery as an additional scan.
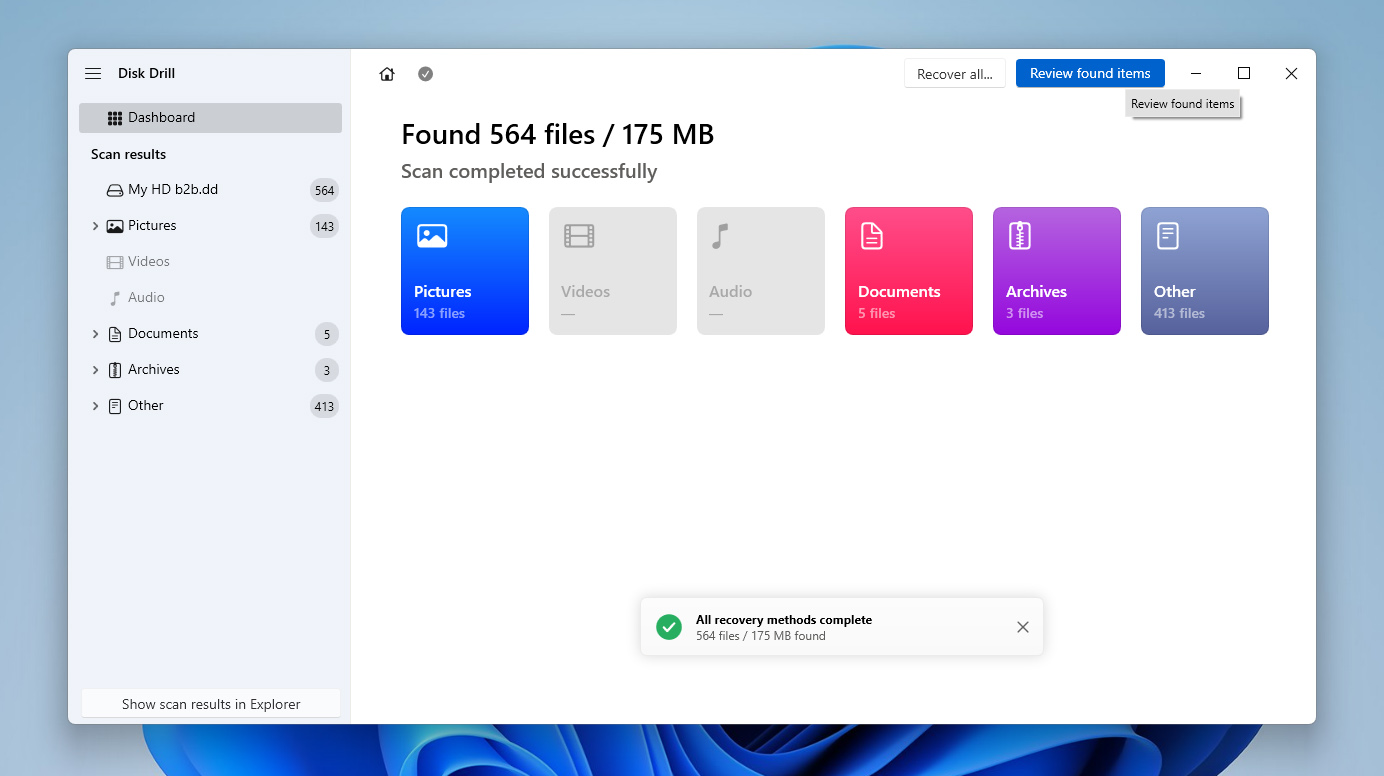
- After the scan completes, click Review found items to check the results, or use Recover all if you want to restore everything at once.
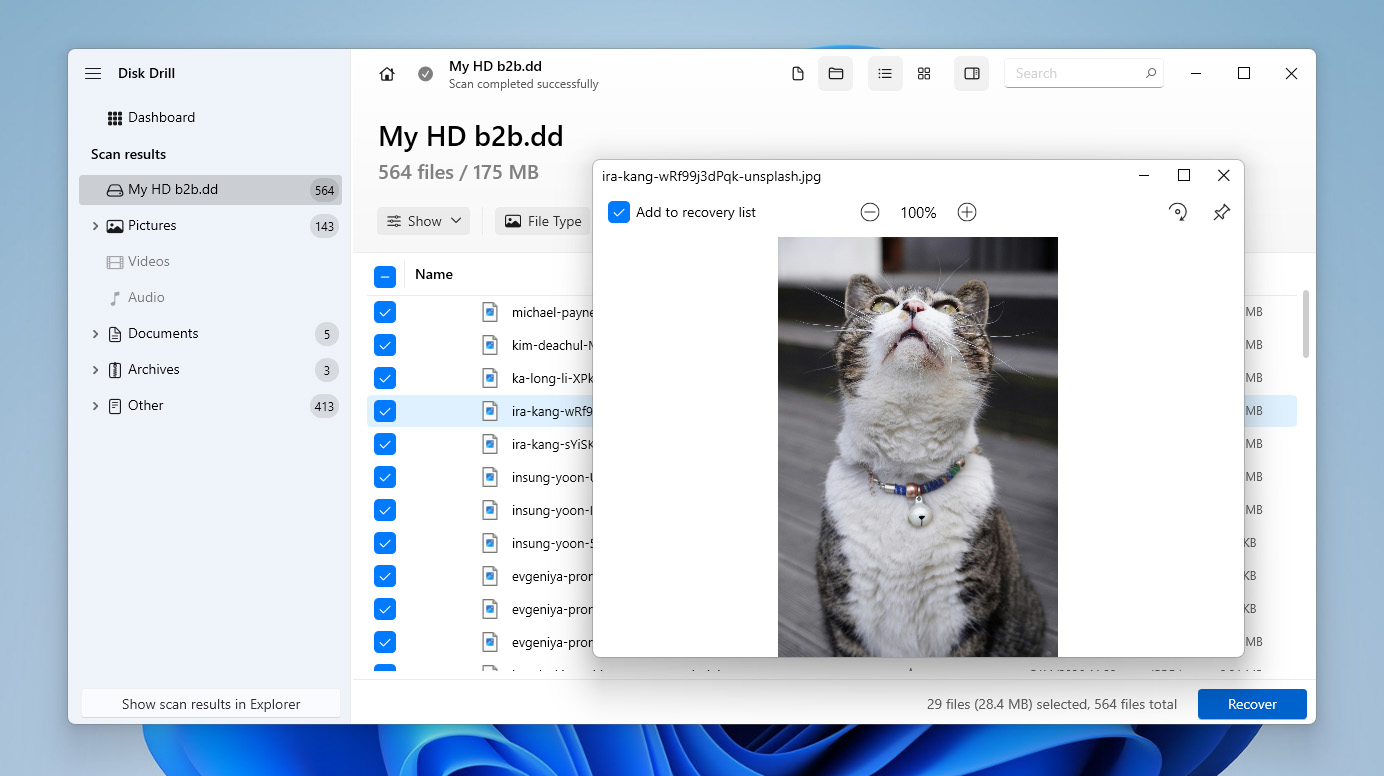
- On the results screen, pay special attention to the Existing category. It often contains folders and files that are still physically present on the hard drive but became inaccessible because of corruption, logical errors, or storage reporting problems.
- Browse through the found files, select what you want to recover, and use filters or preview when needed. When ready, click Recover.
- Choose a safe recovery location on a different drive, not the same hard drive that currently shows incorrect storage usage, then click Next to complete the recovery.
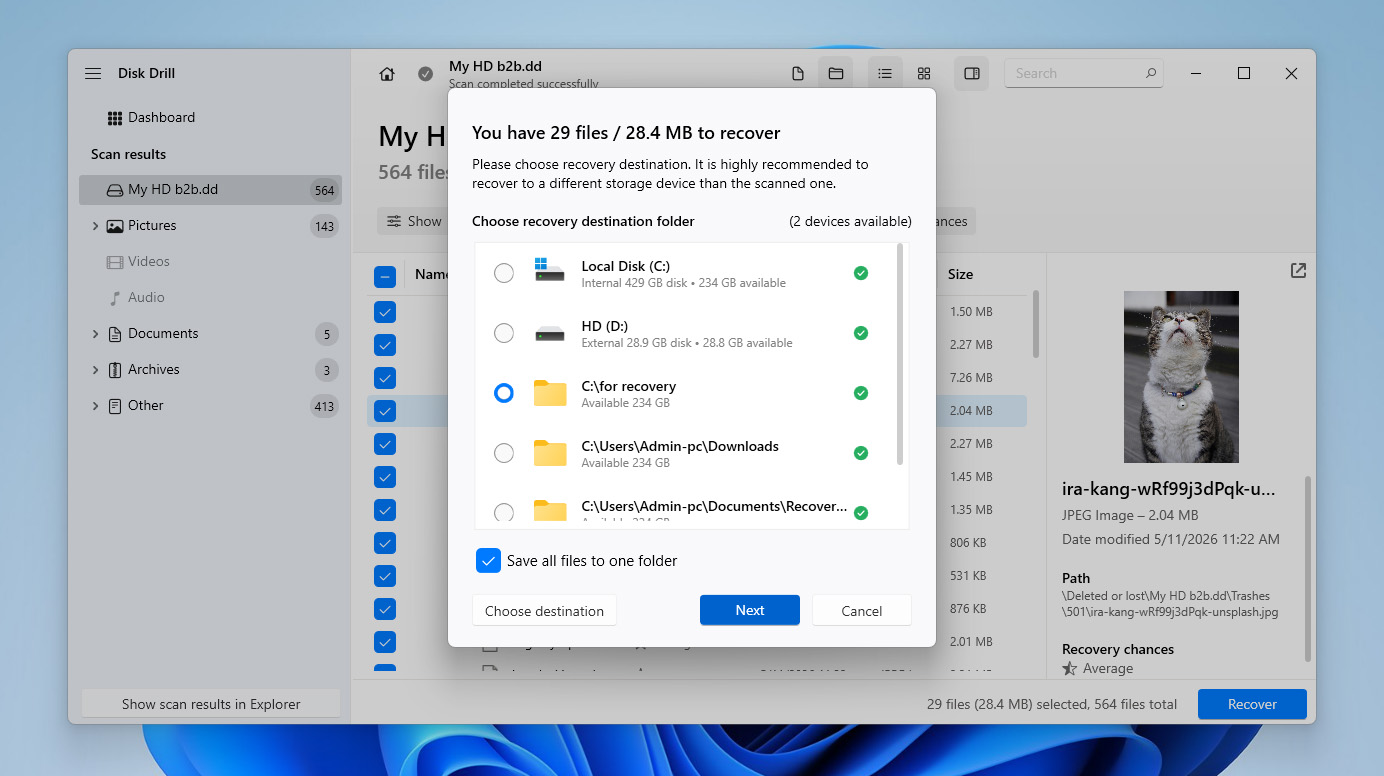
- Once finished, Disk Drill will show the recovery results and provide quick access to your
How to Fix a Hard Drive That Says It Is Full but
Now that you have a better idea of what may cause this problem, let’s move on to the fixes. If you already suspect a specific reason, start with the matching method from the table above. If not, go through the methods one by one until Windows starts reporting the drive space correctly again.
Method 1: Scan Your Hard Drive for Malware
Malware attacks on your computer are one of the most common reasons for your hard drive being full when it actually isn’t. So the first thing you should do when you encounter this problem is to scan your PC for any infections. While there are quite a few competent anti-malware programs available on the market, Windows has a capable built-in one called Windows Defender. Here’s how to use Windows Defender to scan and remove malware from your PC:
- Type Windows Security into your taskbar search feature and select the result with the same name.
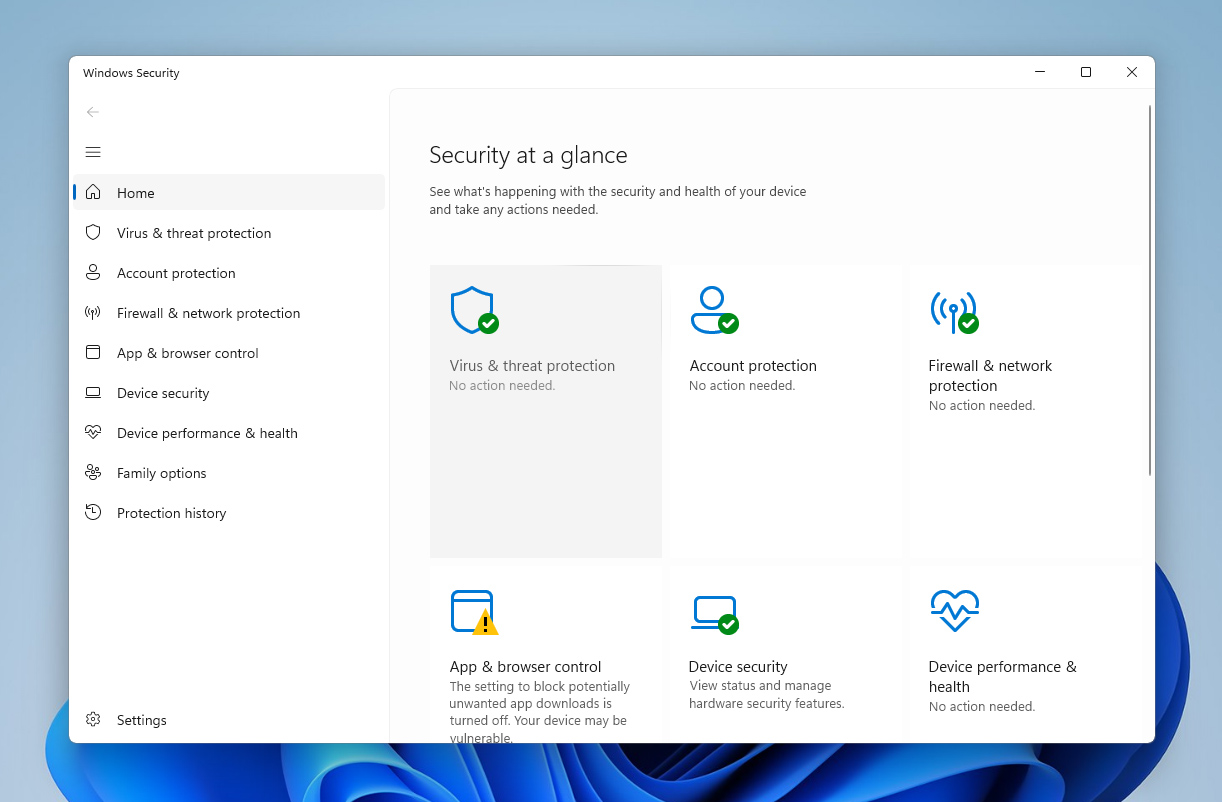
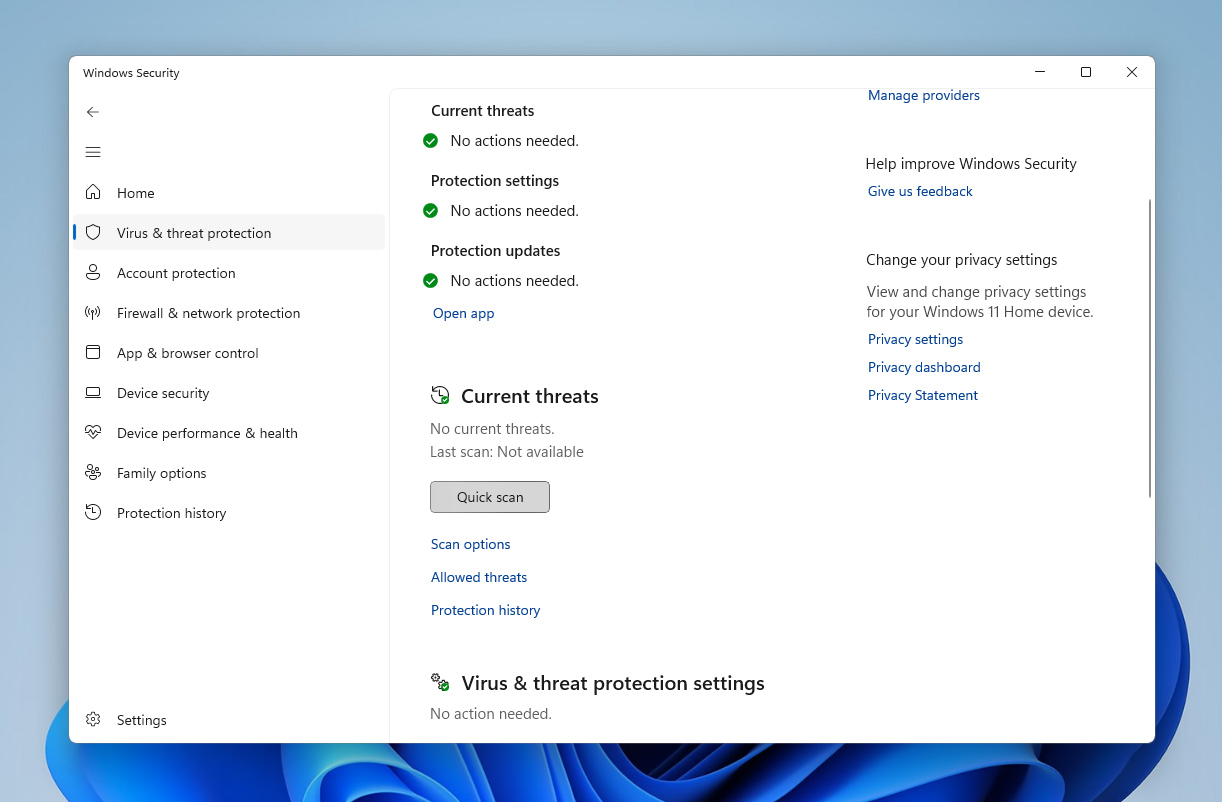
- Click Virus & threat protection.
- Under Current threats, click the Quick scan button. Windows will now scan your computer for any malware threats and potentially remove them.
If you already use another trusted antivirus program, you can run a scan with it instead of Windows Defender.
Method 2: Check for Temp Files
Temporary program files are stored in the “Temp” folder created by Windows, and these files are normally erased in time. However, there are instances when these temporary files accumulate, taking up a whole lot of space. This may be the cause of why your C drive is full, but no files are present since the “Temp” folder is always located in the same drive Windows is installed. So here’s how you can access the “Temp” folder to delete its contents:
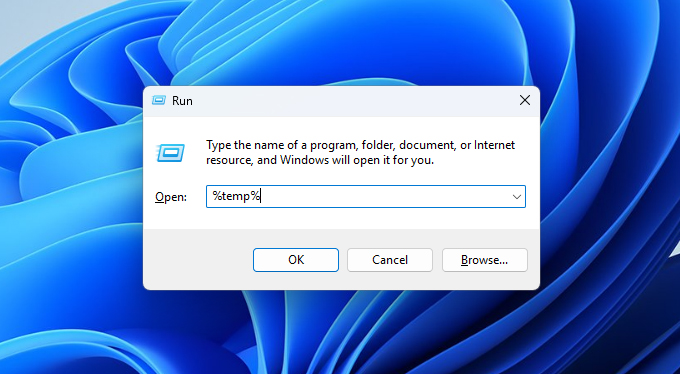
- Press the Windows + R keys to bring up the Run command, then type in %temp% and hit Enter.
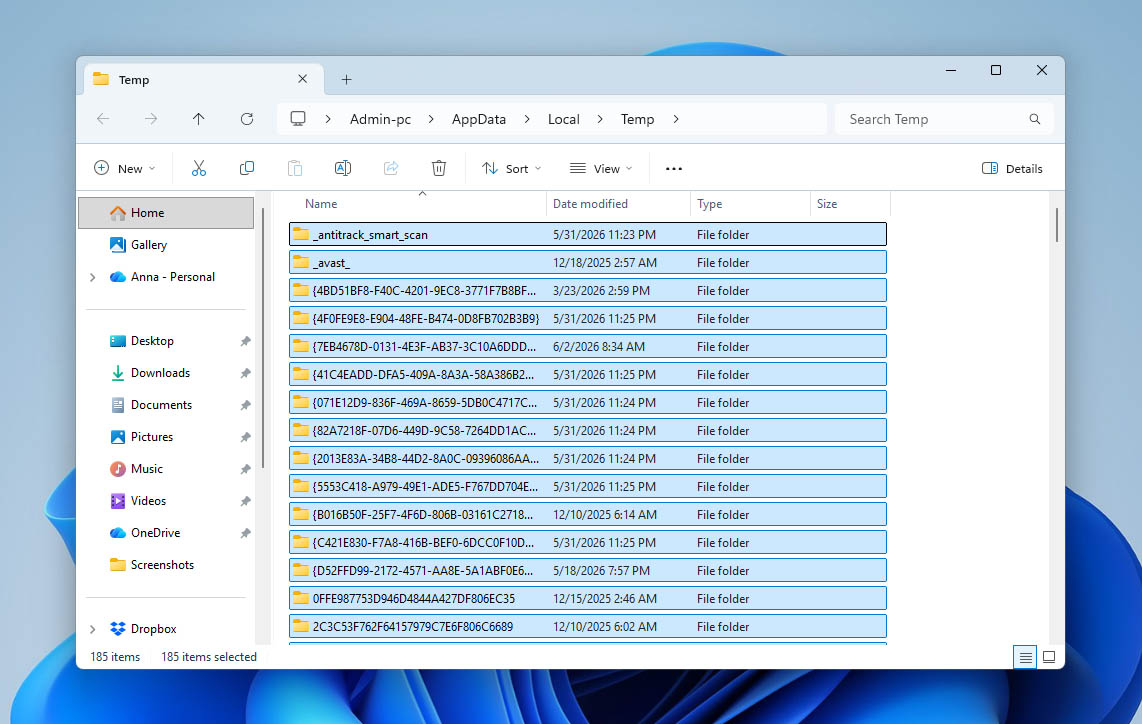
- This should open the “Temp” folder. Simply highlight all of its contents and press the Shift + Delete keys to get rid of them permanently.
The Microsoft Store or other apps may prevent you from deleting certain temporary files. To get past this, you’ll need to stop these apps from running in the background.
- Type installed apps into your taskbar search feature and select the result with the same name.
- Use the search bar near the top of the window to search for the program in question. From there, click the three dots button on the right of the program and select Advanced options.
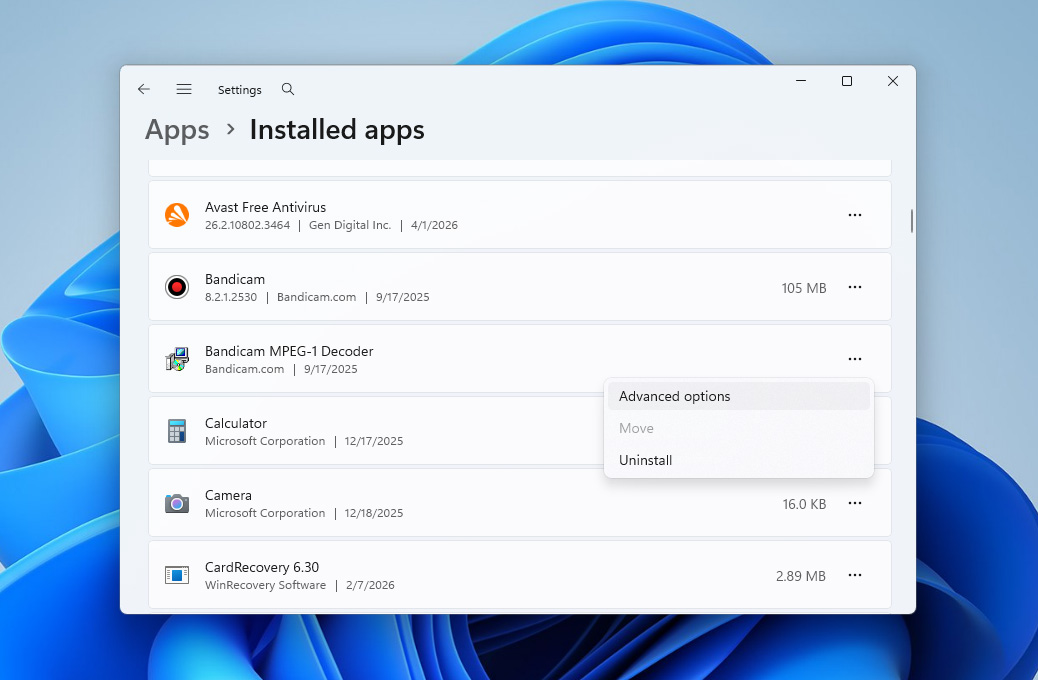
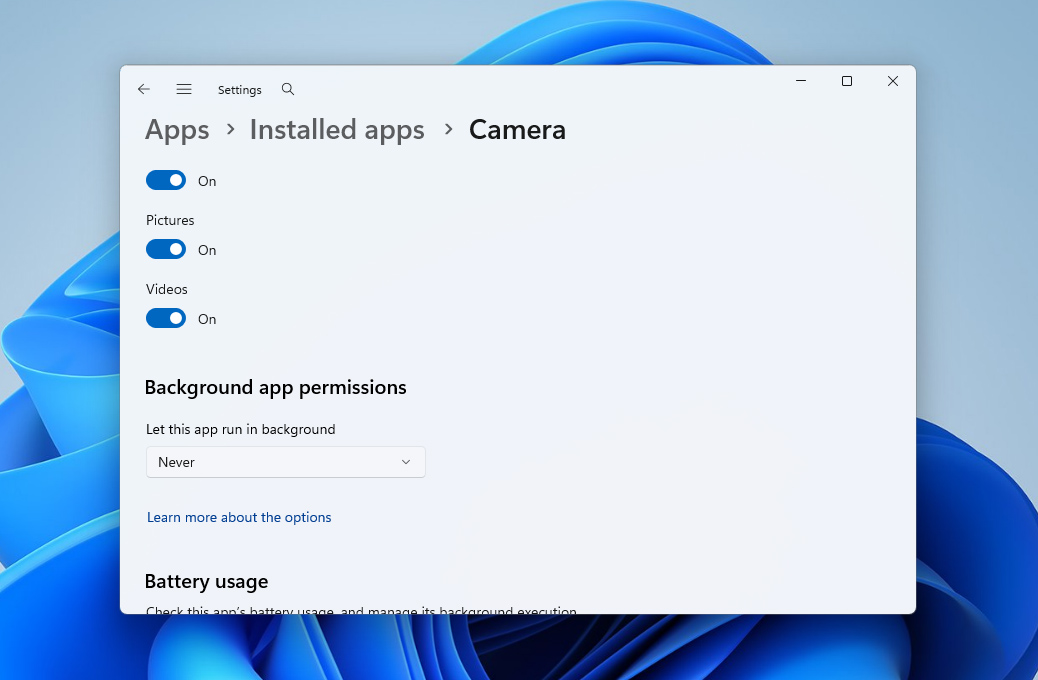
- Click the drop-down under Let this app run in the background and select Never.
- Now you can go back to the “Temp” folder and try deleting the files once more.
Method 3: Clean Recycle Bin
The Windows Recycle Bin acts as an intermediate location for deleted files before they disappear from the system permanently. If you don’t pay attention to it, deleted files can continue accumulating there until they eventually consume the amount of storage space allocated to the Recycle Bin. That’s why it’s worth clearing it from time to time, especially if your hard drive says it’s full when it’s not.
These are the steps for emptying your Recycle Bin:
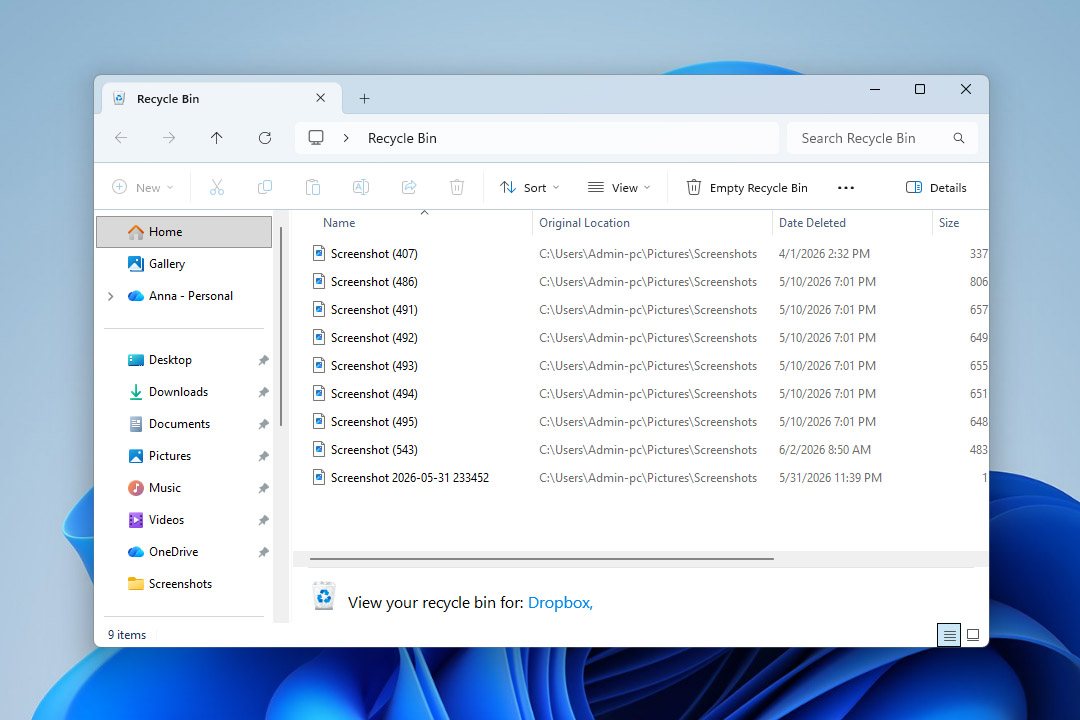
- First, open the Recycle Bin tool from your desktop.
- Then, click the Empty Recycle Bin option near the top of the window.
Did you empty the Recycle Bin and realize some important files were still there? If it hasn’t been too long, there’s still a chance to get them back. Check out our guide on how to recover files from an emptied Recycle Bin.
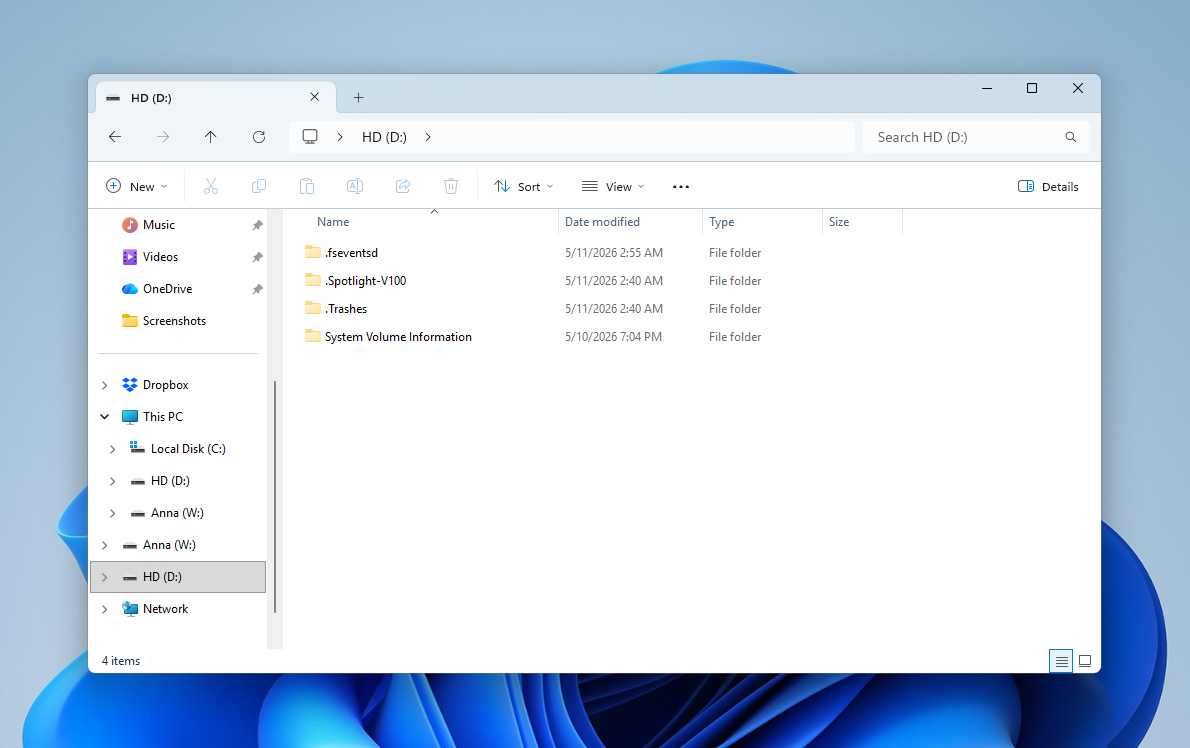
Method 4: Check for Hidden Files
Sometimes, hidden files alone are enough to make a hard drive appear full. This can happen because of malware, system-generated data, or even accidental user actions. For example, you may have hidden certain folders or files yourself and simply forgotten about it later. Either way, it’s worth checking whether hidden files are taking up a significant amount of storage space on the drive.
Here’s how to make hidden files visible through the View panel in Windows Explorer:
- Open File Explorer.
- Click the View option near the top of the window.
- Expand the Show menu.

- Enable the Hidden items option. Windows will now display hidden folders and files inside File Explorer.
Method 5: Do a Deep Cleanup if Your Disk Is Still Full
If you already tried all the tips above but your disk is still full, the problem may simply be that it contains too many files. At this point, it’s worth doing a proper cleanup and removing everything you no longer need.
If you have enough time, you can manually go through folders and directories on the drive and delete files that seem outdated or unnecessary. But if you don’t want to spend hours sorting through data yourself, there’s a more convenient alternative using dedicated software.
This is where we’ll return to Disk Drill, which we already used earlier for backup creation and data recovery. Besides recovery tools, Disk Drill also includes several additional features you can explore in more detail in a Disk Drill review. One of those features is Clean Up, which helps visualize storage usage and quickly locate the largest folders and files on your drive.
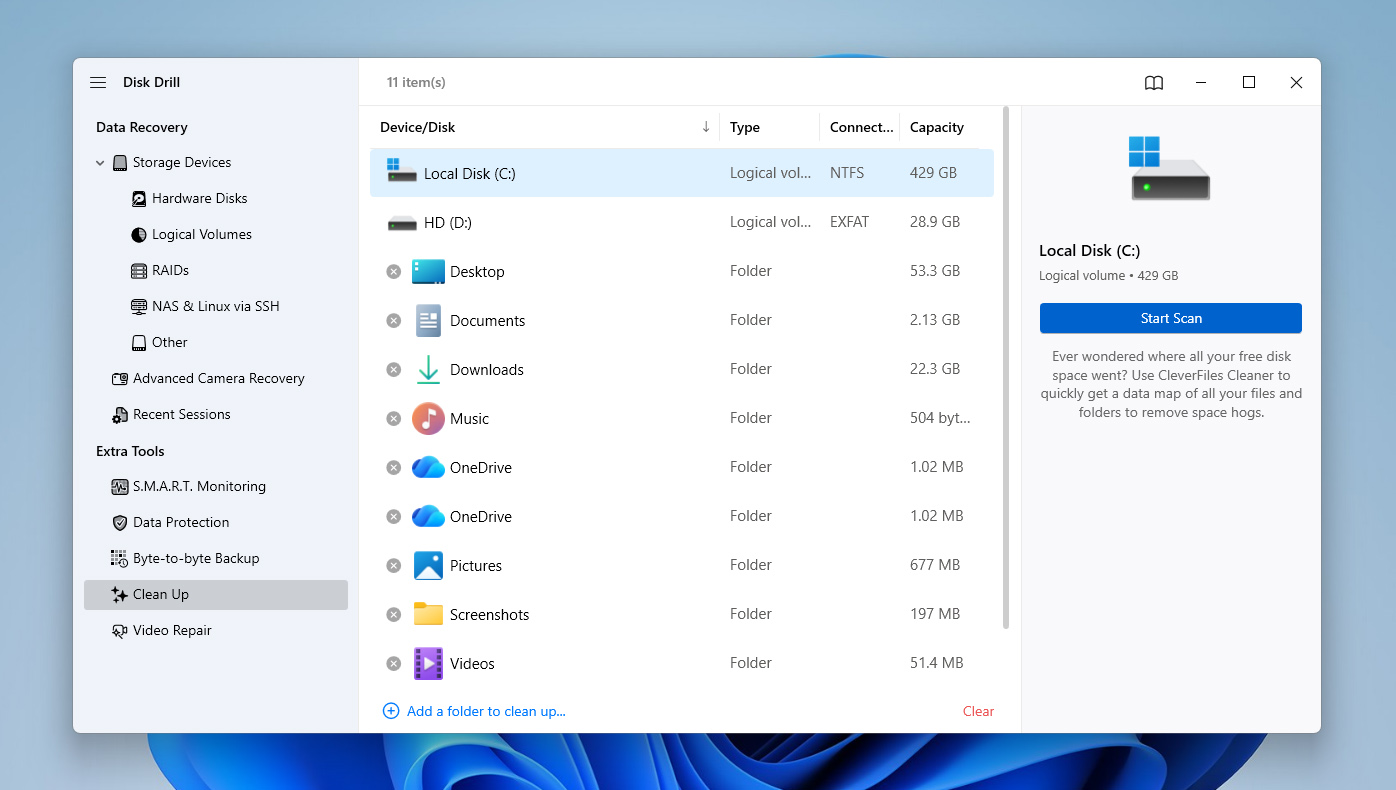
- Open Disk Drill and switch to the Clean Up section in the left sidebar.
- Select the hard drive you want to analyze from the list of available devices and click Start scan.
- Once the scan finishes, Disk Drill will display your drive’s used storage space as a visual map made up of squares of different sizes.
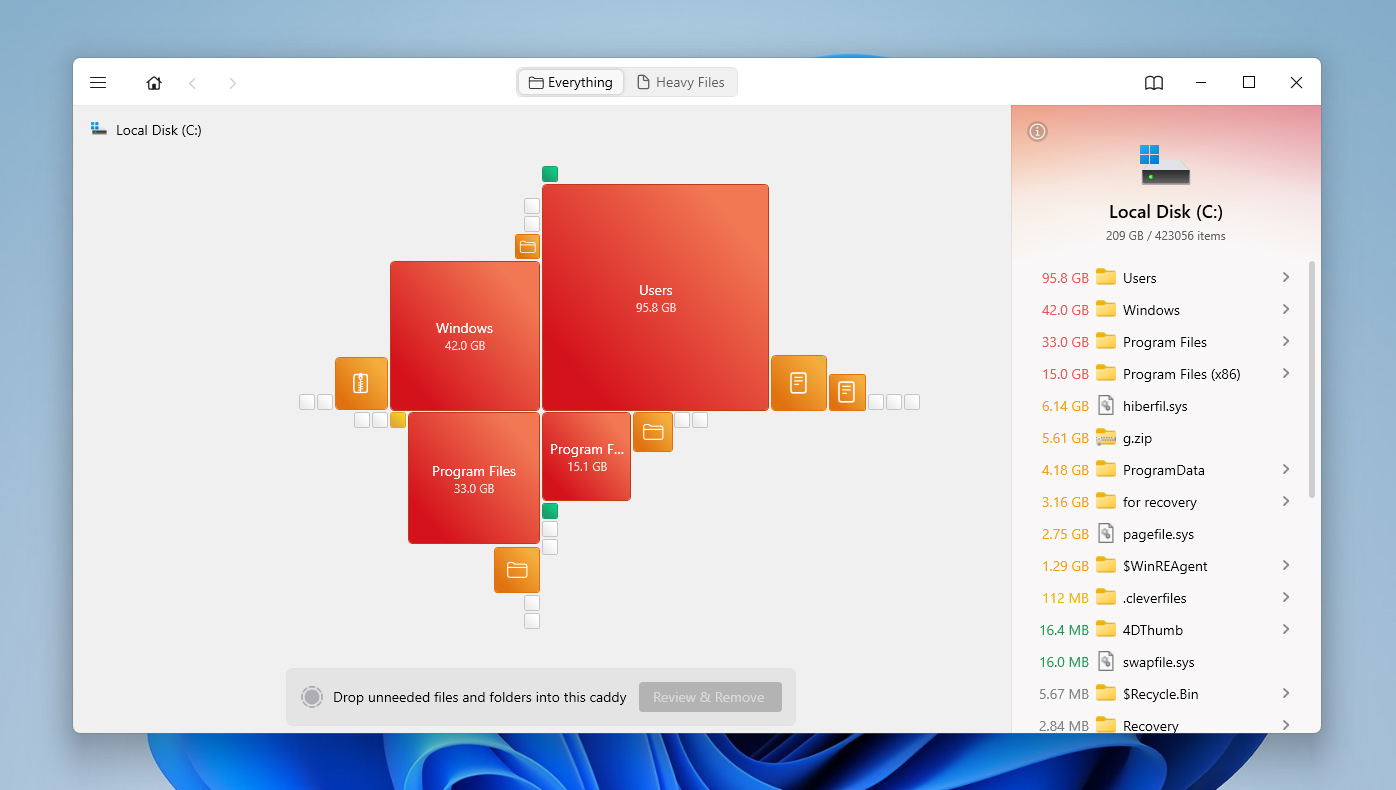
- You can click these squares or use the right side panel to navigate through the largest folders and files on the drive.

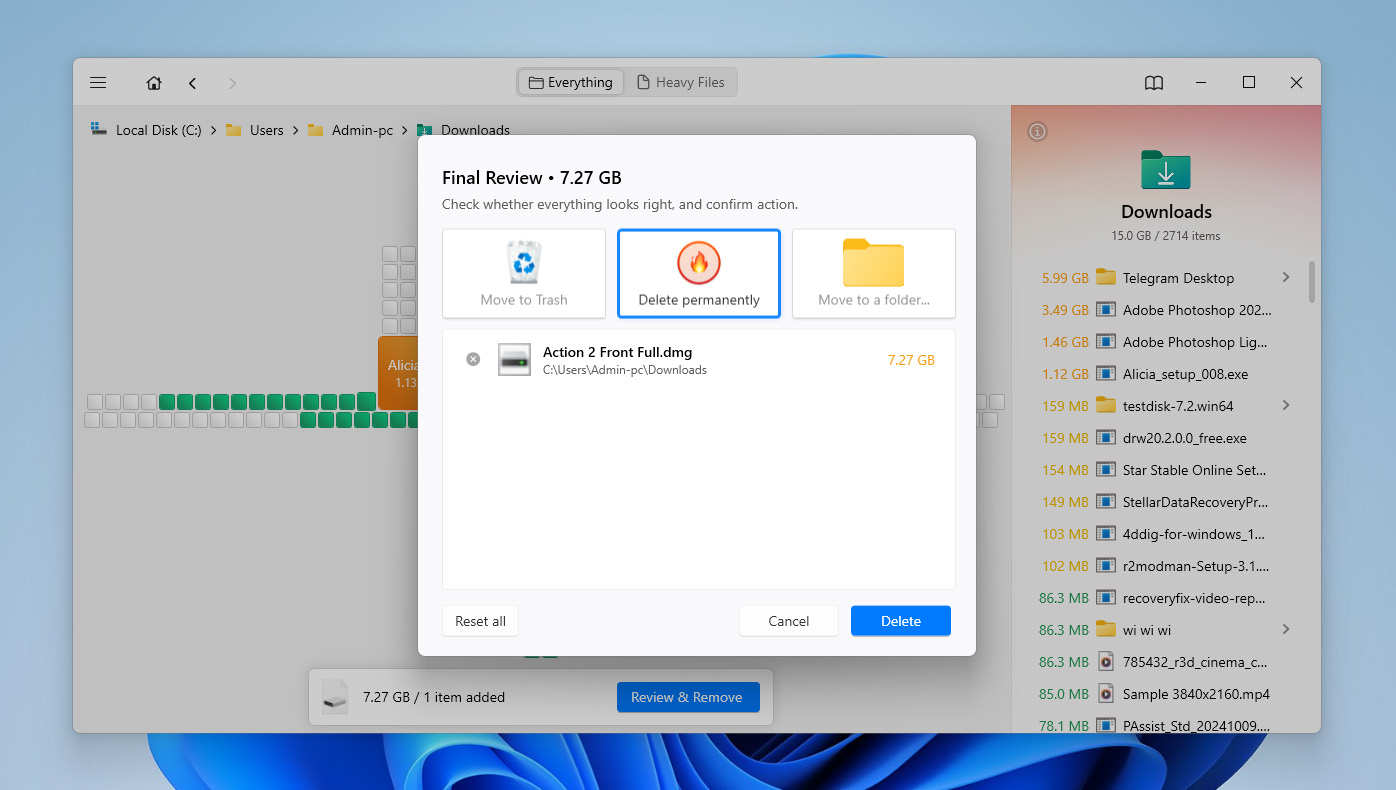
- After finding files or folders you no longer need, drag them into the special area at the bottom of the window.
- Disk Drill will then let you decide what to do with them. You can either move them to the Recycle Bin or delete them permanently. If you don’t want to clean the Recycle Bin afterward, it’s better to choose permanent deletion right away.
Method 6: Remove Old Restore Points and Previous Windows Installations
System restore points, previous Windows installations, and update leftovers can take up a lot of space on the C drive. This often happens after major Windows updates or system changes, when folders like Windows.old or system components such as WinSxS continue to occupy storage in the background. If your C drive is full, it’s worth checking and removing these files through Windows cleanup tools.
If you remove previous Windows installation files, you may lose the option to roll back to an earlier Windows version. Only delete them if your current system works normally.
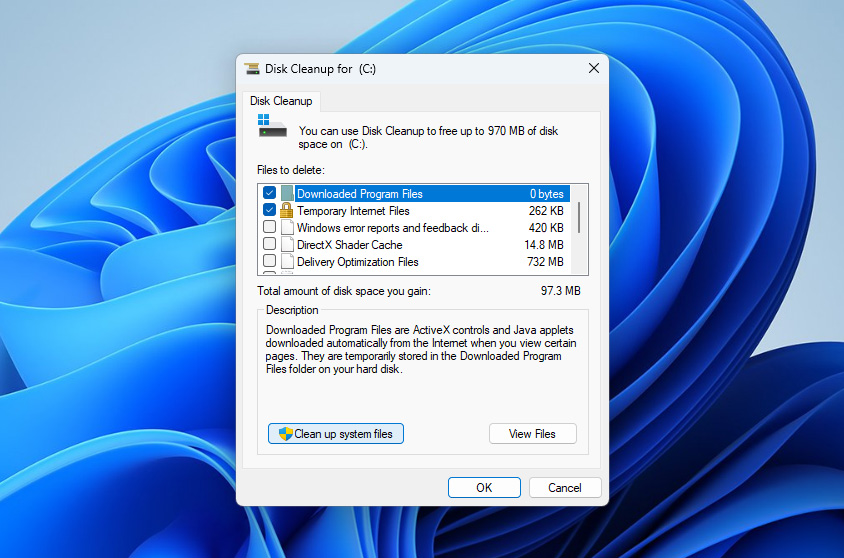
- Type disk cleanup into the taskbar search and open the result with the same name.
- Select your C drive from the drop-down menu and click OK.
- Click Clean up system files near the bottom of the window.
 Select the C drive again if Windows asks you to choose a drive.
- In the list, look for options such as Previous Windows installation(s), Windows Update Cleanup, Temporary Windows installation files, and other system cleanup categories.
- Tick the items you want to remove, then click OK.
- Confirm the action and wait for Windows to delete the selected files.

If your C drive still looks too full after removing restore points and previous Windows installation files, check whether hiberfil.sys takes up a lot of space. This is a Windows system file used for hibernation and Fast Startup, and it can occupy several gigabytes on the C drive. Don’t delete it manually. If you don’t use hibernation, you can disable it through Command Prompt as administrator with powercfg -h off command. Windows will remove hiberfil.sys automatically. If you want to enable hibernation again later, run powercfg -h on.
Method 7: Clear CBS Logs and Other Large System Logs
Large Windows log files can sometimes take up a surprising amount of space on the C drive. One common example is the CBS folder, which stores servicing logs created by Windows updates and system checks. These files are not always easy to notice in File Explorer, but they can grow large enough to affect available storage.
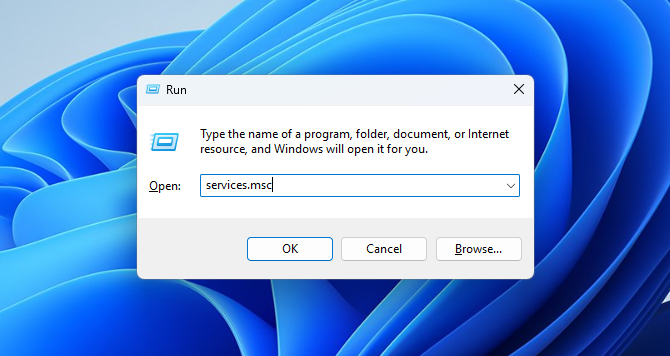
- Press Windows + R to open the Run window.
- Type services.msc and press Enter.
- Find Windows Modules Installer in the list of services.
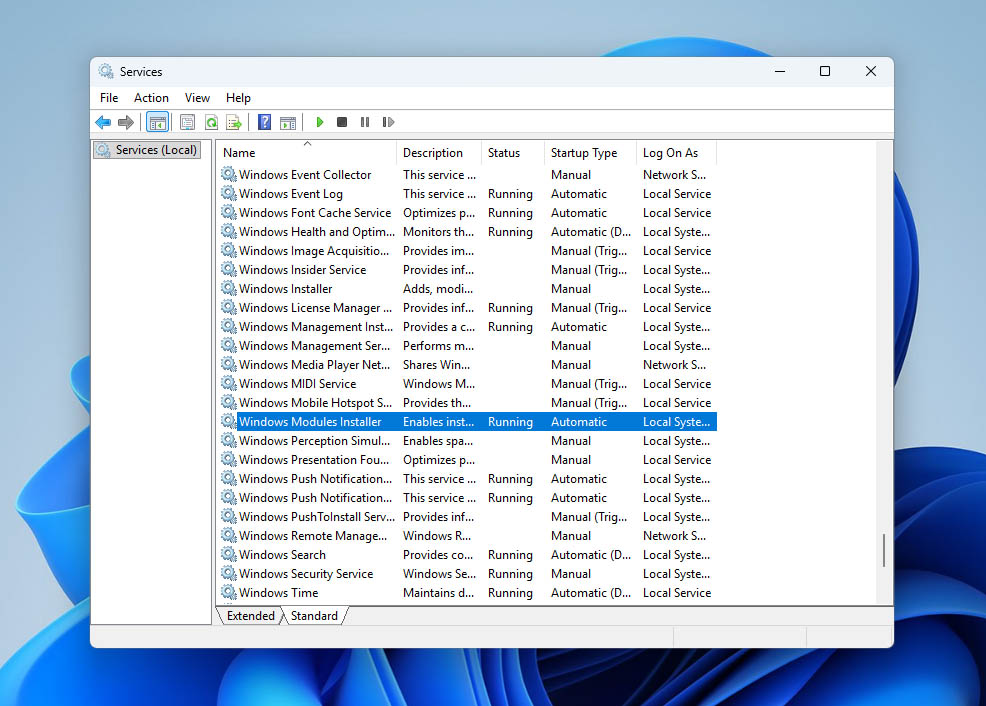
- Right-click it and select Stop. This helps prevent Windows from writing to CBS logs while you clean them.
- Open File Explorer and go to C:\Windows\Logs\CBS.

- Delete old log files from this folder. If Windows does not let you delete some files, skip them.
- Go back to the Services window, right-click Windows Modules Installer, and select Start.
- Restart your computer and check whether the C drive now shows more free space.
Method 8: Remove the Drive Letter From a Hidden Recovery Partition
A hidden recovery partition is a small separate part of your drive that Windows or your computer manufacturer uses to store recovery tools. It can help reset, repair, or restore Windows if something goes wrong. Normally, this partition stays hidden and doesn’t appear in File Explorer.
However, if Windows assigns it a drive letter by mistake, it may start showing up as a normal drive. Since recovery partitions are usually small and almost full by design, Windows may show a low disk space warning for that partition. In this case, you don’t need to delete or format it. You only need to remove its drive letter so Windows hides it again.
- Press Windows + R to open the Run window.
- Type diskmgmt.msc and press Enter to open Disk Management.
- Look for a small partition labeled Recovery, OEM, or something similar. It will usually be much smaller than your main drive.
- Right-click that partition and select Change Drive Letter and Paths.
- Select the assigned drive letter and click Remove.
- Confirm the action when Windows asks.
- Restart your computer and check whether the low disk space warning disappears.
[Do not delete, format, or resize the recovery partition unless you know exactly what you’re doing. It may contain files Windows needs for recovery and repair options.
The next methods apply to drives that may have file system corruption, logical errors, or other software-level disk issues. In these cases, regular cleanup methods usually won’t help. Windows may be reading the drive structure incorrectly, so you need repair methods that work directly with the file system. Before you continue, make sure your important data is safe.
Method 9: Run CHKDSK to Find and Fix Errors
CHKDSK is a built-in Windows feature that performs an integrity scan of a storage device and attempts to fix any errors it finds. These errors could be causing your hard drive space problem.
- Press the Windows + R keys to launch the Run command, then type in cmd and press Ctrl + Shift + Enter to run as admin.
- Type in chkdsk and the drive letter of your hard drive, along with the colon symbol. Following the colon symbol, add a space and then /f to instruct CHKDSK to fix any errors encountered during the scanning. Your end command should be similar to this:
chkdsk C: /f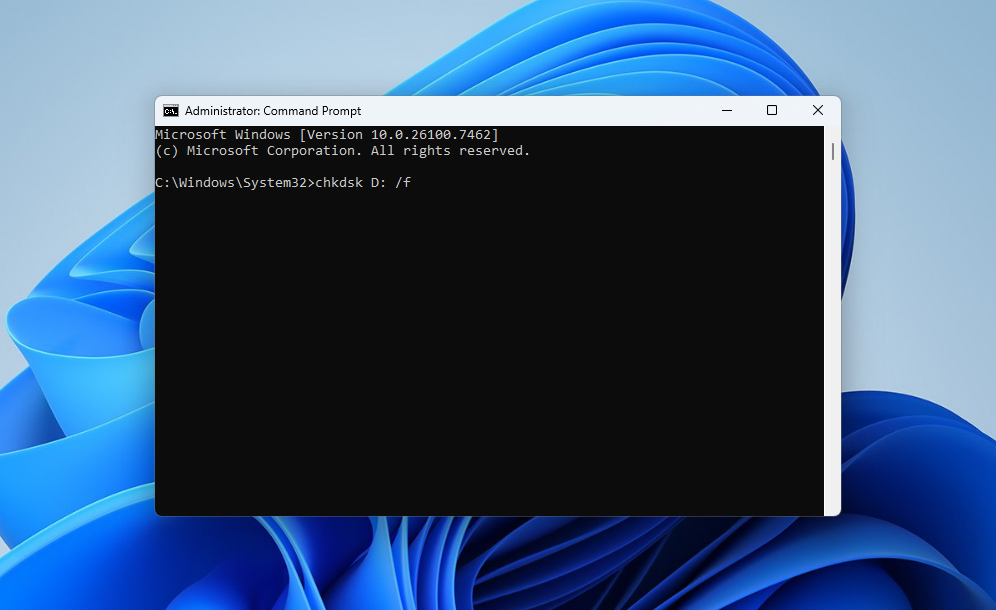
- CHKDSK will now scan your hard drive and fix any errors it finds.
Method 10: Reformat Hard Drive
If none of the methods so far managed to fix the issue, the only remaining option may be to format the drive. There are several ways to do this in Windows, most of which mainly differ in interface and execution method. Here, we’ll show the simplest approach through File Explorer:
- Double-click the This PC icon on your desktop, then right-click the affected hard drive under Devices and drives, and select the Format option.
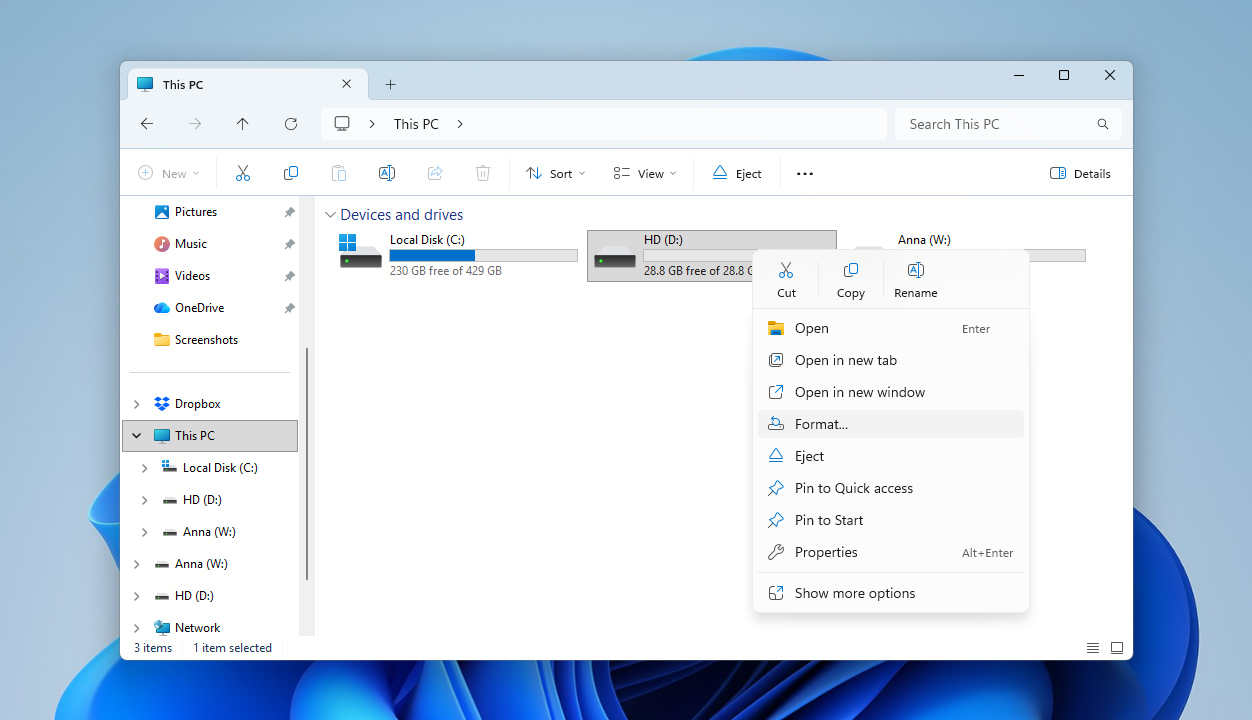
- Select the appropriate File system, Allocation unit size, and Volume label for the drive, then click Start. Windows will then format your drive.

If the affected drive is your system drive, it can only be formatted using operating system installation media. This is the flash drive or DVD used to install the OS.
If you ended up in the worst-case scenario where none of the fixes helped and the drive still says it’s full while appearing empty, the only realistic long-term solution may simply be replacing the drive with a new one.
Conclusion
As you could probably see for yourself, there are many factors that can cause your hard drive to show a lot of used disk space even though no files seem to be present. Fortunately, most of these problems are relatively easy to catch and avoid with proper drive usage habits:
- Avoid downloading files or programs from untrusted websites.
- Properly eject your hard drive before disconnecting it if it’s an external device.
- Try not to drop or physically damage the drive.
- Check the drive’s S.M.A.R.T. data from time to time to monitor its overall health.
- Always keep backups of important files on another storage device or in the cloud.
Still have questions? Feel free to leave them on our forum.


