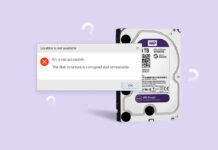
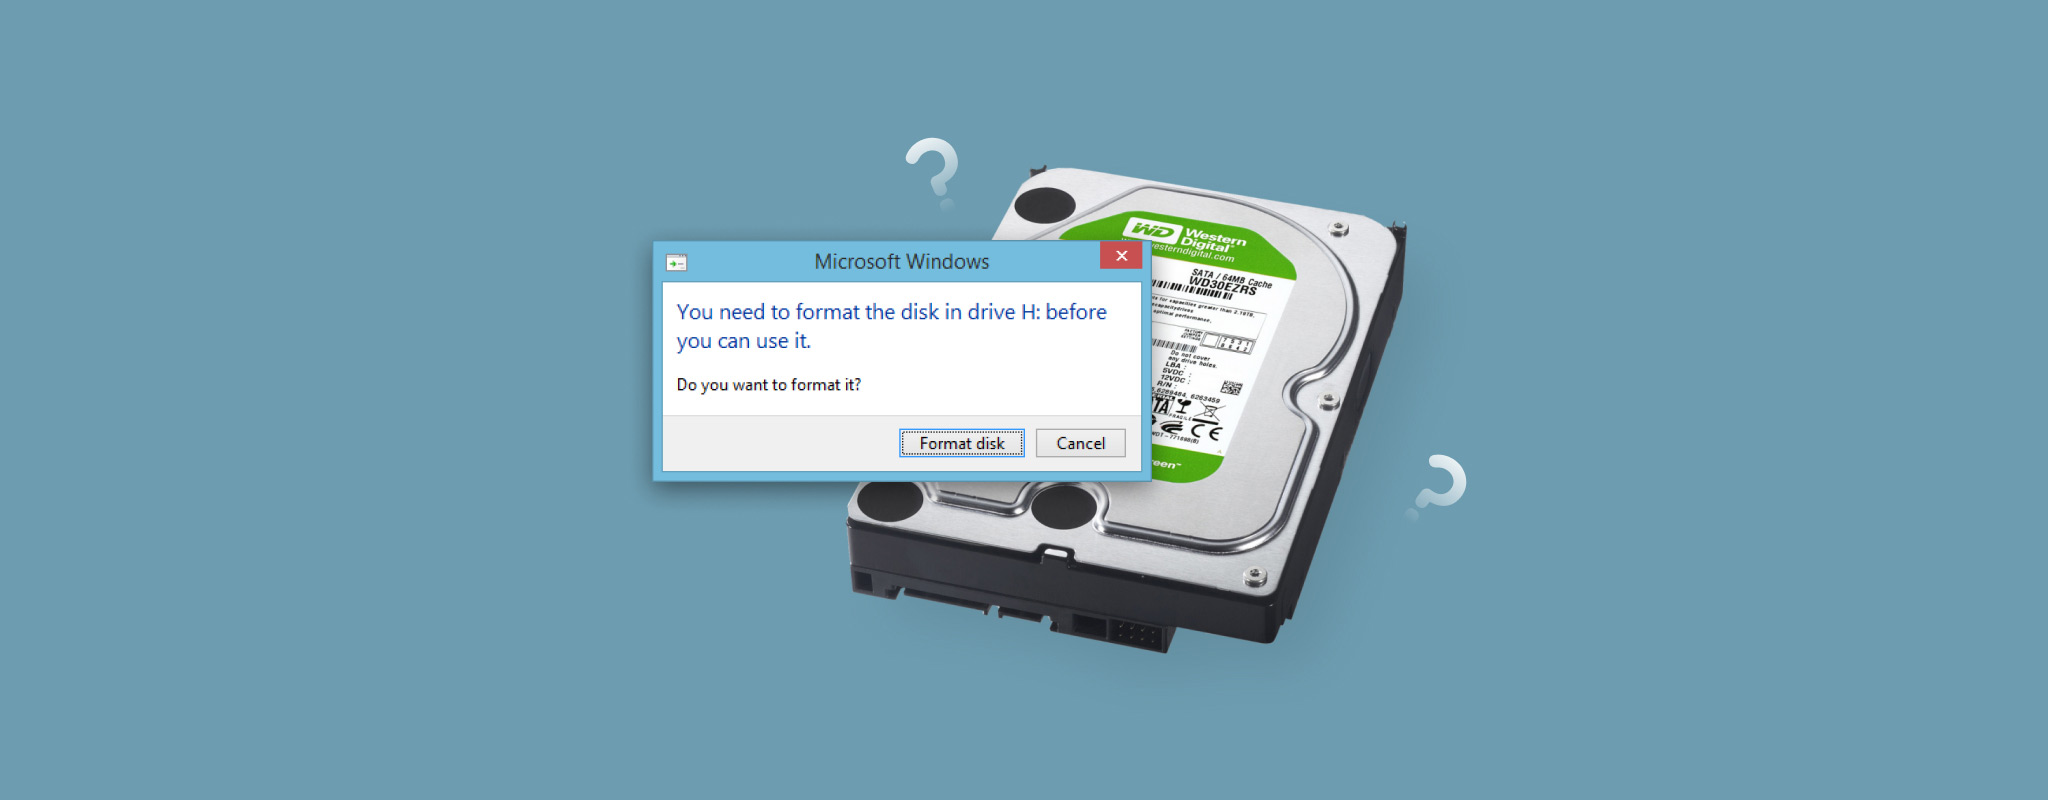
The “You need to format the disk before you can use it” error means Windows can’t read the file system on your drive. This usually happens because the file system is corrupted or uses a format that Windows doesn’t support. Formatting the drive can fix the problem, but it will also remove the data stored on it. So, click Cancel and don’t format the drive yet. Recover your data first, then repair or format the drive.
Below, we’ll explain everything you need to know about this error message, how to recover your files, and how to repair the drive safely. Since the error typically appears with external storage devices, this guide applies to external HDDs, USB flash drives, and SD cards.
What happens when you format a drive? Formatting creates a new file system on the drive and removes the existing file system records Windows uses to locate your files. With a quick format, the data itself may remain recoverable until it is overwritten, but you will no longer see or access it normally. This is why you should recover important files before formatting whenever possible. If you have already formatted the drive, see our guide on how to recover data after formatting.
Check Your Drive in Disk Management Before You Start
Although the “You need to format the disk” error has a fairly simple explanation, the underlying file system problem can sometimes overlap with other issues, including physical damage or a worn-out drive. Before you try to recover data or repair anything, check the current state of the drive in Disk Management. This will help you determine whether it’s reasonable to continue at home or whether the device may need professional attention.
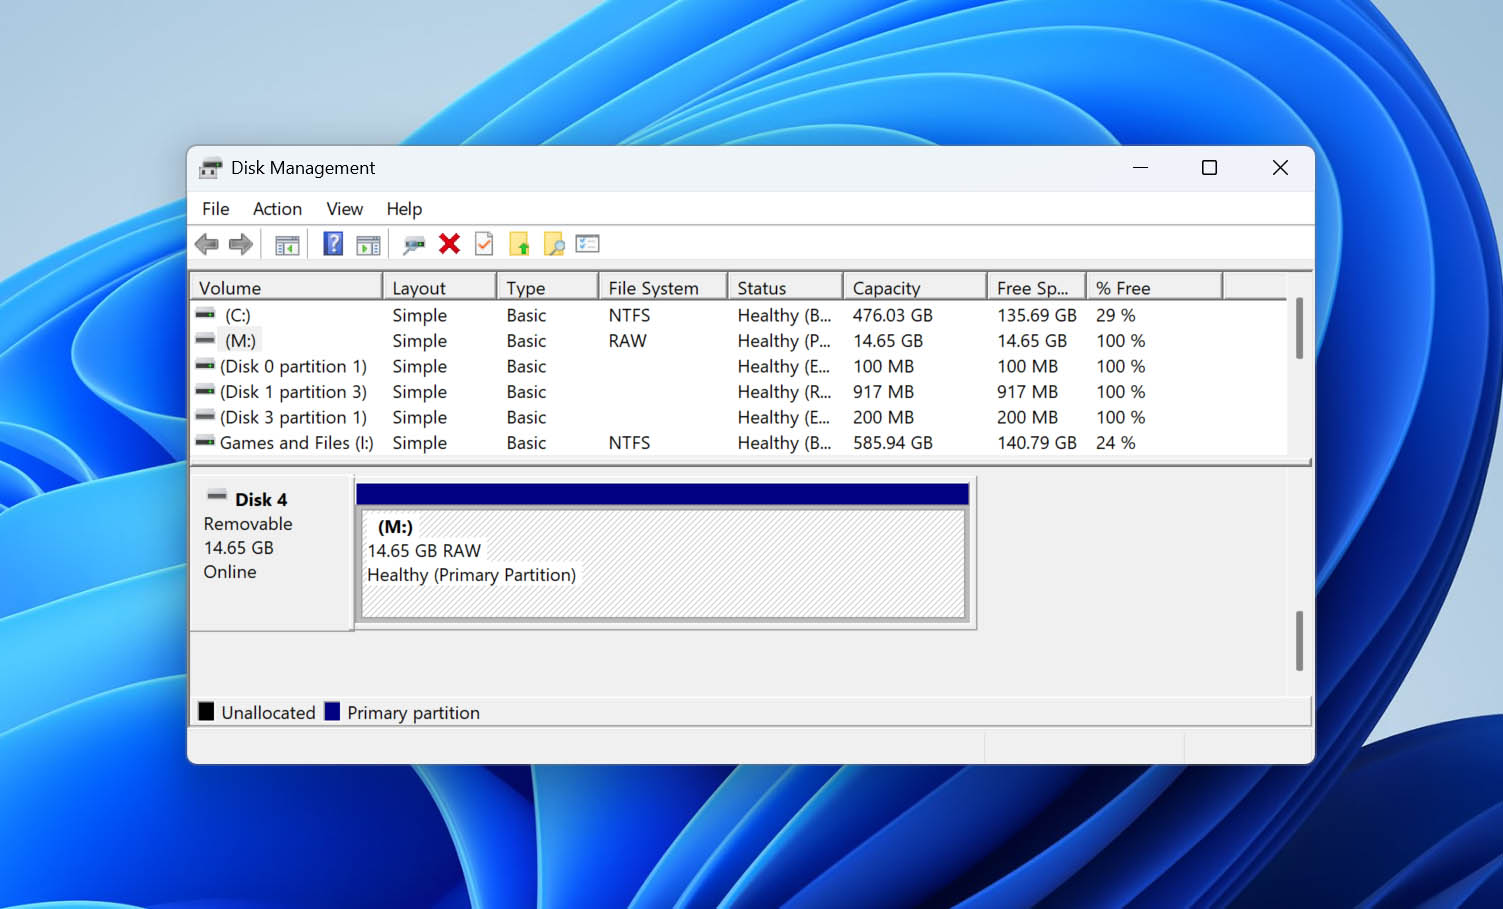
To open Disk Management, right-click Start and select Disk Management. Find the affected drive by its capacity and check how Windows identifies its file system and whether the reported size matches the actual capacity of the device.
| Symptom | What It Means | What to Do |
| RAW with the correct capacity | This is the main state you’re likely to see with the “You need to format the disk before you can use it” error. Windows detects the drive correctly but can’t read its file system. | Try another cable or USB port, and, if possible, connect the drive to another operating system. If nothing changes, recover your data first and then move on to the fixes below. |
| RAW with the wrong capacity | A drive that reports an incorrect capacity may have a more serious hardware or controller problem rather than file system corruption alone. | If the drive contains important data, stop using it and contact a professional data recovery service. After the data is recovered, replace the drive rather than continuing to use it. |
What about Unallocated, Not Initialized? These states point to different problems and normally won’t trigger the error asking you to format the drive. If you see one of them in Disk Management, the troubleshooting steps below aren’t the best match. Instead, use the guide that corresponds to what Windows shows: How to Fix Unallocated Hard Drive and Recover Data from It and Does Initializing a Disk Erase Data from It? All You Need to Know
If the drive shows 0 bytes or doesn’t appear in Disk Management at all, stop troubleshooting it at home. If you need the data, contact a professional data recovery service. If there’s nothing important on the drive, replace it.
How to Recover Data From the Drive that You Need to Format
Before you try to fix the drive, make sure your important files are safe. If you have a recent backup, restore the data from it, but if no backup is available, use data recovery software to retrieve your files.
For this, we recommend Disk Drill. It works with RAW drives and can scan for files even when Windows can no longer read the original file system. It also lets you preview recoverable files, shows Recovery chances for supported results, and allows you to scan the drive for free before deciding whether to recover anything. You can read our Disk Drill review for our full test results or compare it with other options in our data recovery software ranking.
You can use Disk Drill as long as the affected drive appears in Disk Management with its correct capacity. If it shows 0 bytes or doesn’t appear there at all, don’t keep scanning or reconnecting it in an attempt to force it to work. If the files are important, contact a professional data recovery service instead.
If the drive disconnects, produces read errors, or otherwise works unreliably, create a byte-to-byte image in Disk Drill first and scan the result instead of repeatedly scanning the original device. Our guide on recovering data from a corrupted drive covers the disk imaging process in more detail.
- Download and install Disk Drill. Do not install it on the affected drive.
- Open Disk Drill and select the affected storage device.
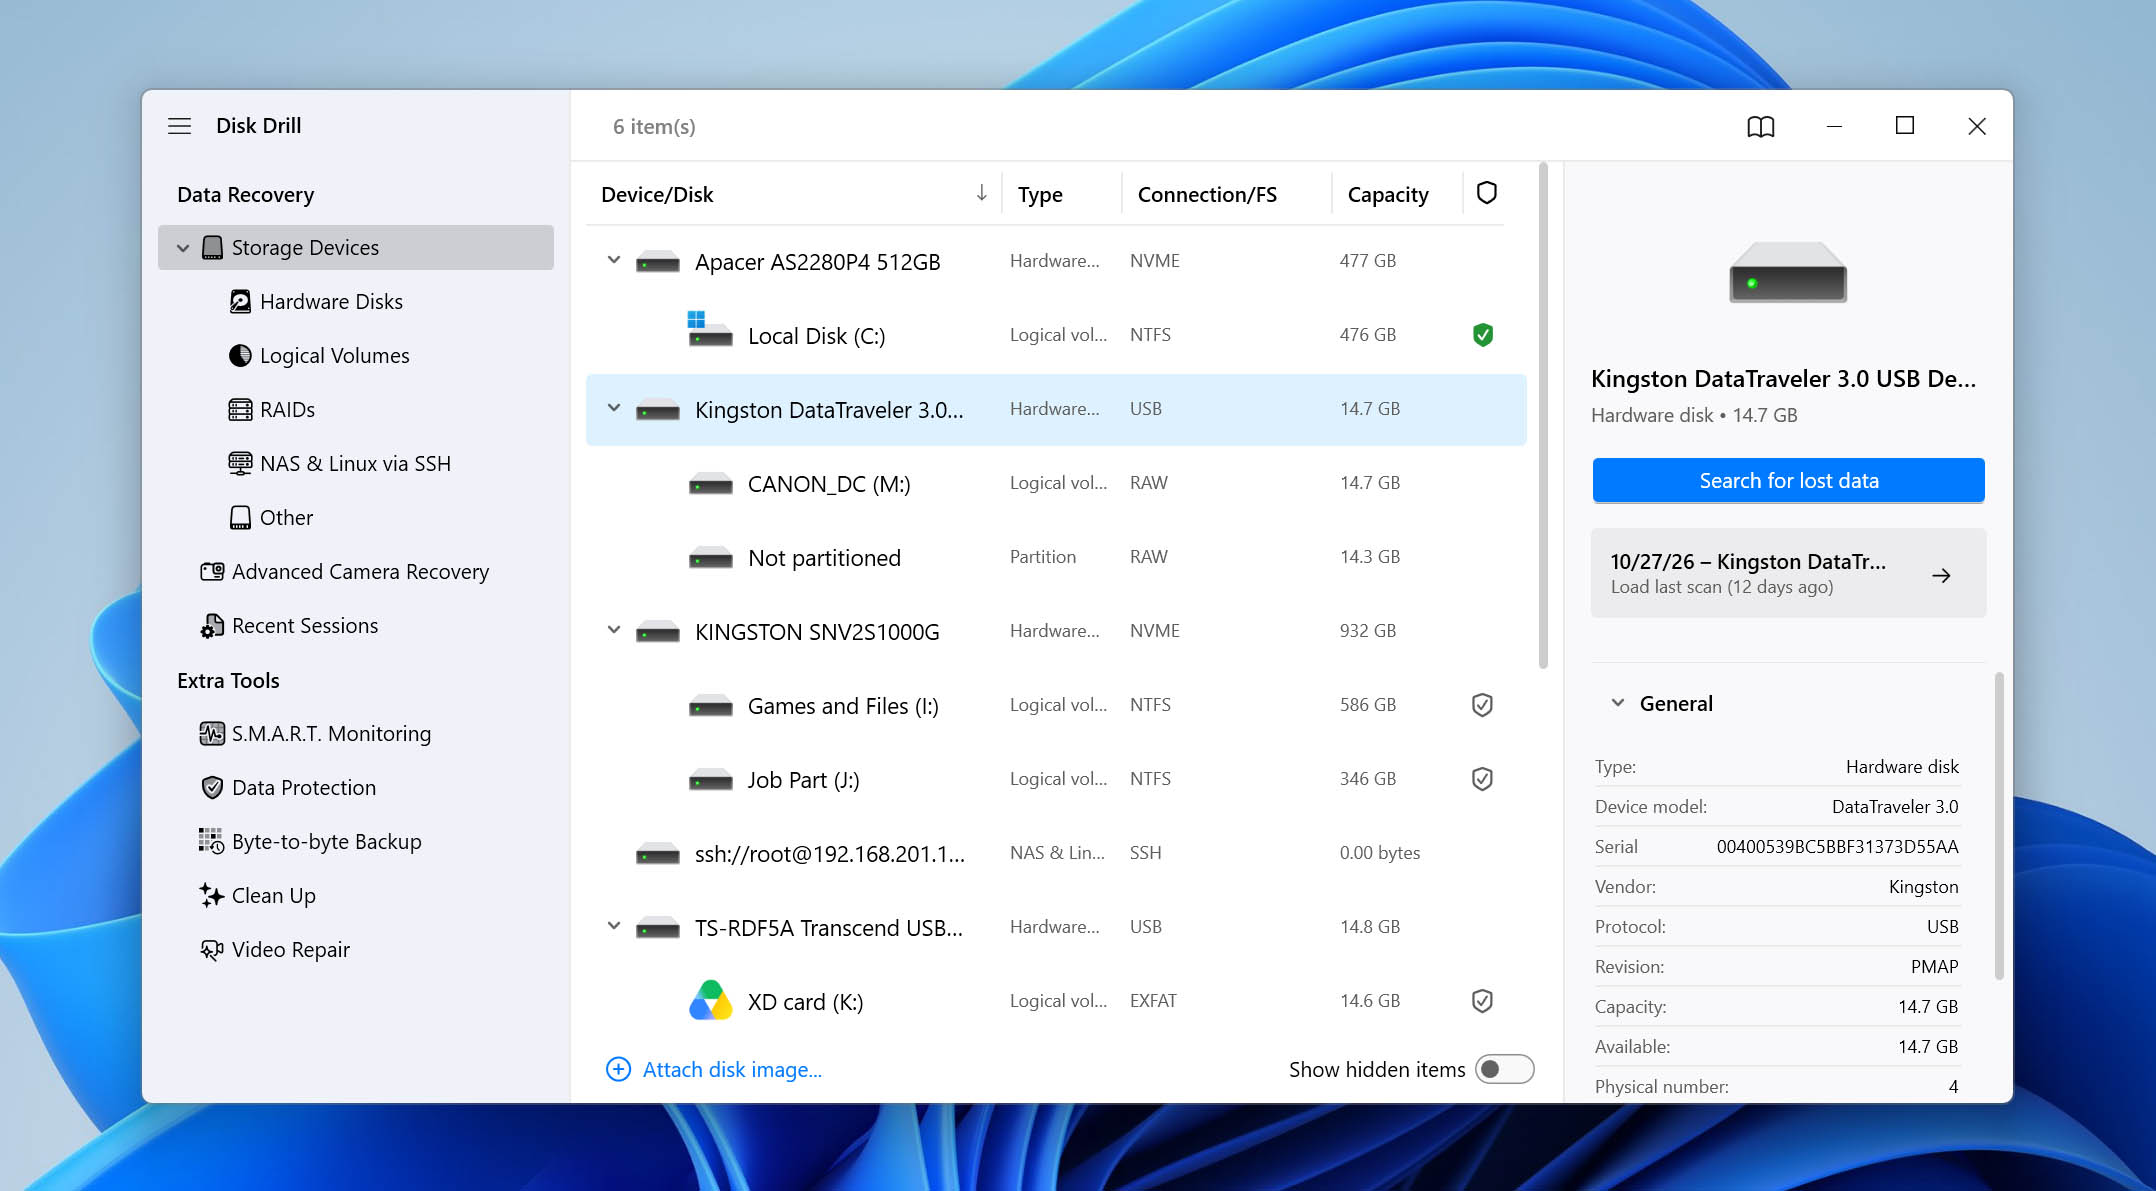
- Choose the appropriate scan method. For most files and storage devices, use Universal Scan. If you need to recover fragmented video from a camera, action camera, or drone, use Advanced Camera Recovery instead.
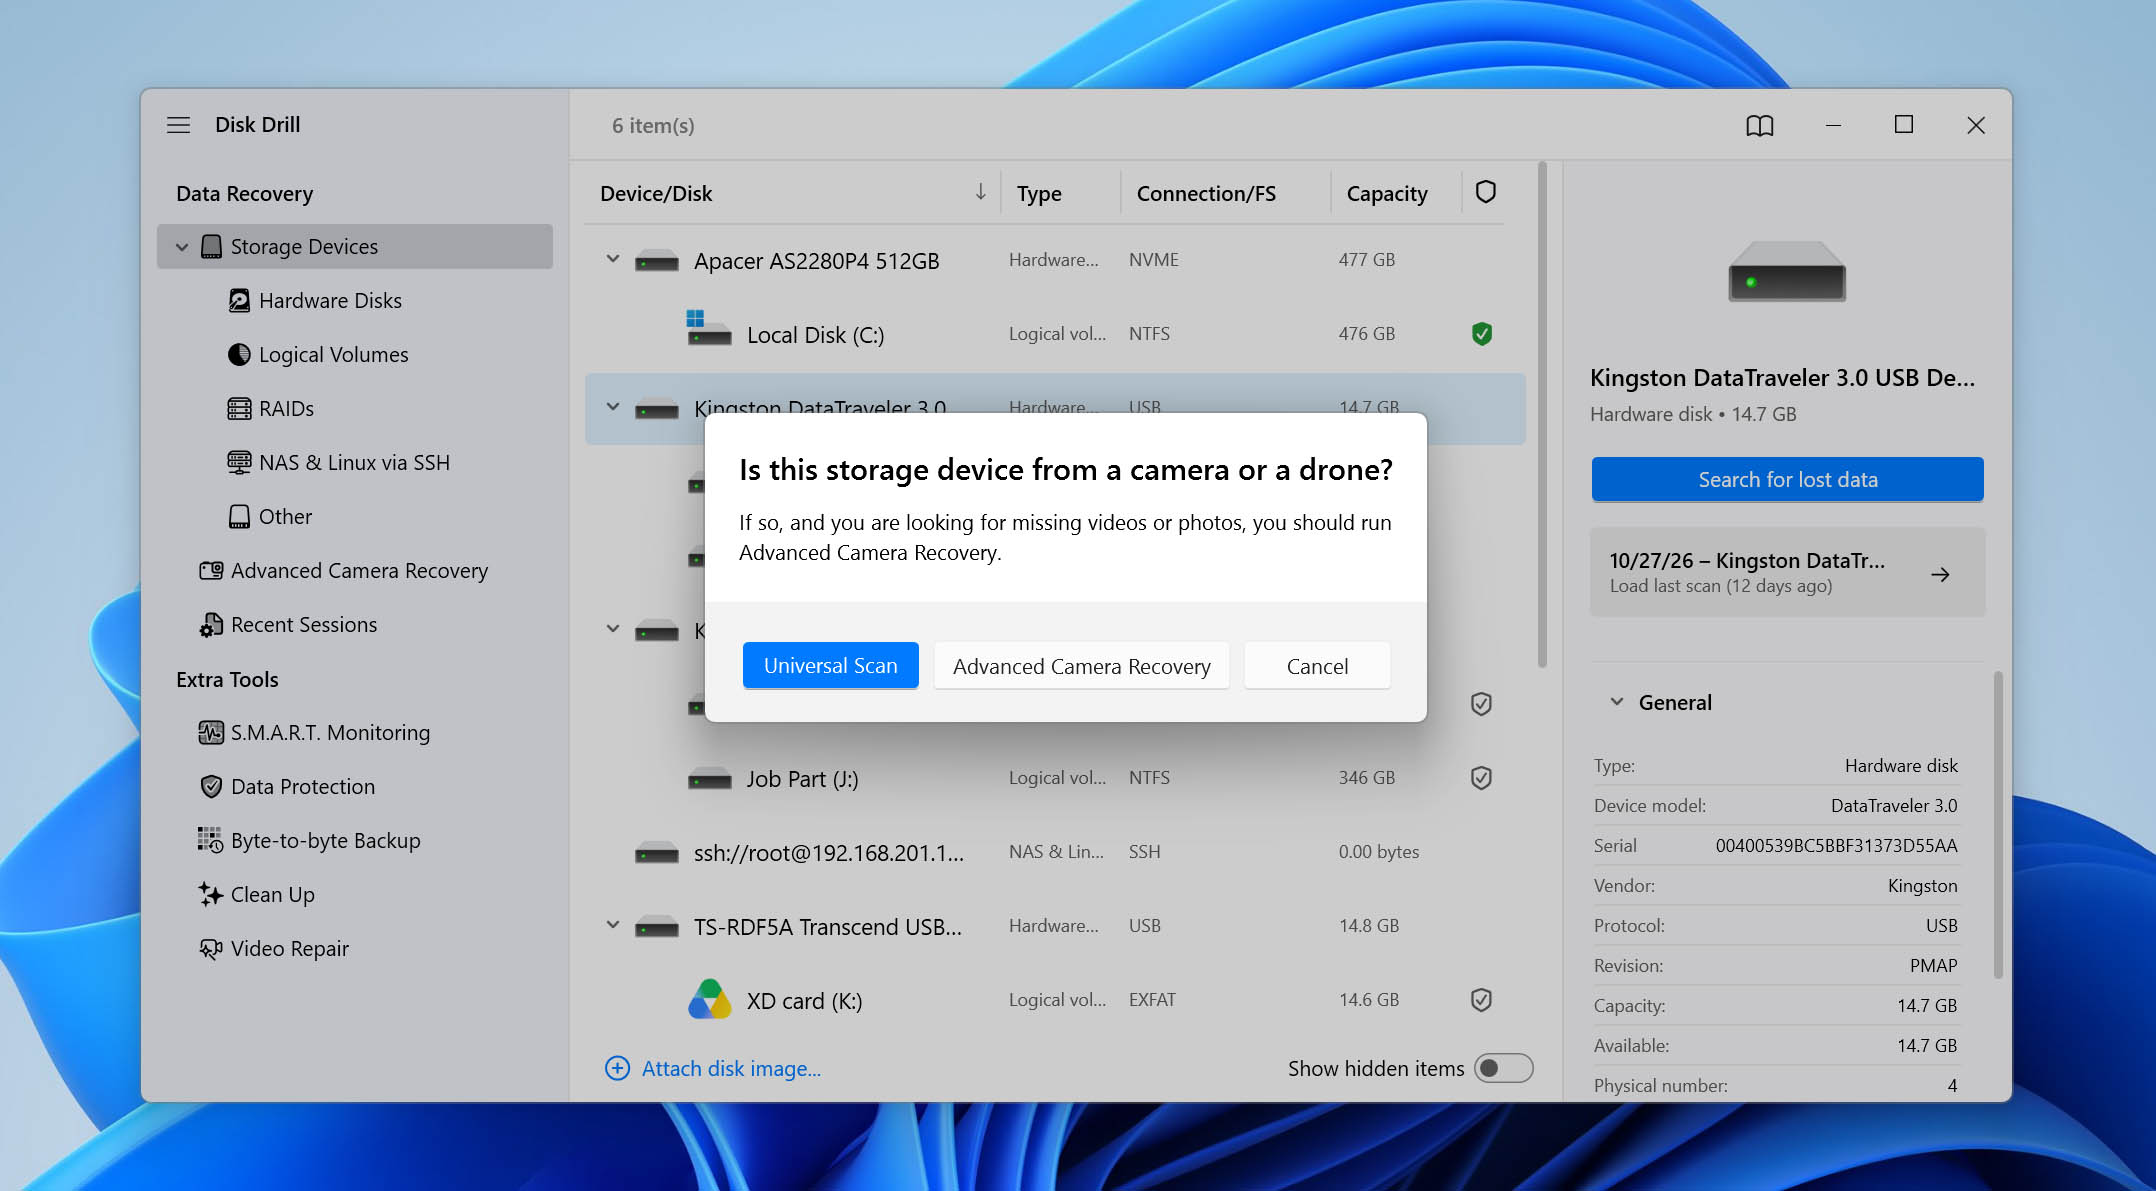
- Start the scan, then click Review found items to browse the results.
- Preview the files you need and check the Recovery chances where available. Select the files you want to restore and click Recover.
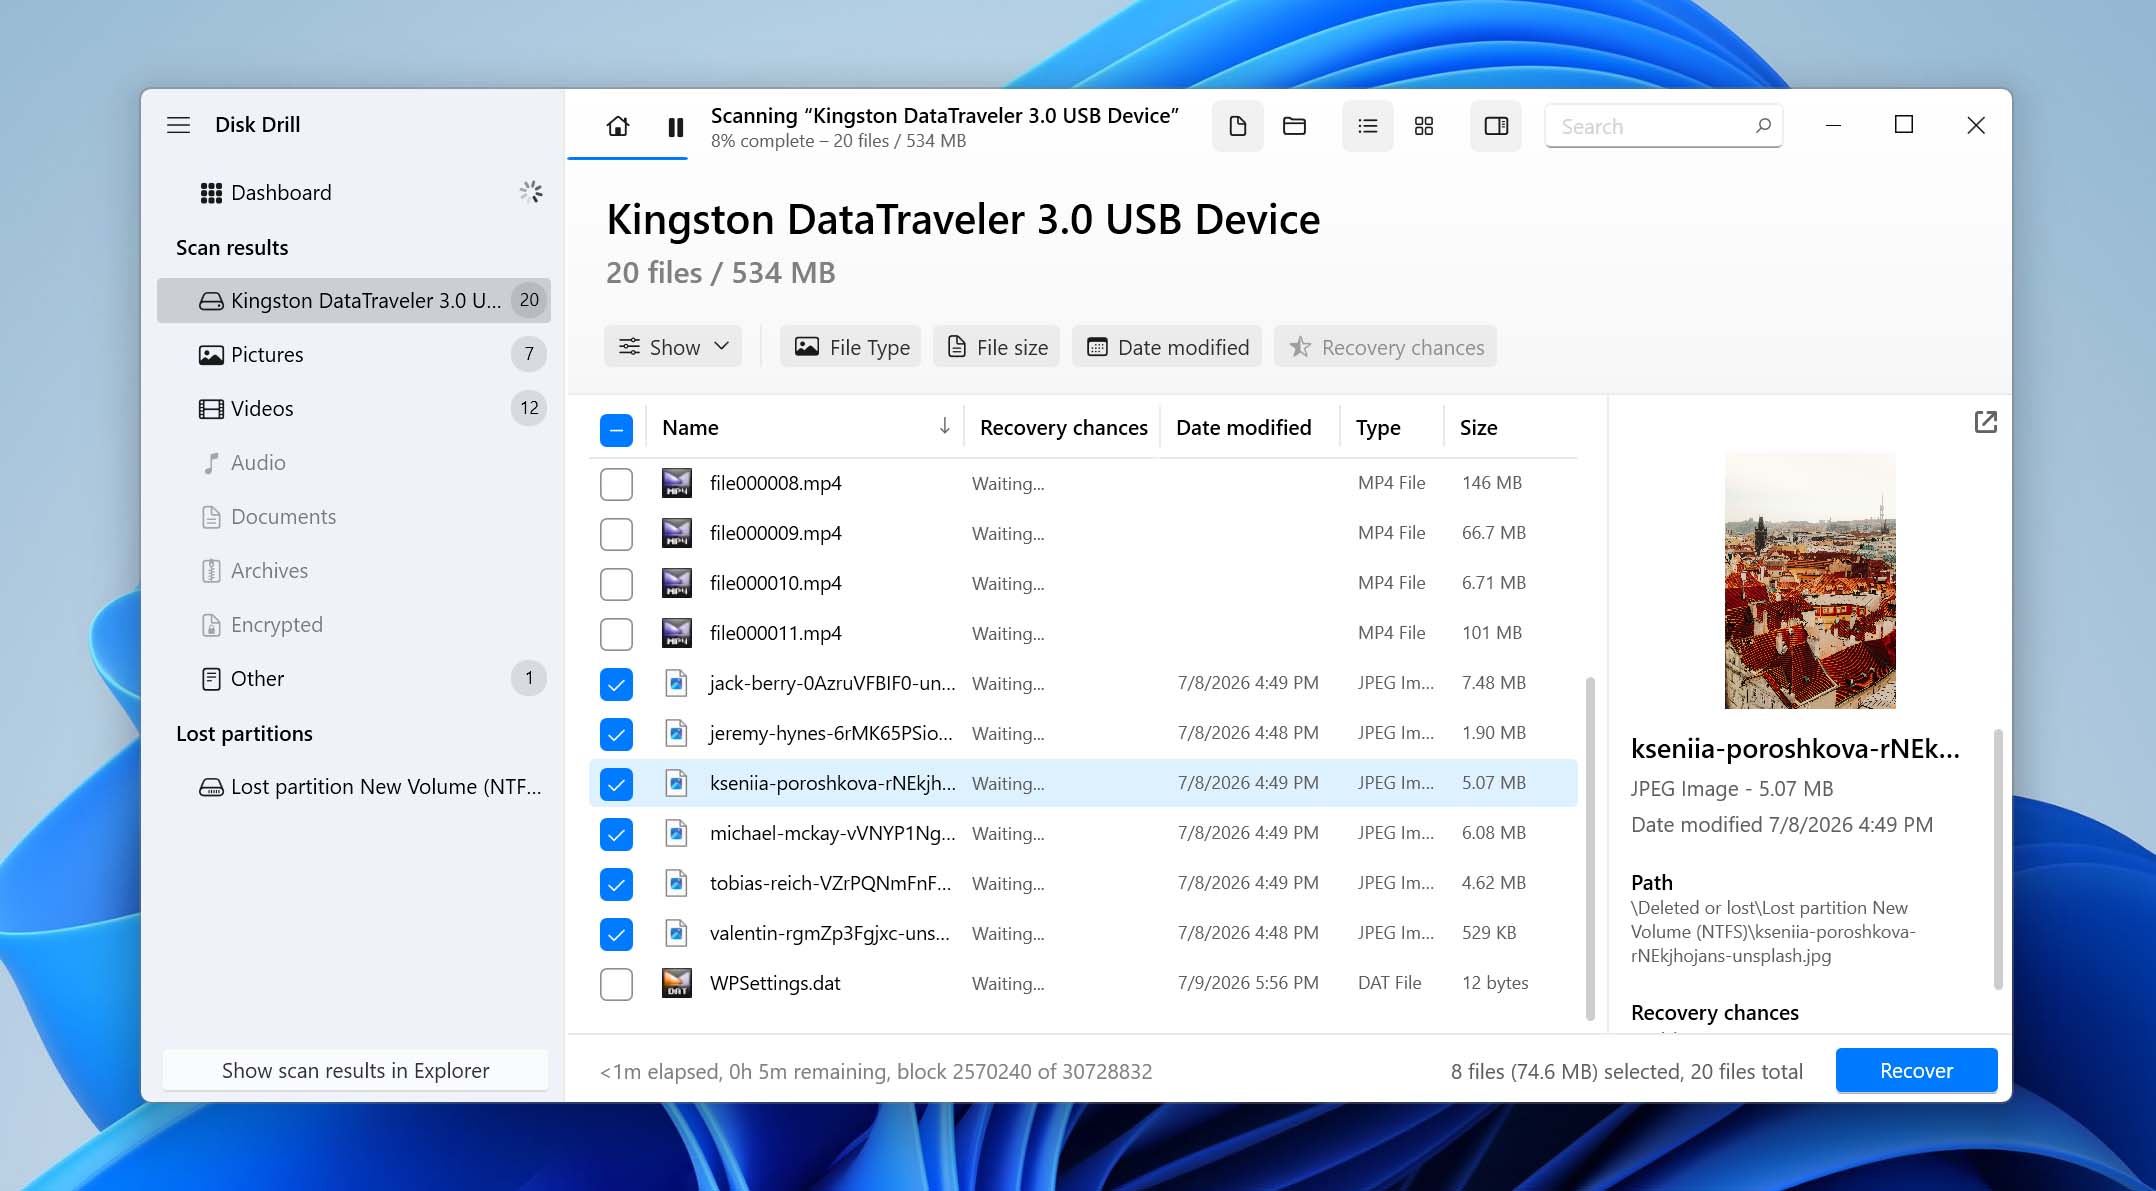
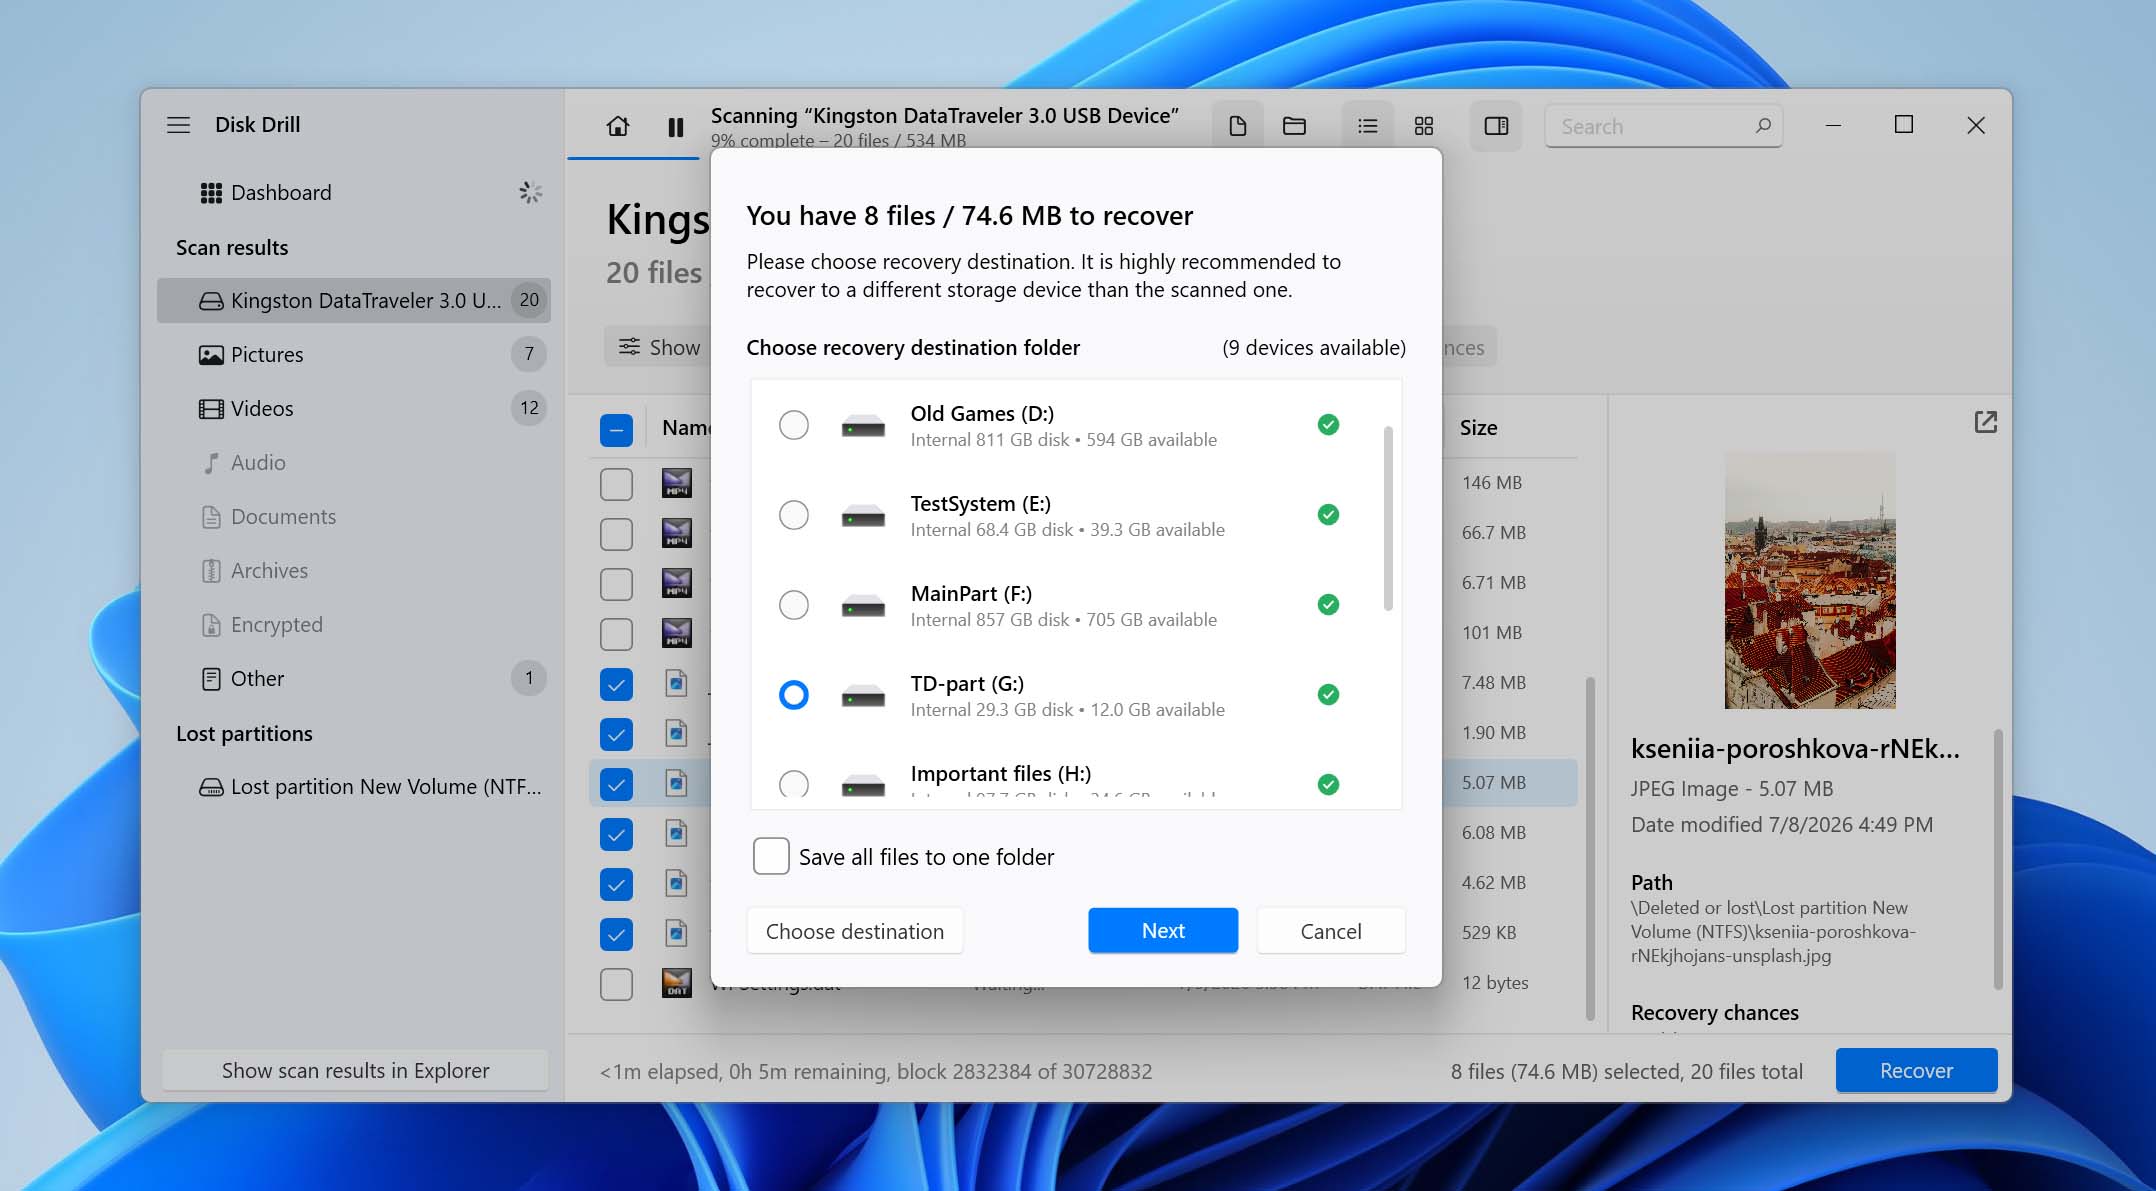
- Choose a recovery location on a different storage device and click Next.
If you already clicked Format and performed a quick format, recovery may still be possible. Stop using the drive immediately and don’t write any new data to it, as new files can overwrite the data you’re trying to recover.
How to Fix the “You Need to Format the Disk” Error
Once your data is safely backed up or recovered (or if there’s nothing on the drive you need to keep), you can move on to fixing the drive that requires formatting. Some of the methods below interact directly with the file system and modify its structures, which can result in permanent data loss. Don’t proceed until any important files are safe.
Method 1: Perform Basic Checks
Start with a few basic checks to rule out connection and system issues before making any changes to the drive.
First, reconnect the device and try another USB port. If you’re using an external HDD with a removable cable, try a different cable as well. Connect the drive directly to the computer rather than through a USB hub, dock, or adapter. If possible, test it on another computer too.
It’s also worth considering where the drive was used before. If it belongs to someone else or was previously used with macOS or Linux, connect it to a computer running that operating system. The drive may use a file system that Windows can’t read rather than having a corrupted file system.
If the problem appears only on your current Windows PC, perform a complete shutdown. This can help if a background service or Fast Startup is preventing Windows from properly reinitializing the device:
- Save your work and close any open applications.
- Right-click Start and select Terminal (Admin).
- Type shutdown /s /f /t 0 and press Enter.
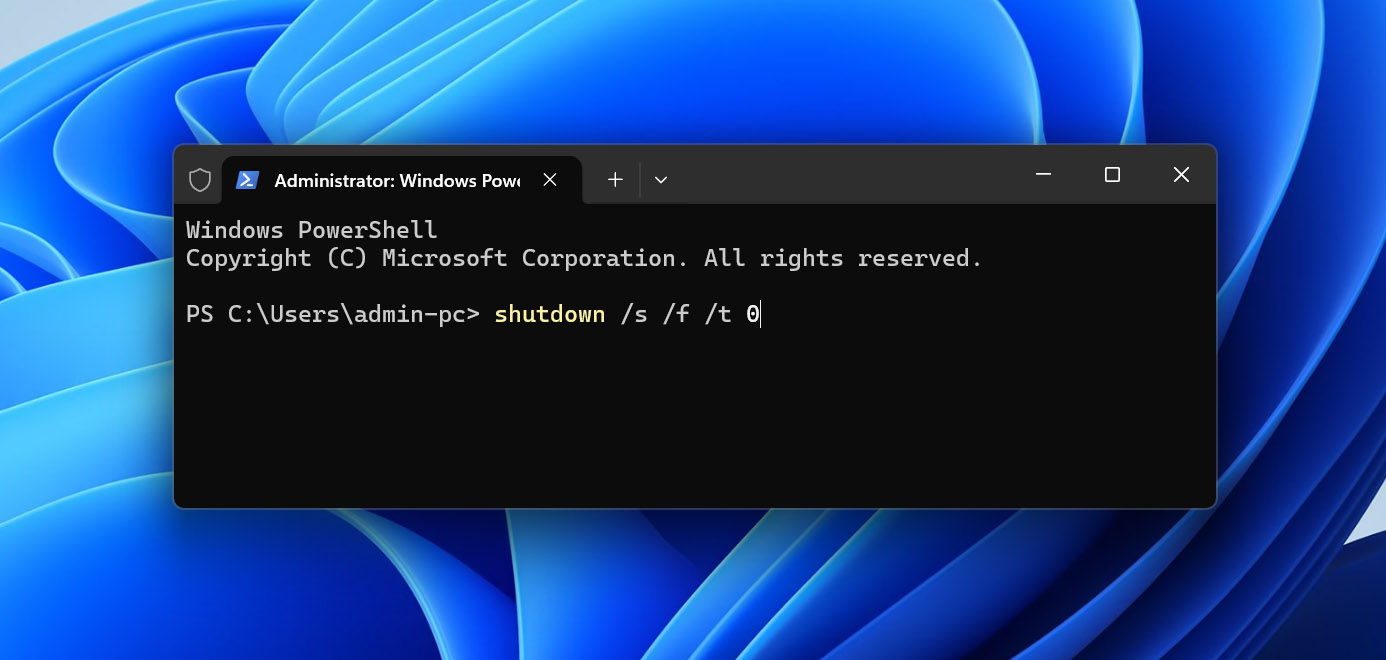
- Turn the computer back on, reconnect the drive, and check whether you can access it normally.
If Windows still asks you to format the drive after these checks, move on to the next method.
Method 2: Repair File System Errors
If the drive still has a recognizable file system, such as NTFS, but some of its file system structures are damaged, CHKDSK may be able to repair them. For example, it can help with certain NTFS file system errors, including problems involving the boot sector.
CHKDSK modifies the file system while attempting repairs. Recover or back up any important data before running it. If the drive is unstable, disconnects, or shows signs of physical failure, don’t use CHKDSK.
To repair file system errors with CHKDSK:
- Right-click Start and select Terminal (Admin).
- Type chkdsk X: /f, replacing X with the drive letter, and press Enter.
- Wait for CHKDSK to finish, then reconnect the drive and check whether Windows can open it normally.
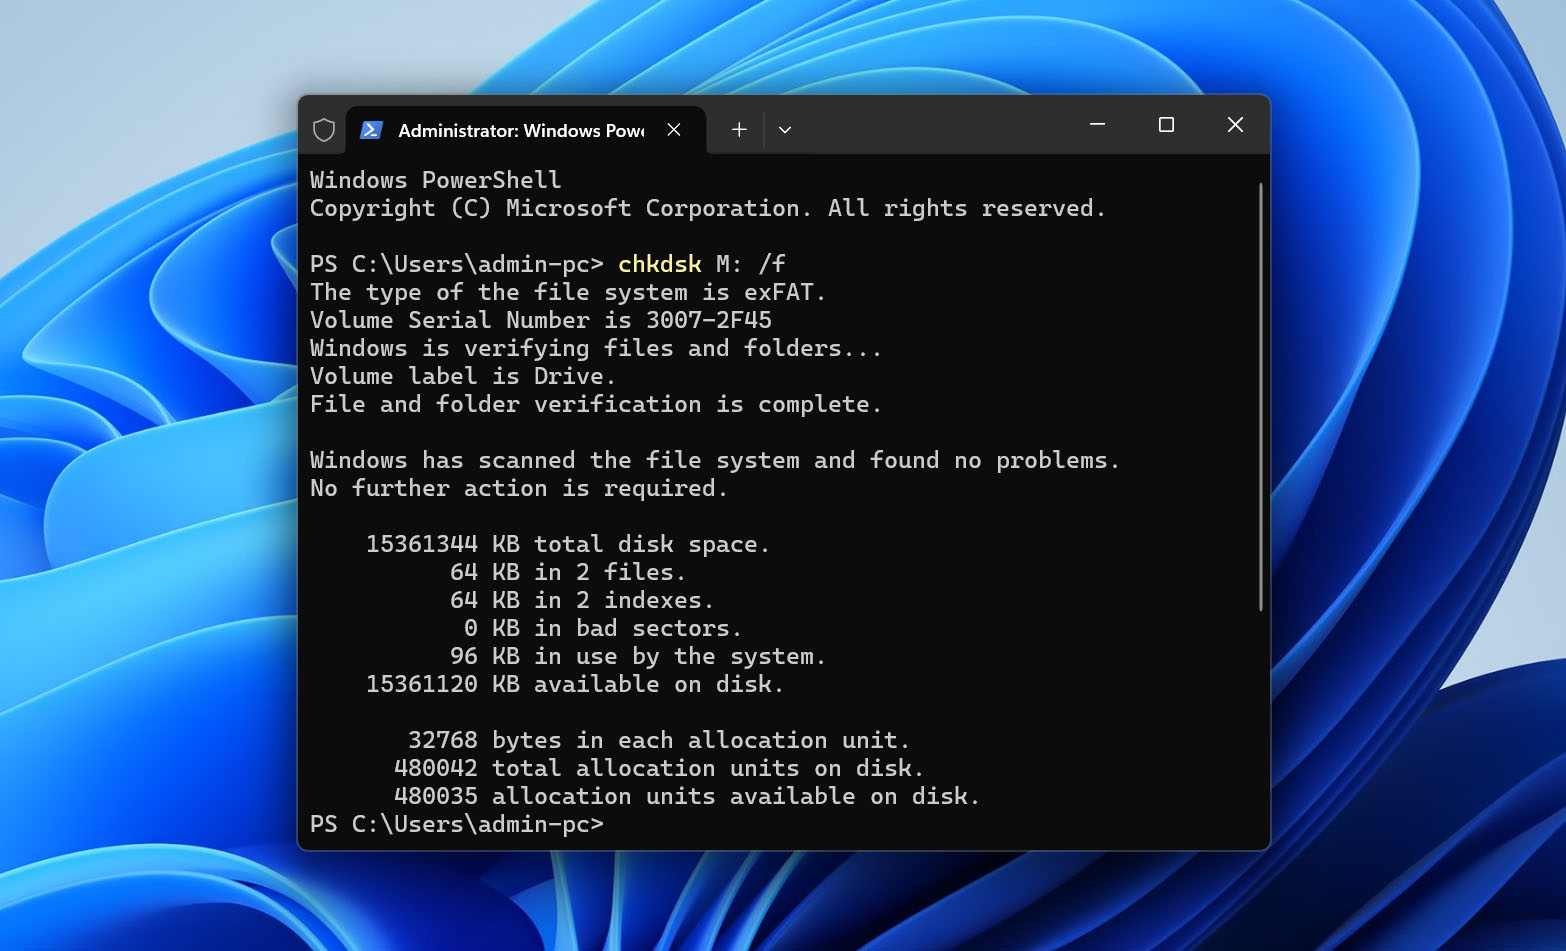
The /f parameter tells CHKDSK to fix file system errors it finds. You may also see /r recommended for drive problems. In addition to fixing errors, /r checks for bad sectors and attempts to recover readable information, so it takes considerably longer and puts more load on the drive. Avoid using /r on a drive that is unstable or may be failing.
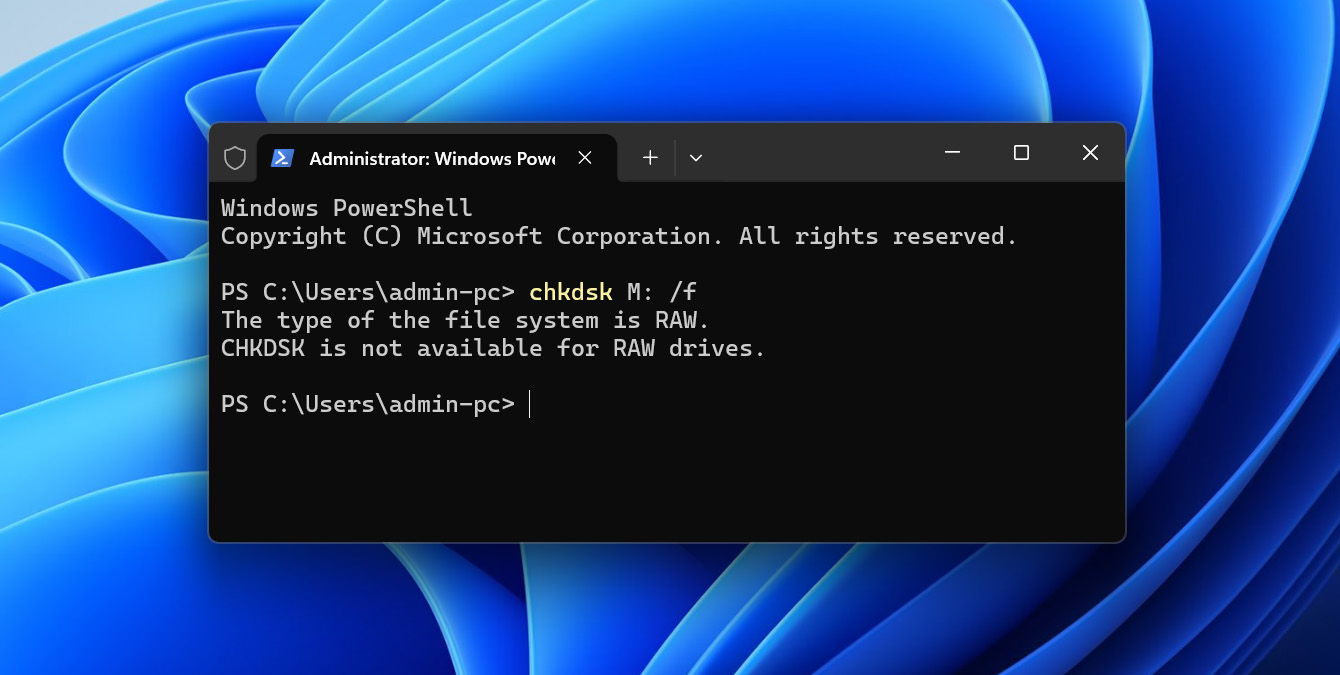
CHKDSK does not work on RAW file systems. If you run it and receive the message “CHKDSK is not available for RAW drives,” skip this method and move on to TestDisk.
Windows also provides a graphical Error Checking tool. Right-click the drive in File Explorer, select Properties, open the Tools tab, and click Check under Error checking. Like CHKDSK, use it only after your important data is safe.
Method 3: Repair a RAW Drive With TestDisk
If CHKDSK can’t run because the drive appears as RAW, TestDisk may help repair the underlying partition structure. This is one of the options you can try to fix the “You need to format the disk before you can use it” error caused by a damaged partition table or boot sector, without formatting the drive.
TestDisk can search for lost partitions and restore the correct partition structure, but it can also write changes directly to the disk. Make sure your important data has already been recovered or backed up before you proceed.
- Download TestDisk, extract the archive, and run testdisk_win.exe as administrator.
- Select Create to create a log file, then choose the affected physical disk. Check its model and capacity carefully so you don’t select the wrong drive.
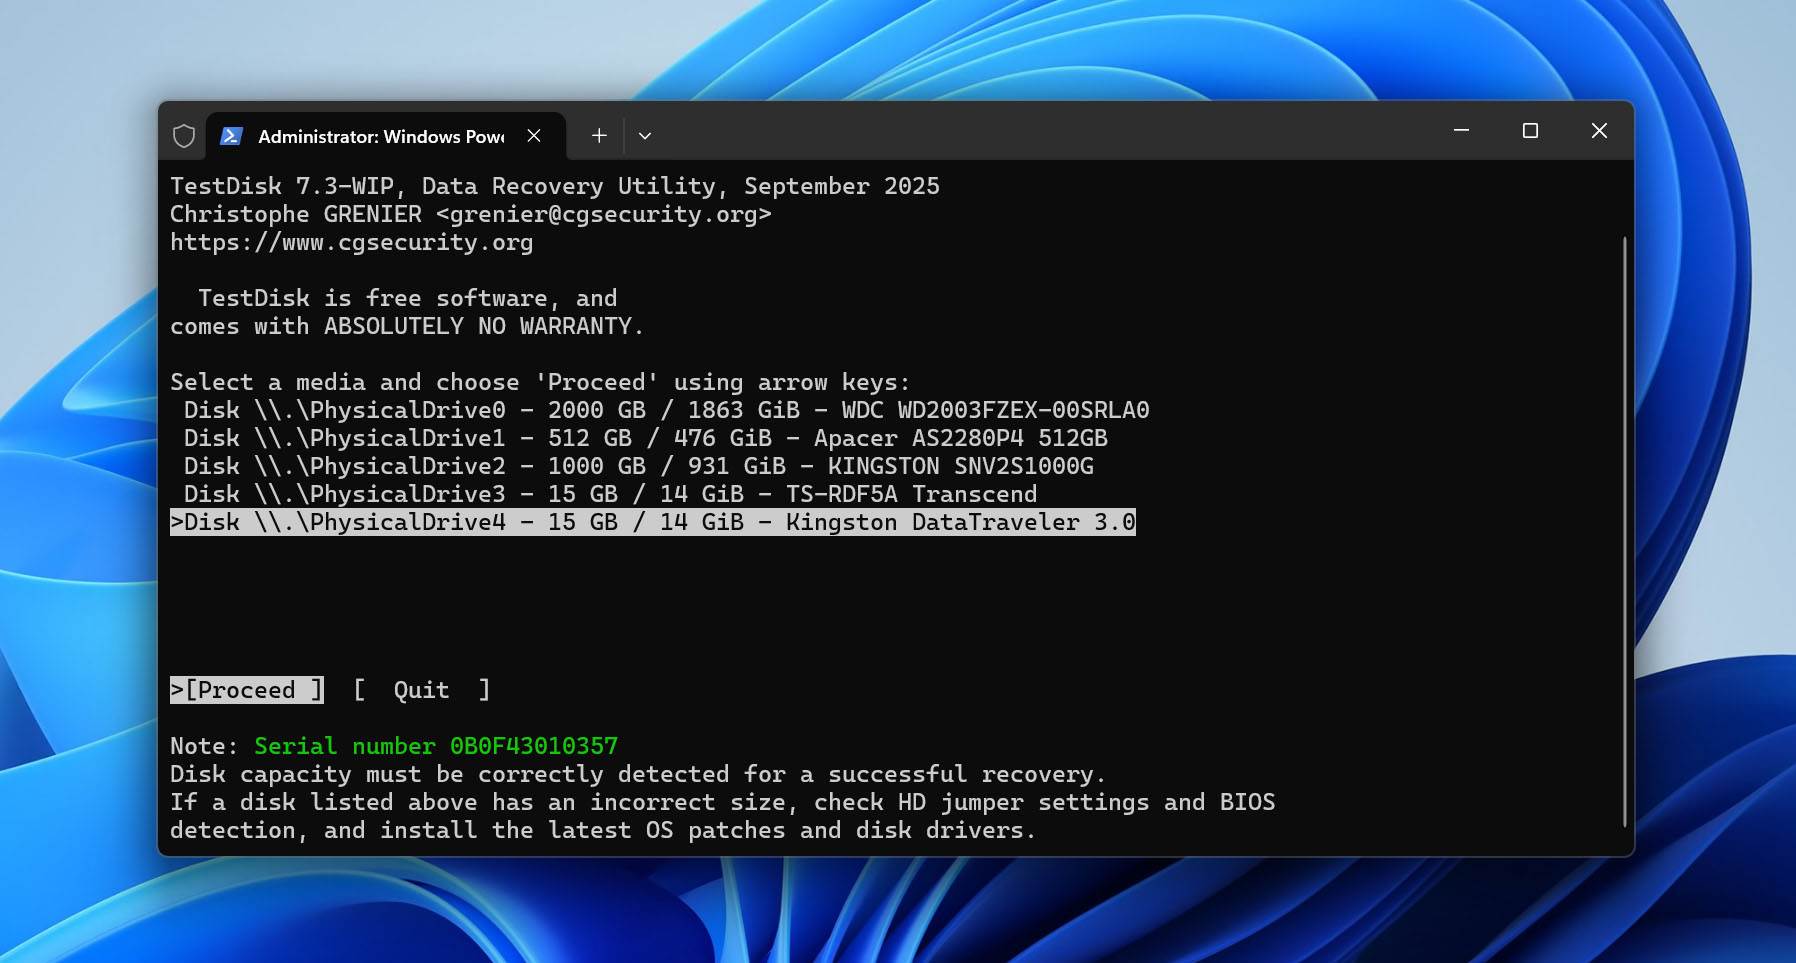
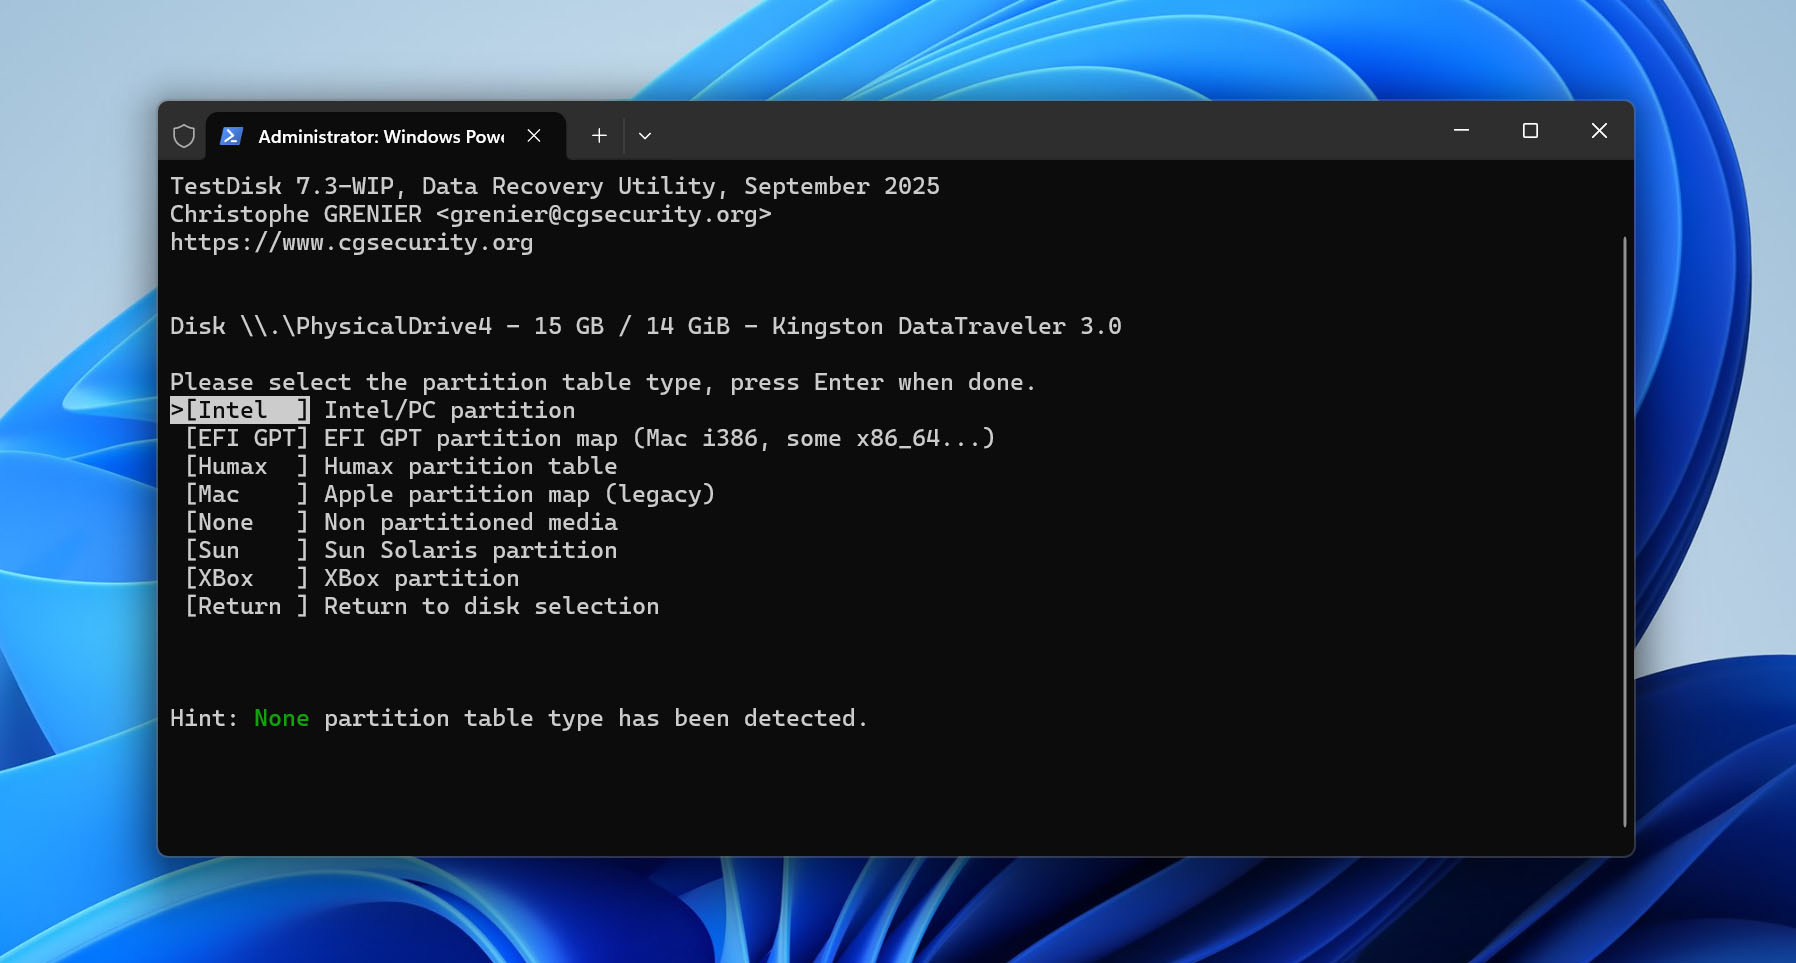
- Confirm the partition table type suggested by TestDisk, then select Analyse.
- Select Quick Search to look for lost or incorrectly recorded partitions.
- Highlight a found partition and press P to list its files. Check whether you can see the folders and files you expect.
- If Quick Search doesn’t find the correct partition, select Deeper Search and wait for the more extensive scan to finish.
- Before selecting Write, check the partition’s file system, size, start and end positions, and contents. Press P again if necessary to confirm that you’re looking at the correct partition.
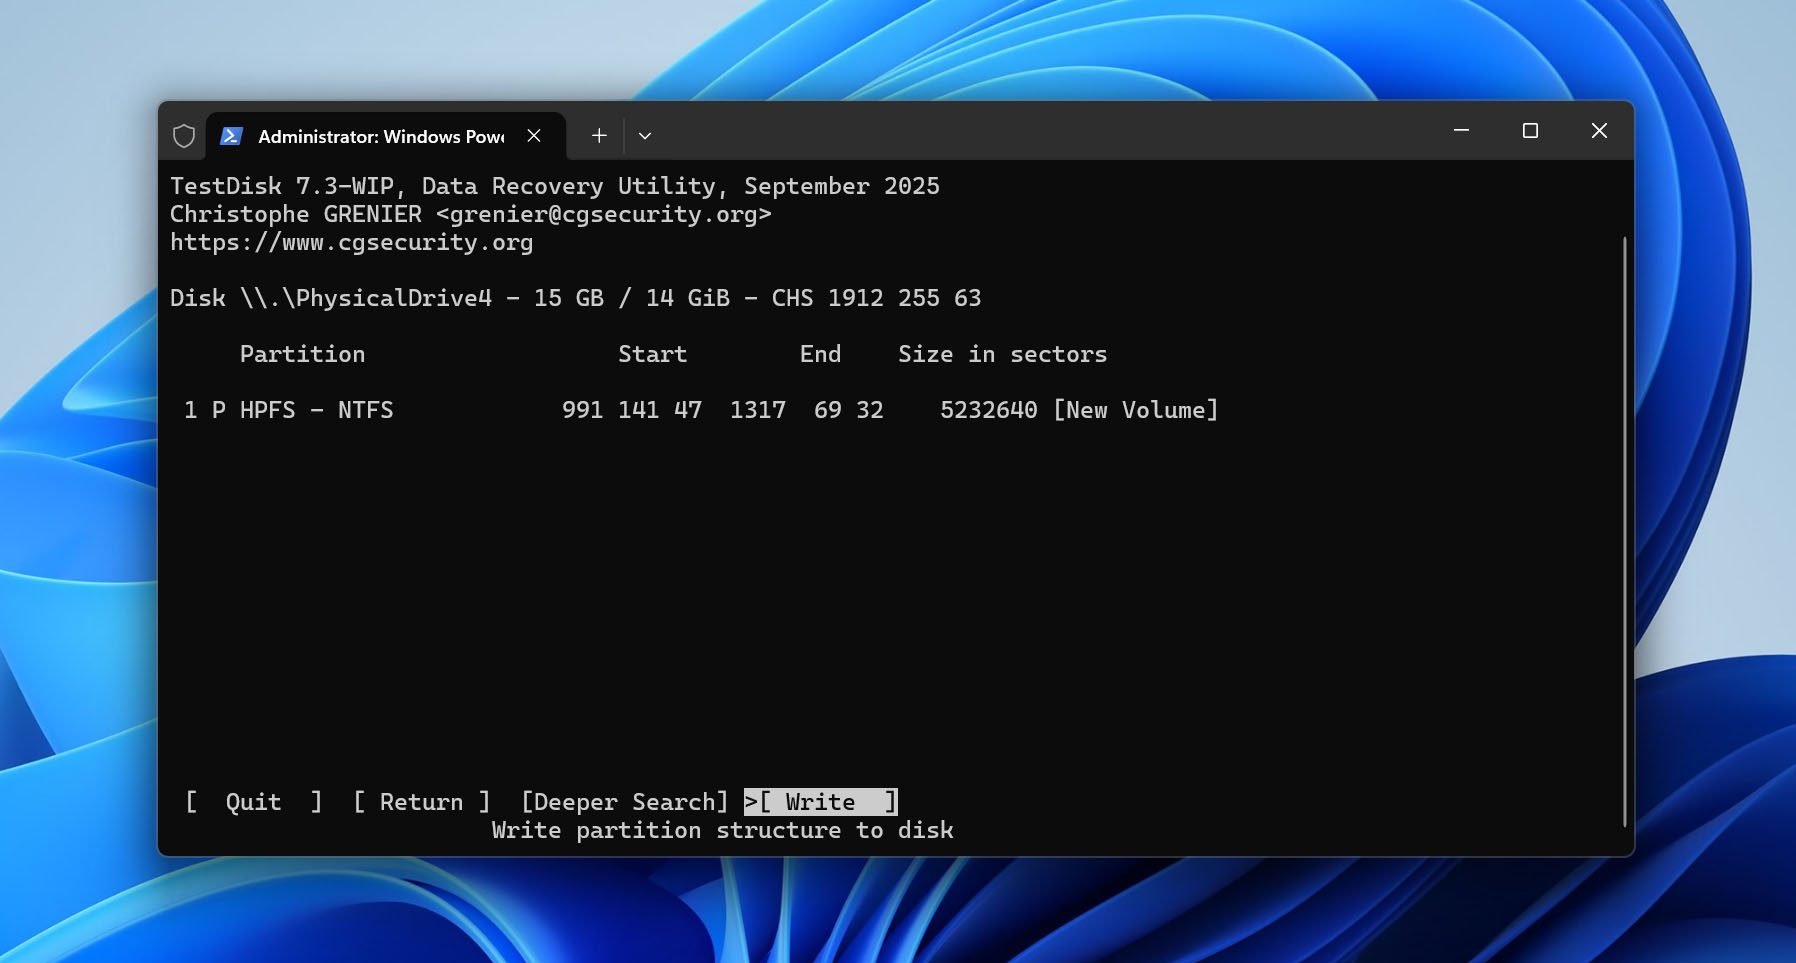
- If everything matches the original partition, select Write, confirm the change, and restart the computer.
Don’t use Write simply because TestDisk found a partition. If its size, file system, boundaries, or contents don’t look right, leave the disk unchanged. You can still use TestDisk to copy accessible files to another drive or return to data recovery software instead.
Method 4: Format the Drive
If none of the previous methods worked, formatting is the final option. It creates a new file system and should make the drive usable again if the problem is logical rather than physical.
Remember that formatting removes the data currently stored on the drive. If you want to format without losing data, you need to back up accessible files or recover inaccessible data first. Only continue once everything important is stored somewhere else.
To format the drive in Disk Management:
- Right-click Start and select Disk Management.
- Right-click the affected volume and select Format.
- Enter a volume label and choose a file system. Select NTFS if you plan to use the drive with Windows, or exFAT if you need compatibility with both Windows and macOS.
- Choose whether to perform a quick or full format. A quick format creates a new file system and is usually sufficient in this situation. A full format takes much longer, checks the drive for bad sectors, and overwrites existing data, which makes subsequent recovery far less likely.
- Click OK, then confirm the format.
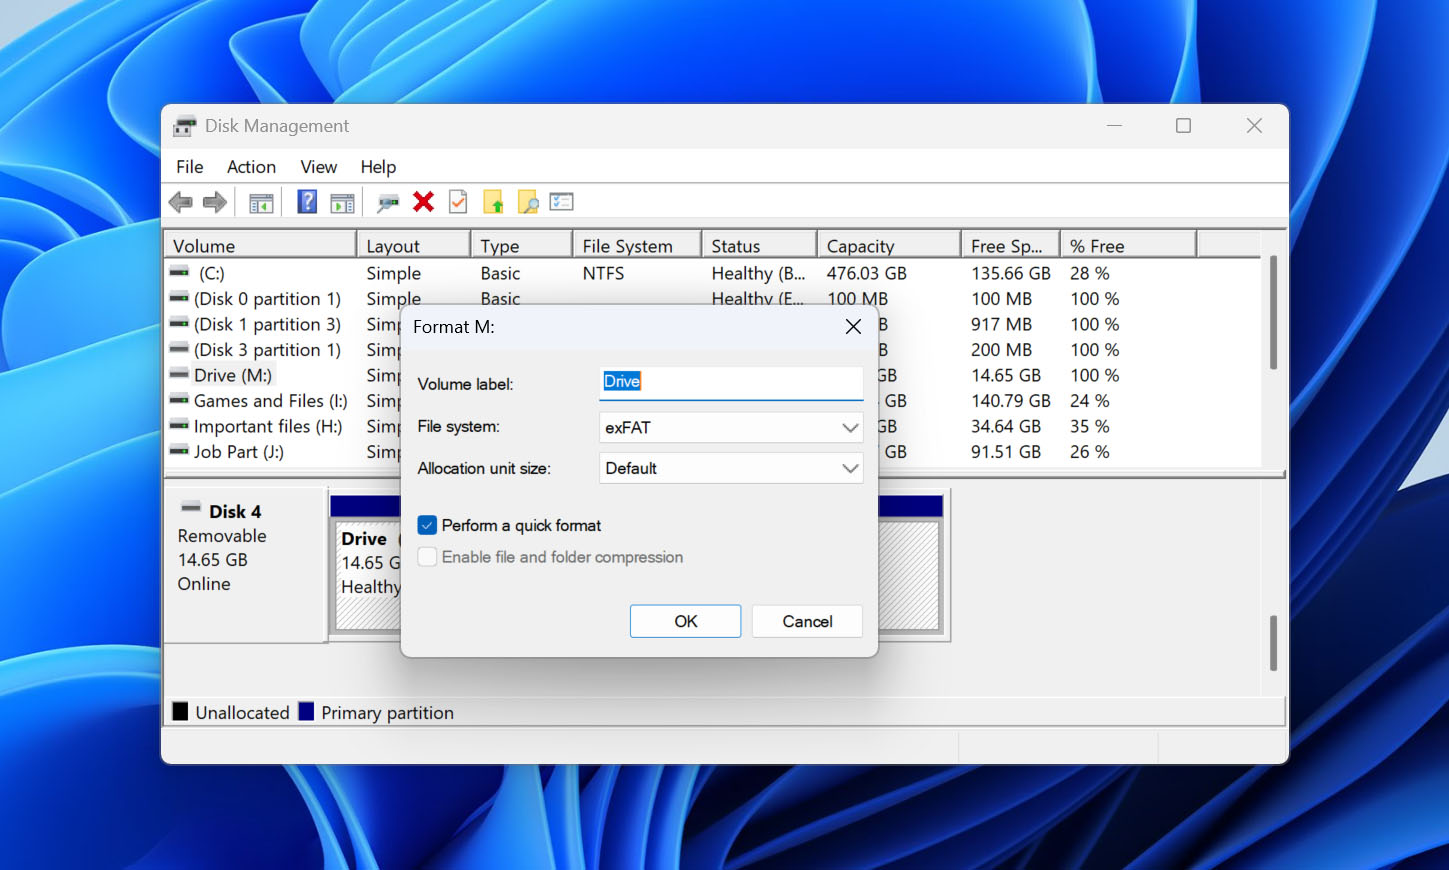
Alternatively, you can format the drive through File Explorer or Command Prompt. The File Explorer process is fairly self-explanatory, so below we’ll show how to do it from the command line using DiskPart:
- Right-click Start and select Terminal (Admin).
- Type diskpart and press Enter.
- Type list disk and press Enter.
- Identify the affected drive by its capacity, then type select disk X, replacing X with the correct disk number.
- Type clean and press Enter.
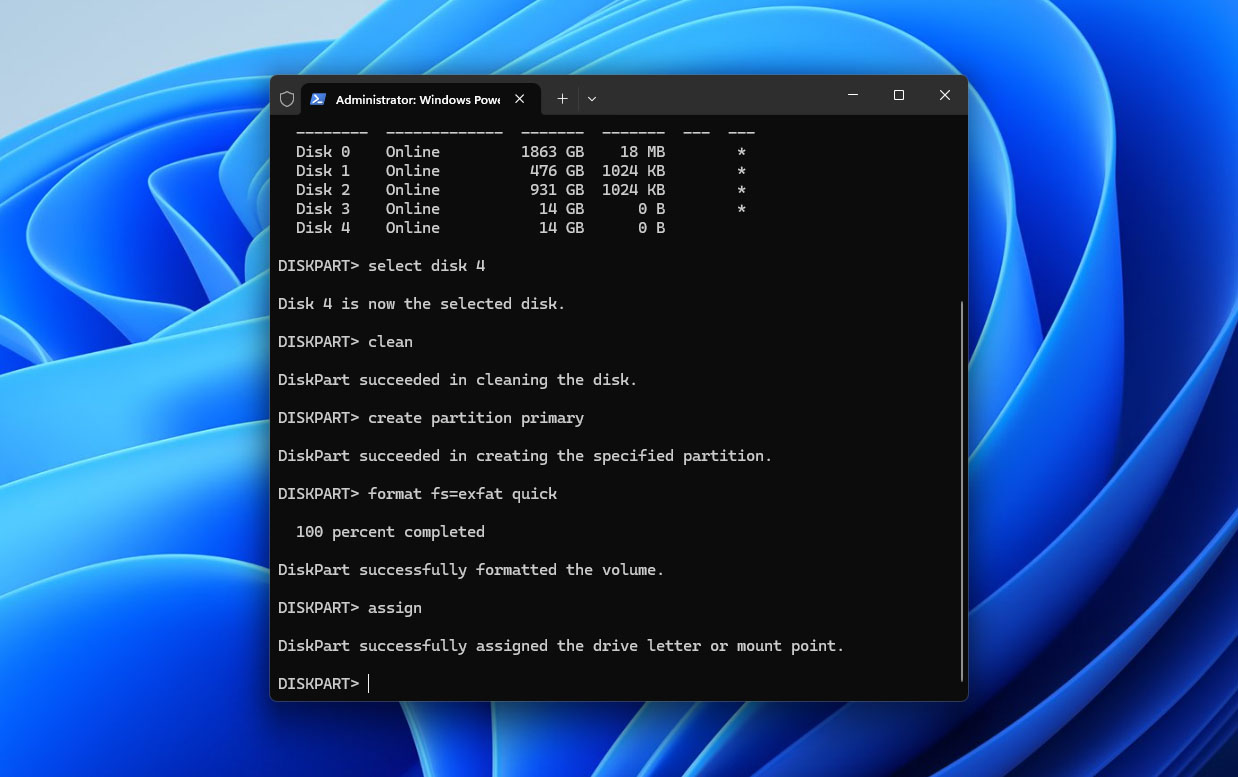
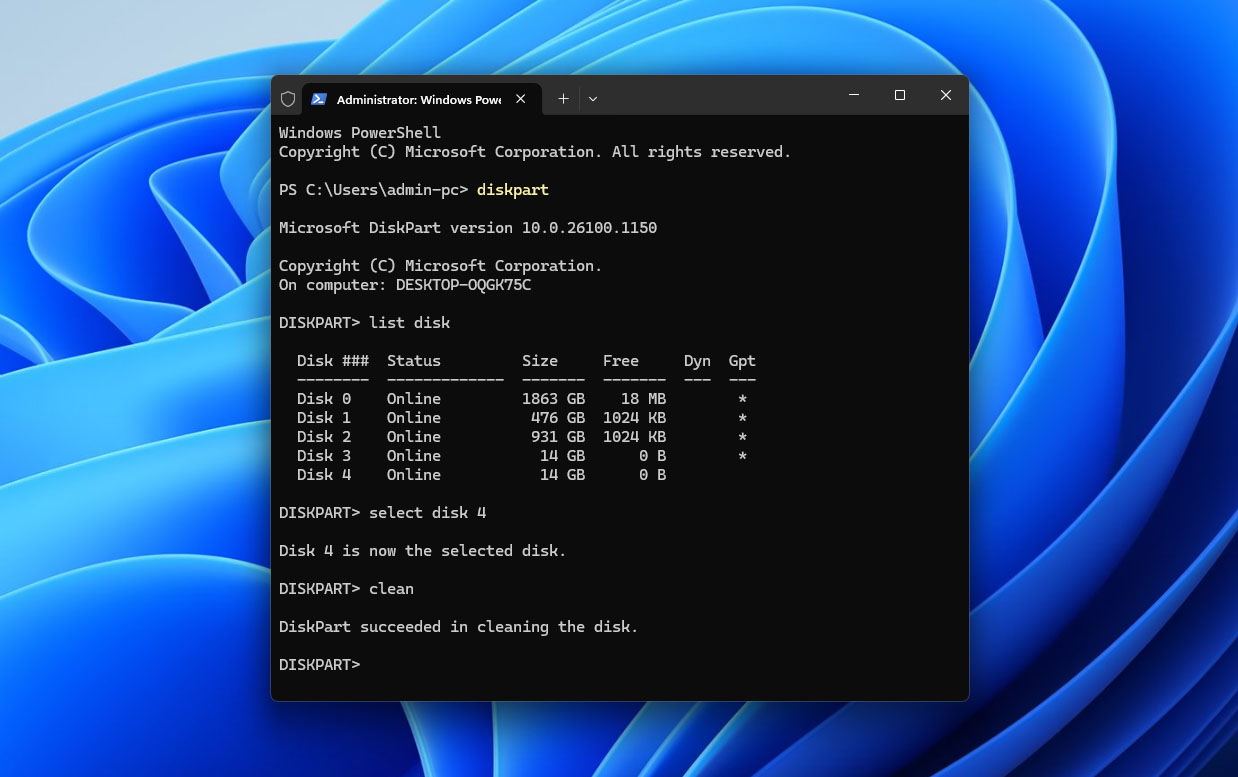 Type create partition primary and press Enter.
- Type format fs=ntfs quick and press Enter. Replace ntfs with exfat if you need the drive to work with both Windows and macOS.
- Type assign and press Enter.
What Causes the “You Need to Format the Disk” Message
The “You need to format the disk before you can use it” error message appears when Windows is unable to read the file system on your drive. The problem drive will prevent you from accessing any of the data currently on it. Here are a few common reasons why this can happen:
| Reason | Description | How to Avoid It |
| ❌ Corrupted file system | The file system can become corrupted after improper ejection, disconnecting the drive during a read or write operation, power loss, bad sectors, malware, or other logical damage. Windows may then detect the device but identify its file system as RAW and ask you to format it. | Always eject external drives safely, avoid disconnecting them while files are being transferred, and replace drives that develop bad sectors or other signs of failure. |
| 🚫 Incompatible file system | Windows can’t natively read some file systems used by other operating systems. For example, a drive formatted as APFS for macOS may trigger a format prompt when connected to a Windows PC even though its file system and data are intact. | If you regularly use the same drive with different operating systems, choose a file system they both support, such as exFAT. Otherwise, access the drive from an operating system that supports its existing file system. |
Final Thoughts
If Windows asks you to format a drive before you can use it, start by checking how the drive appears in Disk Management. If it shows the correct capacity, back up or recover any important data before making changes to the file system. Then try the fixes in order: basic connection checks first, followed by CHKDSK or TestDisk when appropriate. Logical file system problems can often be repaired without formatting, with formatting left as the final option.
Even if the repair works, it doesn’t necessarily mean the drive is reliable. If the same problem returns after formatting, check the drive’s SMART data if the storage device supports it. Critical SMART values or recurring file system corruption are good reasons to replace the drive rather than continue storing important files on it. Keep a separate backup of important data using File History or another backup solution.
If you have trouble with any of the steps, visit the 7 Data Recovery forum. There are already threads covering similar storage problems where users and data recovery experts share solutions. If none of them match your situation, you can create a new thread and describe what the drive shows in Disk Management and what you’ve already tried.