Deleted files can often be recovered from an exFAT drive as long as the space they used hasn’t been overwritten, or restored from a backup if you have one. When a file is deleted, exFAT marks its directory entry and clusters as free, but the data itself can remain on the drive, even after a quick format. This allows data recovery software to scan the drive and retrieve files that are still there.
In this guide, we’ll explain how exFAT data recovery works and walk you through the methods you can use to recover your files. Since exFAT is commonly used on 64 GB and larger USB flash drives, SDXC cards, external HDDs and SSDs, and storage used with cameras, the same recovery methods apply to a wide range of devices.
What Is the exFAT File System?
Extensible File Allocation Table (exFAT) is a file system designed primarily for flash storage and other portable devices. It works with Windows, macOS, and modern Linux systems and supports much larger files than FAT32, which has a 4 GB file size limit and which Windows won’t format on partitions larger than 32 GB using its standard formatting tools. This makes exFAT a practical choice when you need broad operating system compatibility without FAT32’s file size restriction.
If you want to learn more about how this file system works, you can read our detailed guide to the exFAT file system.
Can Deleted exFAT Files Be Recovered?
Deleted files can often be recovered from an exFAT drive because deleting a file doesn’t immediately erase its data. exFAT marks the directory entry as no longer in use (0x85 becomes 0x05) and frees its clusters in the allocation bitmap, while information such as the file name, size, and starting cluster may remain.
Your chances of recovery depend on what happened to the drive:
| Scenario | What happens to the data | Recovery chances | Best method |
| Deleted files | Files may be moved to the Recycle Bin or marked as deleted while their data remains on the drive | High if the data hasn’t been overwritten | Check the Recycle Bin first if available; otherwise, try data recovery software |
| Emptied Recycle Bin | File system records are marked as free, but the file data may still remain | High if the data hasn’t been overwritten | Try data recovery software |
| Quick format | File system structures are reset, but the file data usually remains | High if the data hasn’t been overwritten | Scan the drive with data recovery software |
| Full format | Windows overwrites the volume during the format | None once the data has been overwritten | Software recovery is not possible |
| Formatted in a camera/drone | Camera formatting usually resets the file system without overwriting the recorded data | High if the card hasn’t been used since formatting and the camera didn’t perform a low-level format | Scan with Disk Drill: use Advanced Camera Recovery for camera/drone videos or Universal Scan for photos and other files. |
| Drive shows as RAW | Windows can no longer read the file system, but the files may still be present | Good if the drive is healthy and detected with the correct capacity | Recover the files with data recovery software first, then repair the boot sector with TestDisk |
| Deleted partition | The partition entry is removed, but its file system and data may remain | Good if the space hasn’t been reused | Try data recovery software before creating or formatting a new partition |
| Power loss / unsafe eject | File system metadata or files being written may become corrupted | Varies | Try data recovery software before repairing the file system |
| SSD after TRIM | The SSD clears the blocks that held the deleted data | None once the blocks have been cleared | Software recovery is not possible |
| Physical damage | Parts of the drive may become unreadable or the device may stop working reliably | Depends on the damage | Stop using the drive and contact a professional data recovery service |
Fragmentation can also affect the result. Non-fragmented files are generally easier to reconstruct and may retain their original names, while fragmented files can be harder to recover and may only be found through file signature scanning.
How to Recover Data From an exFAT Drive
The right recovery method depends on how the files were lost. Use the table above to identify your situation, then follow the matching method below.
Before You Start:
- Stop using the drive. Don’t copy, download, or save anything to it.
- Don’t format the drive, even if Windows prompts you to do so.
- Don’t run CHKDSK before recovery.
- Recover files to another drive.
- Stop DIY recovery if the drive has physical problems and contact a professional data recovery service.
Method 1: Recover Deleted Files from Recycle Bin
When it applies: You deleted files normally from an exFAT HDD/SSD and haven’t emptied the Recycle Bin.
On Windows, files deleted from internal drives normally go to the Recycle Bin unless you use Shift + Delete. If you deleted files from an exFAT HDD or SSD, connect the drive to your computer and check the Recycle Bin as well.
To restore your files:
- Connect the exFAT drive to your computer if it’s an external HDD or SSD.
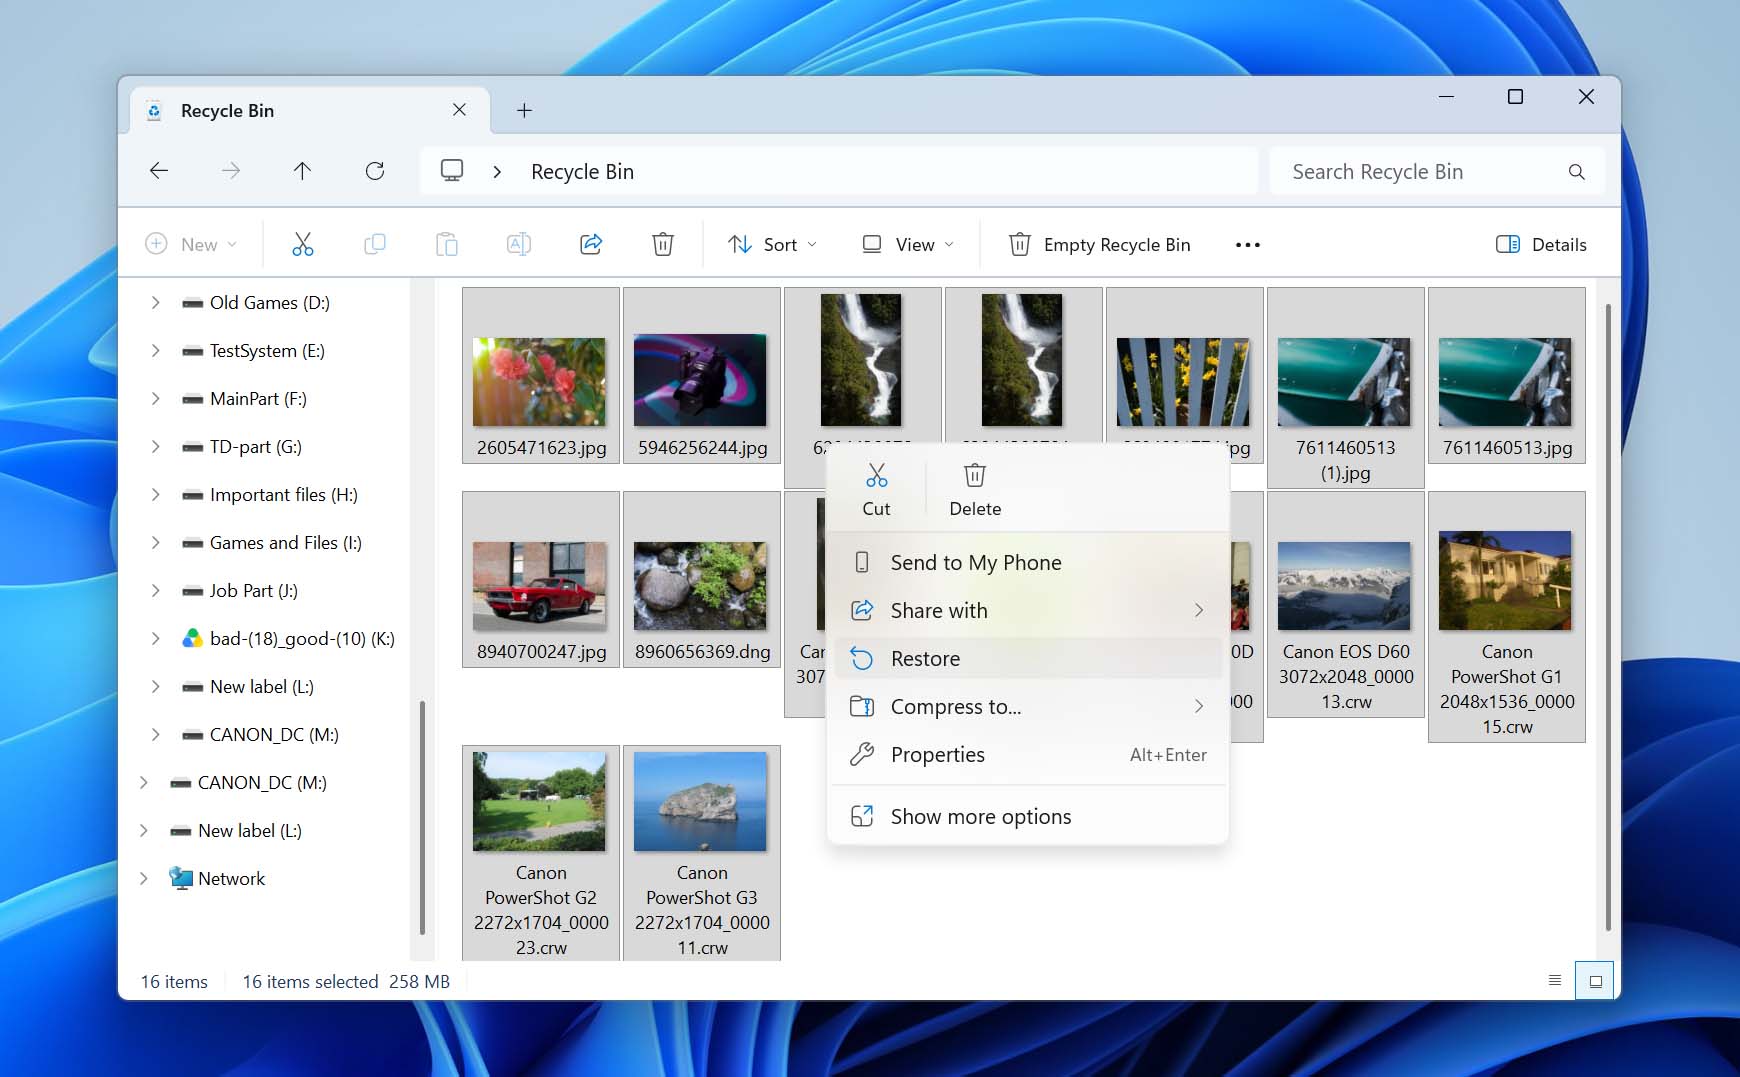
- Open the Recycle Bin from the desktop.
- Find and select the files you want to recover.
- Right-click them and select Restore. Windows will restore the files to their original location on the exFAT drive.
Files deleted from USB flash drives and SD cards don’t normally go to the Recycle Bin on Windows, so this method doesn’t apply to them. On macOS, files deleted from removable devices can appear in Trash.
Method 2: Use Professional Data Recovery Software
When it applies: Your exFAT drive is detected with the correct capacity, but files were deleted, the drive was quick-formatted, the partition was lost, or the file system became corrupted or RAW.
We chose Disk Drill for exFAT recovery based on our own recovery tests. When we tested it for our Disk Drill review, we used an SD card image from a DJI drone with deleted photos and fragmented MOV videos. The scan took around four minutes, and Disk Drill recovered all four MOV videos along with roughly 100 deleted photos. All four videos played correctly after recovery, which is particularly notable because fragmented camera and drone videos are often difficult to reconstruct.
Disk Drill can also scan external hard drives, SSDs, USB flash drives, and memory cards, so it covers the devices you’re most likely to encounter in the scenarios described in this guide. It also ranked among the best data recovery apps we tested. On Windows, the free version lets you recover up to 100 MB of data, while scanning and file previews are available without that recovery limit.
Here’s how to recover data from exFAT drive using Disk Drill:
- Download Disk Drill’s setup file, launch it and follow the install wizard’s guidelines to complete the installation.
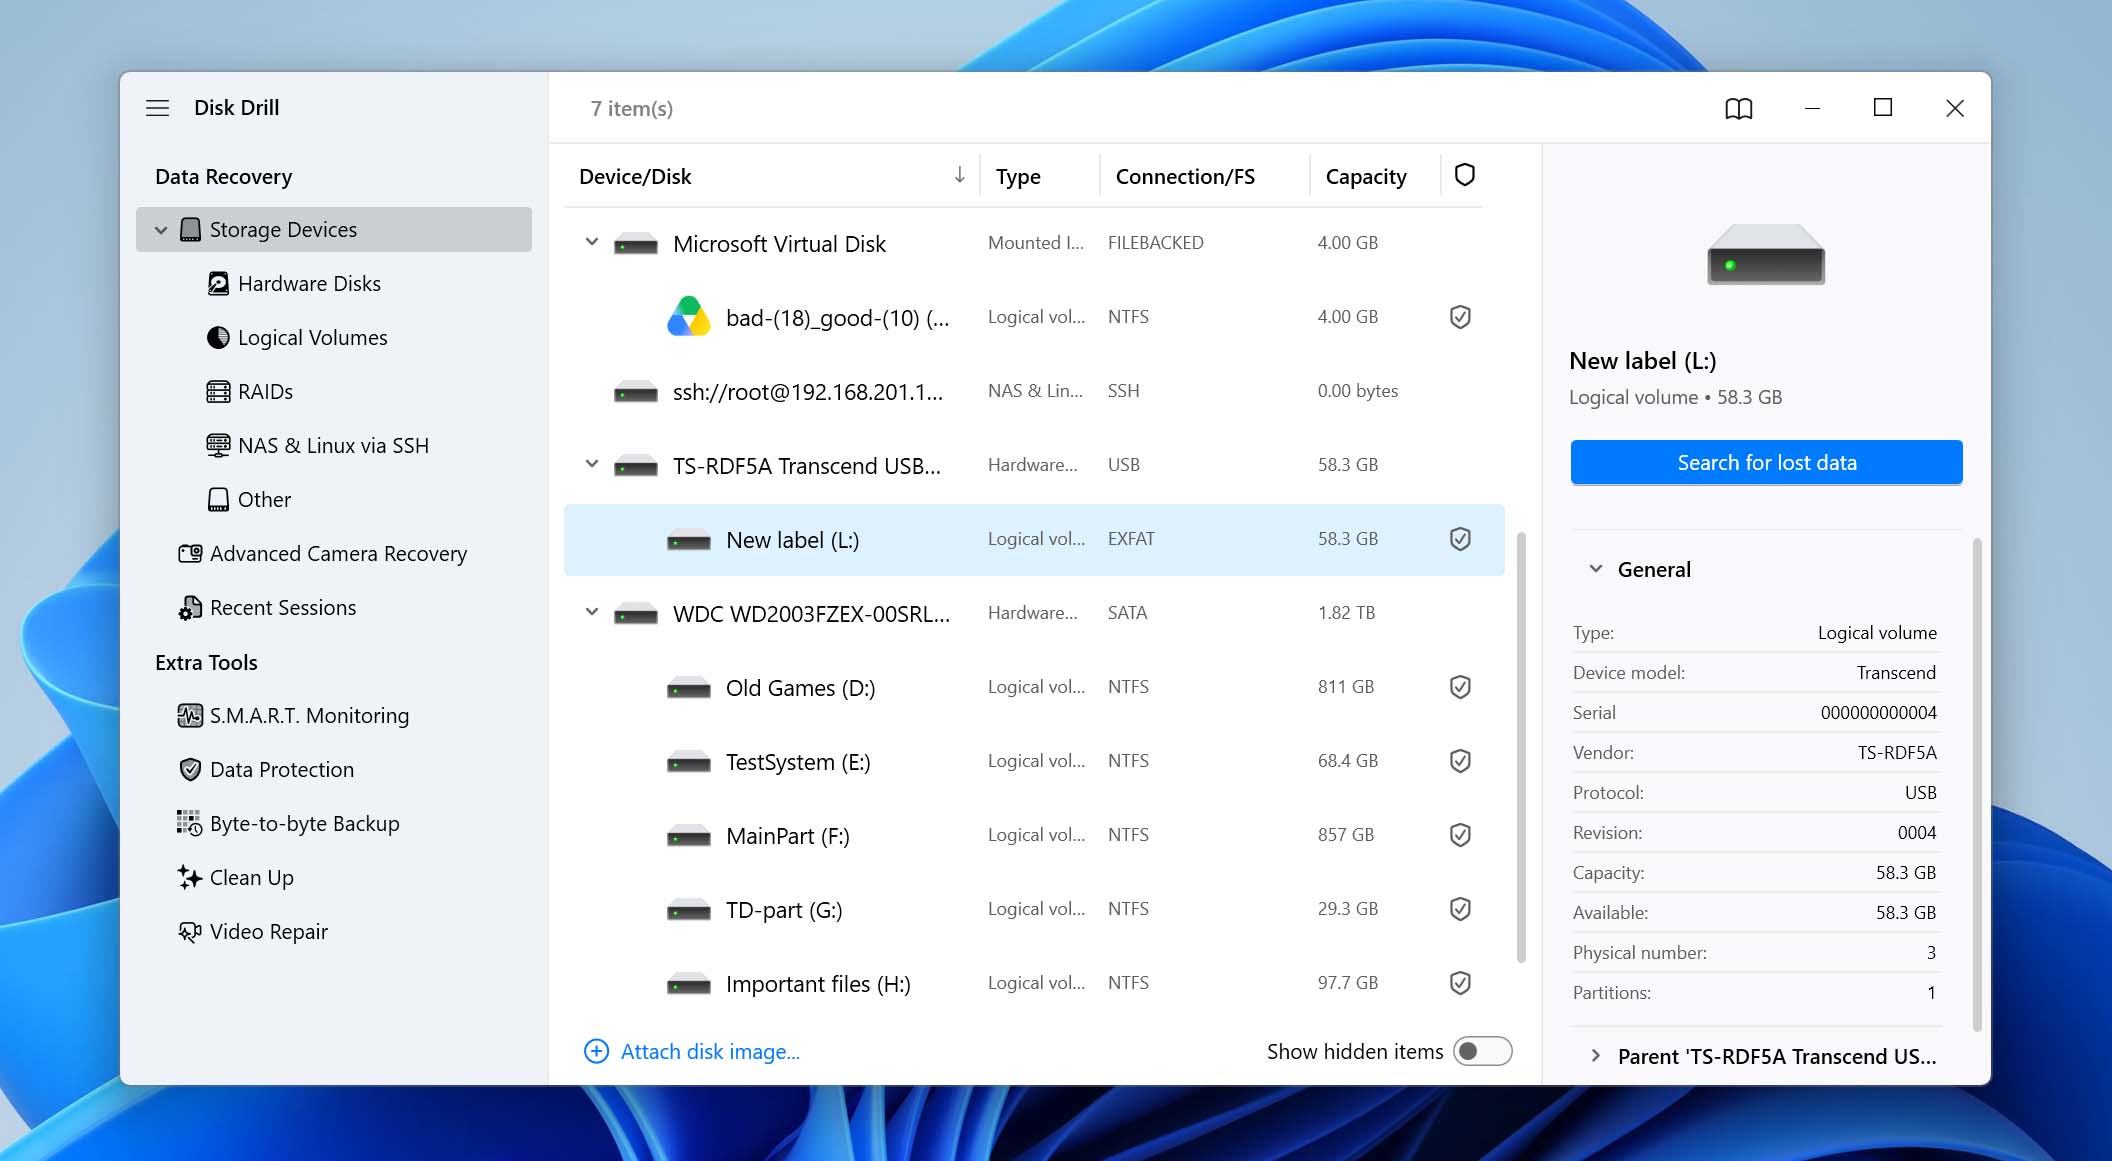
- Once the installation completes, launch Disk Drill. You’ll see a list of drives with their details. From here, select the device which could be an external hard drive, flash drive, or SD card that you want to recover data from, and click on the Search for lost data to start scan.
If your exFAT drive appears corrupted (for example, Windows asks you to format it or shows it as RAW), create a byte-to-byte image and scan that instead of the original drive. Our guide to corrupted SD card recovery shows how to do this; the same steps apply to other exFAT devices.
- Choose the scan type. In most cases, select Universal Scan, which is designed to find deleted and lost files across different data loss scenarios. If your exFAT device is an SD card used in a camera or drone and you need to recover videos, select Advanced Camera Recovery instead. This mode is designed to reconstruct fragmented video files produced by cameras and similar devices.
- You’ll now see Disk Drill scan your drive for data on your exFAT partition.
- Once the scan completes, it will show you the list of files that can be recovered. Disk Drill segregates files based on file types, so your documents, pictures, and other types of files will appear in an organized list. You can also preview the file before recovering it by clicking on the eye button so you can make sure you’re recovering the correct files.
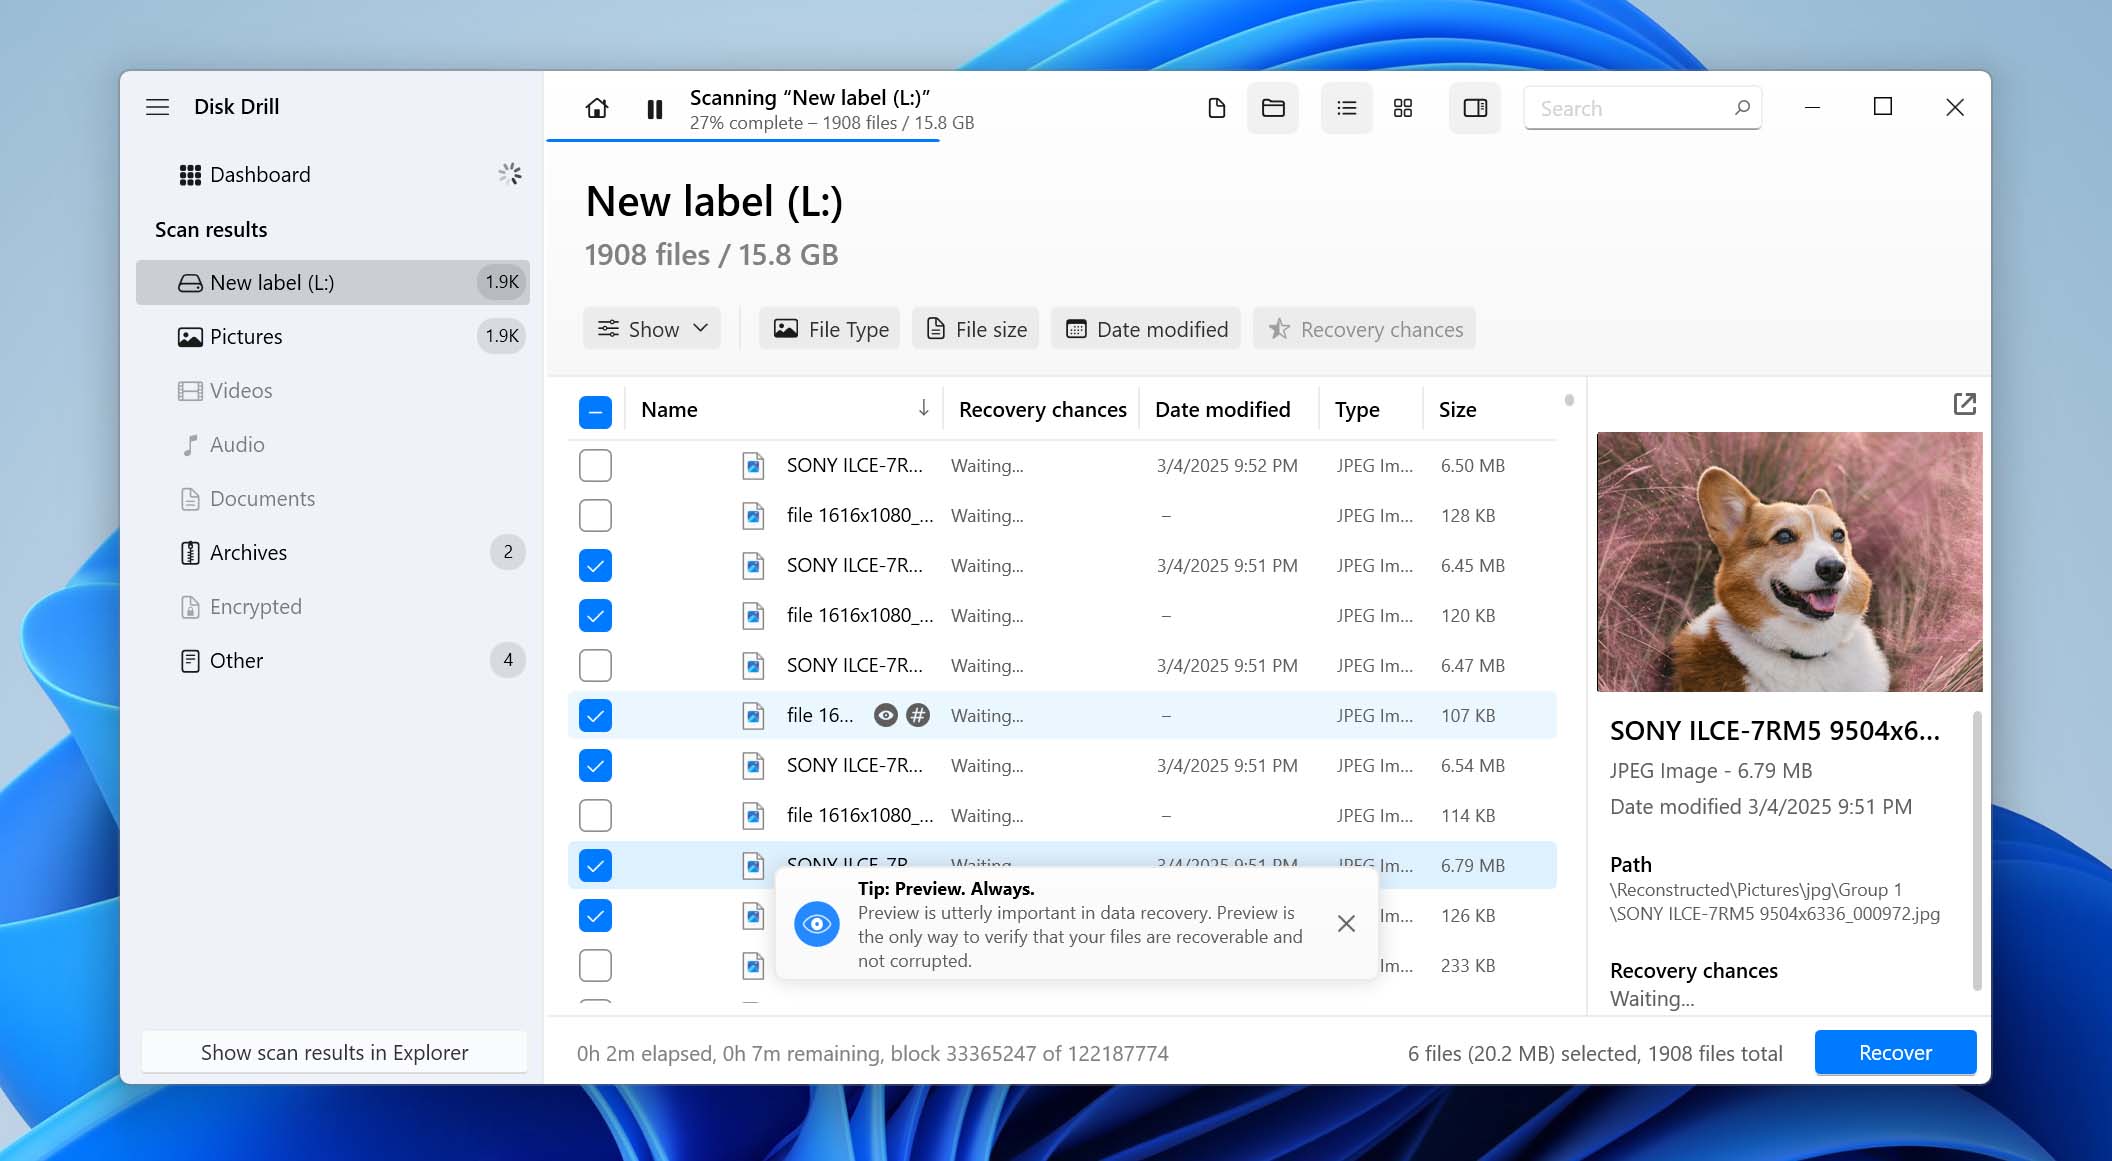
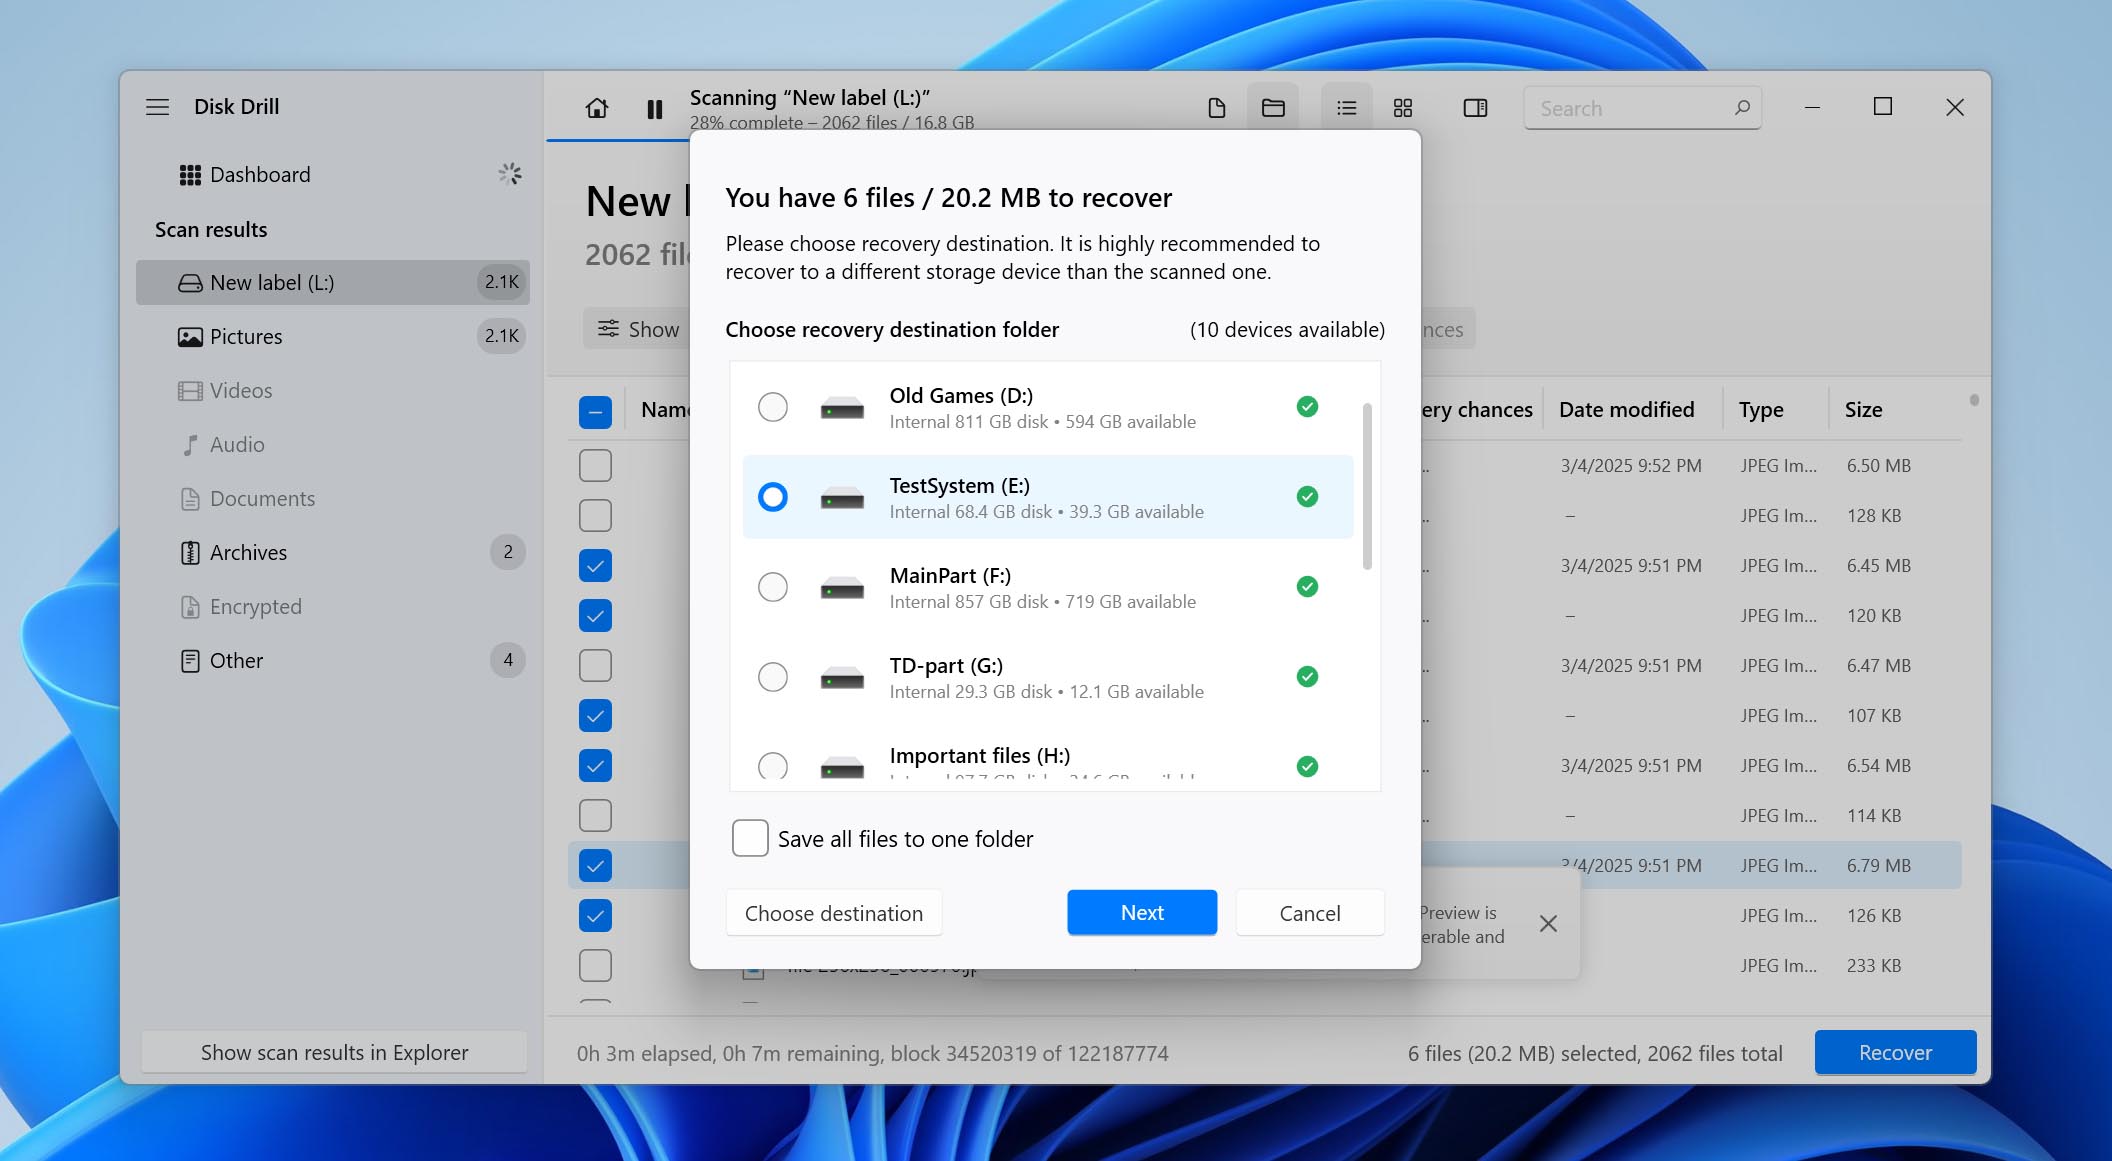
- Check the boxes beside files you want to recover. When you’ve selected all files to be recovered, click on the Recover button at the bottom. You’ll now need to select a location where you want to recover the files. Remember to select a location other than the partition you’re recovering from.
Using a Mac? The recovery process is largely the same, but Disk Drill Basic for macOS lets you scan and preview recoverable files for free rather than recover them. If you want to see what Disk Drill looks like on macOS and compare it with other Mac recovery tools, check out our guide to data recovery on Mac.
Method 3: Recover Lost Data From Backup
When it applies: The files from your exFAT drive were also stored in your user folders on the PC and File History was enabled before they were lost.
File History backs up selected folders on your Windows PC to another storage location; it doesn’t back up the contents of an external exFAT drive itself. So, if the files were originally copied from your PC to the exFAT drive, it’s worth checking whether an older copy is still available in File History.
Restore your files using File History by doing the following:
- Make sure the storage device with your backup is connected to your computer.
- Open Control Panel and go to System and Security > File History.
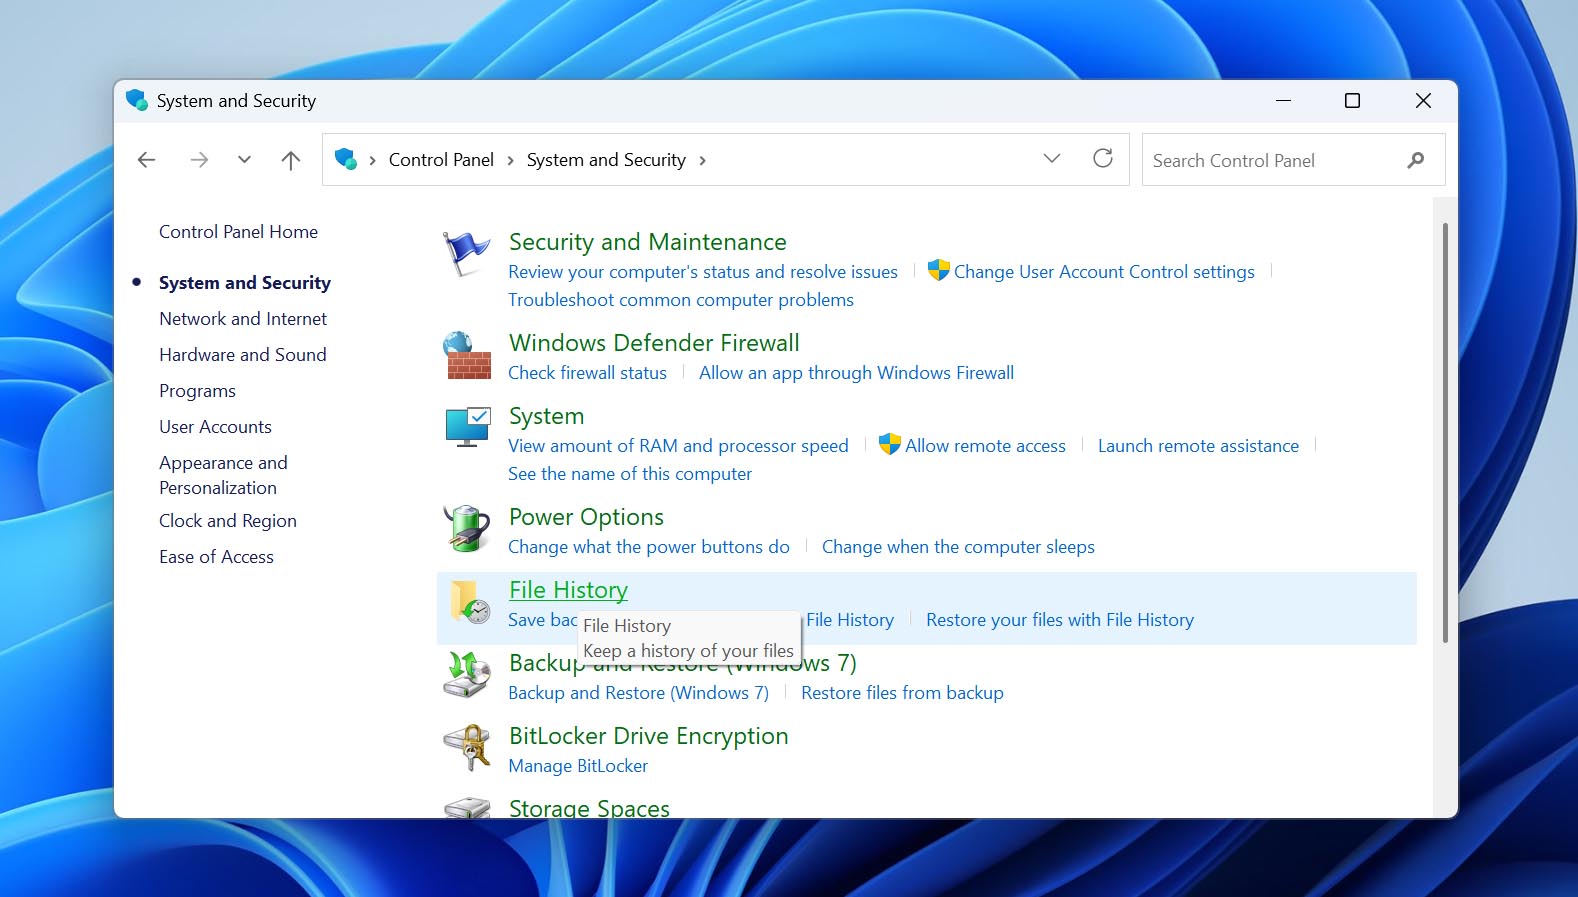
- Click Restore personal files in the left sidebar.
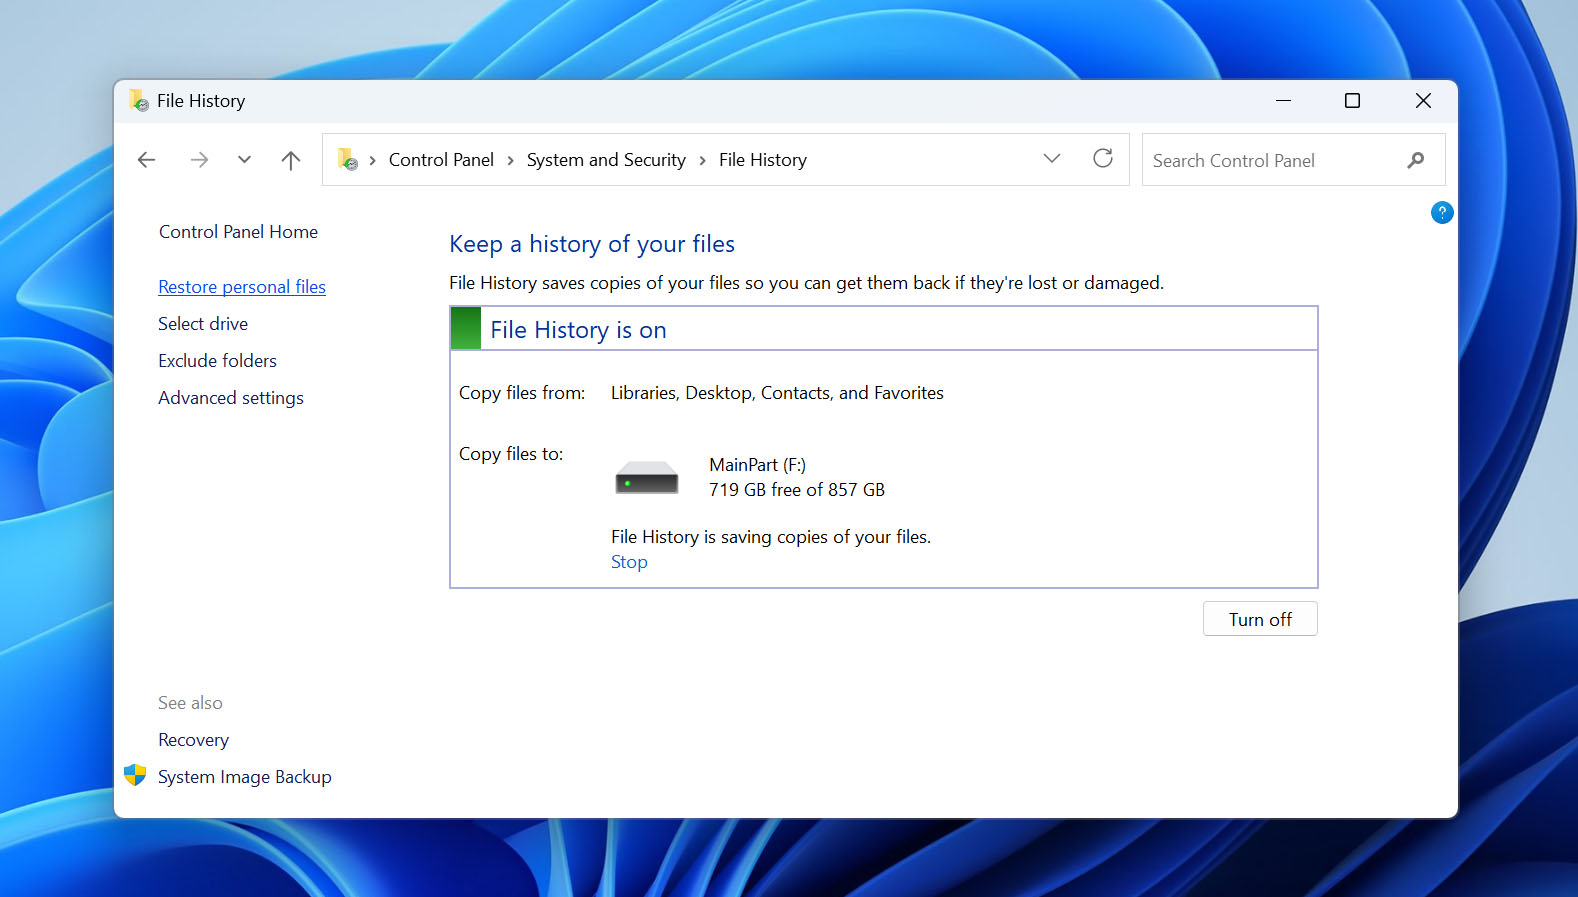
- Browse through the available backups until you find the files or folders you need.
- Select them and click the green Restore button. To save them somewhere else, right-click the button and select Restore to.
Remember that File History will ask for your permission to overwrite any existing file with its backup. If you want to avoid this, select another location for your recovered files.
Method 4: Repair a RAW exFAT Drive With TestDisk
When it applies: Your exFAT drive shows as RAW or Windows asks you to format it when you try to open it.
A damaged exFAT boot sector can prevent Windows from recognizing the file system even when the files themselves are still on the drive. TestDisk can check the primary and backup boot sectors and, if the backup is valid, use it to replace the damaged primary copy. A successful repair can make the exFAT partition and its files accessible again without formatting.
Before you proceed: This method writes changes to the exFAT file system. We recommend recovering important files with data recovery software first or, at minimum, creating a byte-to-byte image of the drive before attempting the repair.
- Download TestDisk, extract the archive, and launch testdisk_win.exe.
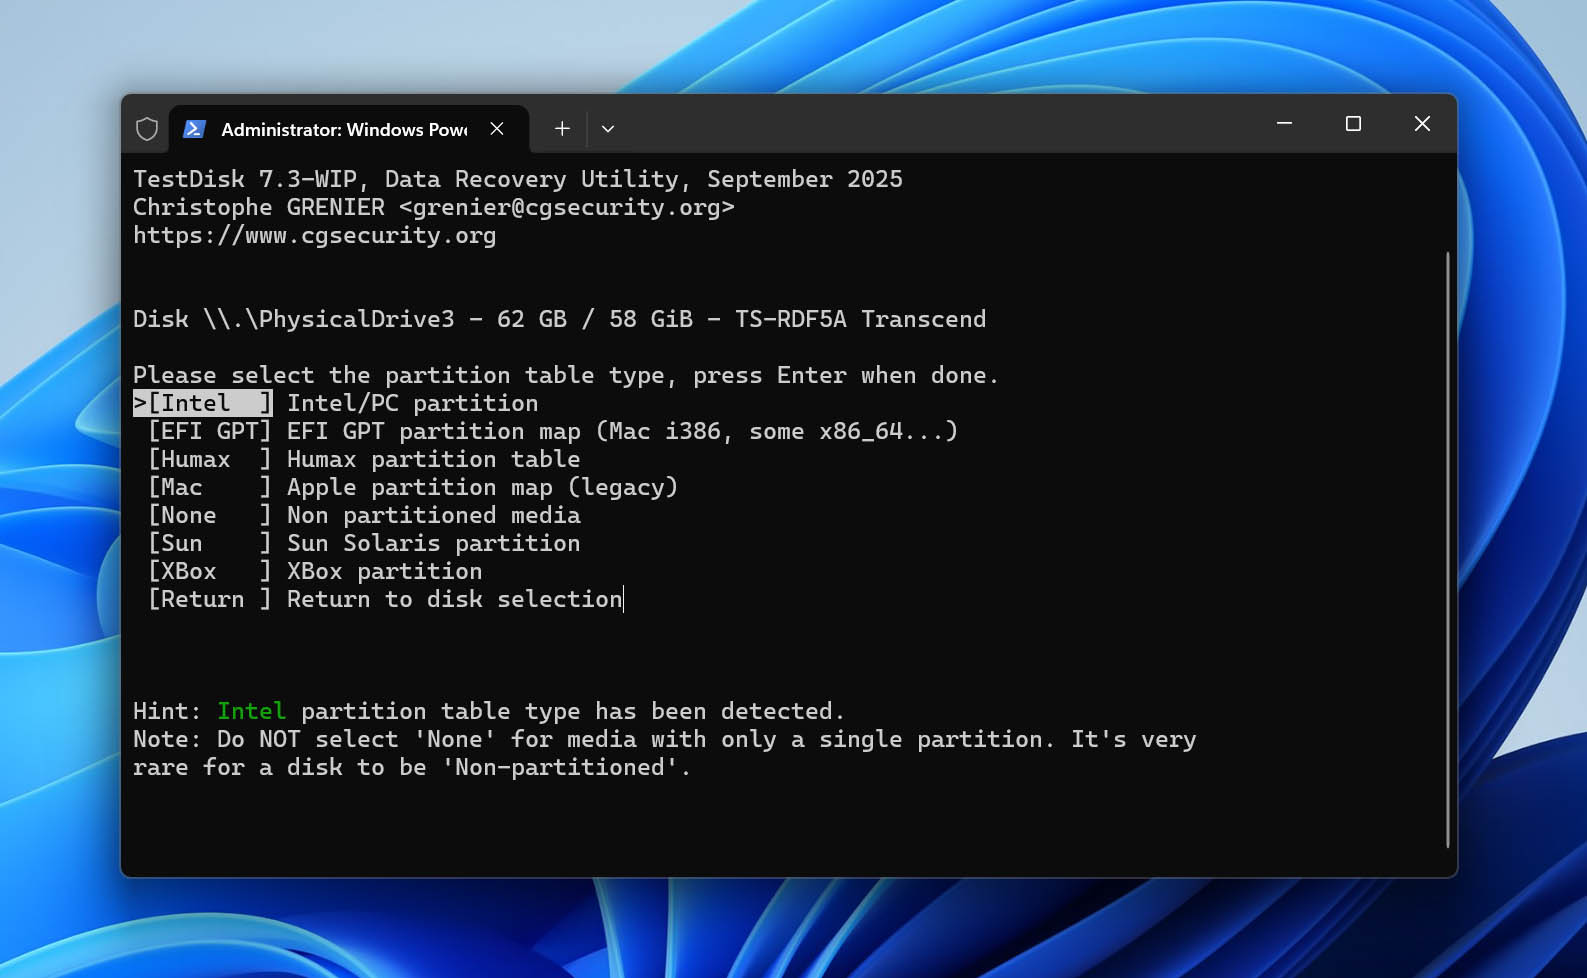
- Select Create to create a log file, then select the physical drive that contains the exFAT partition and press Enter.
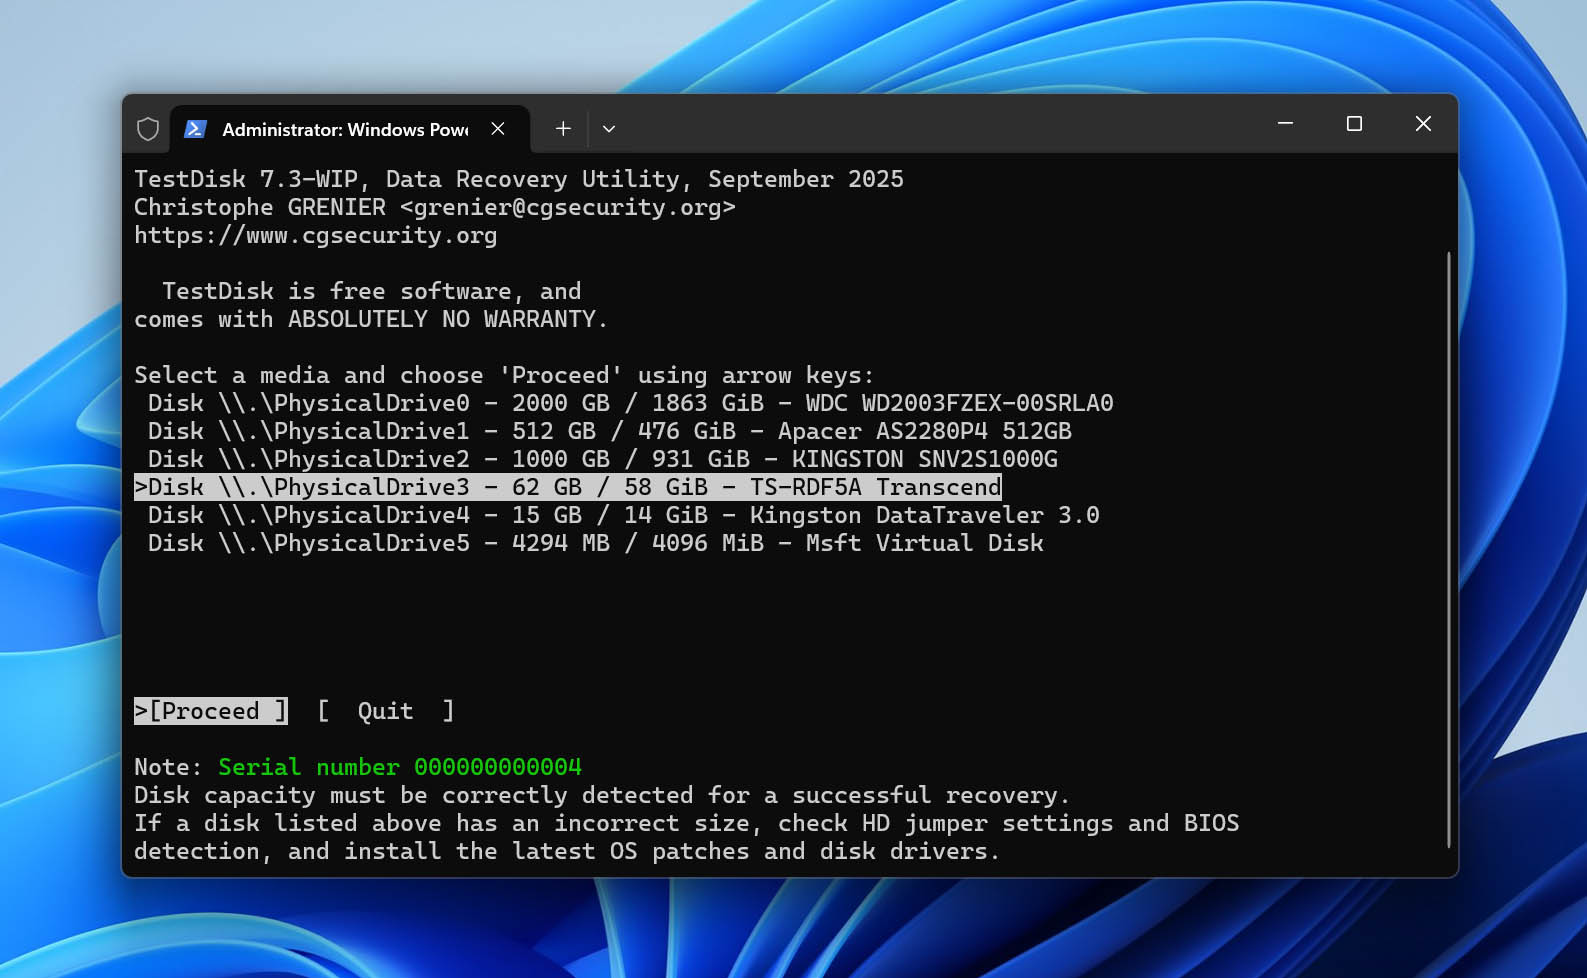
- Confirm the partition table type detected by TestDisk.
- Select Advanced, highlight the exFAT partition, and choose Boot.
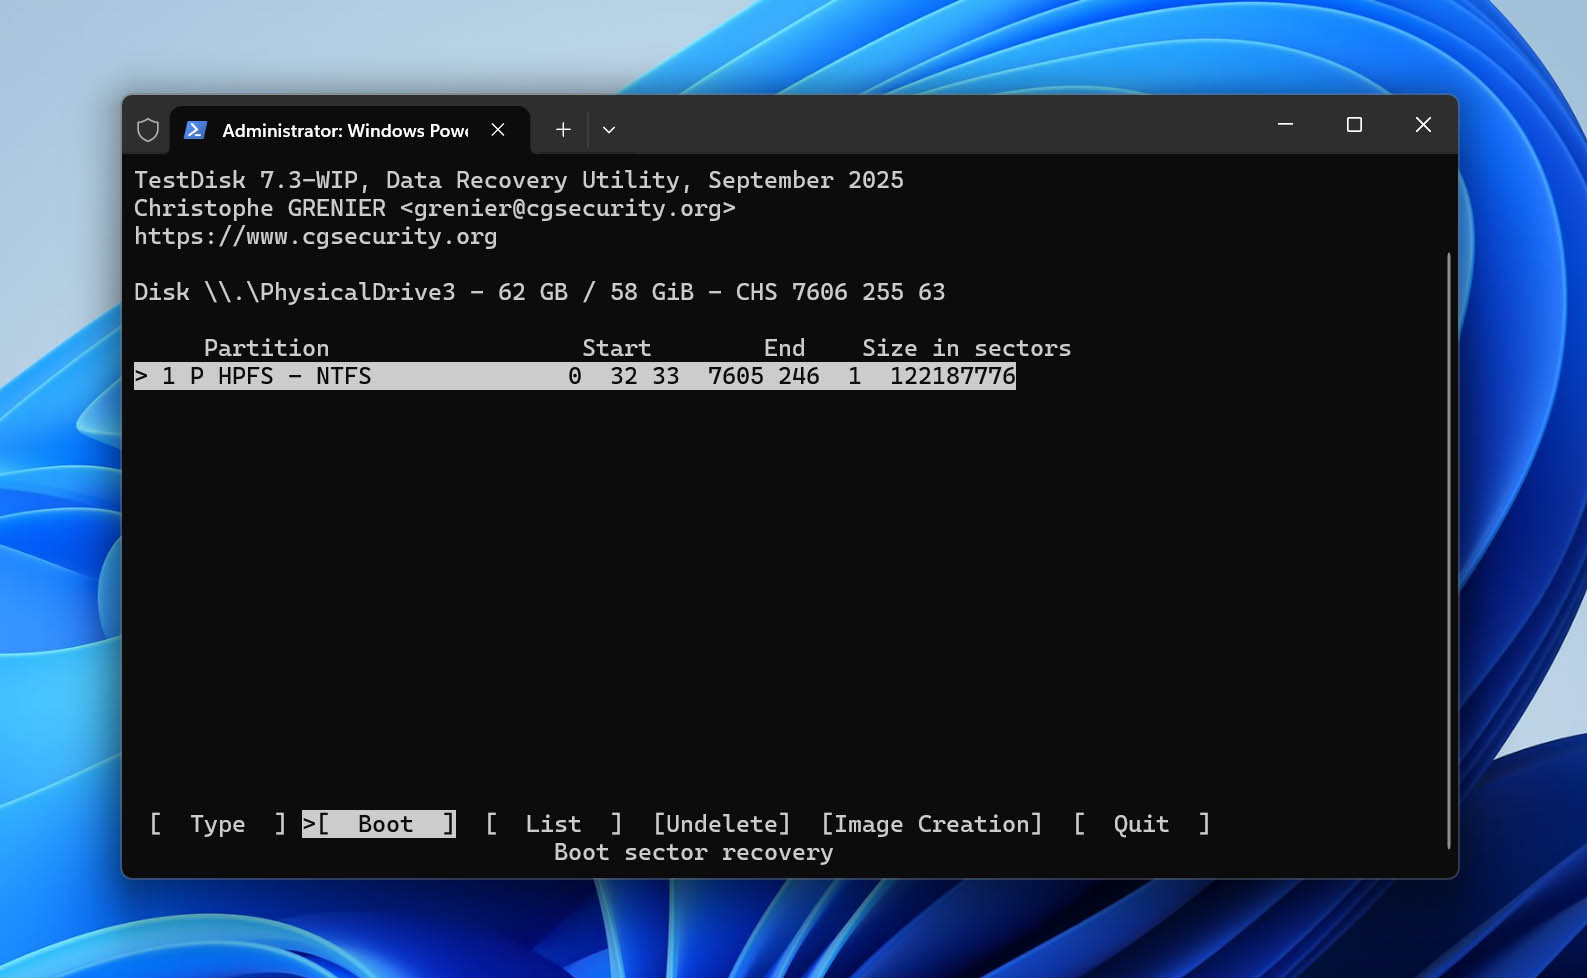
- Check the status of the boot sector and its backup. If the primary boot sector is damaged but the backup is valid, select Backup BS to replace the damaged boot sector with the backup.
- Confirm the operation, exit TestDisk, and restart your computer. Then check whether you can access the exFAT drive and its files in Windows.
TestDisk can also recover deleted partitions; we show how to do this in our guide to deleted partition recovery. For more about its other features, check out our TestDisk review. It also comes bundled with PhotoRec, a free file recovery tool that we cover separately in our PhotoRec review.
Fix the exFAT Drive After Recovery (If Needed)
If your files were lost because of logical damage to the exFAT file system, the drive may still be inaccessible or behave incorrectly after recovery. Once you’ve recovered and checked your files, you can try to make the drive usable again.
- If Windows still recognizes the exFAT file system and assigns the drive a letter, open Command Prompt as administrator and run chkdsk X: /f, replacing X with the correct drive letter. CHKDSK can repair file system errors, but it won’t work if the volume is detected as RAW.
- If CHKDSK doesn’t help or you simply want to start fresh, format the drive as exFAT in File Explorer or Disk Management. Formatting removes the existing file system and data, so only do this after confirming that everything you need has been recovered.
Final Thoughts
Recovering data from an exFAT drive is often possible after accidental deletion, a quick format, or file system corruption, as long as the original data is still available on the device. The most important part is doing things in the right order. Attempts to repair or reformat the drive too early can reduce your recovery chances.
If you discover that files are missing or your exFAT drive is no longer accessible:
- Stop using the drive to avoid overwriting recoverable data.
- Scan it with data recovery software and recover the files you need.
- Save recovered files to another physical drive, not back to the affected exFAT device.
- Only after your files are safe, repair or reformat the drive if necessary.
If the drive clicks, repeatedly disconnects, reports the wrong capacity, or isn’t detected at all, skip software recovery and consider a professional data recovery service instead.
FAQ
- Disk Drill – Best Overall
- R-Studio
- EaseUS Data Recovery Wizard
- Stellar Data Recovery Professional
- DMDE